 Invisible zips are nice to look at, they give a professional finish to your garment and with a bit of practise are actually not difficult to insert when you know how.
This is what a concealed zip looks like…..
FRONT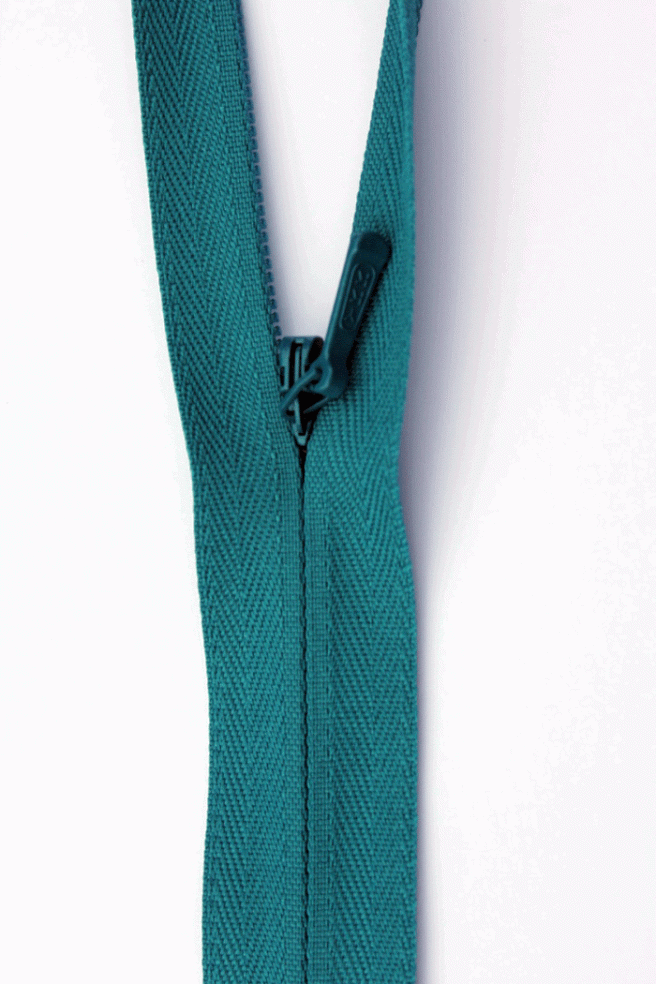
 BACK
BACK
You will need to insert on your machine a concealed zip foot or just a standard zip foot will do (actually I prefer it!)
A concealed zip foot looks like the first image but make sure its one thats compatible with your machine. The second one is a standard zip foot.


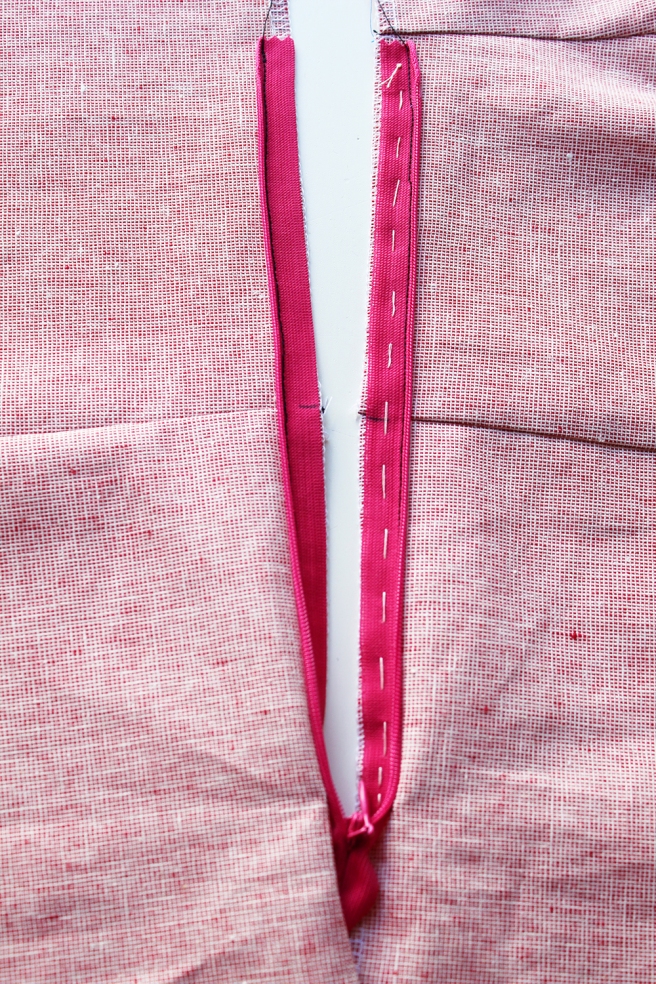
This is what it looks like when its been inserted.You can see that also the cross seams are matched up perfectly, if you read on, you will learn how to achieve the same perfect finish.  Before you start, take a look at the back of your invisible zipper. See how the coils of the zipper curl toward the back? This is what makes the zipper less visible than a normal zipper. You will need to uncurl those coils by gently ironing the zipper flat first with the tip of a warm iron. This lets you stitch much closer to the coils.
Lay your zipper wrong side up, with the zipper open. Set your iron on warm (or the synthetic setting). Use your fingers to uncurl the teeth of the zipper while pressing it flat with the tip of your iron. Do this on both sides.
 Lay your garment right side up, facing you.
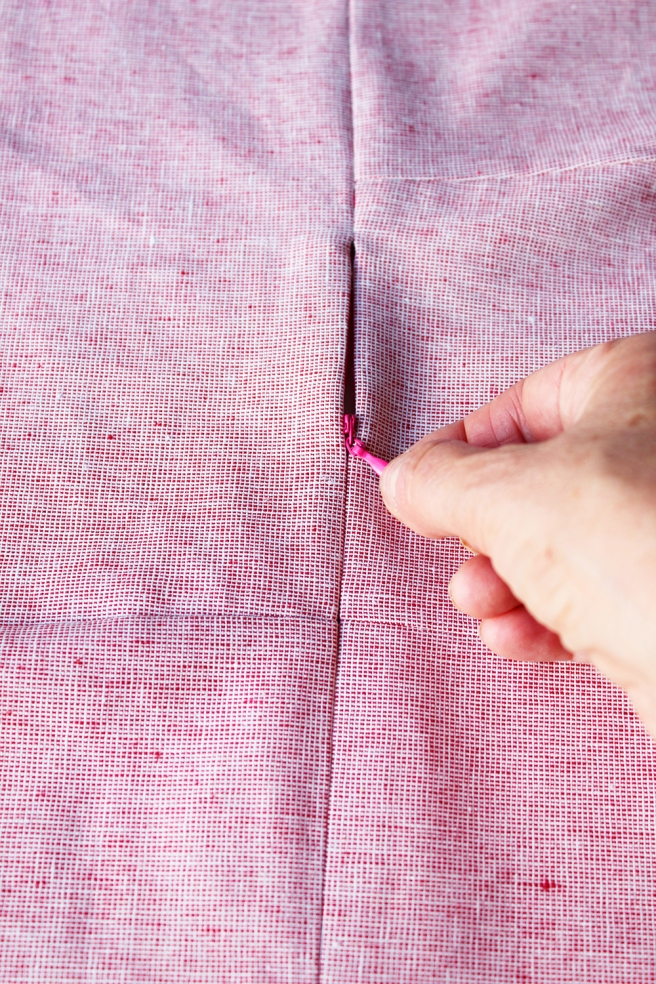
Place one side of the open zipper face down on the fabric and lined up one zip outside edge with one side of the fabric raw edge. NB there is a 1cm seam allowance with Cecily dress, however, if you have a 1.5cm seam allowance, then place with a 5mm space between the zip and the outside edge. Pin in position, with Cecily dress start just below the dart. If you have a cross seam (at the waistline for example) then mark the back of your zip each side so that you ensure your cross seams match up after sewing in your zipper. Hand tack.
Now instead of hand tacking, you could use quilters 1/4″ tape to temporarily adhere the zip to the fabric side edge before you sew it in. It saves loads of time and great if you hate hand sewing (unlike me…bring it on I say!).
 Stick a piece either side of the back of the zip. Place in position on the garment with the right sides of the zip facing the right side of the dress.
 Having inserted the invisible zipper foot into your machine, lower the foot down onto the zipper. Make sure that the zipper coil is in the left groove of the foot. If you don’t have an invisible zip foot, use a standard zip foot and nudge the needle over so it lines up with the coil underneath or as near to the teeth as possible.

Make sure your cross seams are aligned. Sew slowly as far as you can and (if you are using a standard foot, as close to the teeth as you can without sewing over the teeth). Stop when you reach the end of the zipper. Backstitch. Repeat for the other side of the zip.
Close the zipper up. Pin together the fabric below the zip and sew a 1cm seam sewing from the previous line of stitching to the end of the fabric. Do the same at the section above the zip.
 Press the seams open on the back and press the zip on the right and wrong sides so that the coils spring back into action.
 There you have now mastered the art of the concealed zip!

Hi can you do a tutorial on how to apply the concealed zip on the same side as the pocket please. Thank you
Emma
LikeLike
I wouldn’t advise this – not something I would do, its better to have on the opposite side to the zip or dont have a zip at all. Fiona
LikeLike