
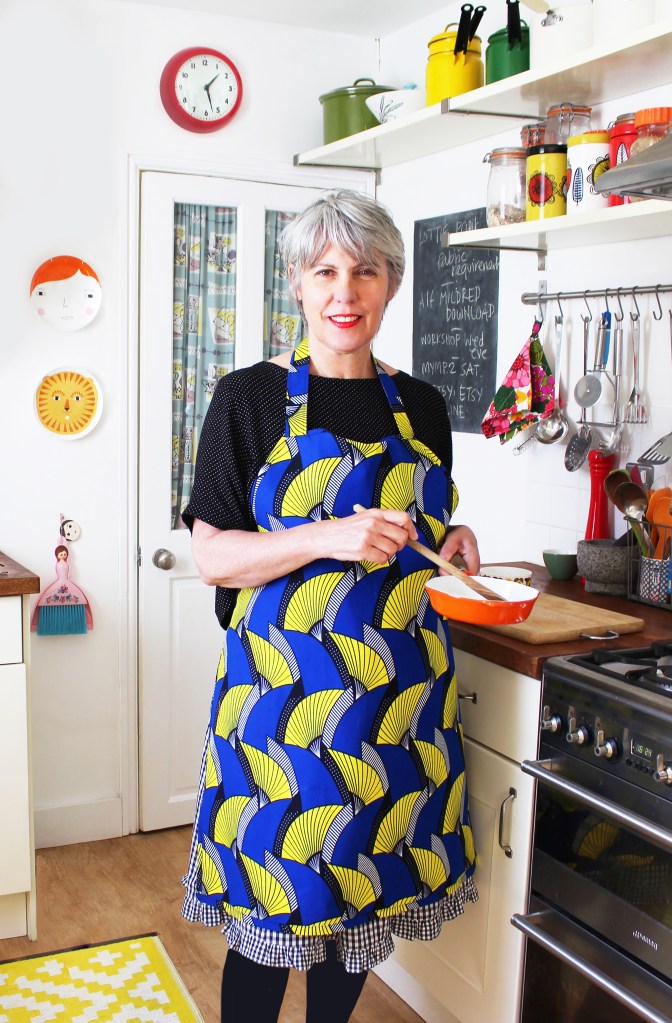
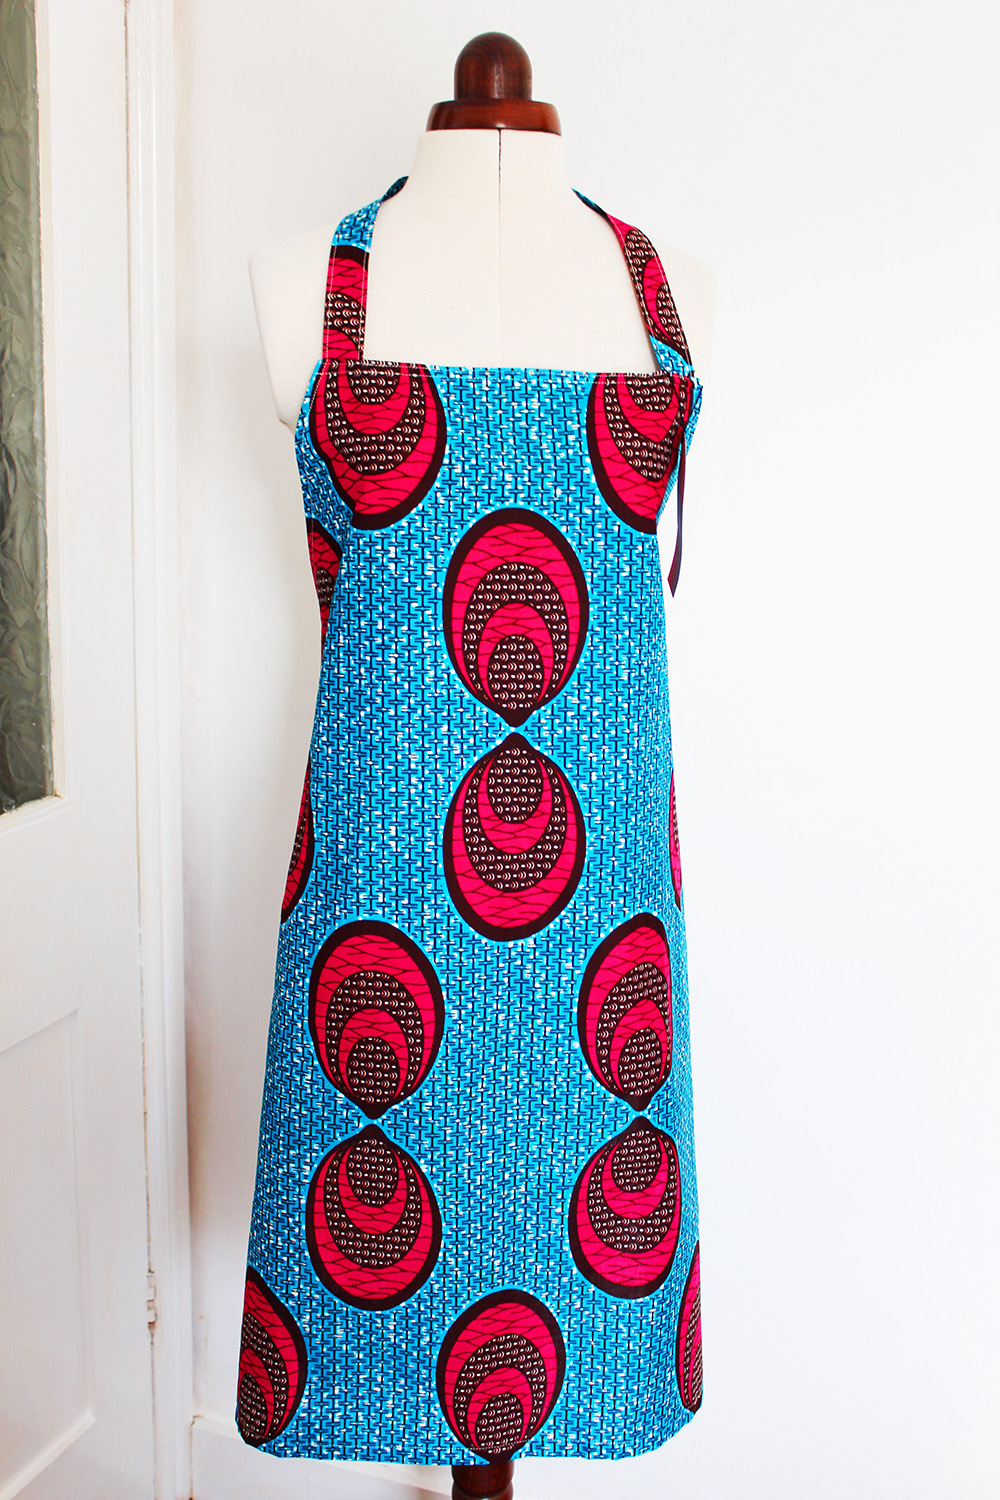
Who doesn’t love a groovy apron? And with matching kitchen accessories like a teacosy, mitt or potholder -I’m in culinary heaven! A kitchen is a place where you can wear loud patterns, adding a bit of zing to your life. Frankly, I’m completely addicted to sewing for my Funky Kitchen, I love to cook, but I like to look stylish too, so everyday I pop on my funky apron, even just to heat up a tin of baked beans! I even pop ‘Funky Kitchen’ labels on pots of homemade jam and chutney like so…..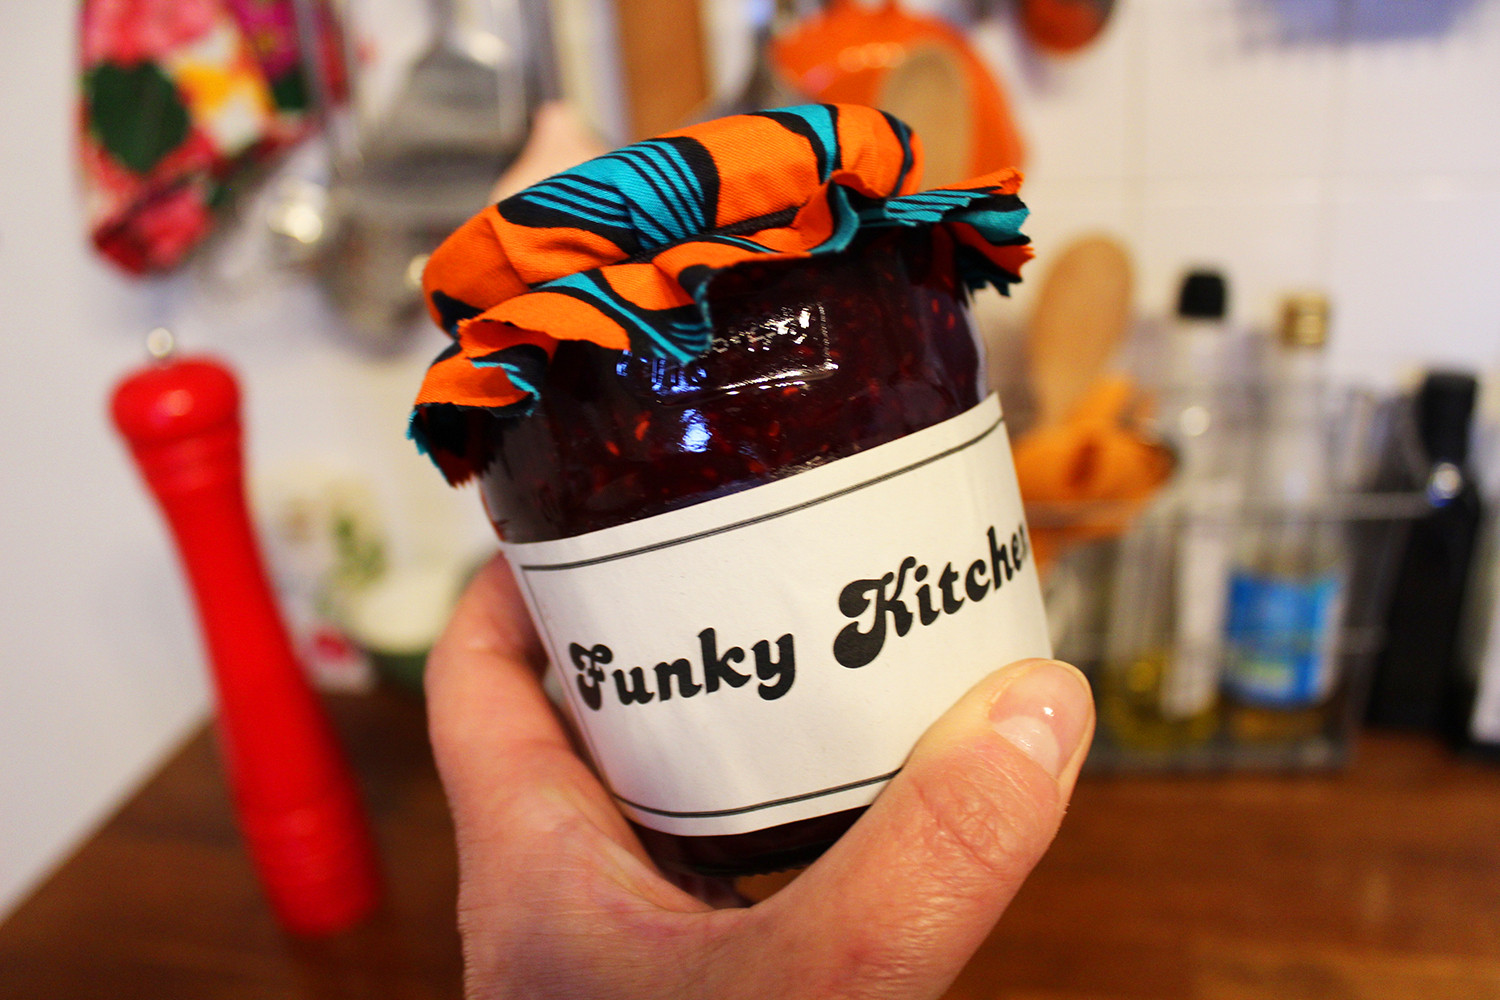
So now you can too! With my Funky Kitchen sewing pattern, you can make all of these items: apron, teacosy, potholder, oven mitt and the pattern also includes 6 Funky Kitchen labels and a jam topper template too.
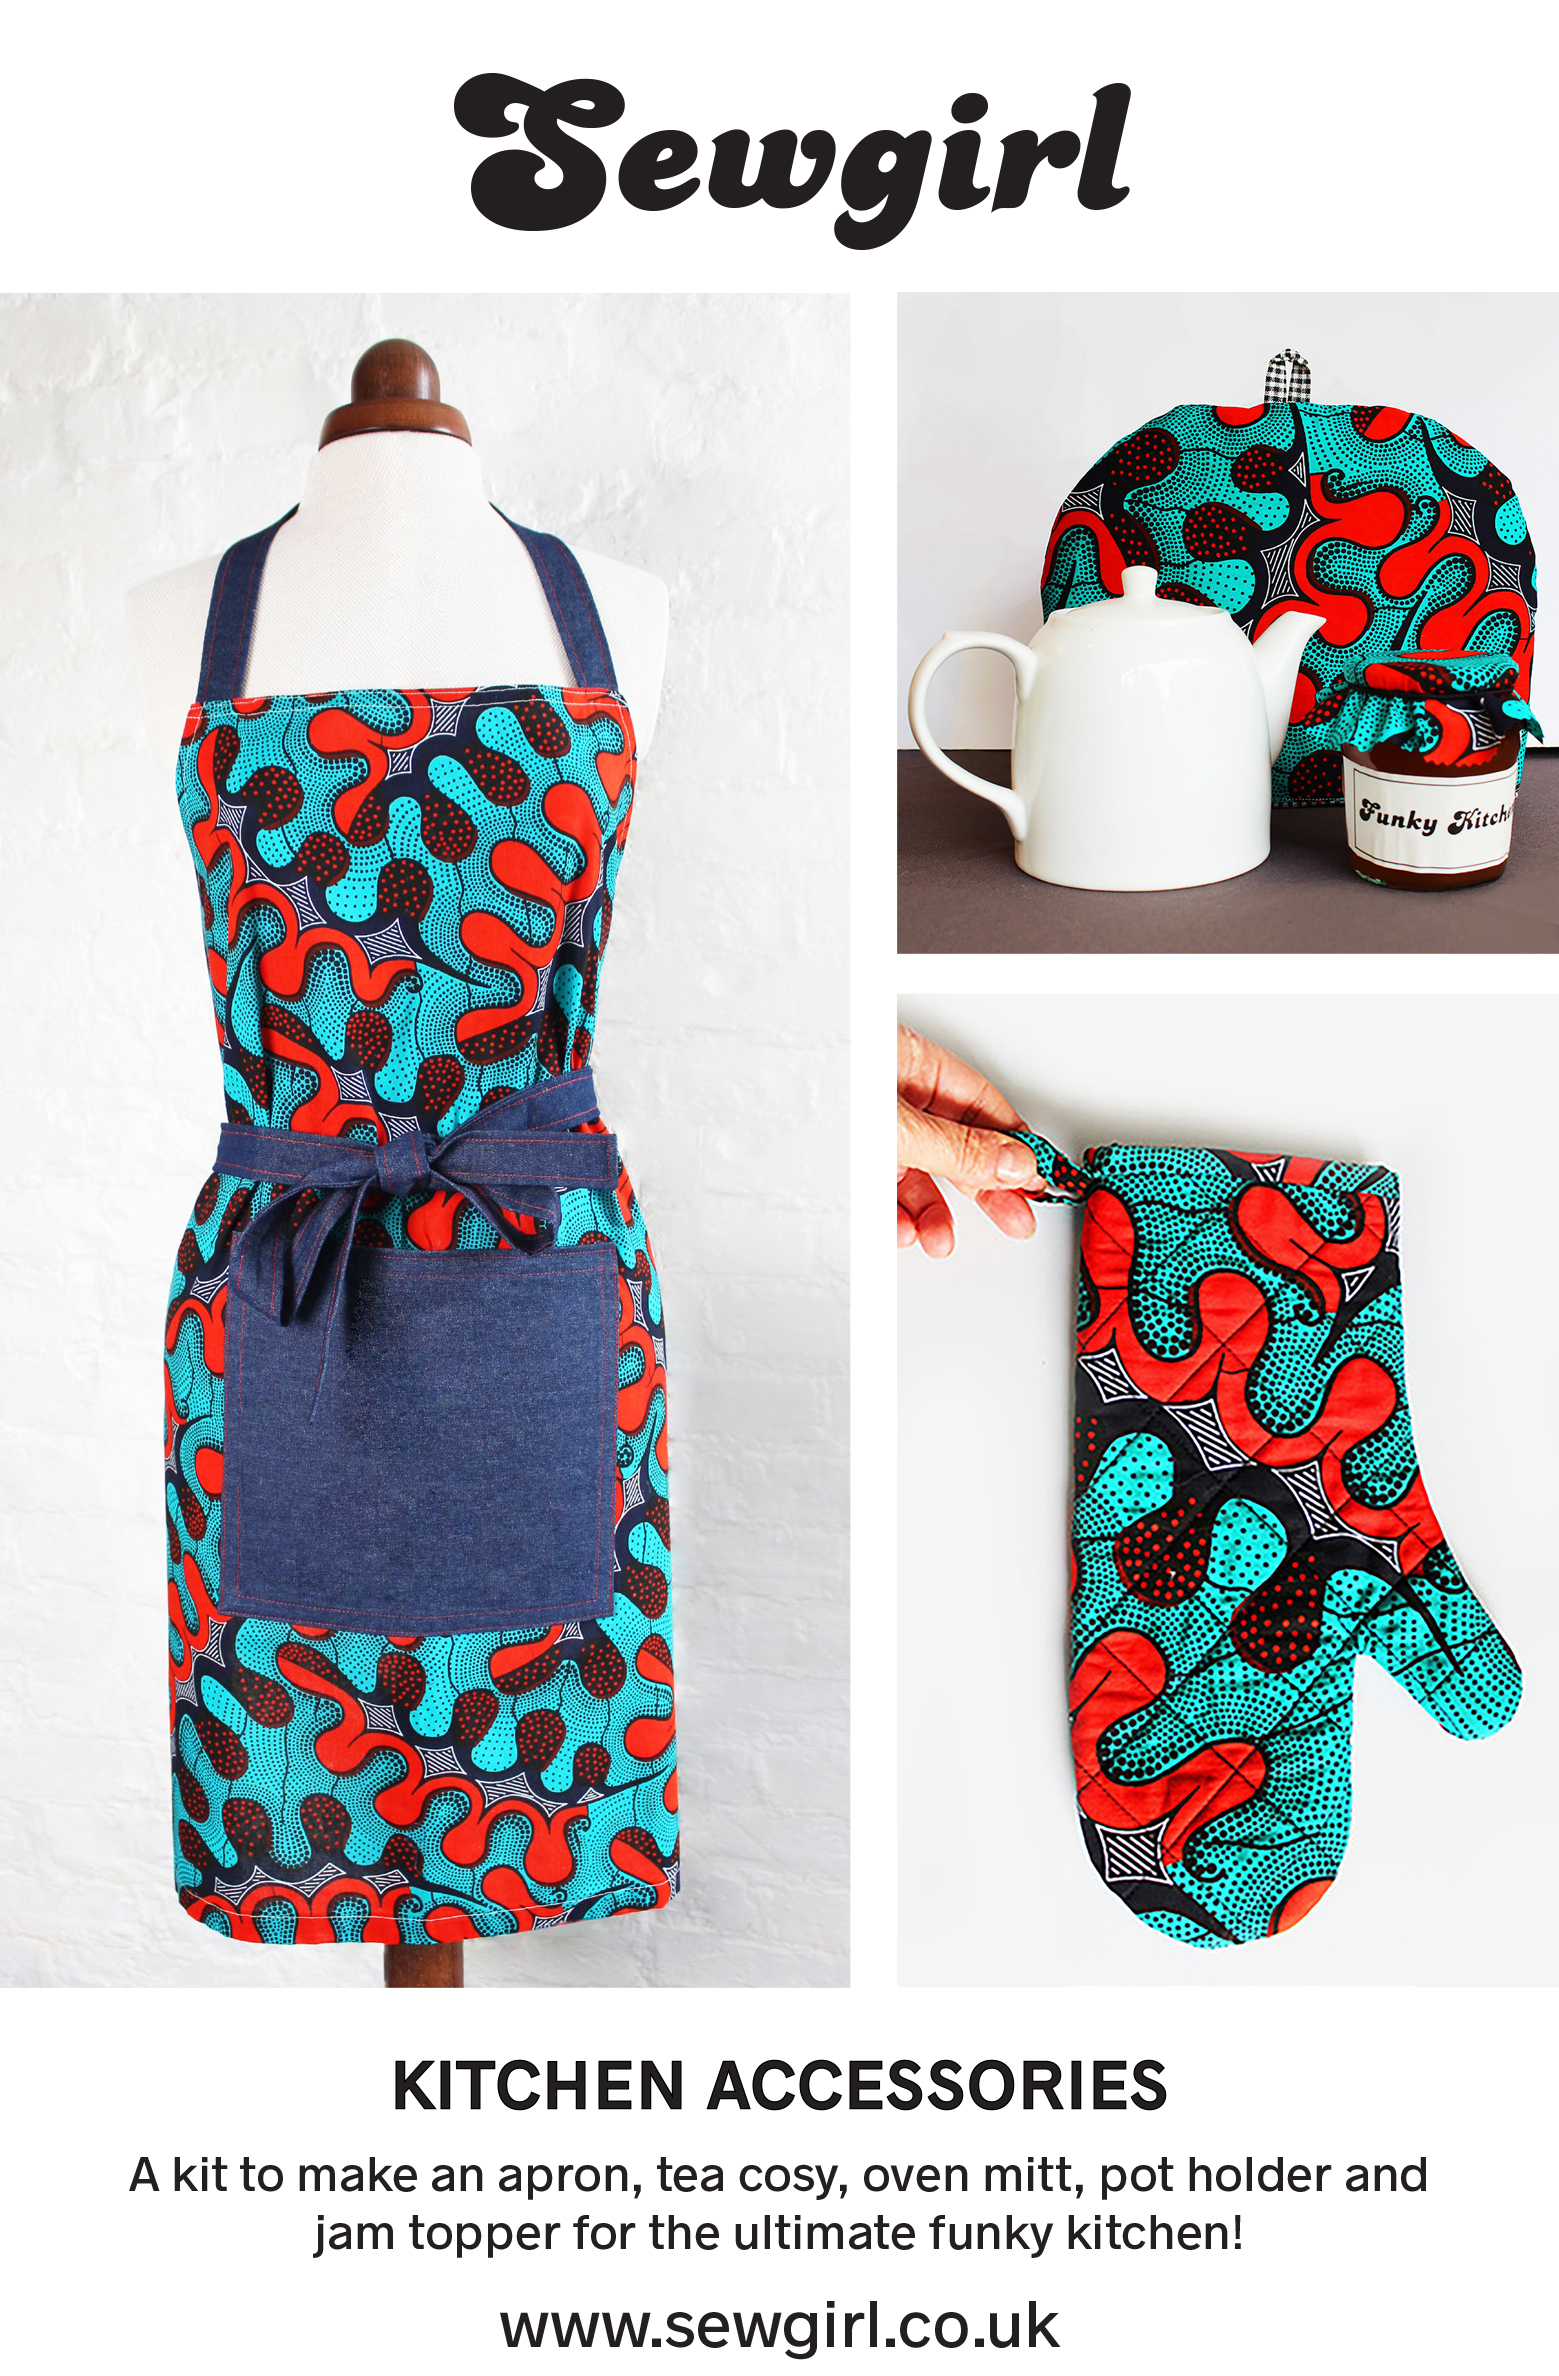

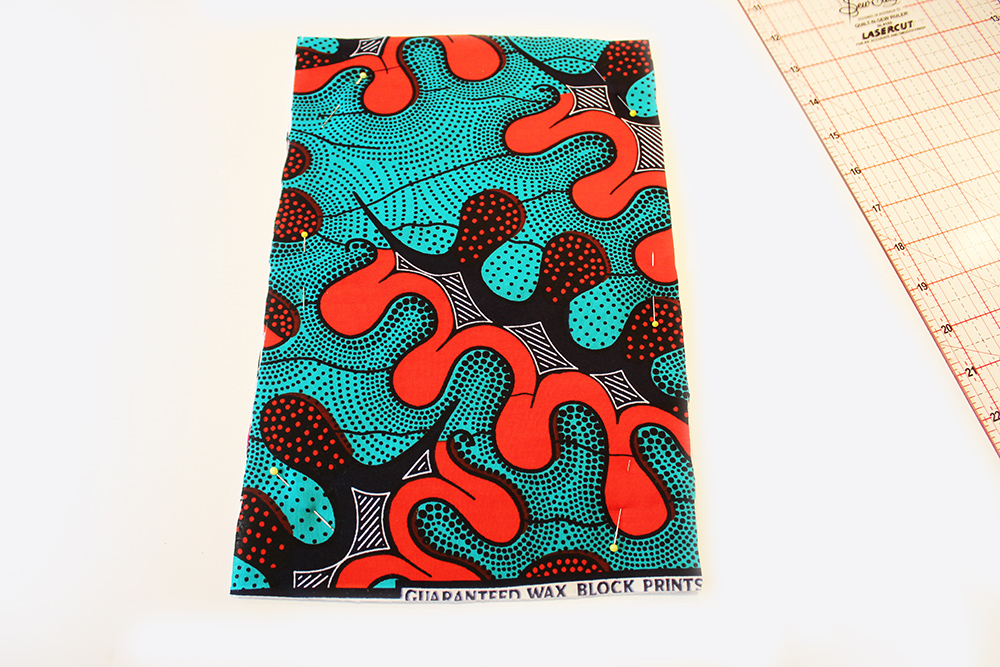
 These items are all made in African wax fabric which is included in the FUNKY KITCHEN KIT which I have for sale on my Etsy shop or you can buy the pattern on its own without fabric, if you prefer it. It would also make a super gift for a sewing beginner or enthusiast.
This is what the pattern looks like. You can see included on the sheet is a template for an apron, oven mitt, tea cosy, pot holder, jam pot topper and some ‘Funky Kitchen‘ labels to cut out and stick on your homemade (or bought) jam or chutney for example.
So switch on some funky music (Craig Charles springs to mind), get yourself a piece of homemade cake and a cuppa and enjoy sewing up your Funky Kitchen.
HOW TO MAKE FUNKY KITCHEN ACCESSORIES
You will need:
Equipment:
A pair of scissors, pins, iron, invisible marking pen, poking tool such as a chunky knitting needle, chopstick or blunt ended pencil.
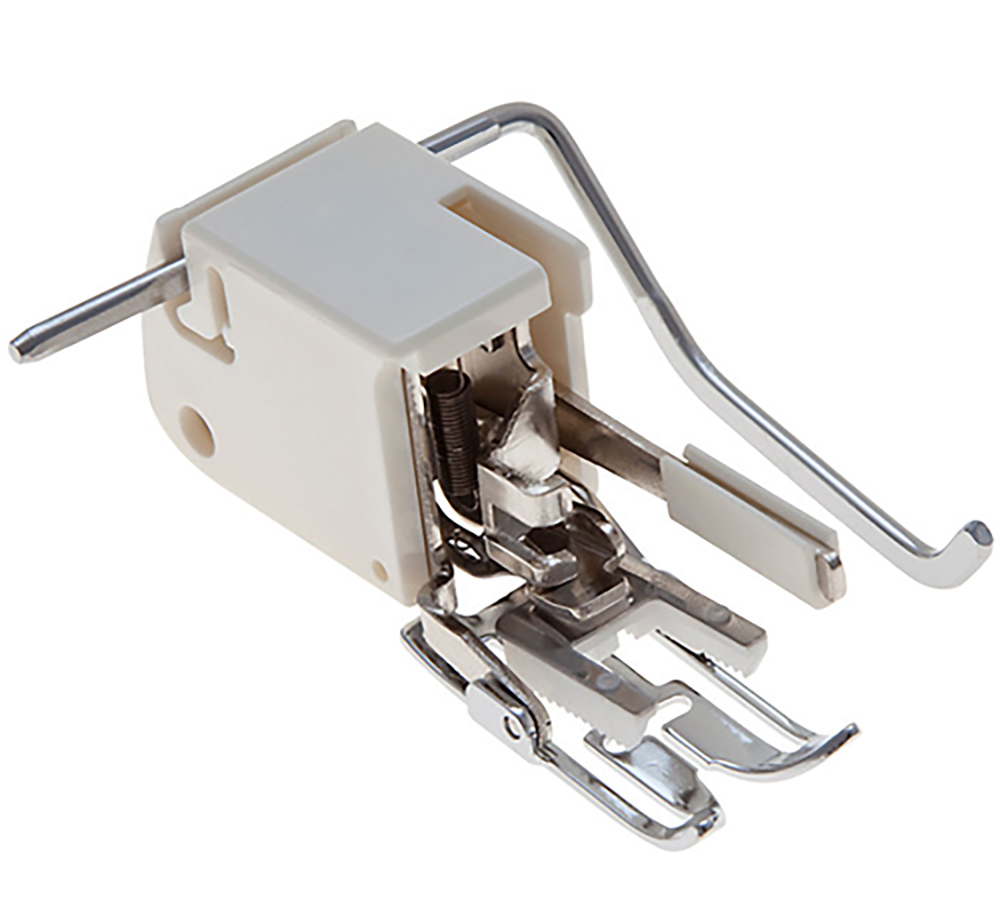
NB. When sewing projects with thermo interfacing sewing will be made easier if you use a walking foot attachment* to your machine.
This is what a walking foot attachment looks like. It’s incredibly useful when quilting fabric because it has a rolling action to balance the flow of the fabric under the feed.
Fabric Requirements:
Apron = 1m of fabric (if your fabric is 112cm wide you will need an extra 30cm if you want a pocket in a different fabric). NB. you could always use a different fabric for the ties and pocket as an alternative for extra quirkiness.
Tea cosy = 30cm x 80cm of main fabric, lining fabric and thermolam wadding. 1m of 25mm wide bias binding (or make your own from the left over fabric).
Oven Mitt =25cm x 70cm of main fabric, lining fabric and insul-bright interfacing and 50cm of (25mm wide) bias binding.
Pot holder = 25cm x 50cm of main fabric and insul-bright interfacing and 1m of bias binding.
HOW TO MAKE AN APRON
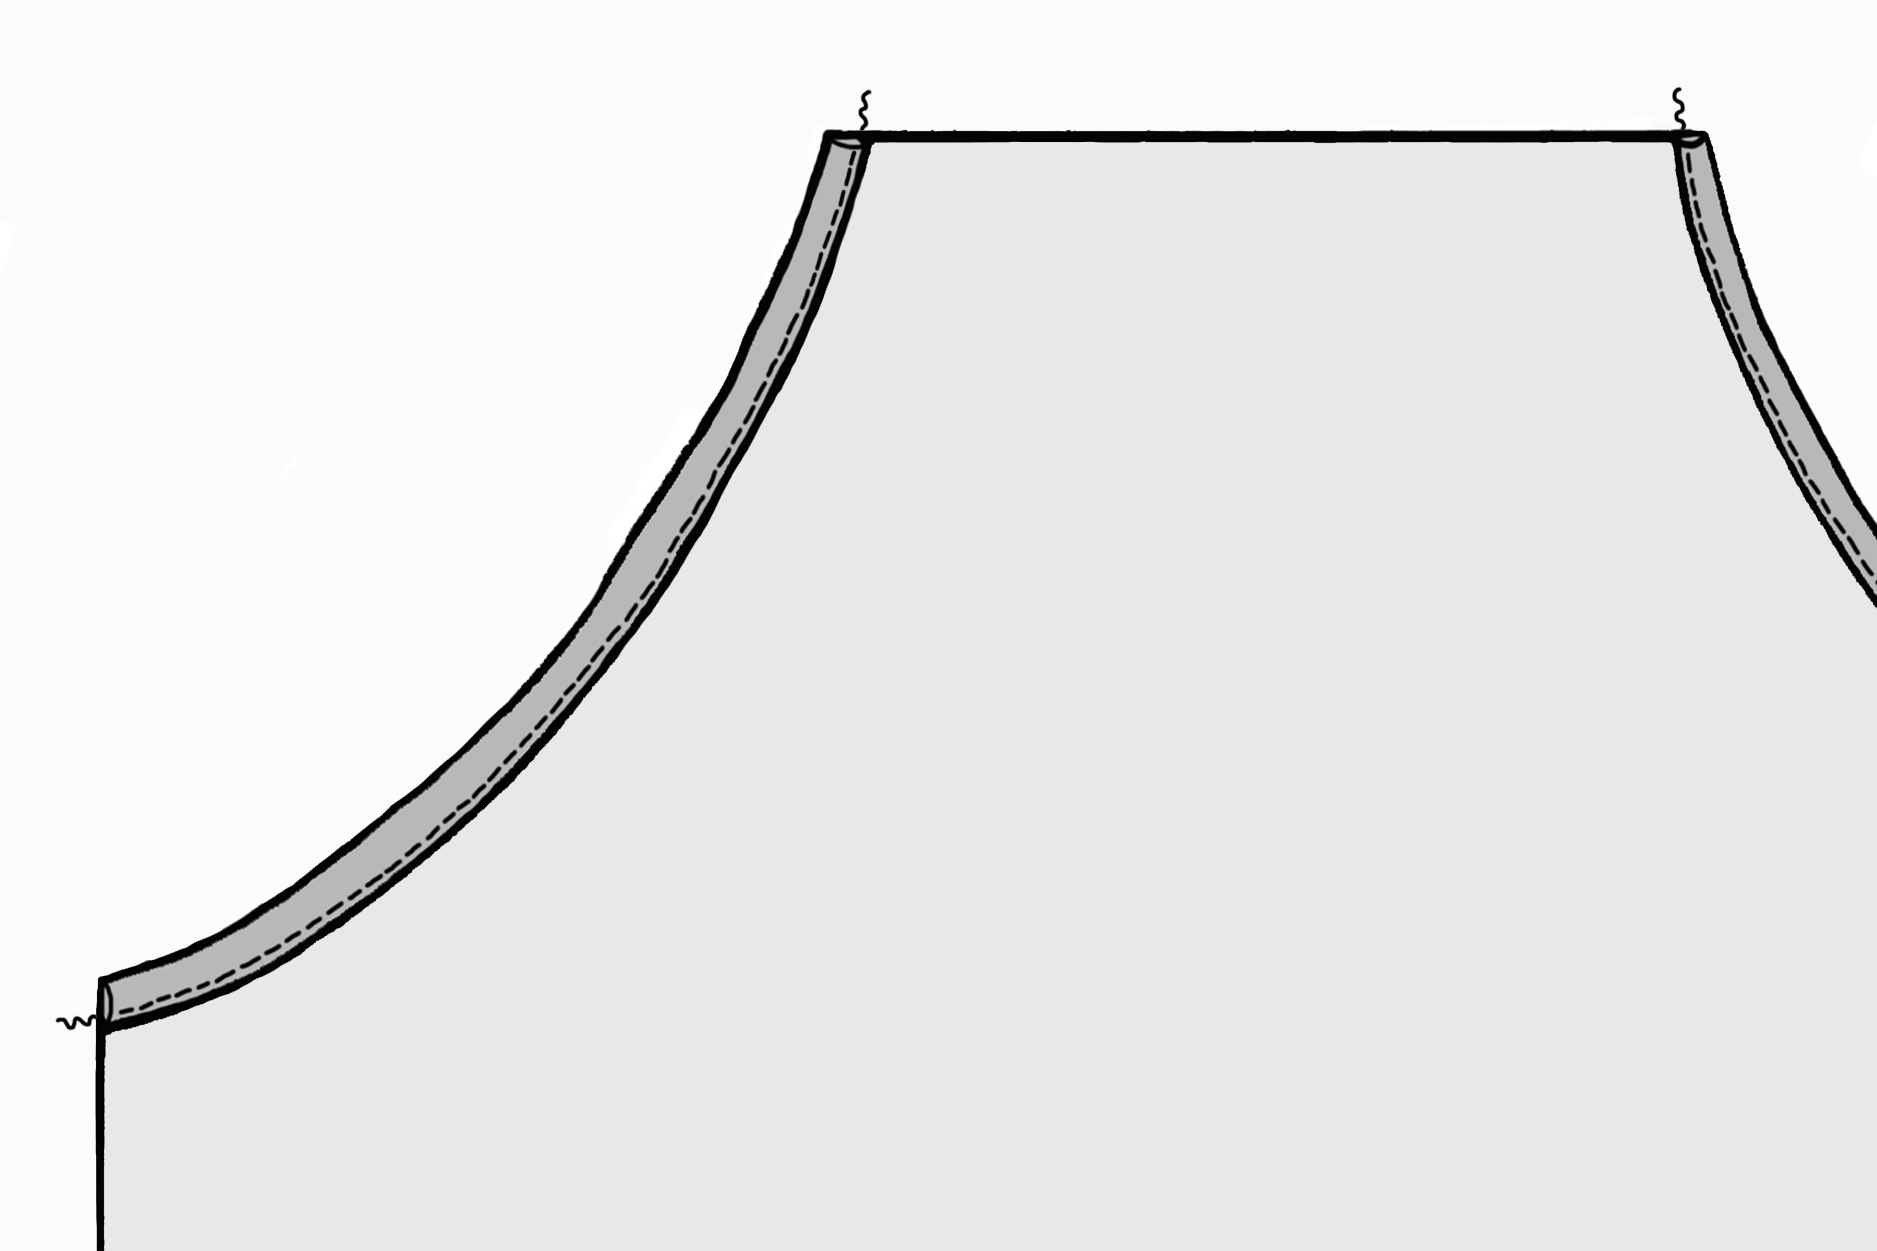
Fold over and press a 1cm then again 1cm then stitch along to make a small hem at the two slanted top side edges of your apron front piece. (PLEASE NOTE THAT THIS STEP HAS BEEN LEFT OFF THE PATTERN BY MISTAKE ).
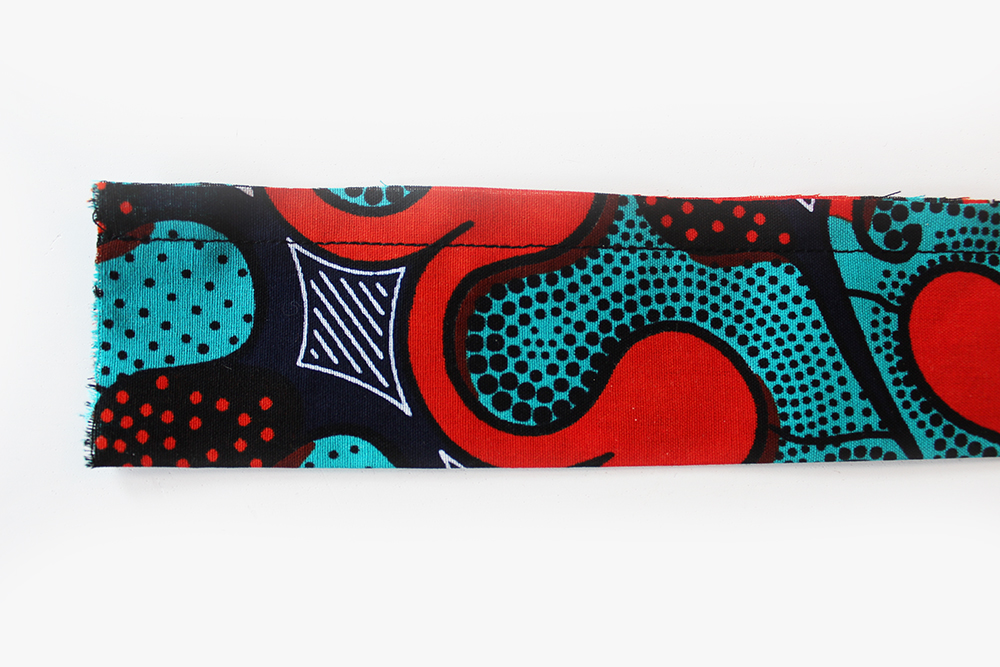
Next make your neck strap and side ties.
So fold the strips of fabric in half lengthways matching the raw edges and with the RST* (right sides together). Pin then stitch along the open side all the way down.
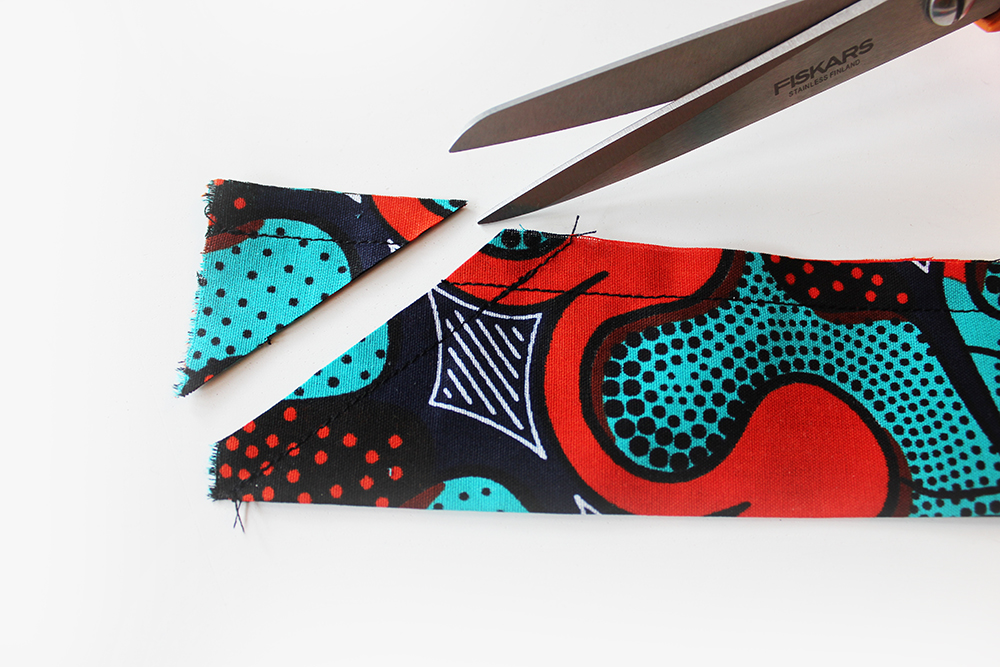
With the side ties only stitch across diagonally as shown on the template at just one end then trim off the excess seam allowance leaving a 1cm approx margin.
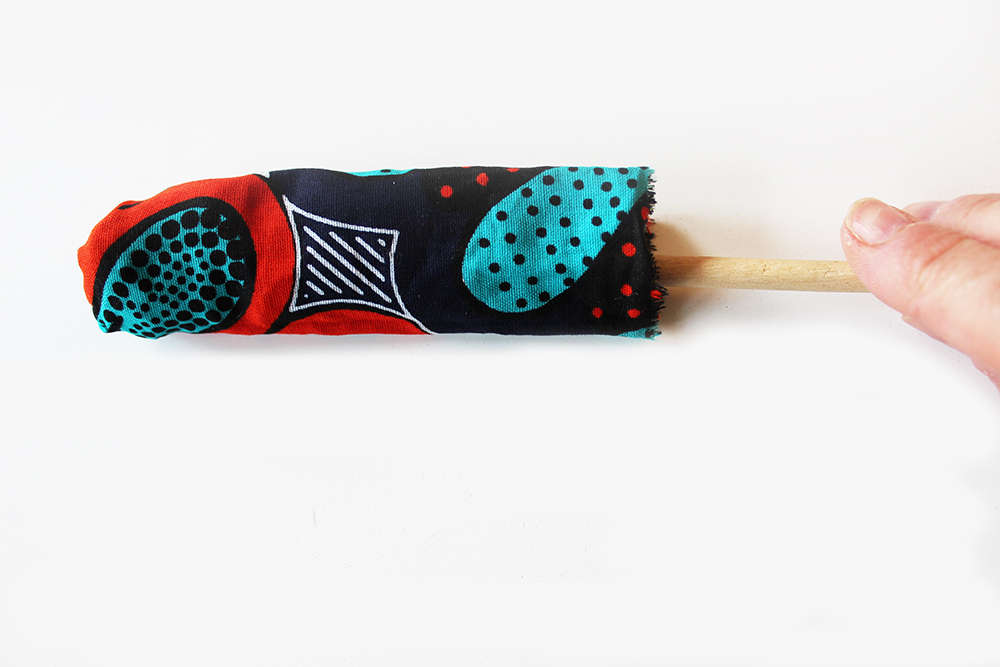
Now turn inside out so grab yourself a poking tool (as mentioned above in equipment section) and push the tie or neckband inside out.
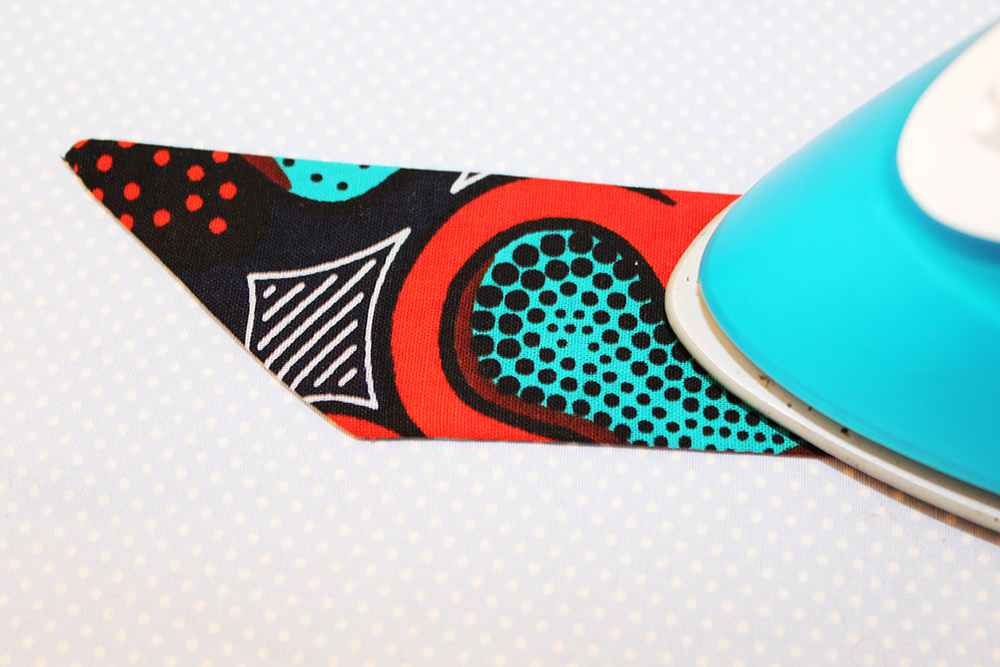
Then iron your ties so the seam lines are aligned with the fold.
Alternatively , if you find turning inside out too tricky you could just fold and press the long raw edges 1cm then fold the whole band in half and press. Stitch down the sides close to the edge and then hem the ends.
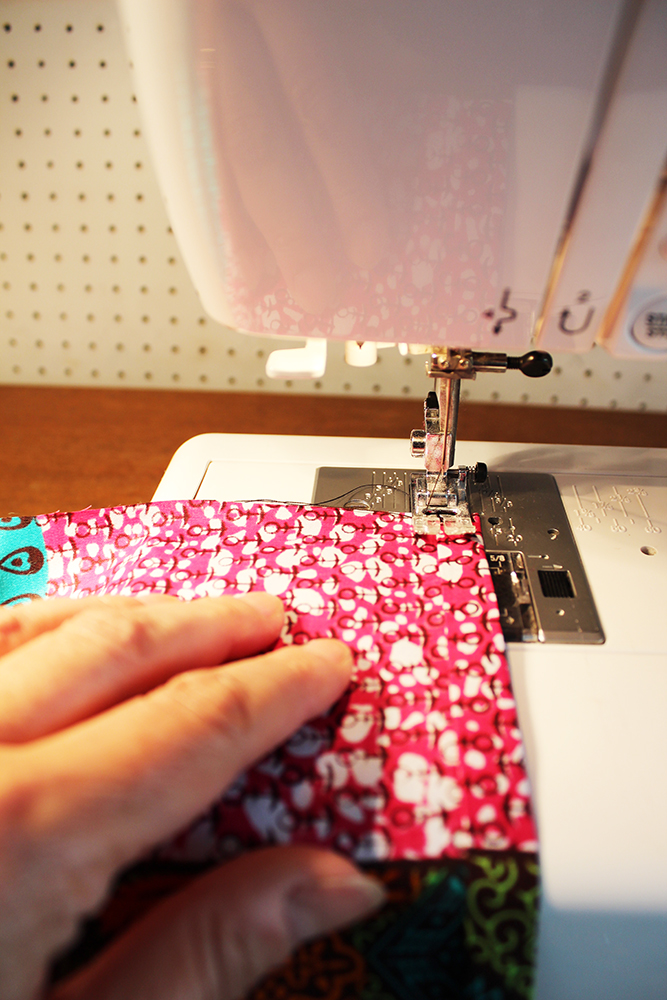
Right so with all the ties and neckband made why not top stitch them on the RS* (right side). I always think it finishes it off so much better and I love a bit of topstitching!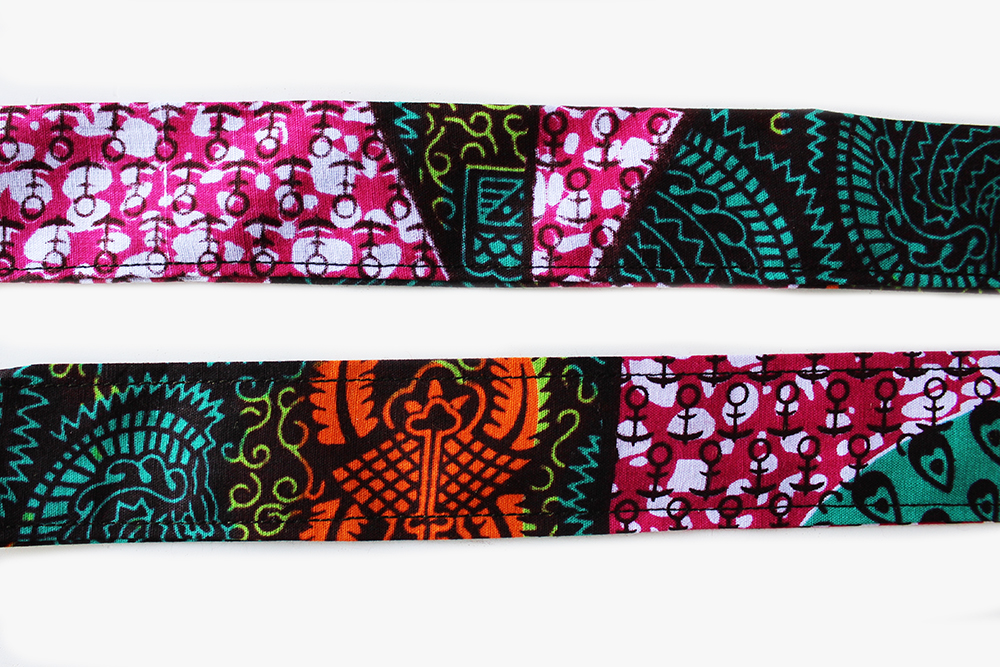
Next we sew the neckband into the apron, so first double fold over and iron a 1cm hem at the very top horizontal edge of the apron. Now before you stitch it just tuck in the raw edges of your neckband under the fold and pin to hold ….hanging downwards towards the apron like this….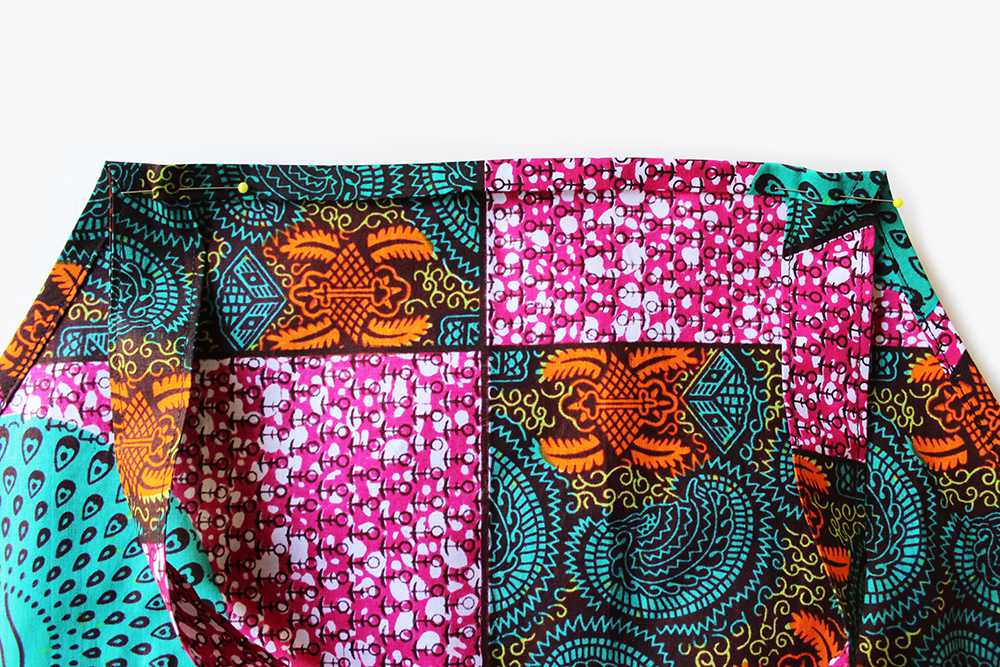
Be careful not to twist your band so it should be the same sides facing down each side.
Then stitch across from one side to the other sewing in the neckband straps as you go. Finally fold straps up and stitch across at the upper edge of the hem again like this….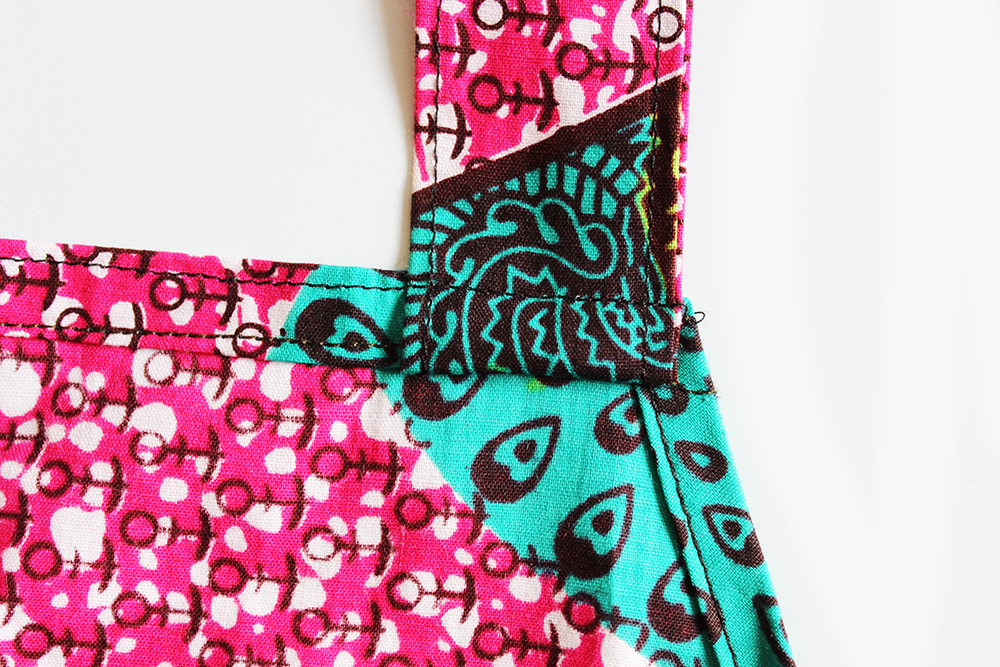
You will need to sew in any loose ends of course. Brilliant. Now to the side ties….
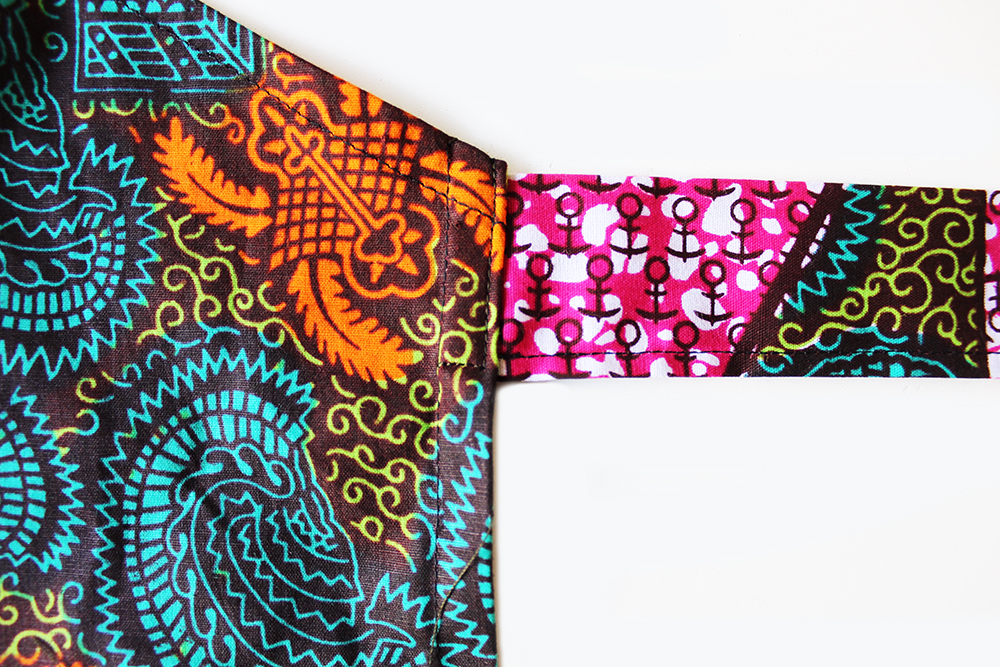
Fold over and press 1cm then again 1cm at the side vertical raw edges each side. Now tuck the raw edge end of the apron under the fold just like before with the tie extending towards the apron.
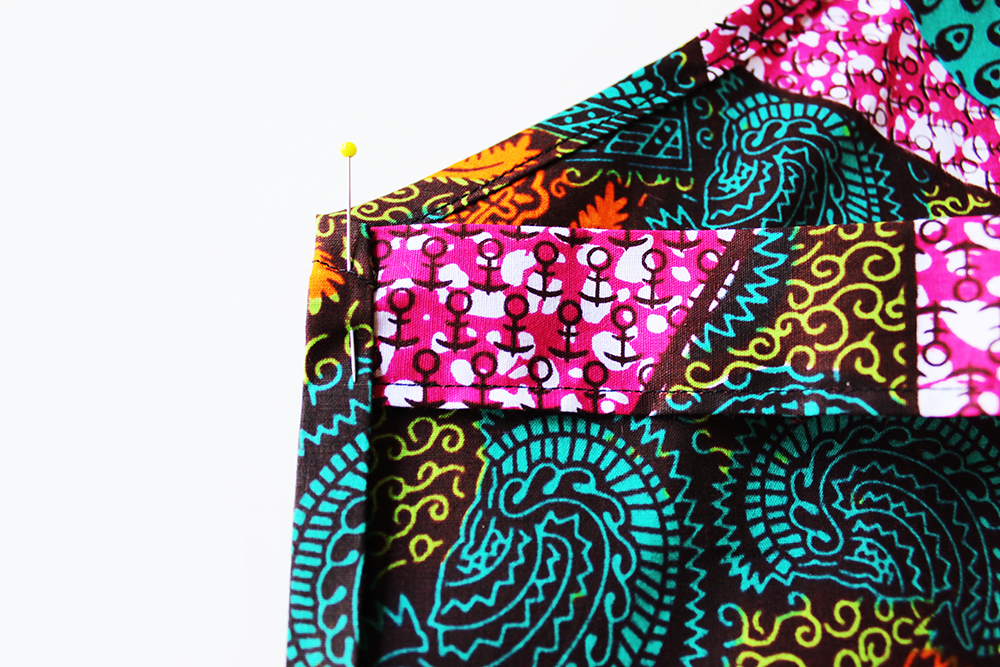
Then stitch down the side hem close to the inner fold.
Next you just fold back the tie just like you did before with the neckband and stitch again.
 All thats left to do now is to hem the lower edge.
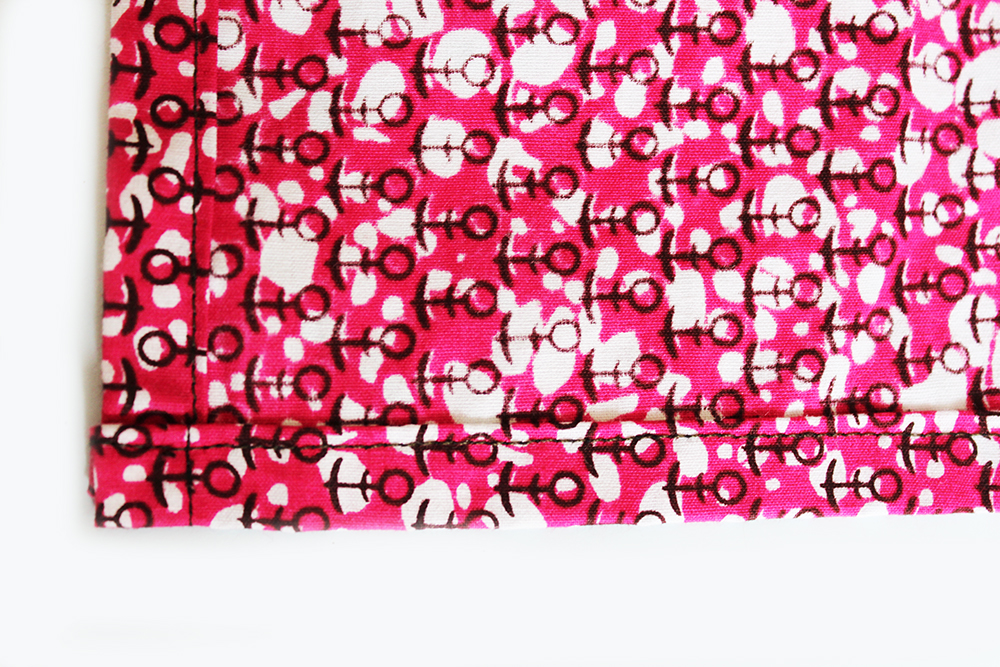
and there you have a lovely funky apron!
To add a pocket make a 1cm double fold hem at the top edge of the pocket piece. Fold over and press the remaining three sides 1cm. Pin the pocket on to your apron front in the required position tack stitch all around by hand. Sew around the three un-hemmed edges about 4mm from edge, make a small triangle at the top two corners to enclose the seam on the inside. remove tacking stitches.
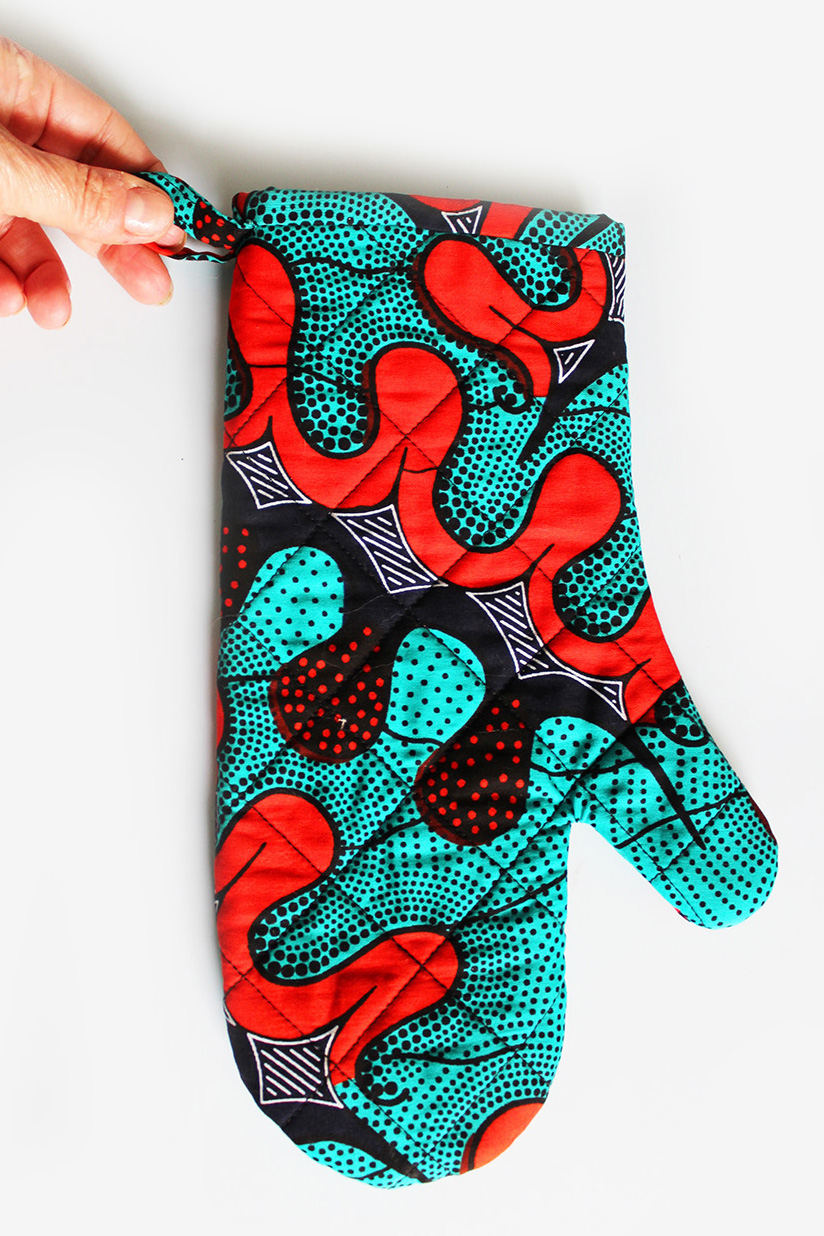
HOW TO MAKE AN OVEN MITT
So to make an oven mitt is a joyful thing, a perfect companion to your lovely apron don’t you think! (up there with cake I’d say!)
The fabric requirements are at the top of the page.
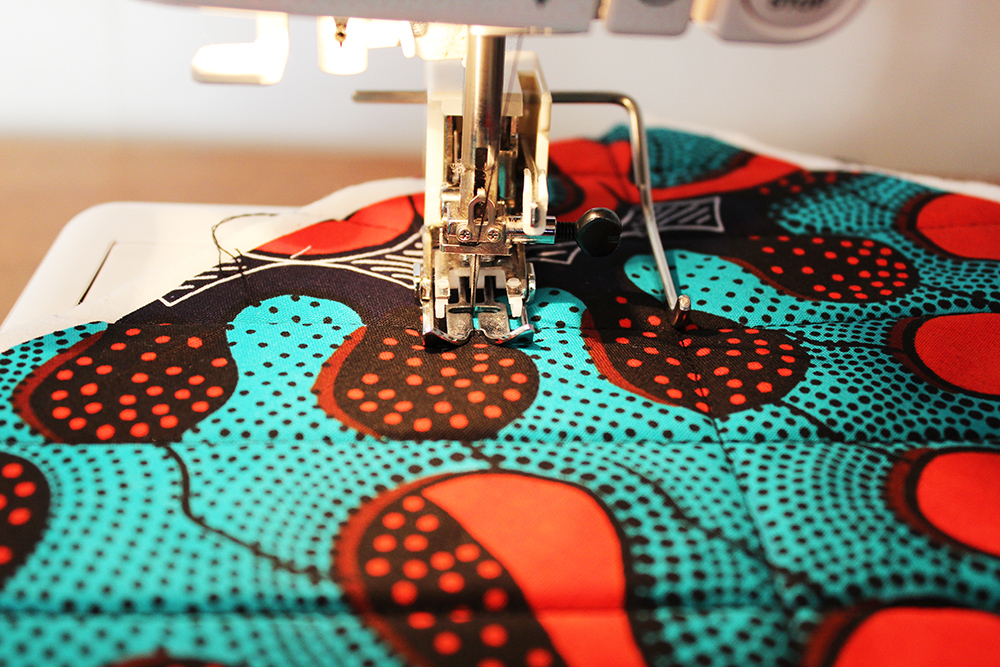
First I start quilting my fabric pieces together, to do this you may need a walking foot attachment which looks like this…*
A strange looking thing I know, but it does make it SO much easier when quilting multi layers of fabric and wadding together but if you haven’t got one, don’t despair, you could either try stitching it without one or just leave out the quilting bit (tack stitch your fabric together to hold layers in place).
So firstly lay your pieces together main fabric RS up followed by a layer of thermo interfacing then a layer of lining RS facing outside. Pin to hold.
Draw a diagonal line using a marker pen on the fabric layers at the centre.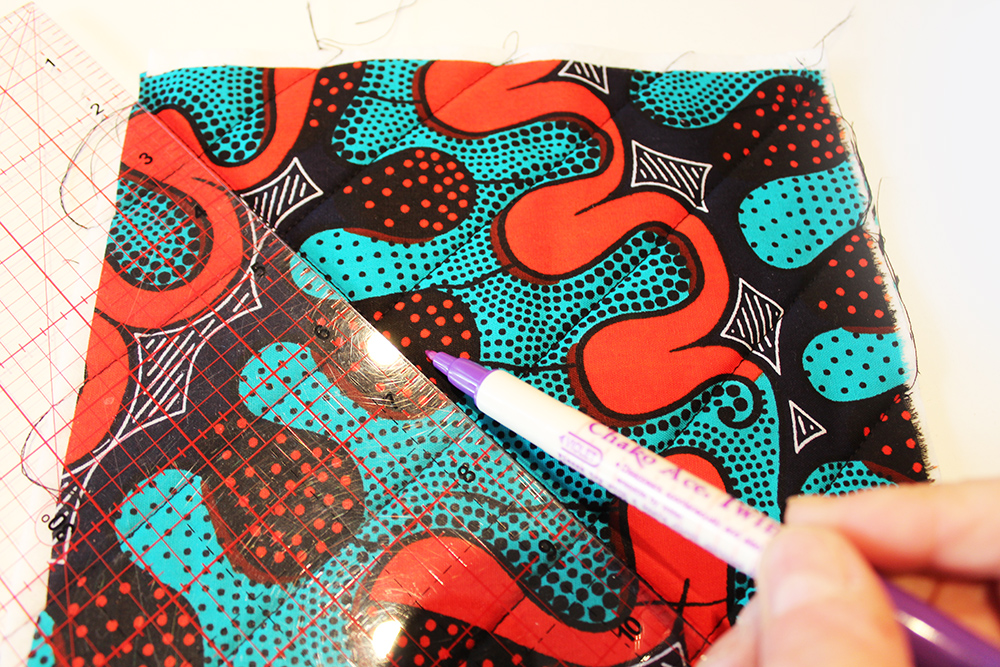
You can stitch lines 4cm apart using the long quilt guide, lining it up to the previous stitching. Stitch across one way and then the other until you have a trellis like pattern.
Do the same for both pieces, then place your template on top of the fabric and cut out two mitts NB cut one with template facing up and one with template facing down so you have two pieces mirrored.
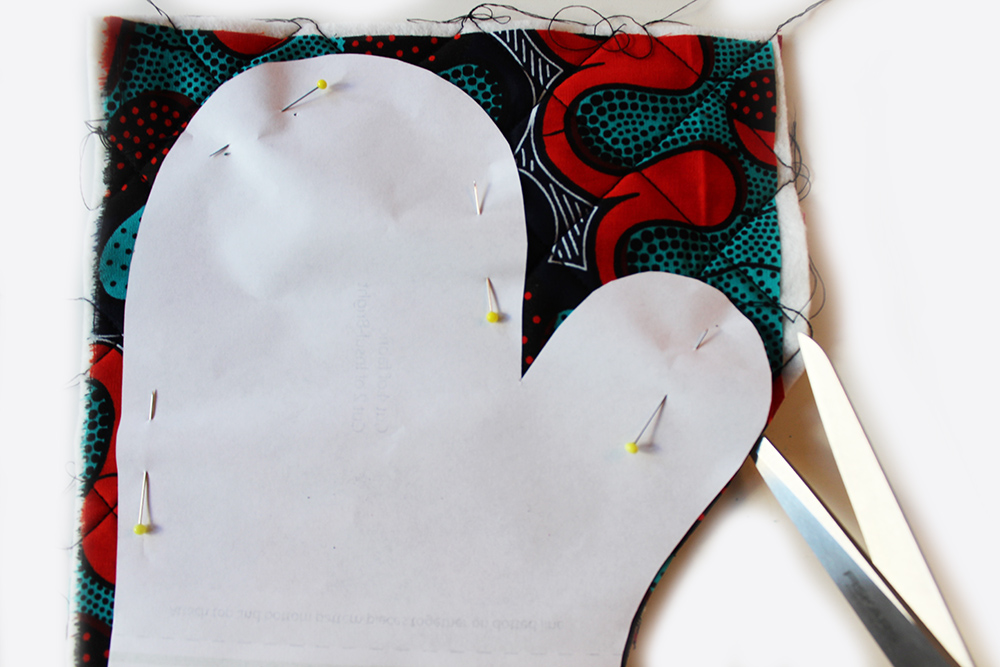
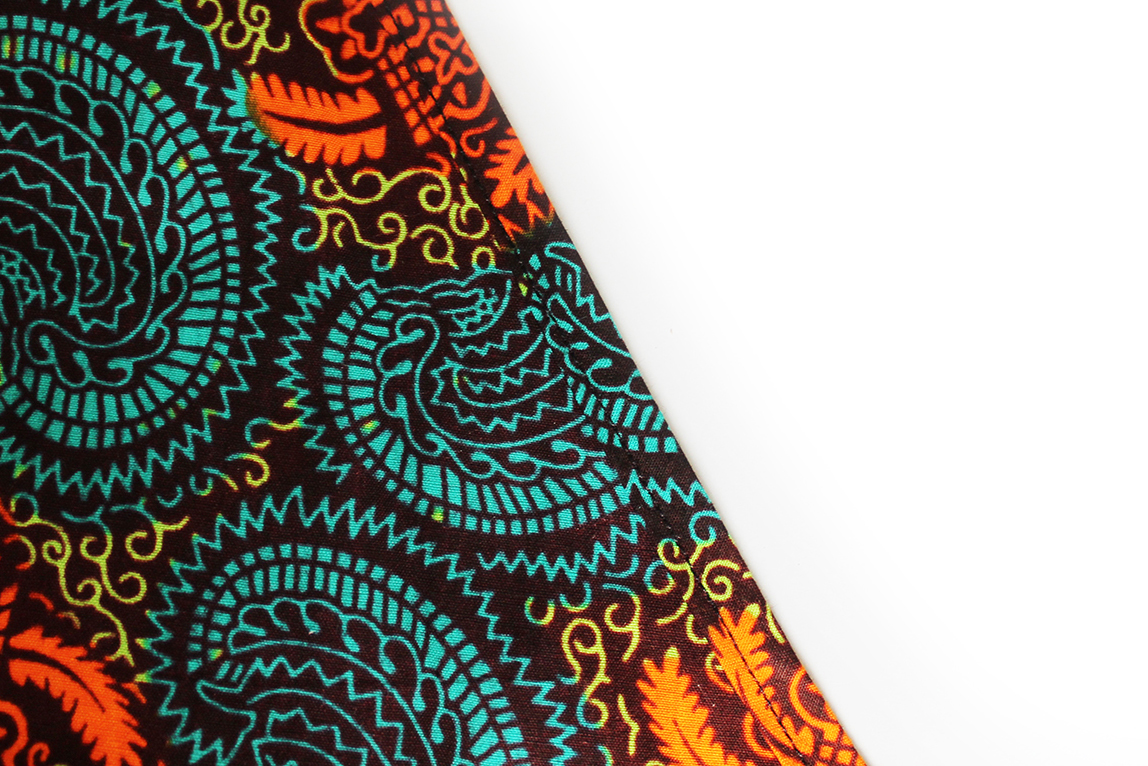
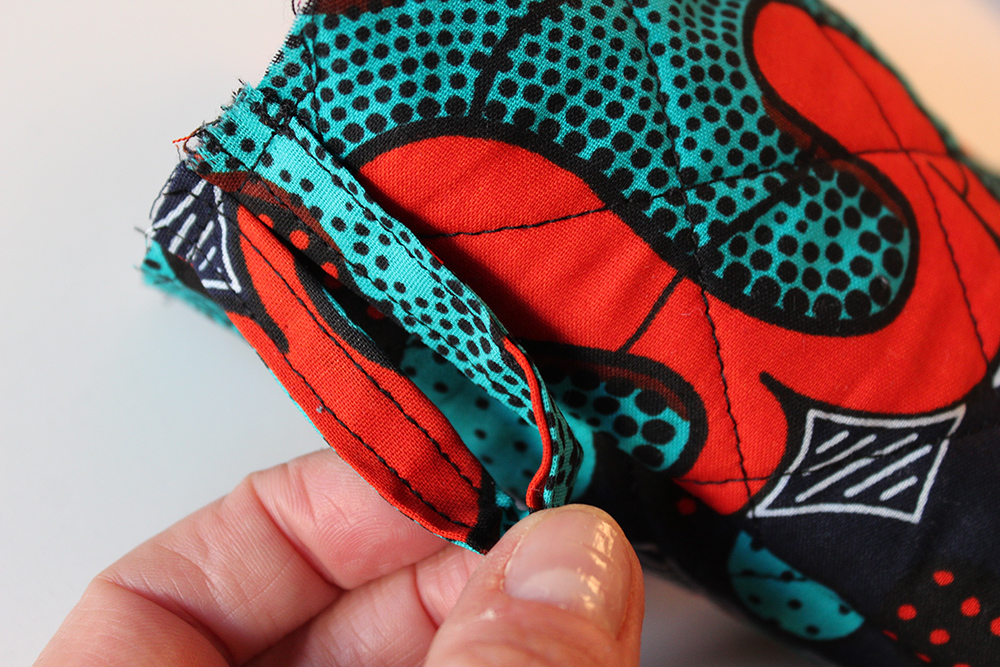
Pin the mitt pieces together with main fabric right sides together. Stitch all around with a 1/4″ (6mm) seam. Zig zag the outer raw edges all around and nick into the corner between the thumb and mitt to allow for movement.
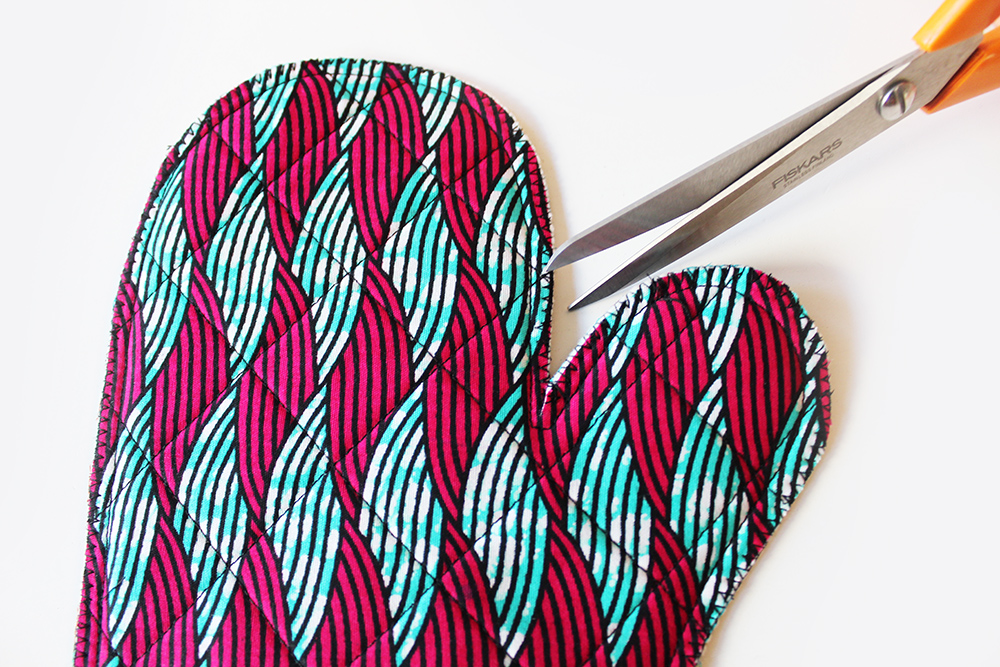
Turn your mitt inside out and push out edges with a poking tool.
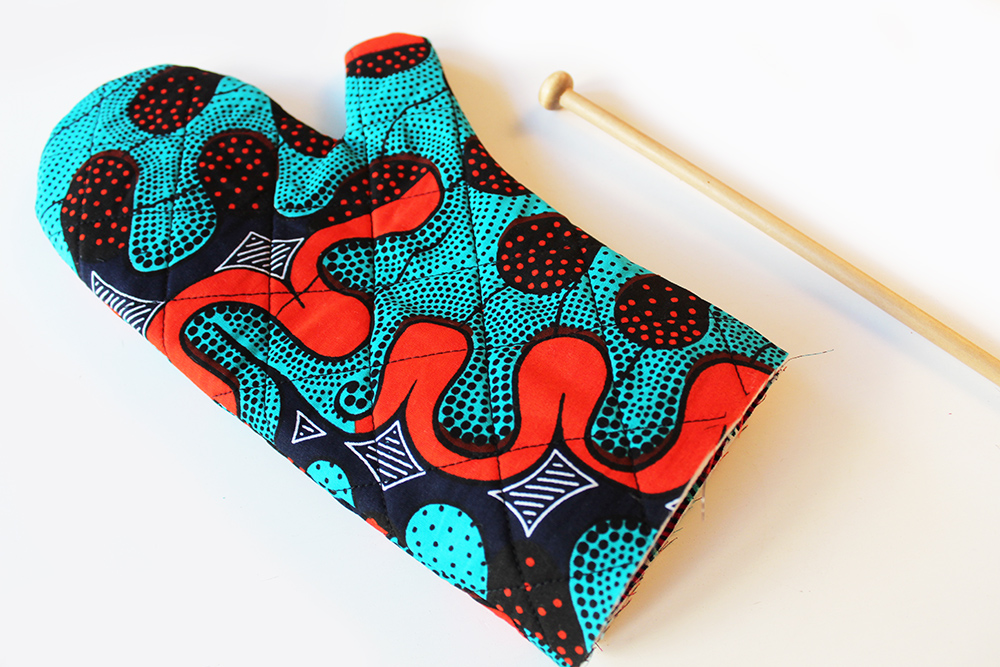
Nearly there now, just a few things to do before we arrive at Oven Mitt Heaven!
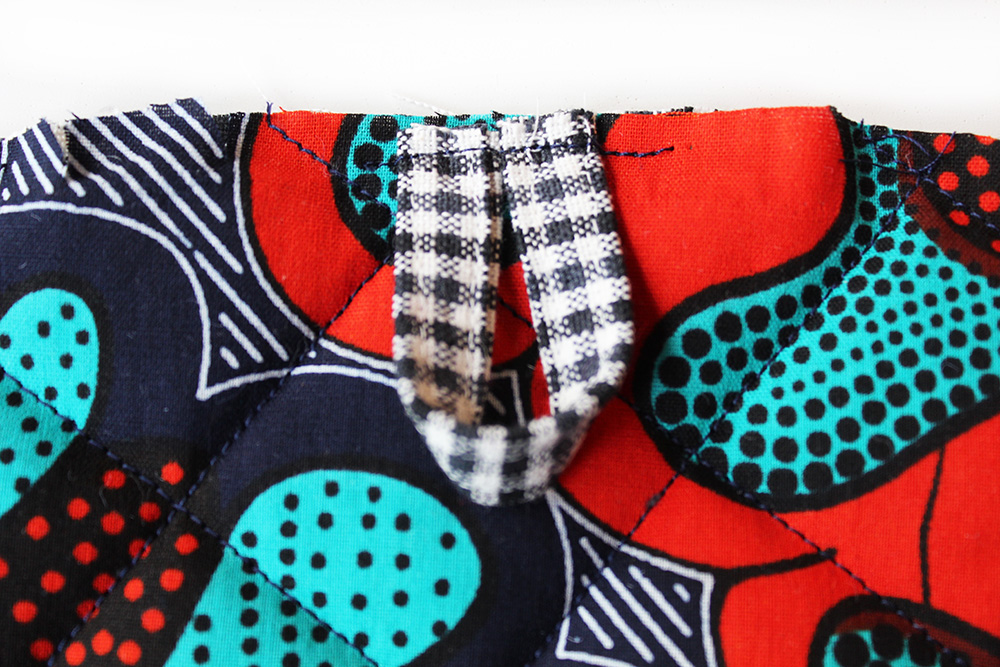
First lets make a tab loop so we can hang it up on display for everyone to see.
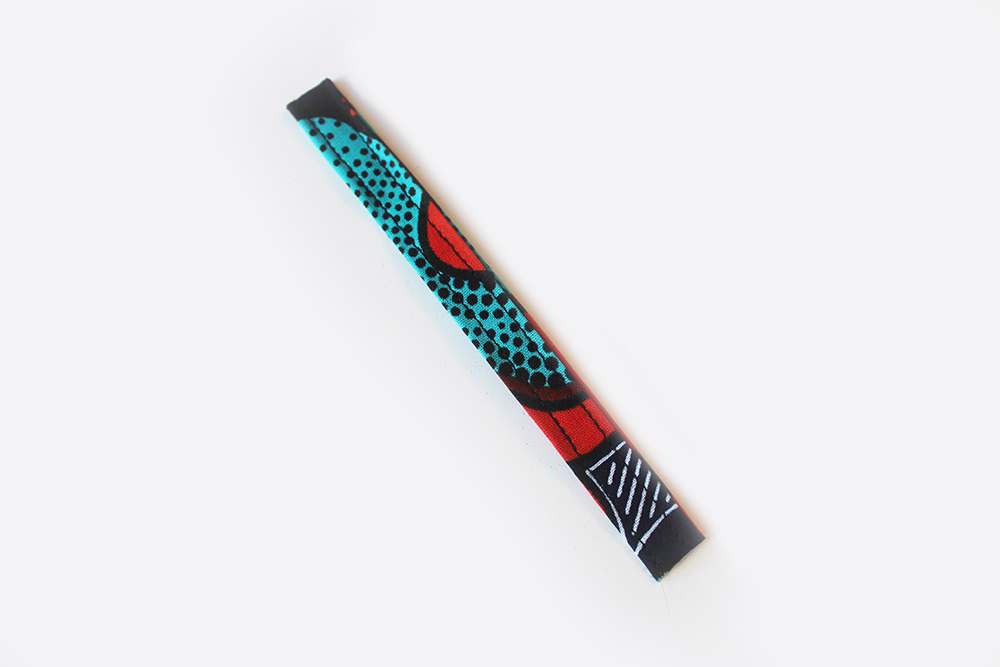
To do this we cut a strip of fabric 10cm long by 4cm wide.
Fold over and press 1cm each long side like so….
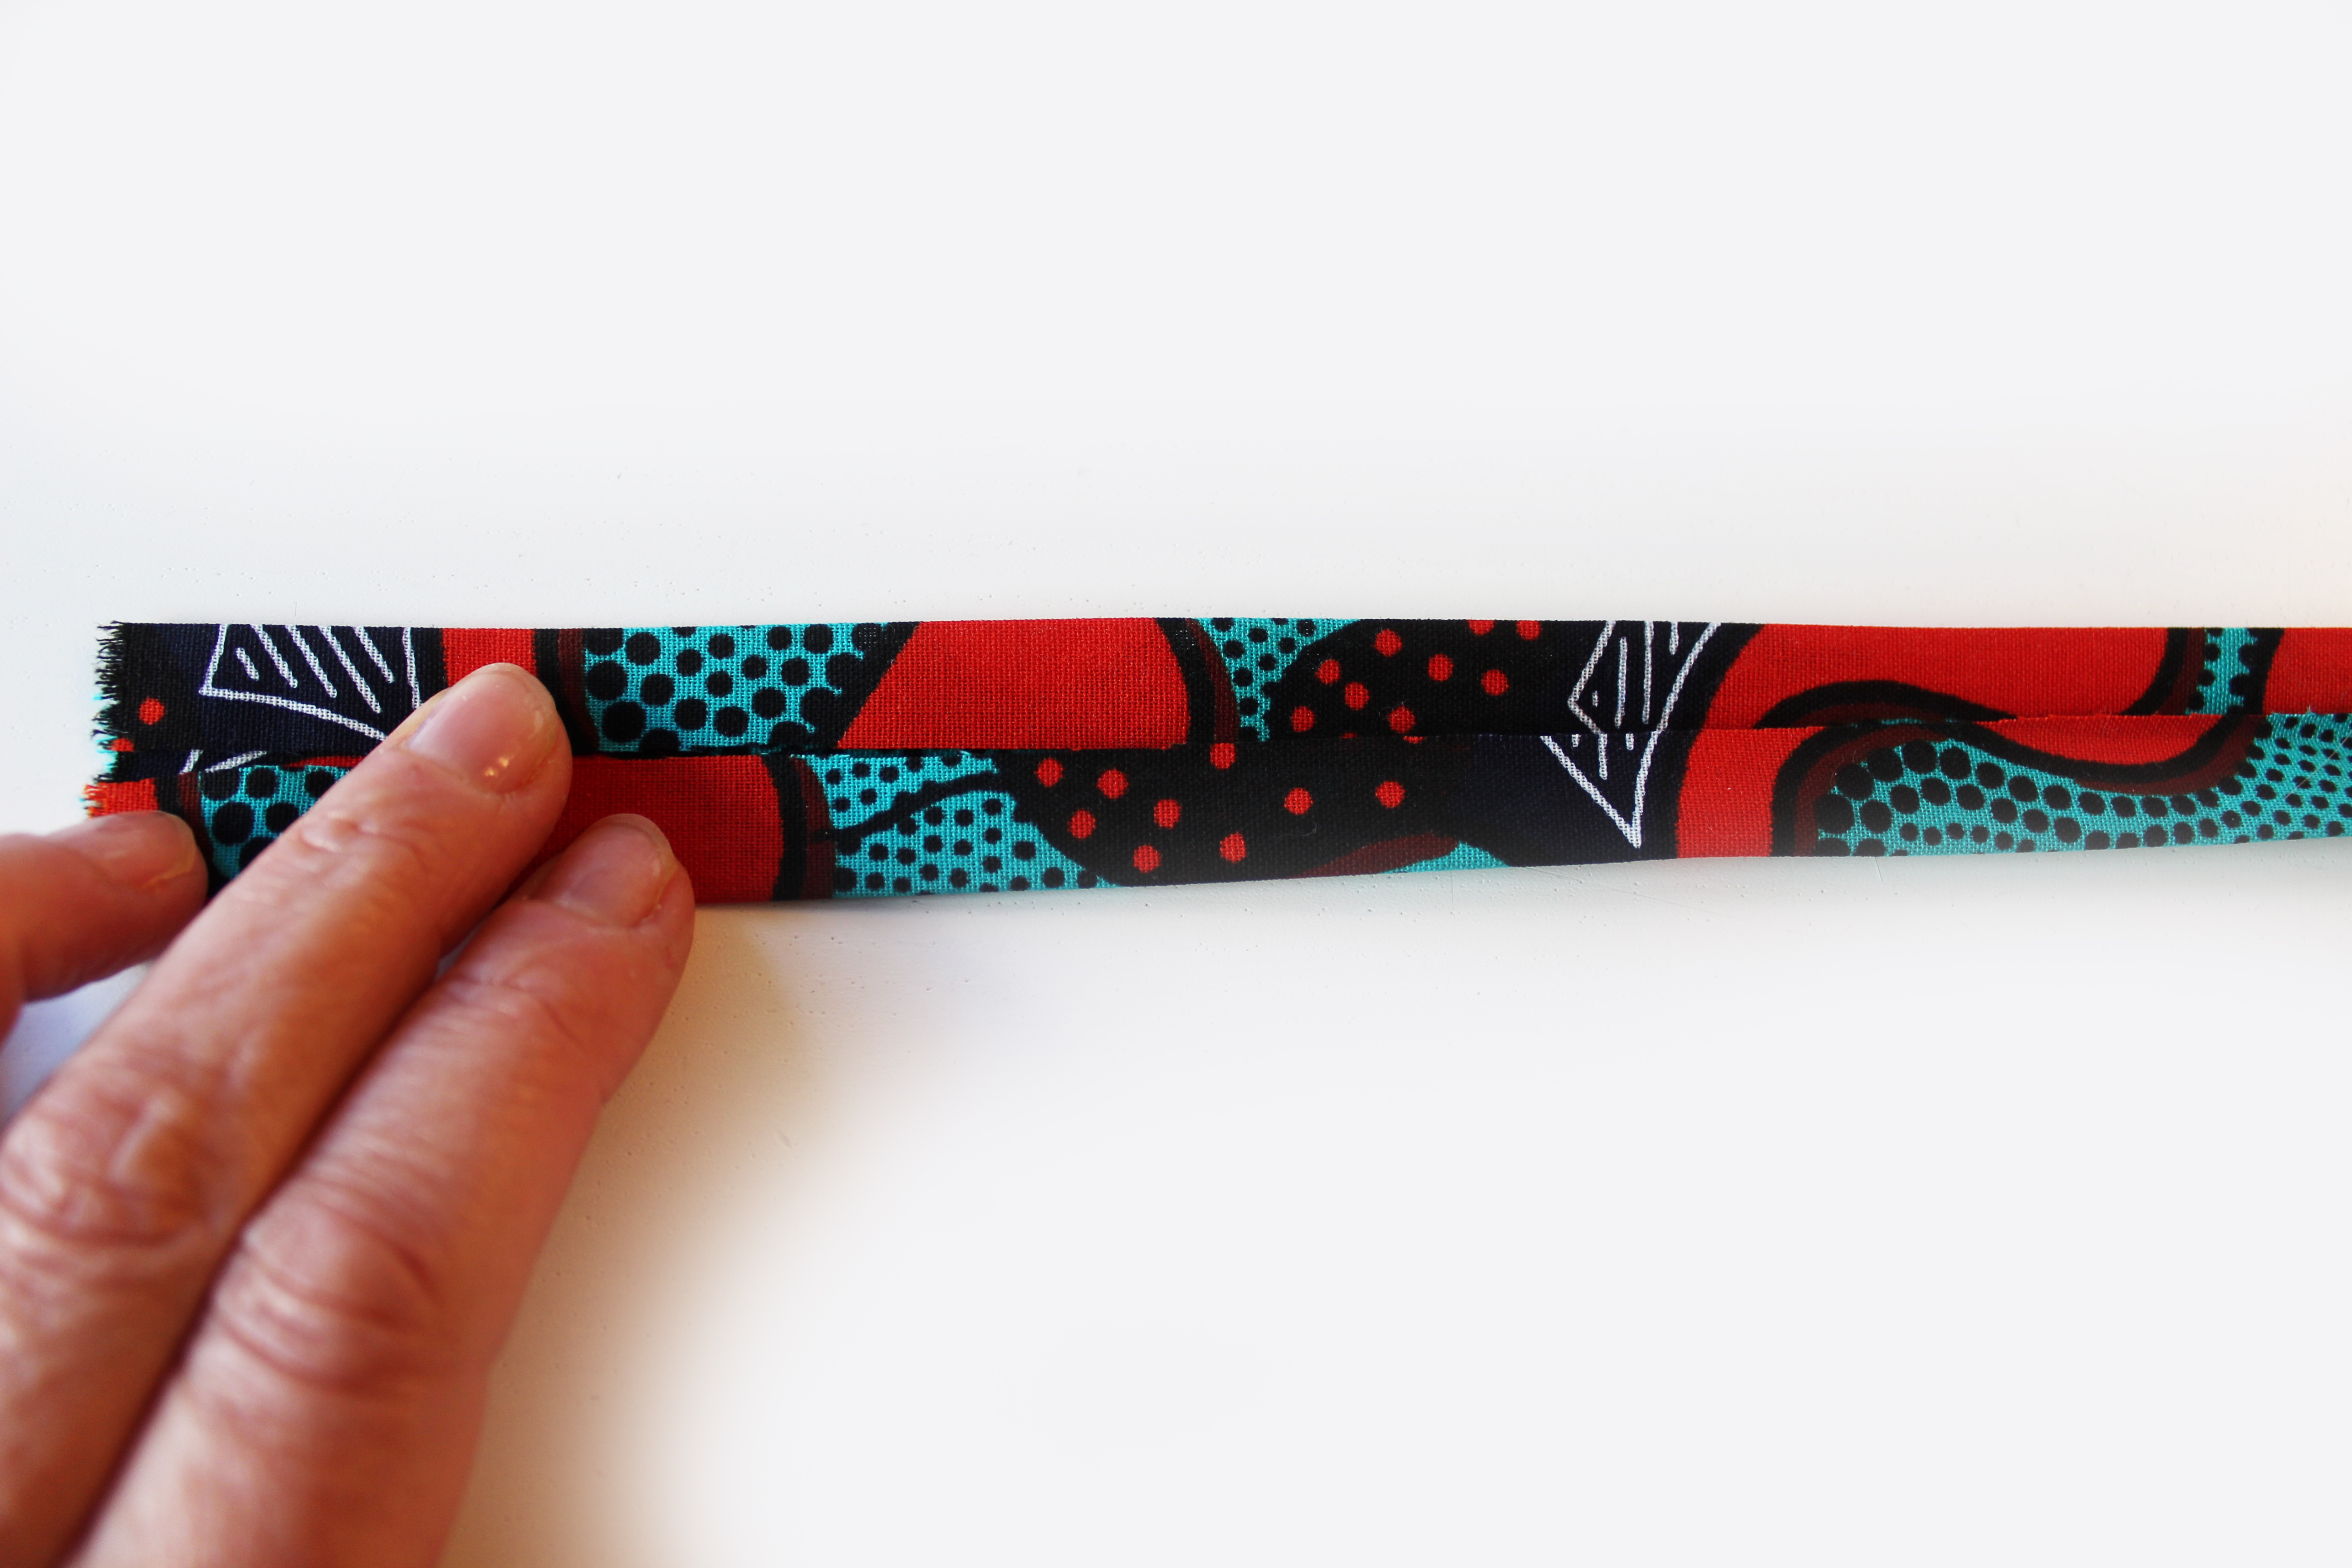
Then press over in half and stitch down each side like this……
Insert your loop at the top edge of the mitt and tack stitch on the machine close to the edge like this….
Next we stitch some binding at the top edge so either cut yourself a strip of fabric 4cm x 32cm (fold and press 1cm each long side) or use some ready made bias binding available at most good haberdashers. You could use an accent colour from your fabric print to enhance the design. Bind the top edge of your mitt thus encasing the raw edges.
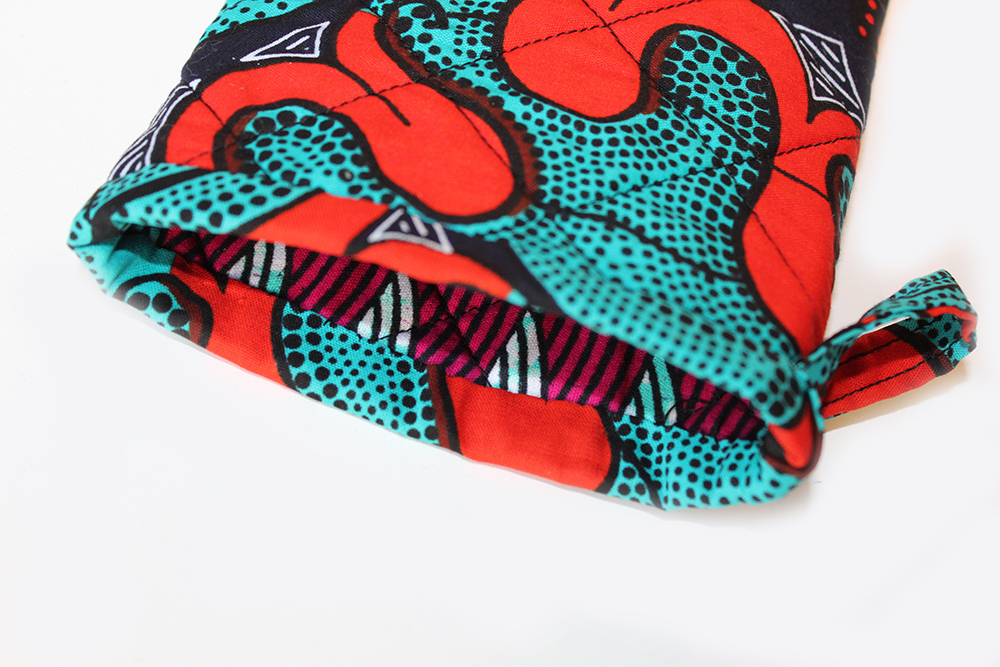
There you have one fab mitt.
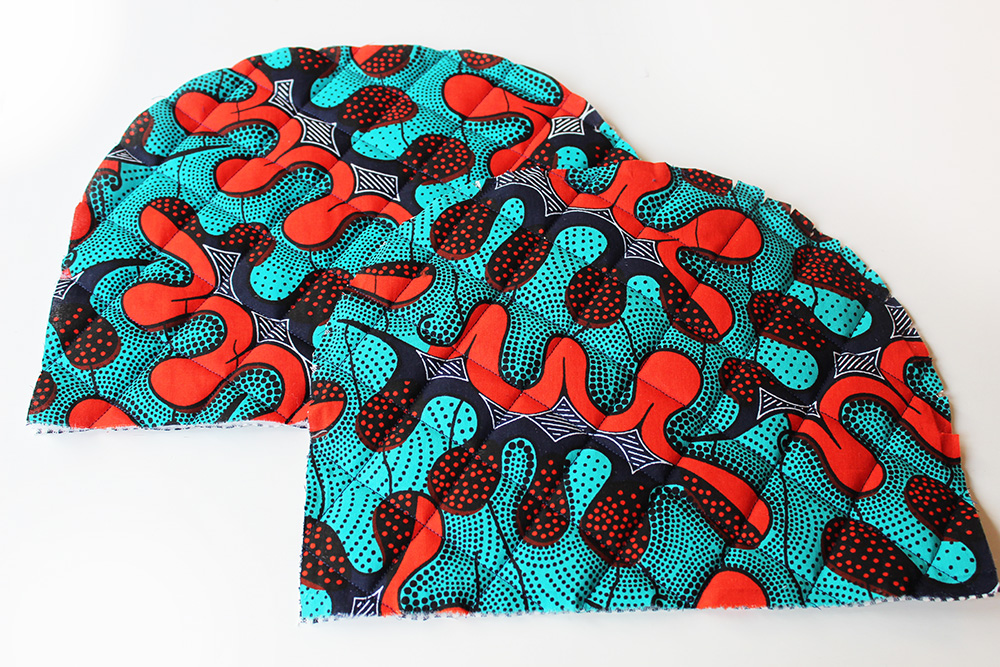
HOW TO MAKE AN TEA COSY
See above for fabric requirements.
This is what you do:
Sandwich your 3 fabric pieces together with the RS of fabric outermost and the thermal interfacing in the middle. Pin all around.
Draw one line diagonally in each direction, across the top fabric at the centre with an invisible fabric marker.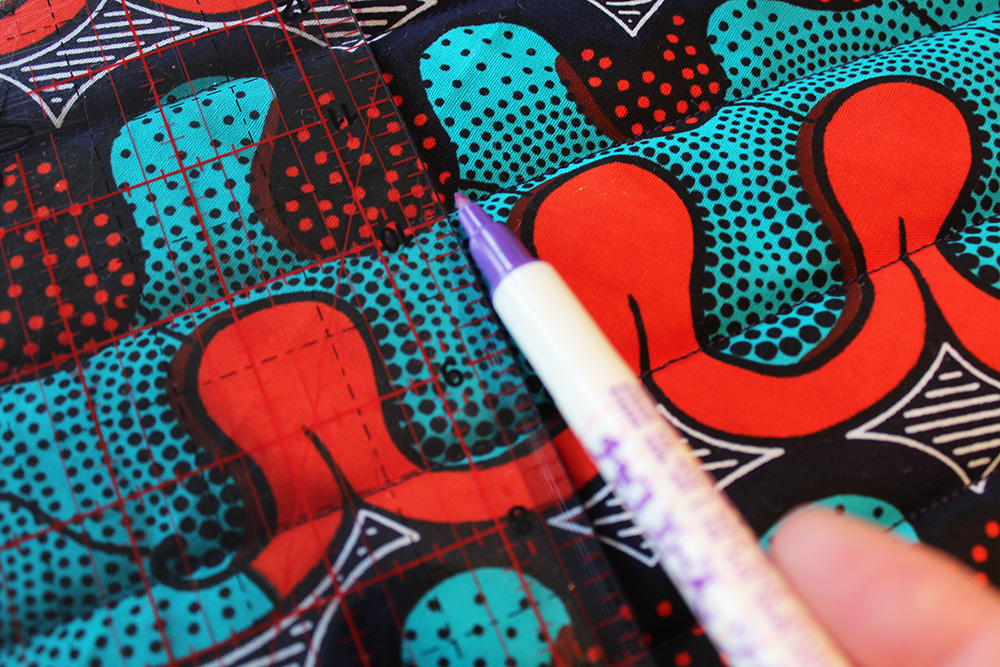
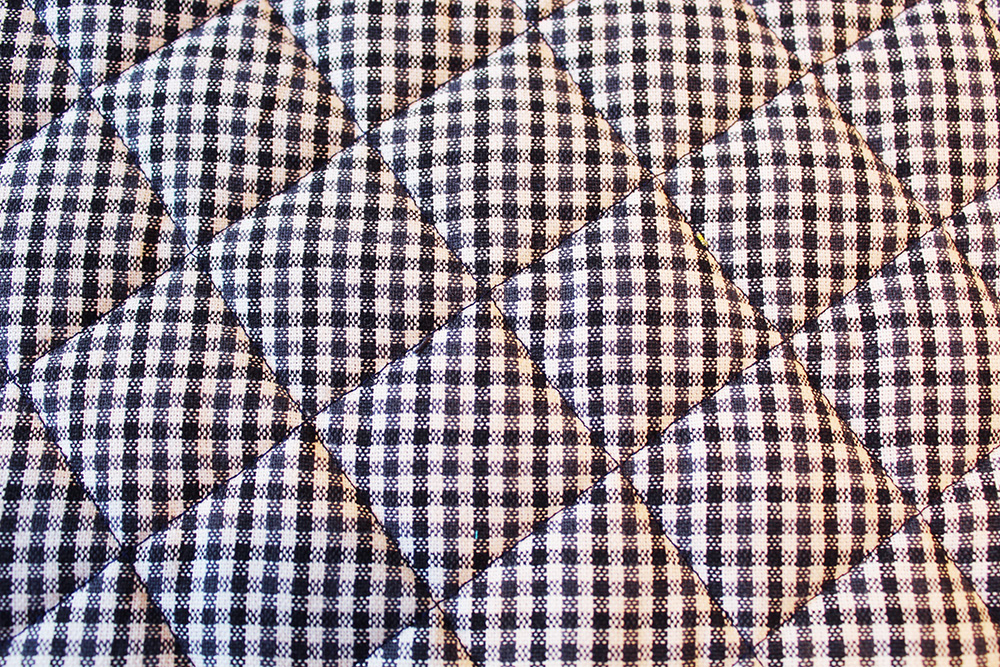
Then stitch along the line, using a stitch line guide, what is that! I hear you say…..
here it is you’ve probably seen one in your accessories box and wondered what it was for.
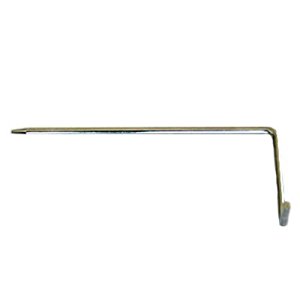
well fitted onto your machine at the back of your foot or walking foot, it helps you keep straight lines, parallel to each other at the set required distance from each other.
Nifty huh?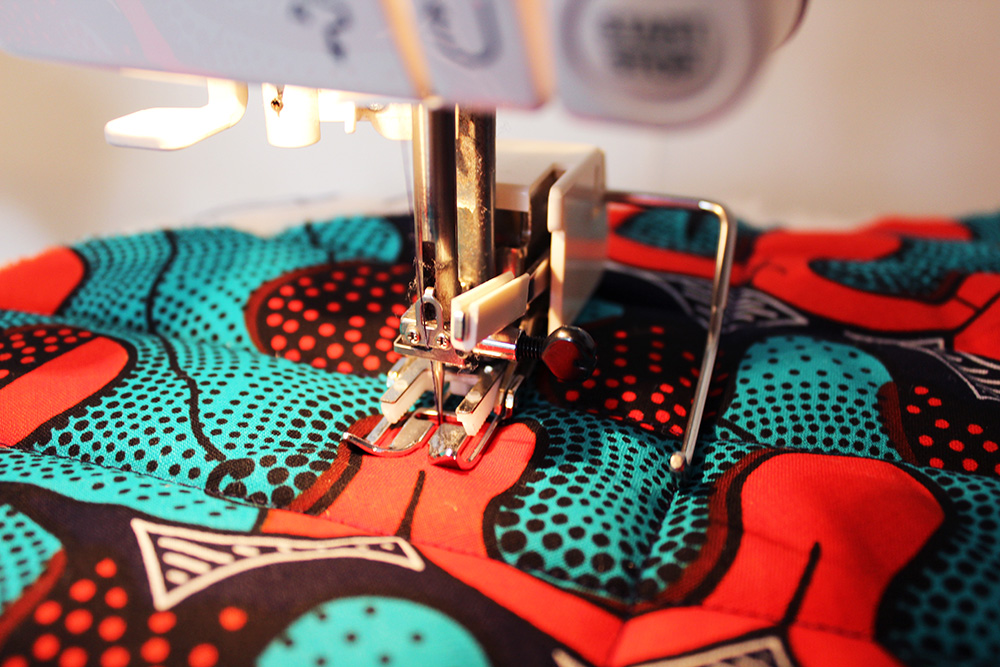
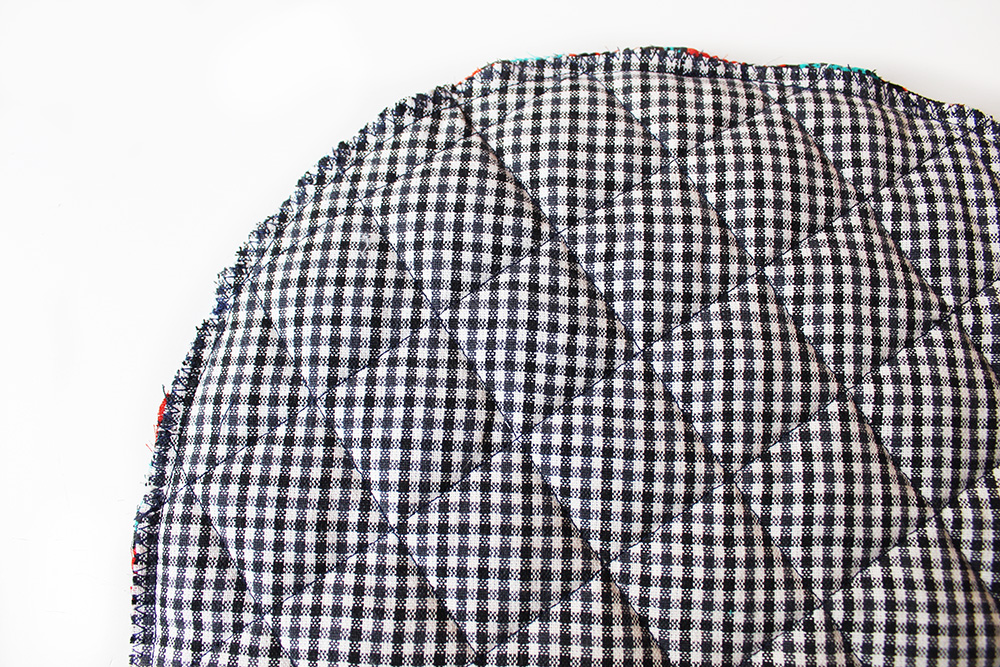
So once you have quilted all your tea cosy it should look like this on the front…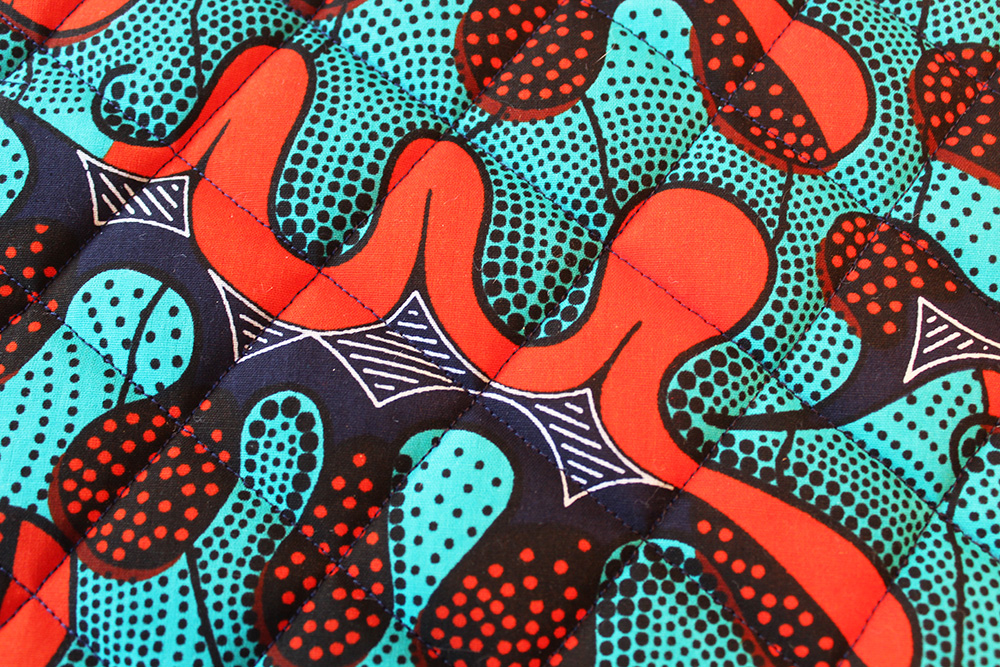
and like this on the back…
Next you cut out two tea cosy shapes using the template on your pattern sheet.
Making the loop
Now we put the little loop in at the top. So cut a strip of fabric 5cm x 10cm in either the main fabric, lining or use a strip of bias tape. Fold and press 1cm each long side, then fold in half again so all raw edges are enclosed and sew down each long side lengthways. Pin, then stitch on to one of the tea cosy pieces at the centre of the top like this….
Place the two tea cosy pieces together with the right sides facing each other. Pin all around then stitch 6mm from the edge all around (except the bottom straight edge of course…derr!). Zig zag the outer raw edge.
Then turn it inside out, pushing out the seam edges from the inside.
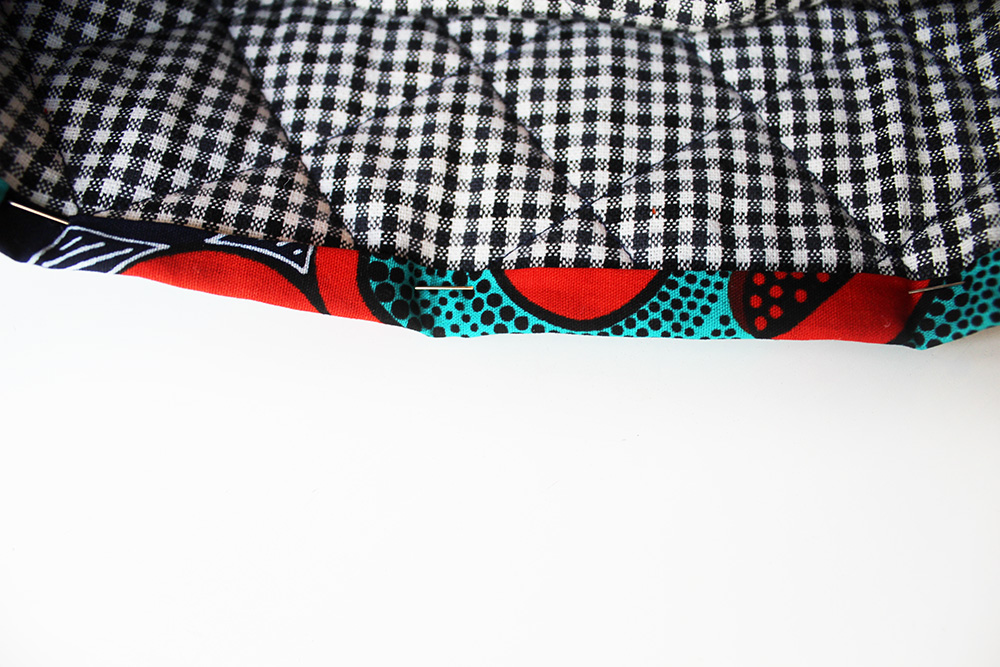
So just one more thing to do, thats the binding. You can use bias binding, which looks nice when you pick up on one of the colours in your print pattern (yum!) or make your own by cutting a 4cm strip of fabric and folding over 1cm on one long side (WS on the inside). 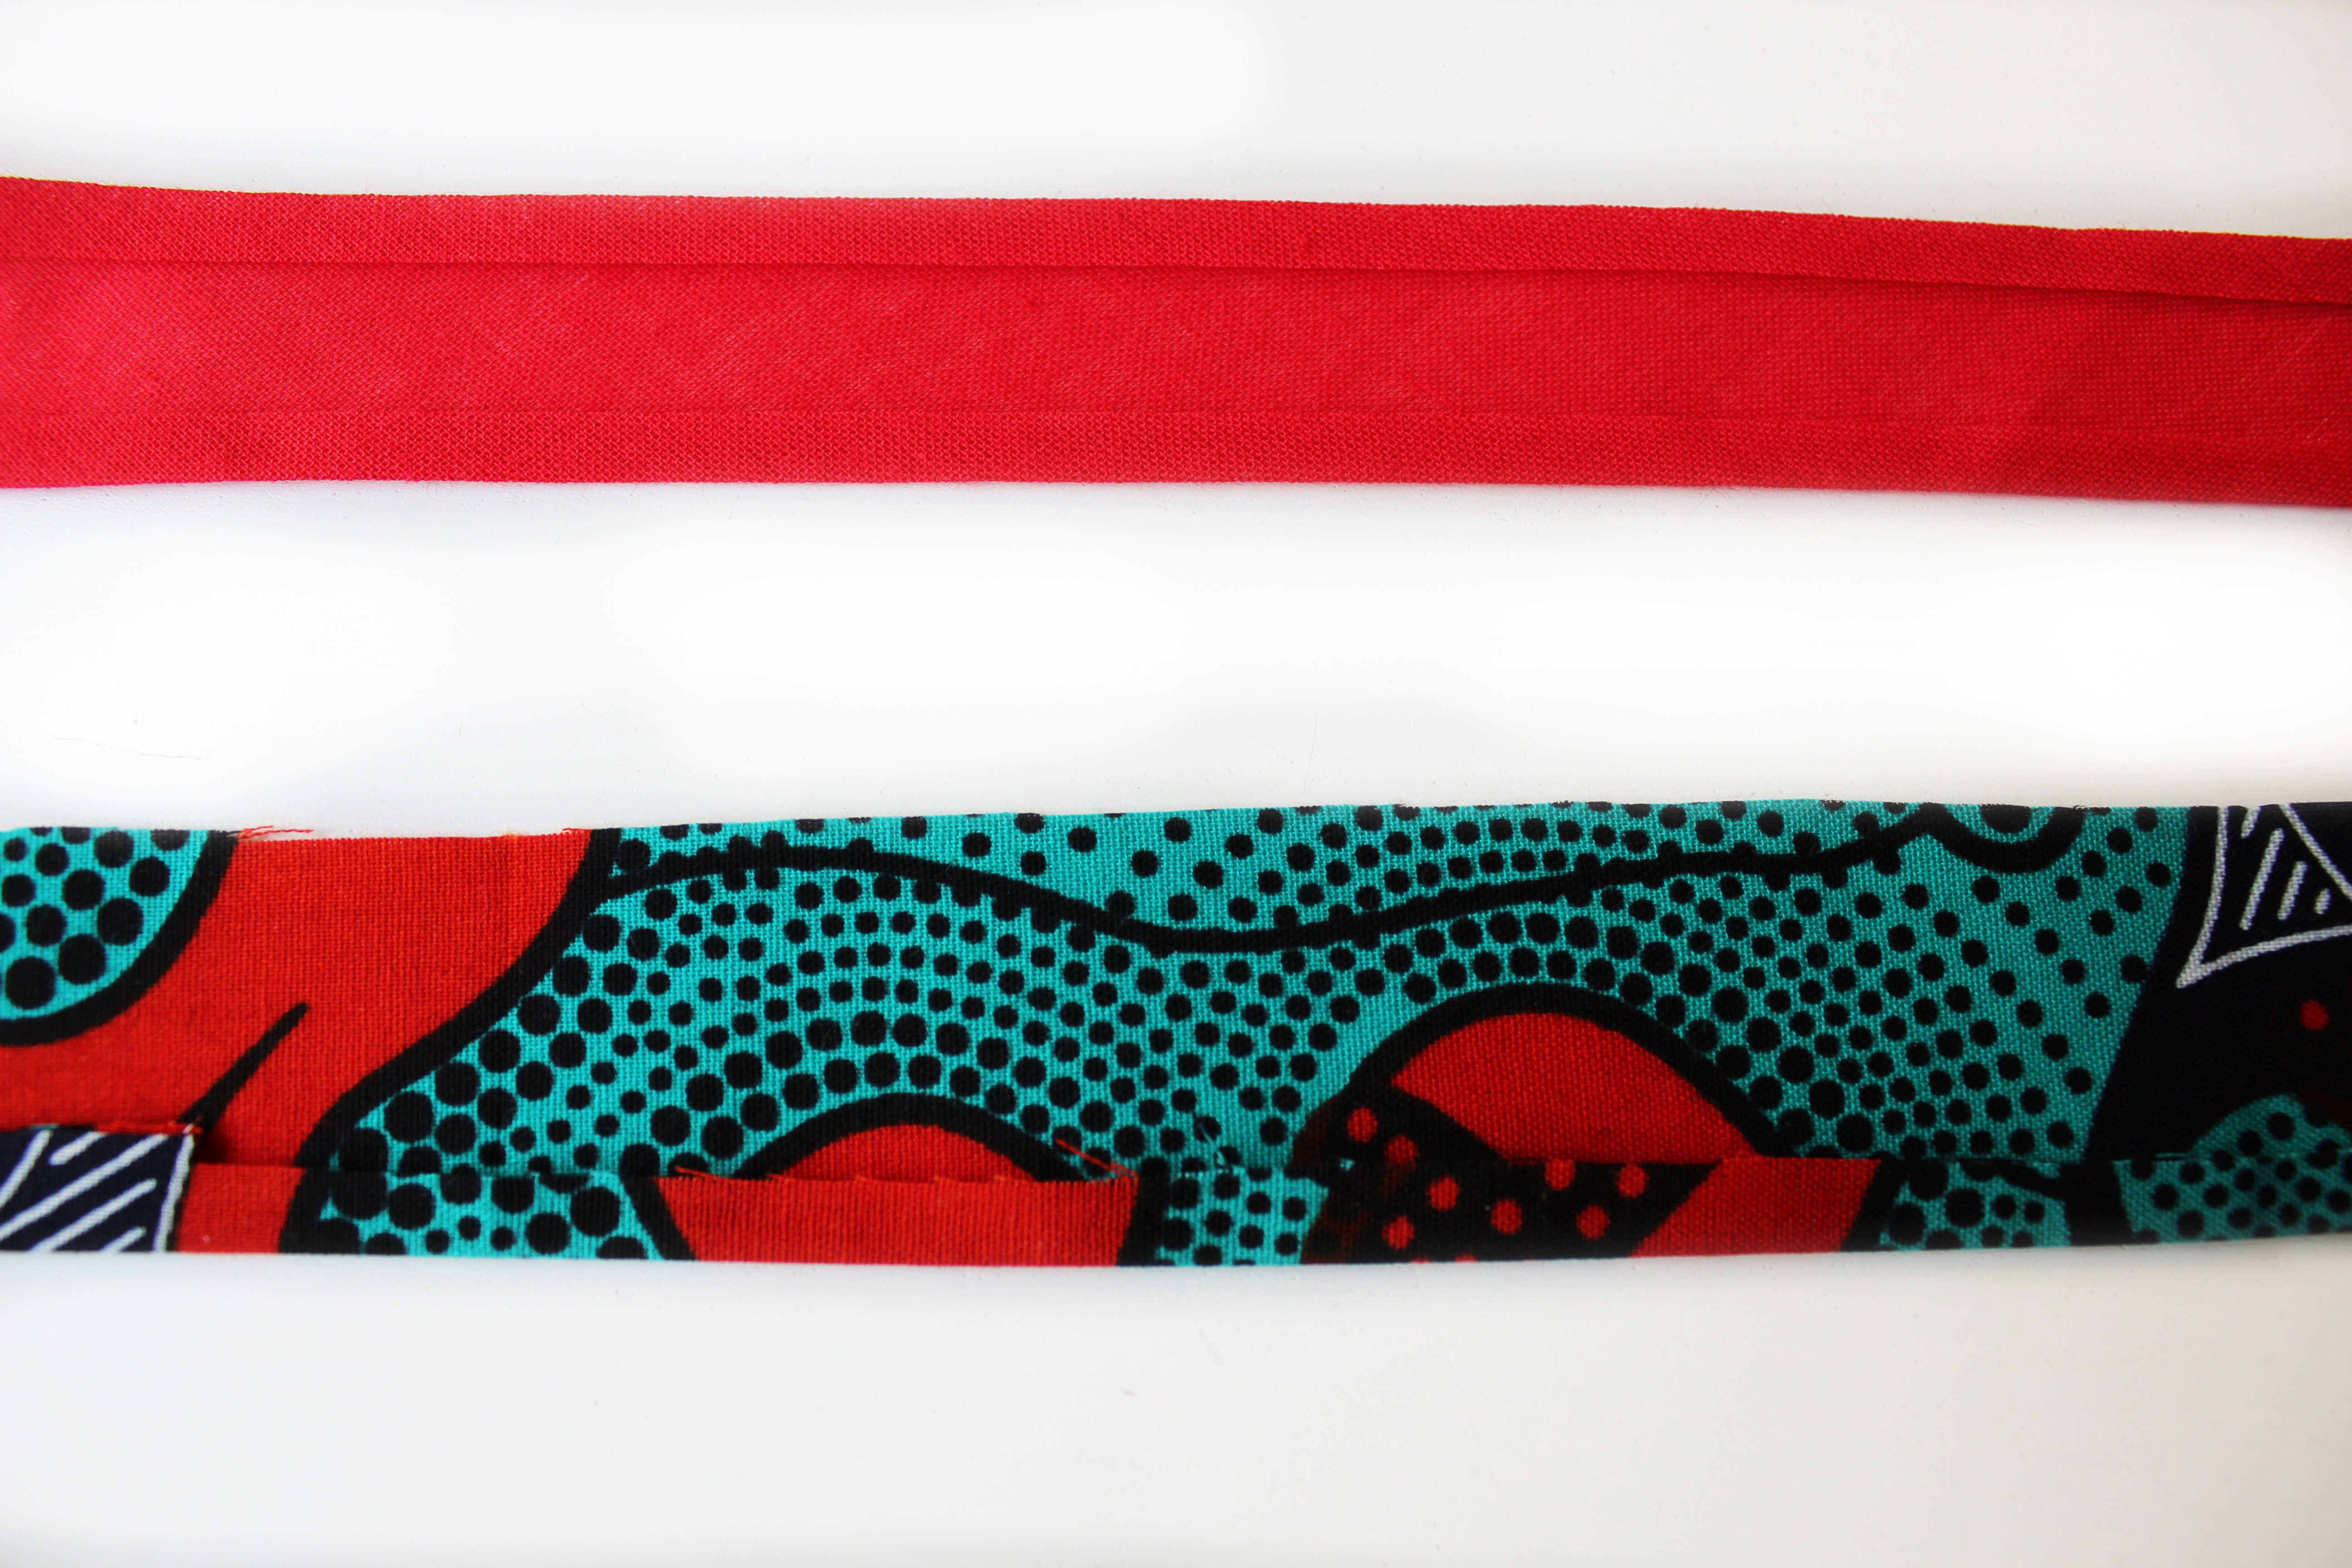
Pin one unfolded edge of the binding to the RS of the tea cosy at the lower raw edge. Stitch along the fold.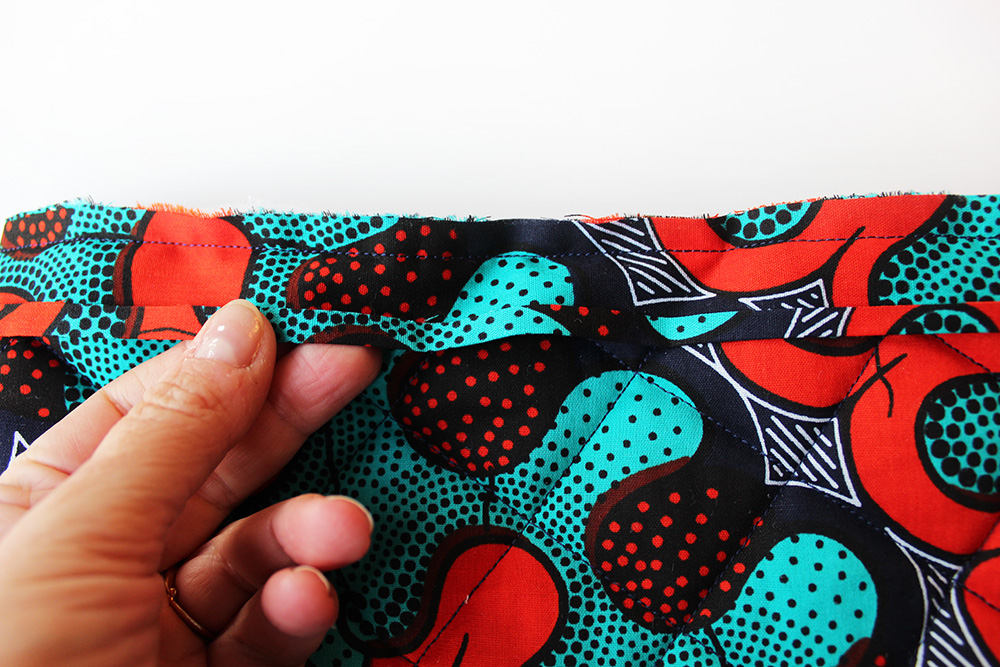
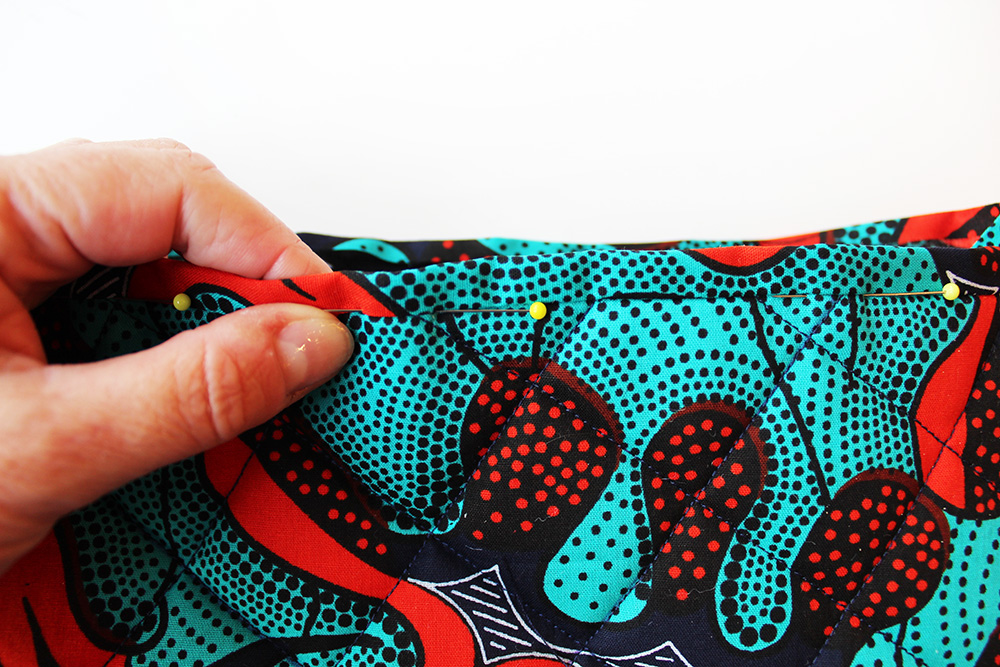
Fold over the binding to the reverse side. Pin, hand tack stitch to hold in position then stitch in the ditch* on the machine on the RS, ensuring the stitching holds the binding on the reverse side.
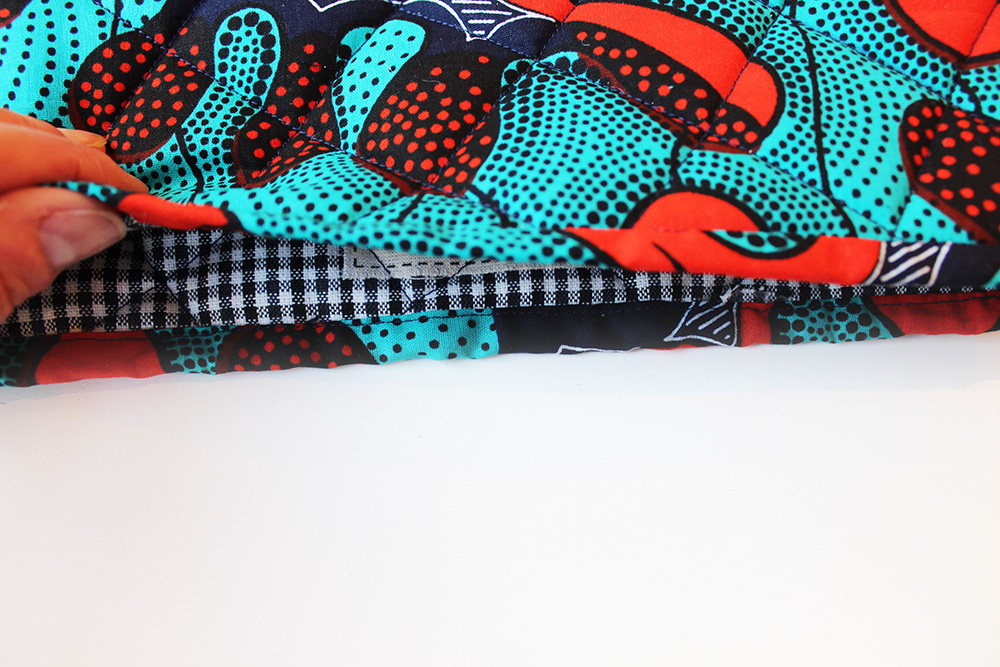
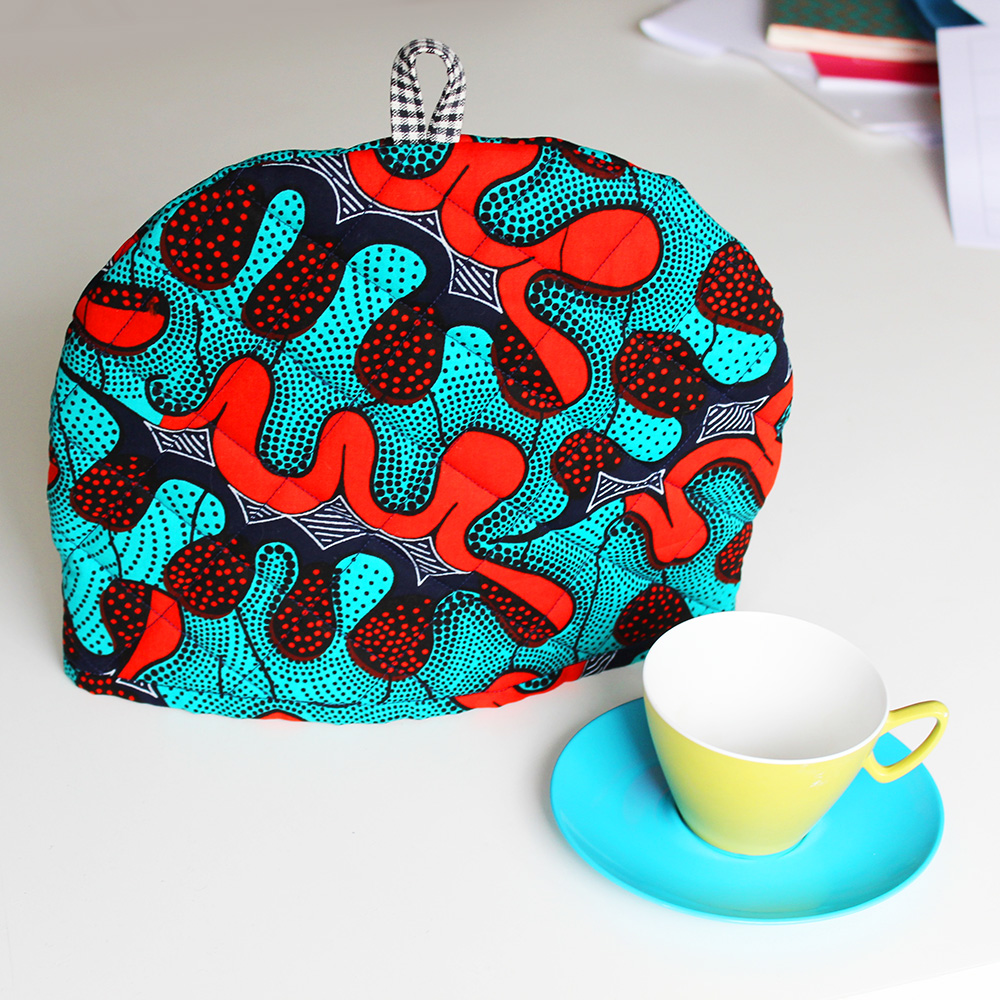
There you have a lovely tea cosy.
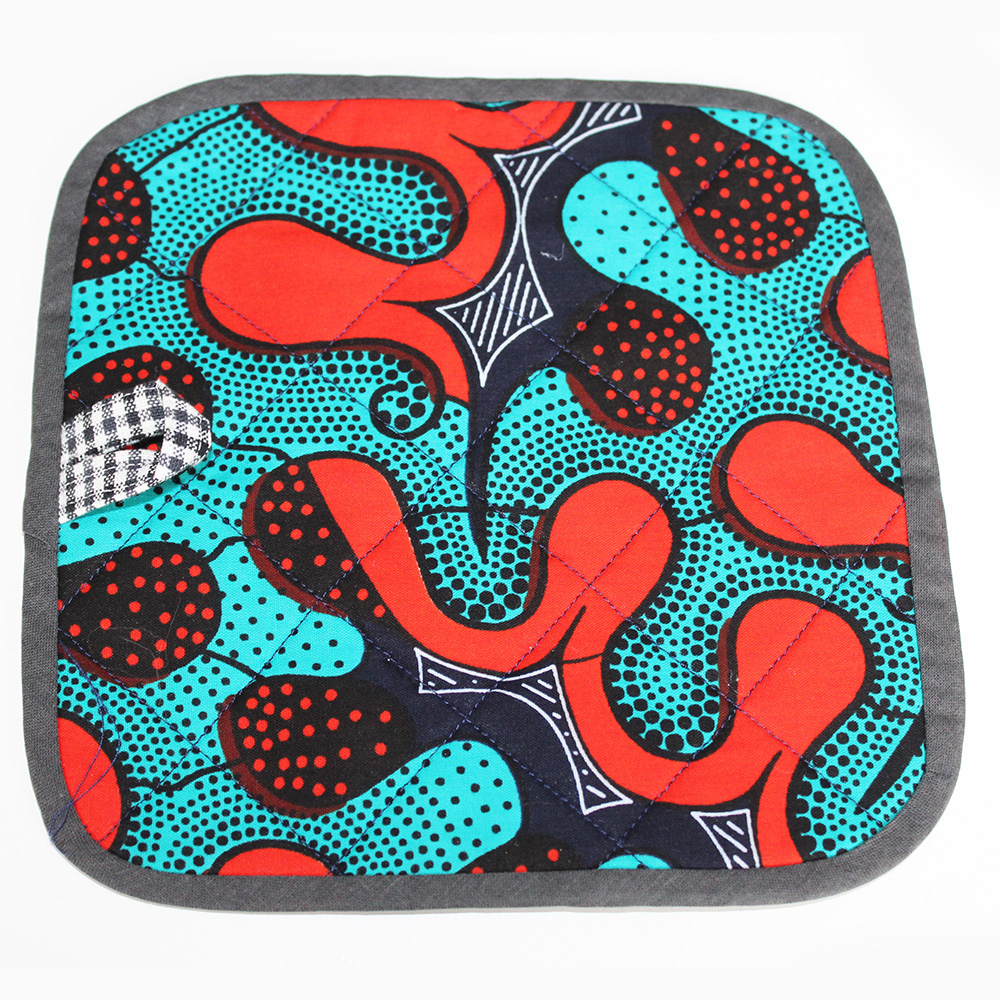
And if you fancy making a pot holder like this:
just cut out two pieces in main fabric and one piece in Thermolam from the pot holder template, a strip 4cm x 10 cm in main or contrast fabric and you will need a metre of (25mm) bias binding too.
Layer your pieces just as you did for the cosy and machine quilt in much the same way.
Make your loop that you have stitched just like the teacosy one (above) and tack it in to the centre edge of one side.There you have it. Ta dah!
One very Funky Kitchen! And don’t forget to dress up the jam!


