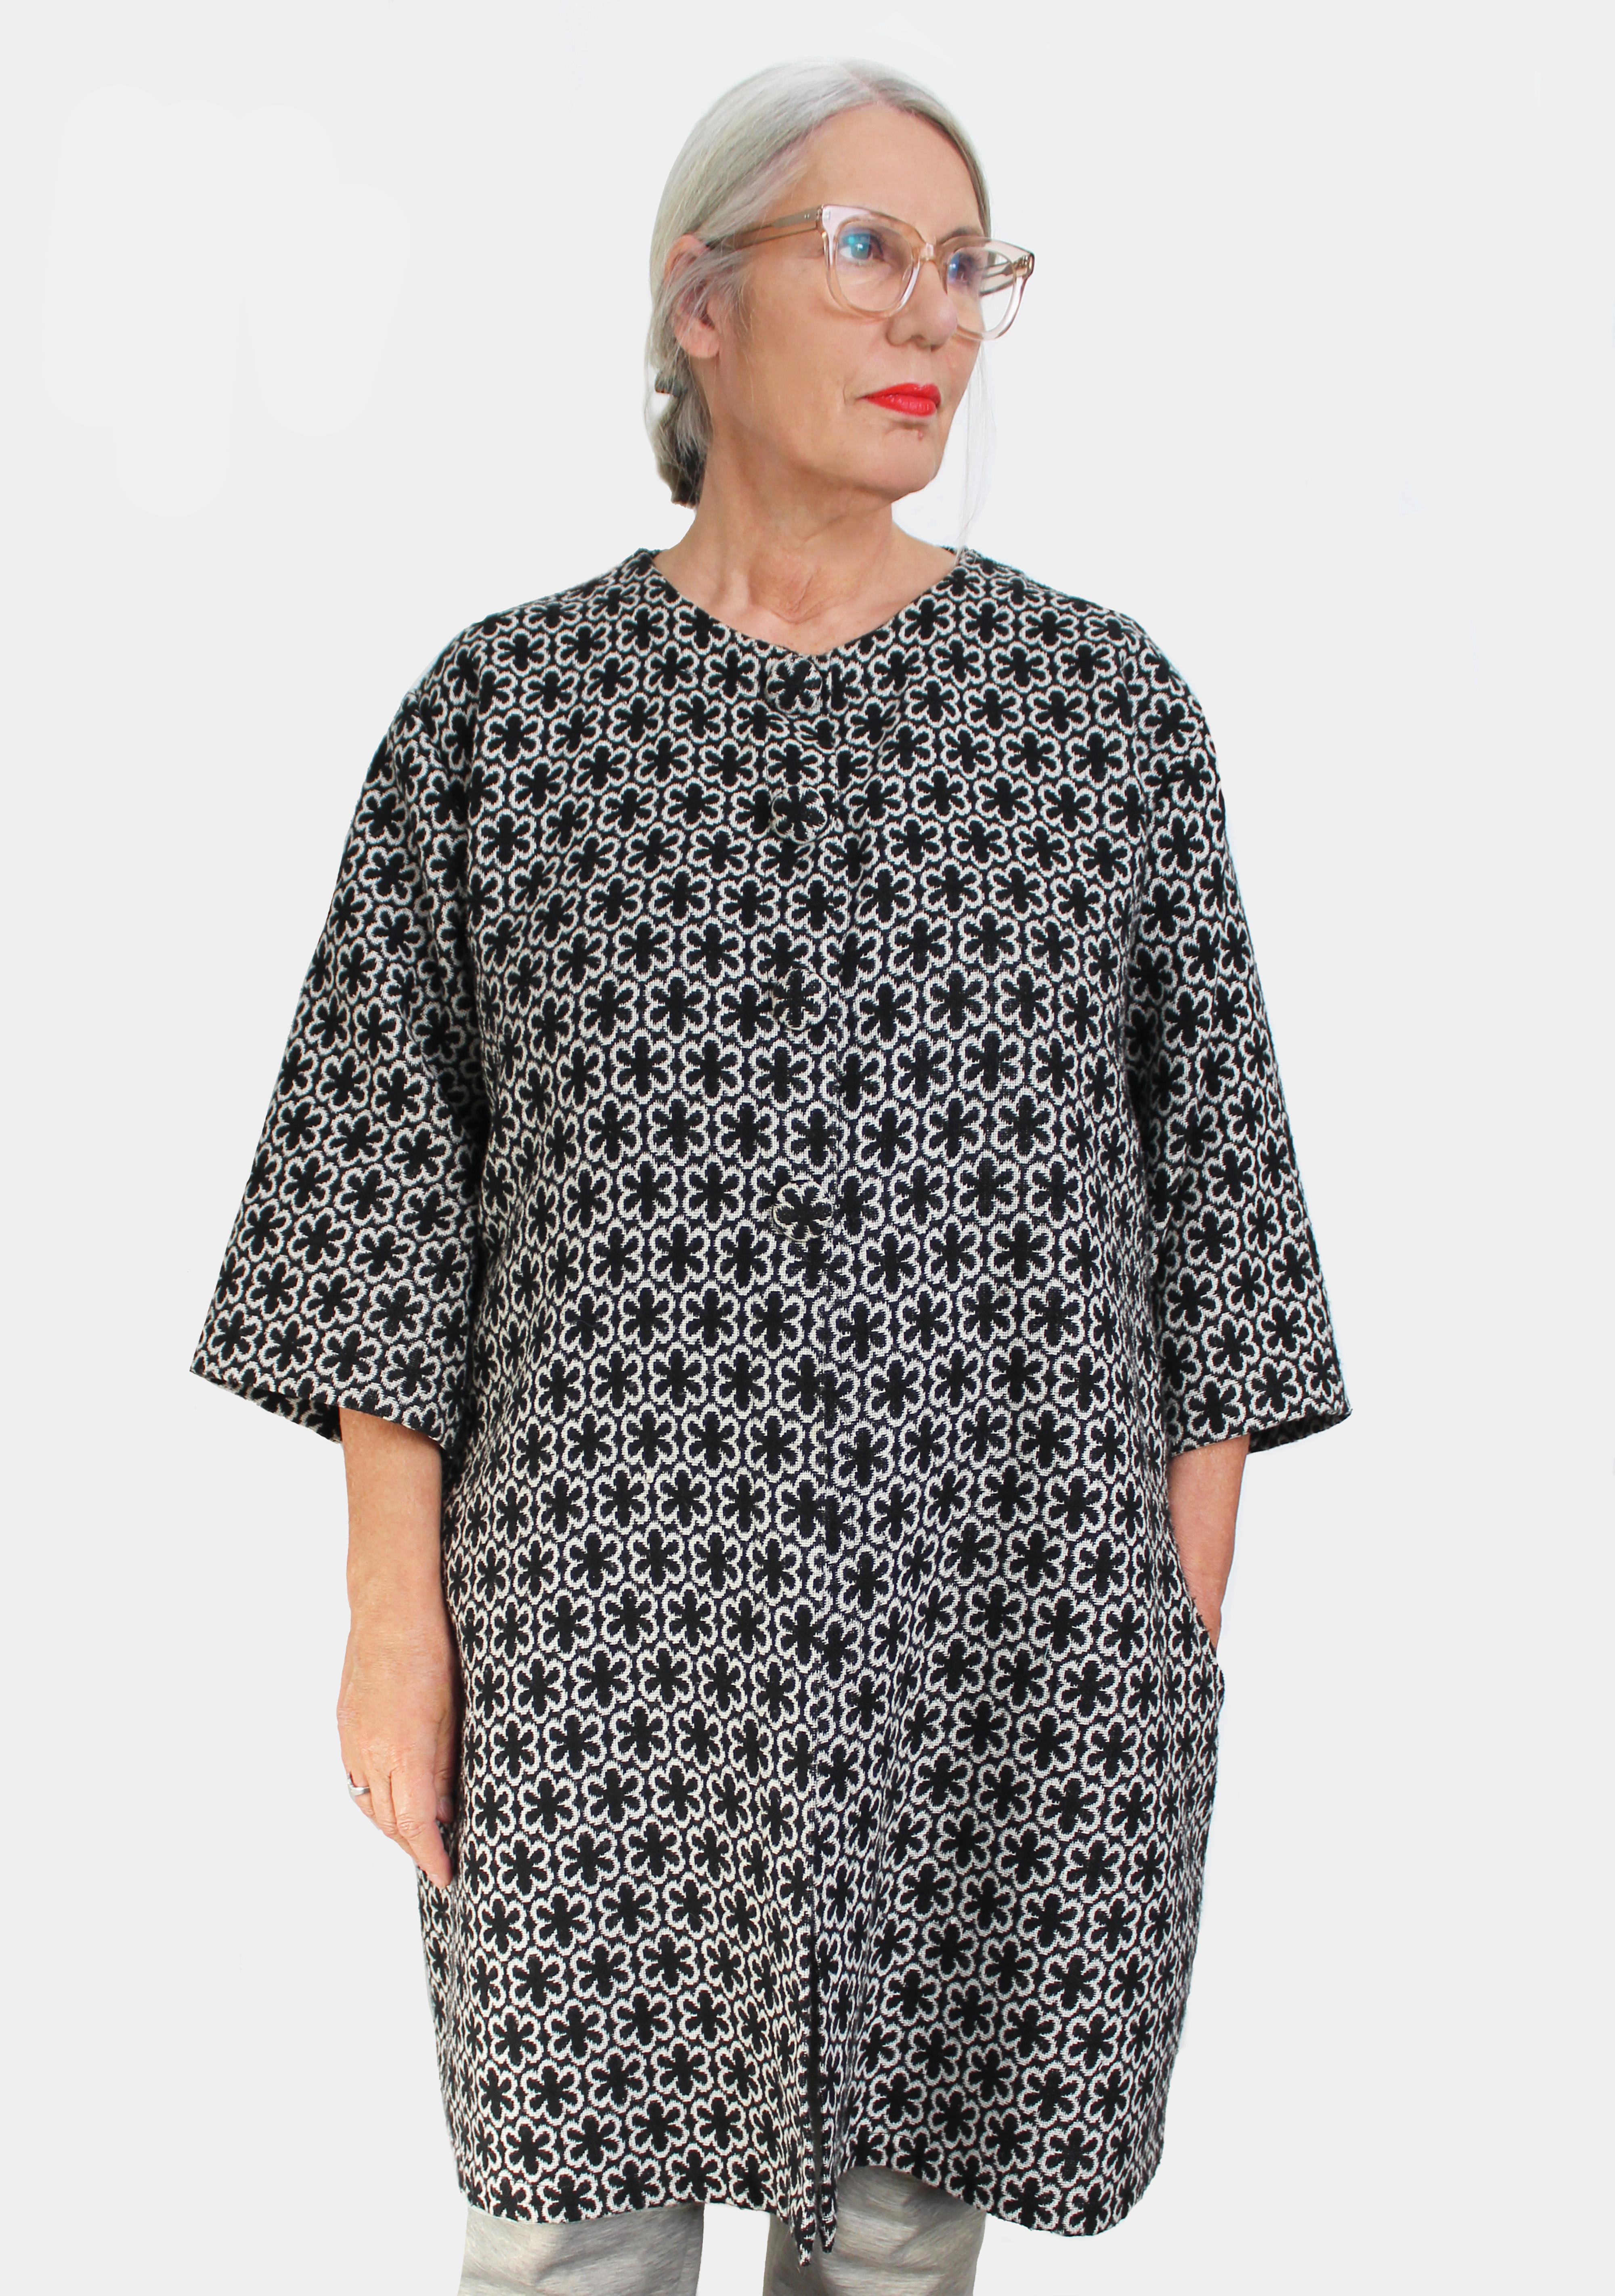
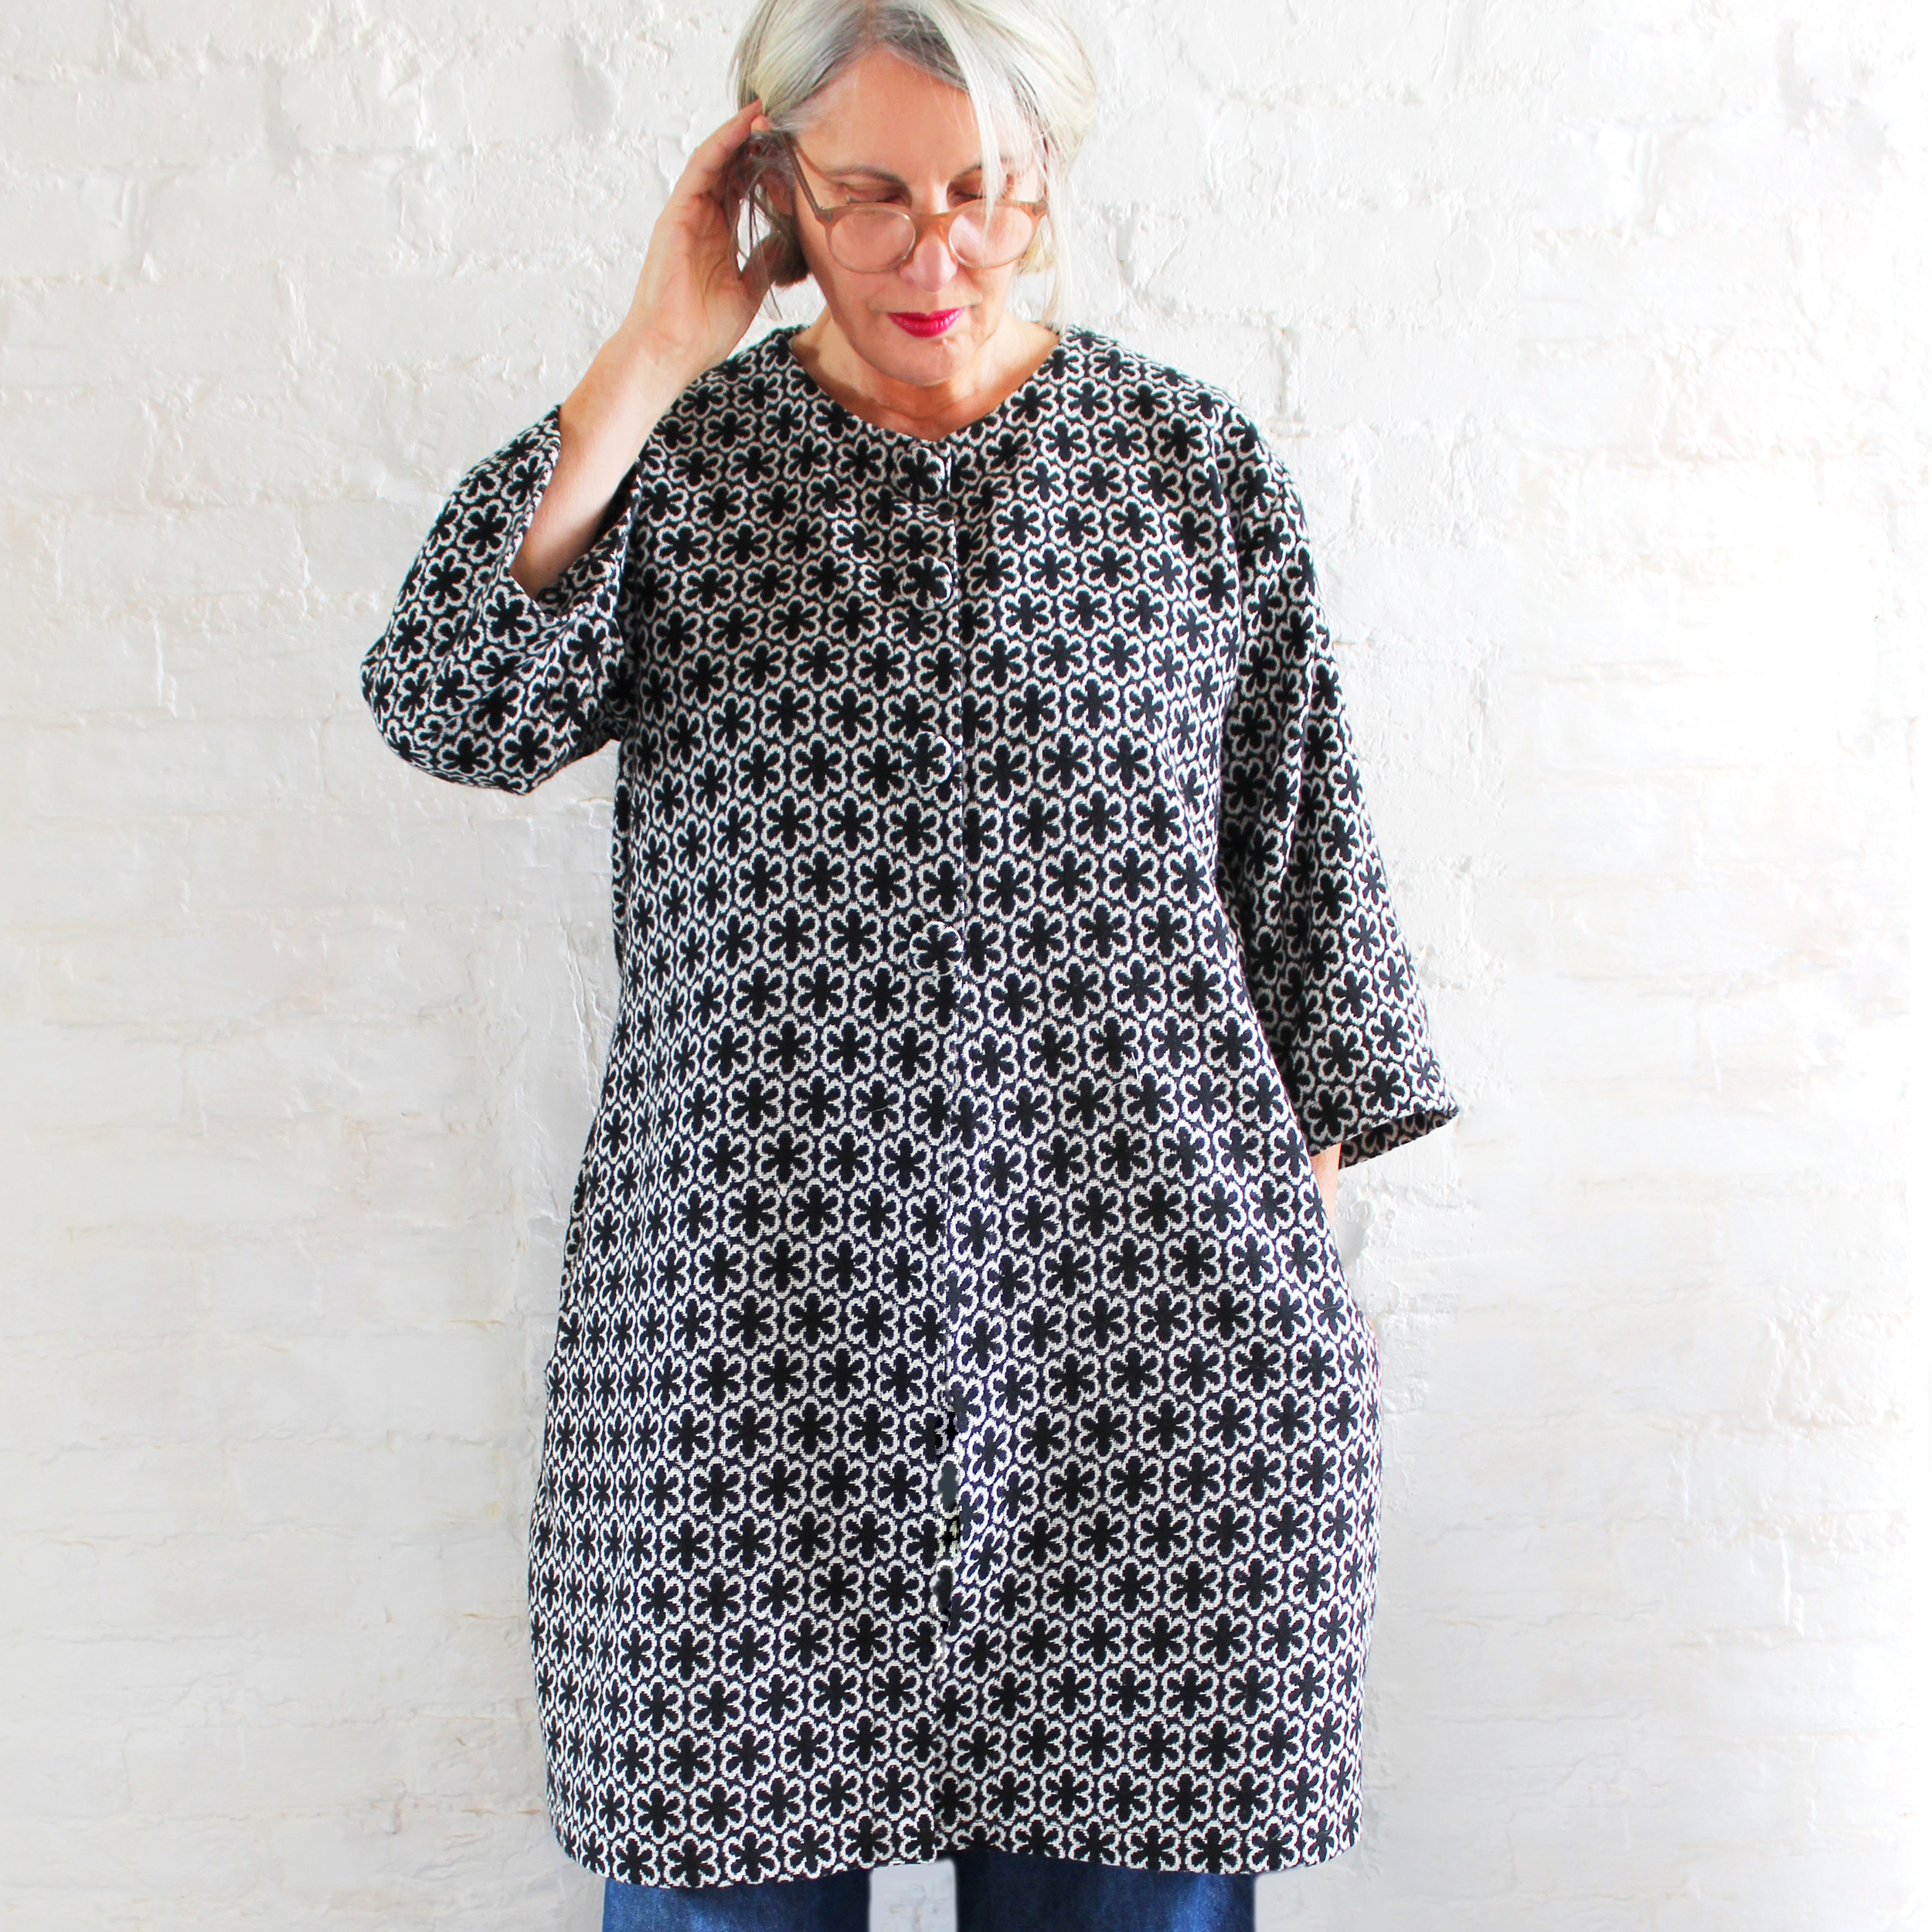
 Long version front view in wool mix jacquard.
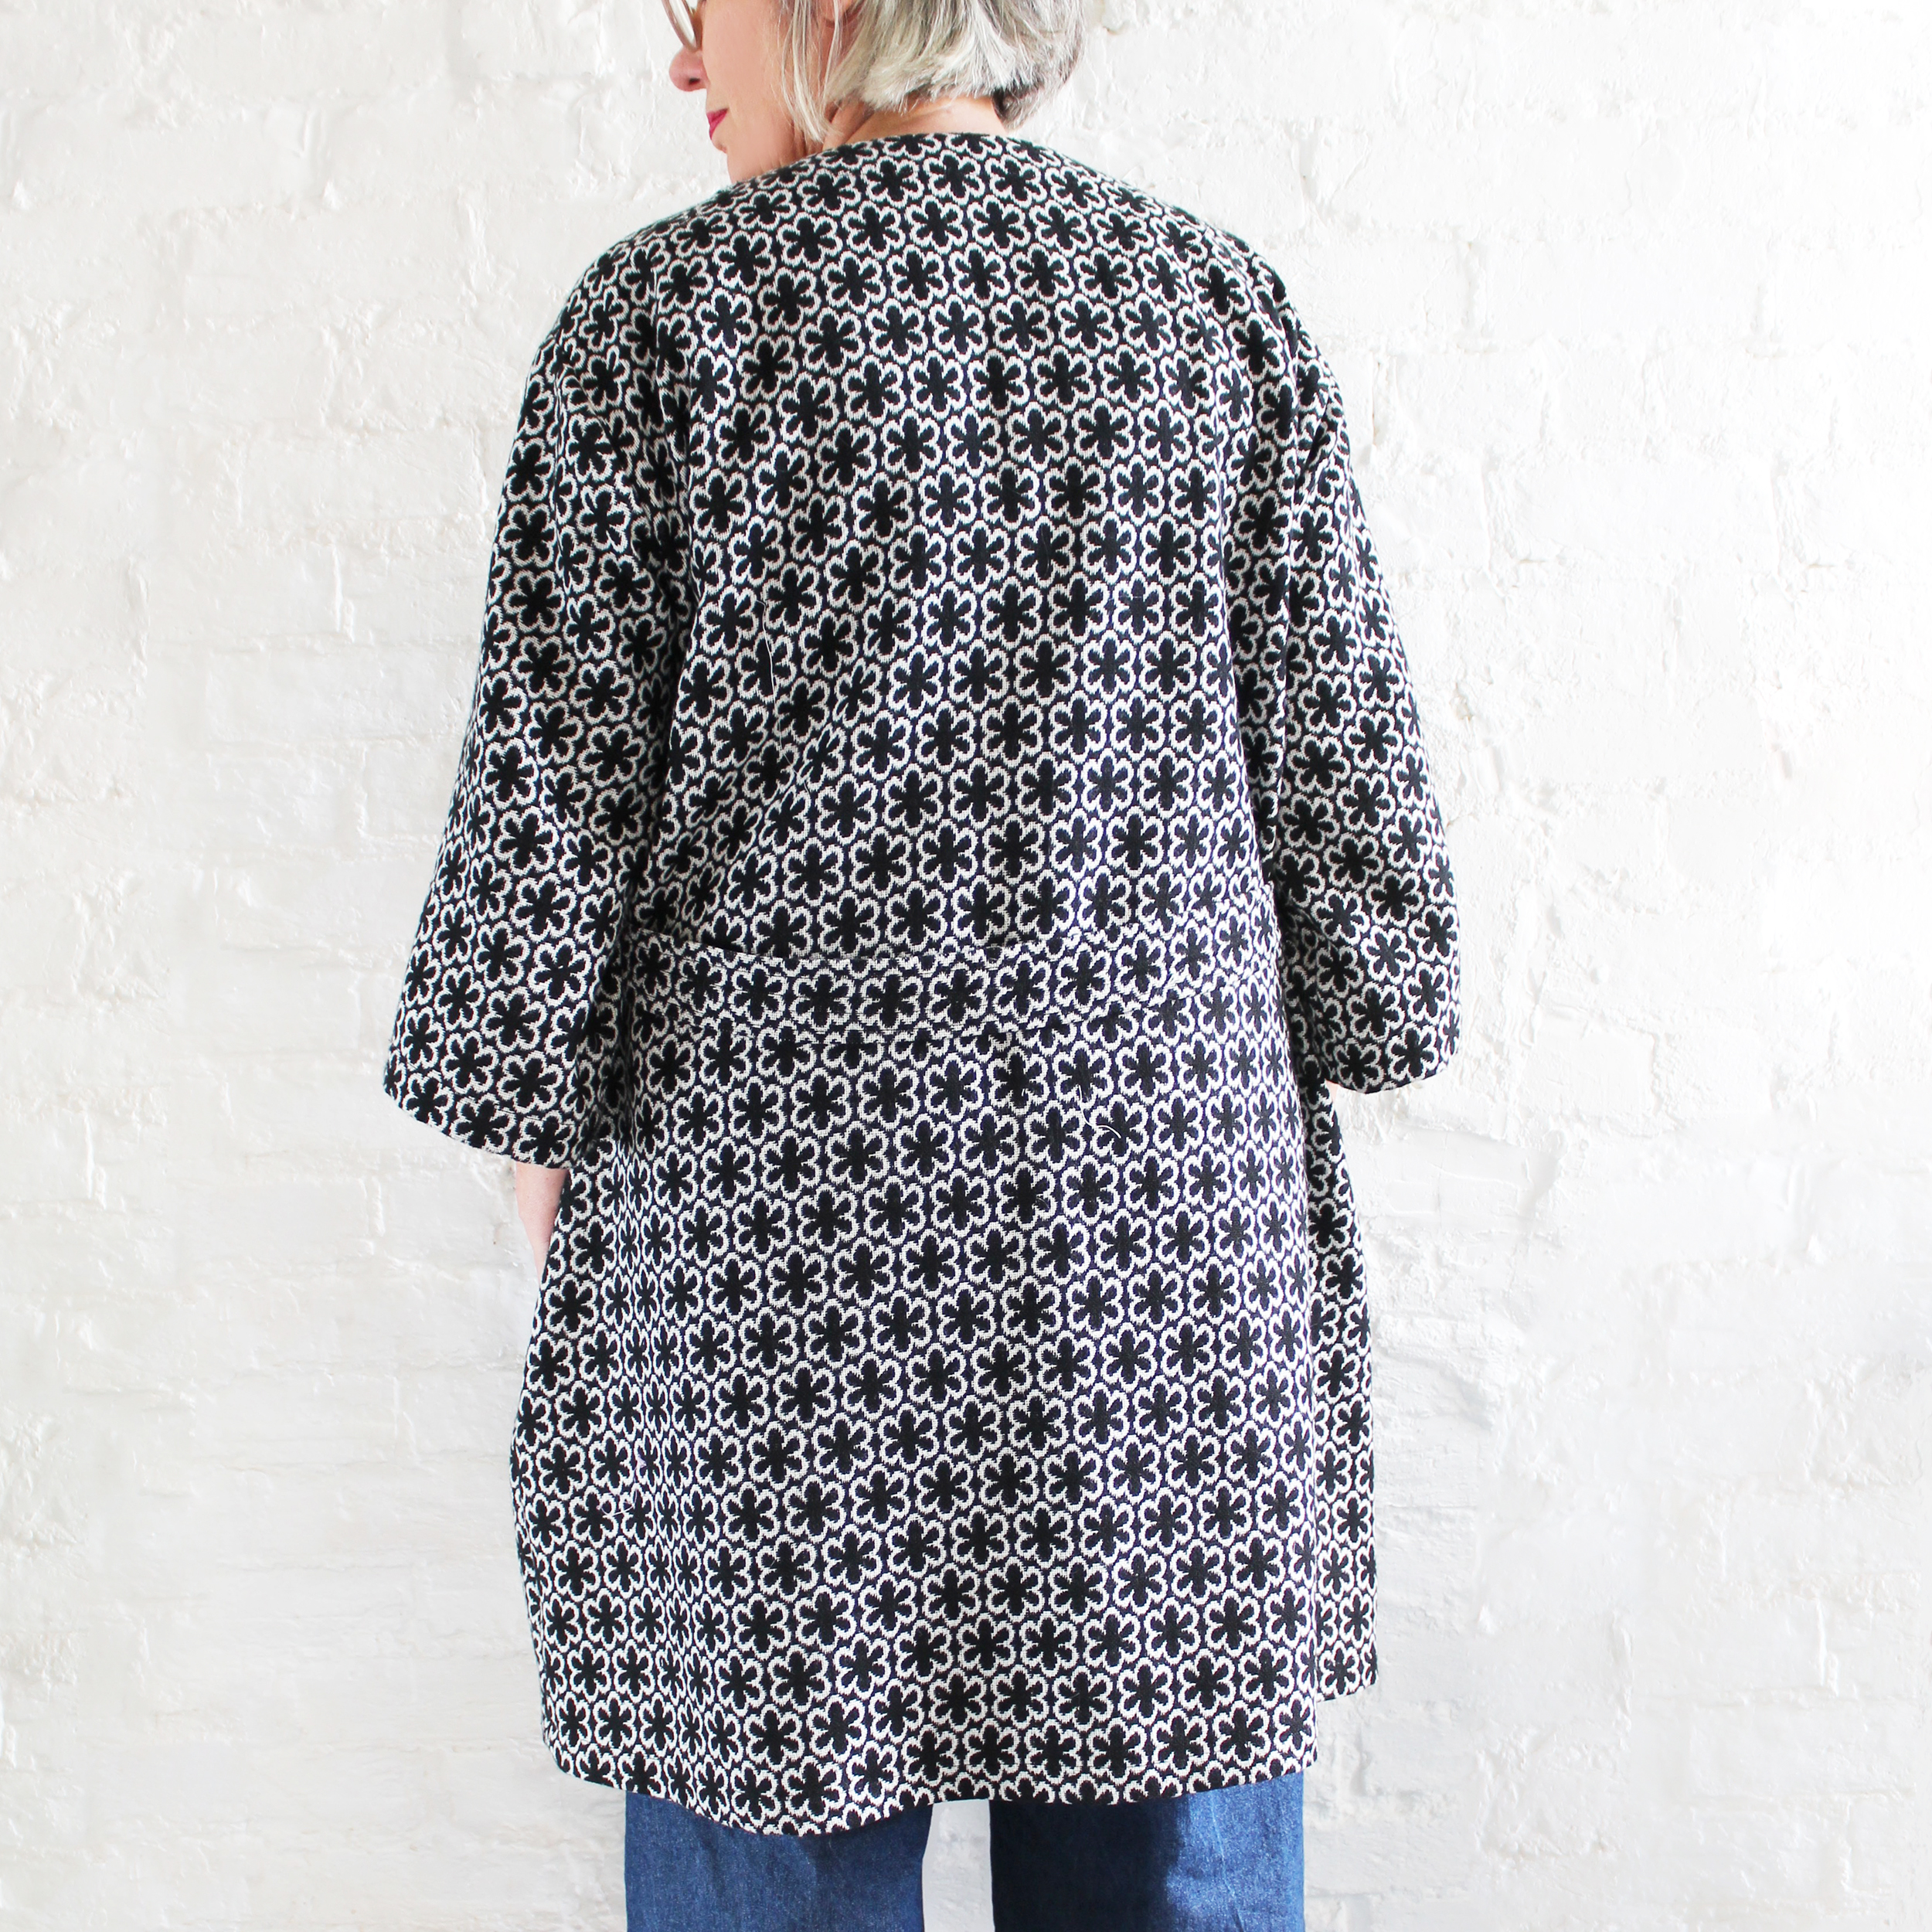
Long version back view with optional back belt.
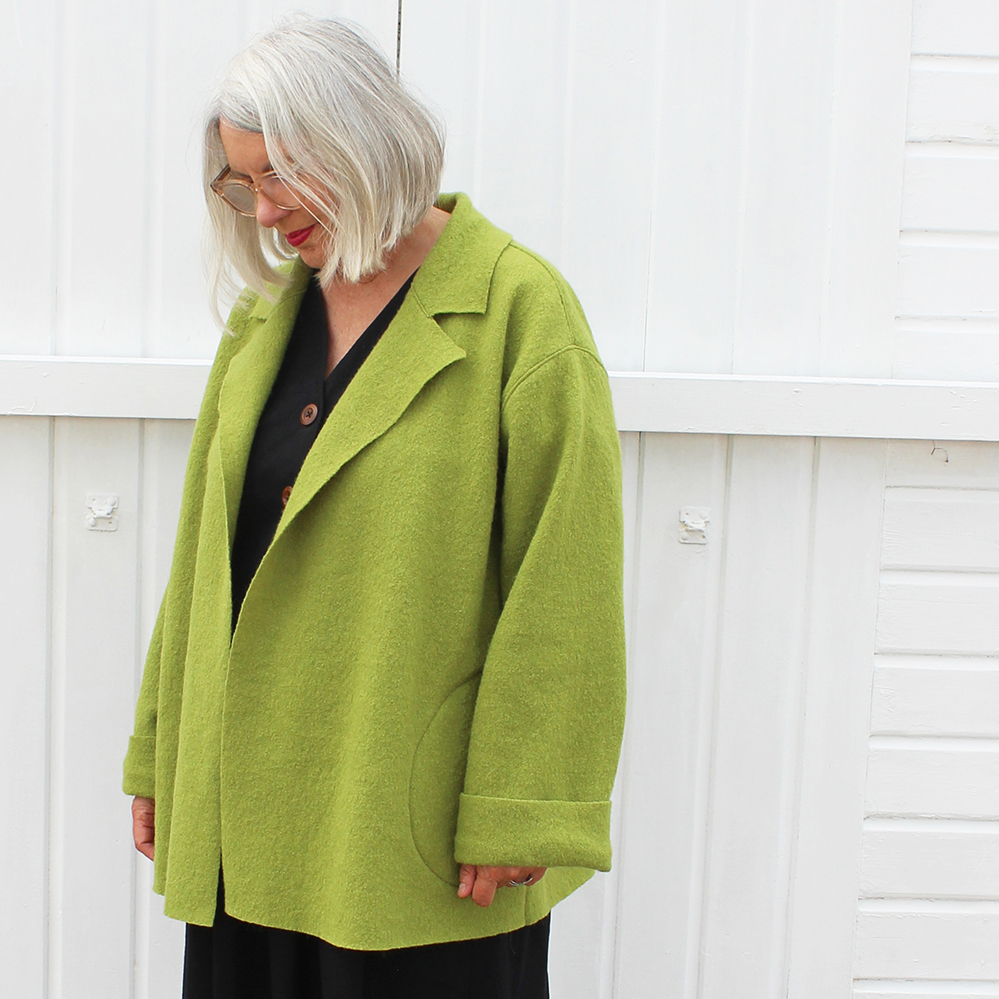
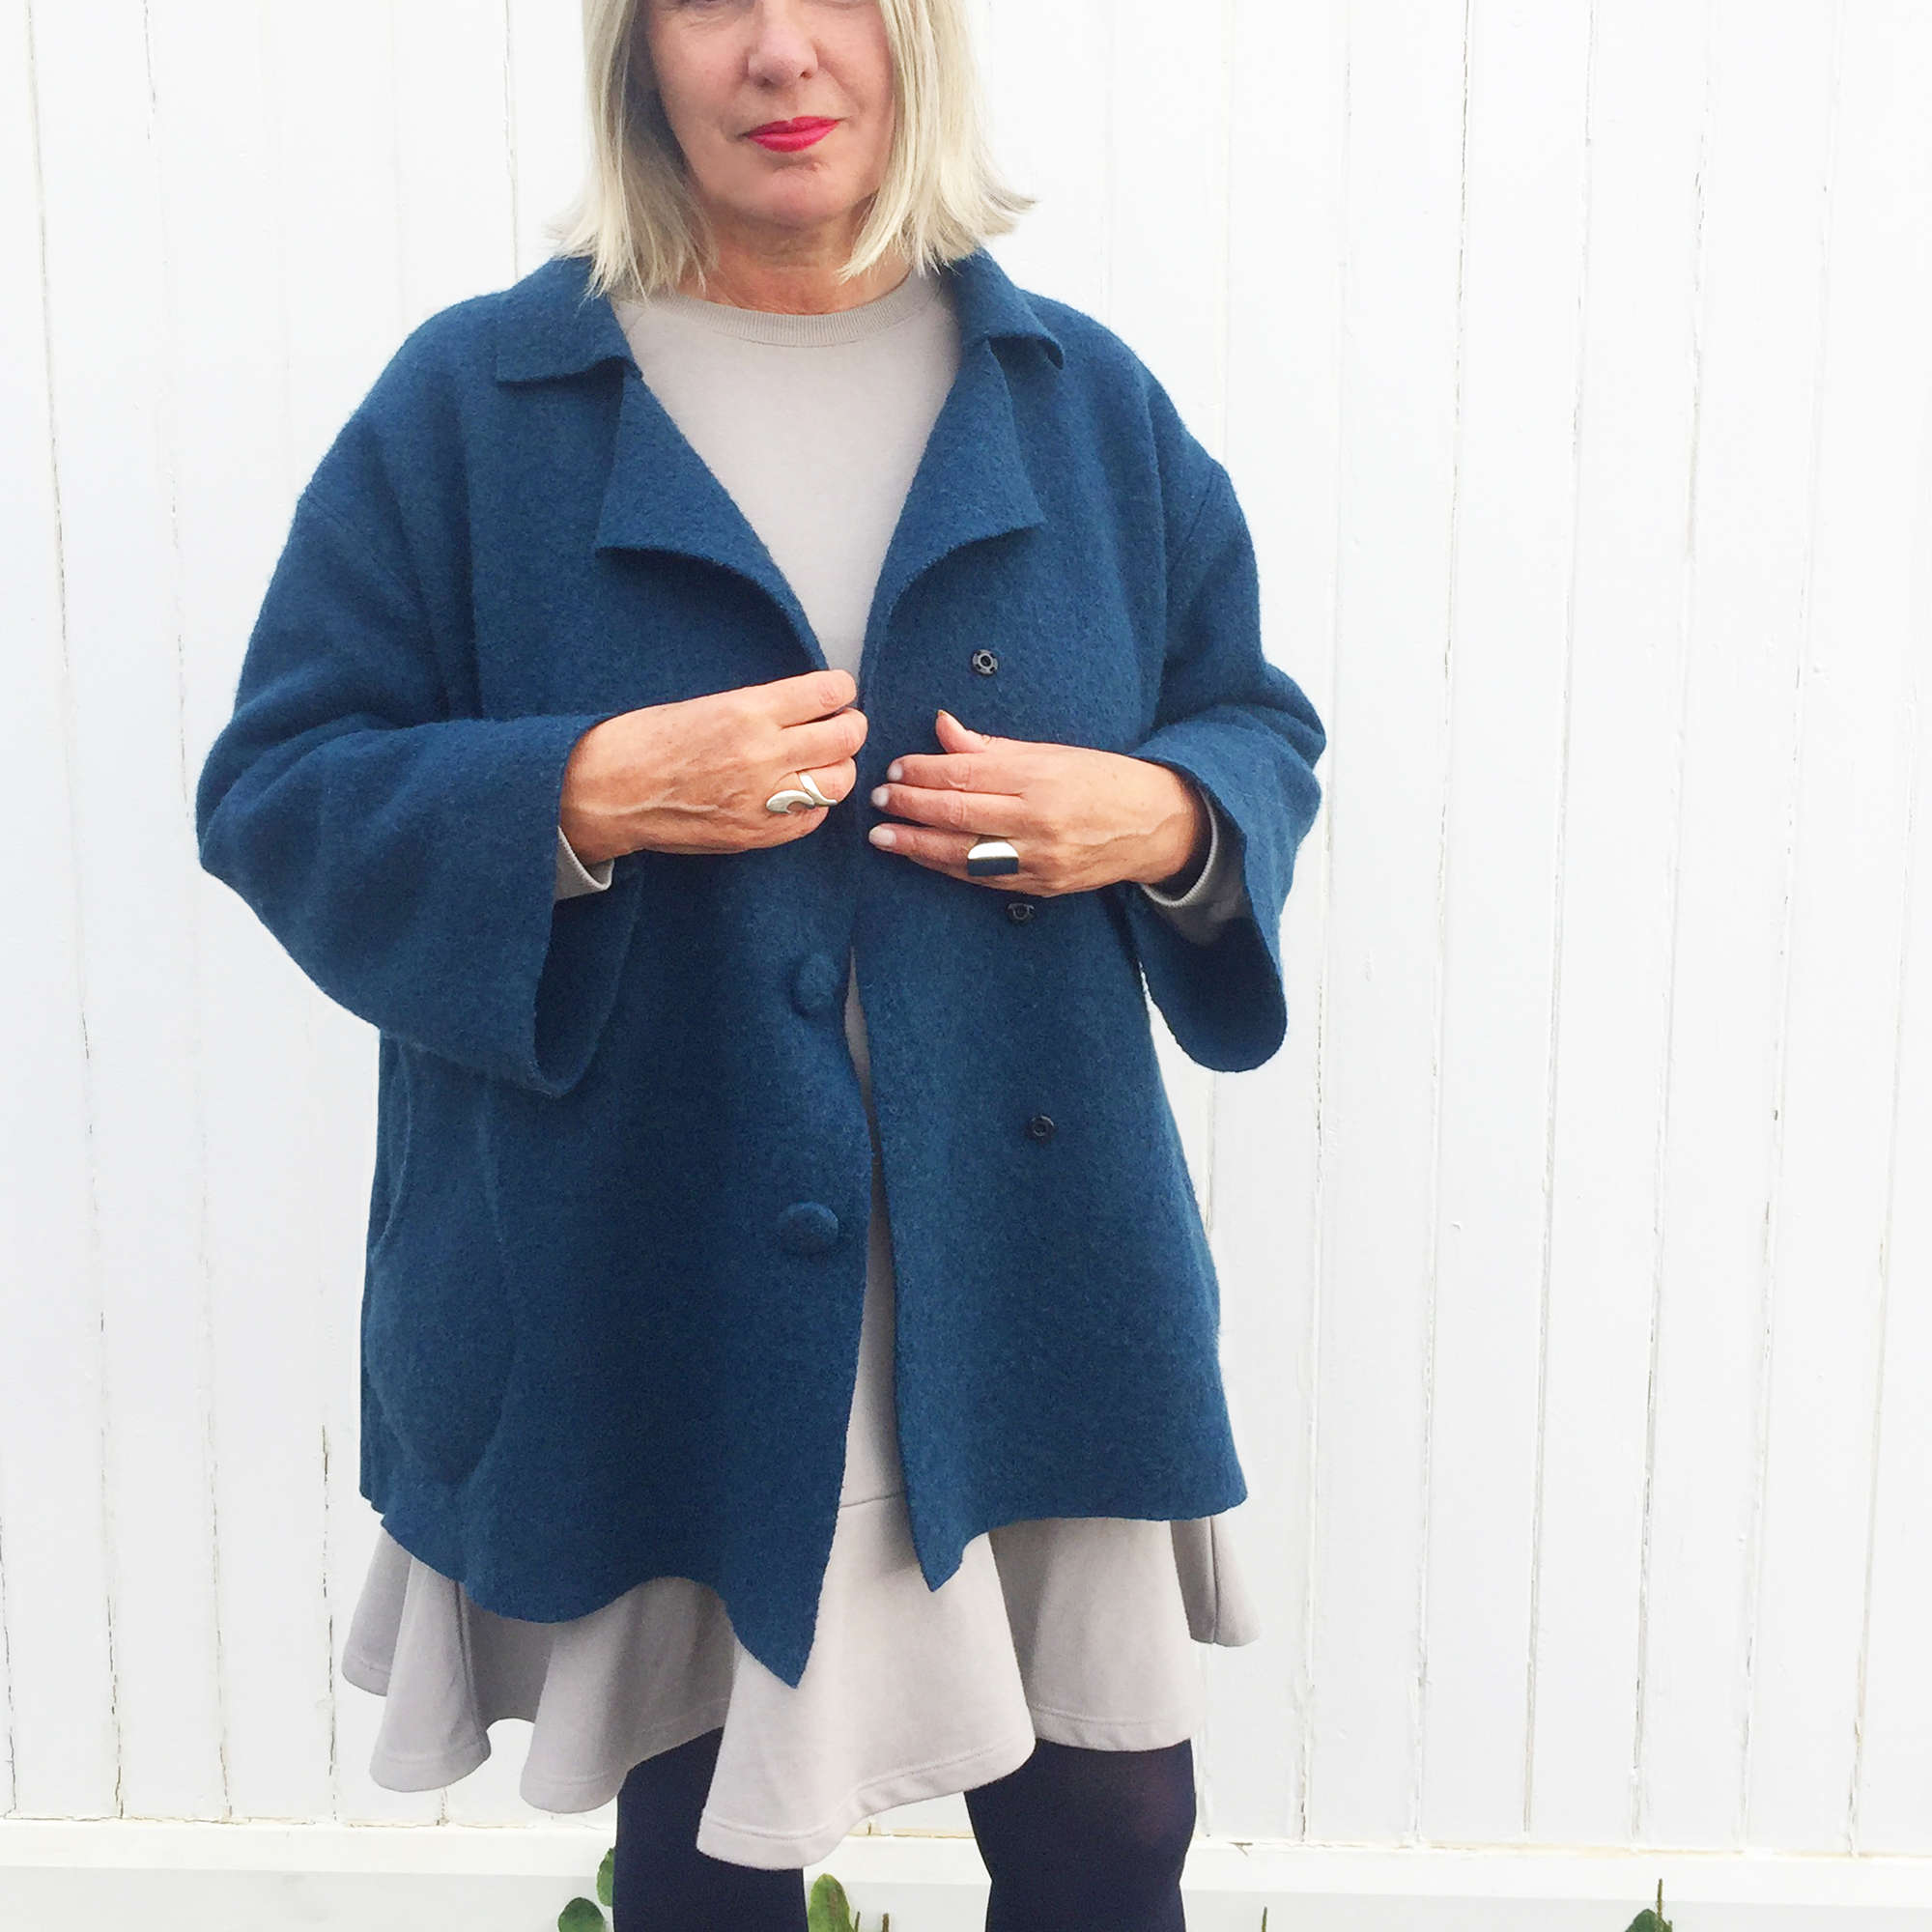
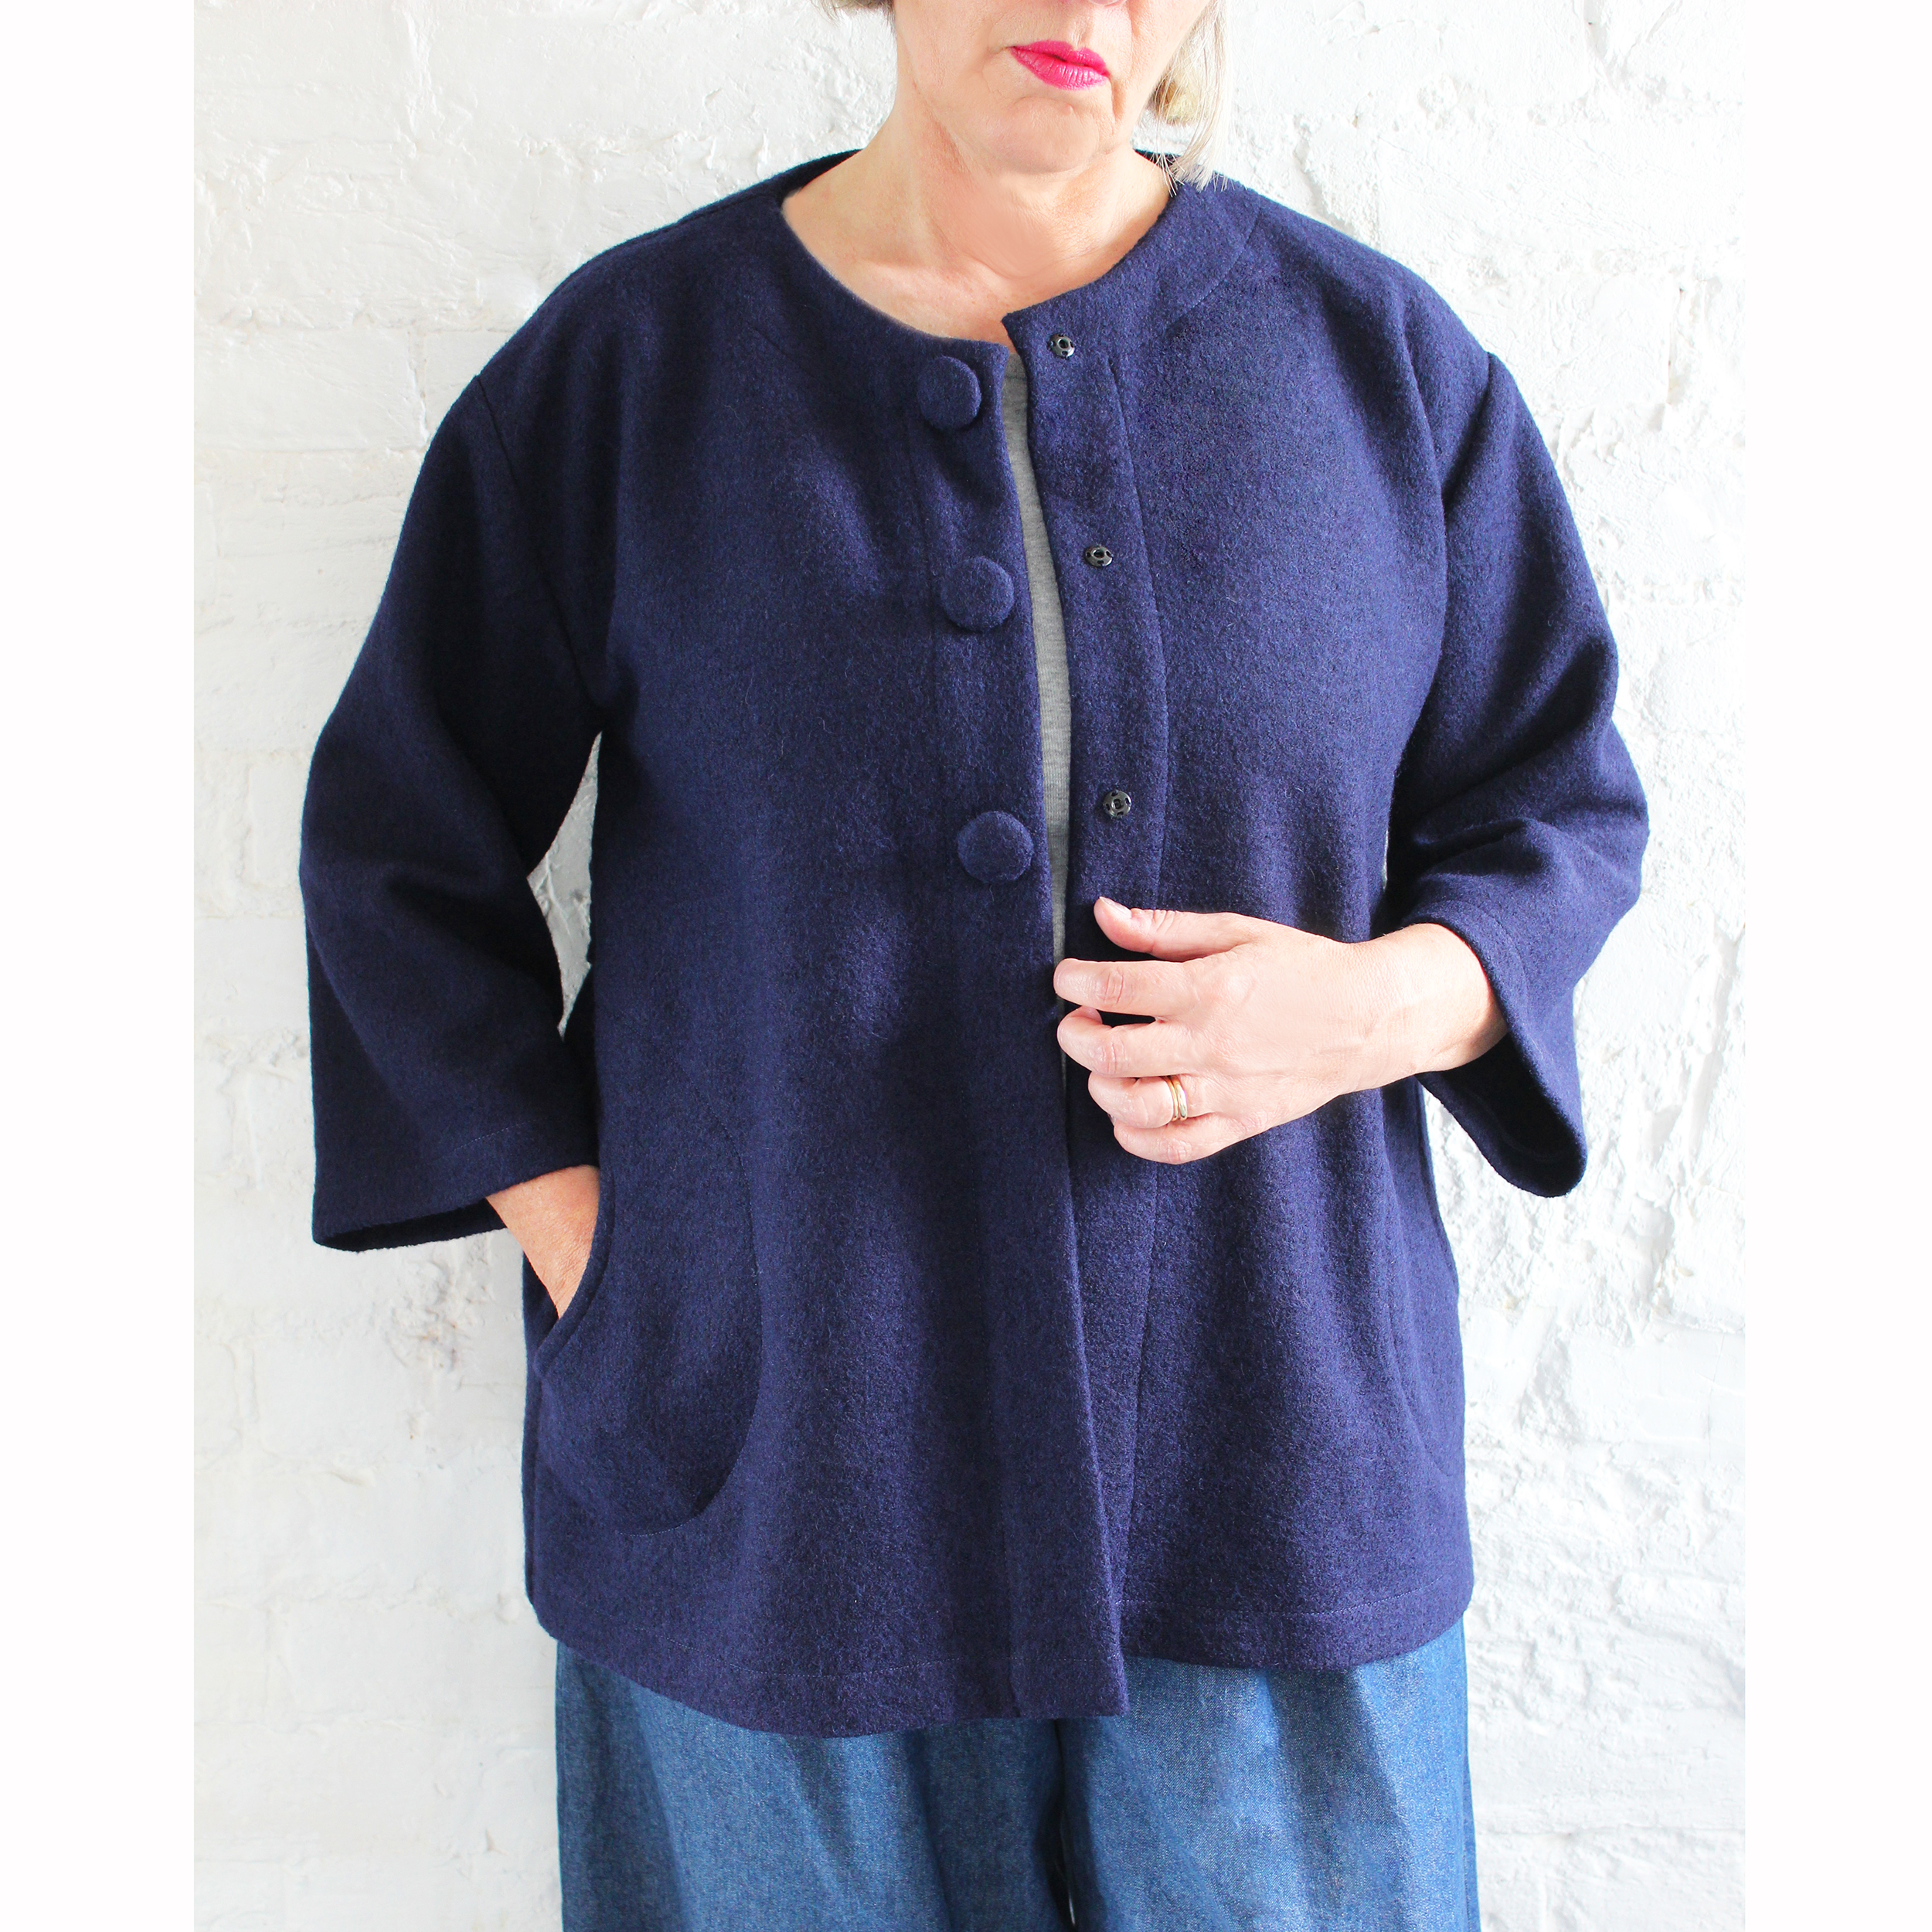 Short jacket version in boiled wool
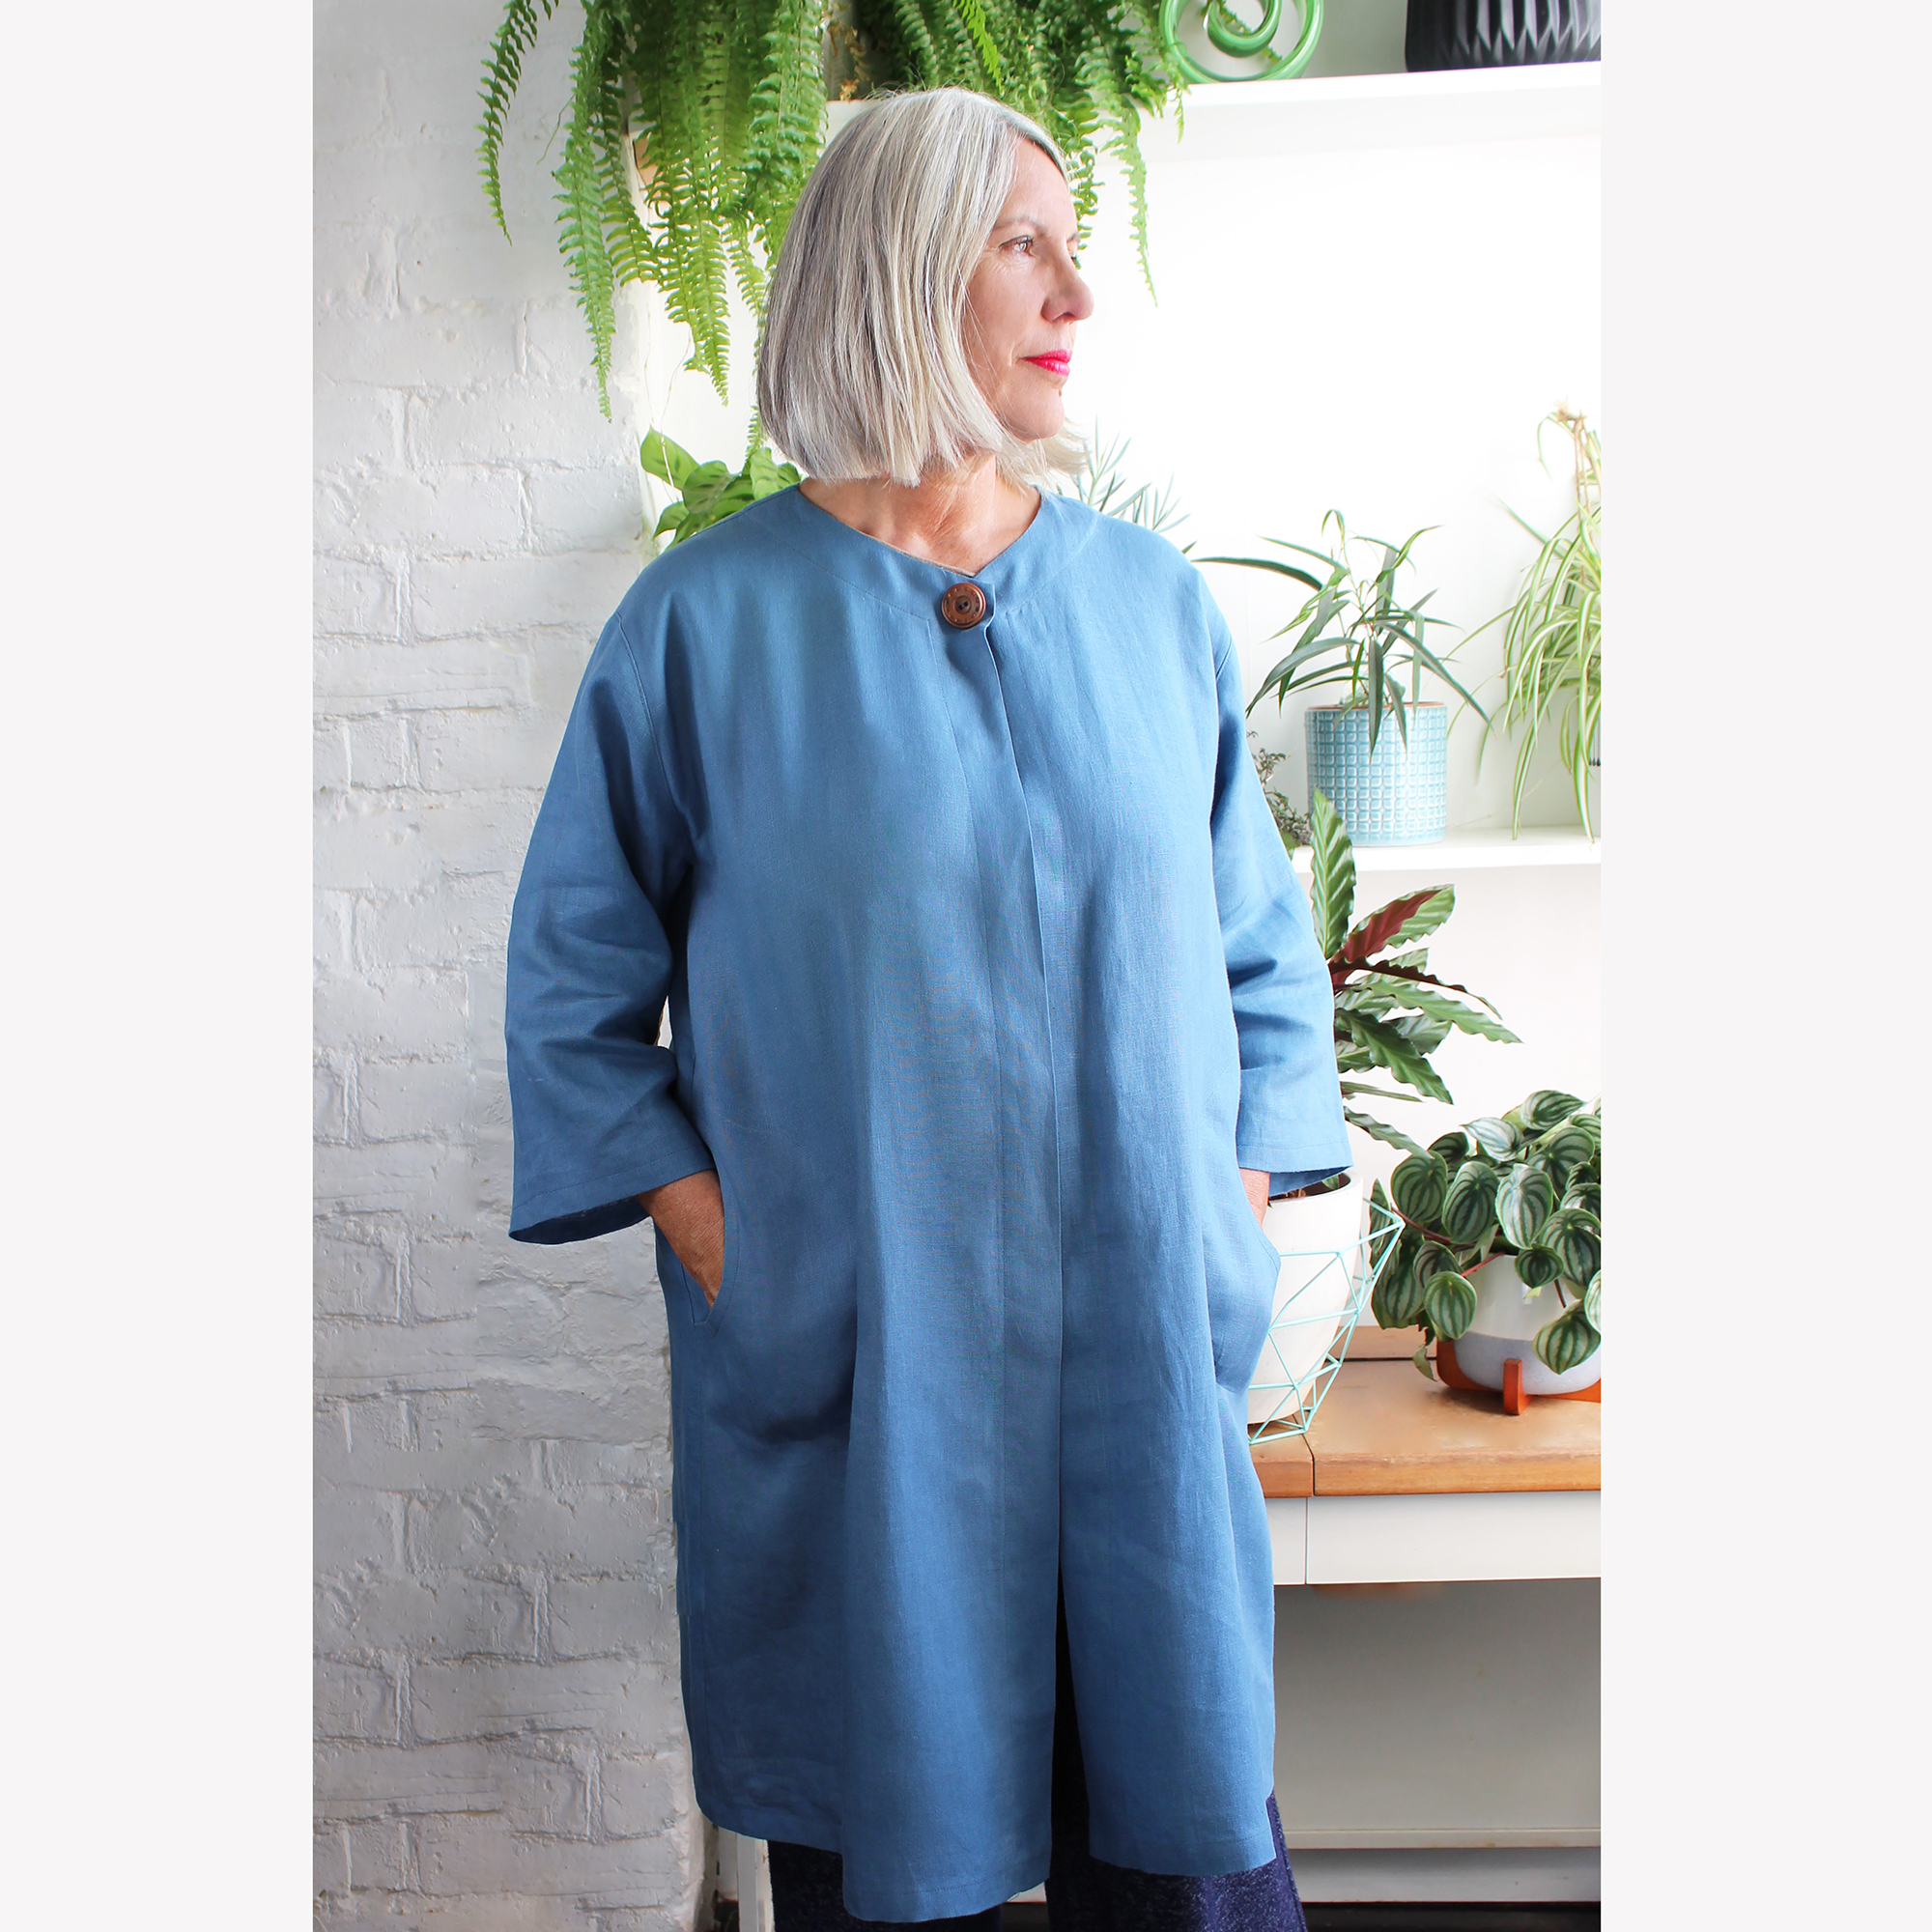 Ursula adopts a ‘duster coat’ style when made in linen as shown above.
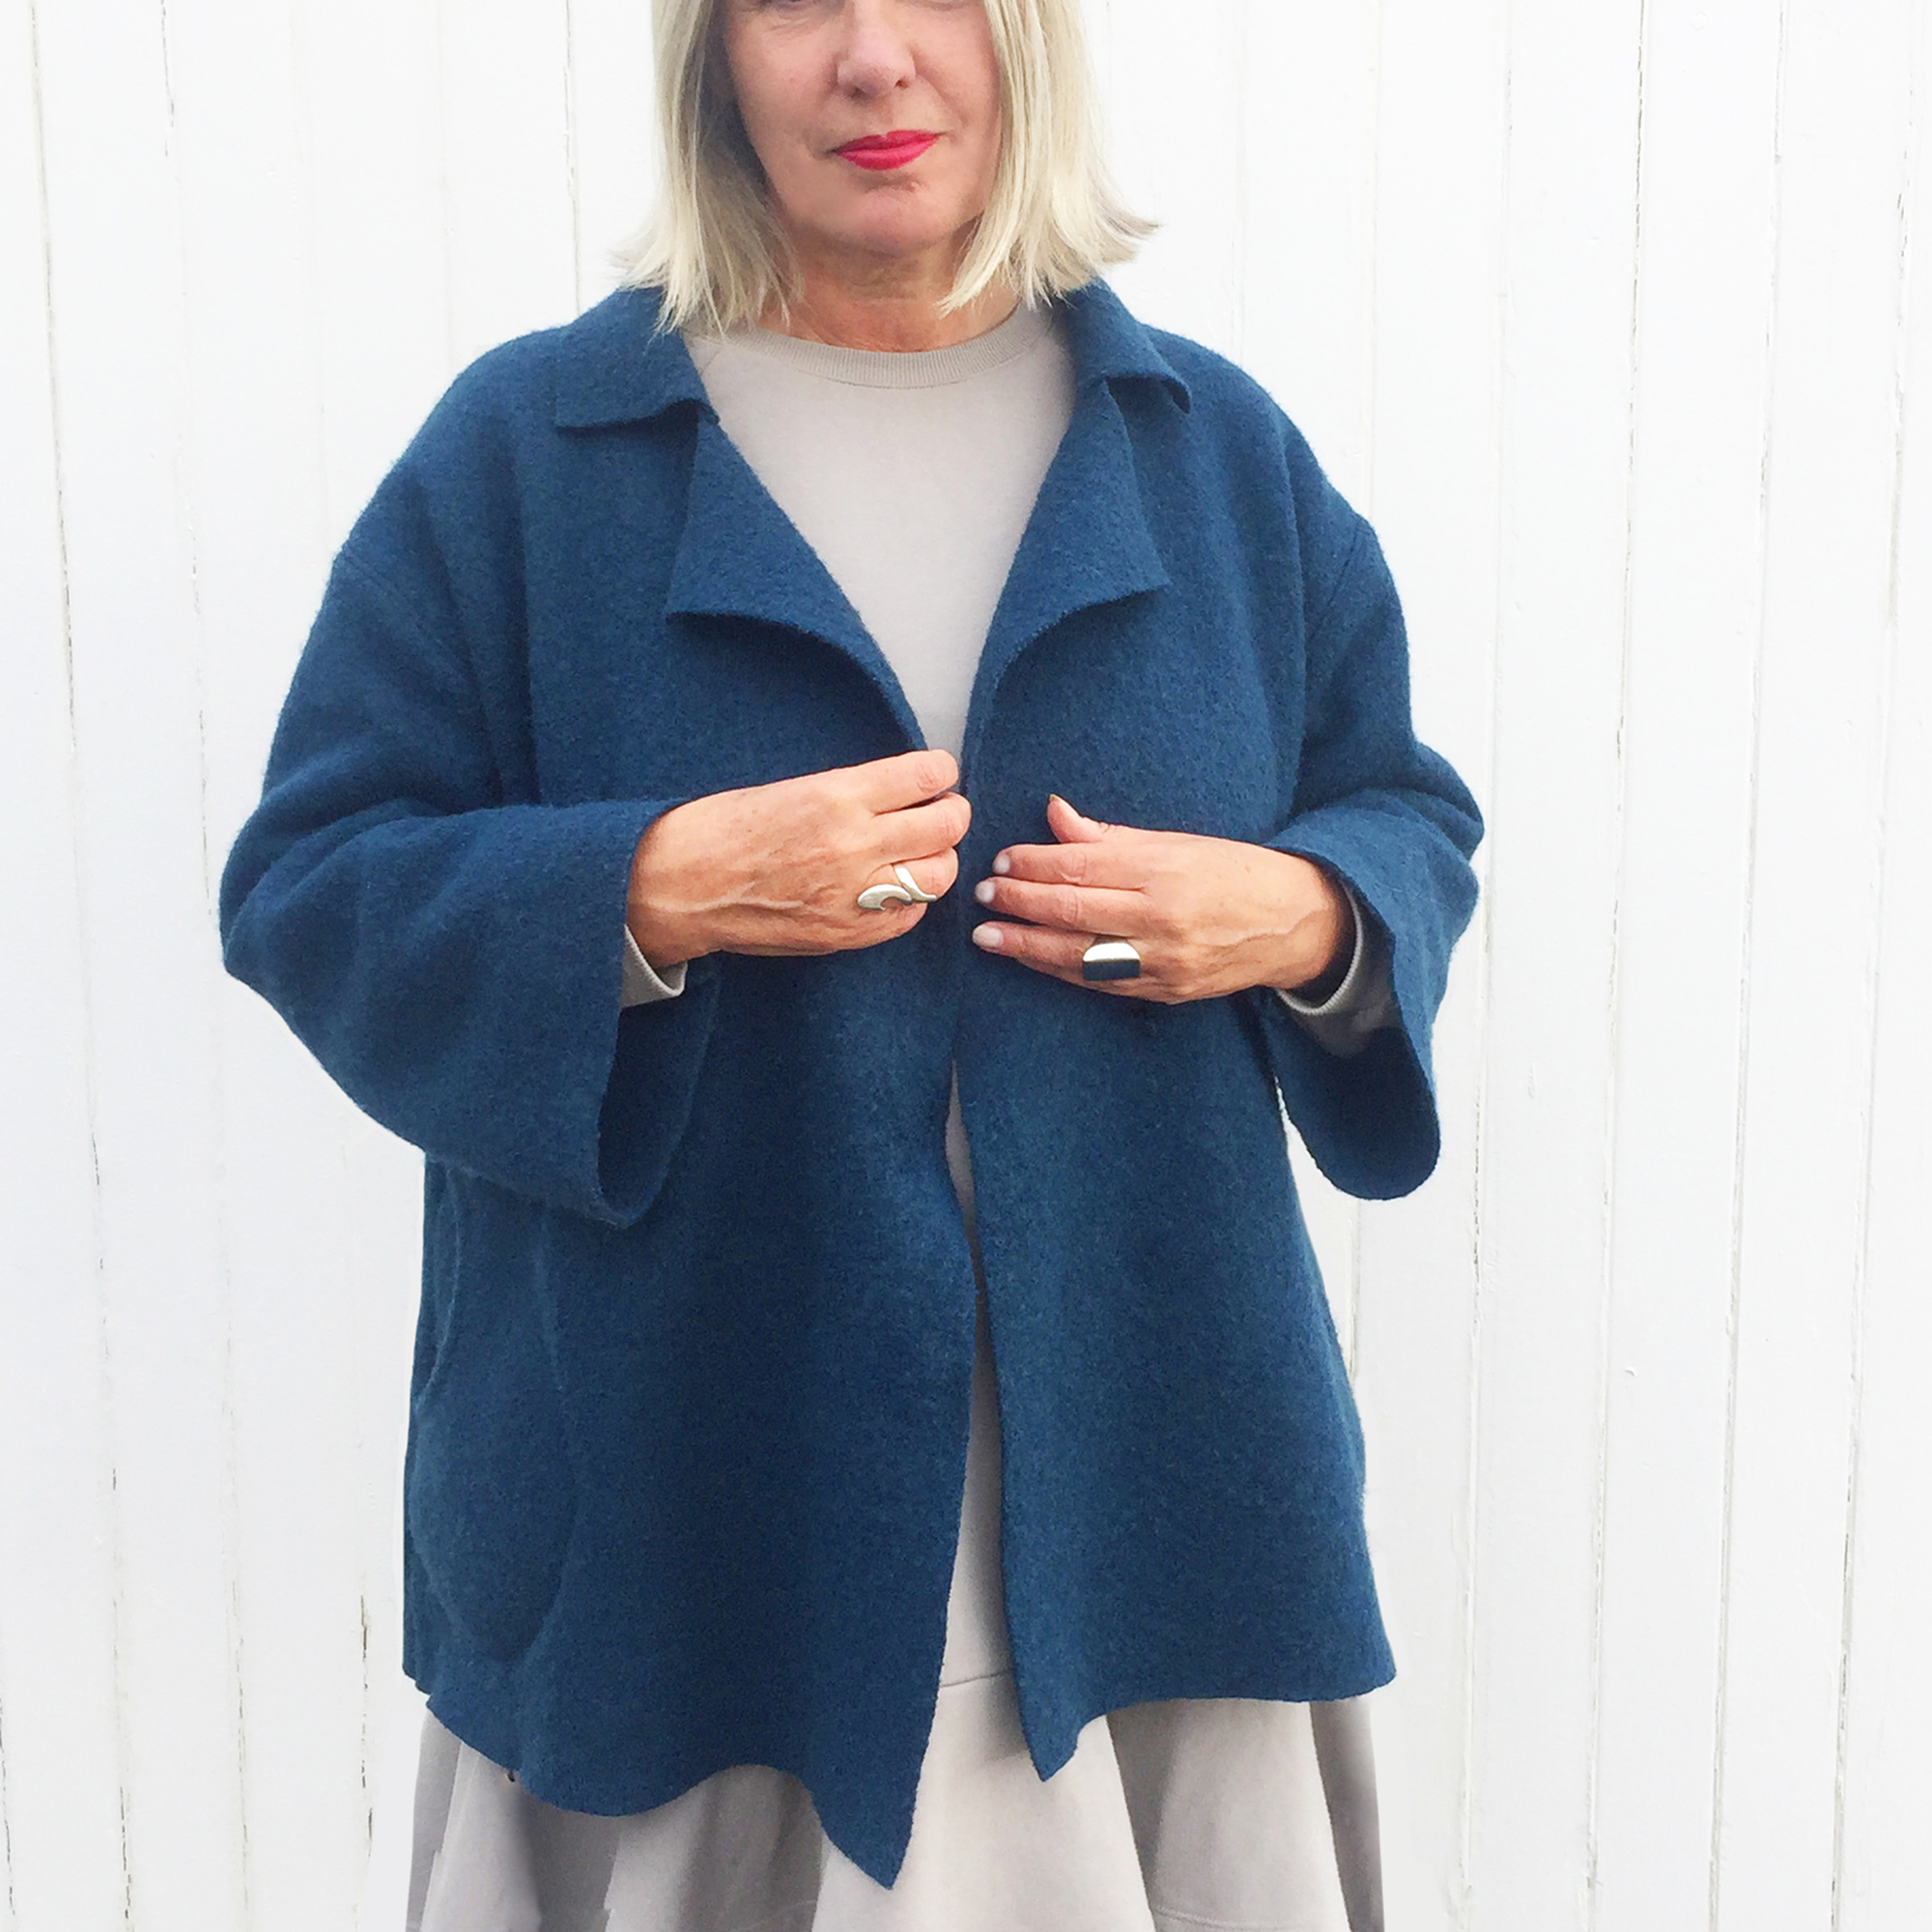
URSULA HACK JACKET IN BOILED WOOL
NEW! Ursula pattern now has a template and instructions included with the pattern to make this ‘Hack’ version using boiled wool. I bought this fab 100% boiled wool fabric from Stitch Fabrics by Rosenberg &son. Here is a link to their site.

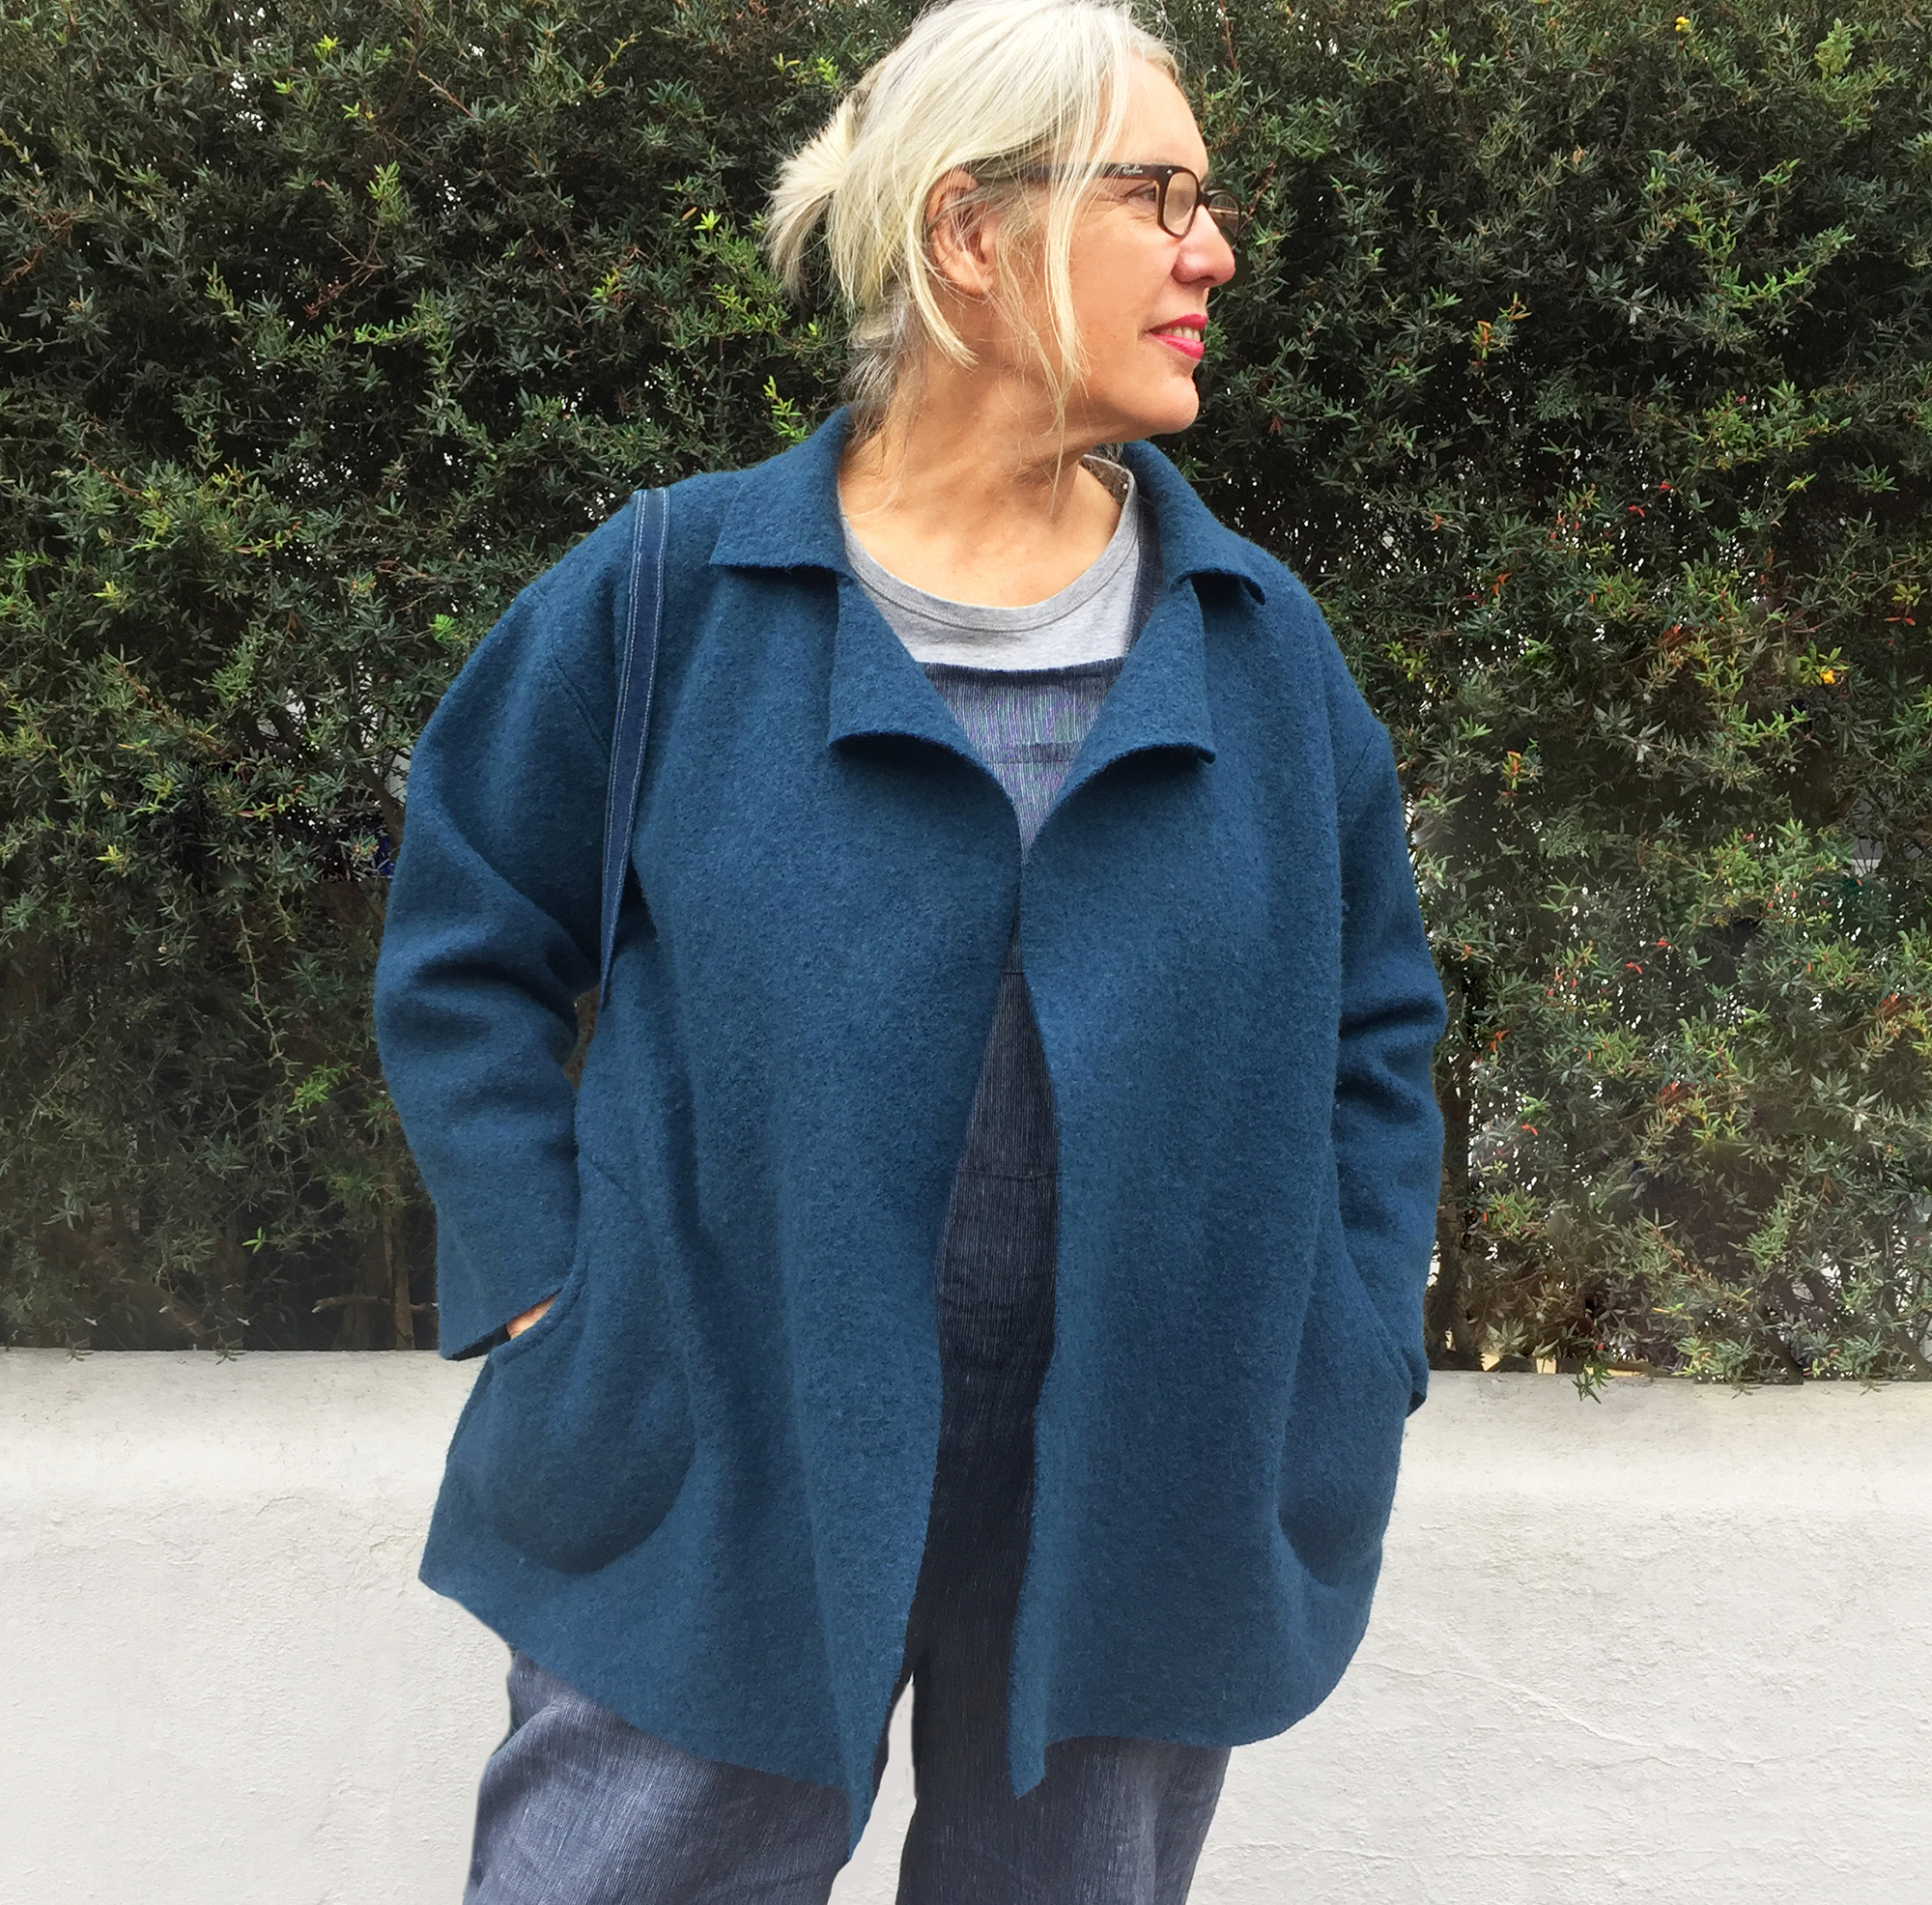
This a simple hack, made from the Ursula pattern in a reversible boiled wool, a fabric that looks exactly the same on both sides. This gives it a more relaxed oversized look (this hack is not possible if your fabric isn’t reversible). In a nutshell I left the back belt off, no hems, no facings or front folded edge, just a simple piece (template included with the pattern) added on to the back neck.
You can buy a pattern via my website, click on the link below.
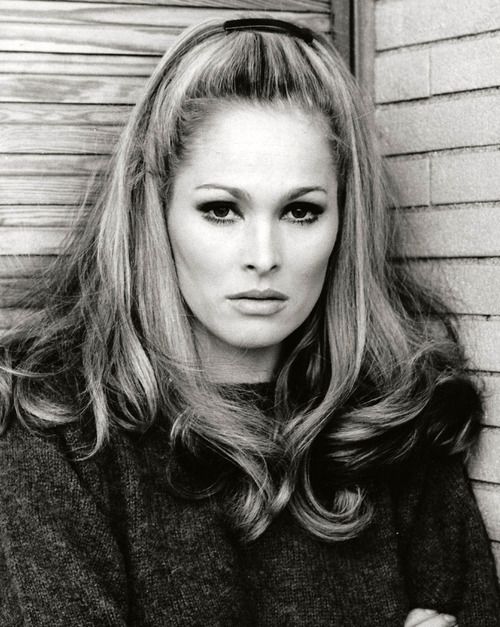
Ursula coatigan, inspired by a bygone era, and her namesake Ursula Andress….what a woman!
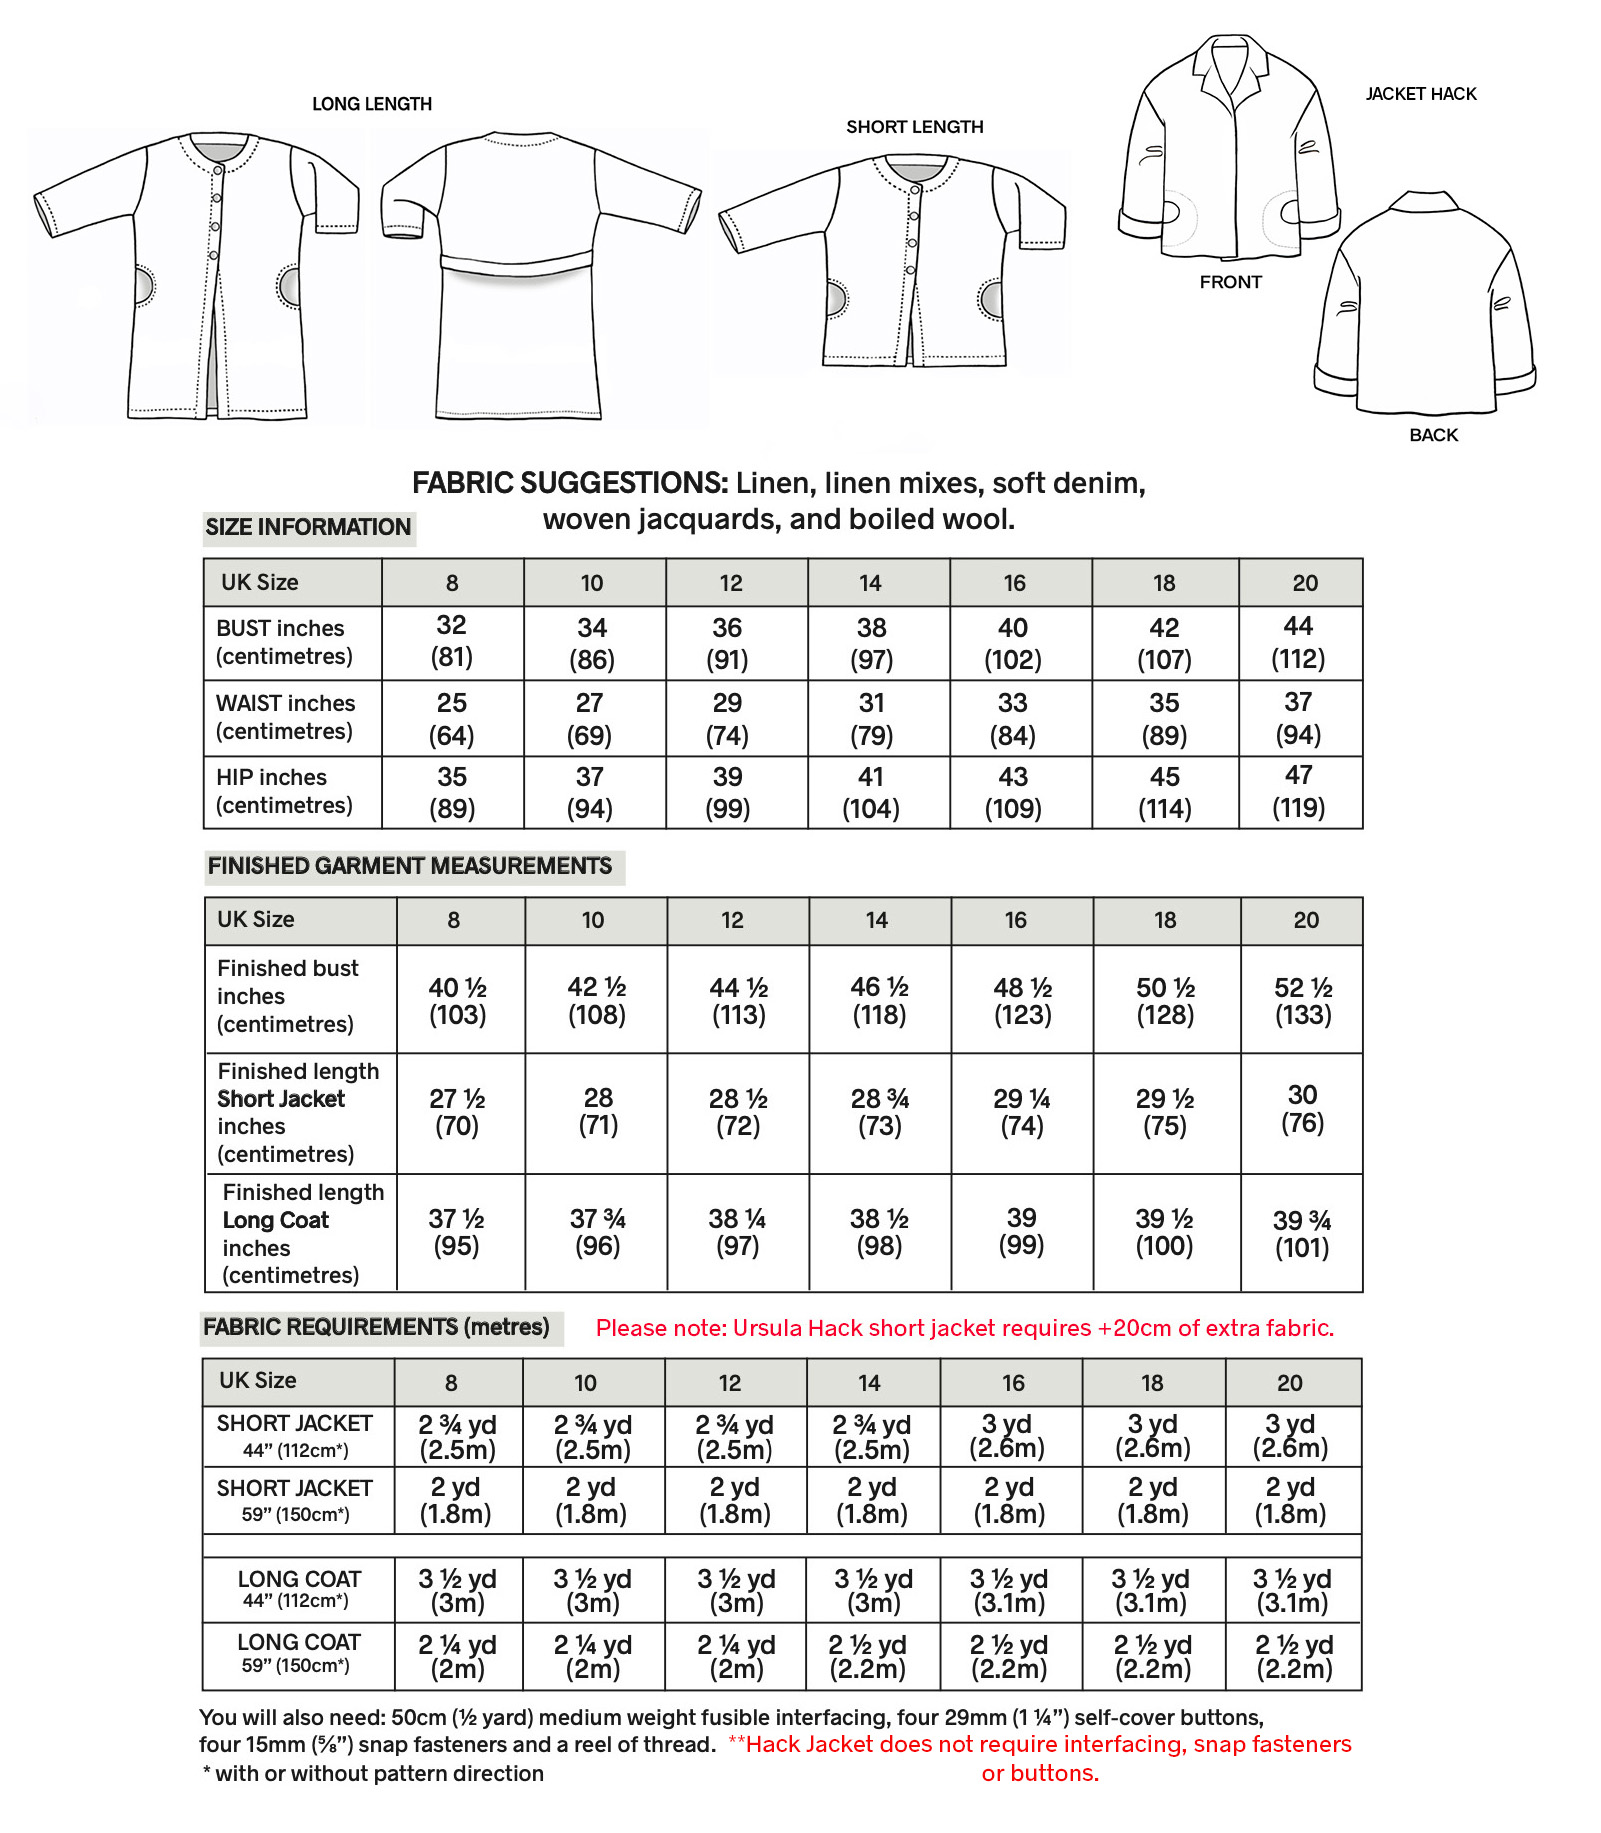
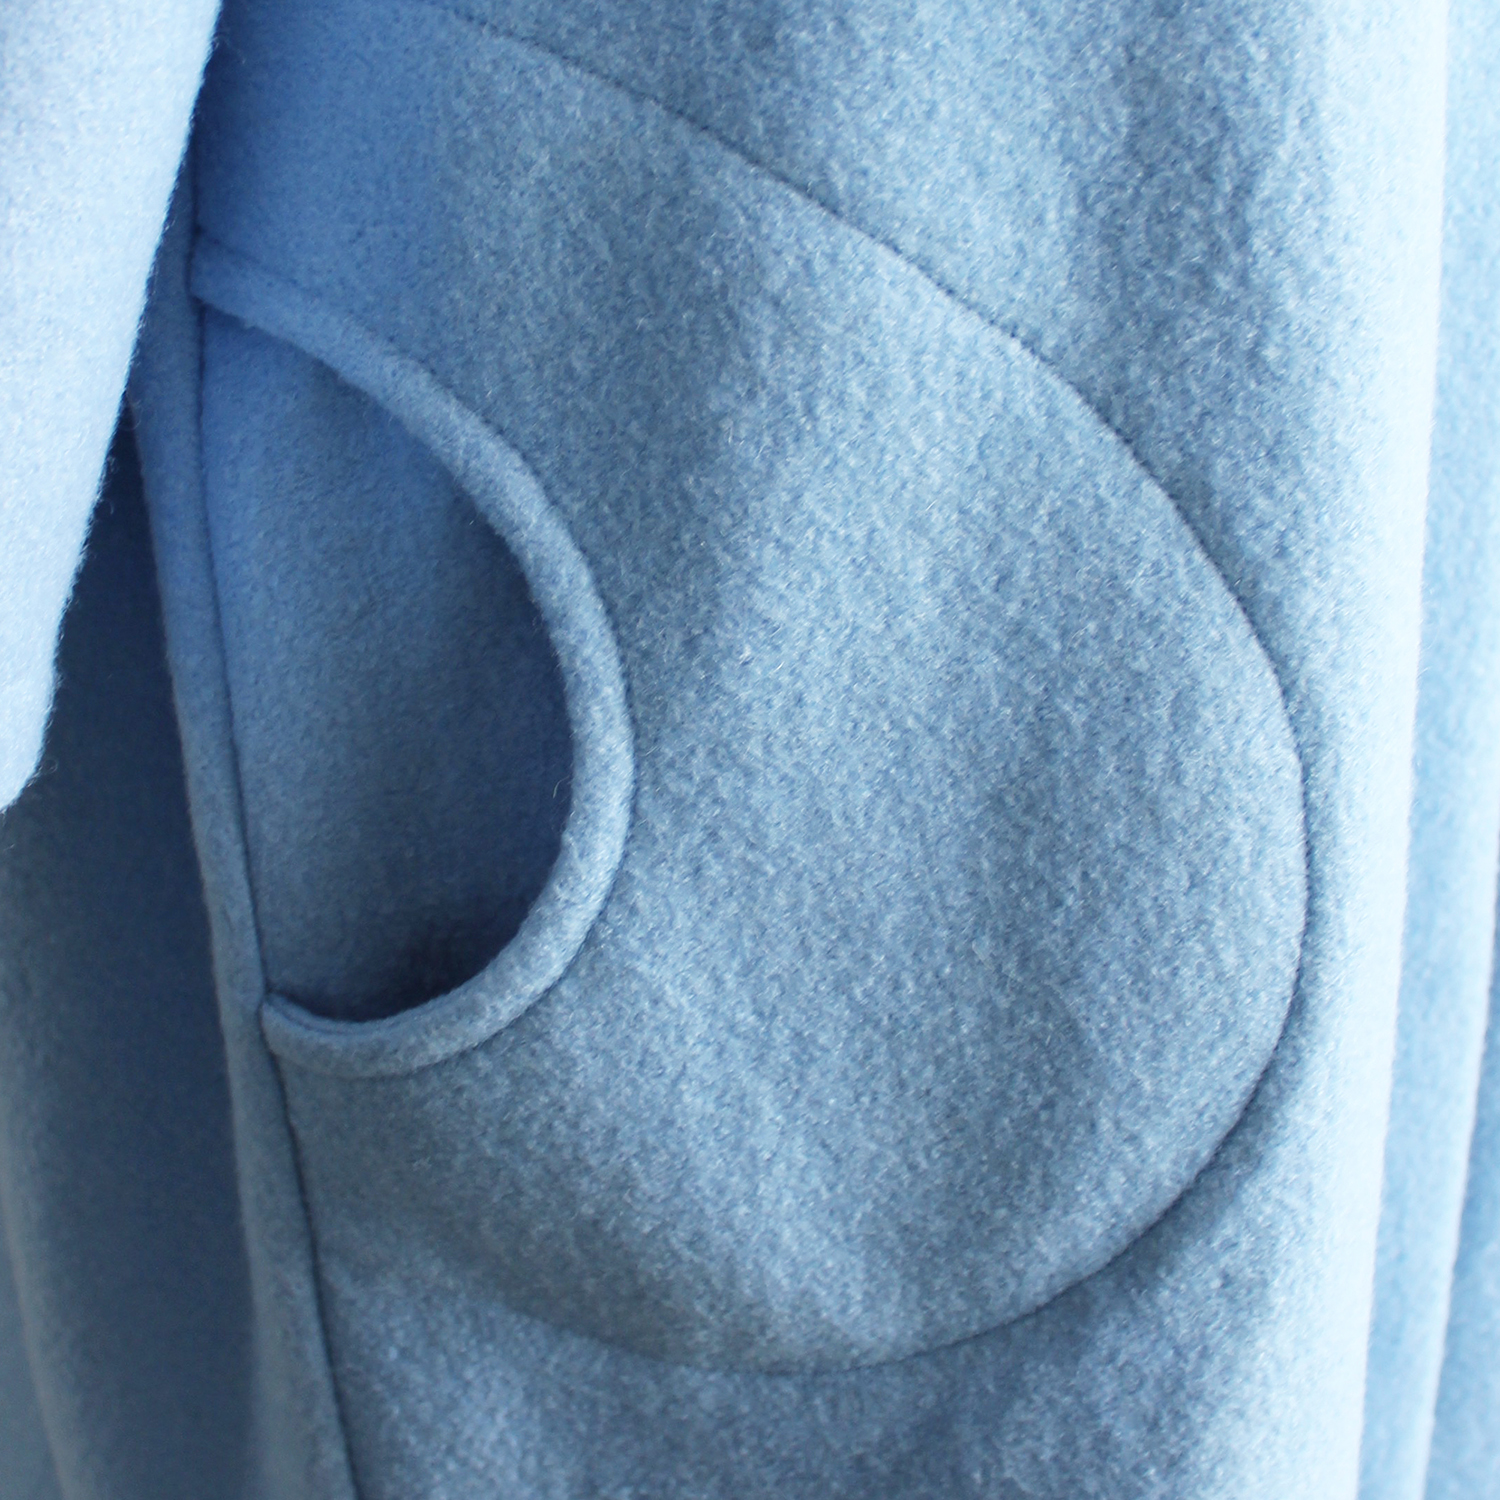
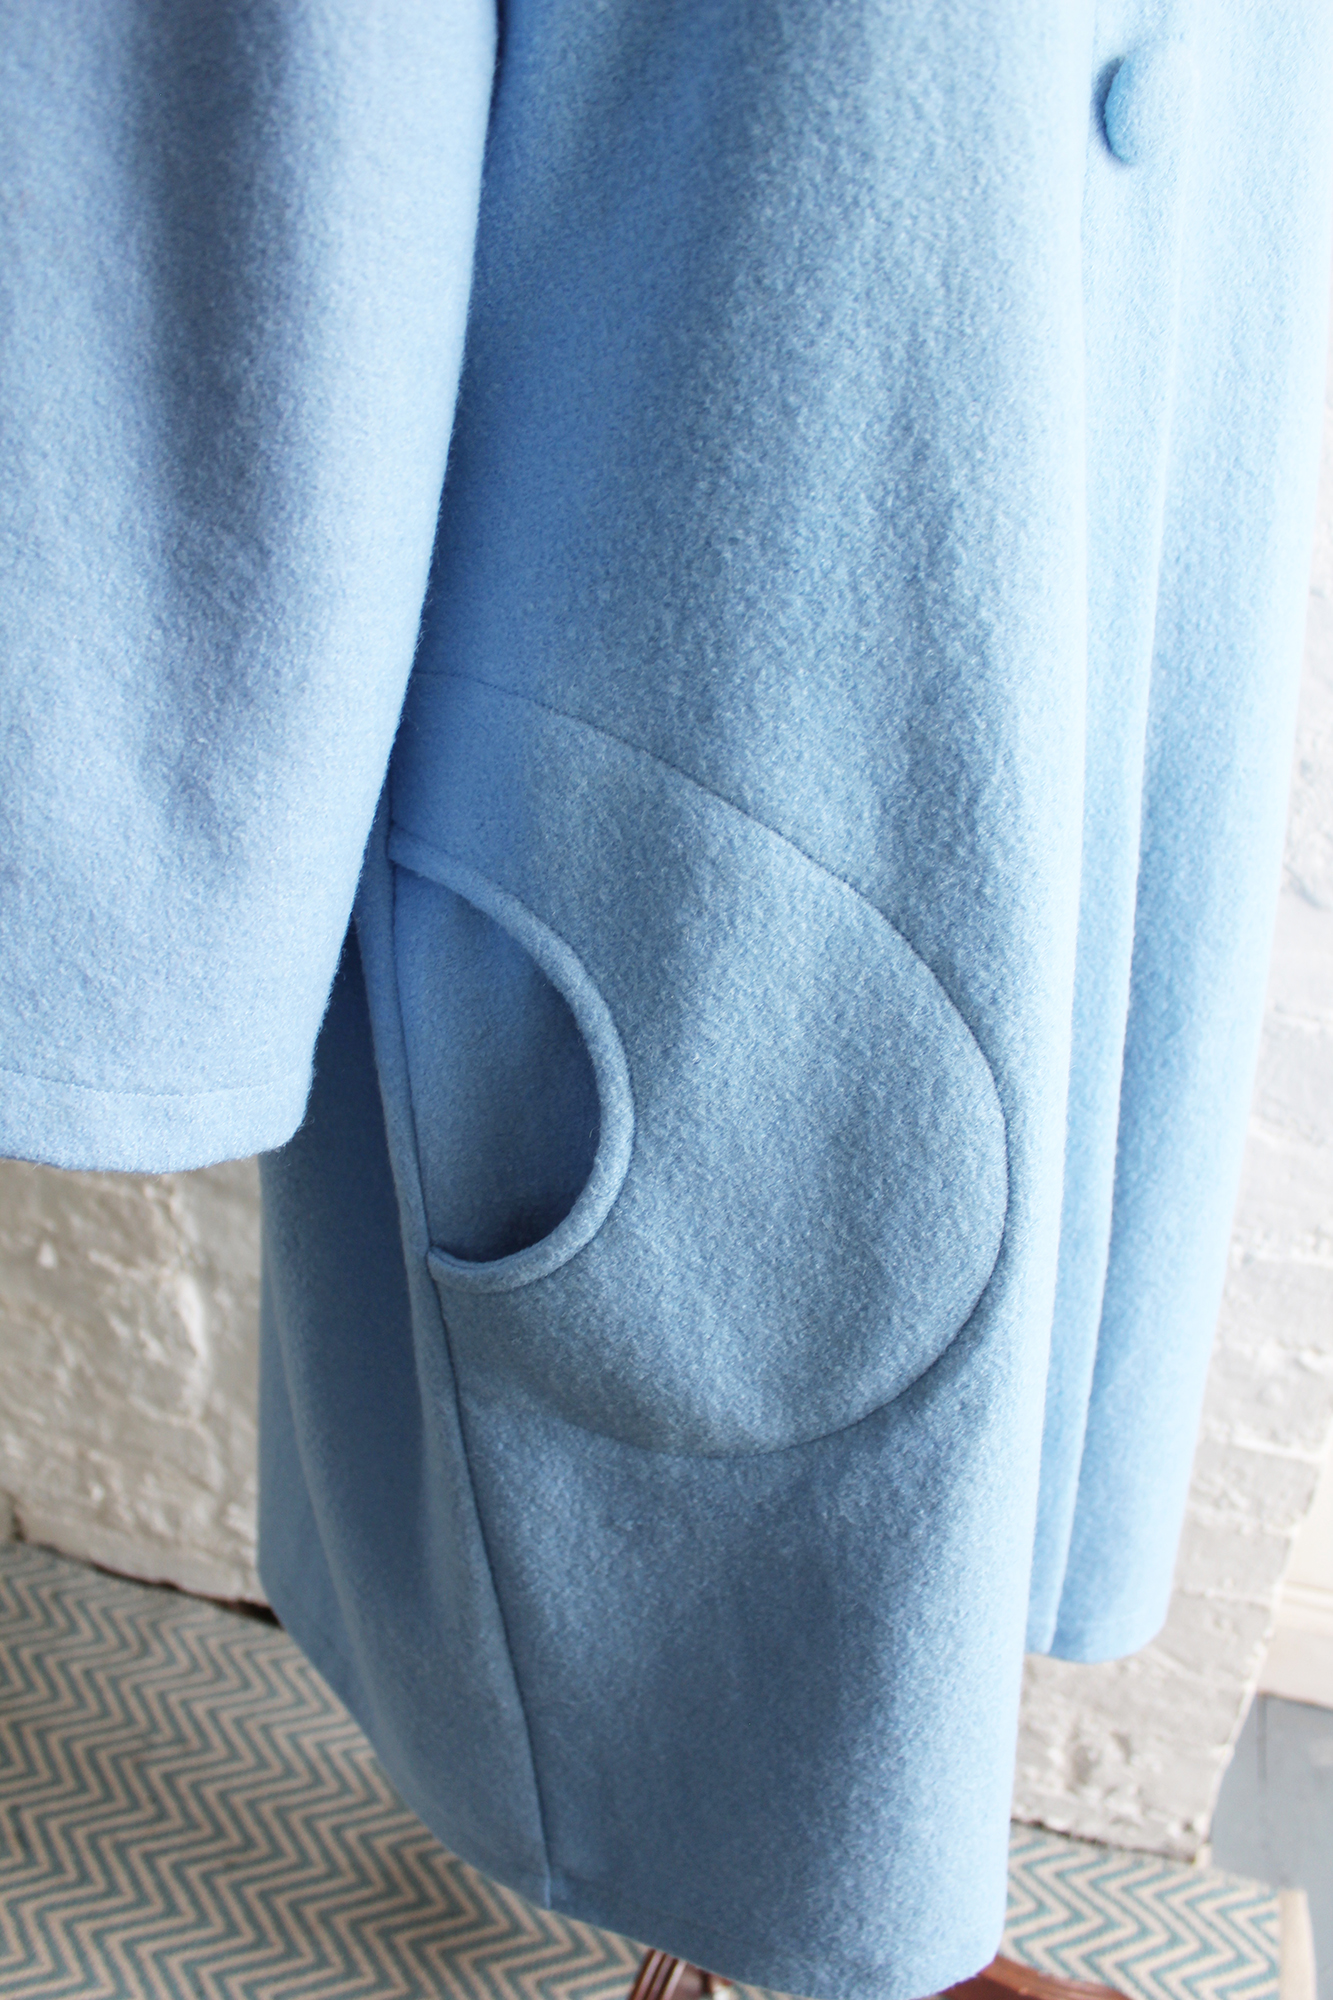
This stylish unlined duster coat/coatigan, round neck in two lengths; long or jacket length, with rounded pocket details, three or four covered buttons with large snap fasteners and the three quarter length sleeves gives an air of the 1960s.
Make in woollens such as wool mix jacquards and checks or plain boiled wool in vibrant colours for Autumn/Winter or Linen and Linen mix fabrics for Spring/Summer. Its a versatile pattern for all seasons! Here is a link to some wonderful British wool fabrics at reasonable prices.
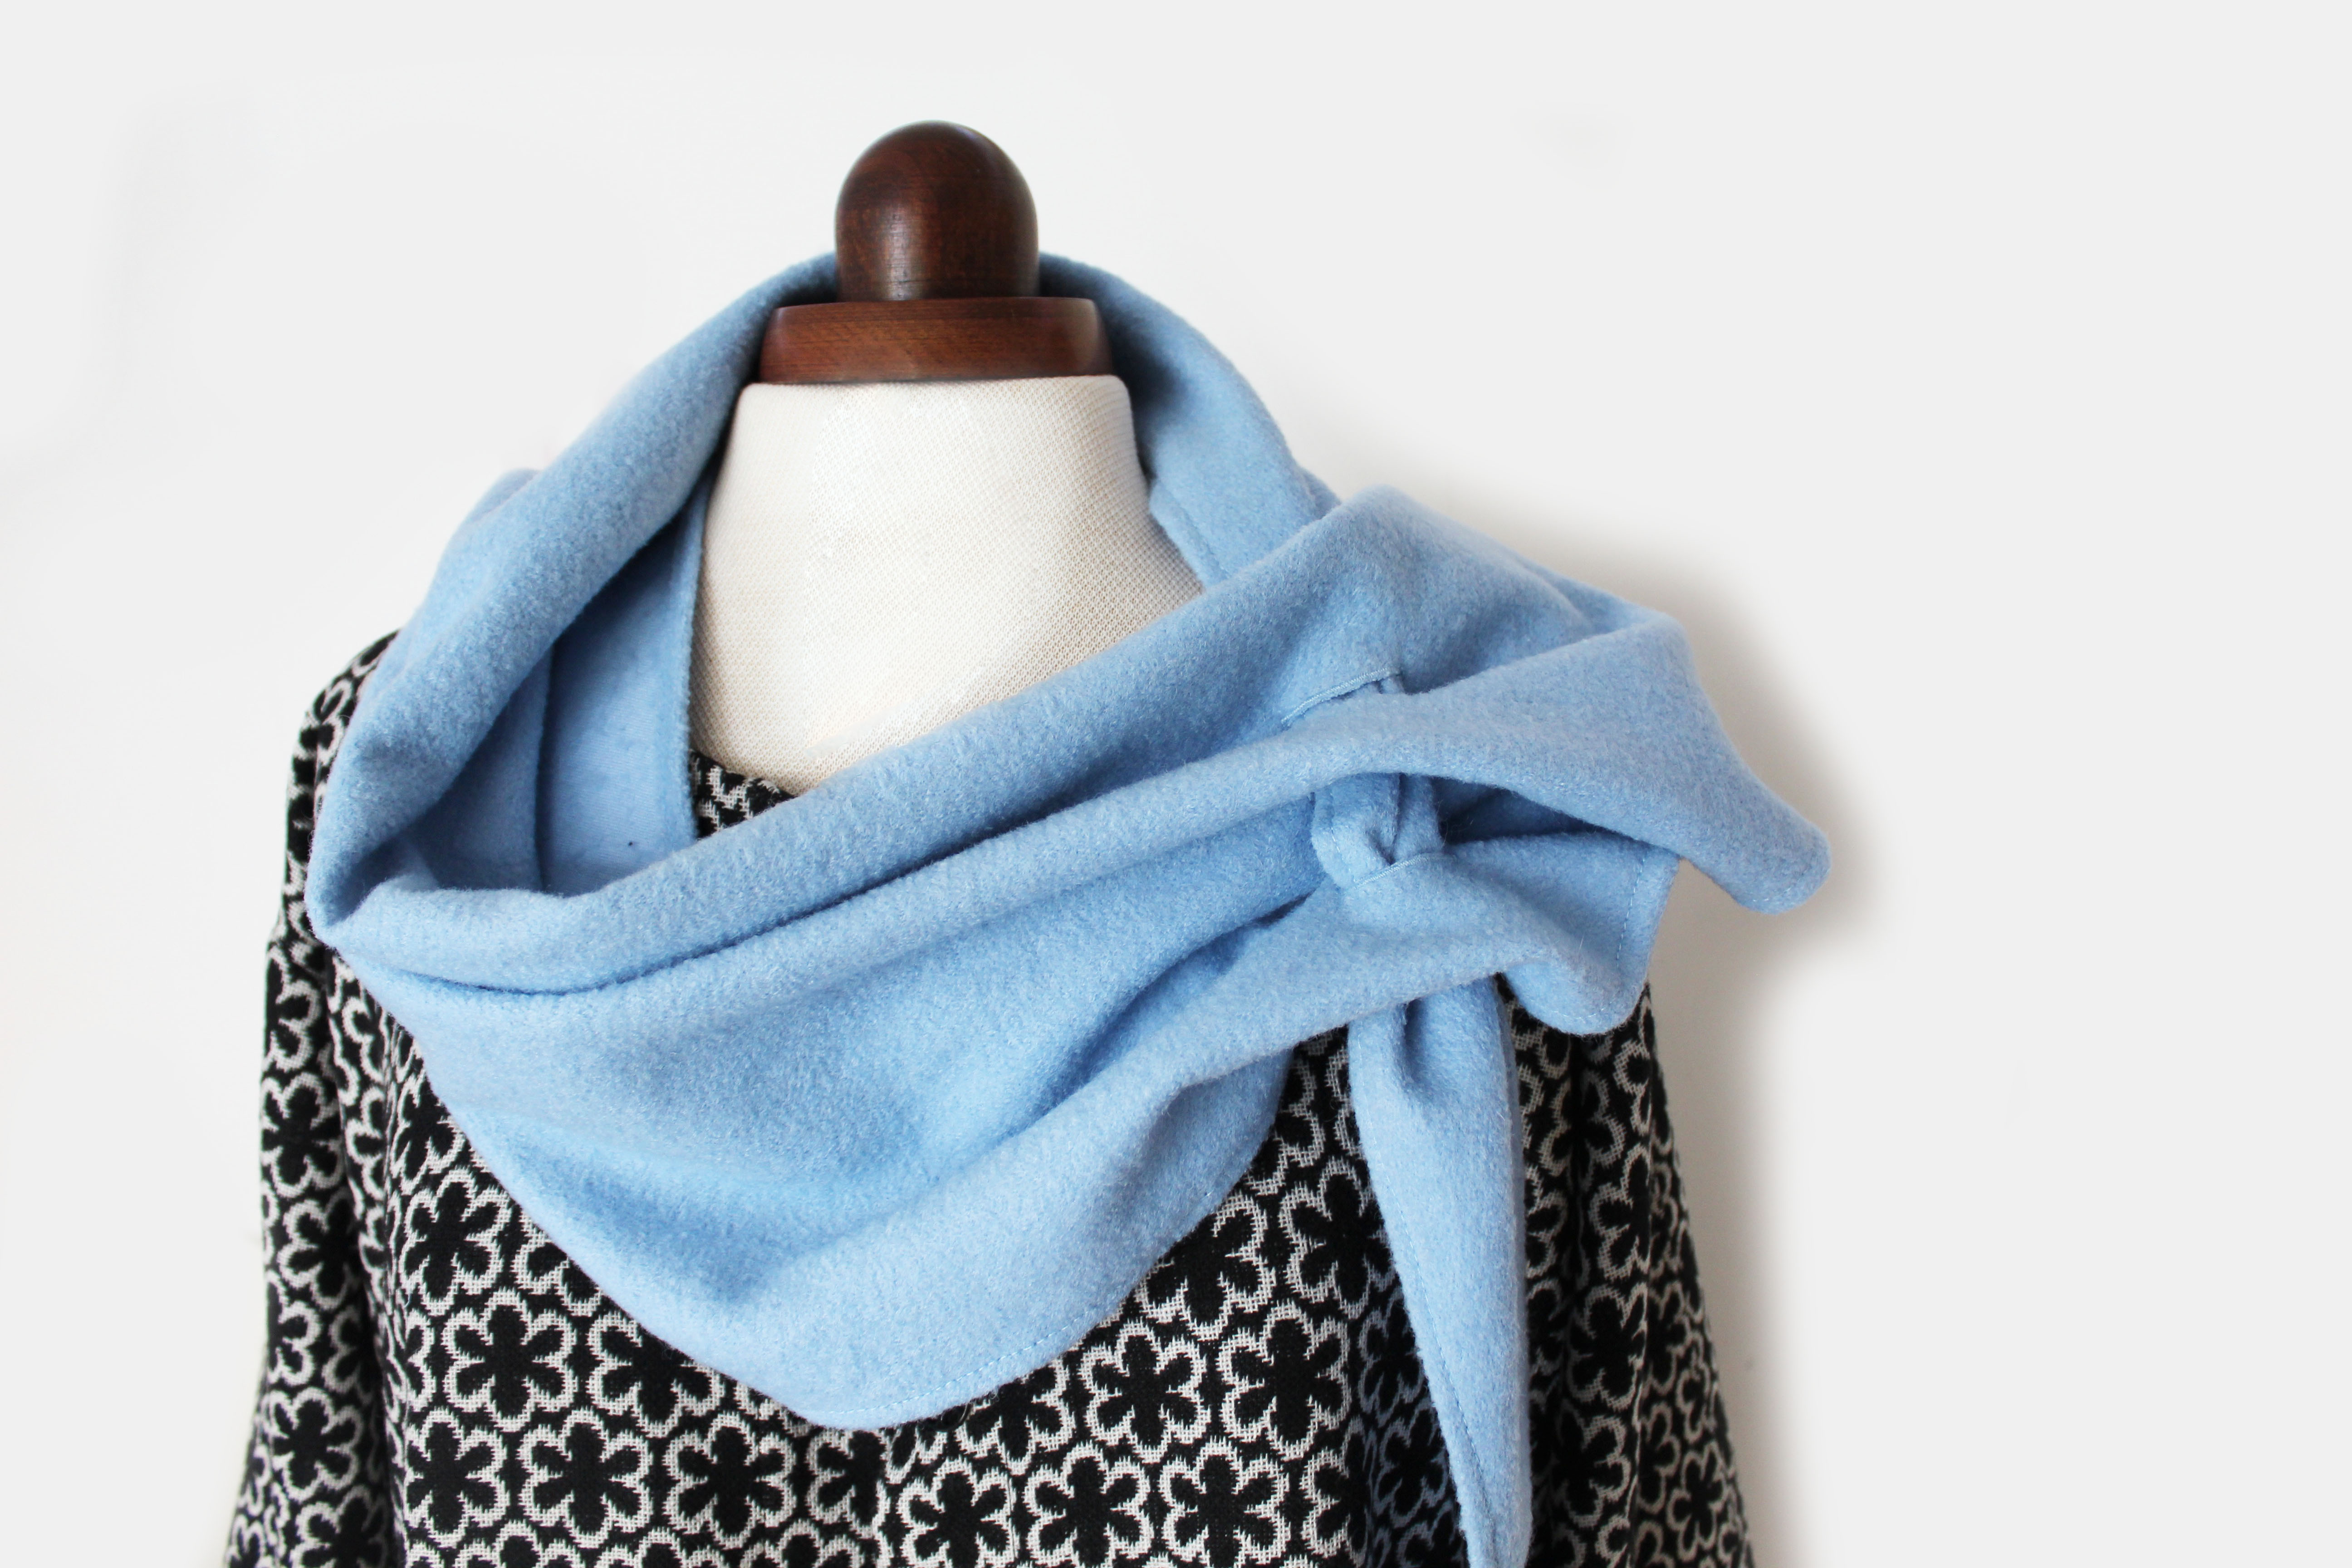
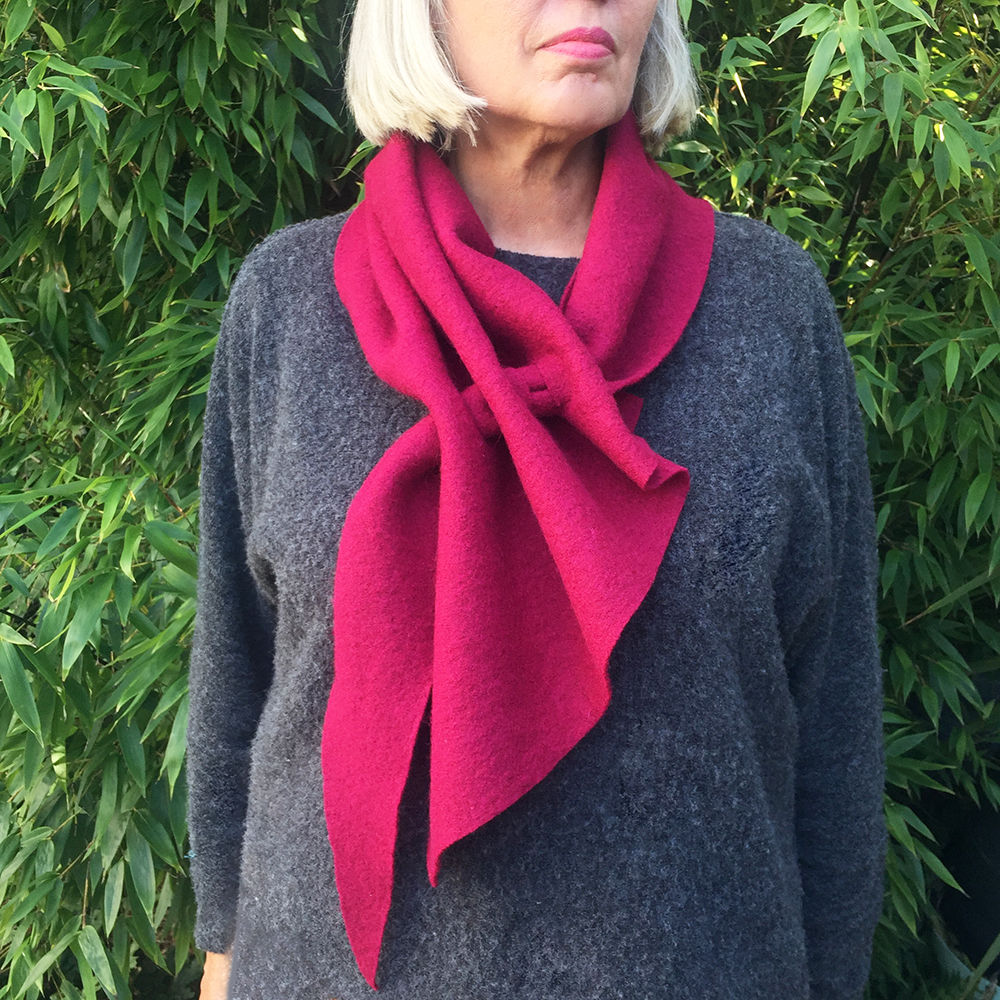
Why not team up with jeggings, jeans, long skirts and a polo neck top for a sixties look. Or, what about making a wrap shawl out of any leftovers like this one.
Scroll to the bottom of this page for the Wrap Shawl step by step instructions.
8 Templates: FRONT, BACK, SLEEVE, FRONT FACING, BACK FACING, POCKET, POCKET LINING and BACK BELT
Here is the measurements guide:
Sew 1cm (3/8″) seam allowance unless otherwise specified. Finish raw edges with an overlocker or zigzag stitch or leave unfinished if using boiled wool.
Topstitching –sew 4mm (1/8″) approx. from seam with a straight stitch length at 2.8mm.
Stay stitching- a line of straight stitch to prevent stretching
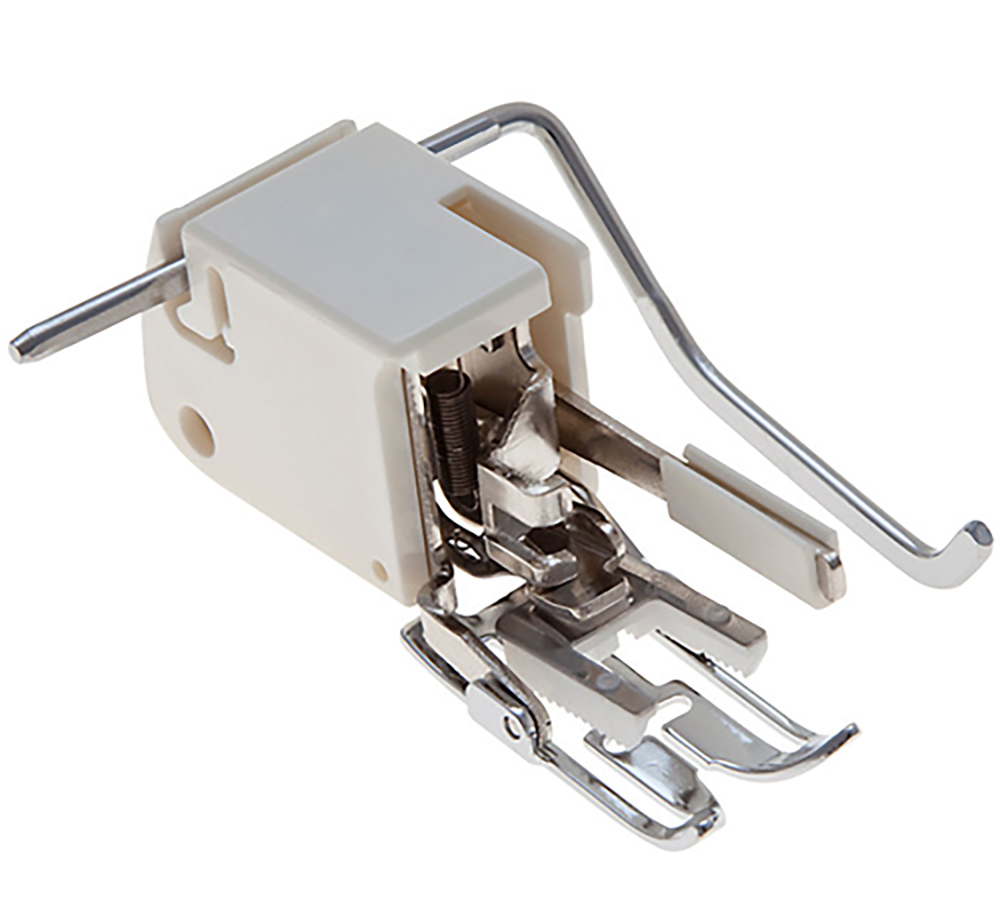
WORKING WITH BOILED WOOL TIP: pop a walking foot on your machine and use a ballpoint needle no.90 which helps give a better sewing experience
HOW TO MAKE URSULA COATIGAN
SEWING THE BACK BELT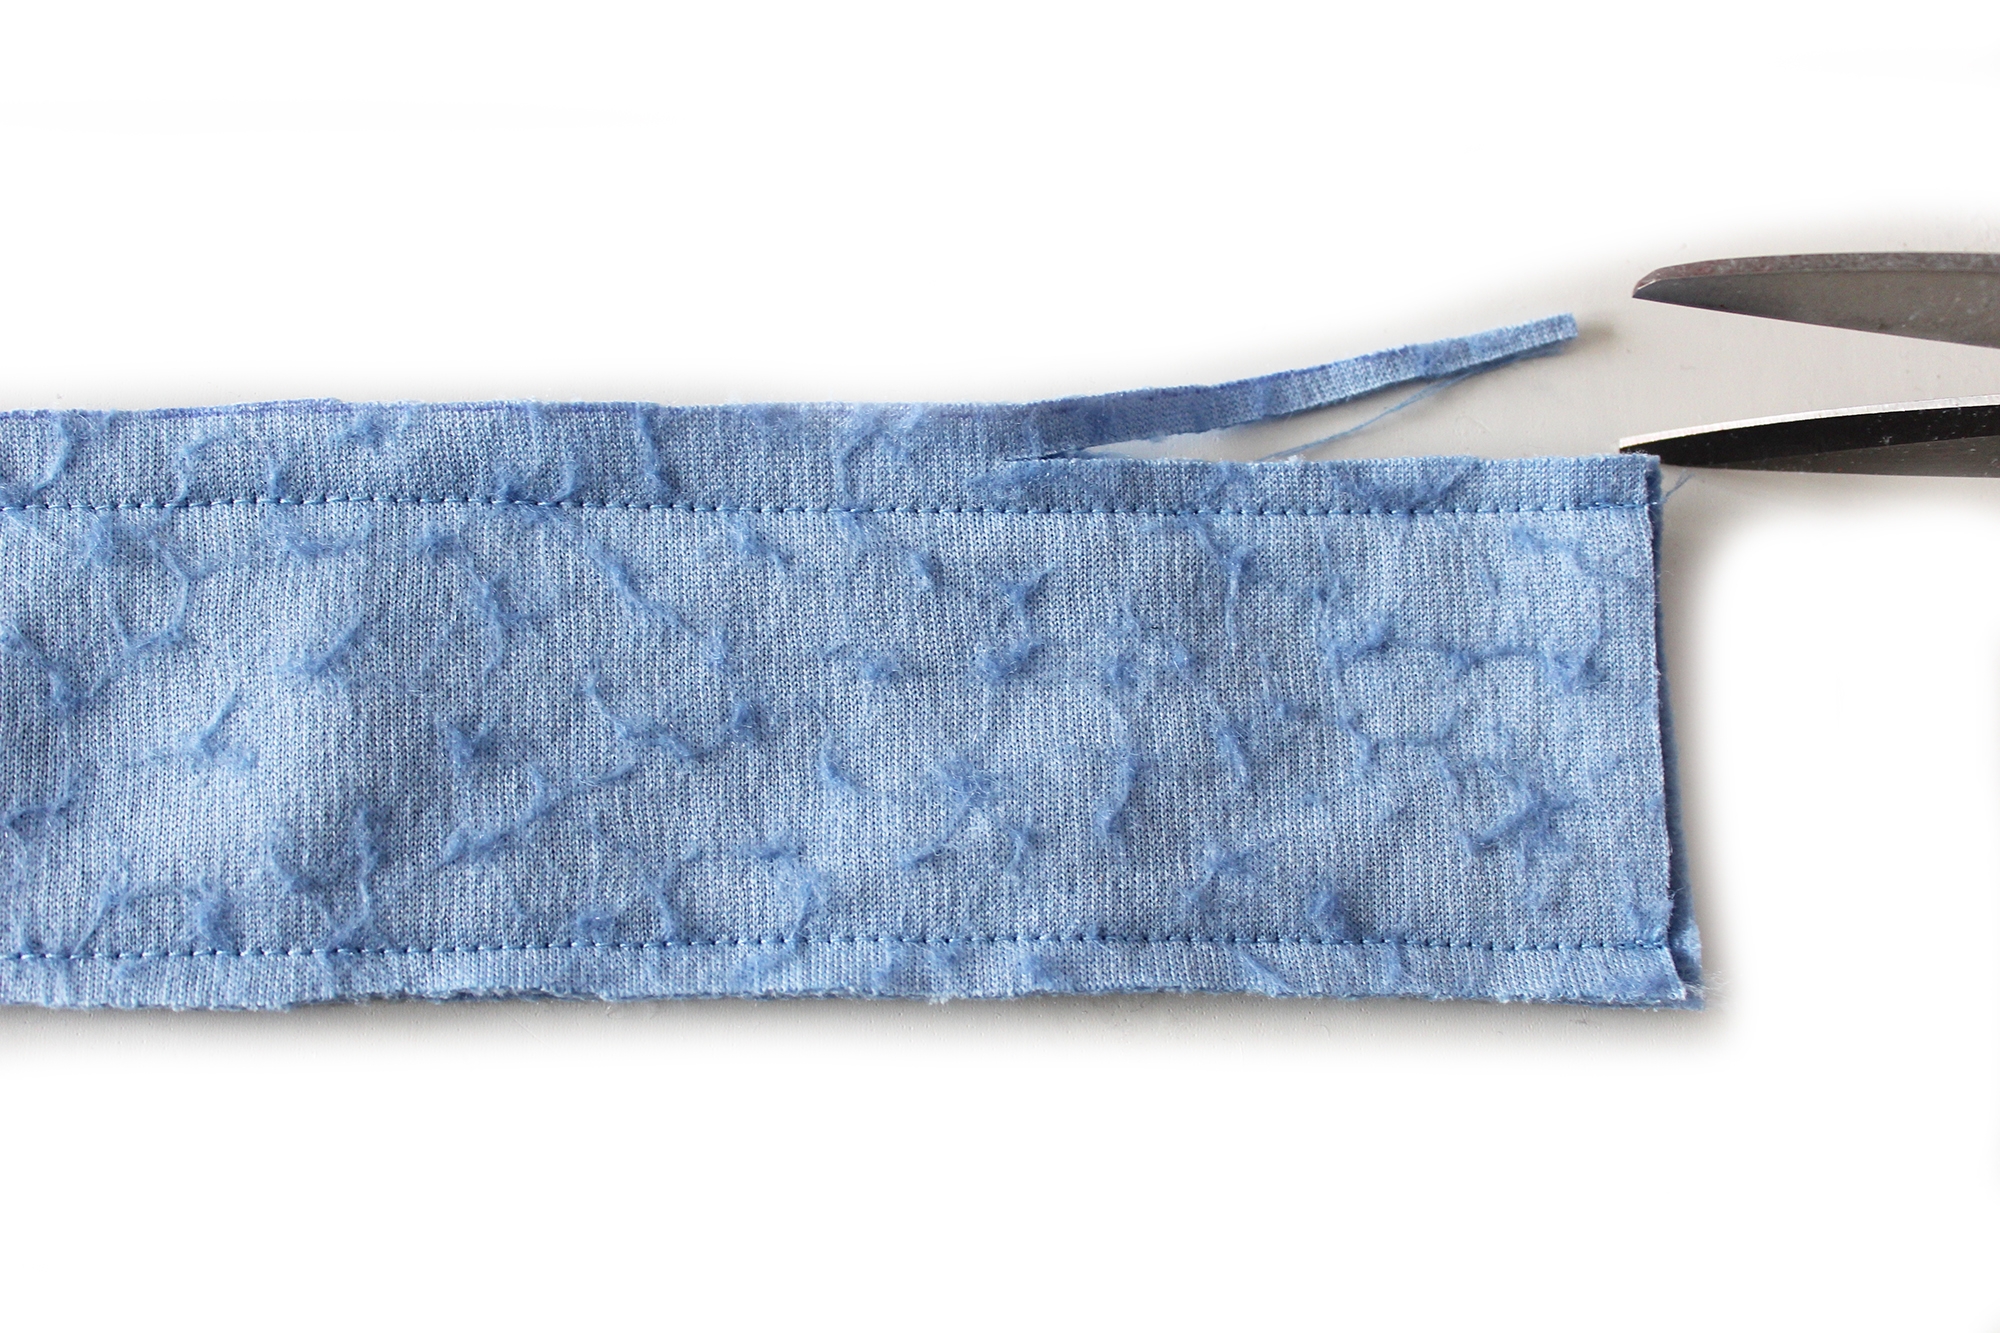 The Back belt is optional but I think its nice feature to the rear angle! Stitch down each side, then turn inside out. Press.
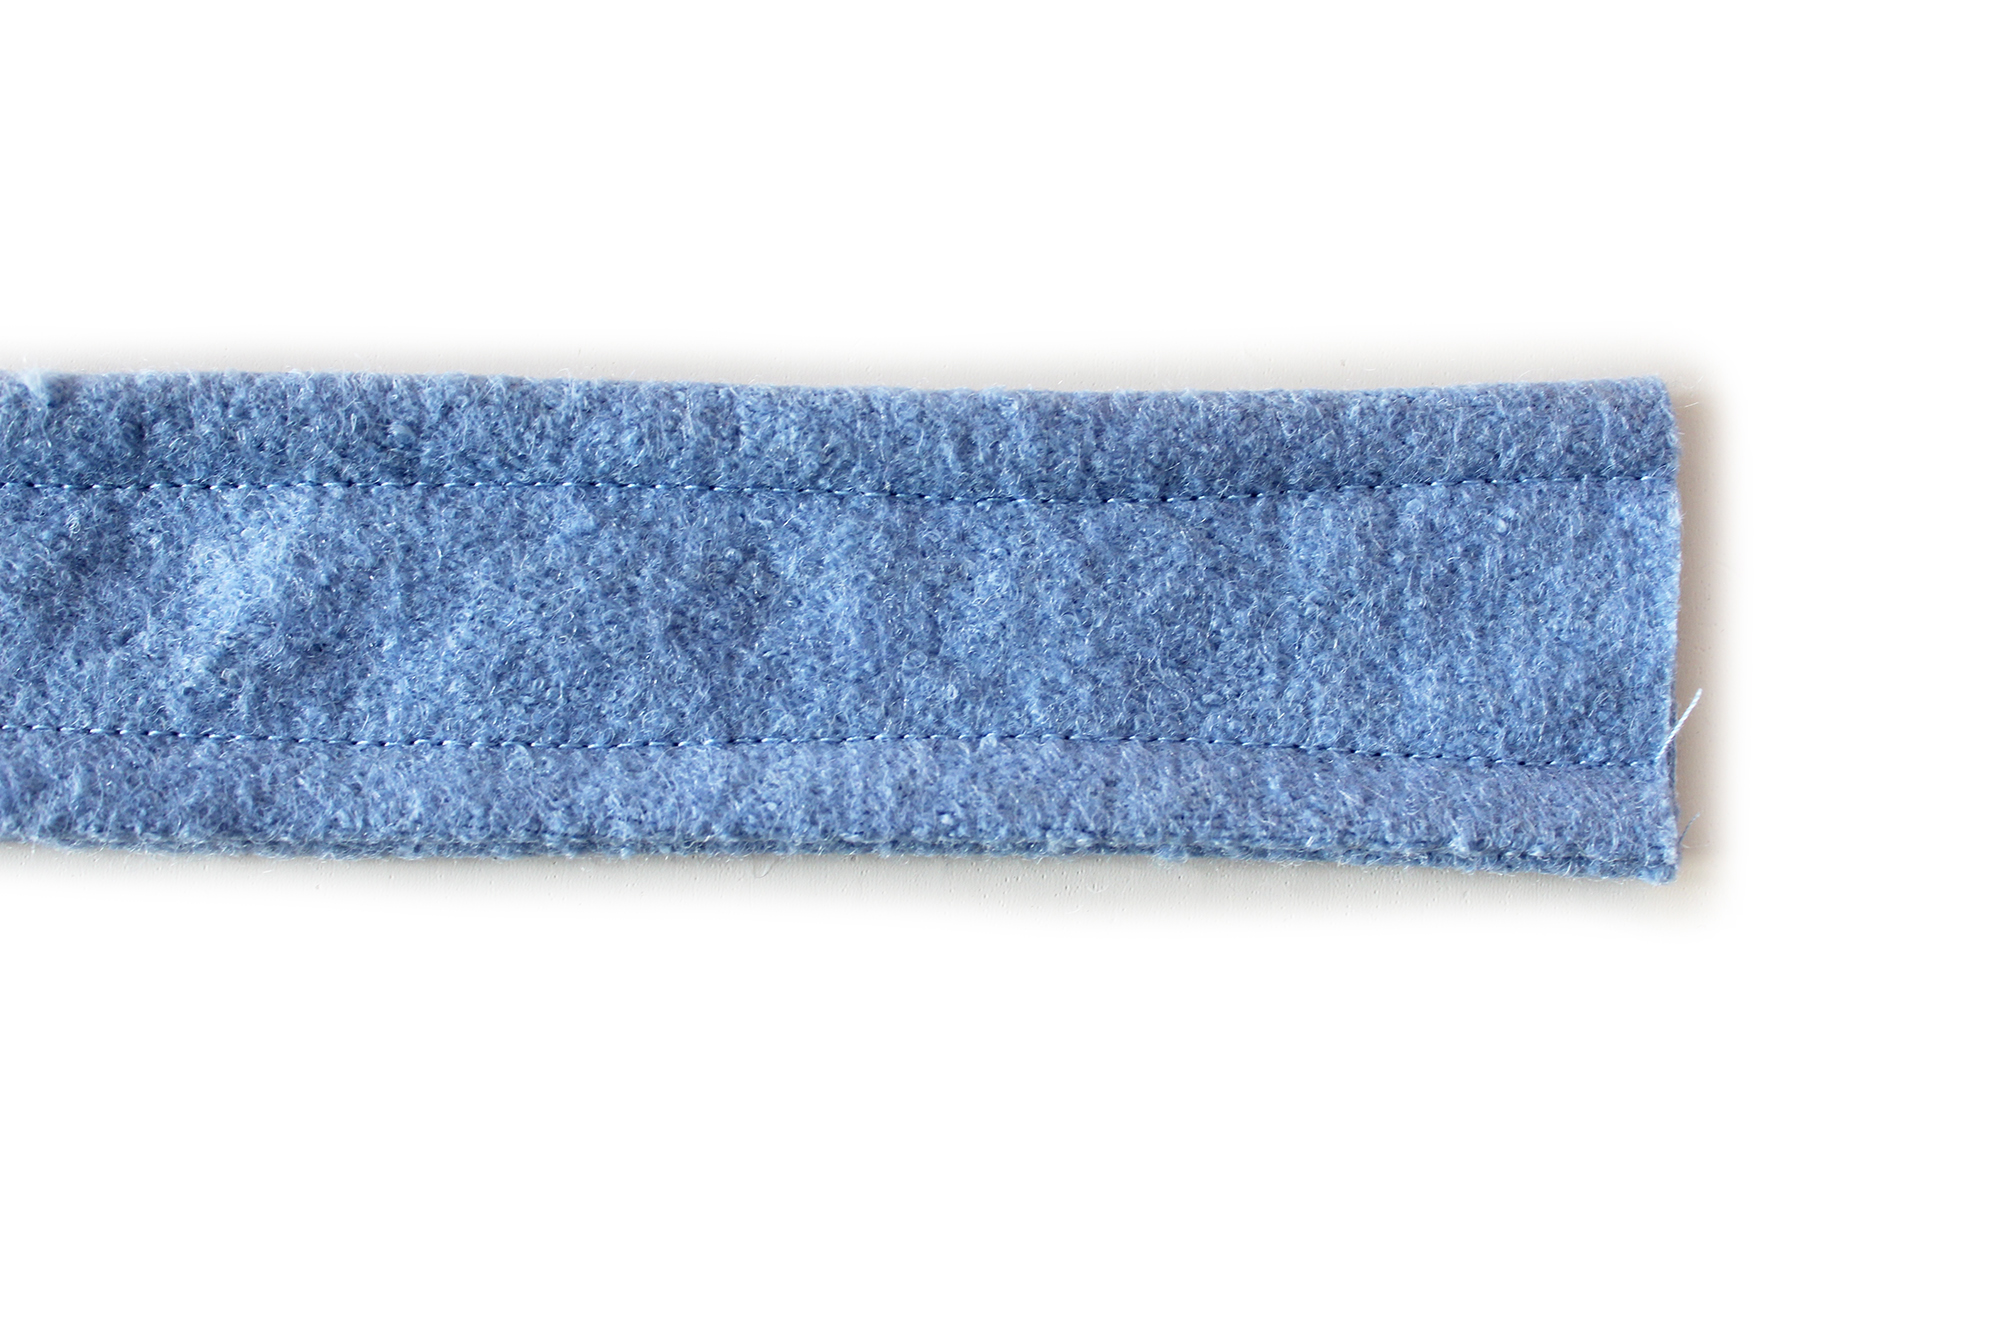 Top stitch down each side.
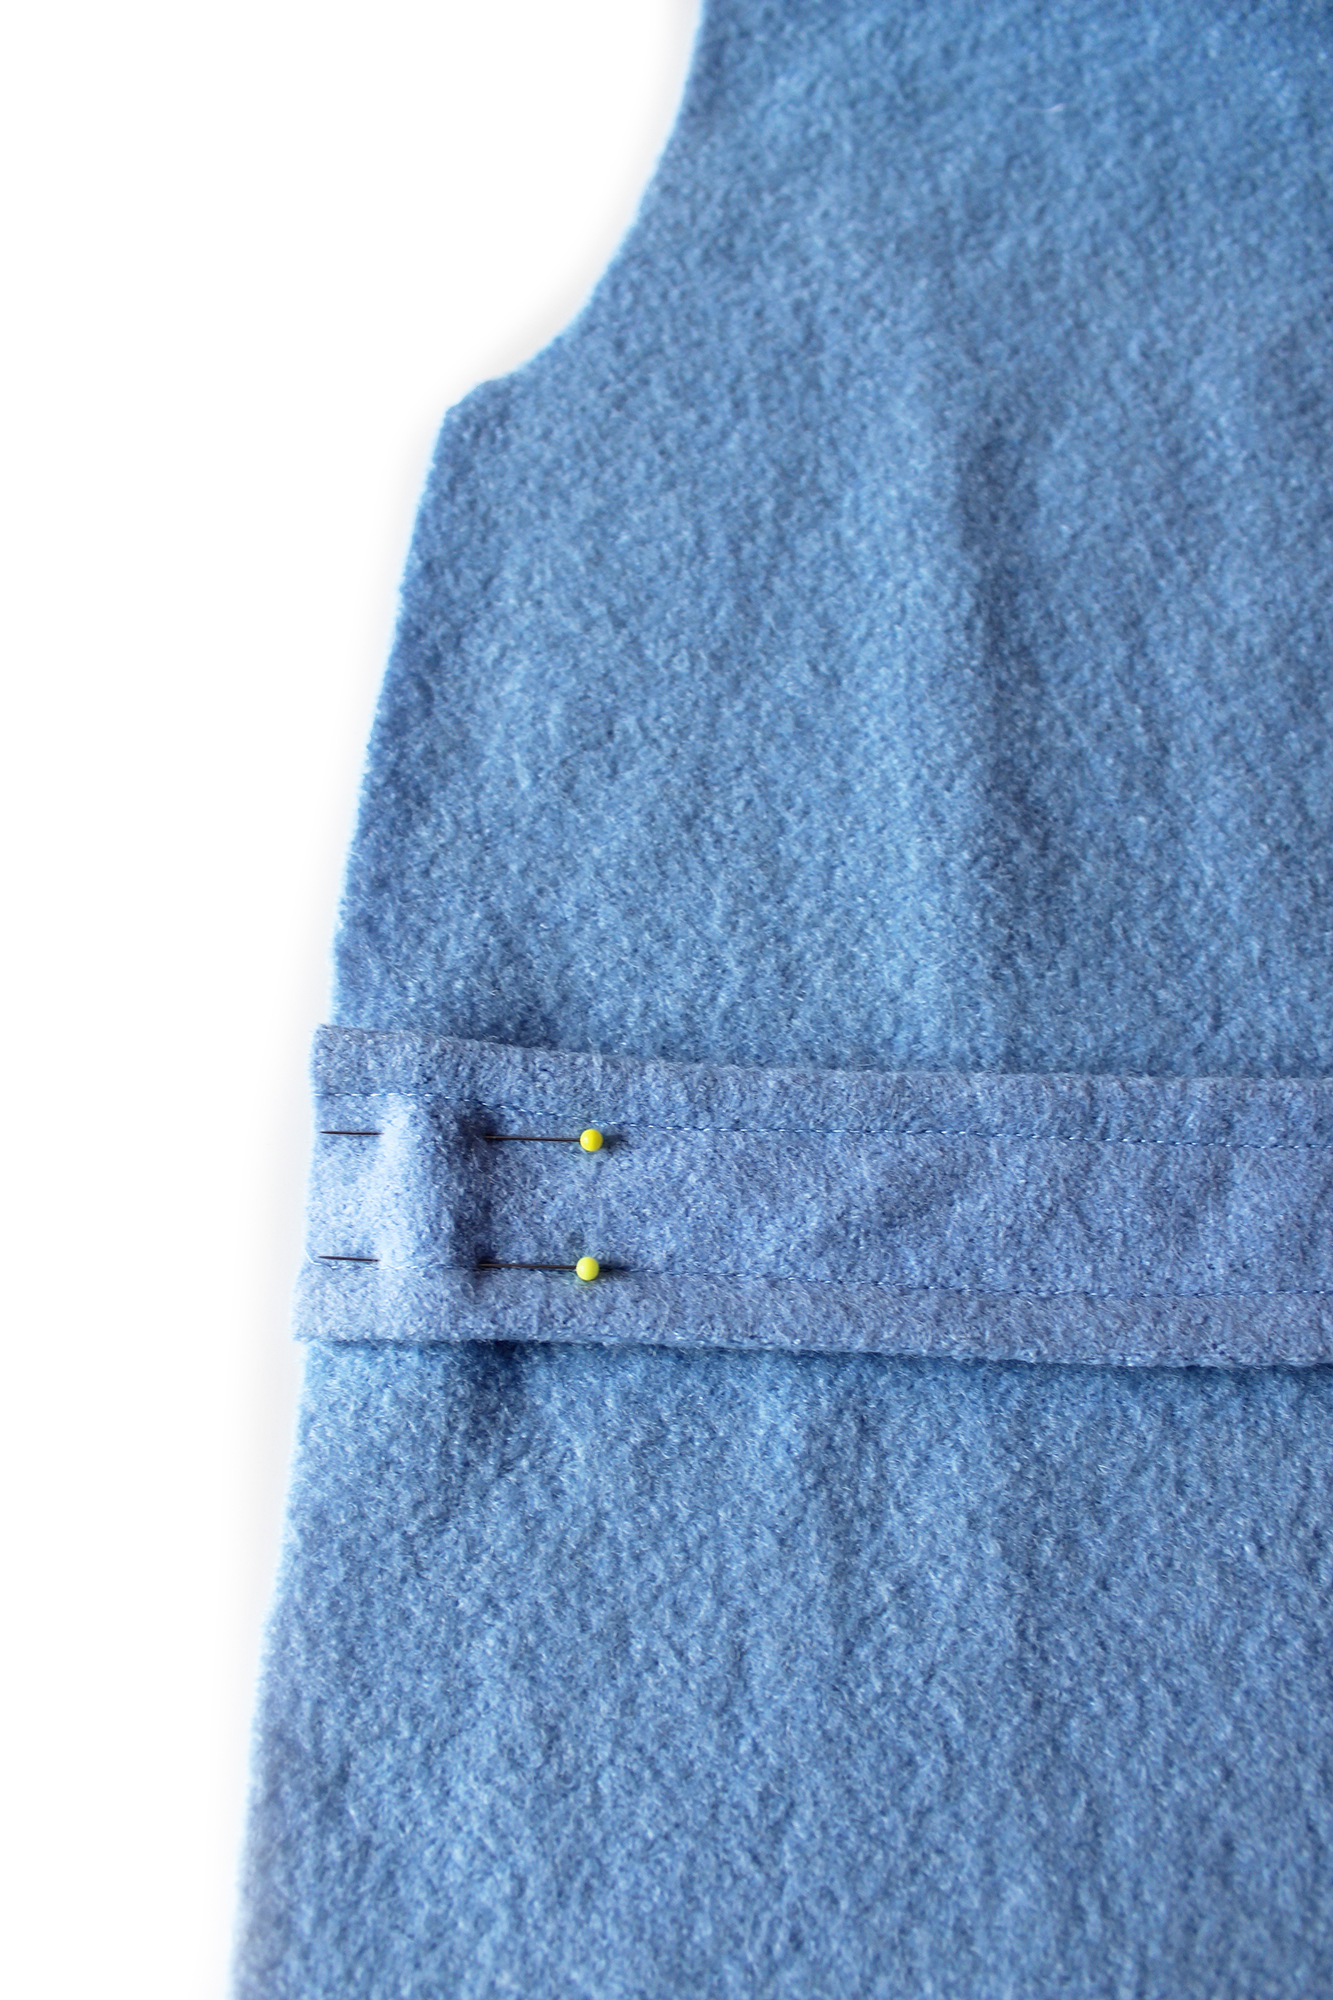 Pin the back belt to the back piece at each side. Machine tack within the seam allowance.
SEWING THE NECK FACING
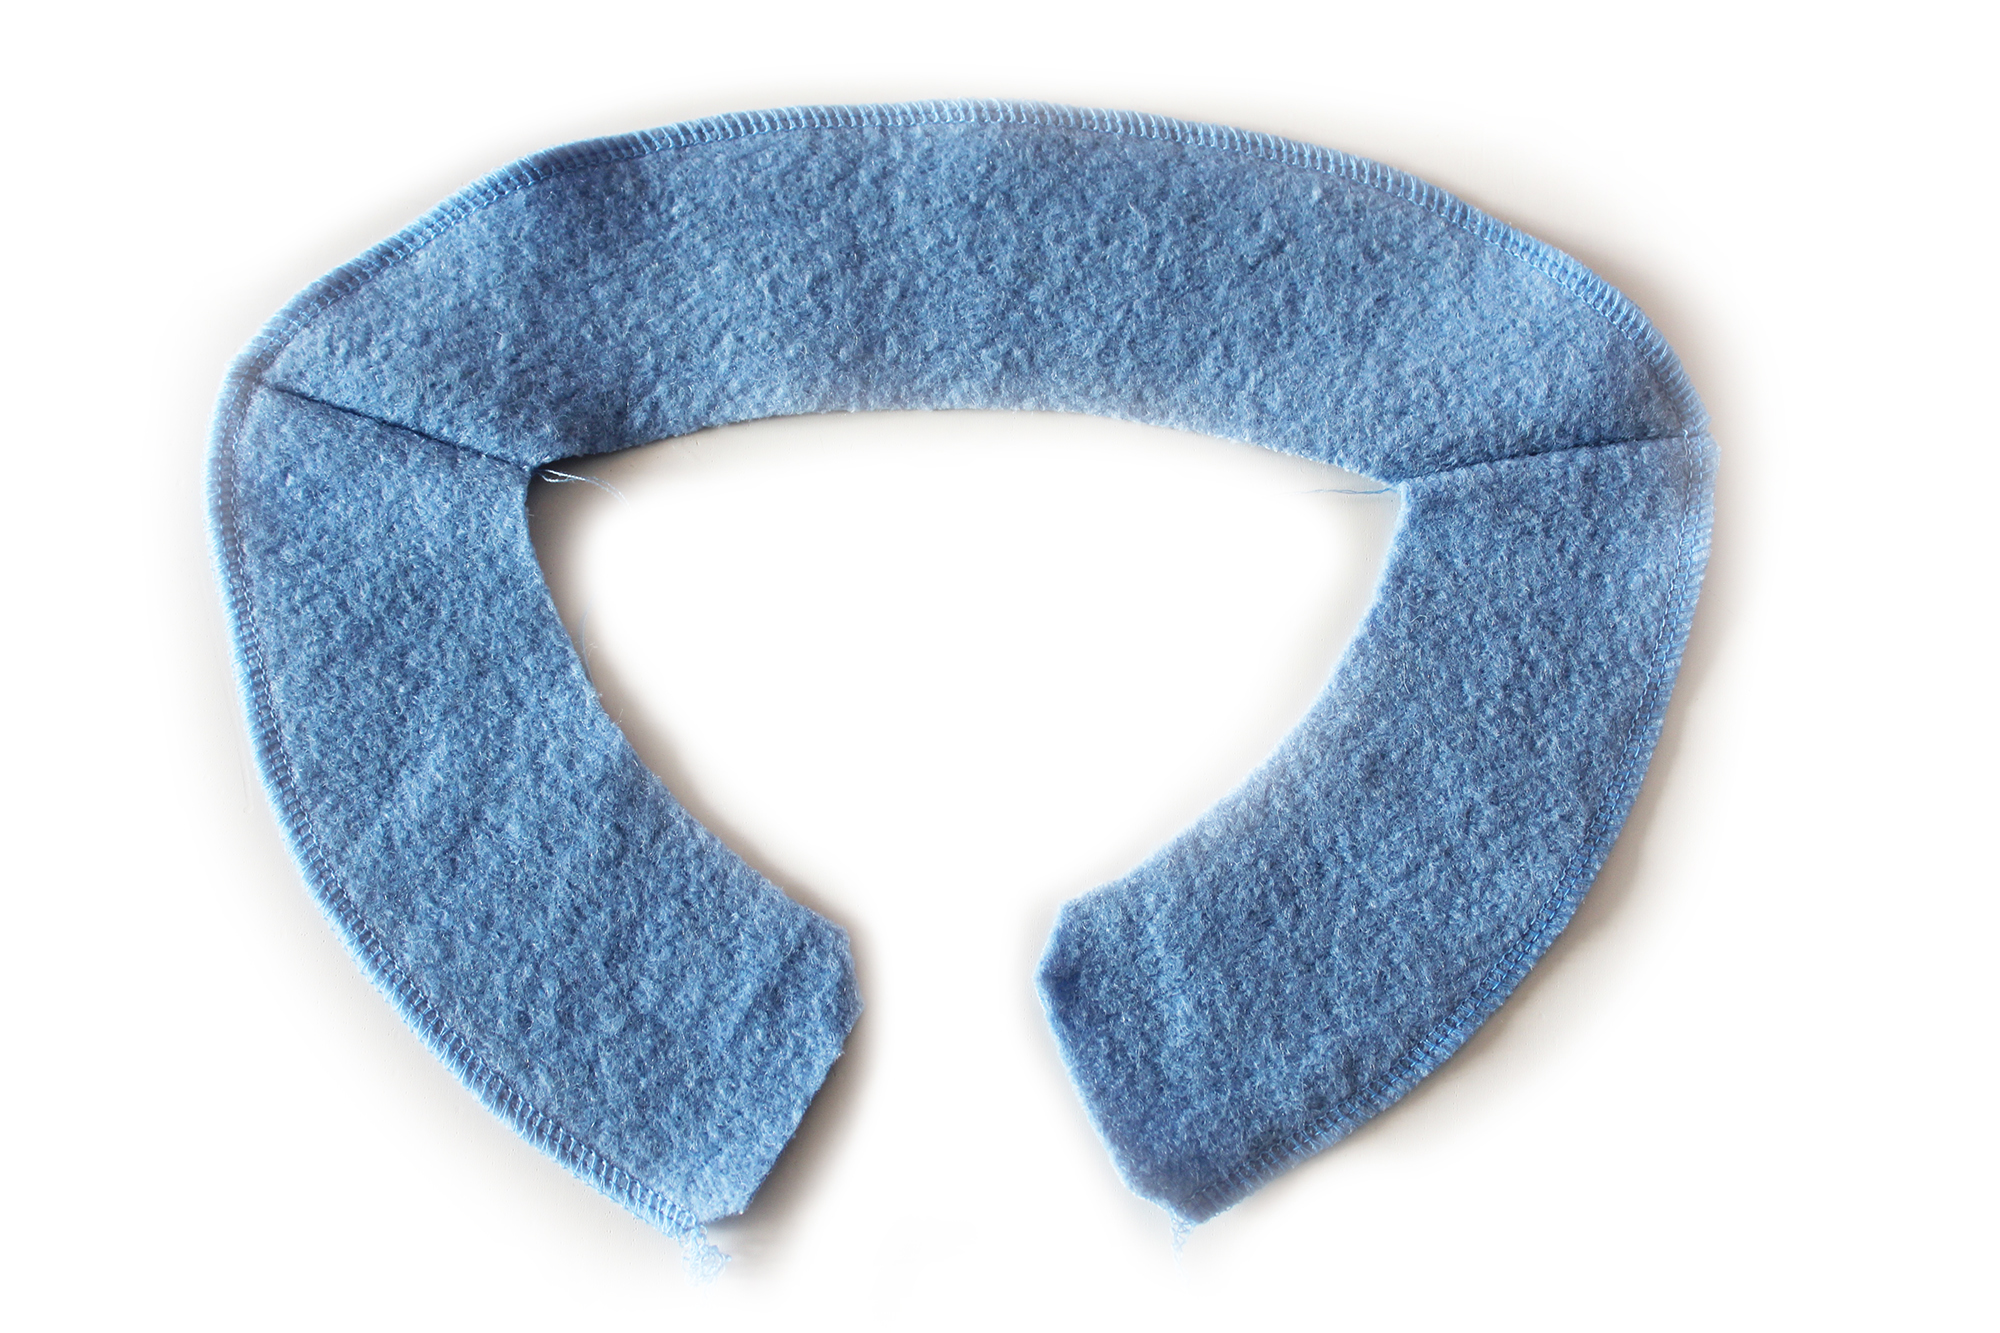
Sew the (interfaced) facing pieces RST. Press the seam allowances open. Finish the outer edge.
SEWING THE POCKETS
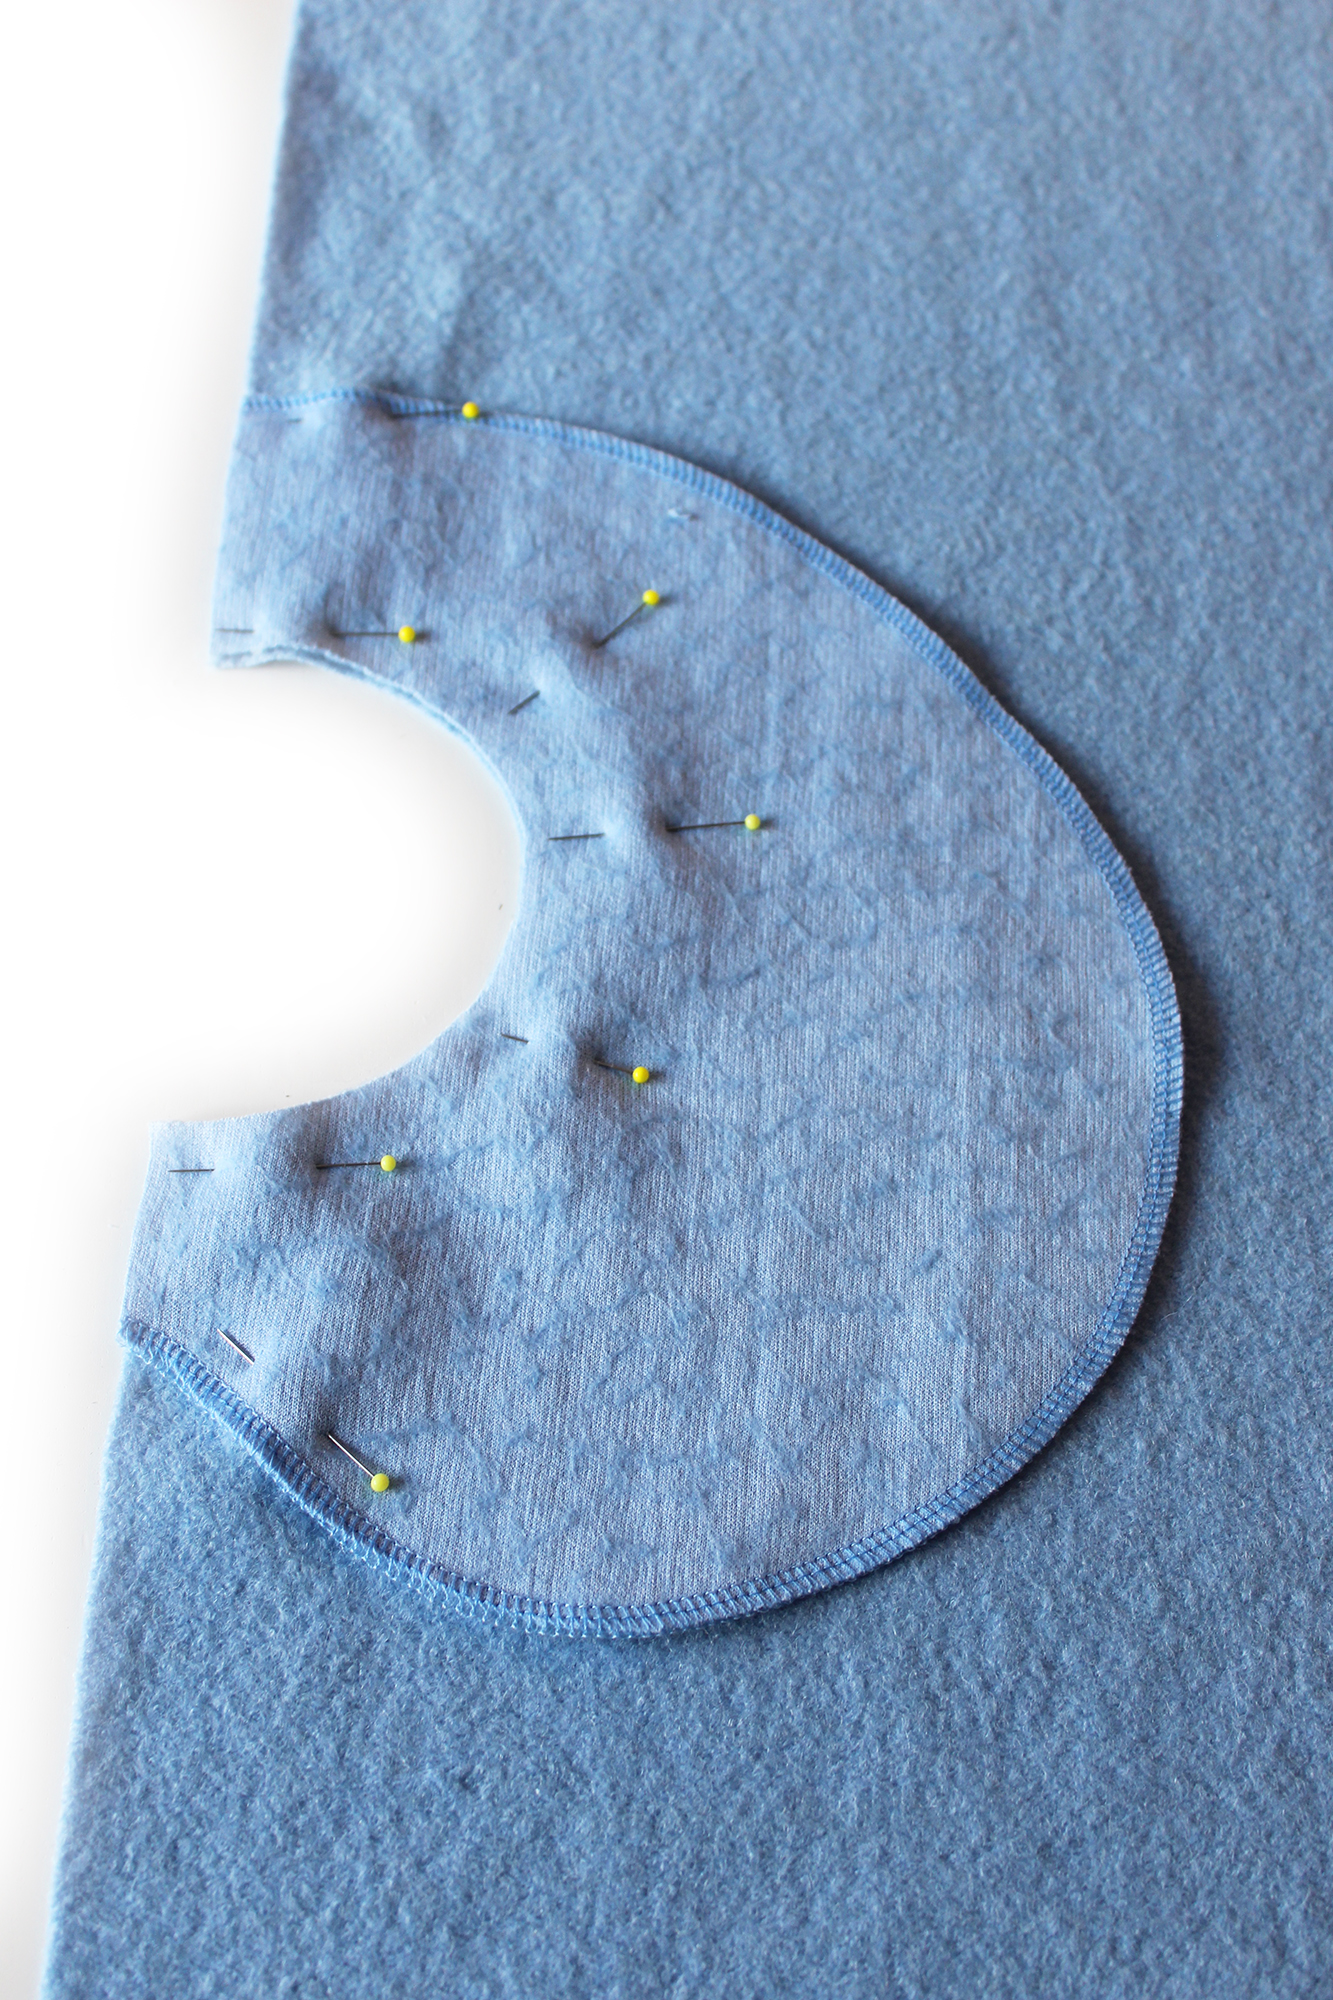 Finish the outer edge of the pockets and pocket lining pieces. Pin the pocket piece at each side matching the curved edge. Sew. Clip the seam allowances.
 Turn to the WS and topstitch 1cm away from the edge..
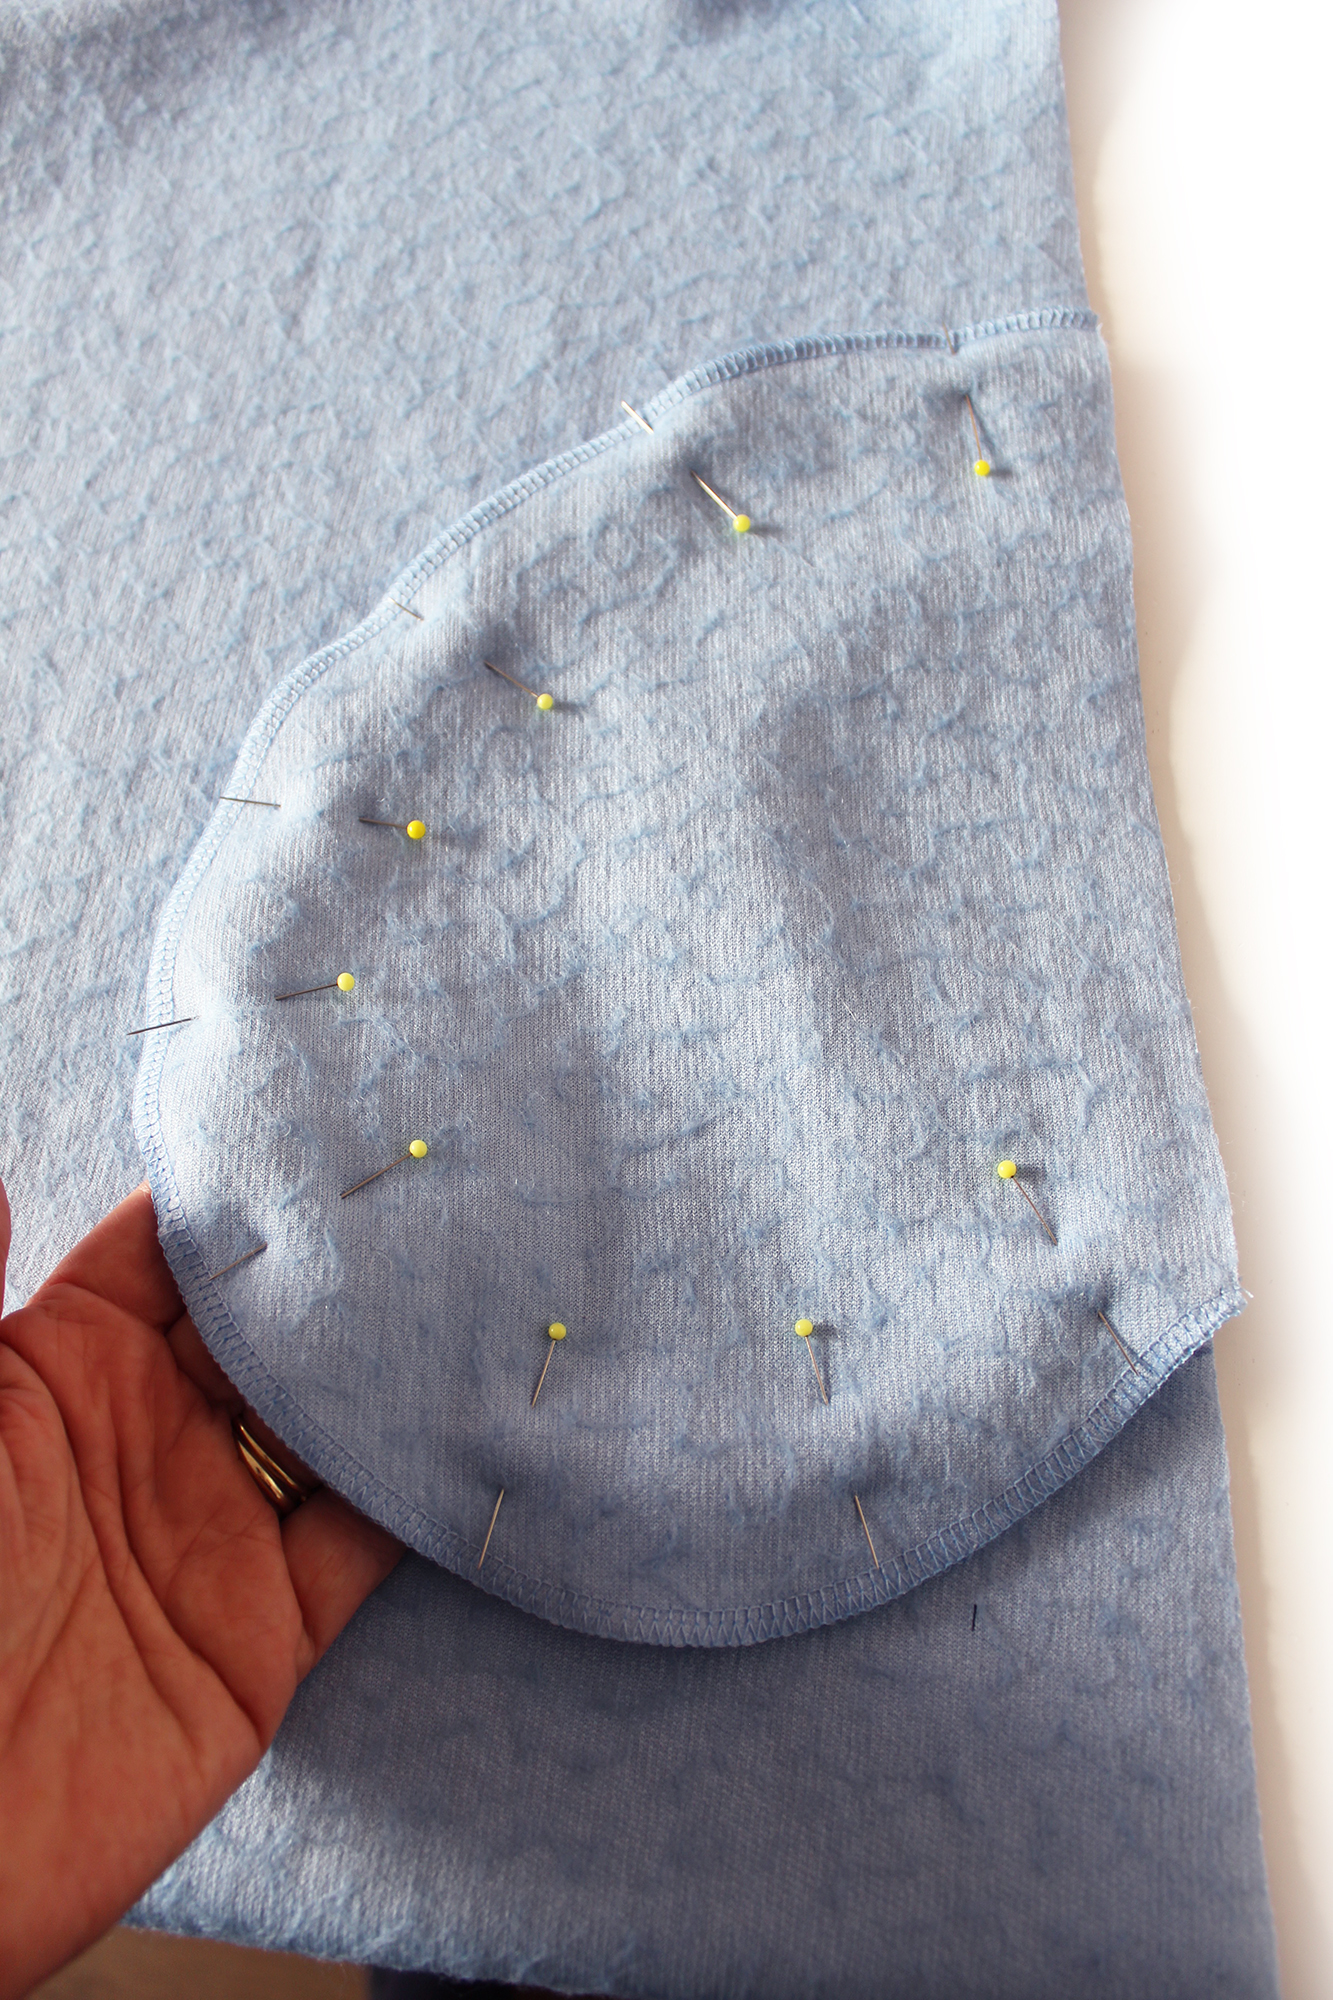 Pin the pocket lining piece to the pocket at the outer edge. Sew.
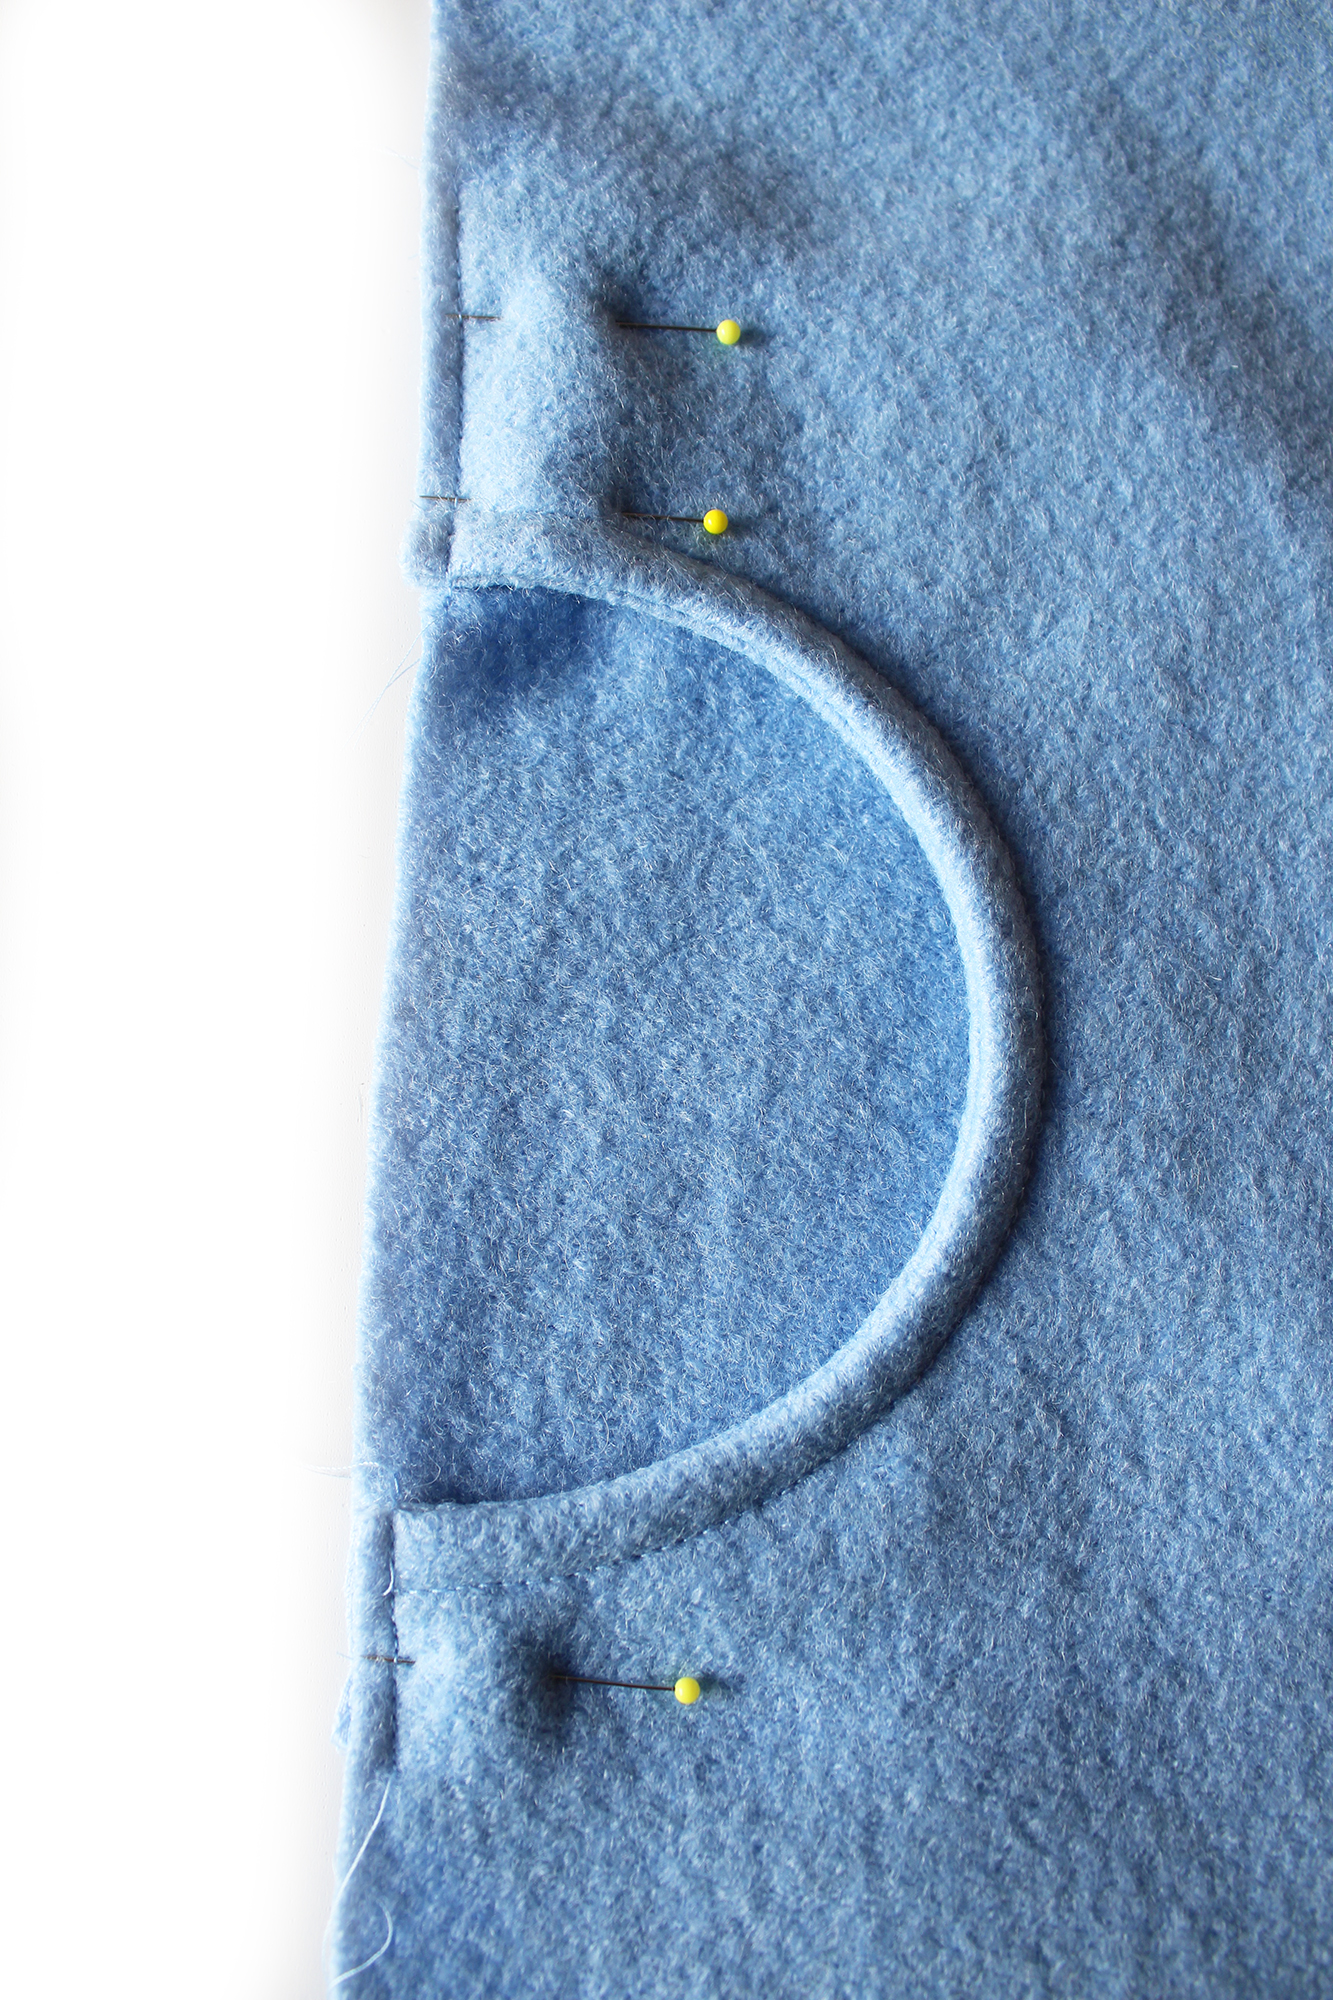 Tack stitch at the sections above the pocket curve to secure.
SEWING THE FRONT TO BACK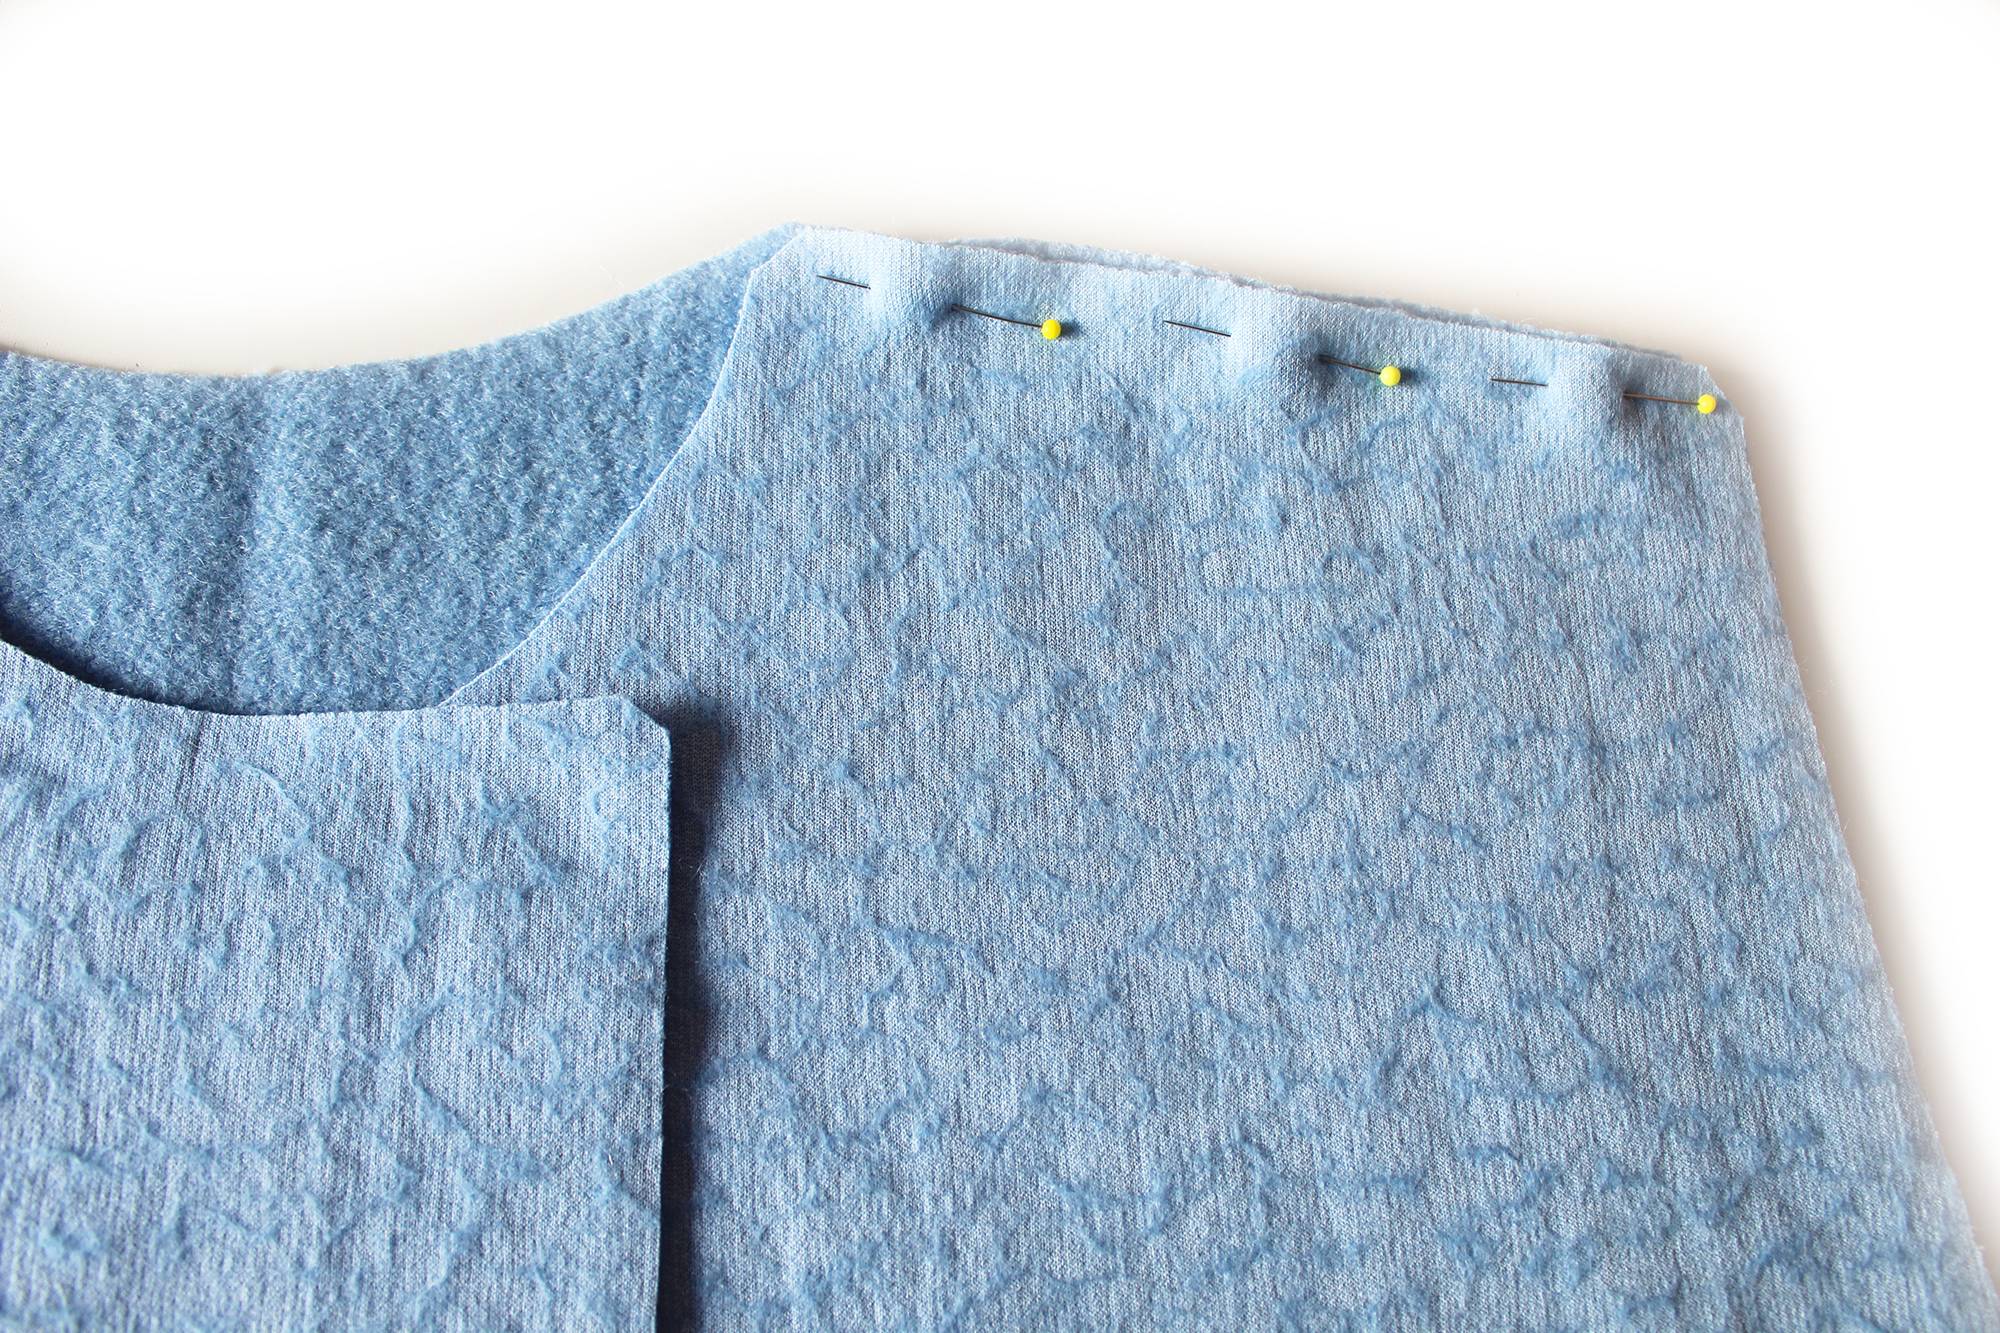 Pin, then sew the front to back at the shoulder edges. Finish the raw edges together. Press towards the back. Top stitch on the right side. Staystitch around the neck edge.
Sew the front to back at the side edges. Finish the raw edge. Hem the lower edge of the front and back piece.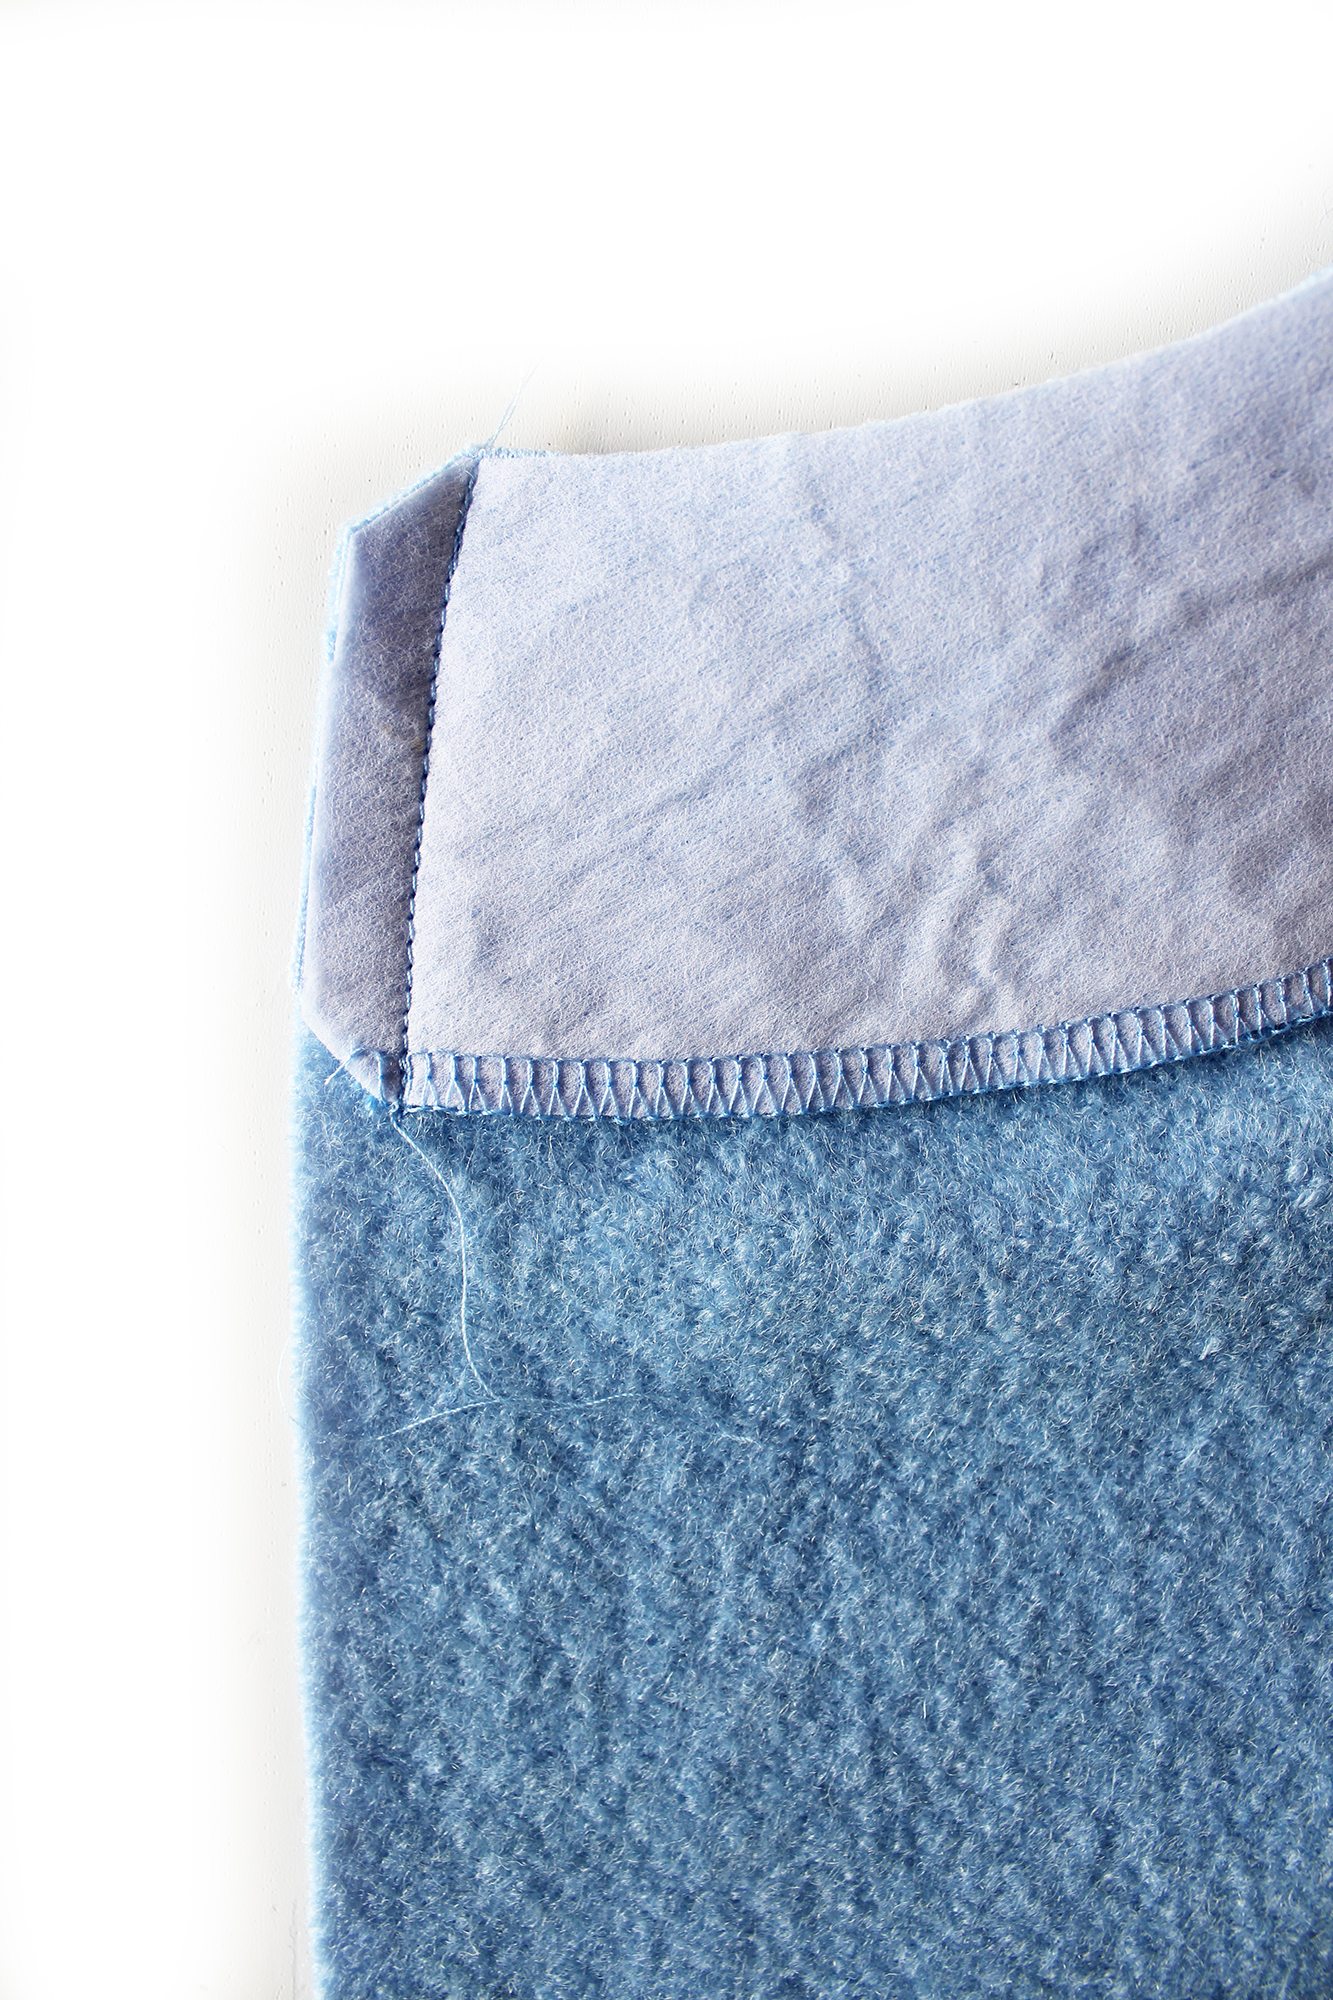 Pin the facing to the Front at the top side edge. Sew. Press the seam allowances open.
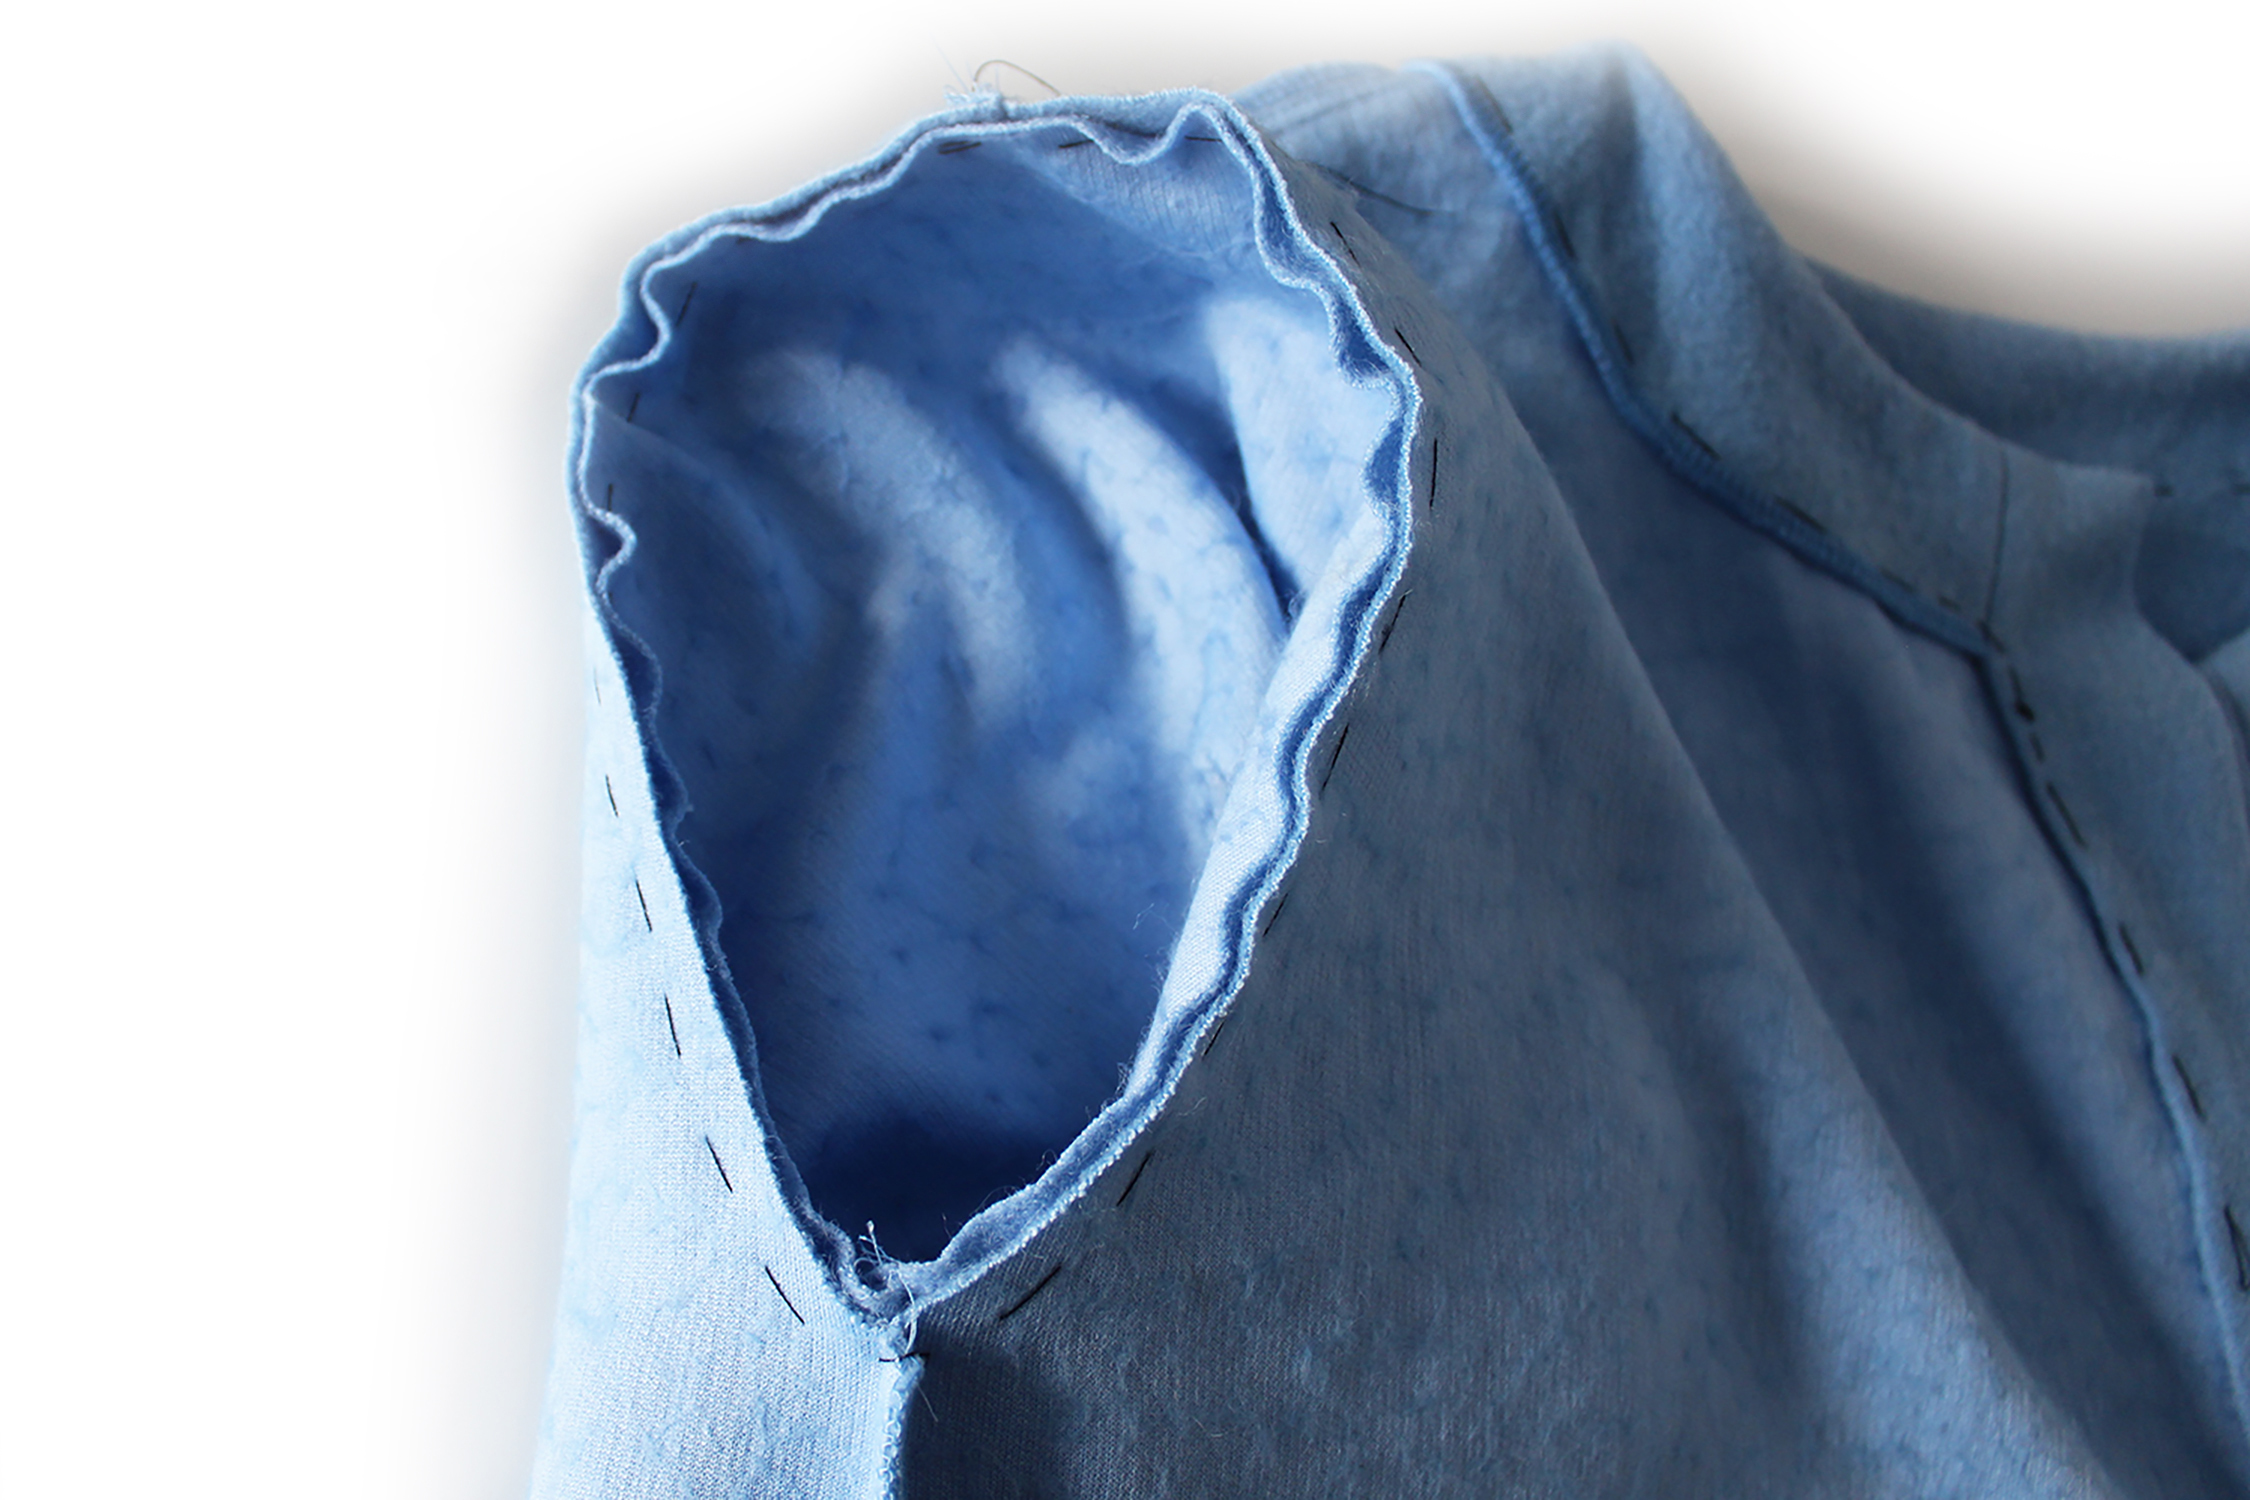
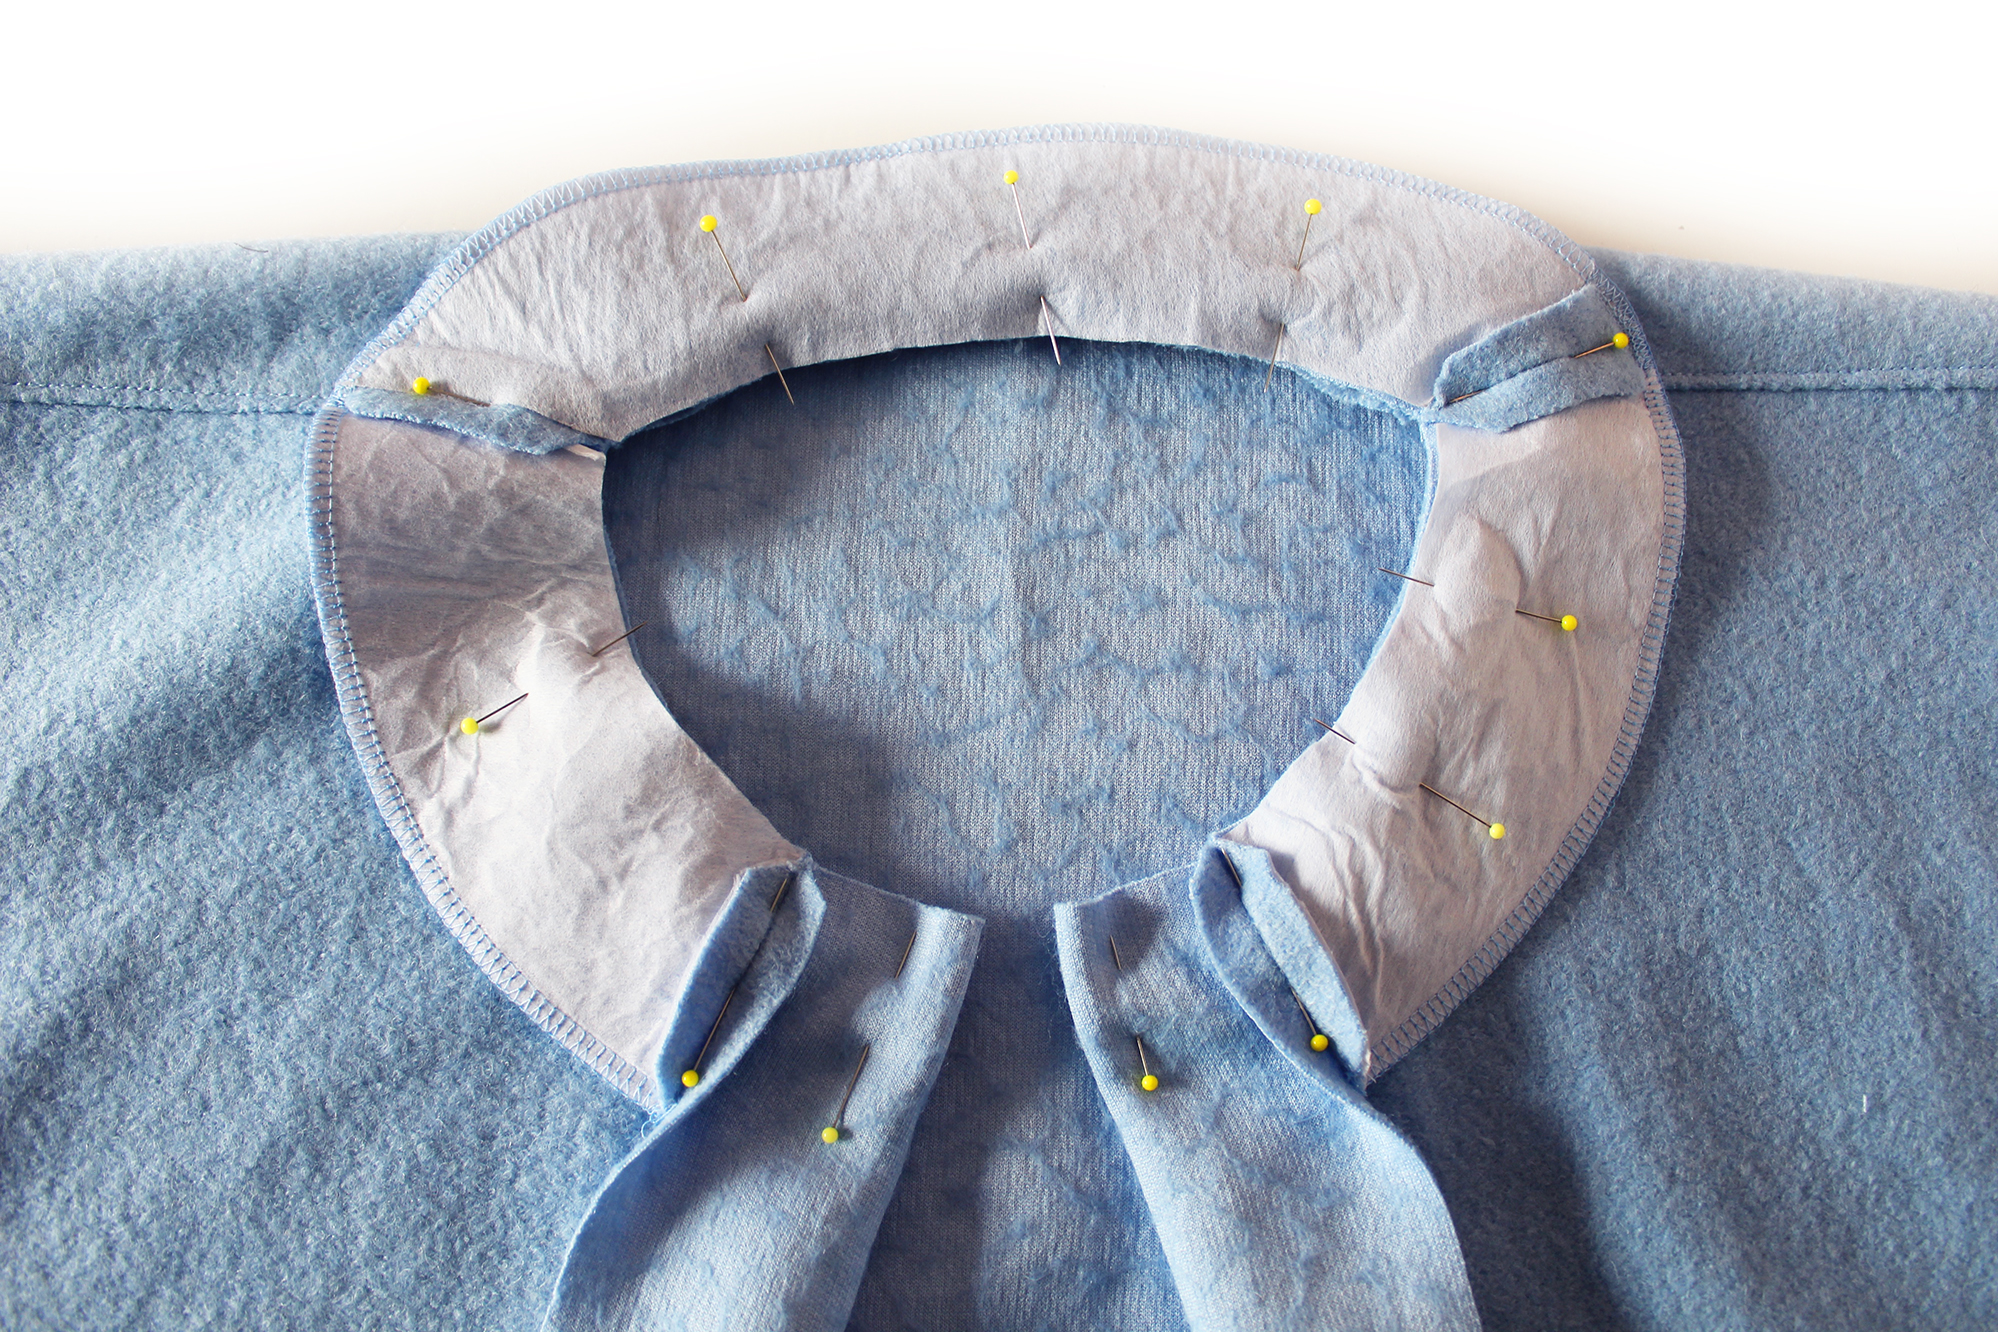 Pin the neck facing to the neck edge, match up the cross seams. Hand tack stitch all around the neck edge. Sew.
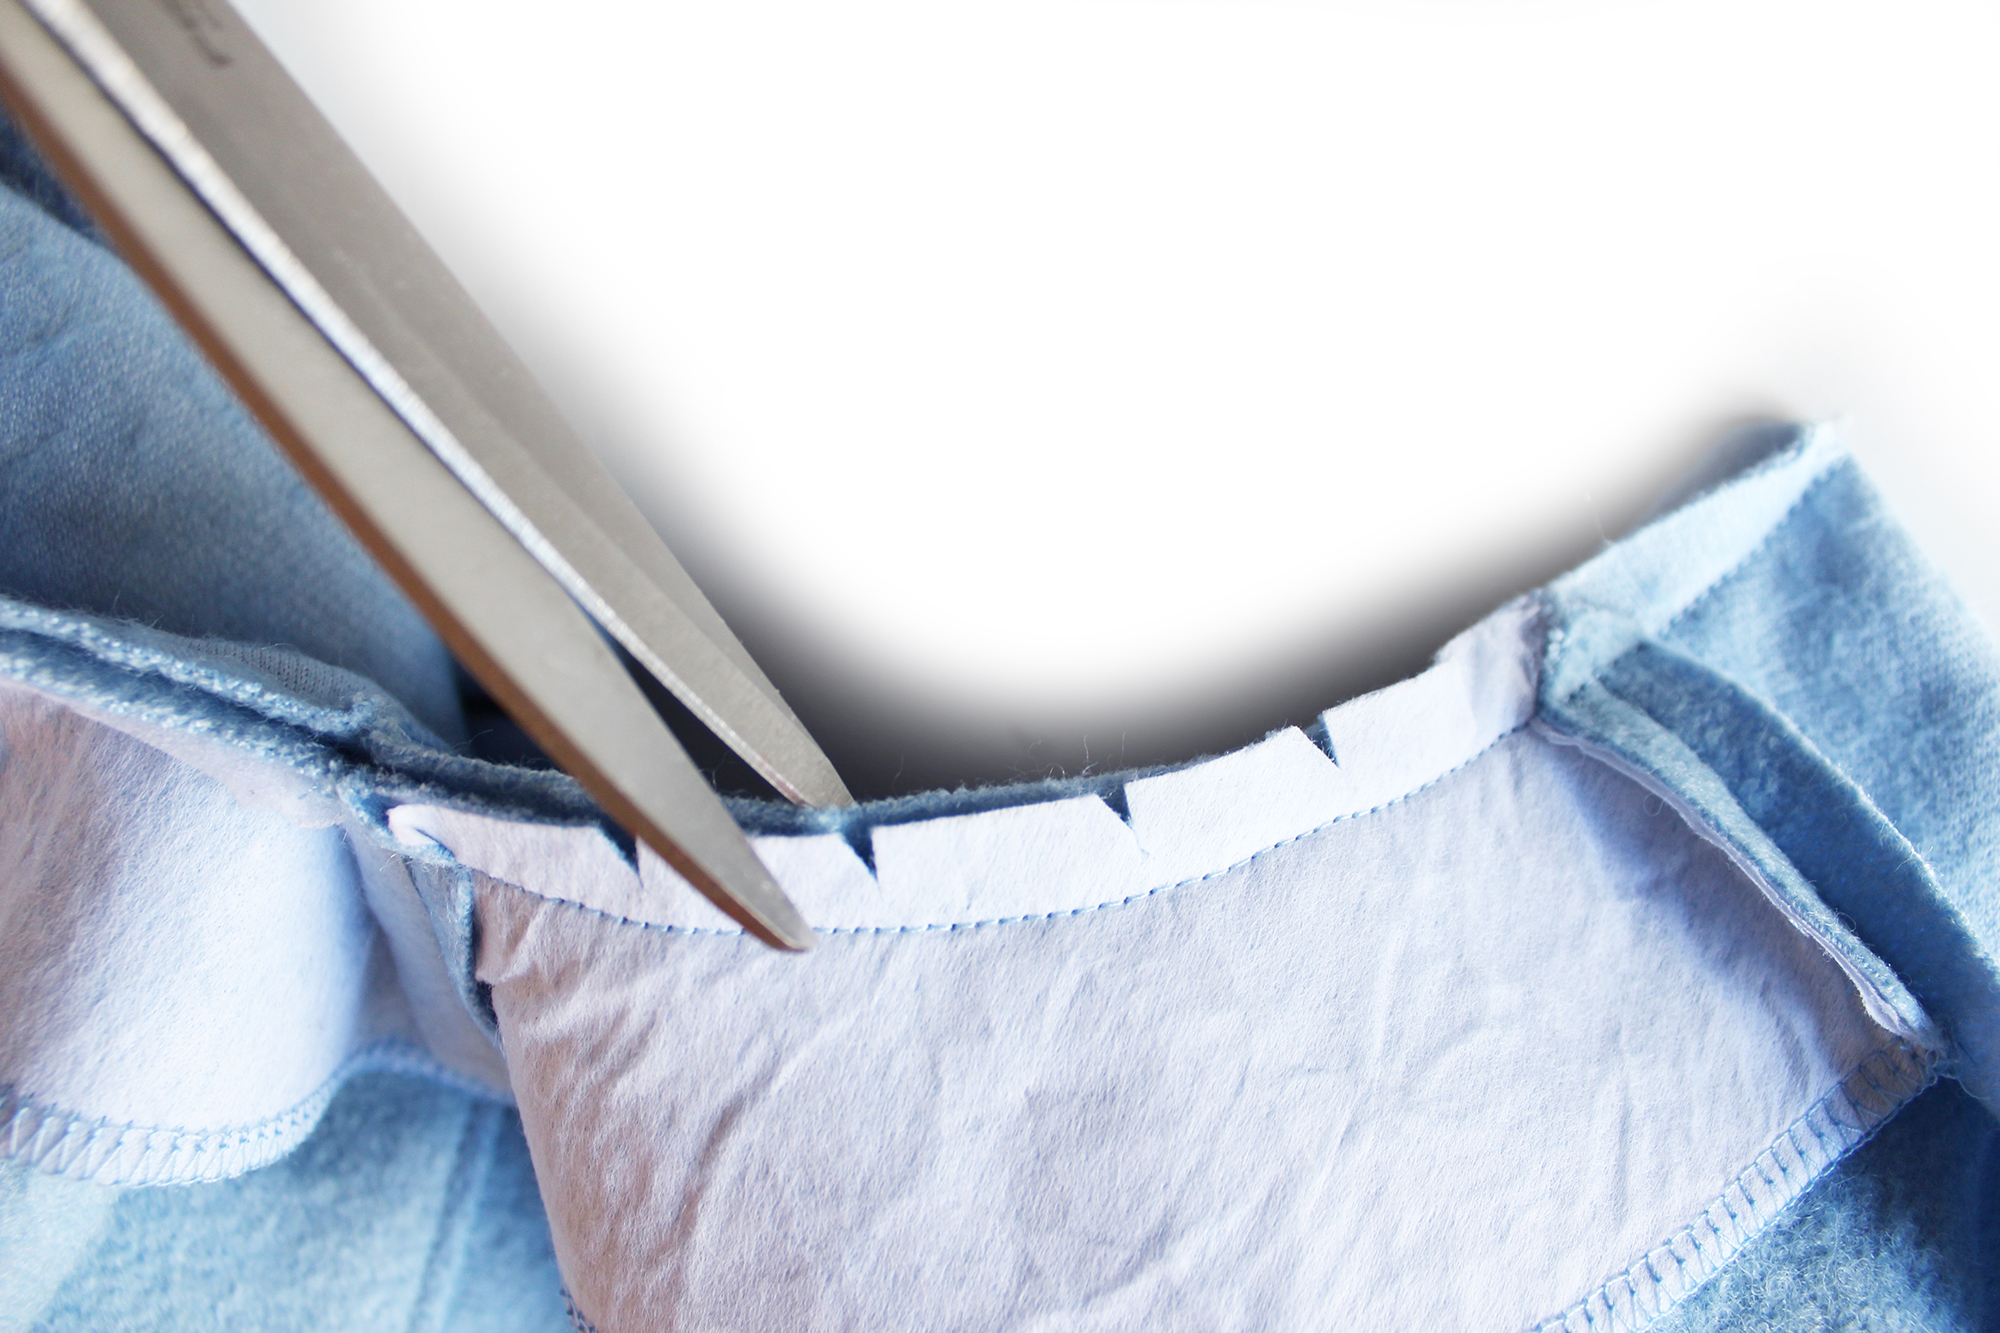 Nick the seam allowance all around.
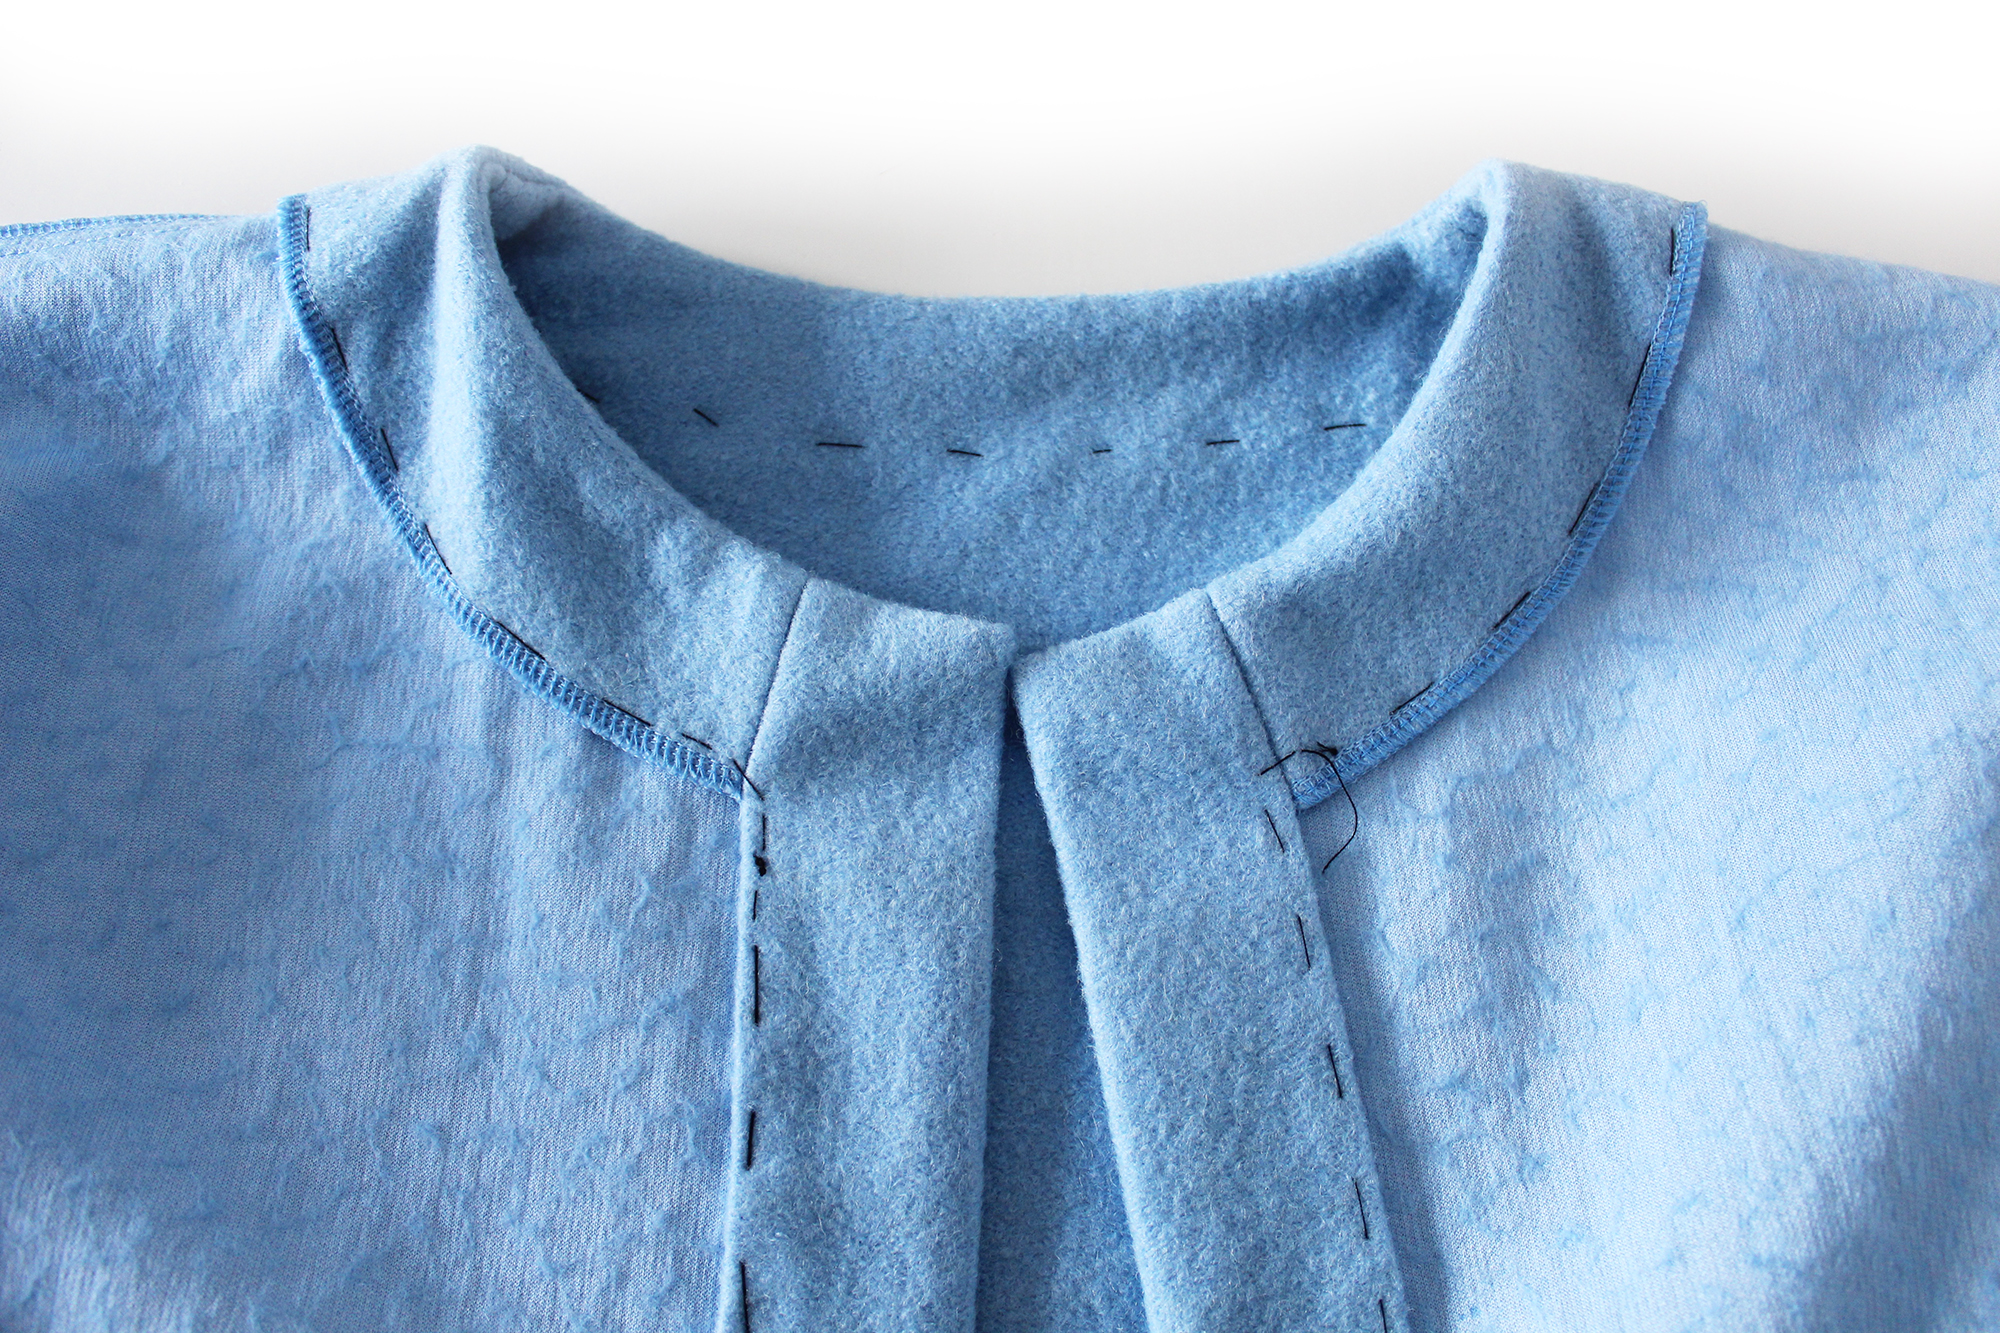 Fold over to the reverse side. Hand tack stitch around the neck facing. Fold over 1cm at the centre front edge. Press. Hand tack stitch down the front to secure.
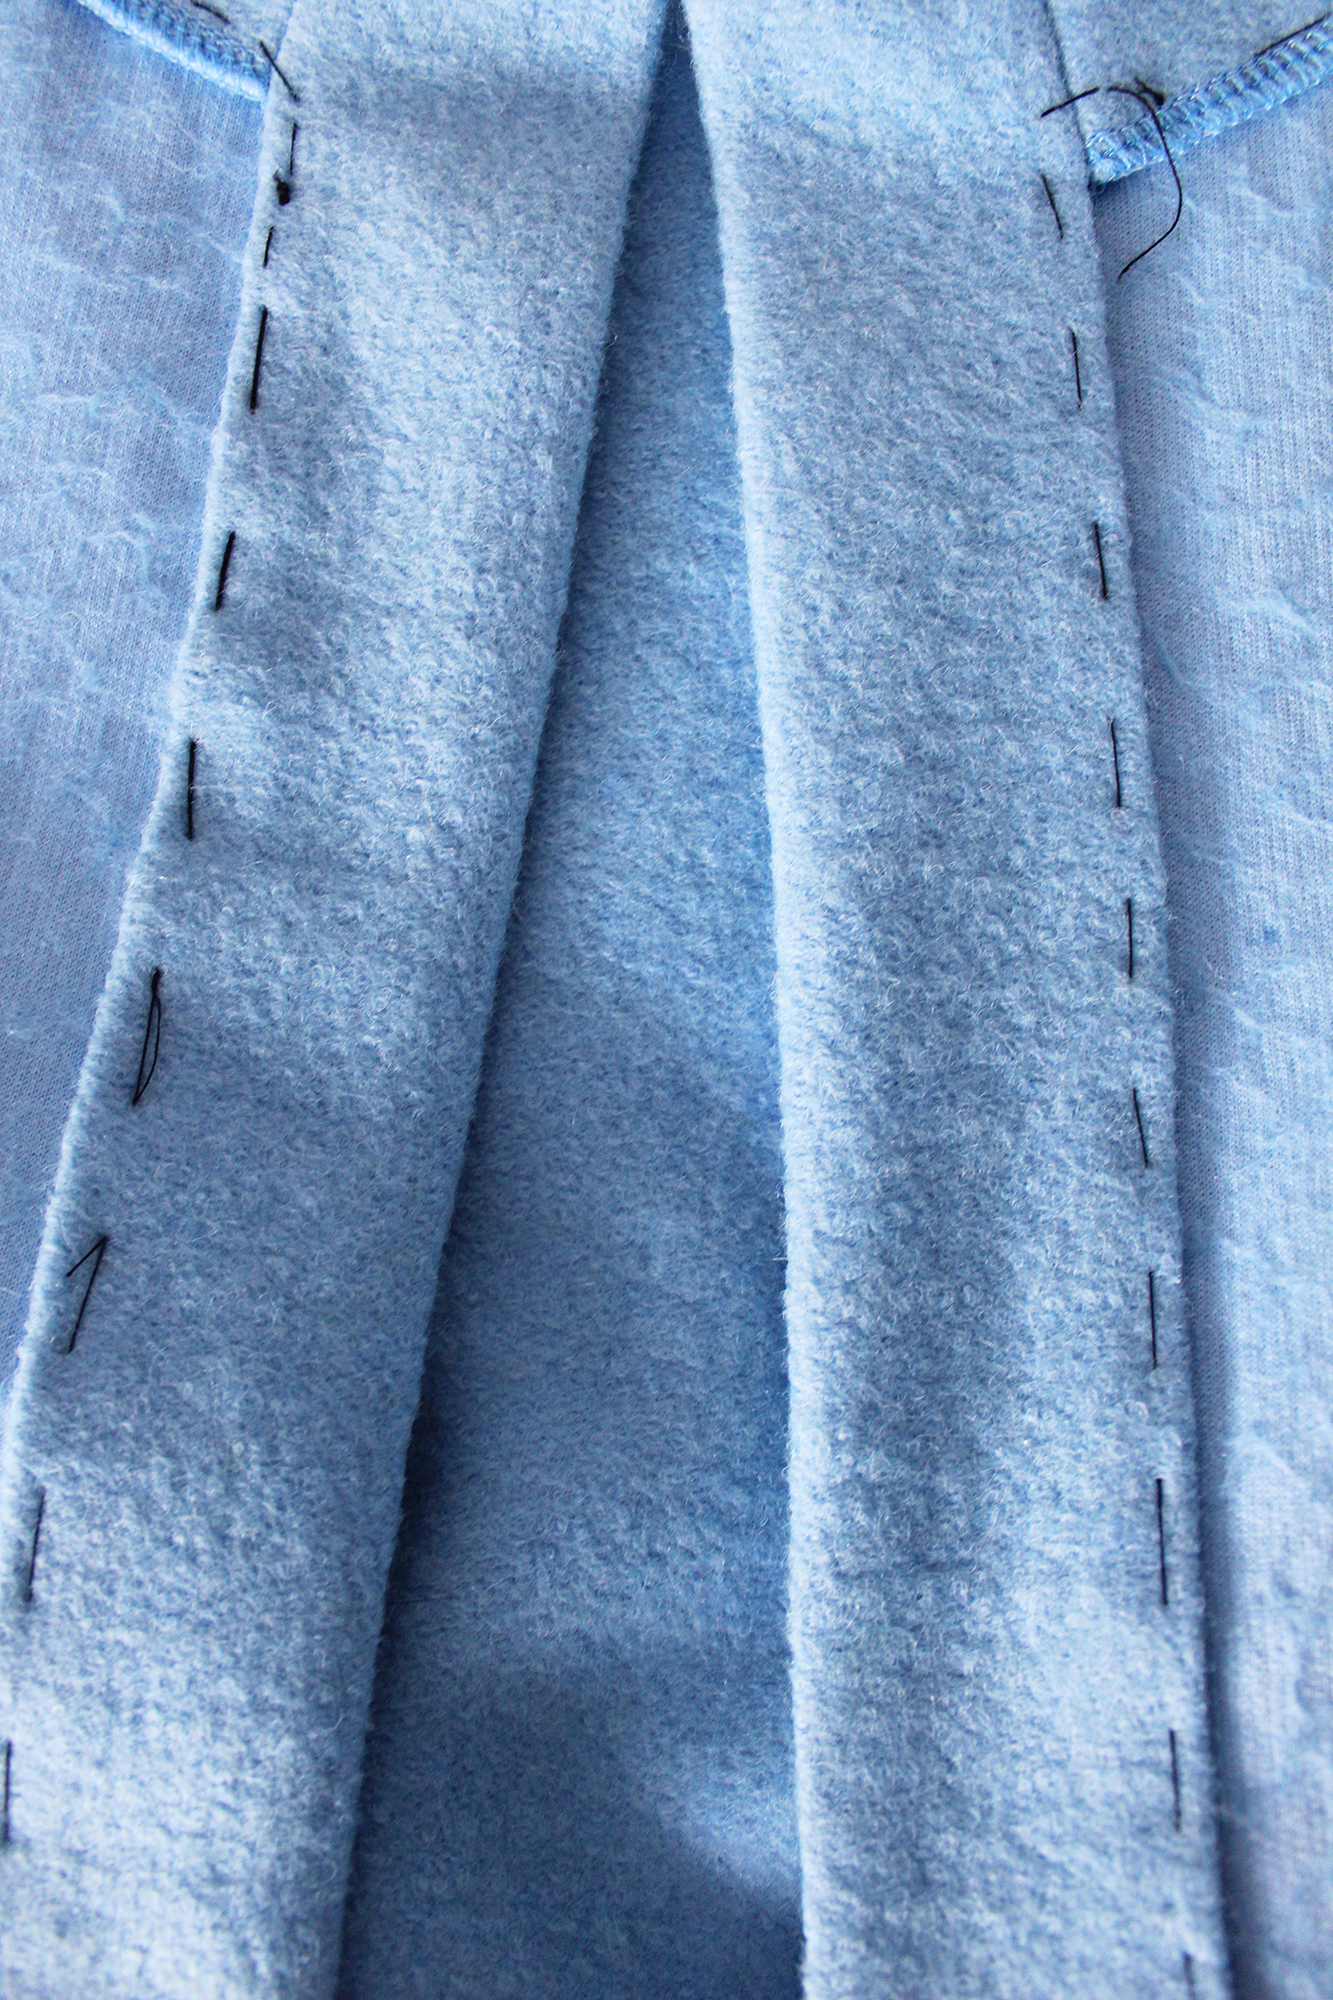
Stitch around the neck facing and down each long centre front band.
SLEEVES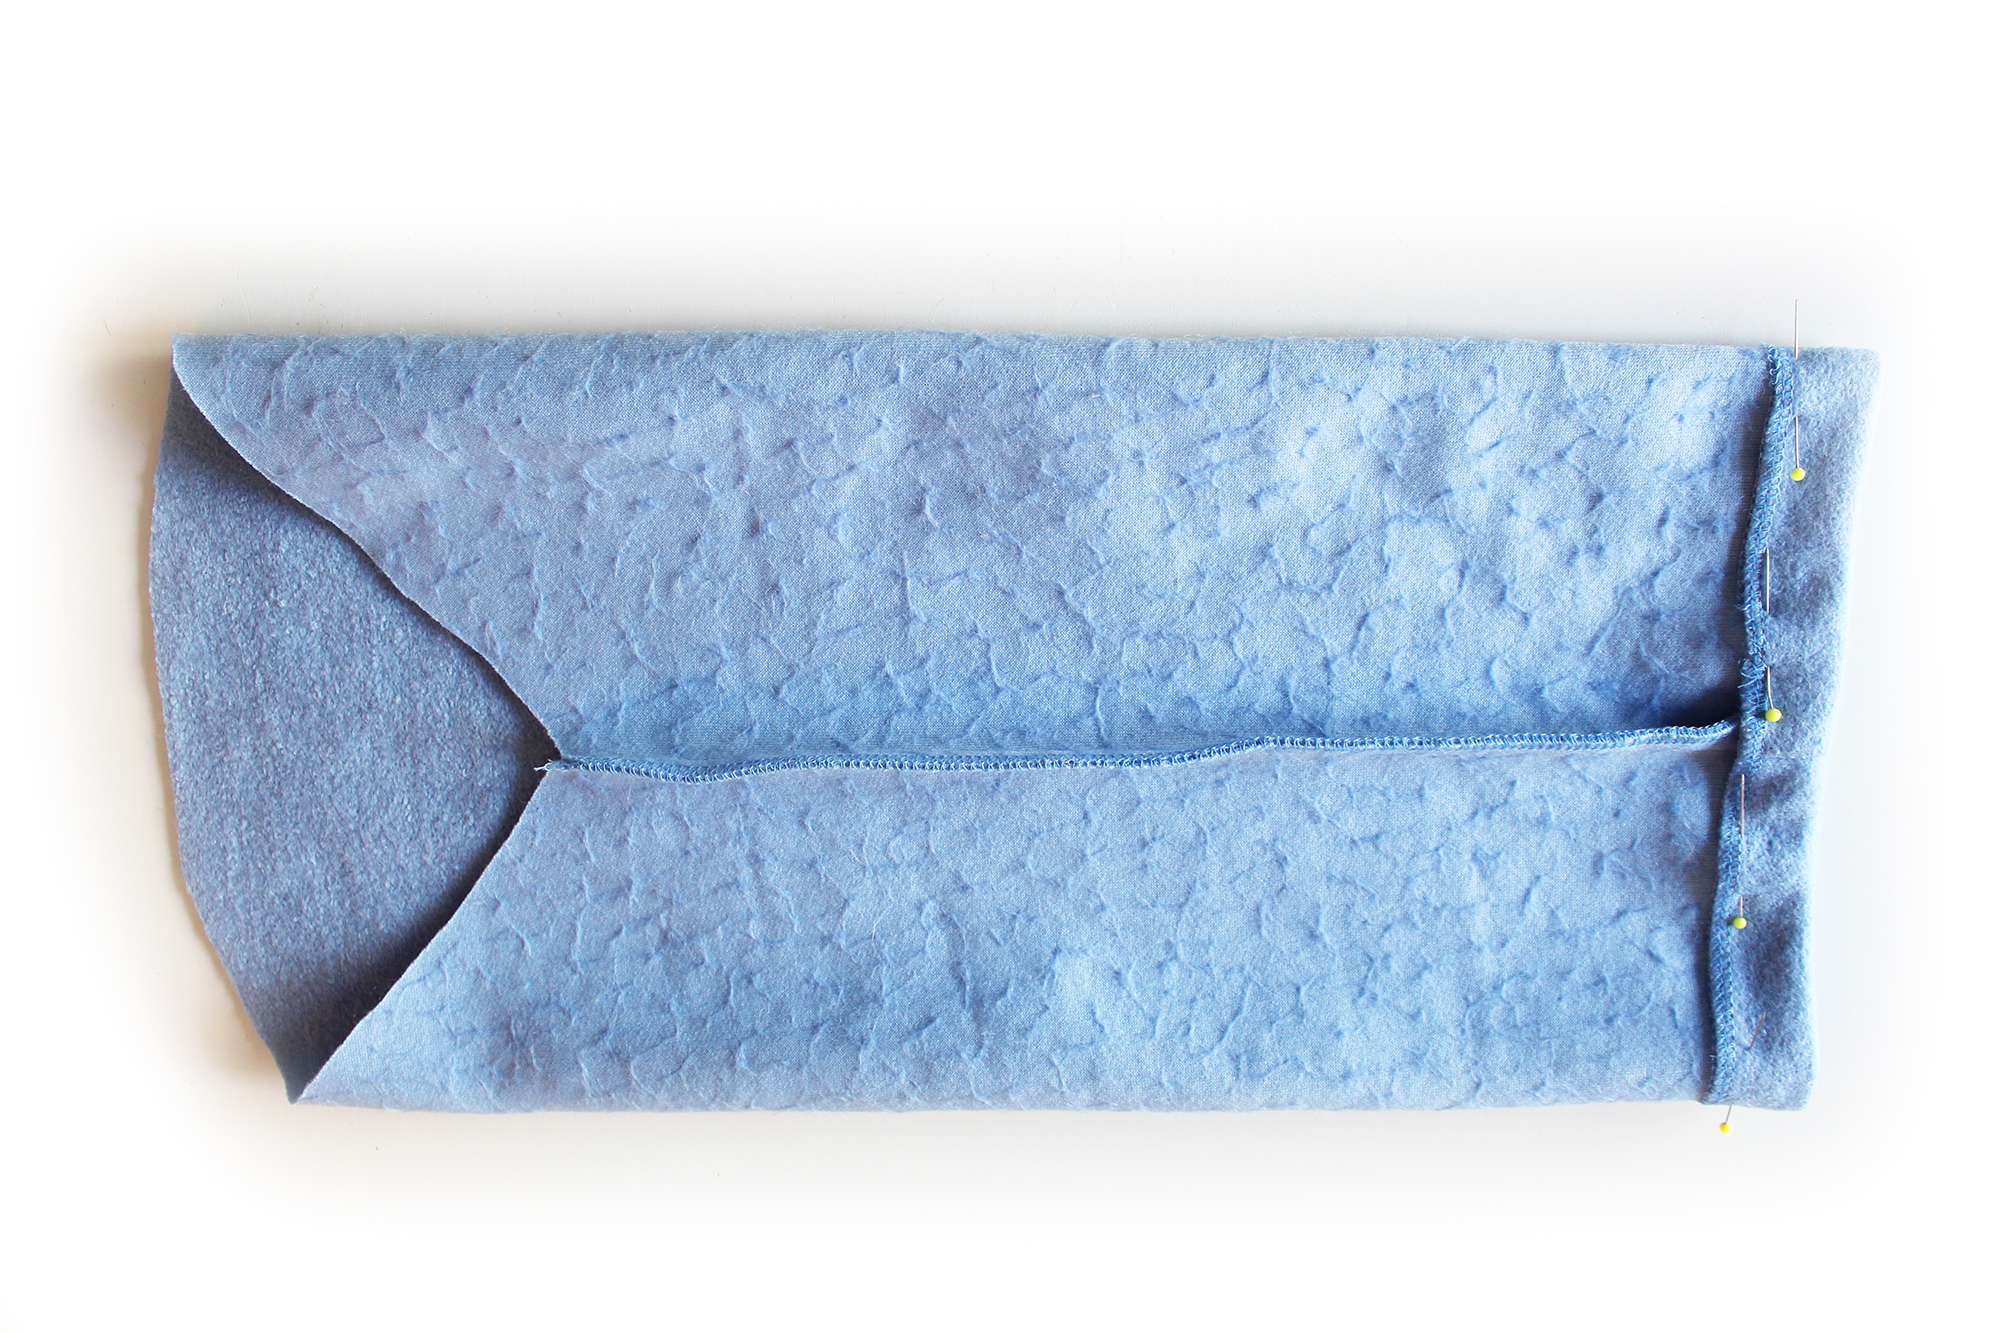 Pin the sleeves RST at the long side edges. Sew. Finish the raw edge. Press. Turn under the cuff hem, press, pin. Stitch.
 Pin the sleeve to the body, align the back of the sleeve head (see template) to the back. Sew. Finish the raw edge. Press. Topstitch on the RS.
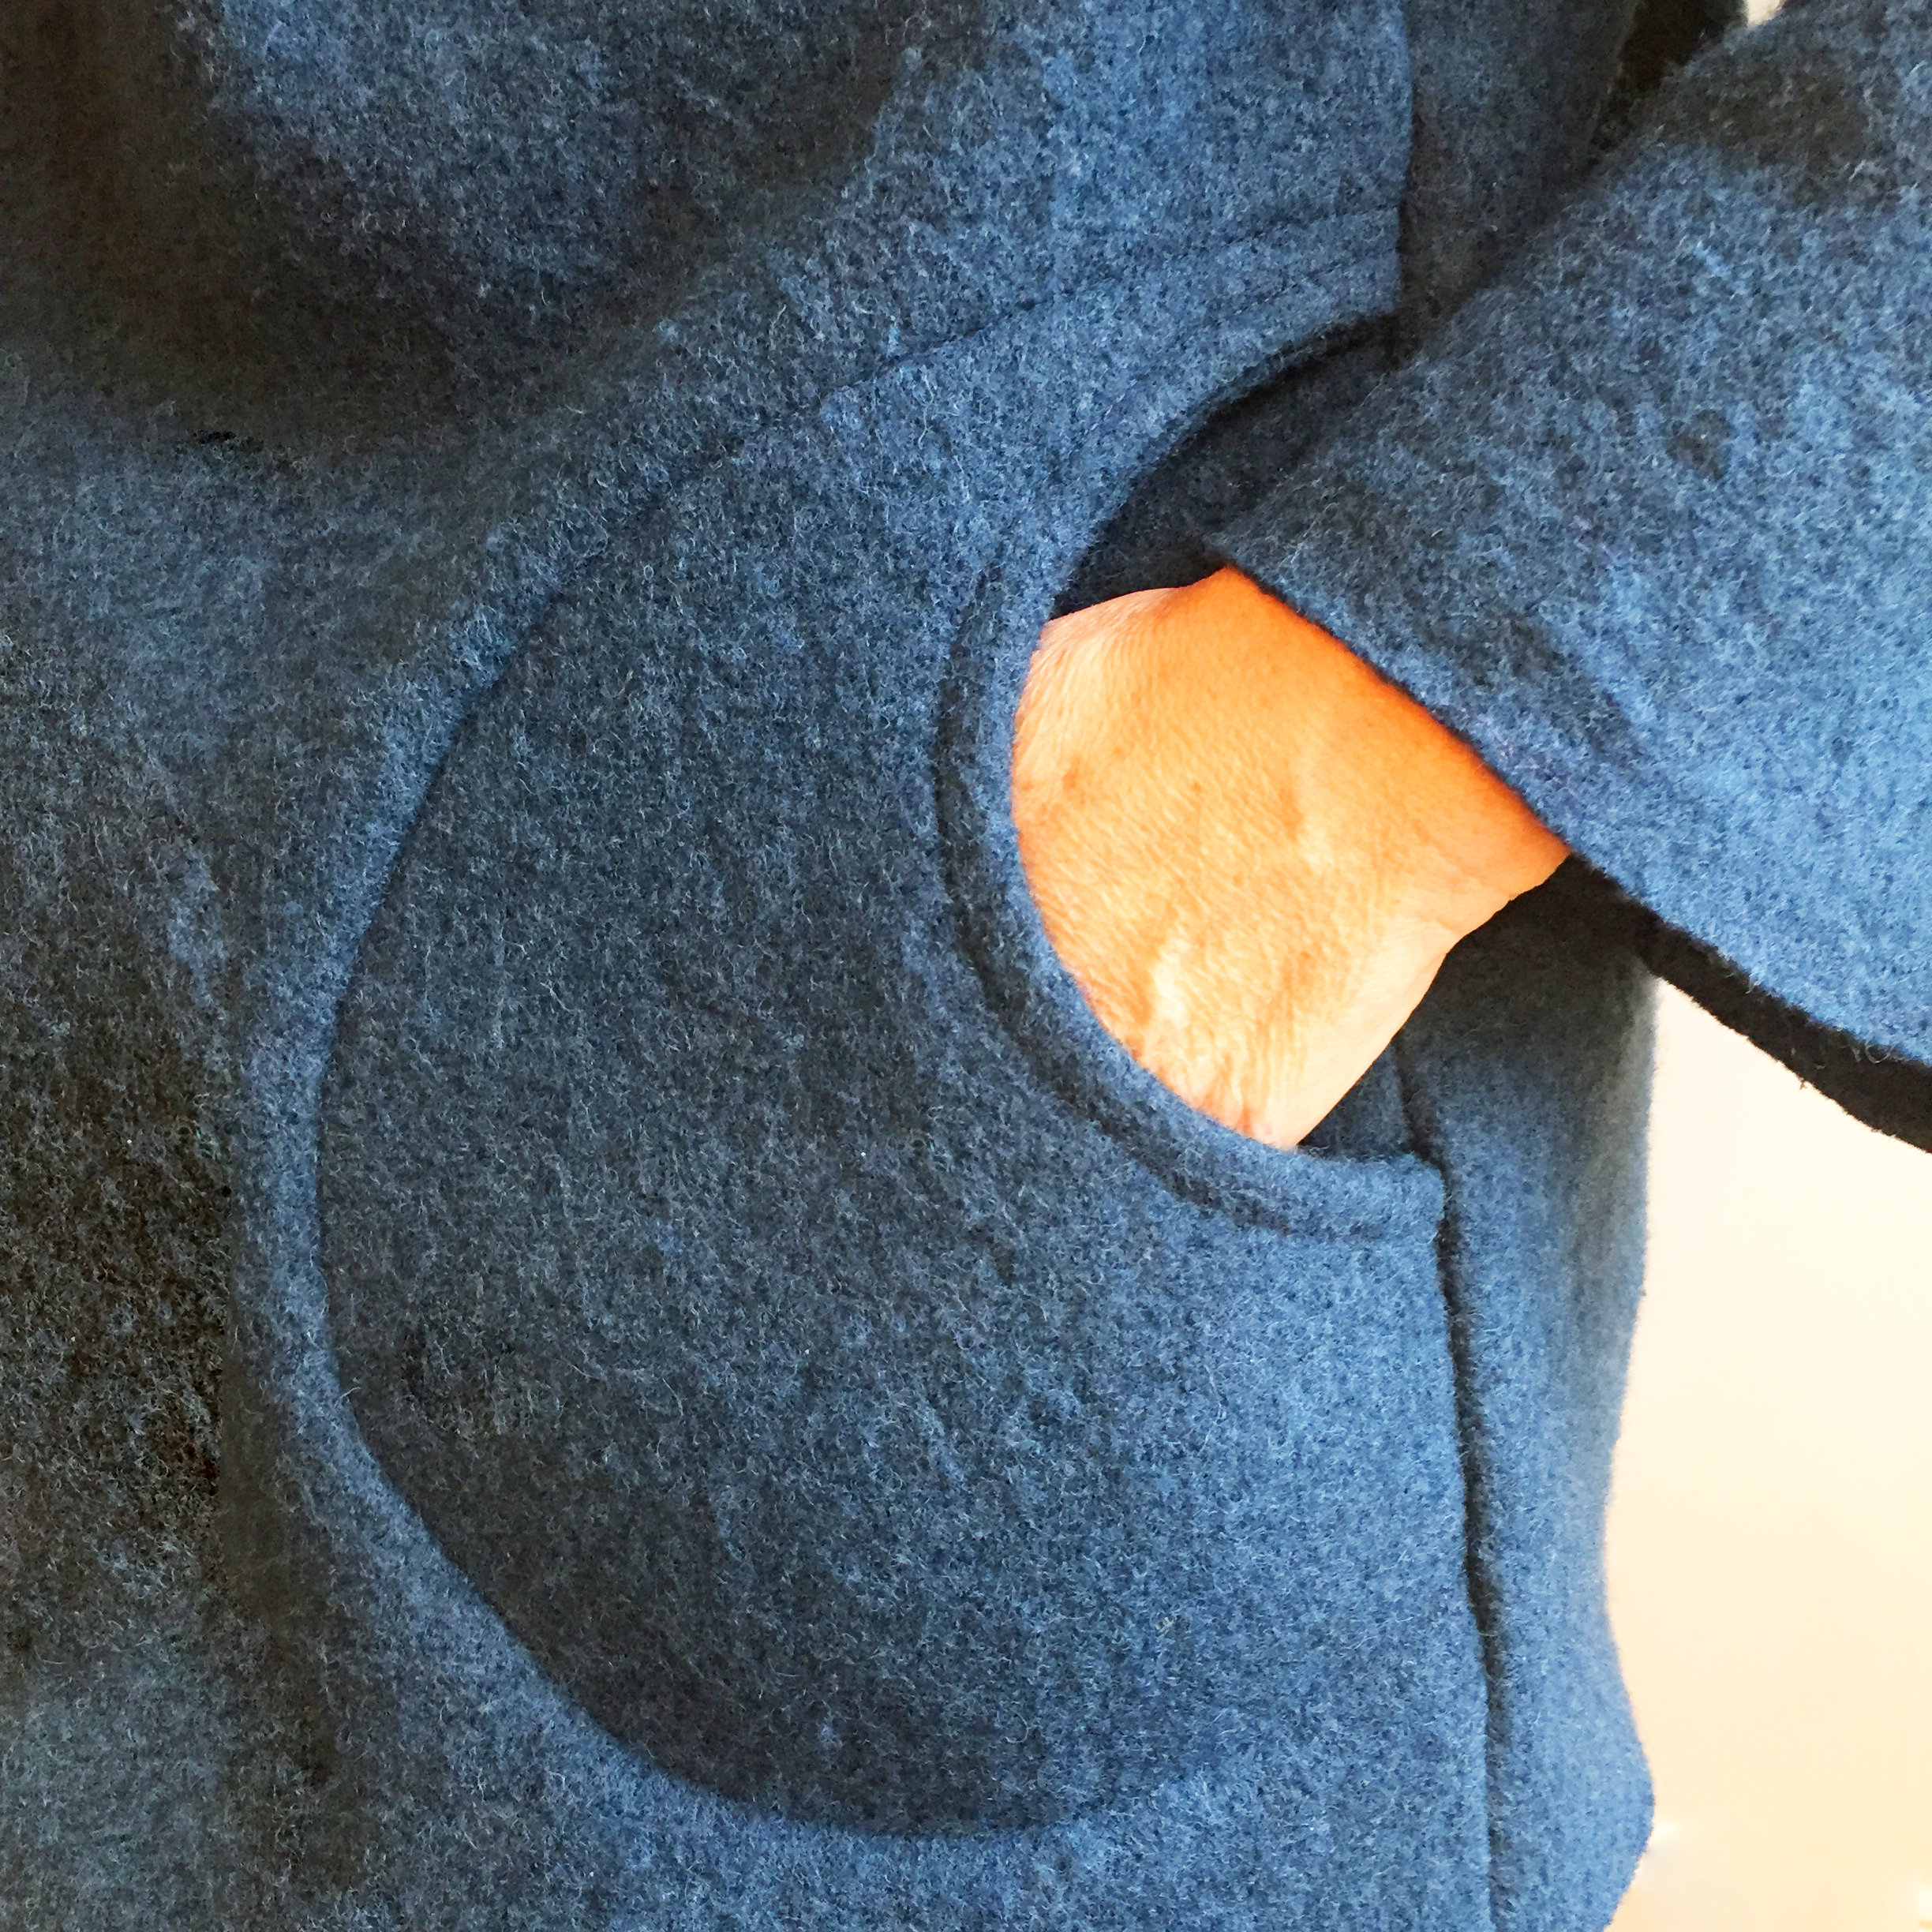
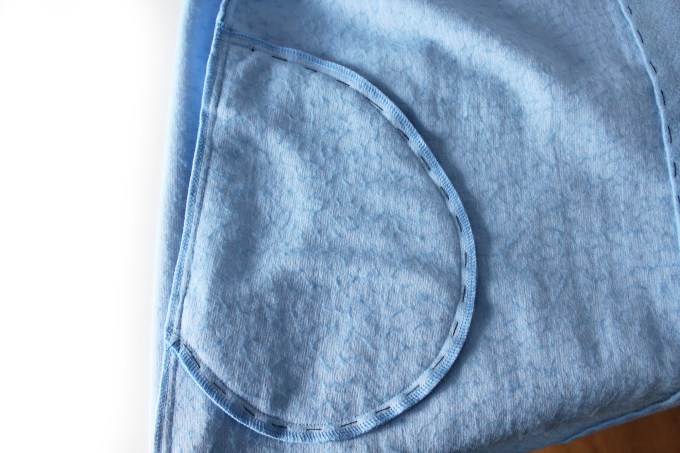 Pin, hand tack the pocket to the body. On the reverse side, stitch around the pocket with a longer stitch length. This will define the pocket on the RS. Like this……
TO MAKE SELF COVER BUTTONS (34 x 29mm) So I made up the four large self cover buttons, which to be honest, with this fabric, were quite a challenge. Of course you could use normal large buttons or none at all. Anyway, I did get there in the end, heres a few tips which hopefully may make it easier for you:
- Flatten your disc of fabric as much as possible with a steam iron, bash with a hammer or pull it apart so its as thin as possible.
- Push your fabric under the claws as much as possible, I used a tool like this one (below), which really helped, but you could use the end of a screw driver or old scissors.
- Then, getting the metal button backing disc on was tricky, brute force is needed, but if you really cant get it on then I recommend covering the back with a small disc of fabric with a small slit in the centre for the wire loop then, sewing the button fabric together underneath to hold it together, then stick the disc over the top with fabric glue. In a lot of ways I think this is actually better than getting the metal back on because then you don’t see any metal on the back at all.
Snap fasteners: Then I stitched on the poppers, to match the buttons. You could always use bought buttons rather than self cover ones or have no buttons at all.
One last thing…..
Pilling: By the way, if you are getting pilling with your boiled wool, I’ve read that it helps to spray the fabric with hairspray- I haven’t tried it myself but I’m going to give it a go.
Boiled Wool Washing Instructions – Manufacturer says: A gentle cold-to-lukewarm bath (an actual bath would be good where it can spread out and not need moving about much) with a specific wool wash. Avoid agitation or wringing. Carefully rinse and roll and press in a towel to remove excess water. We strongly recommend testing a small piece first to be sure.
How to make an URSULA HACK JACKET VERSION
In a nutshell, this hack version is where the front band is left unfolded, no hems at all on the lower edge or cuffs with a back collar piece added to to make a rever fold back collar. It makes for a more relaxed Japanese feel. The pockets are stitched as normal.


So you may have seen my show on the Sewing Street where I demonstrated my Ursula Coatigan. You can catch up here on the YOUTUBE link. Scroll on to the fourth hour for the Ursula demo. I’ll also be doing a demo of this hack version on October 14th 2021. I’ll upload a Youtube link when its ready.
So, the lovely folk at Stitch fabrics sent me some boiled wool to make up a sample and use to demonstrate on the show. When it arrived, I have to say, I was a little bit worried, because it was significantly thicker than other boiled wools I’ve used before. Well, I gave it a go and found that if you used a walking foot (recommended anyway for any bulky fabric), a good strong 90 needle, and made single fold hems on the band and lower hem and cuffs, instead of double fold hems, then you’d be fine.
 The boiled wool was like felt, it didn’t fray at the edges at all, so I thought leave them be. This 100% wool fabric was, I thought, a bargain price and would keep you nice and toastie, and no nasty synthetics! Wonderful!
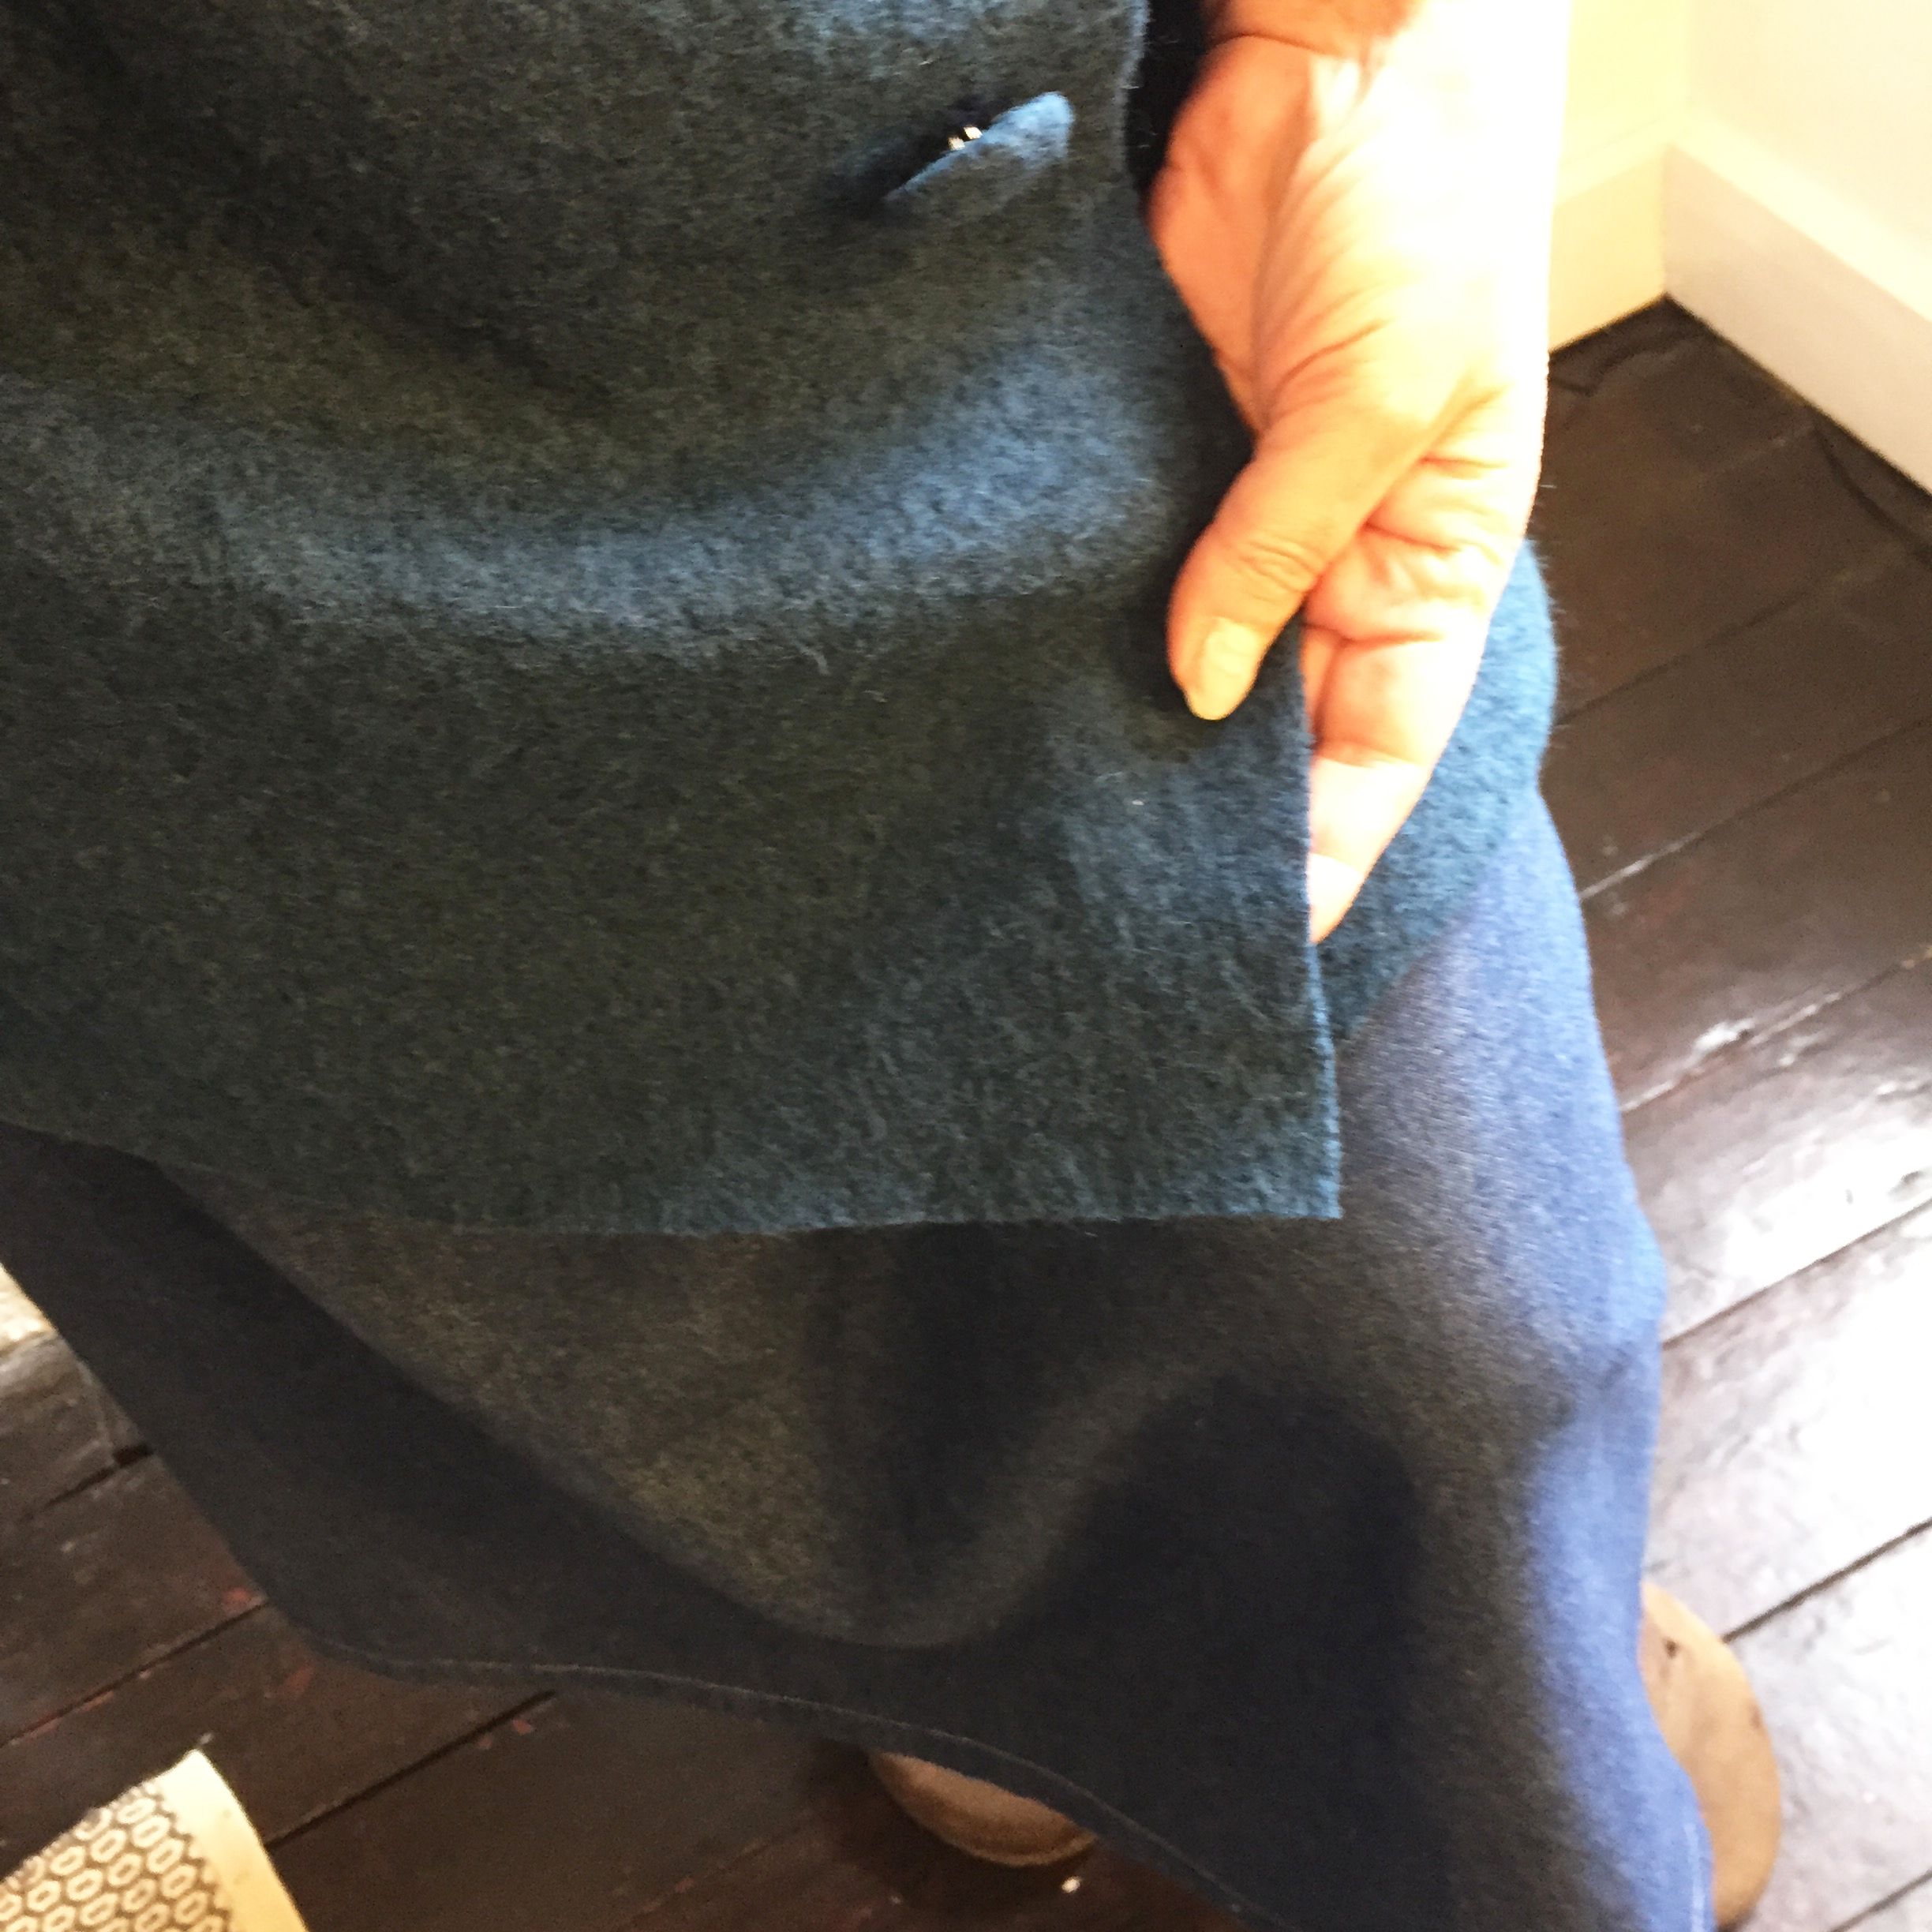
Well I stitched the pockets, and the side edges, inserted the sleeves and all looked good. At this stage, I didn’t hem the lower edge, nor the sleeve cuffs.
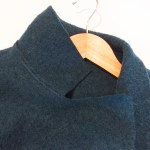
 Then to the facing bit. I popped the body on to a mannequin and started to look at Ursula in a new way. The pre-facing, waterfall neckline looked quite interesting, and it gave me an idea.
 So I left the facings off, and the back belt, I didn’t fold back the centre front either. I just left it un-hemmed and I thought it looked very Japanese in style. Then I thought- what about if I stitched on a simple rectangle of fabric at the back neck to make a collar? oooo ….nice!
So I’ve now added in instructions and templates to the pattern to make a Hack version, however if you haven’t got this in your pattern already you can download it here for free. 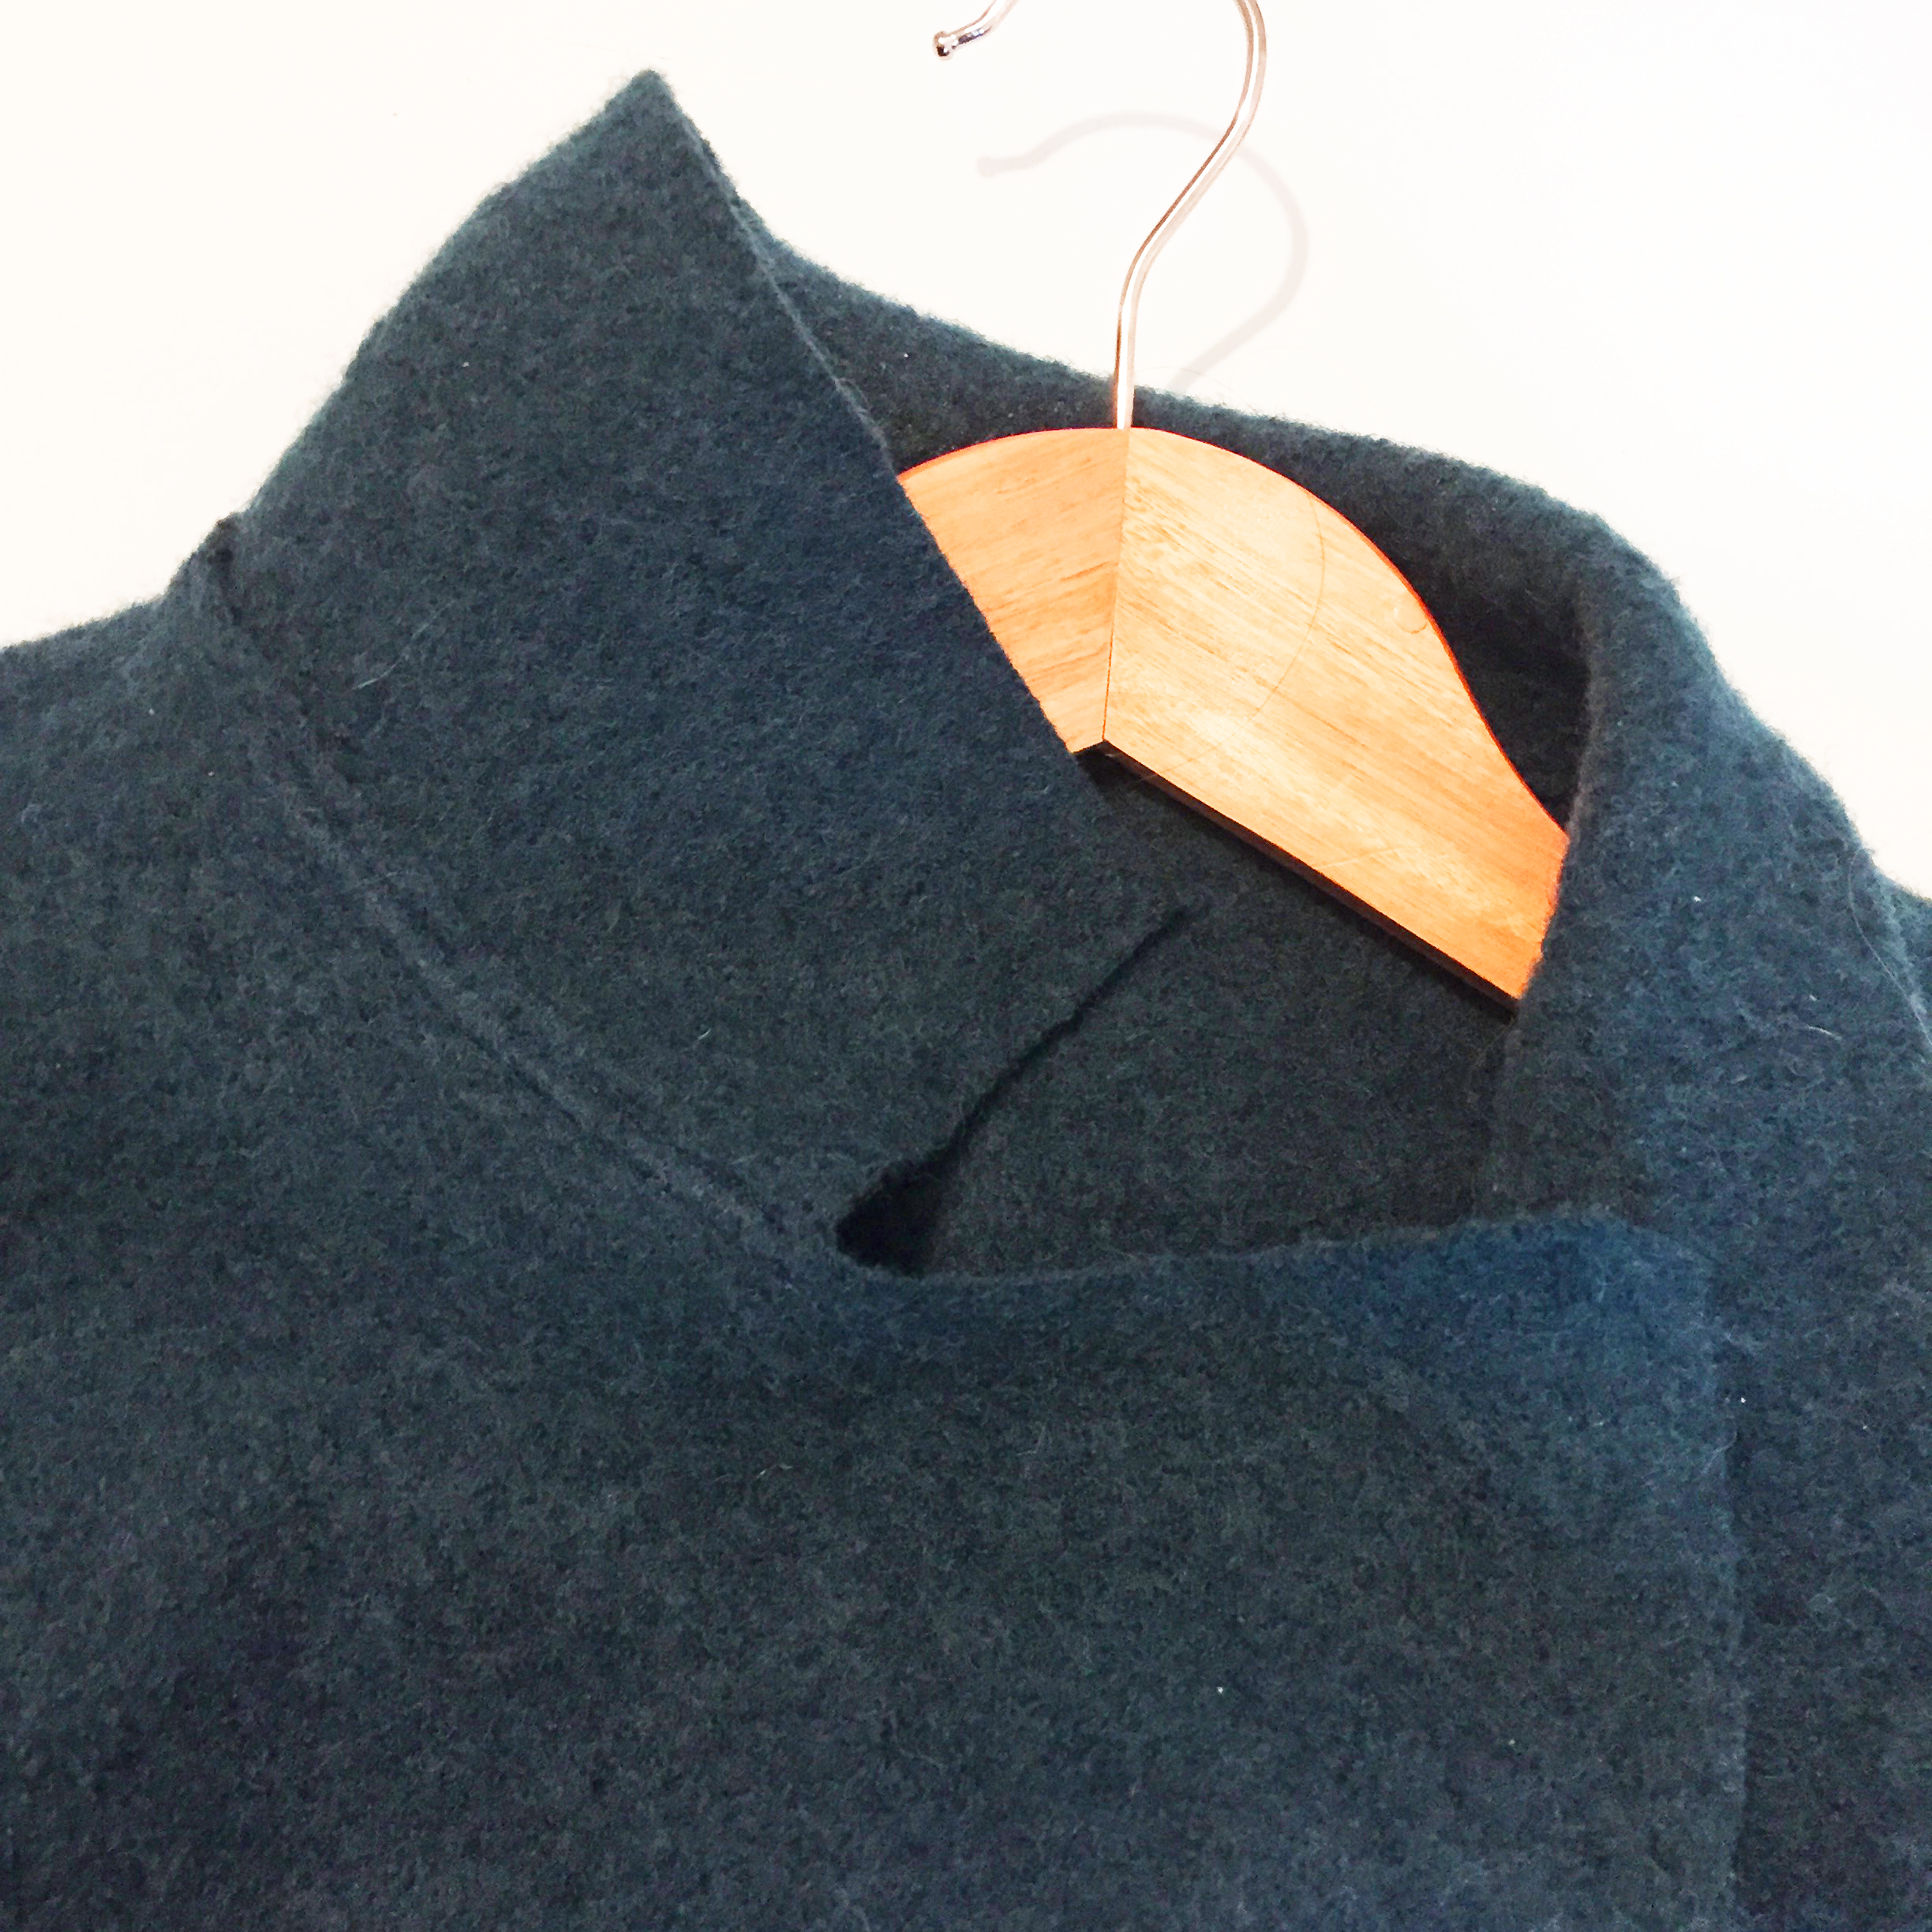
BACK COLLAR & CUFF PIECE CUTTING GUIDE
Please download these instructions and templates for making the Ursula Hack.
URSULA HACK JACKET instruction sheet
URSULA HACK JACKET (Back Neck Collar)
You will require an extra 20cm of fabric for the Back neck and Cuffs add on.
HOW TO MAKE A WRAP SHAWL
This wrap shawl is perfect for boiled wool. Suitable for beginners, it needs about a half metre of double sided boiled wool fabric (or anything for that matter). With a nifty threading system through a line of holes or buttonholes, you can gather up the folds to make a waterfall effect wrap shawl. 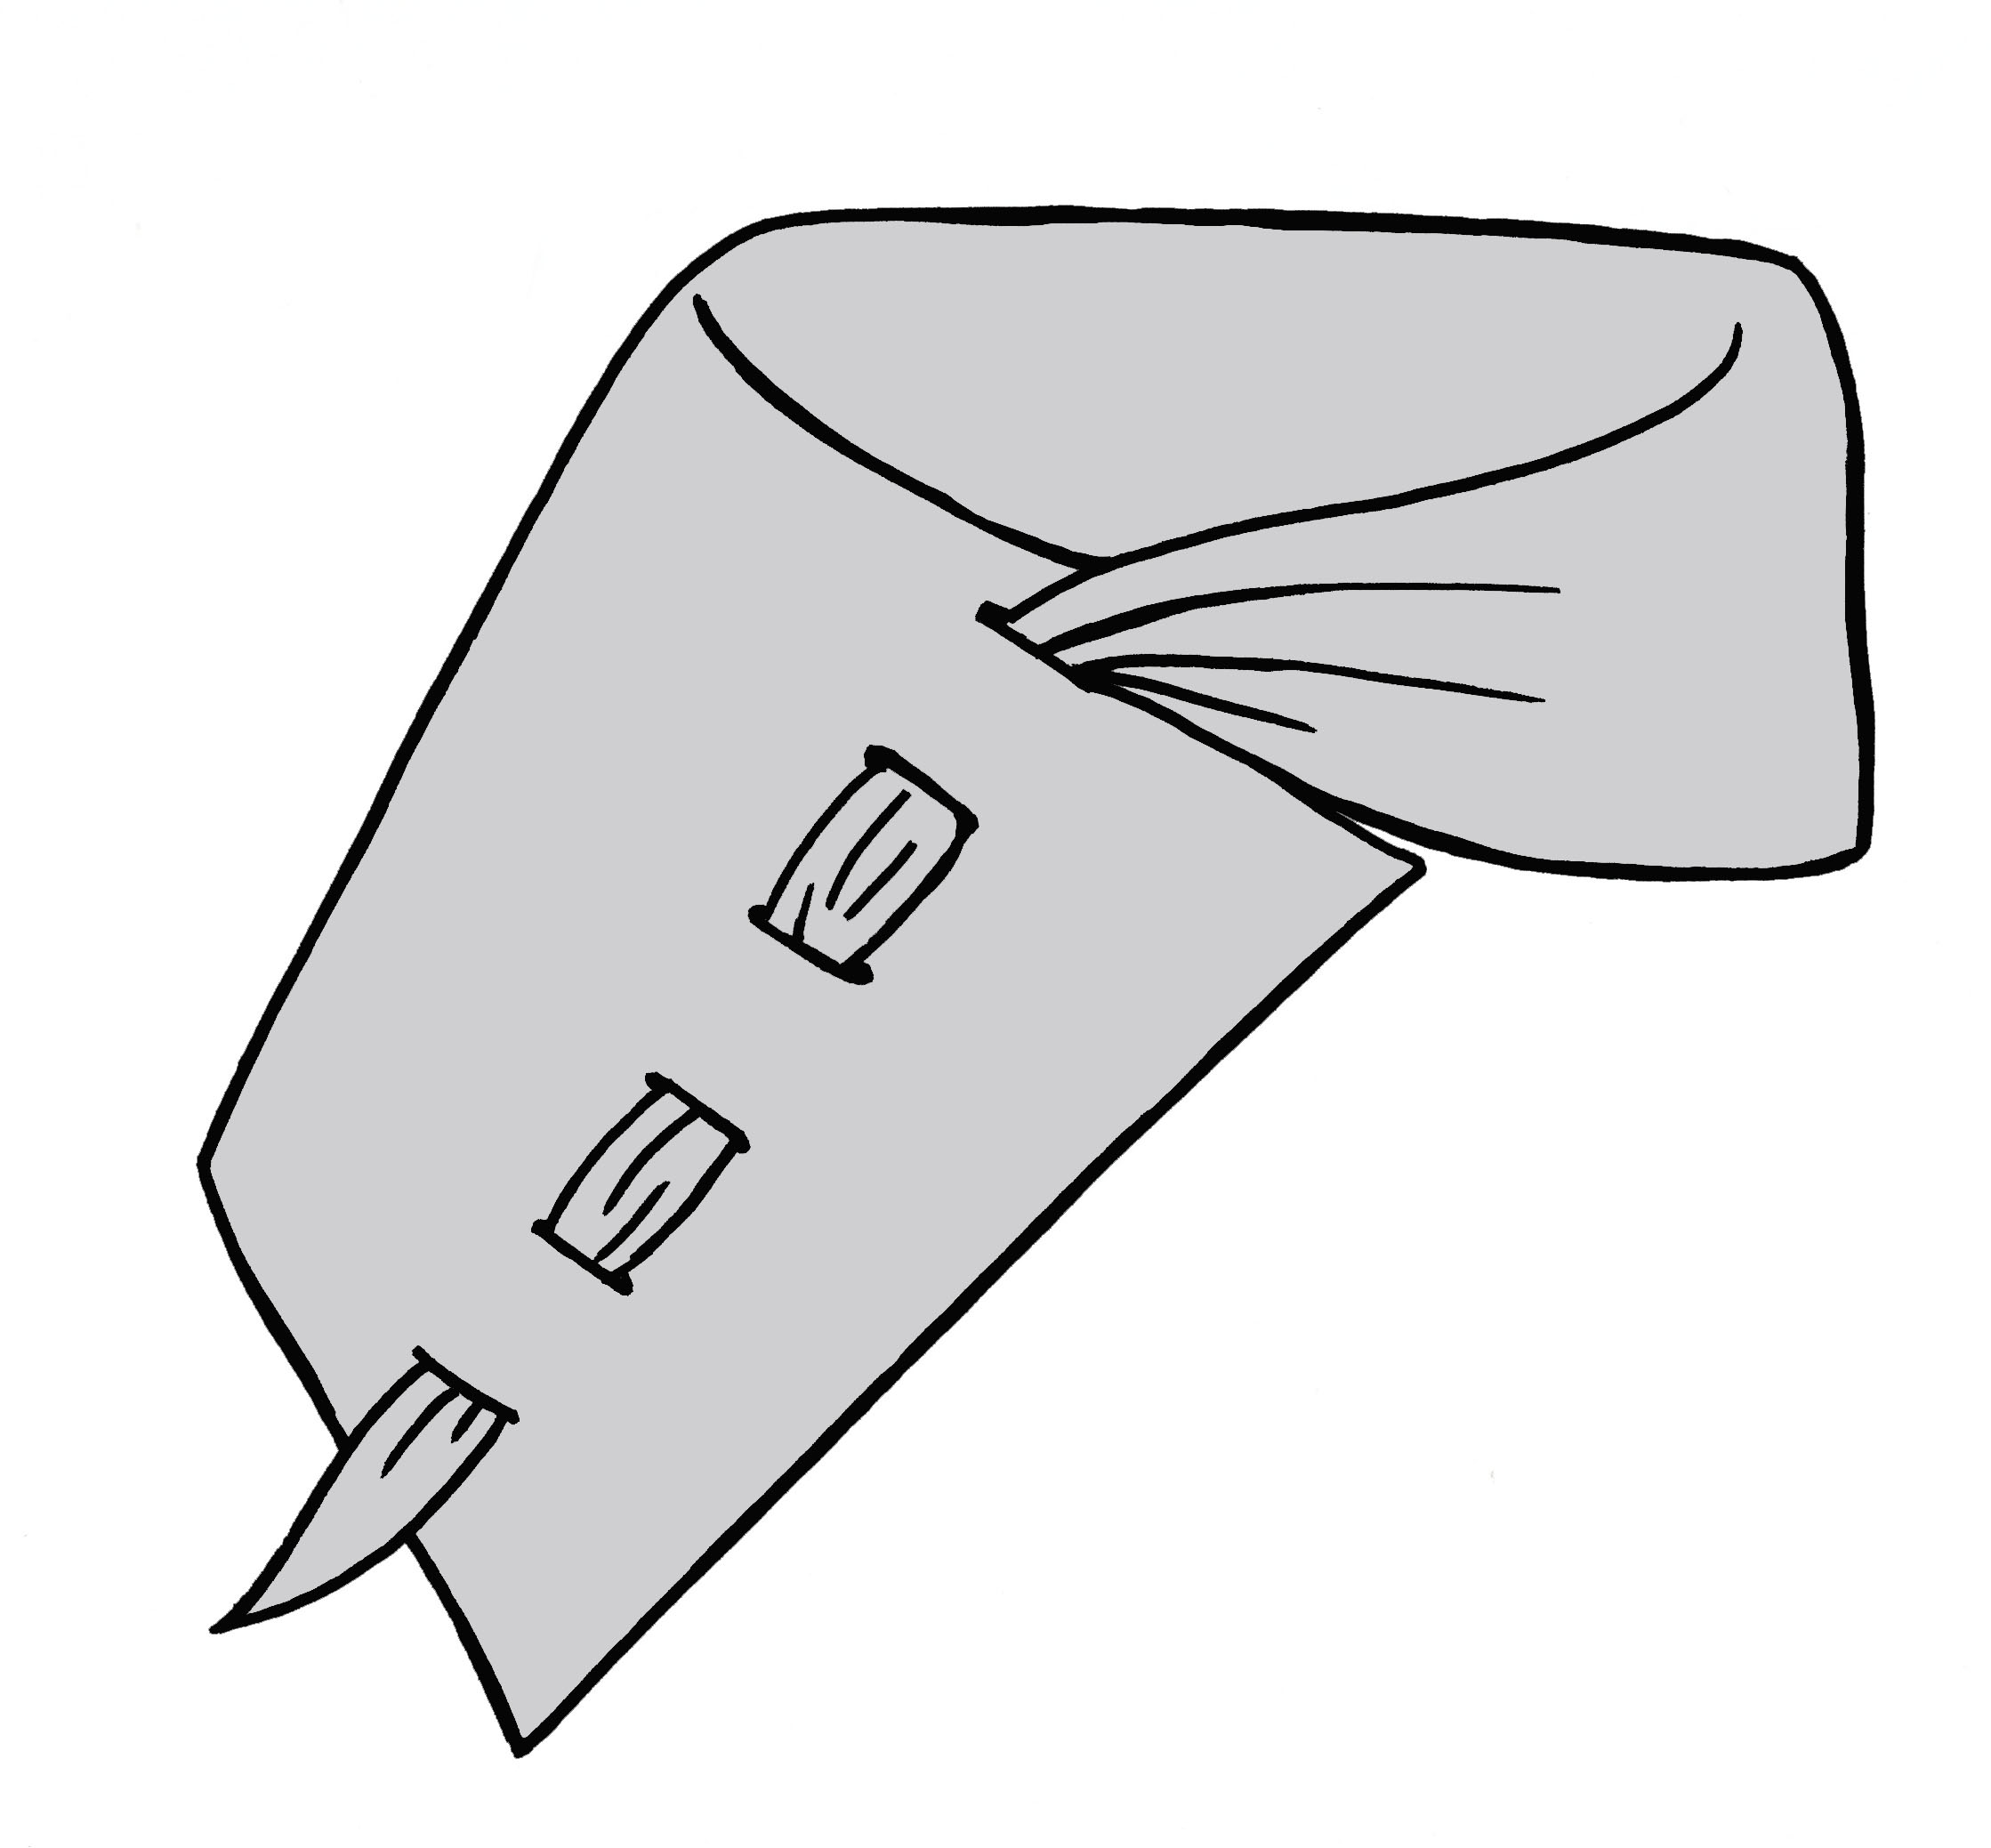
FABRIC REQUIREMENTS
WRAP SHAWL (unlined)
50cm x 150cm of fabric such as boiled wool. A reel of thread
(If overlocking the raw edges use matching coloured threads).
EQUIPMENT
Use a 90-100 jersey or ballpoint machine needle when sewing knitted or stretch fabrics
Overlocker (optional)
Invisible marker pen/ masking tape
Stitch unpick
Seam allowance is 1cm unless otherwise stated.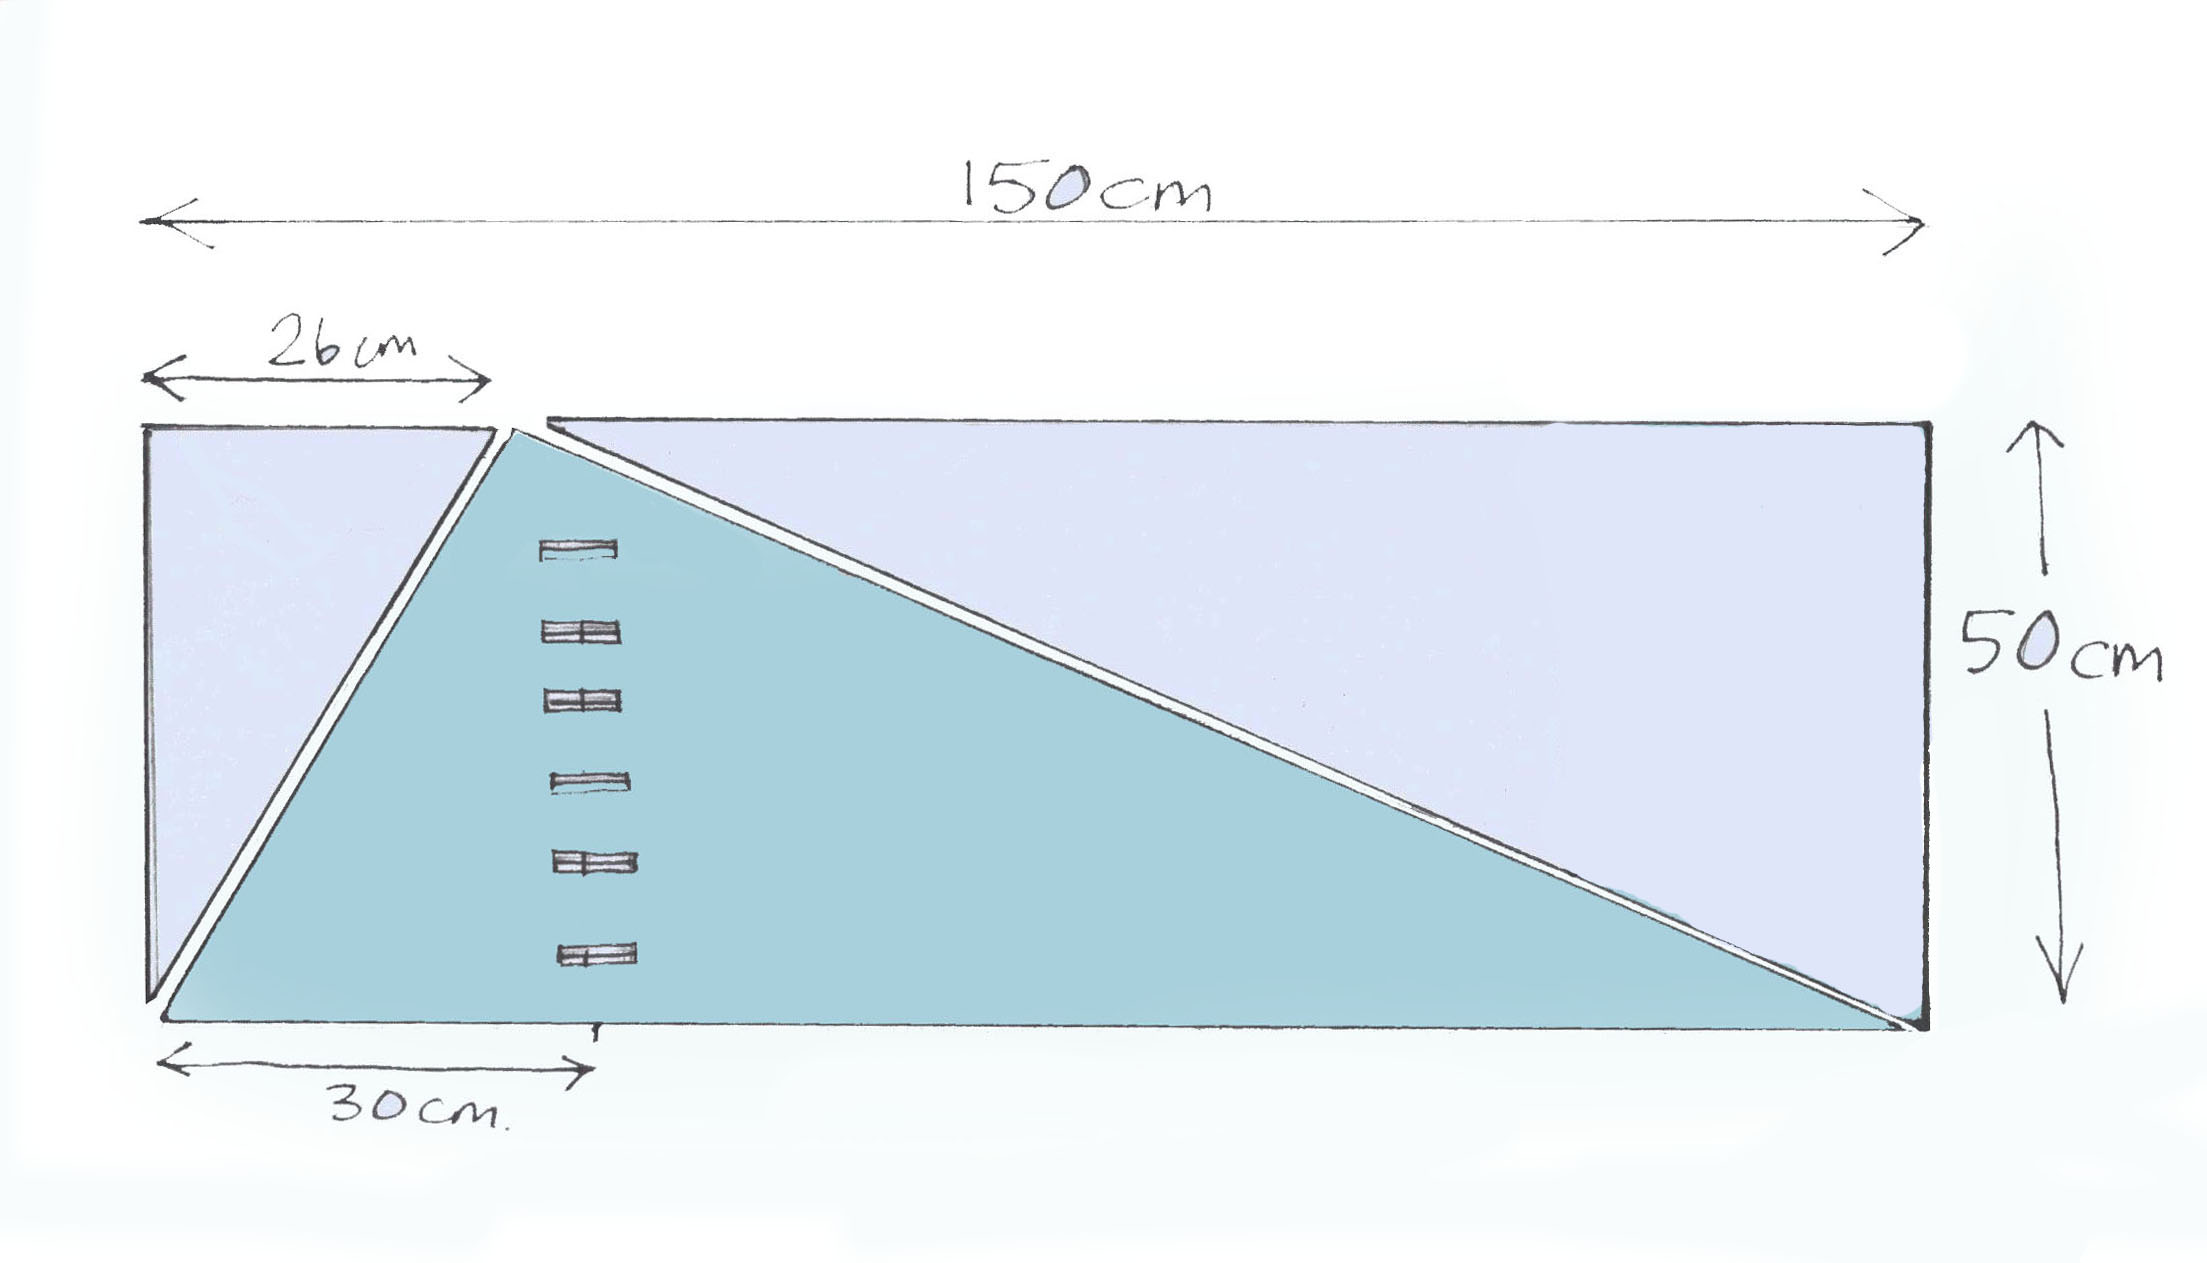
CUTTING OUT Lay out your 50cm x 150cm fabric rectangle, wrong side up on a table. Mark a point 26cm in from one long side. Draw a line from this point to the lower left and right corner points. Cut along this line.
Mark a point 30 cm in from the lower left corner. Draw a vertical line upwards with chalk or invisible marker pen. This line marks the centre line for your buttonholes or just cut holes (if using boiled wool).
Buttonholes are 4cm wide and run horizontally to the long lower edge. Mark out the six buttonholes positions (each one is 40mm wide) starting with the first at 4cm up from the lower (long) side, then another five buttonholes with a gap of 8cm in between each one.
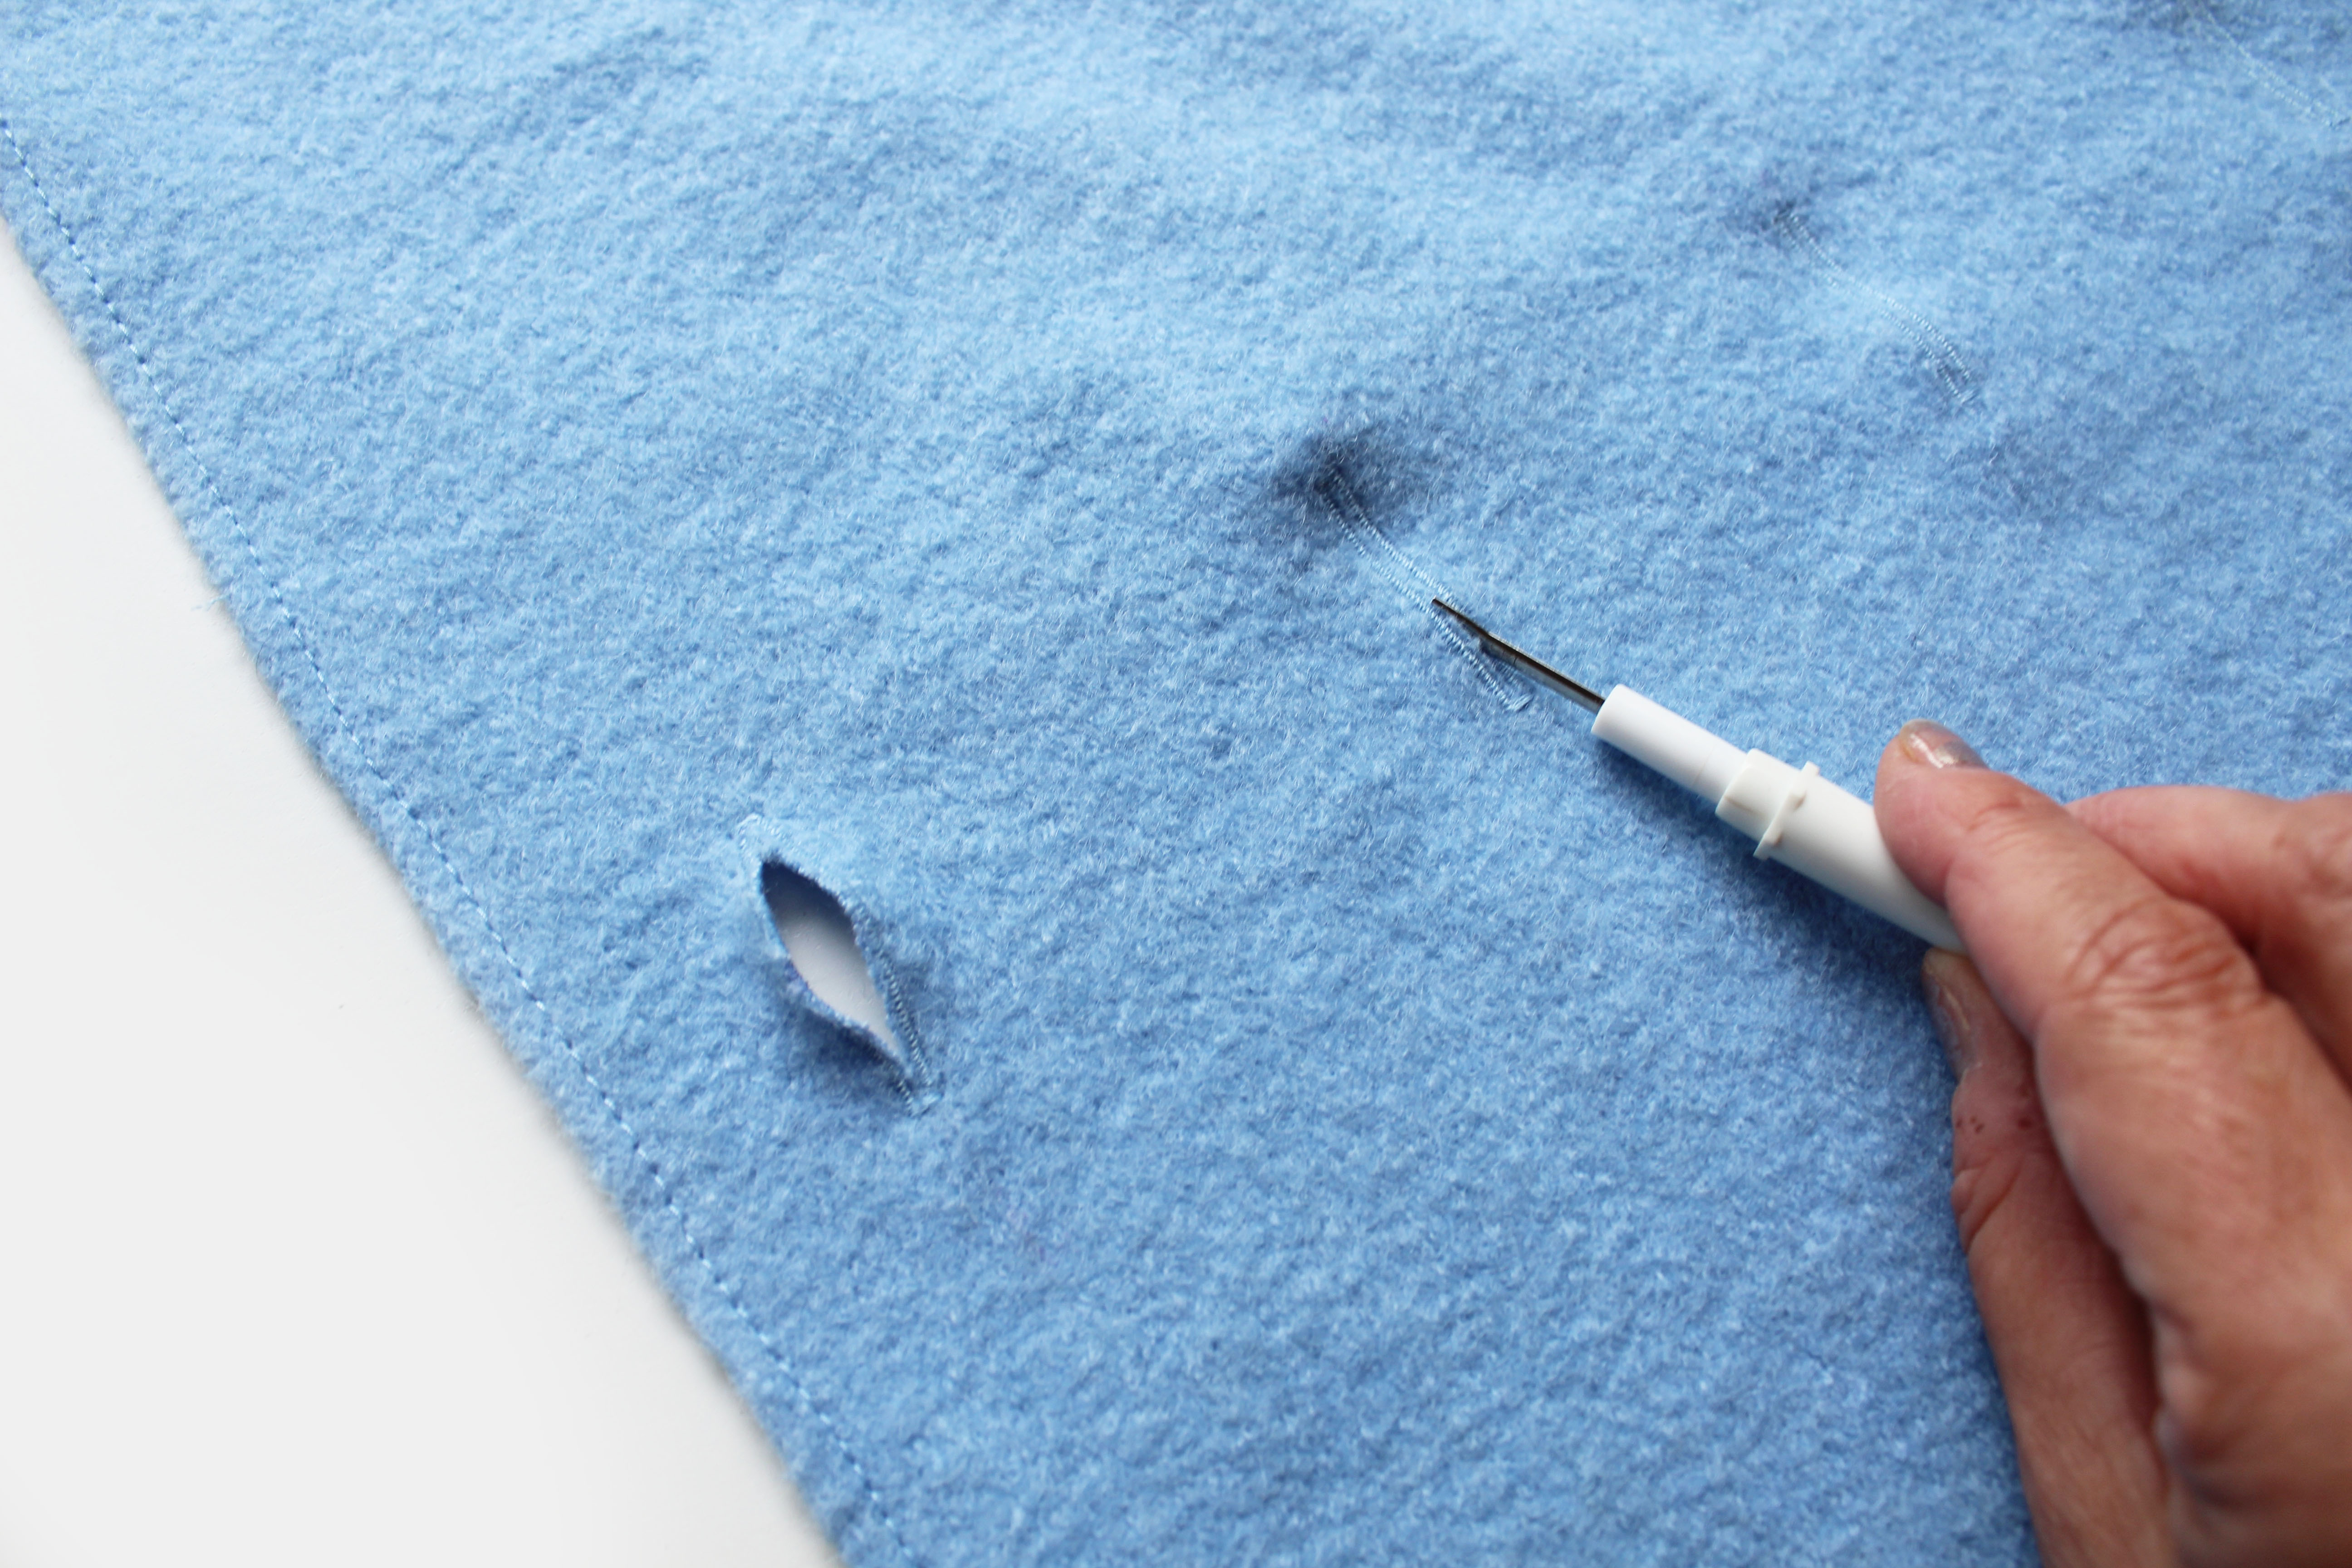
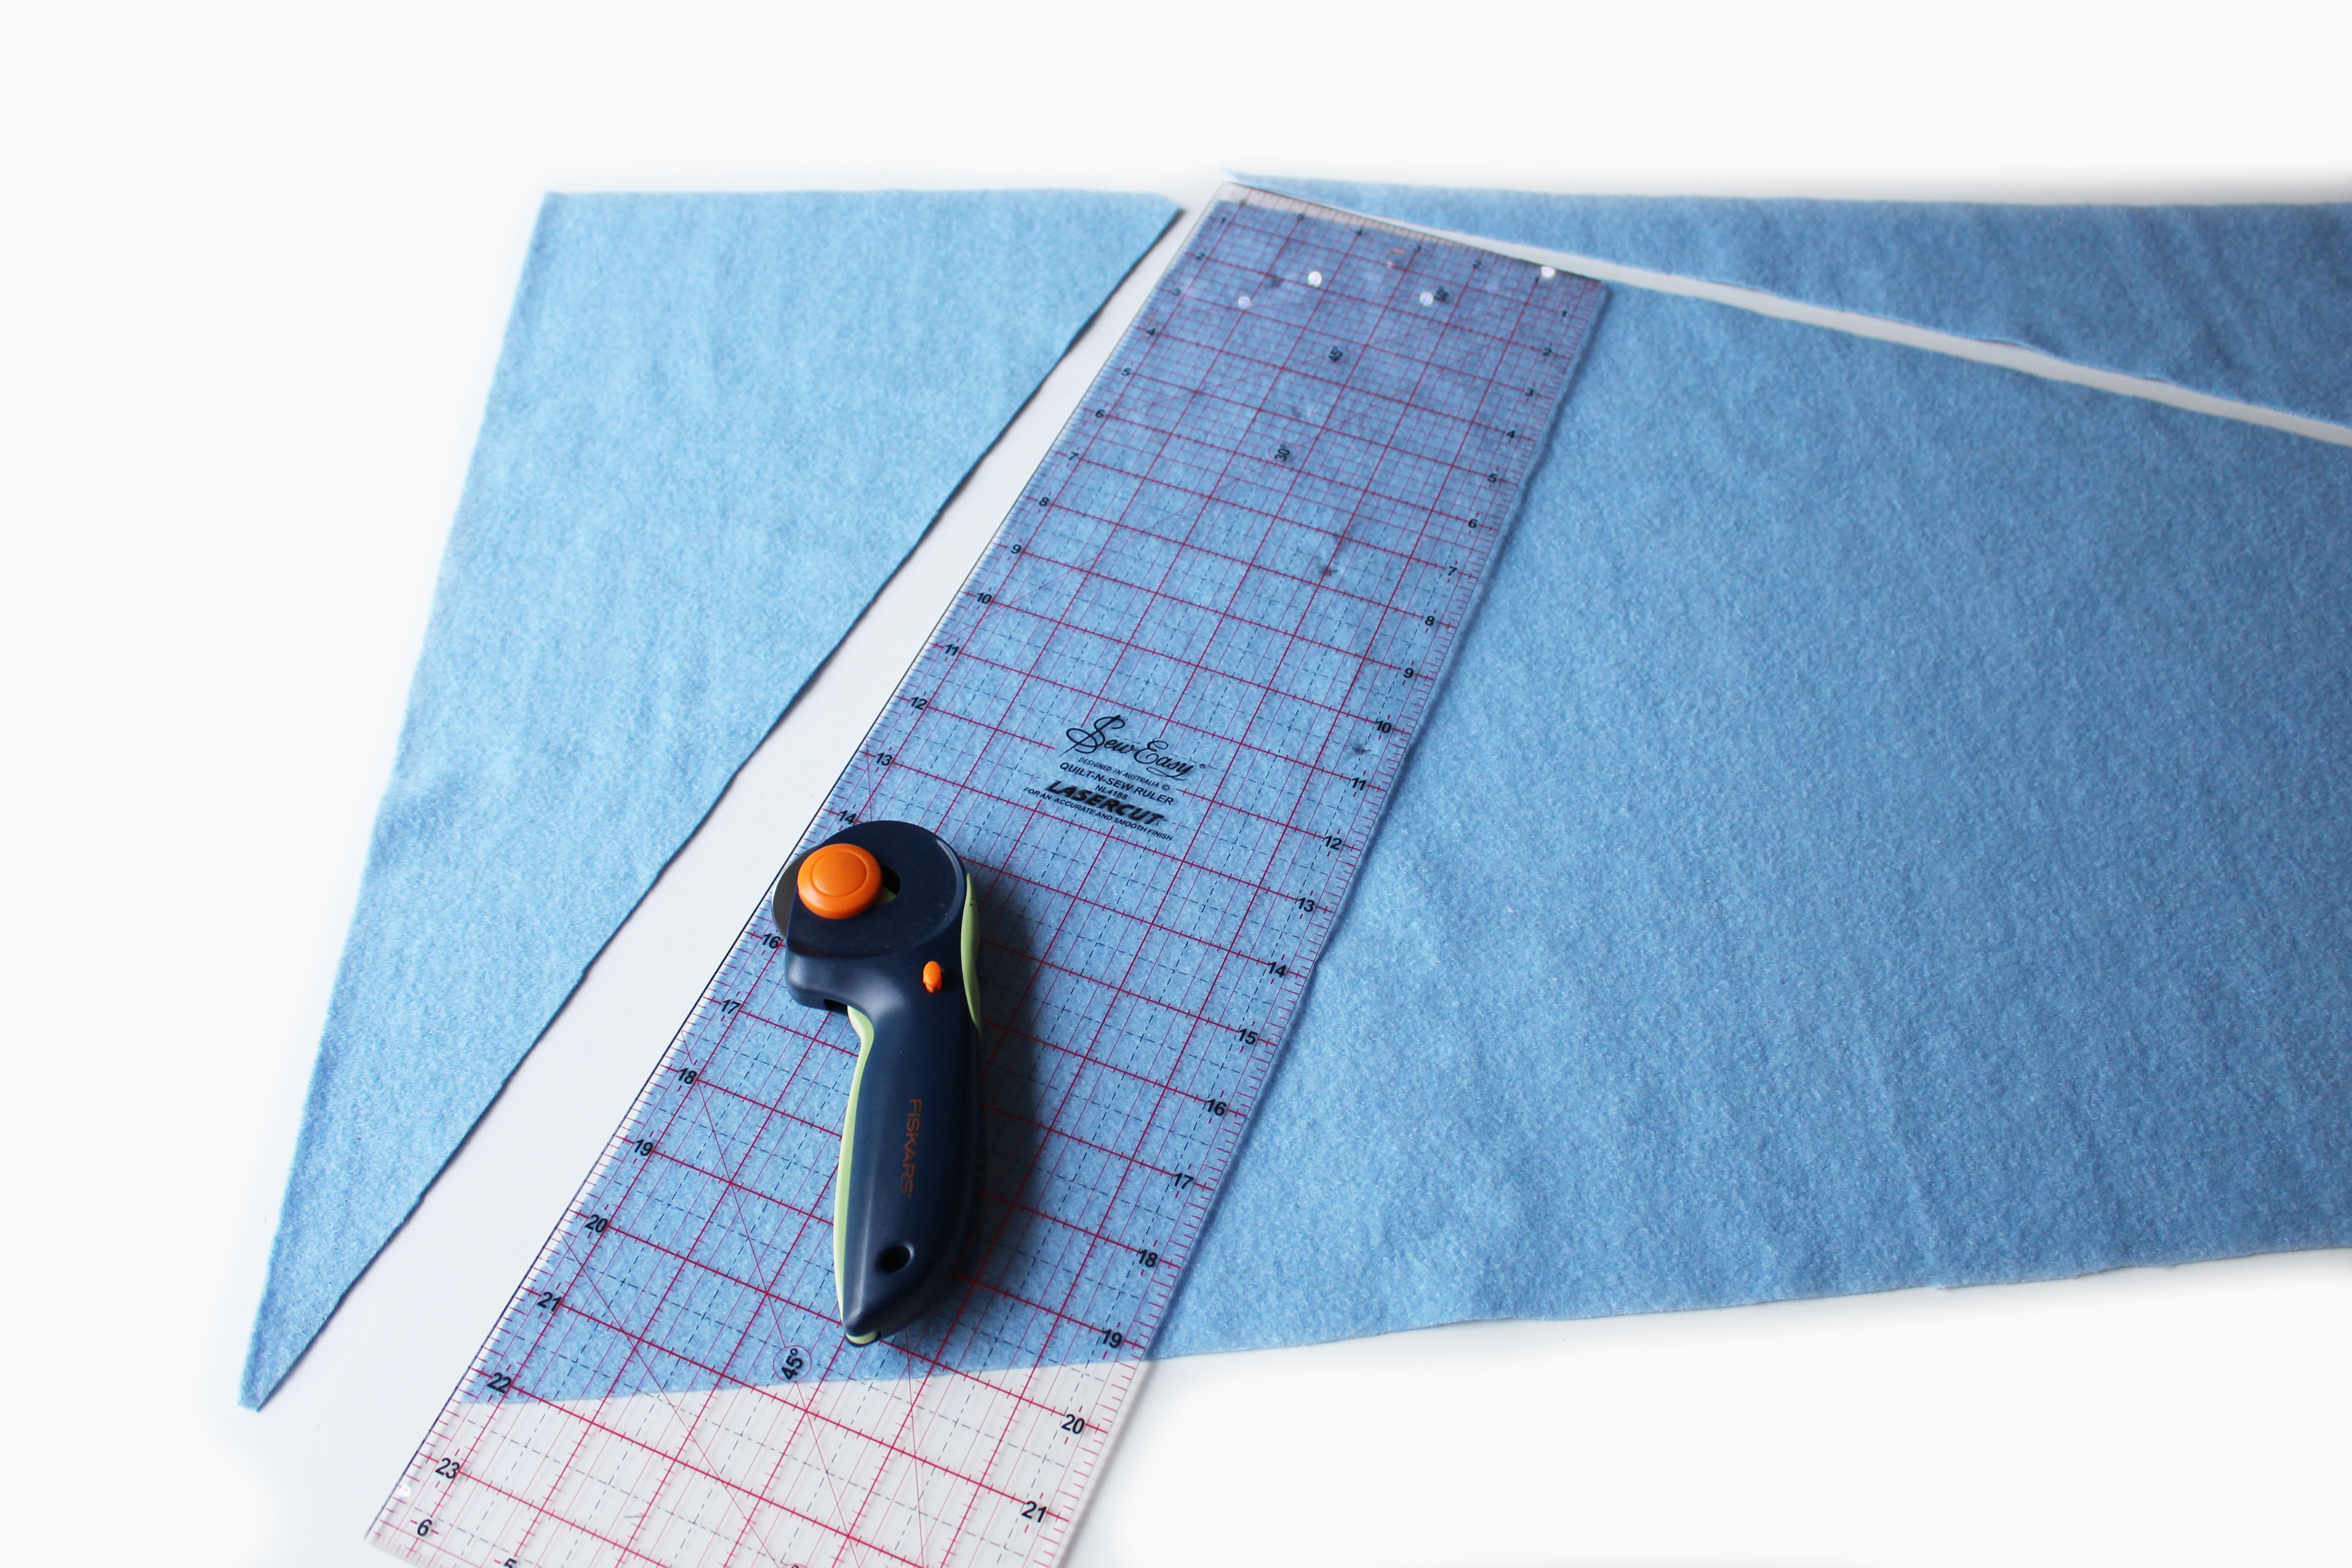
SEWING THE BUTTONHOLES Cut open using a stitch unpick then trim any ragged edges and loose thread ends with small scissors NB take care not to cut your buttonhole end bar tacks.
Alternatively, if using boiled wool fabric that doesn’t fray, just cut the 4cm holes with an 8cm gap in between and leave unfinished.
FINISHING THE OUTER EDGE if your fabric doesn’t fray you could leave your shawl outer edges unfinished alternatively finish them off with an overlocker with matching colour threads or make a small hem all around the outer edge.
Option 1 – Using an overlocker. With matching overlocker threads, starting with the two long sides at the widest point, finish the raw edges. Finally finish the raw short edge. Sew in all the thread ends.
Option 2– Hemming. Trim off the pointed corner so the end tip is 1cm across. Fold over a minimum hem (5mm approx.) to the reverse side. Commencing at the widest end, sew a small hem at the two long sides. Repeat for the shortest side. Using your thread end, hand stitch the corners to close up the open seams.
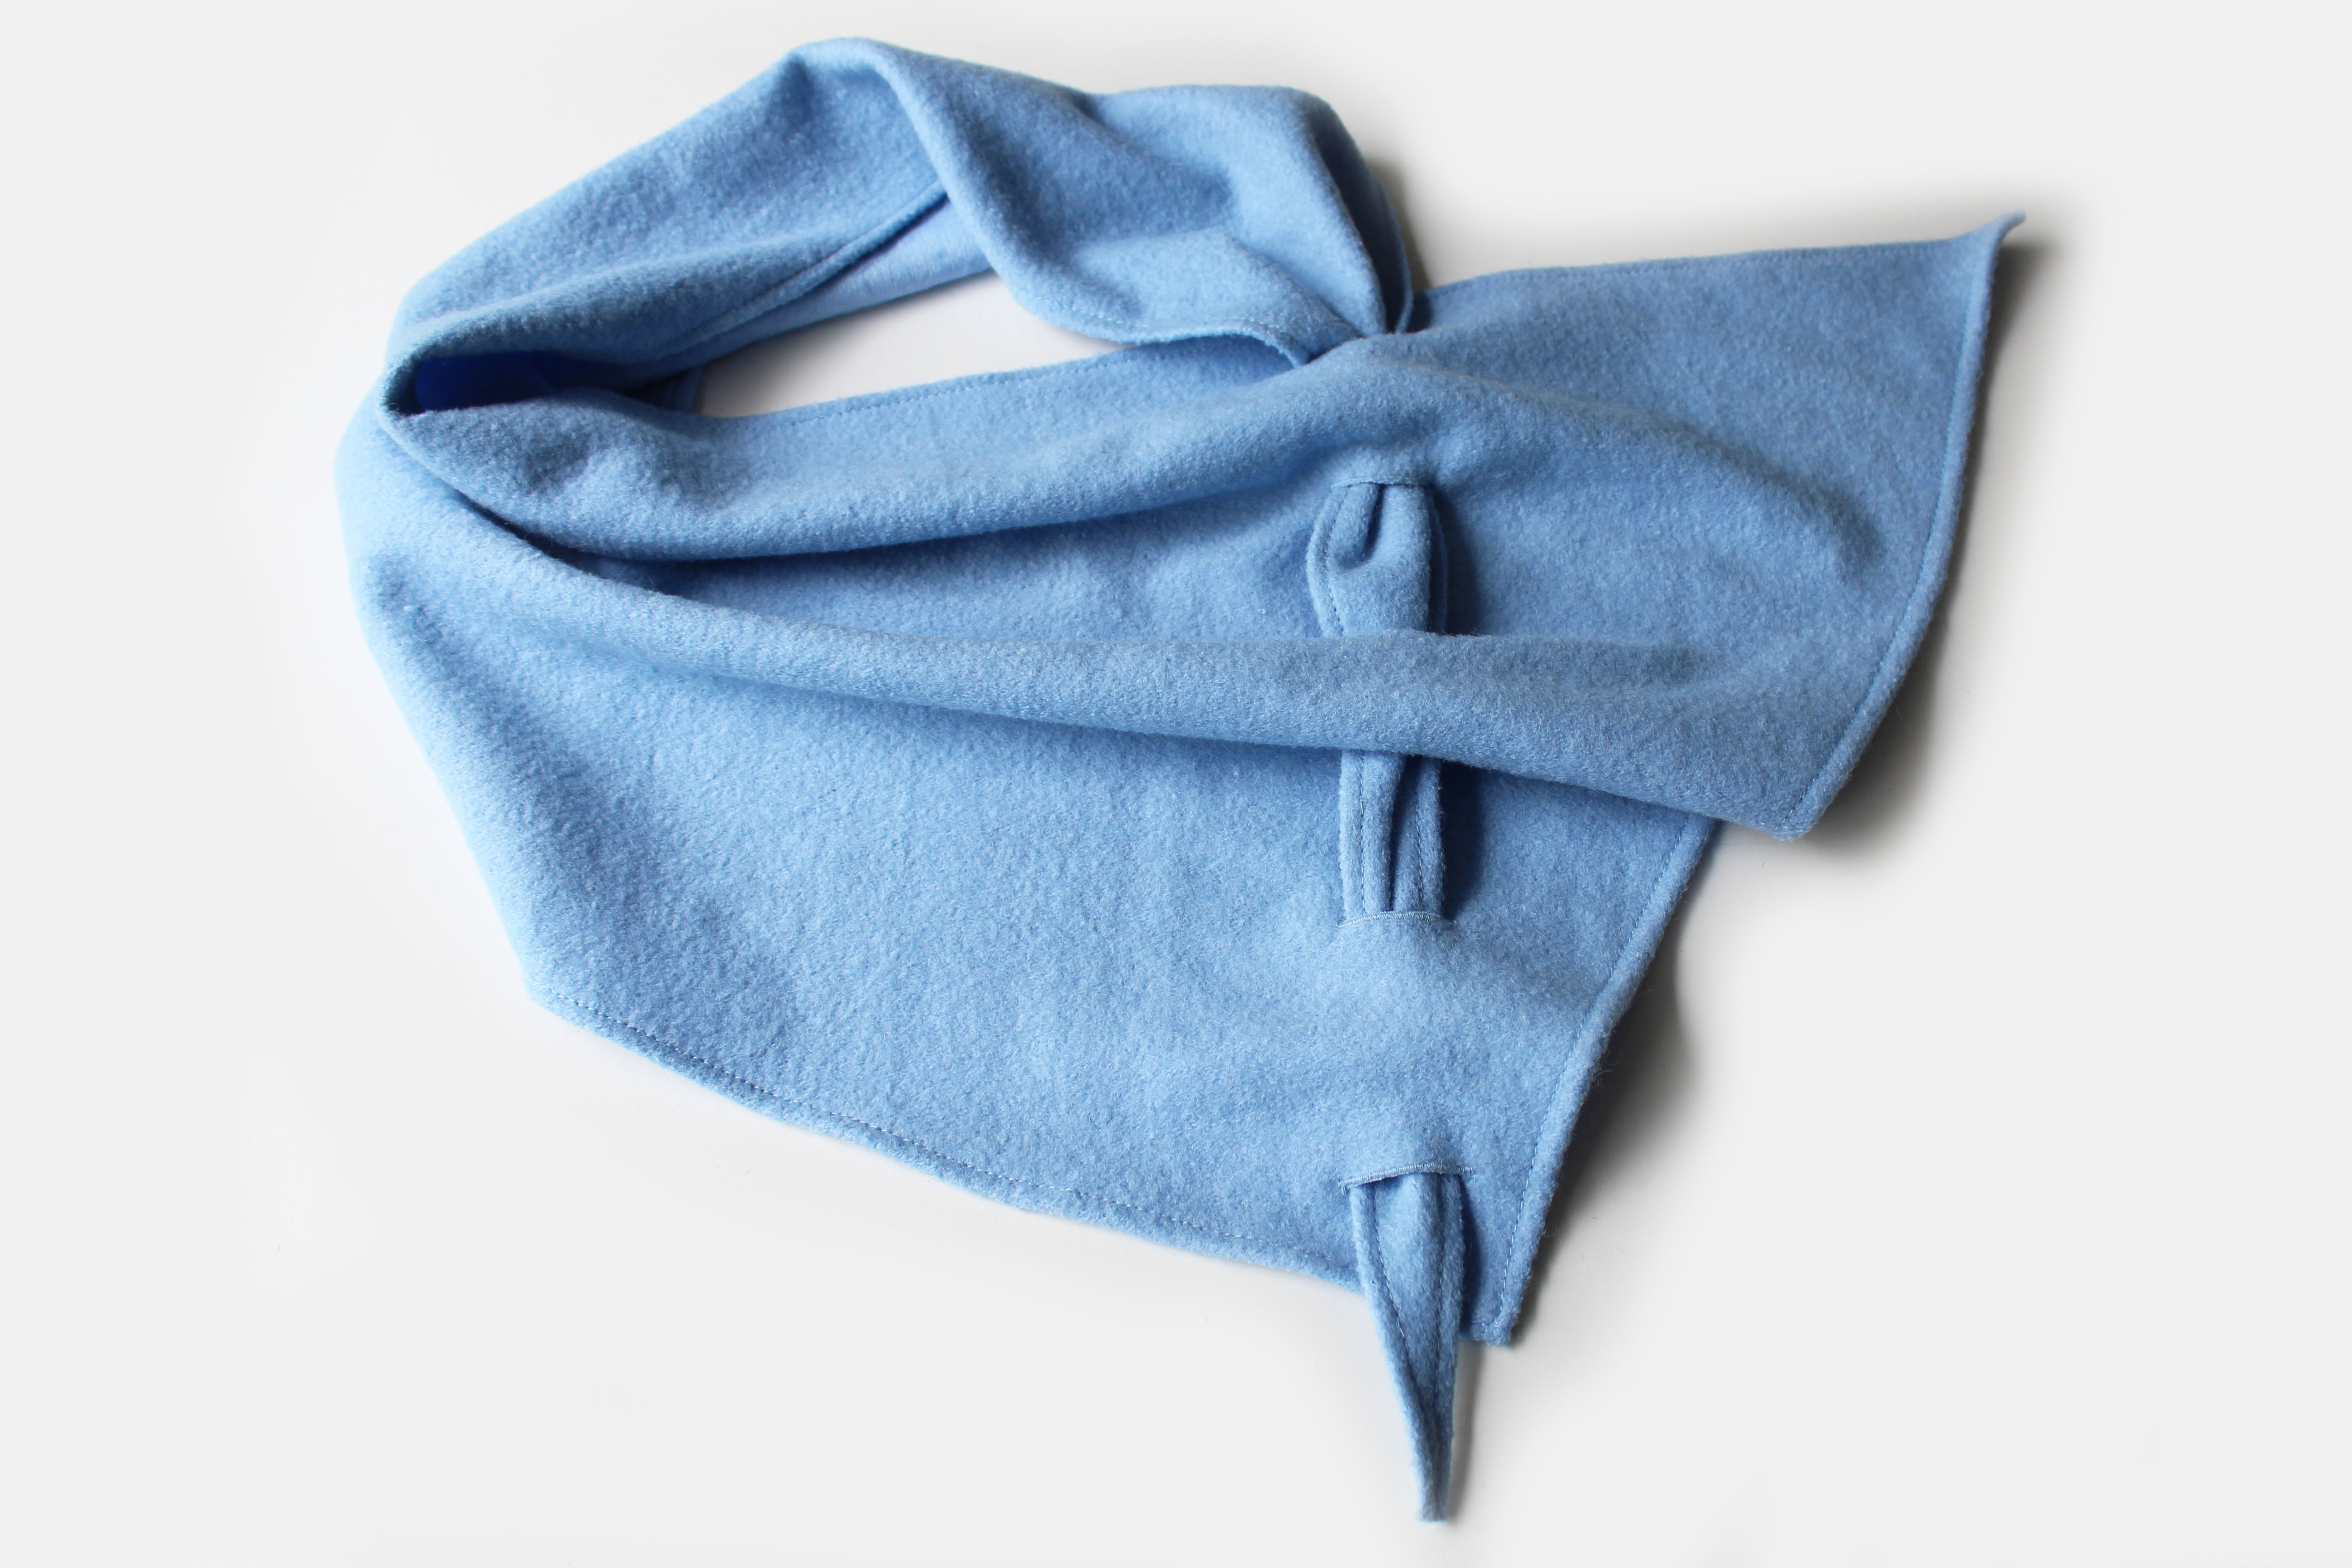
HOW TO WEAR THE SHAWL Thread the point of the shawl through the first hole near the longest edge, then in and out of each hole. Leave the pointed end extended.
There you have it! Very chic!