
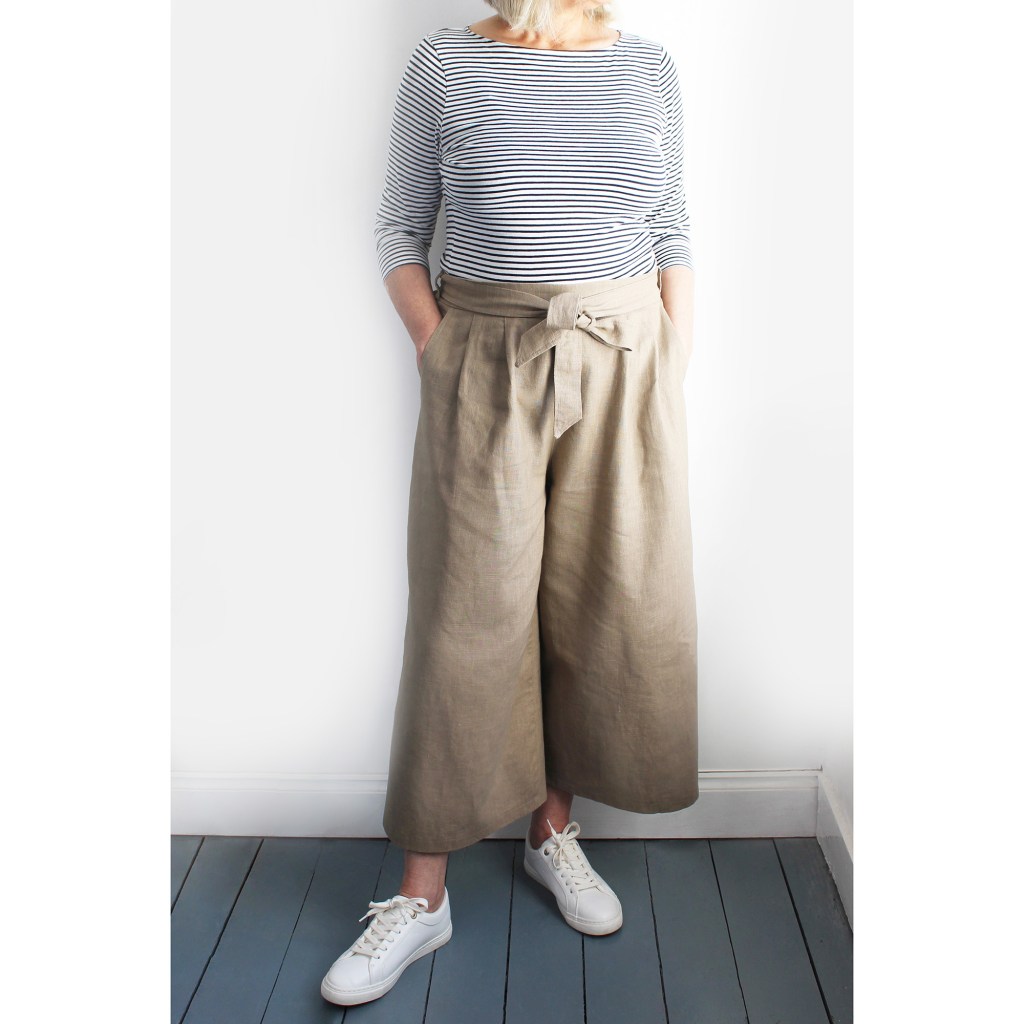
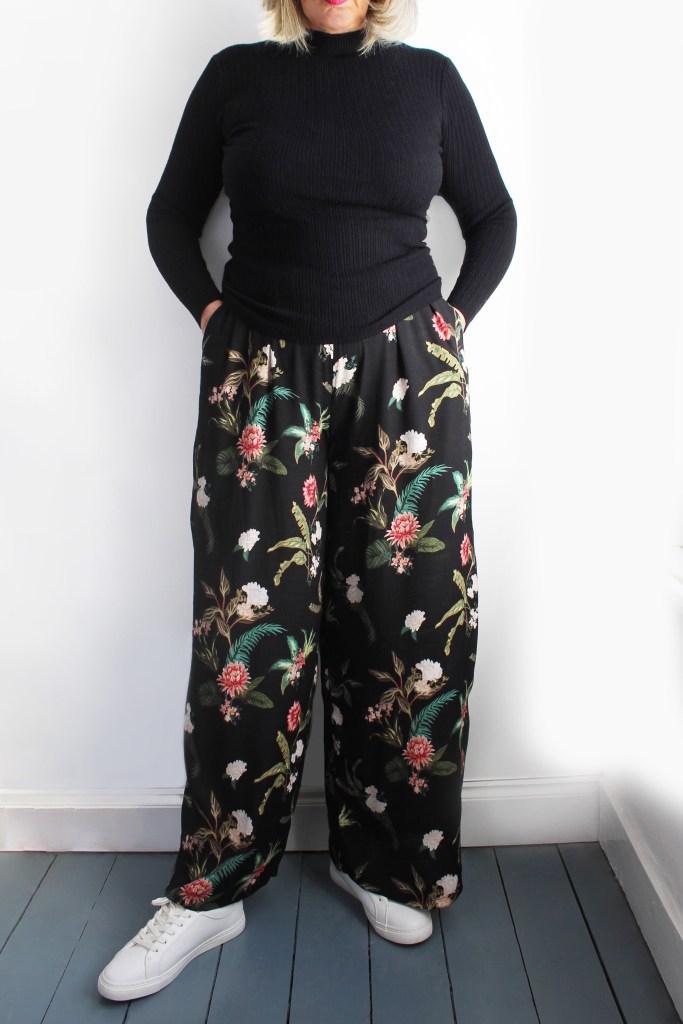
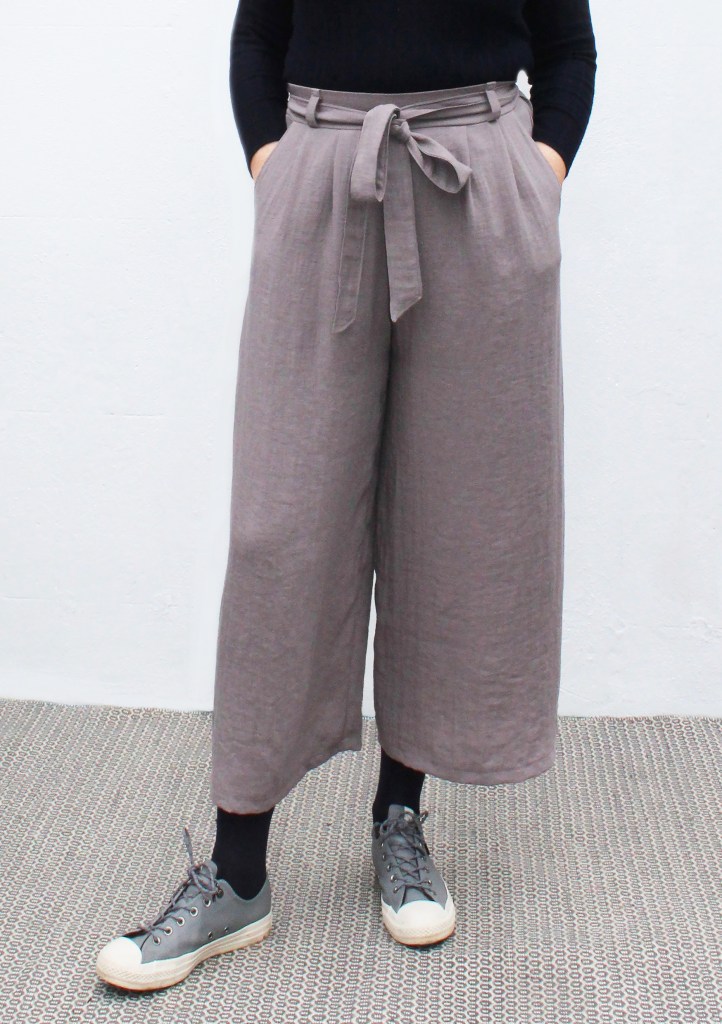
Baggy trousers are surprisingly flattering and I’m a total convert. I don’t wear tight jeans…..ever! I really don’t like them. Don’t get me wrong, I like a pair of stretch jeggings under a tunic but jeans yuk…. I find them way too uncomfortable. These beauties, however, with their elasticated back waist section, are my go to trews for lounging about it or when I want to feel like a Hoxton Hipster ! : ) They also look great with sandals or flatties. Wear with short or long tees. You don’t have to tuck in your tee either, cover any lumps and bumps (we all have them!) with a tee or a tie belt (I love a tie belt).
If you prefer to make your Elsies into drawstring trousers instead of pleated at the front, scroll down to the bottom of the page for a free instructions download.
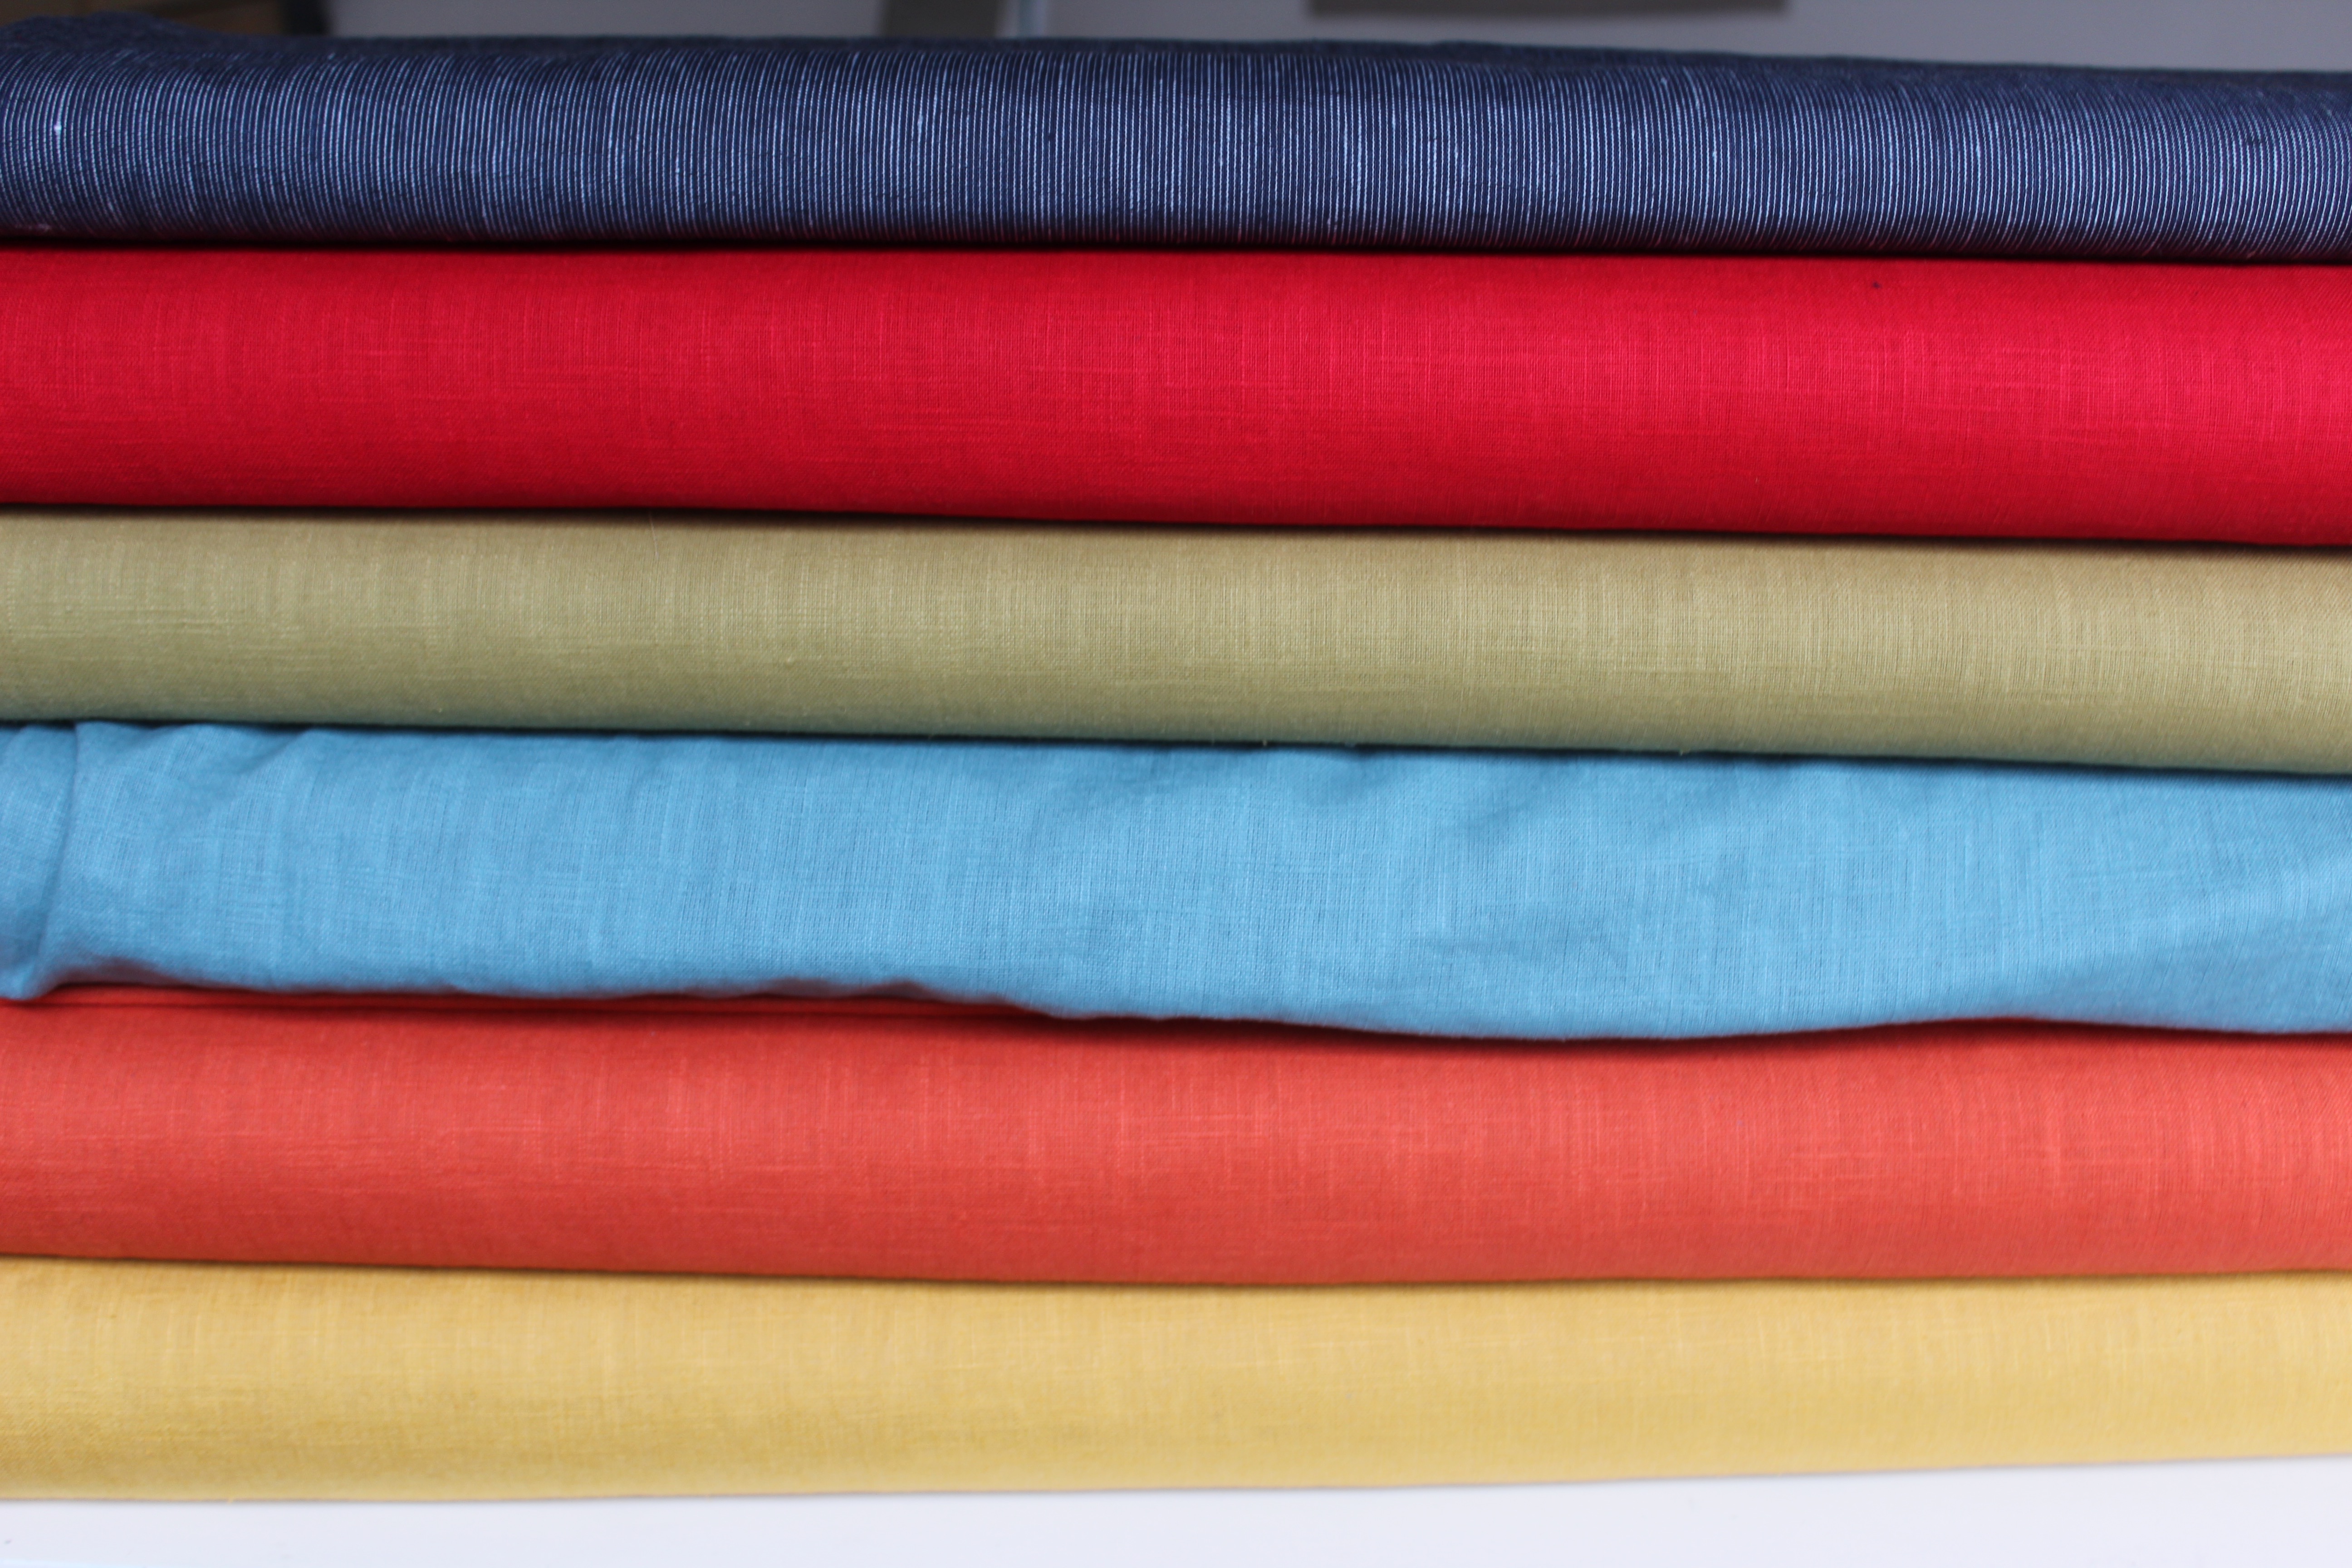
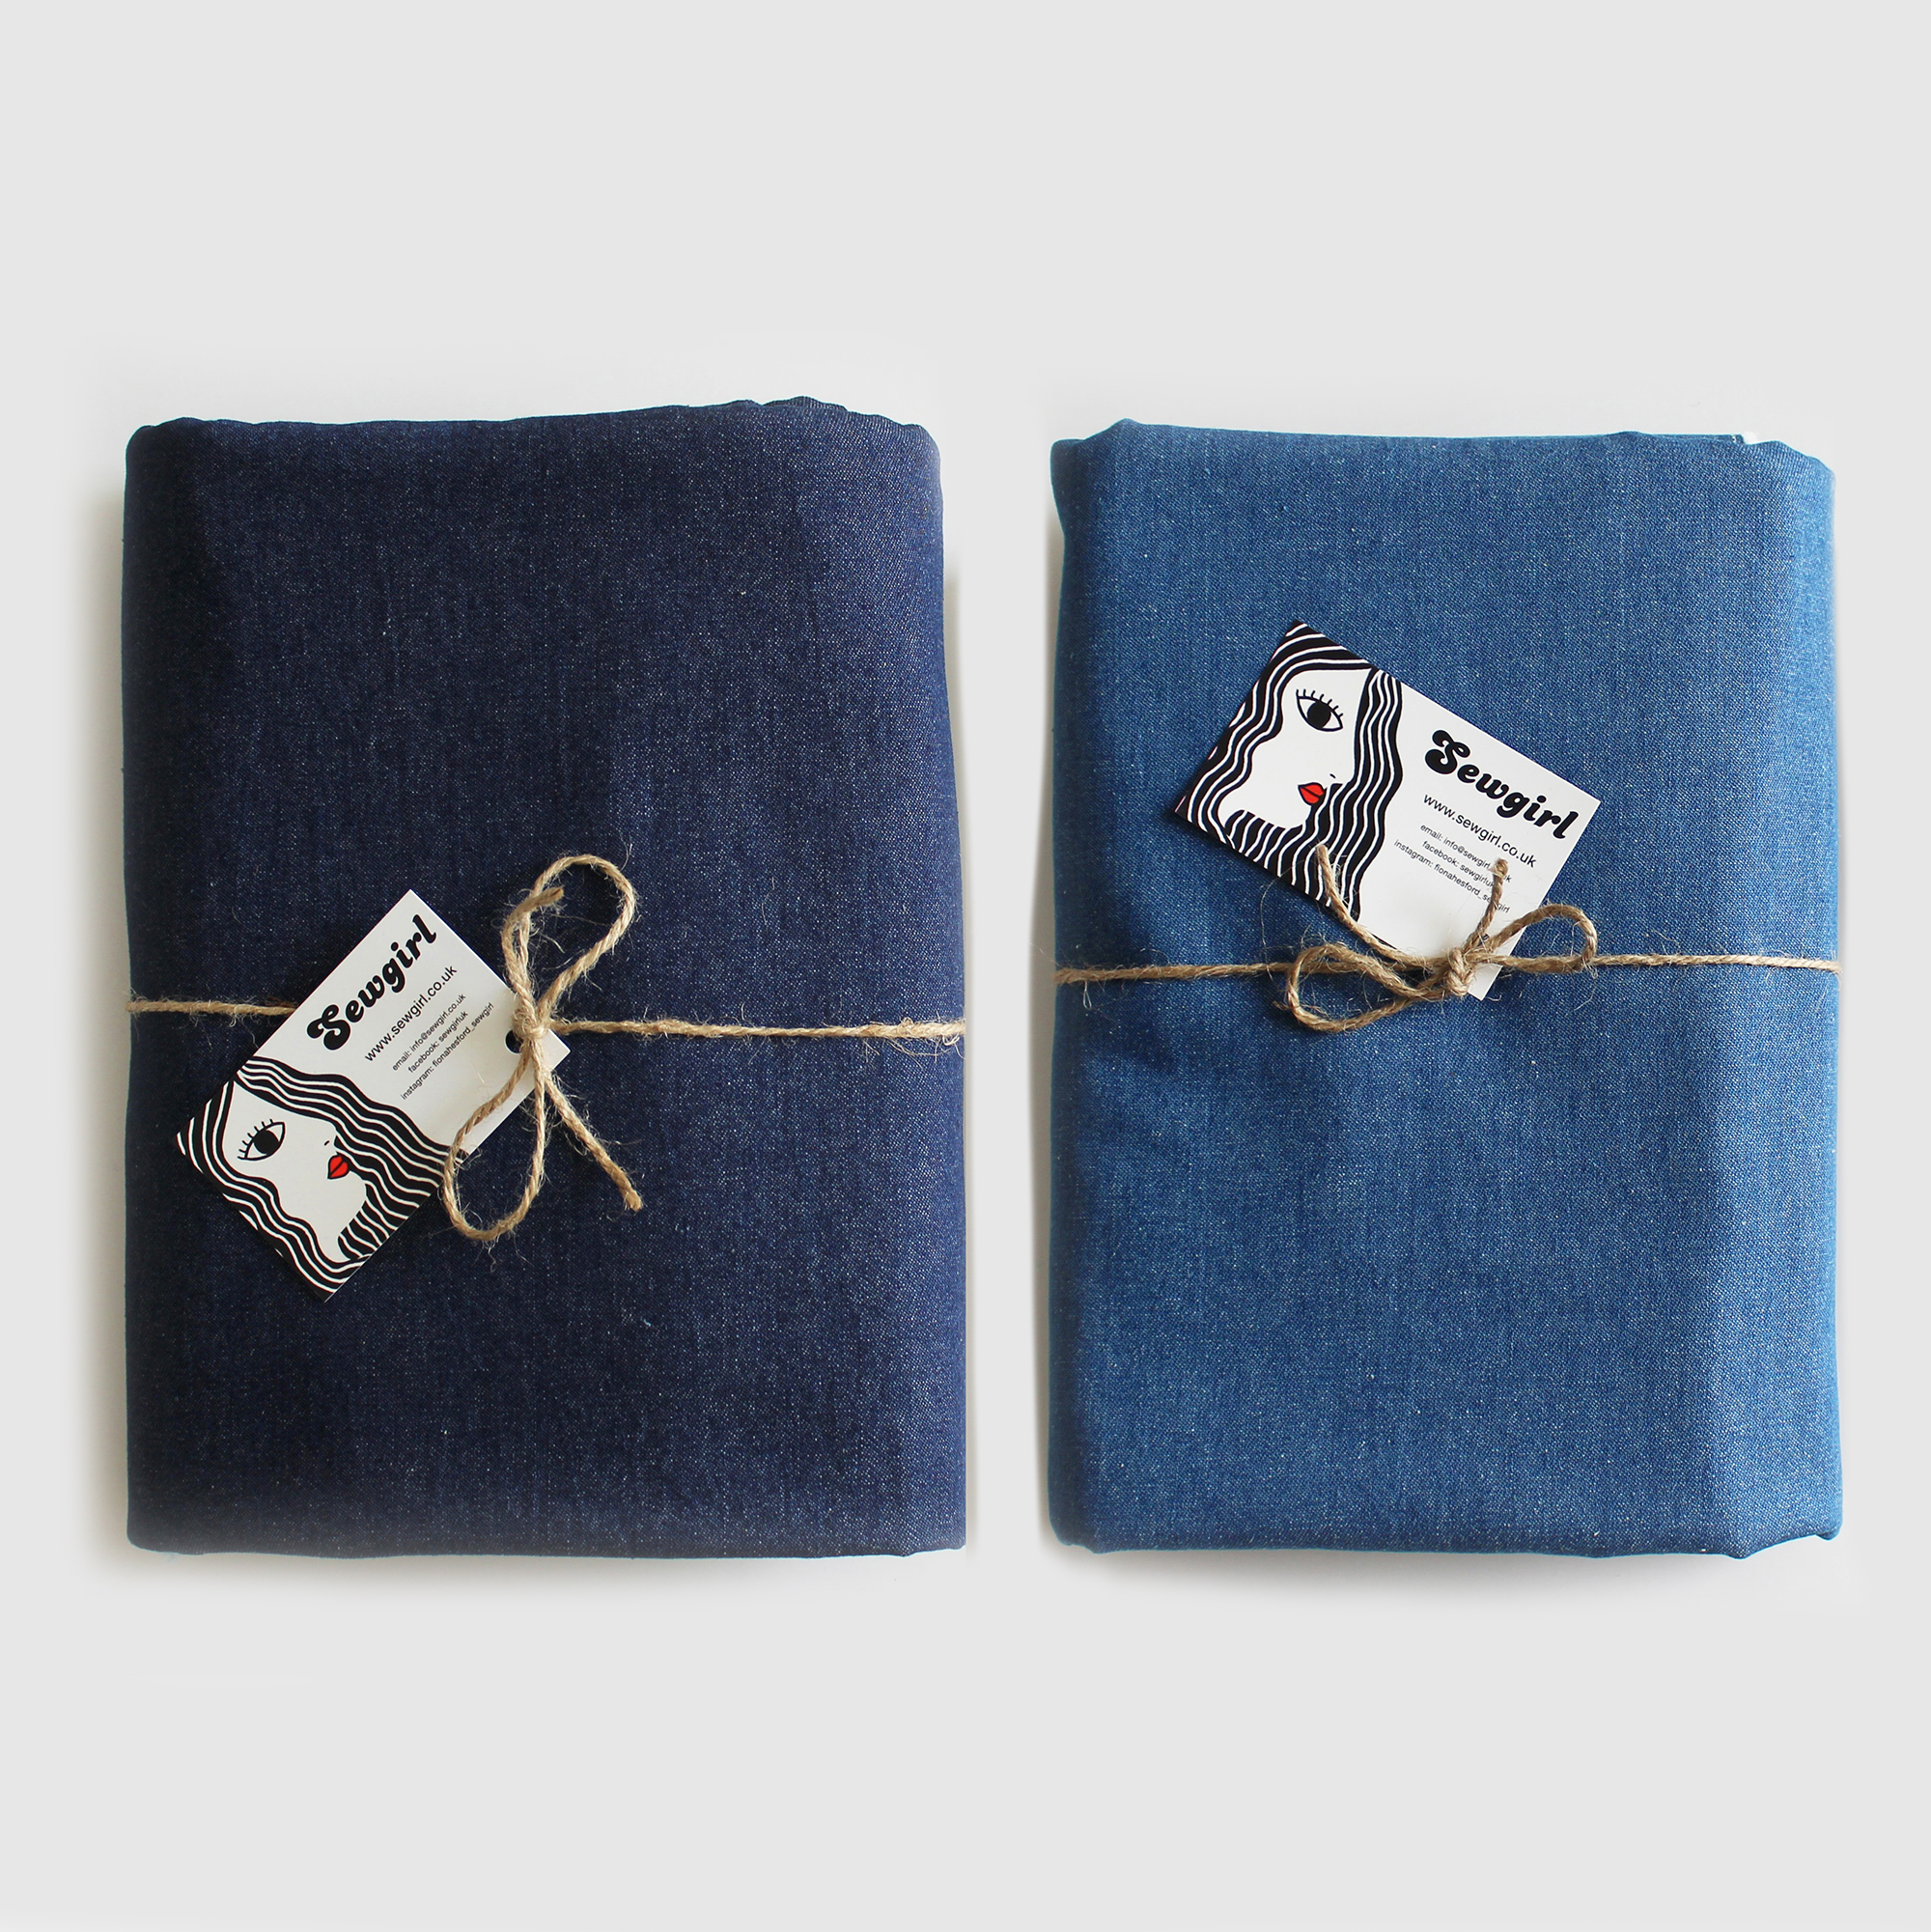
So Elsie can be made in linen, and funnily enough I do have some fab ones in lovely colours, perfect for making Elsie on my shop. Theres also 8oz indigo denim which is also great for everyday wear. Ive also made a kit available on a separate listing which includes fabric, pattern, elastic and interfacing.
These trousers can also be made in a floppy viscose or polyester fabric for a ‘Palazzo Pants‘ style which are perfect for holidays. Imagine lounging around the pool on a hot evening, sipping cocktails in your palazzos …… (well a girl can dream cant she!).
Elsie has front pleats on to the waistband and an elasticated back waistband (yippee!) so no zips just pull em on! There are also two rather lovely inset side pockets and an optional tie belt…..did I mention that already?
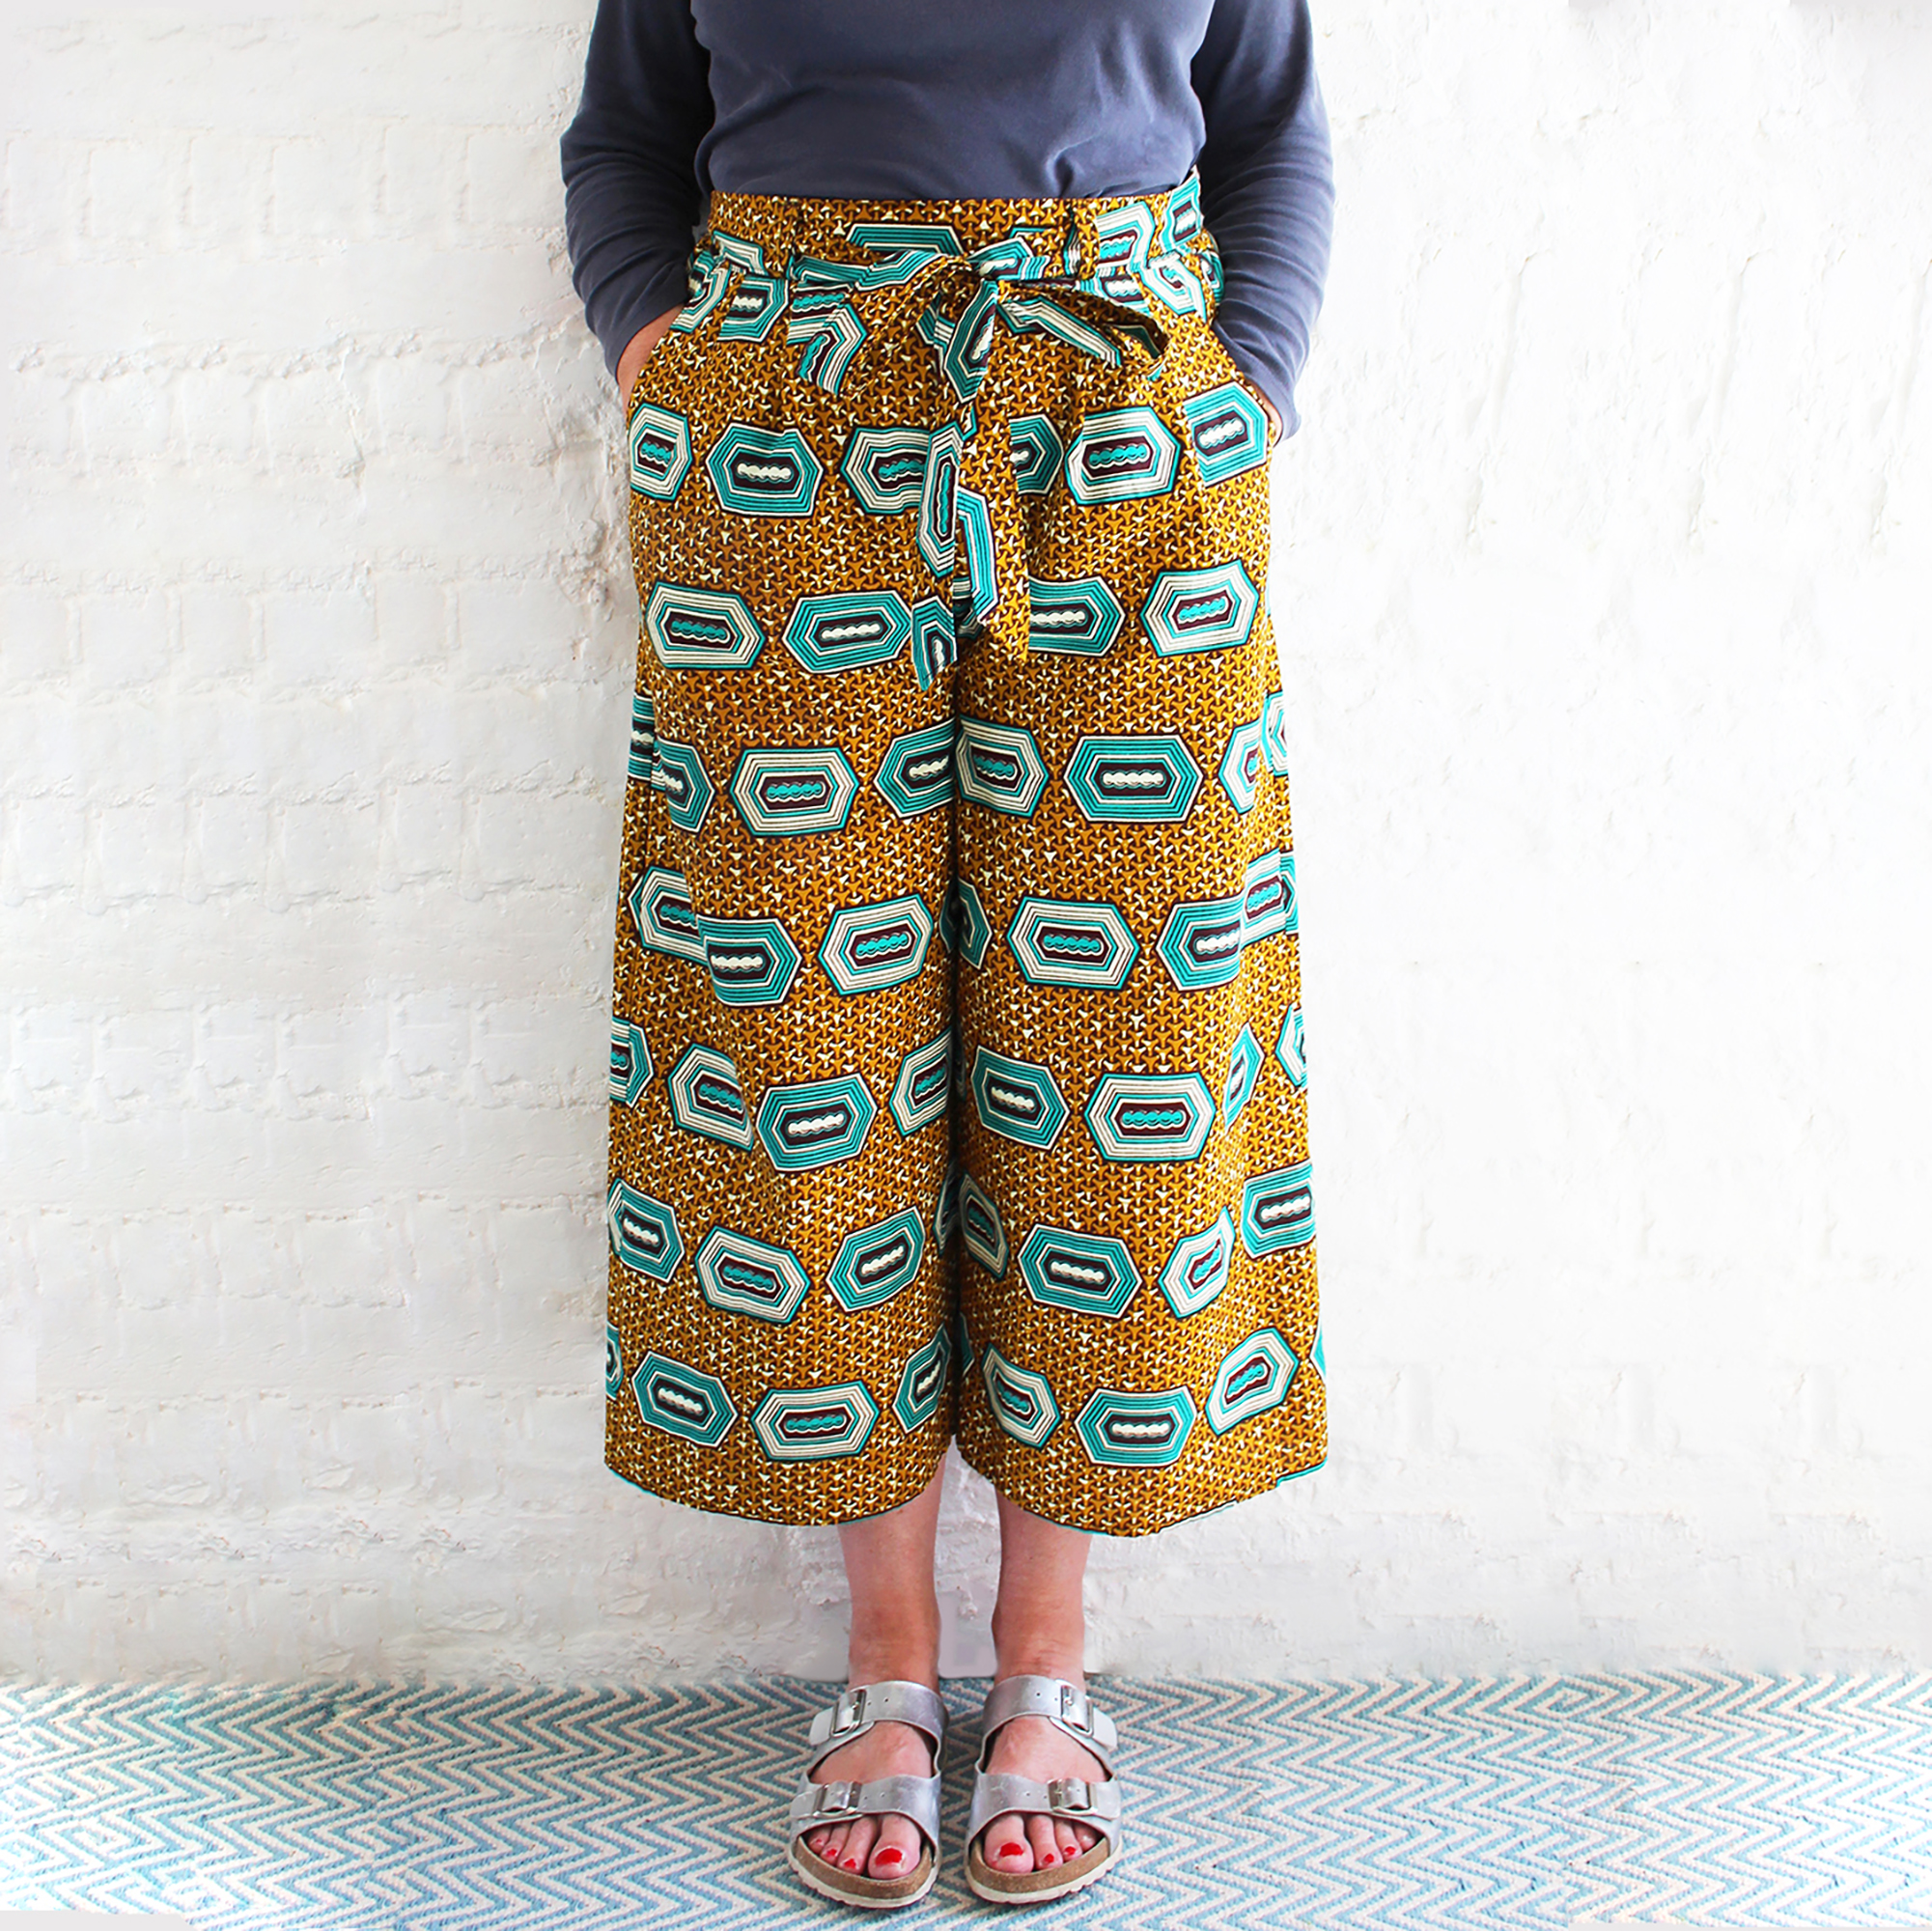
Heres a picture of me wearing a full length version of Elsie made in a fab viscose print fabric by Lady McElroy, its a completely different look being more glam Palazzo pants style.
Actually Ive also made them from African Dutch Wax and I think they look oh so cool, perfect for holidays.
The pattern comes in two lengths – cropped or full length so if you can check the size chart for more details about the finished measurements and fabric quantities.
I measure 5 ft 7 and my cropped Elsie trousers (pattern cover picture) measure 22cm (9″ approx.) from the bottom of the hem to the ground. You may like to use this measurement as a guide as to how long your cropped trousers should be on you. Some of us have longer legs than others, so you can adapt the length to suit your body if needed.
Here is a chart showing the measurements:
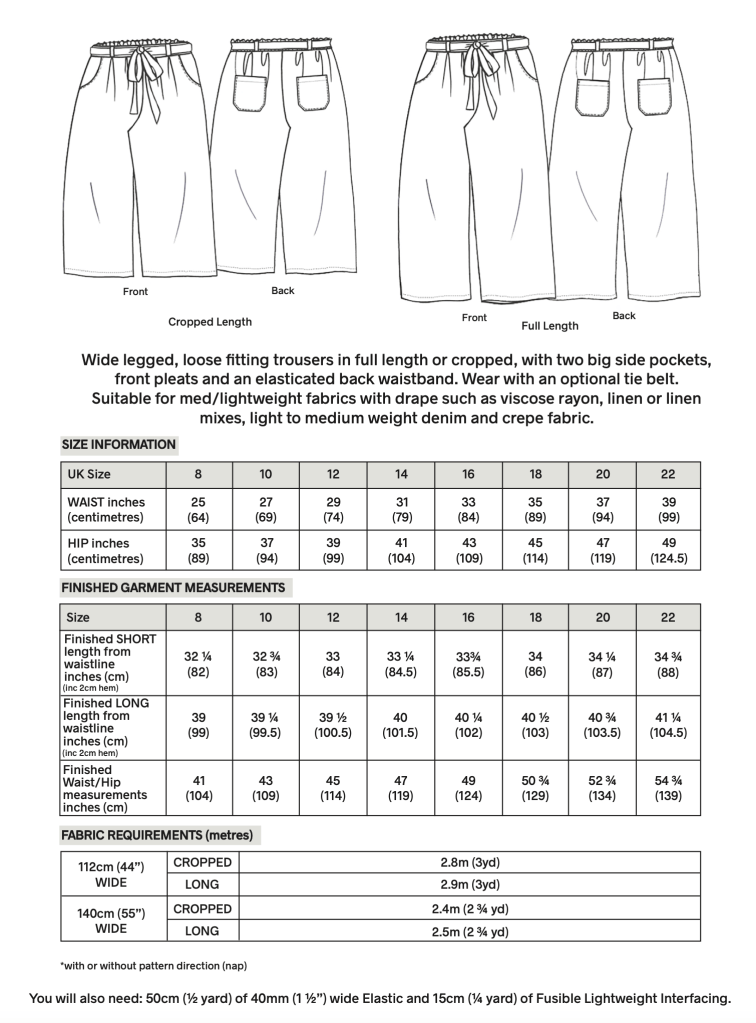
A BIT ABOUT EASE! You will need to allow at least 10-15cm (4-6″) at the waist/hips (whichever is the largest measurement) for ‘ease‘ this allows you to pull them on and off without struggle. Here are the finished waist/hip measurements:
Suitable fabrics for making Elsie trousers- linen, linen mixes or 6-8oz denim (make sure its really nice and soft and has some drape to it). Then viscose, polyester drapey fabrics. Try to avoid anything too lightweight and nothing see through (no VPL s please!).
For cutting instructions and Layplans see the paper pattern. You also need a half metre of 40mm
(1 1/2″) elastic (soft variety) and 20cm (1/4 yd) of fusible light/med weight interfacing.
Here is an edited down version of the pattern instructions to give you an idea about whats involved.
Seam allowance is 1cm (3/8″).
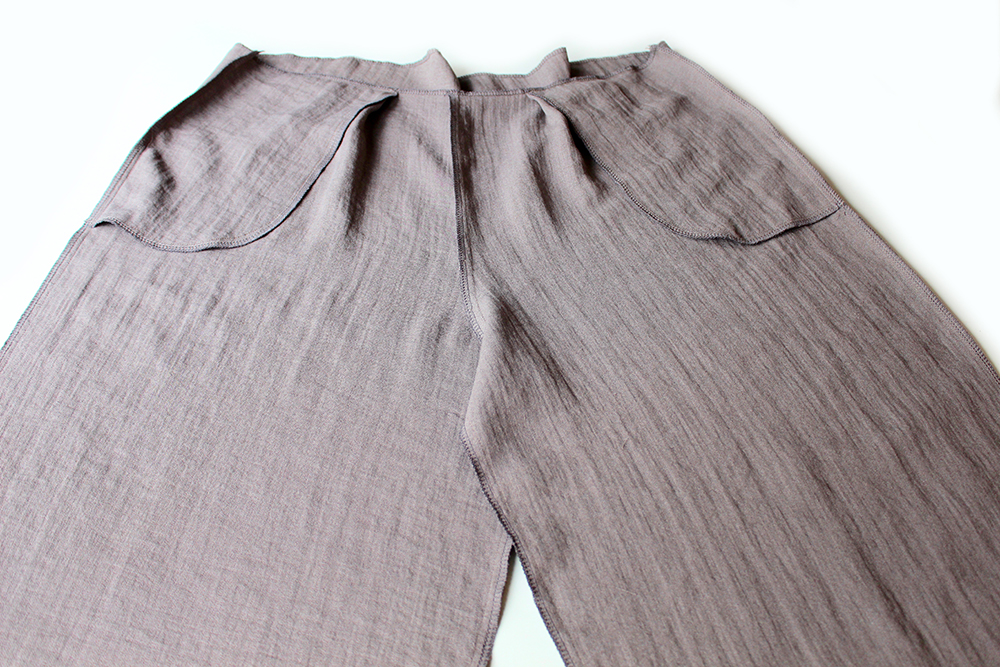
SEWING THE BACK POCKETS
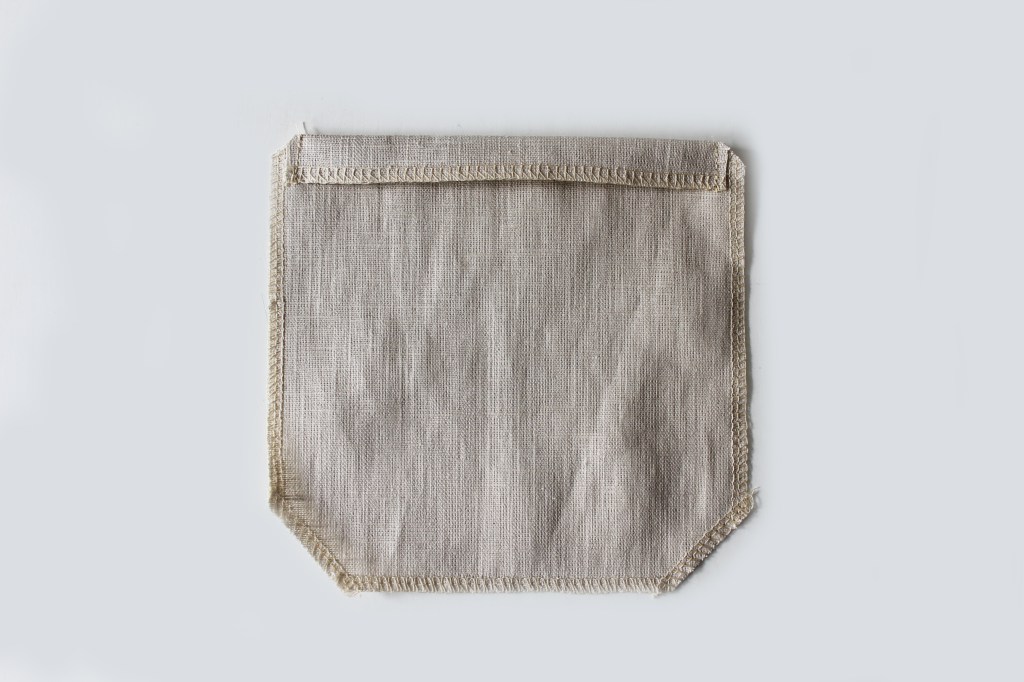
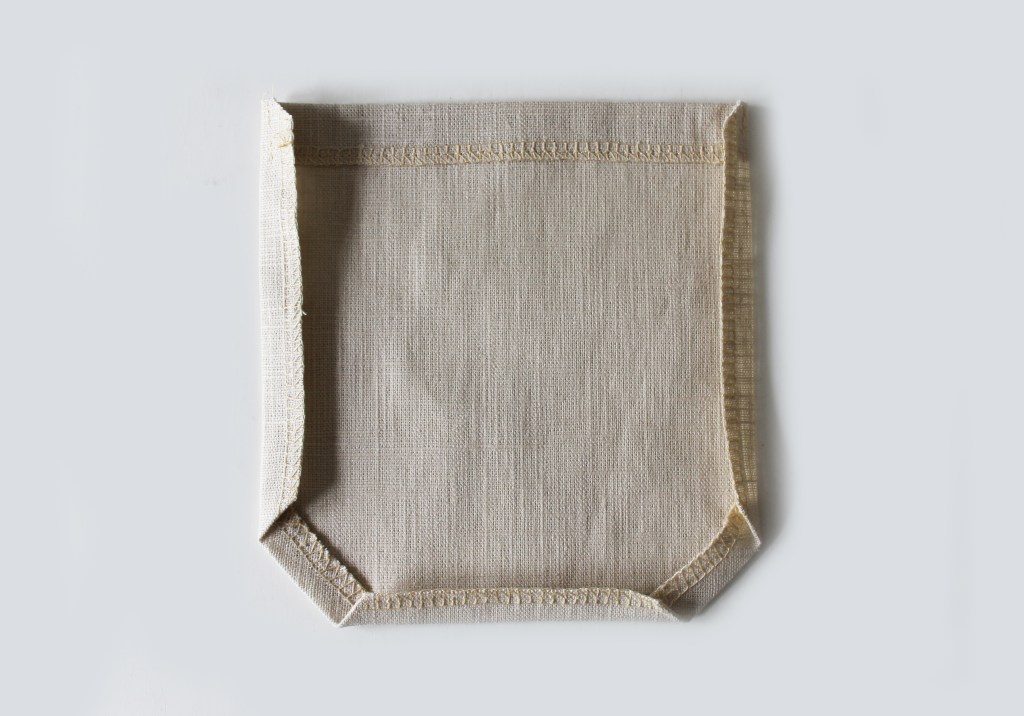
Make a hem at the top edge of the Pocket. Finish the edges all around. Fold over the three finished edges 1cm. Press. Pin to the trouser back each side. Topstitch. (Hand tack first if preferred).
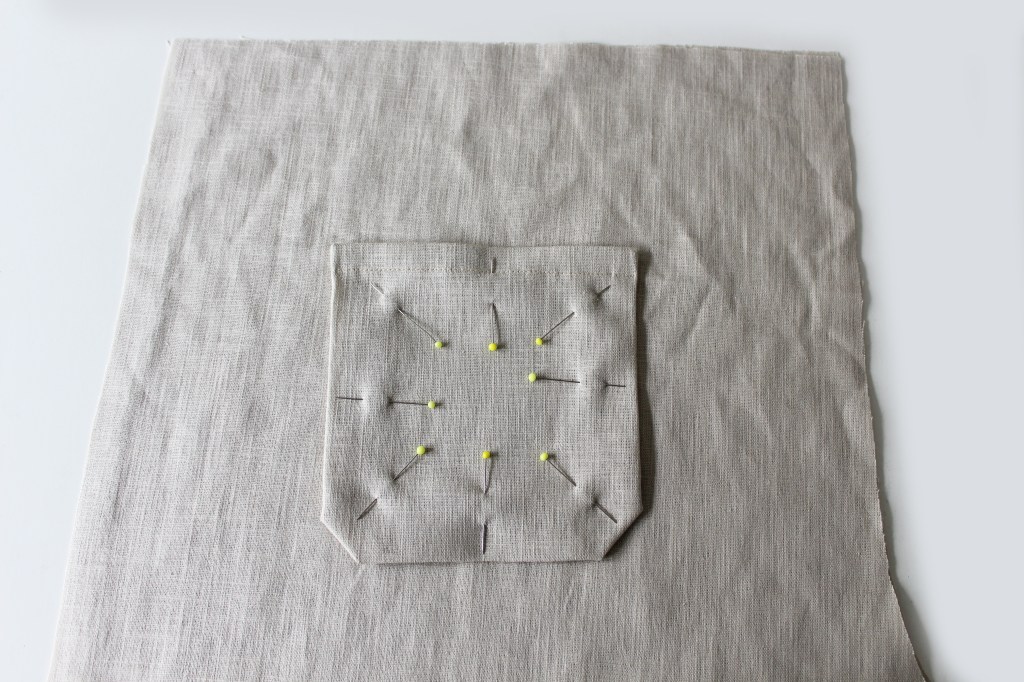
FRONT PLEATS
Pin the pleats as shown on the template on the front only, either side of the centre. 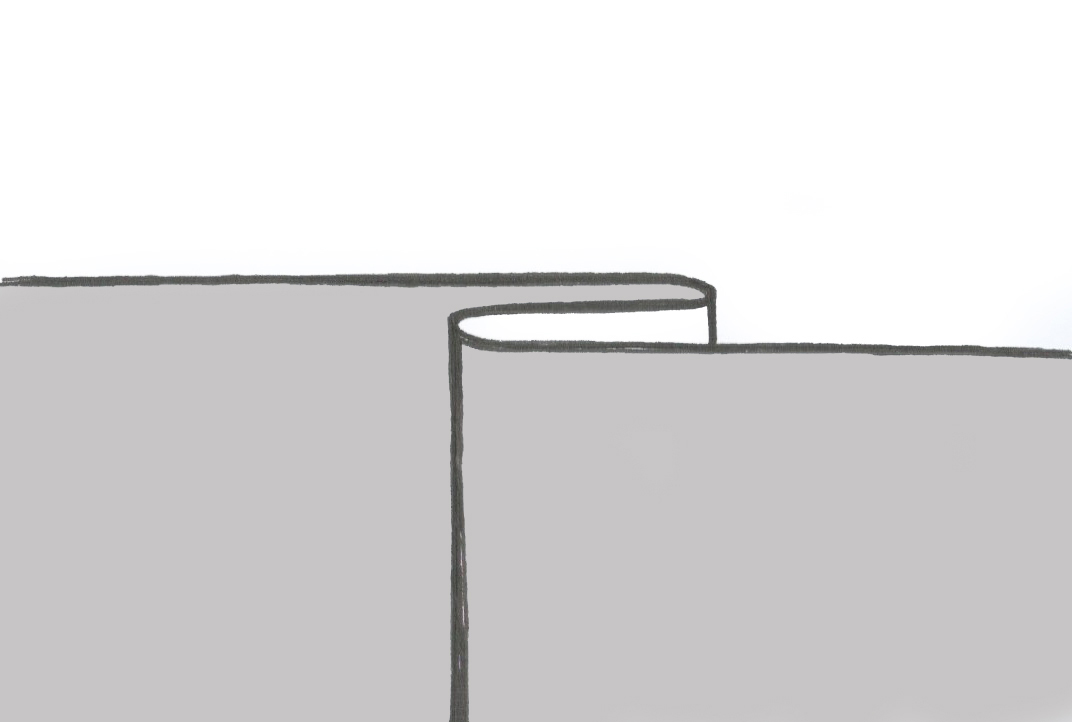
Two on the left hand side of the centre seam.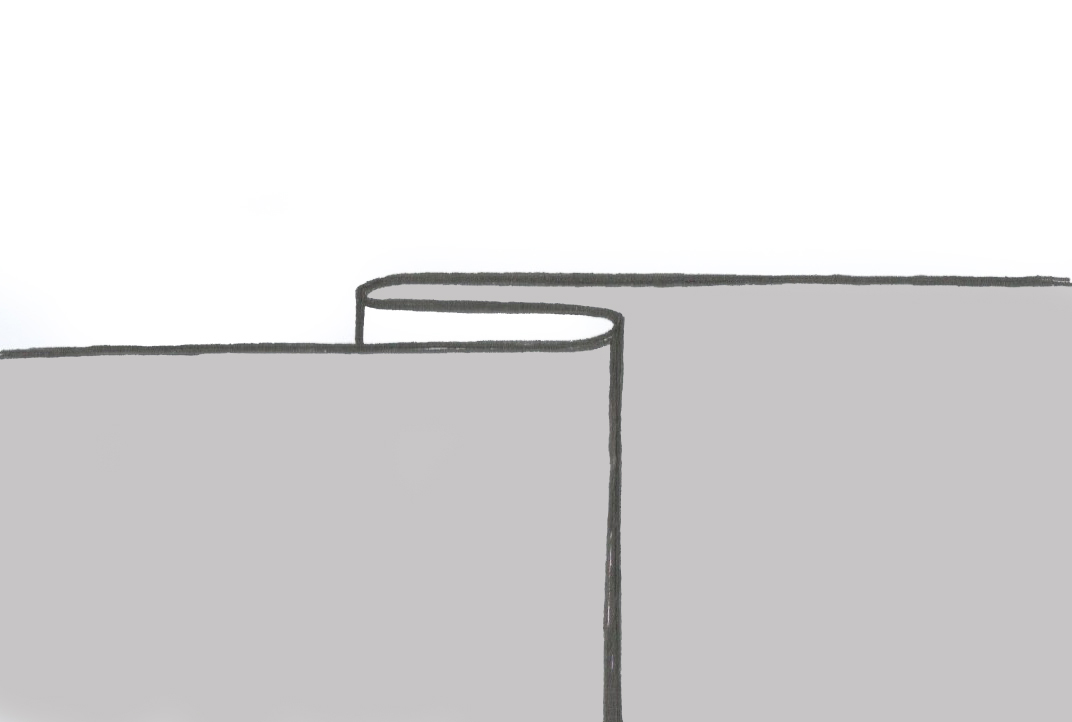 Two on the right hand side of the centre seam.So it looks like this. Machine tack stitch the pleats to hold in position along the top edge so you can remove the pins and the pleats are held in position.
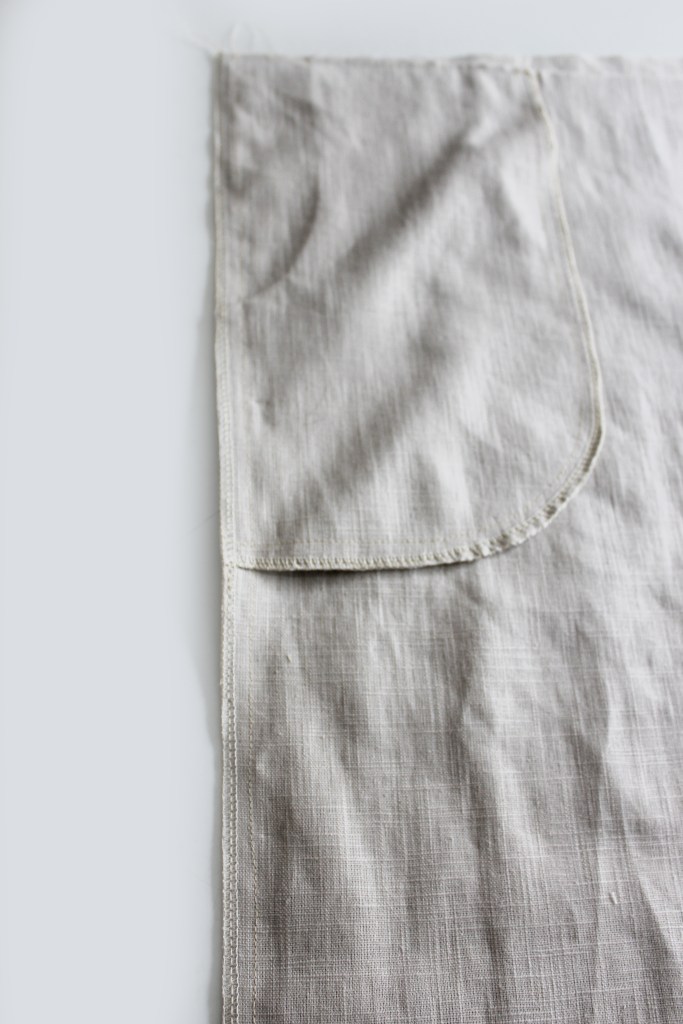
FRONT SIDE POCKETS
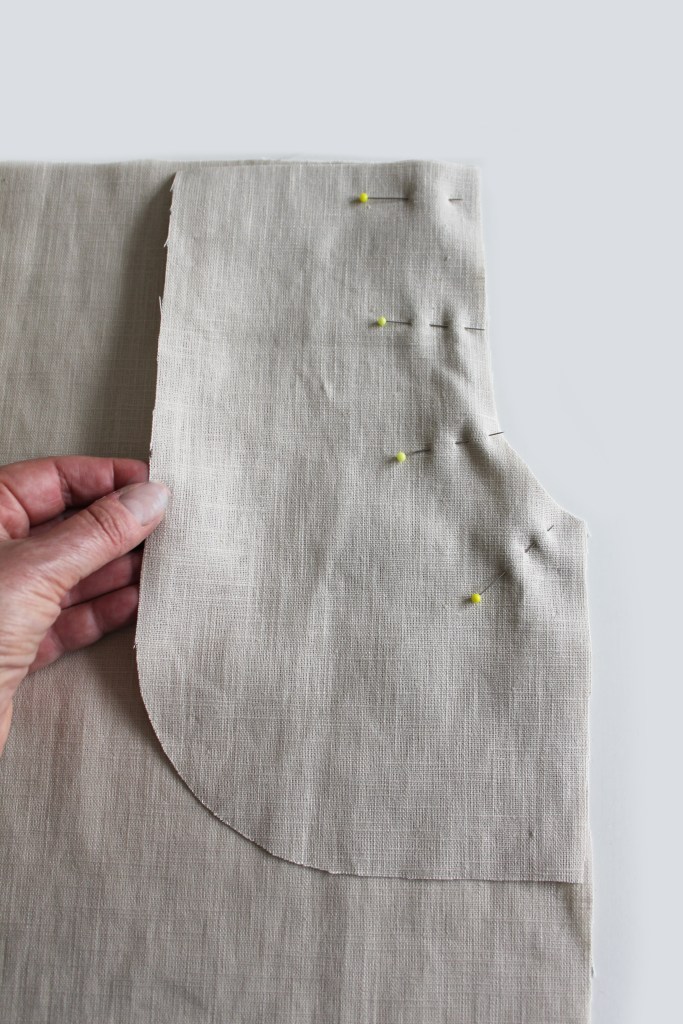
Pin the Pocket right sides together, matching the side curved edges.
Sew. Press the seam allowance open.
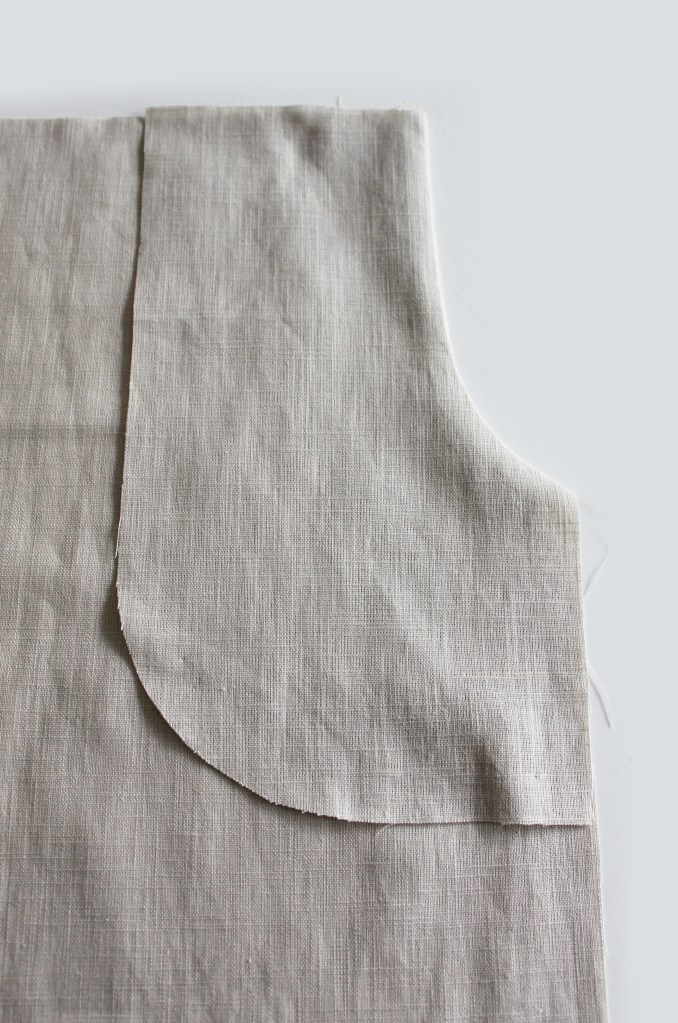
Fold the pocket to the reverse side. Press.

Topstitch.
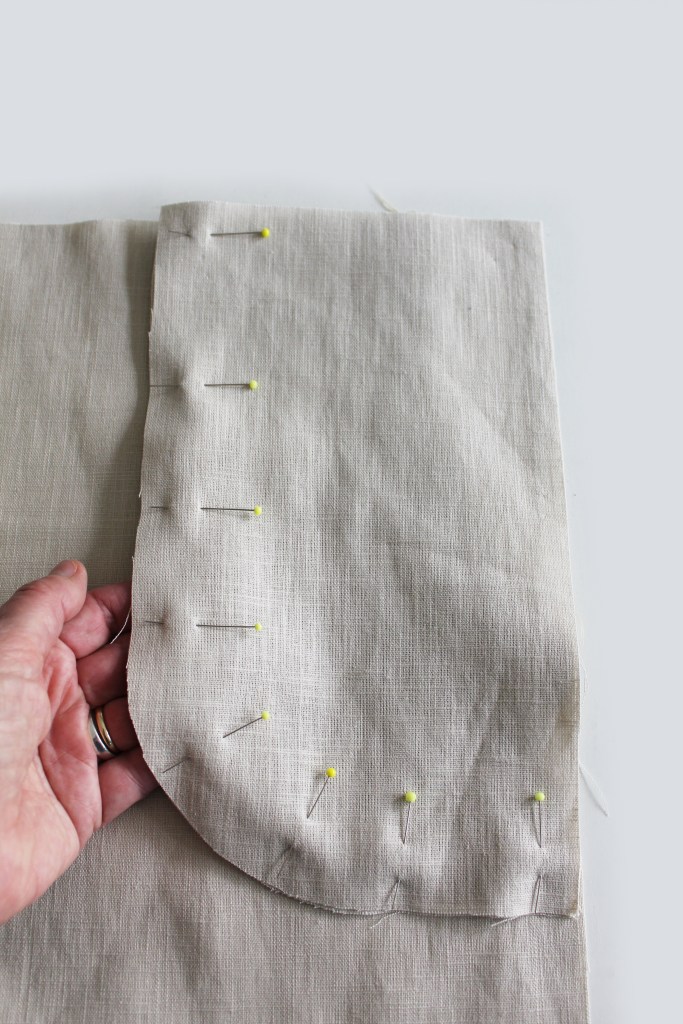
Pin a pocket lining to the outer curved edge with the right sides together. Sew along the outer curved edge.

Finish the outer curved edge. Pin the side edges and top edges to the trouser Front to secure the Pocket in place.
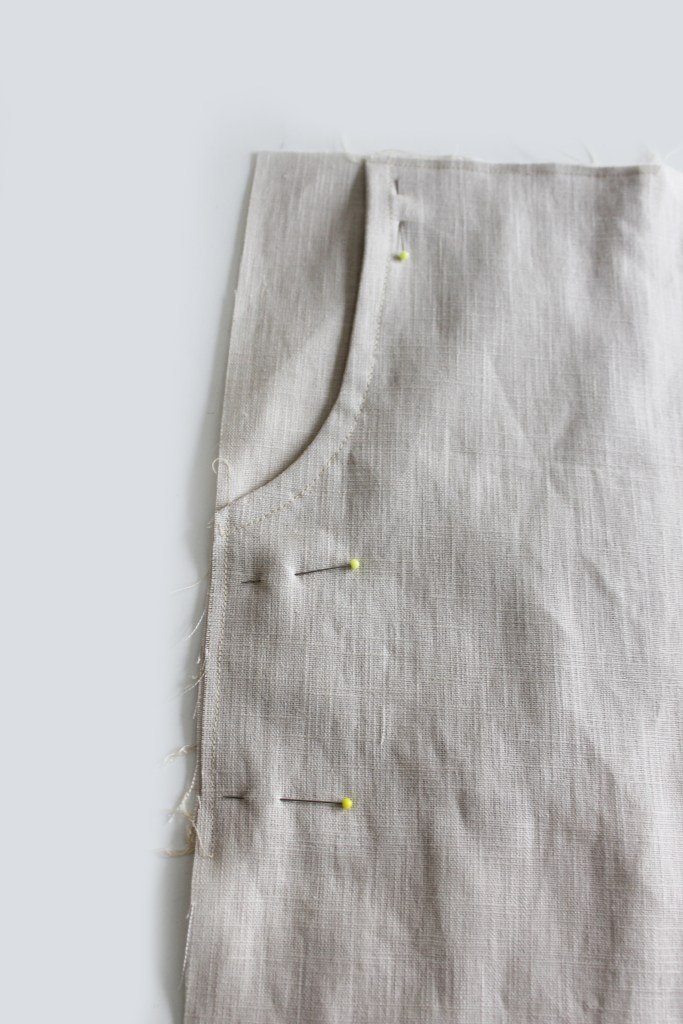
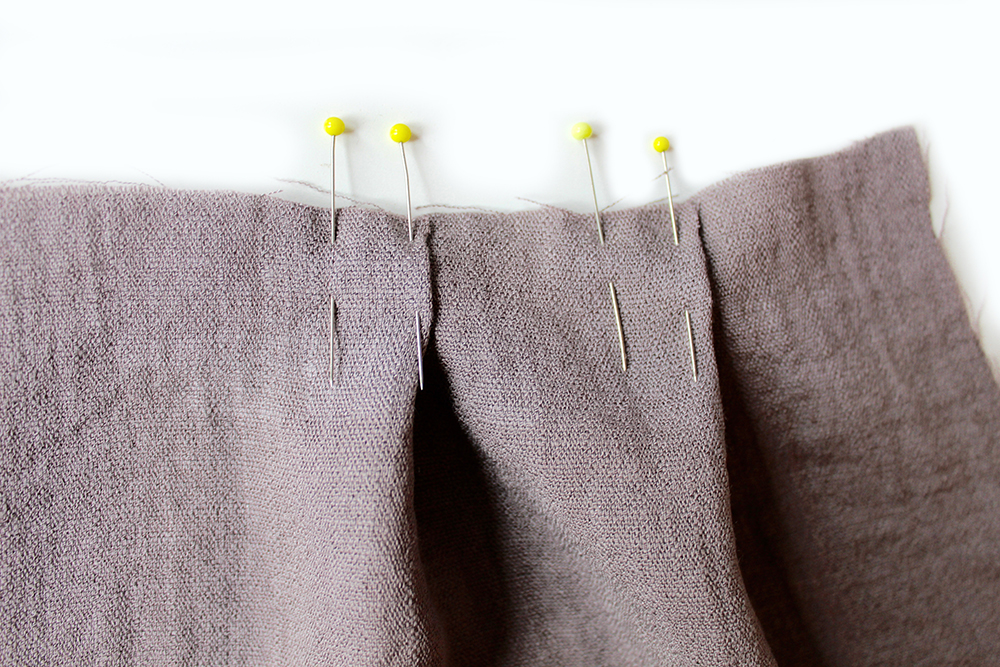
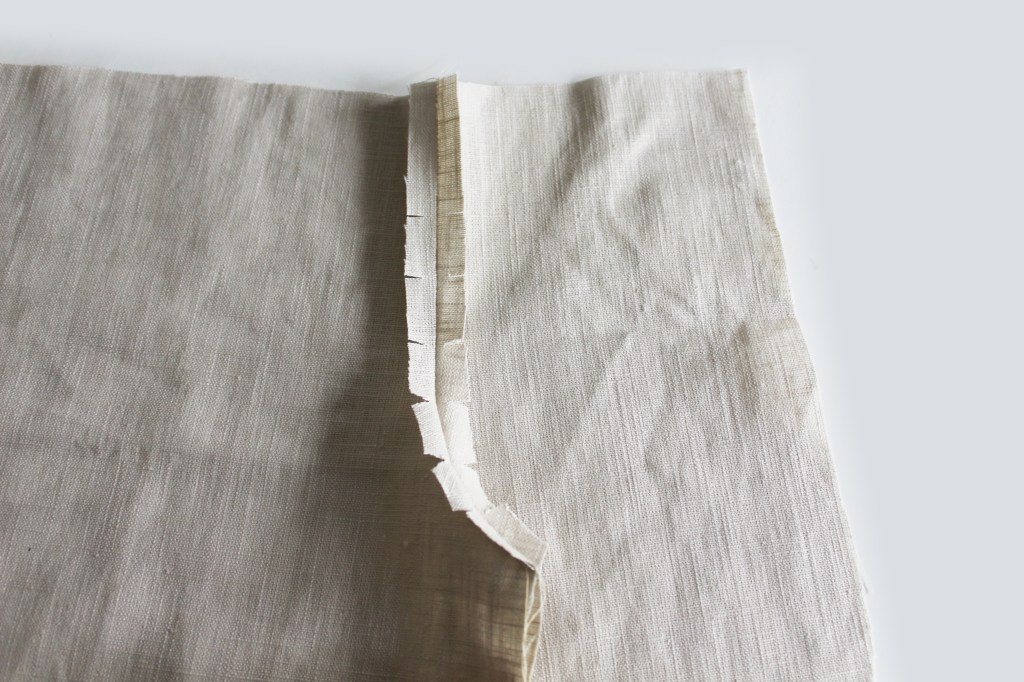
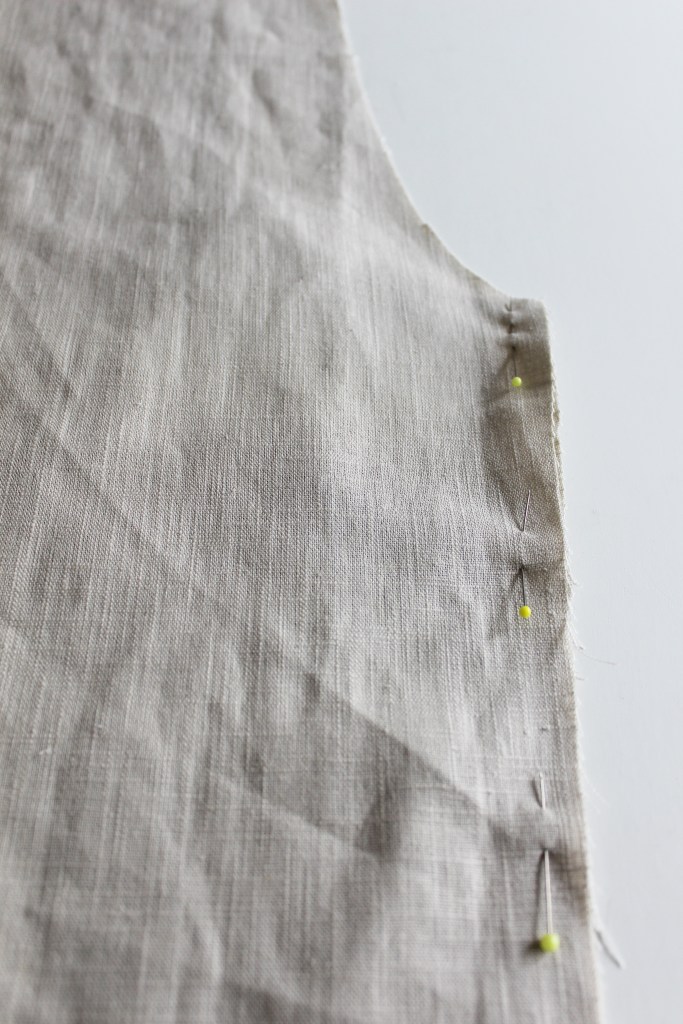
With the right sides facing together, pin the trouser leg Front to Back at the side edges.
Sew. Finish the seam allowances together. Topstitch on the right side, all the way down each outer leg seam.
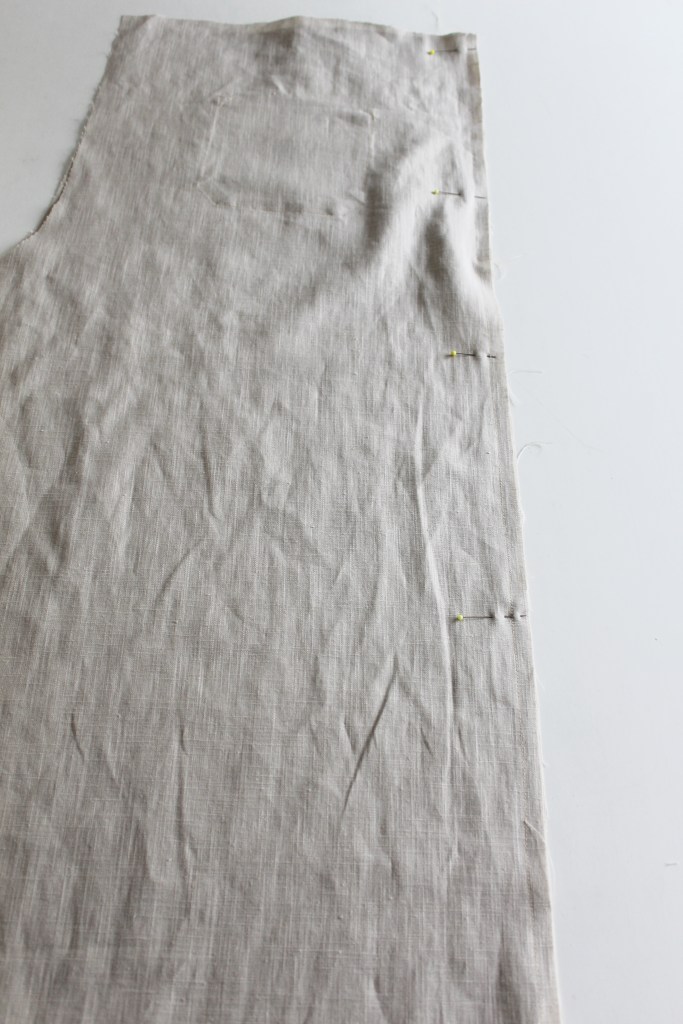
Pin the Front and Back Trouser leg at the inner leg edge. Sew. Finish the seam allowances together.
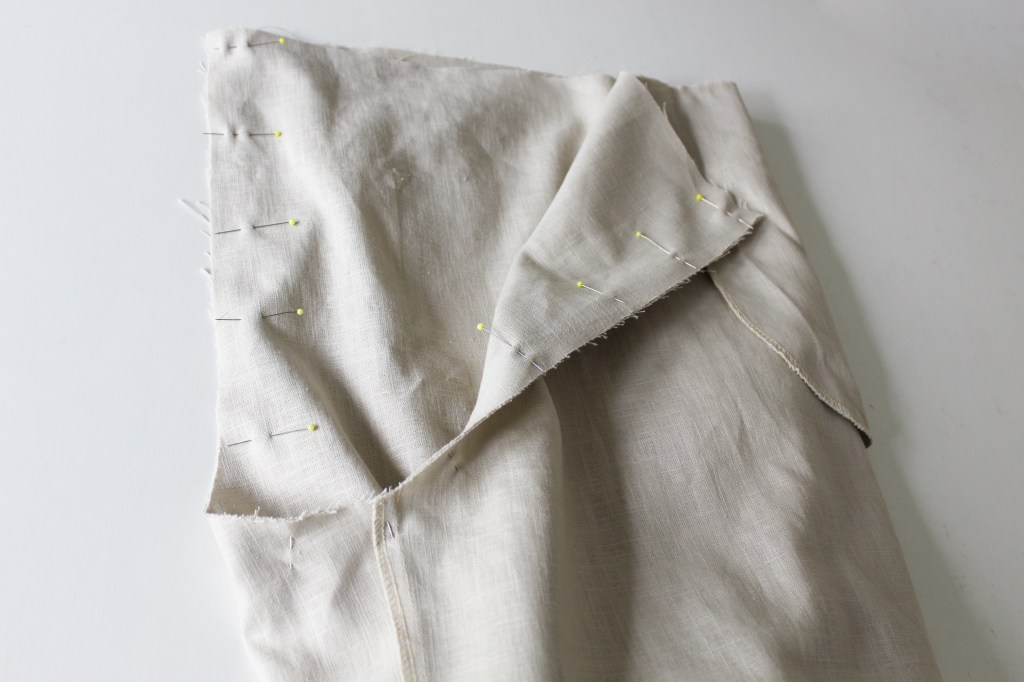
With one trouser leg right side facing and one wrong side facing, place one leg inside the other and pin, matching the curved crotch raw edges Front and Back, aligning the leg seams. Sew. Topstitch.
Now you have made the trousers, time to make the waistband.
WAISTBAND
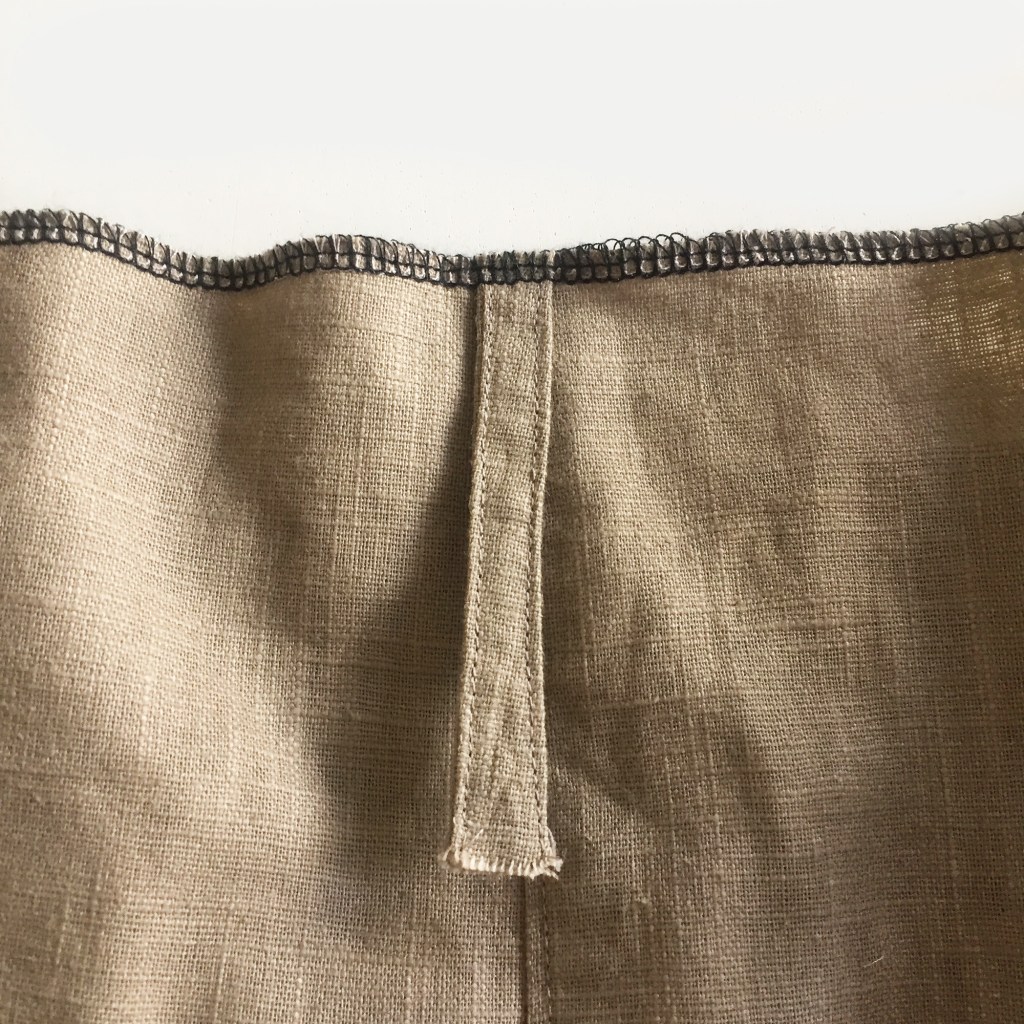
First make your tabs for the belt, or omit this if you are not having a belt.
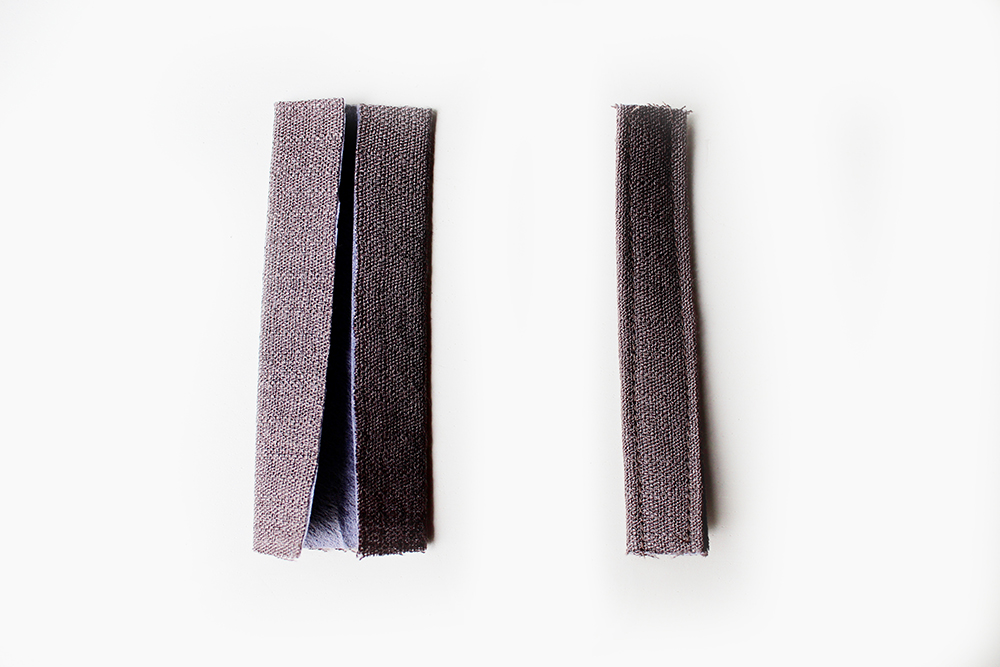
Fold over the Tab long sides 1cm to the wrong side. Press. Fold again in half. Pin, topstitch close to each long side.
Press over 1cm (3/8″)at one short side. Place to one side. Repeat for the other three tab pieces.
SEWING THE WAISTBAND -METHOD 1
This little film link below will help in inserting elastic using method 1
FILM ABOUT INSERTING THE ELASTIC
If you have an over locker you could insert the waistband this quick way…for an alternative way see the following section -Method 2.
 Interface the front waistband only. Pin and sew RST at the short sides. Press the seam allowances open.
 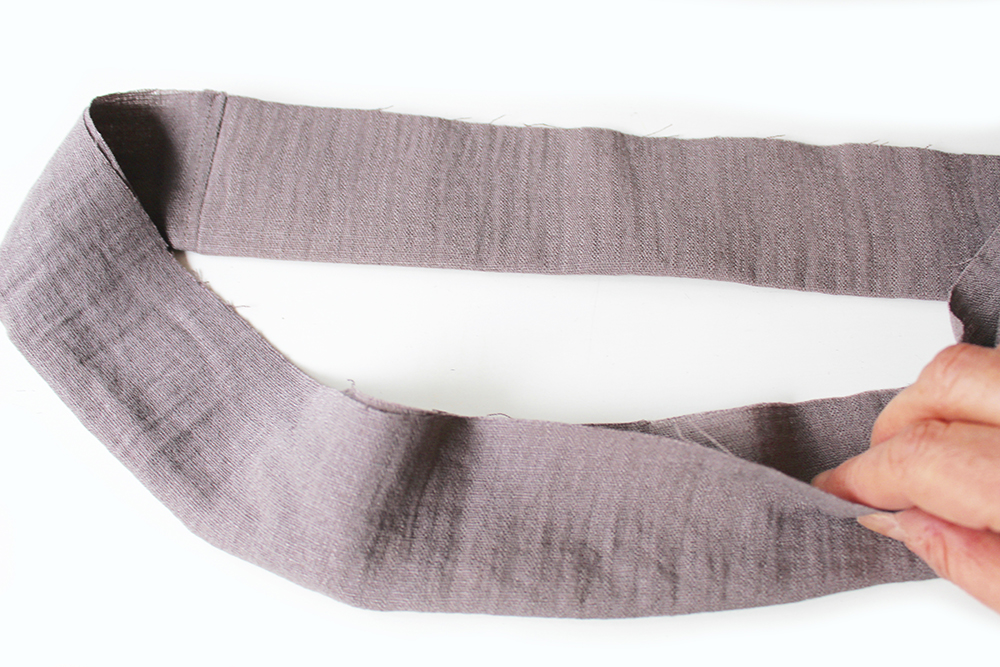 Fold in half so the WST (wrong sides are together), match the raw edges.
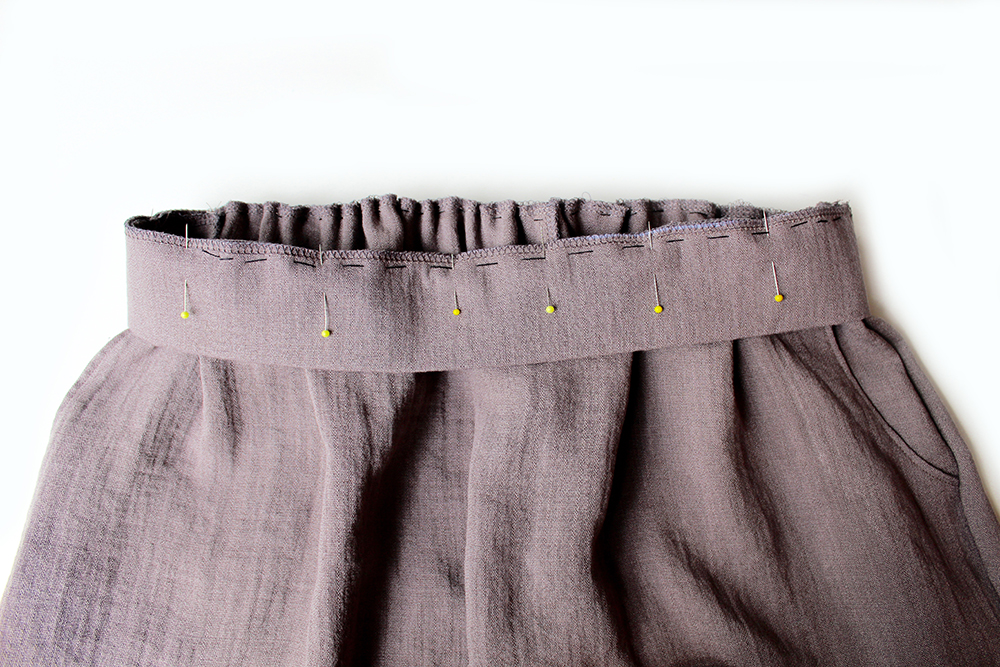
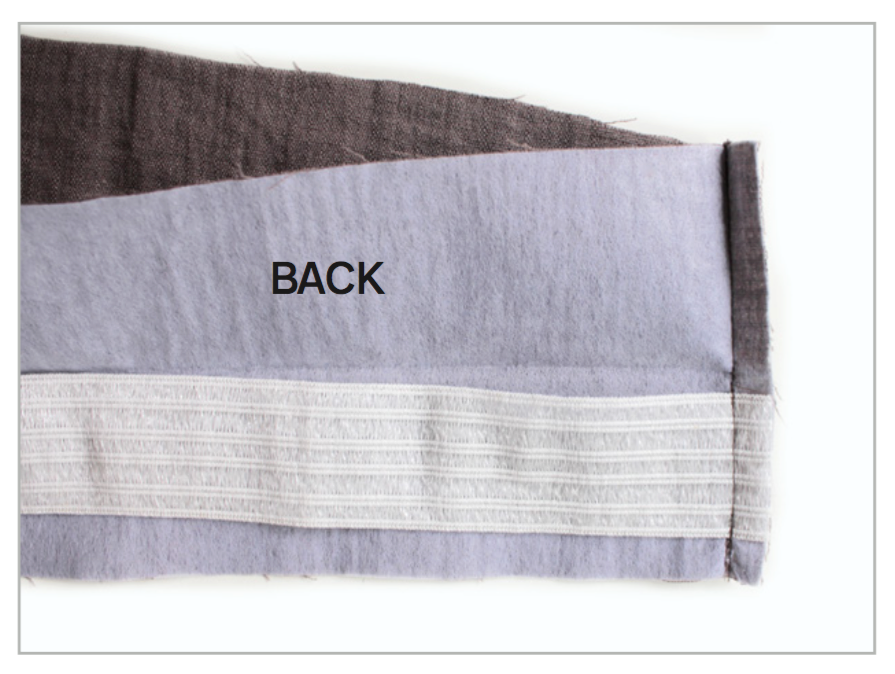 Pin the elastic at the side seams and extend across at the Back section.
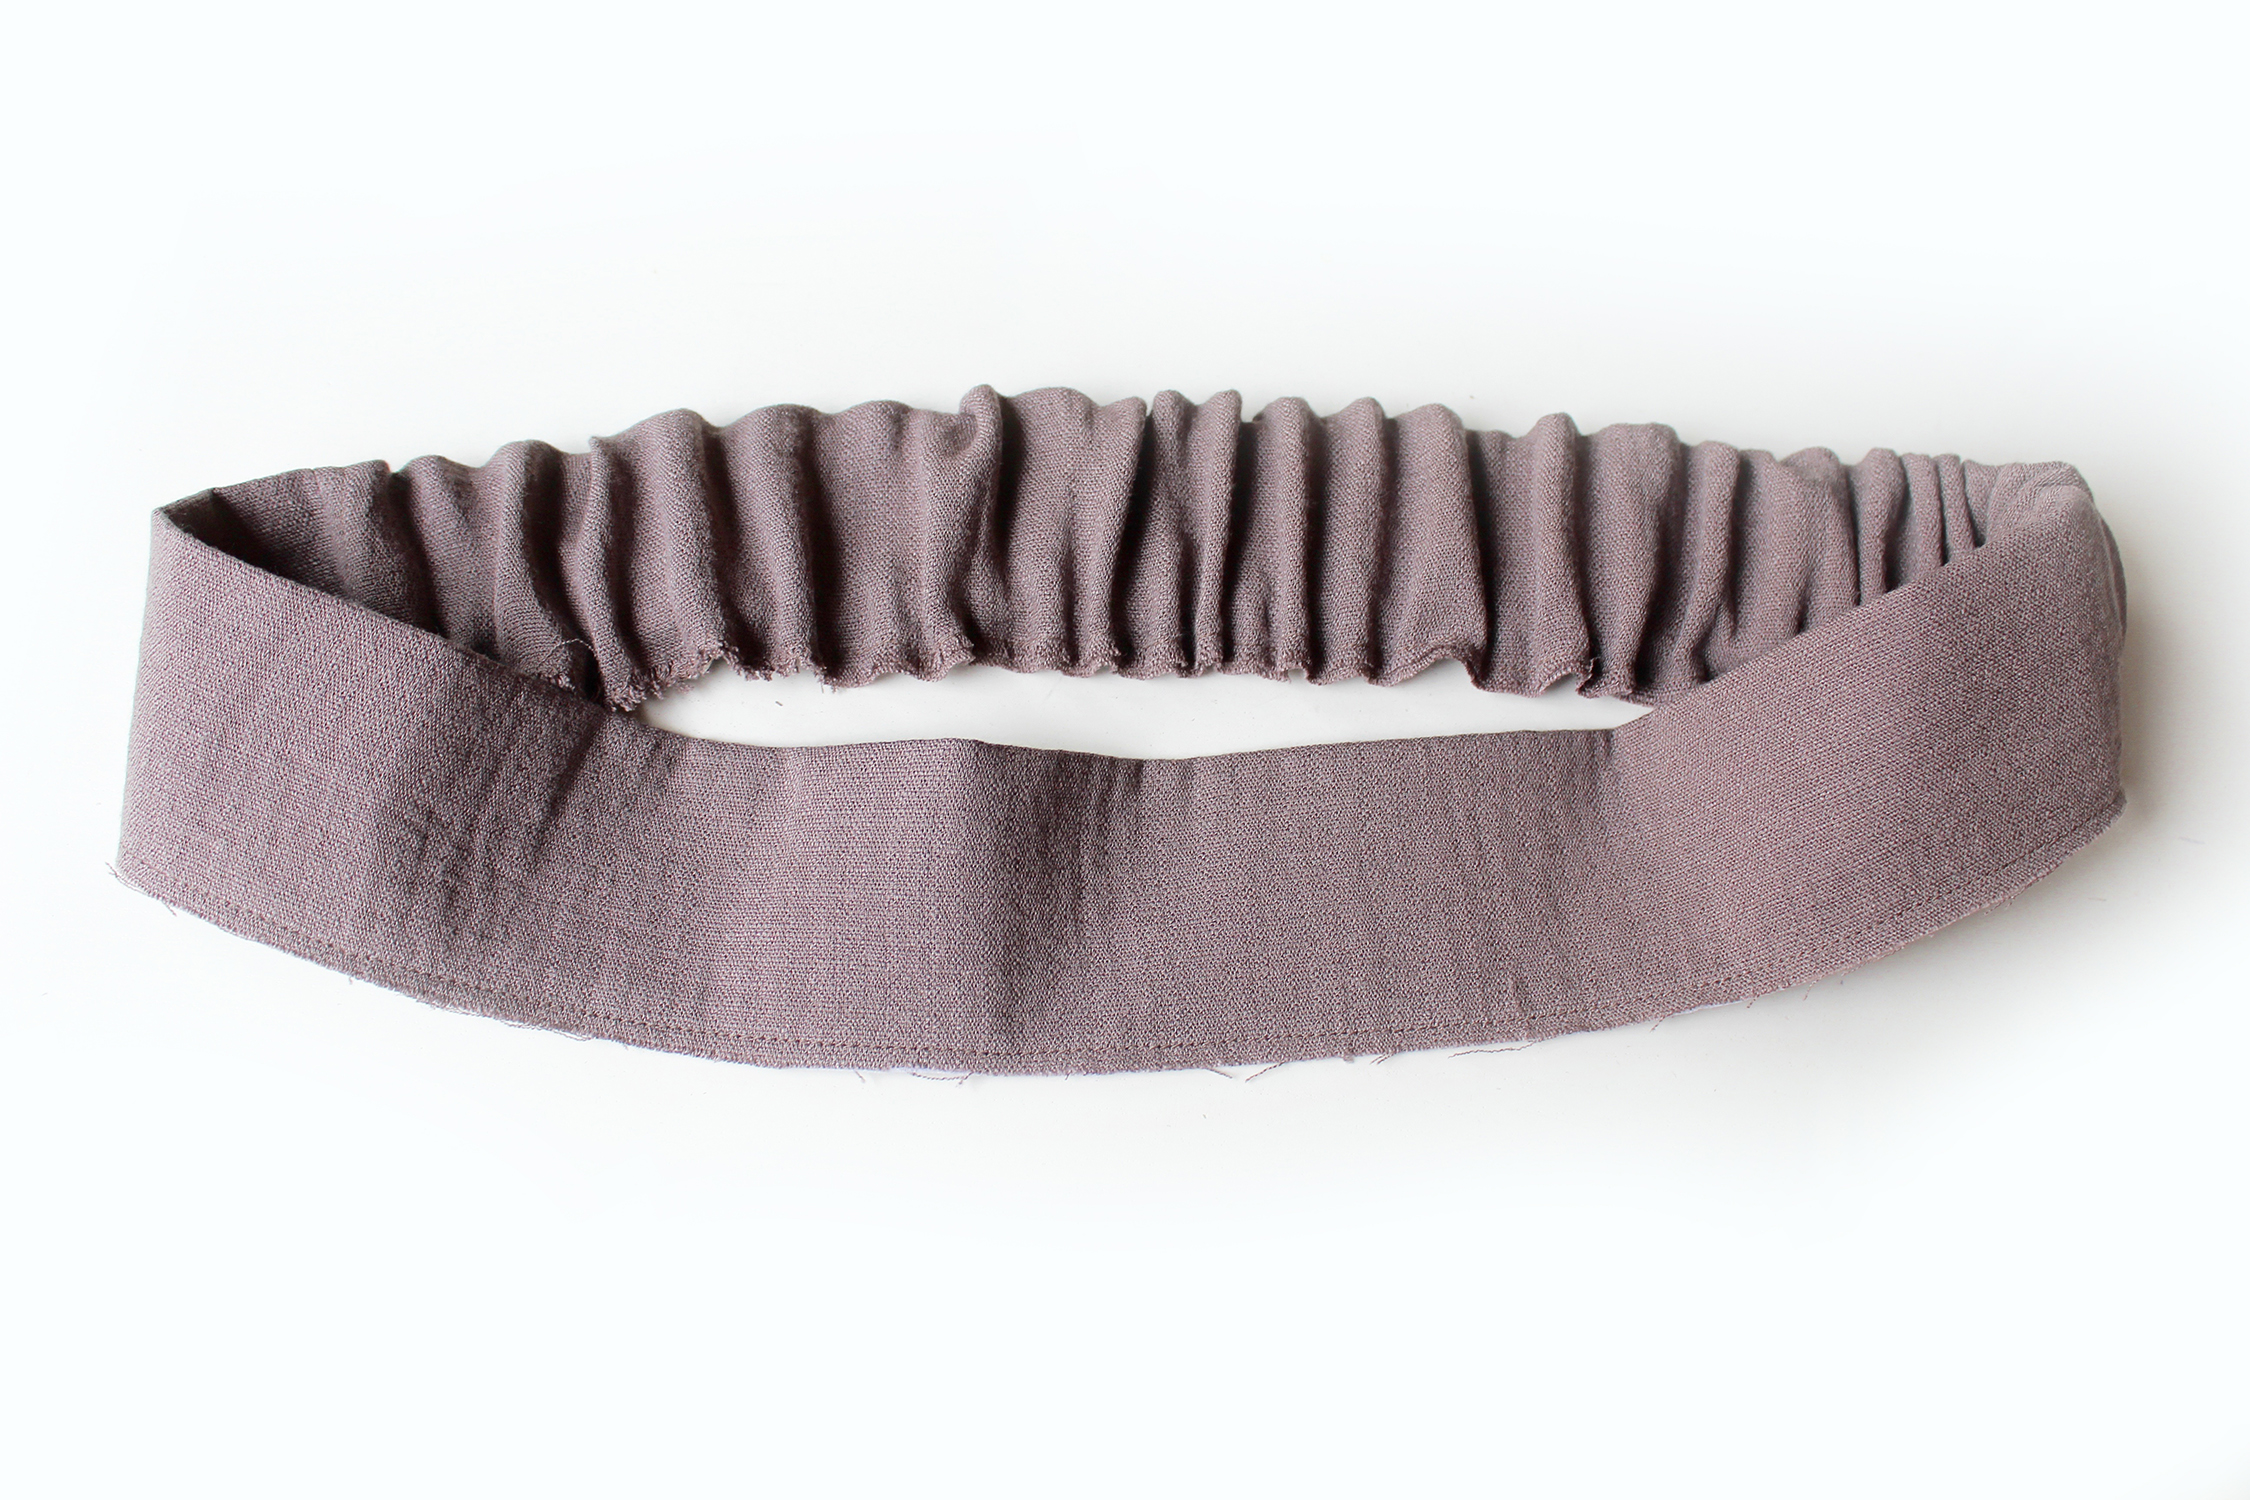 Machine tack close to the raw edges, making sure you don’t sew in any elastic. Finish the raw edge, also on the trousers front and back top edge.
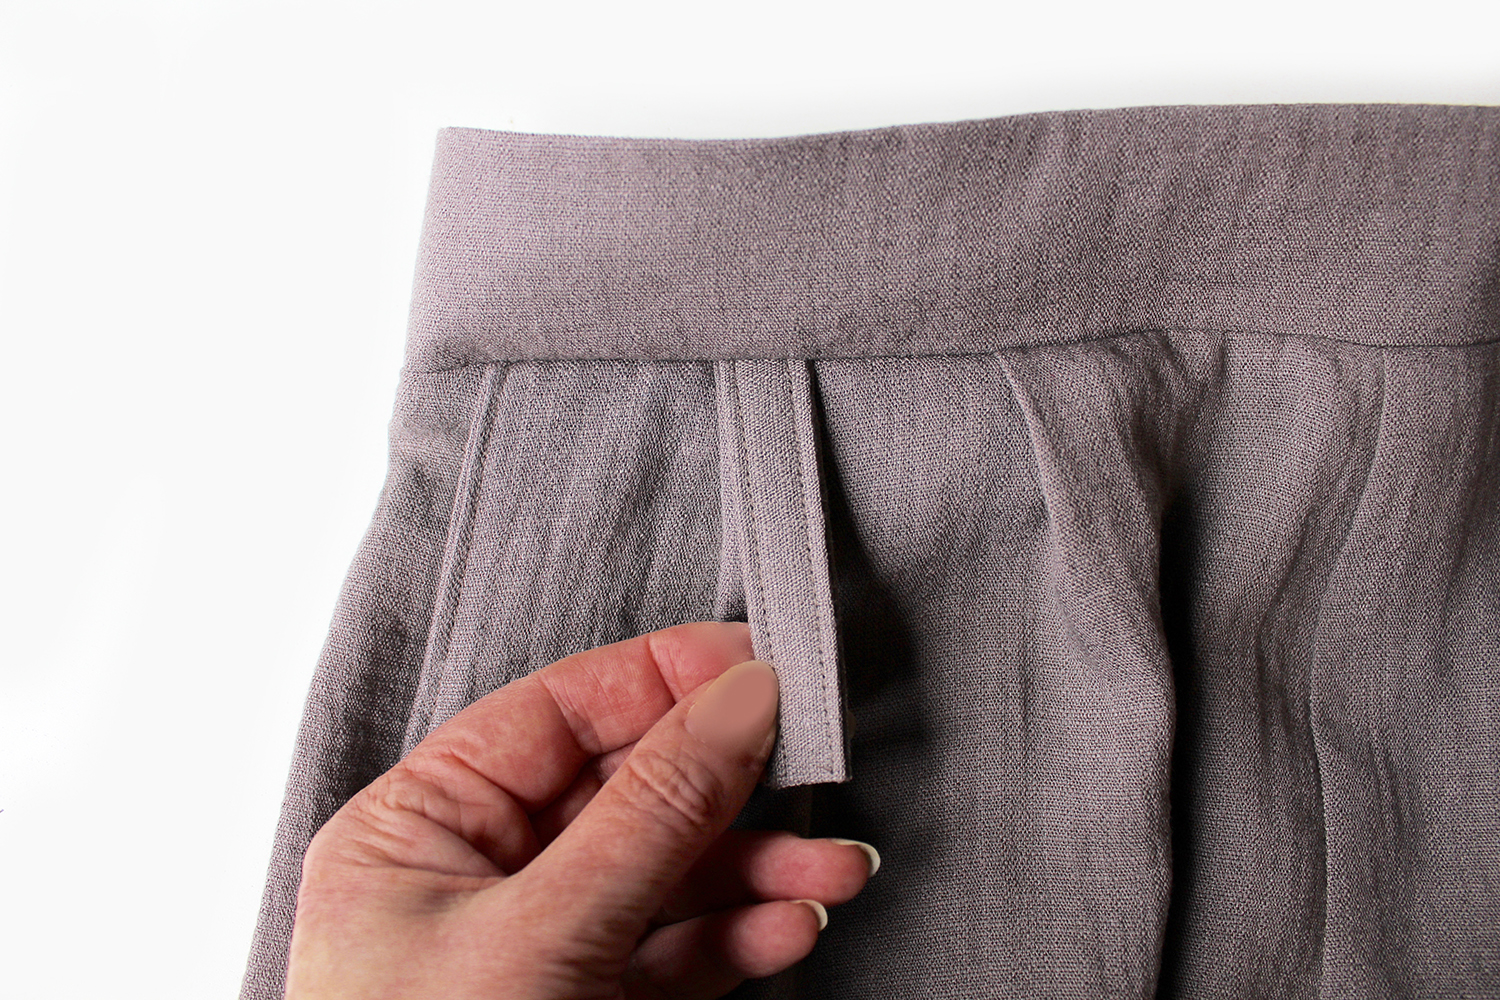
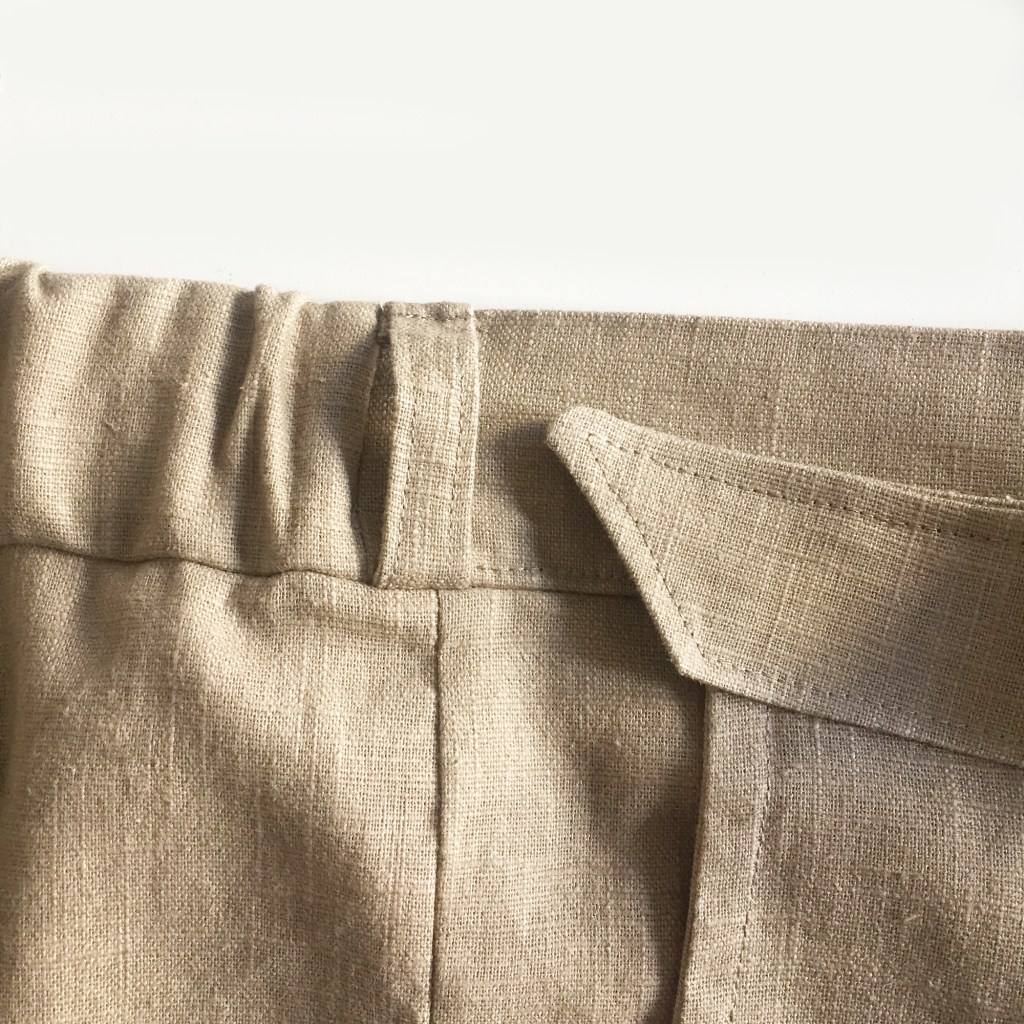
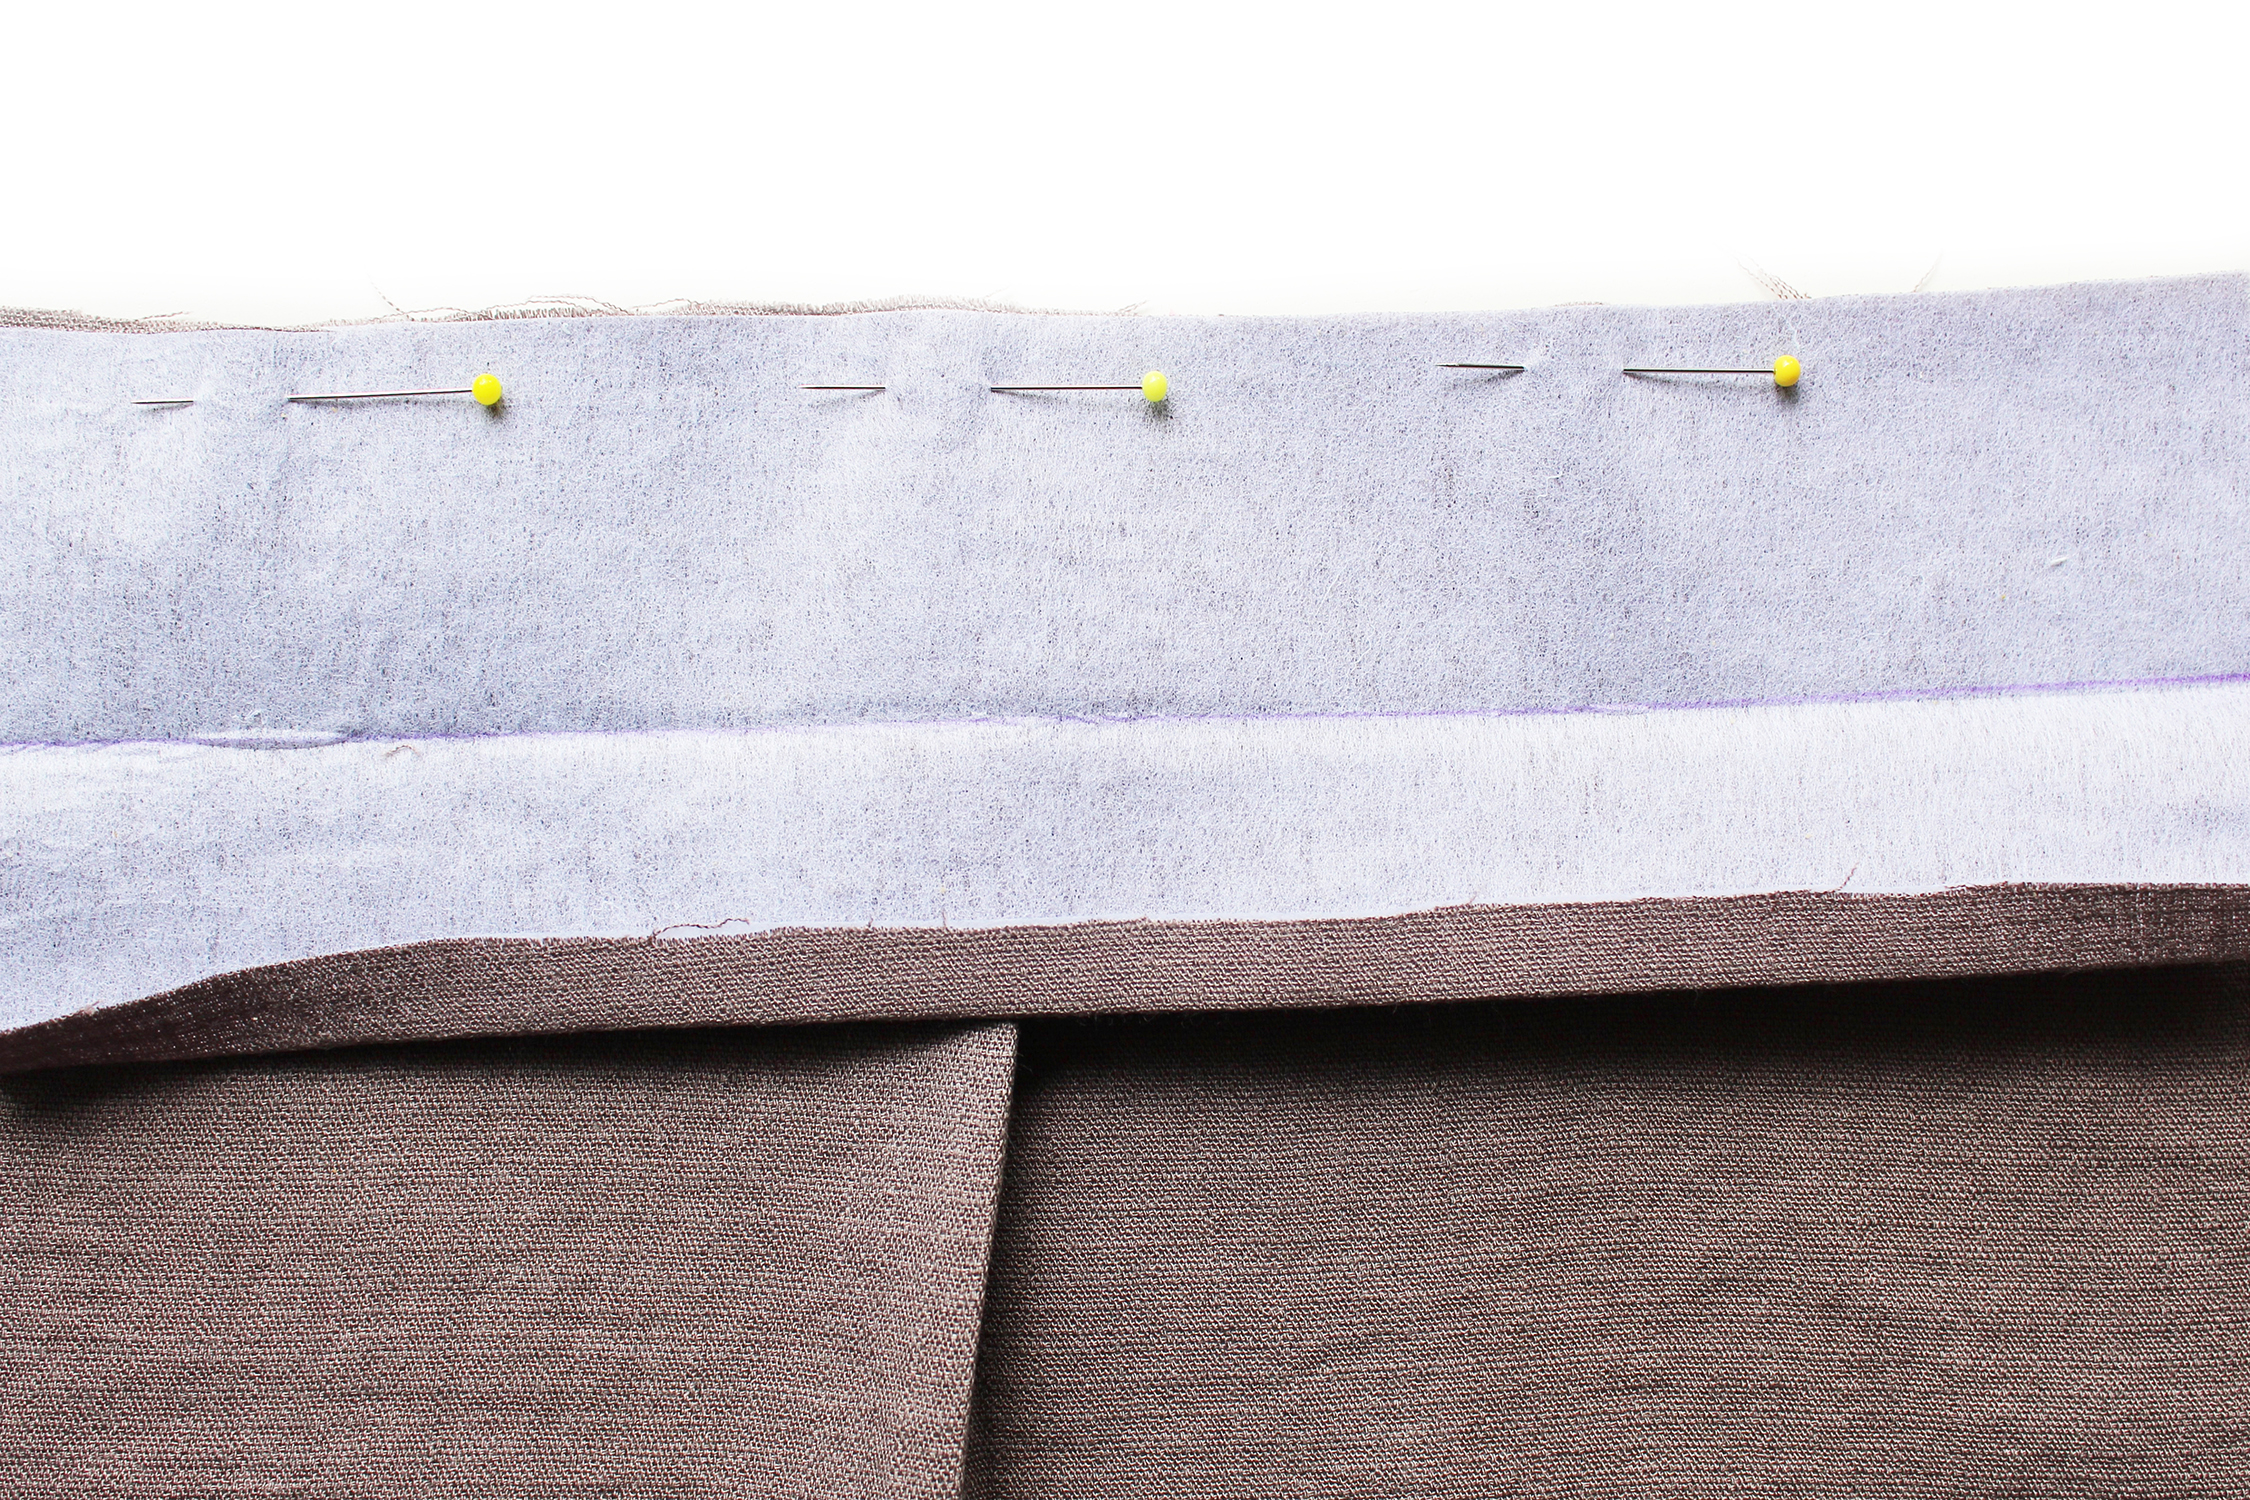
These trousers I placed the tabs one above the pleats each side and two on the back.
Pin the waistband piece to the trousers top edge, align front and back, match up the side seams. Insert the tab piece short end under the waistband before you stitch, align with the outer pleats and insert two tabs in the same way under the back waistband. Hand tack stitch. Sew all around pushing the elastic beyond the (dropped down) needle as you go, careful not to sew the elastic so push it away from the seam edge or pin it in position.
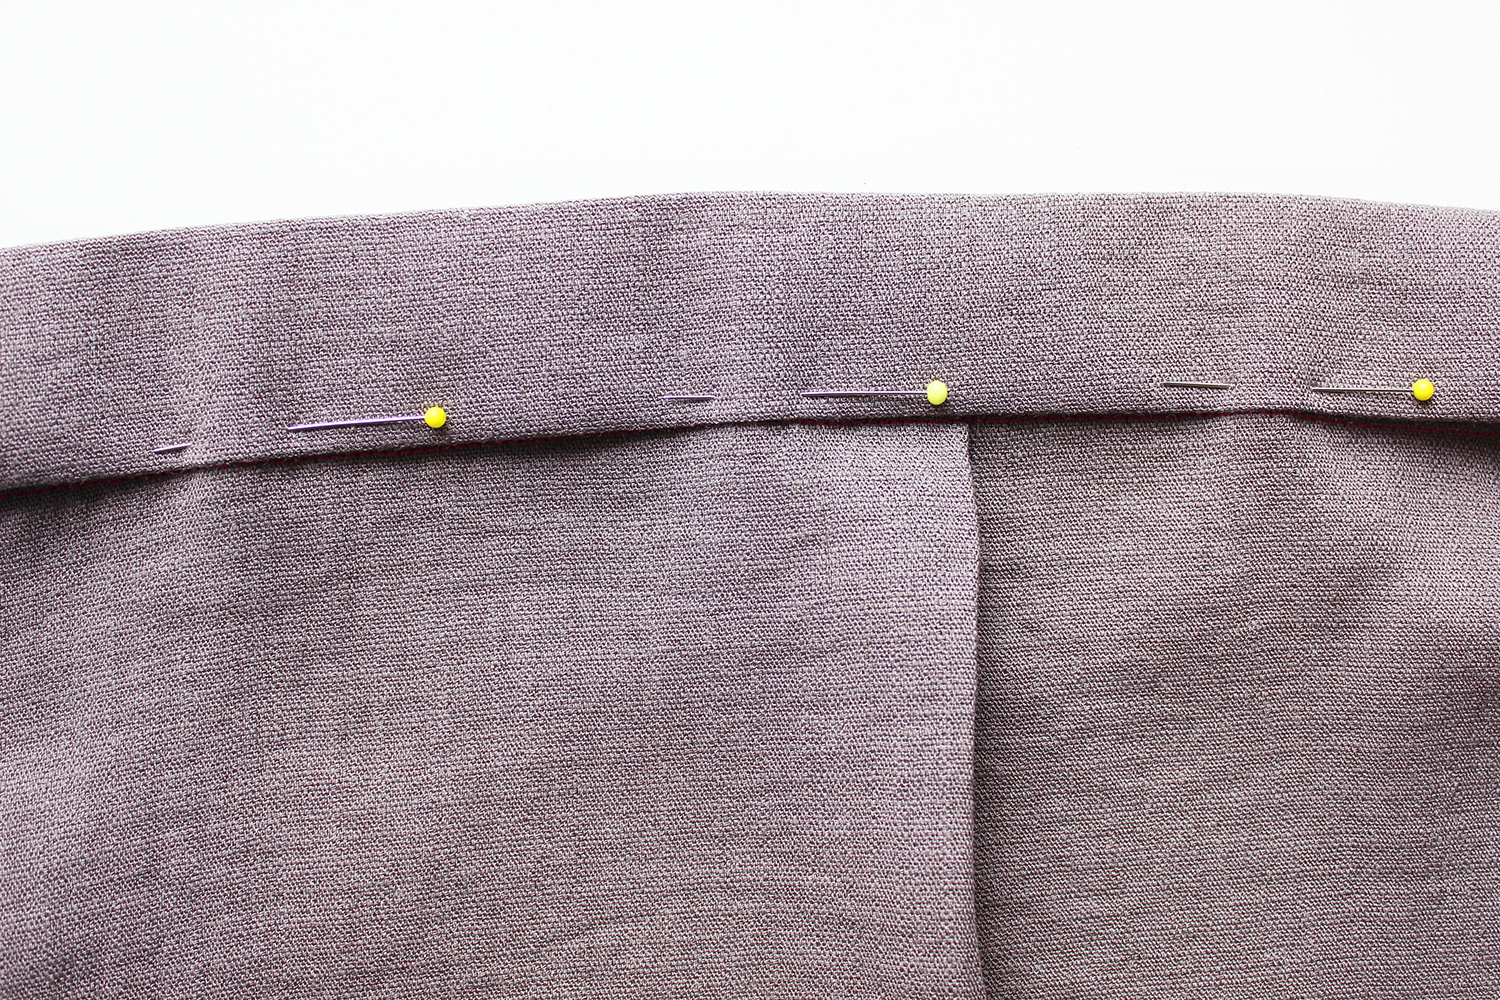
Press the waistband upwards, seam allowance downwards on the reverse side.
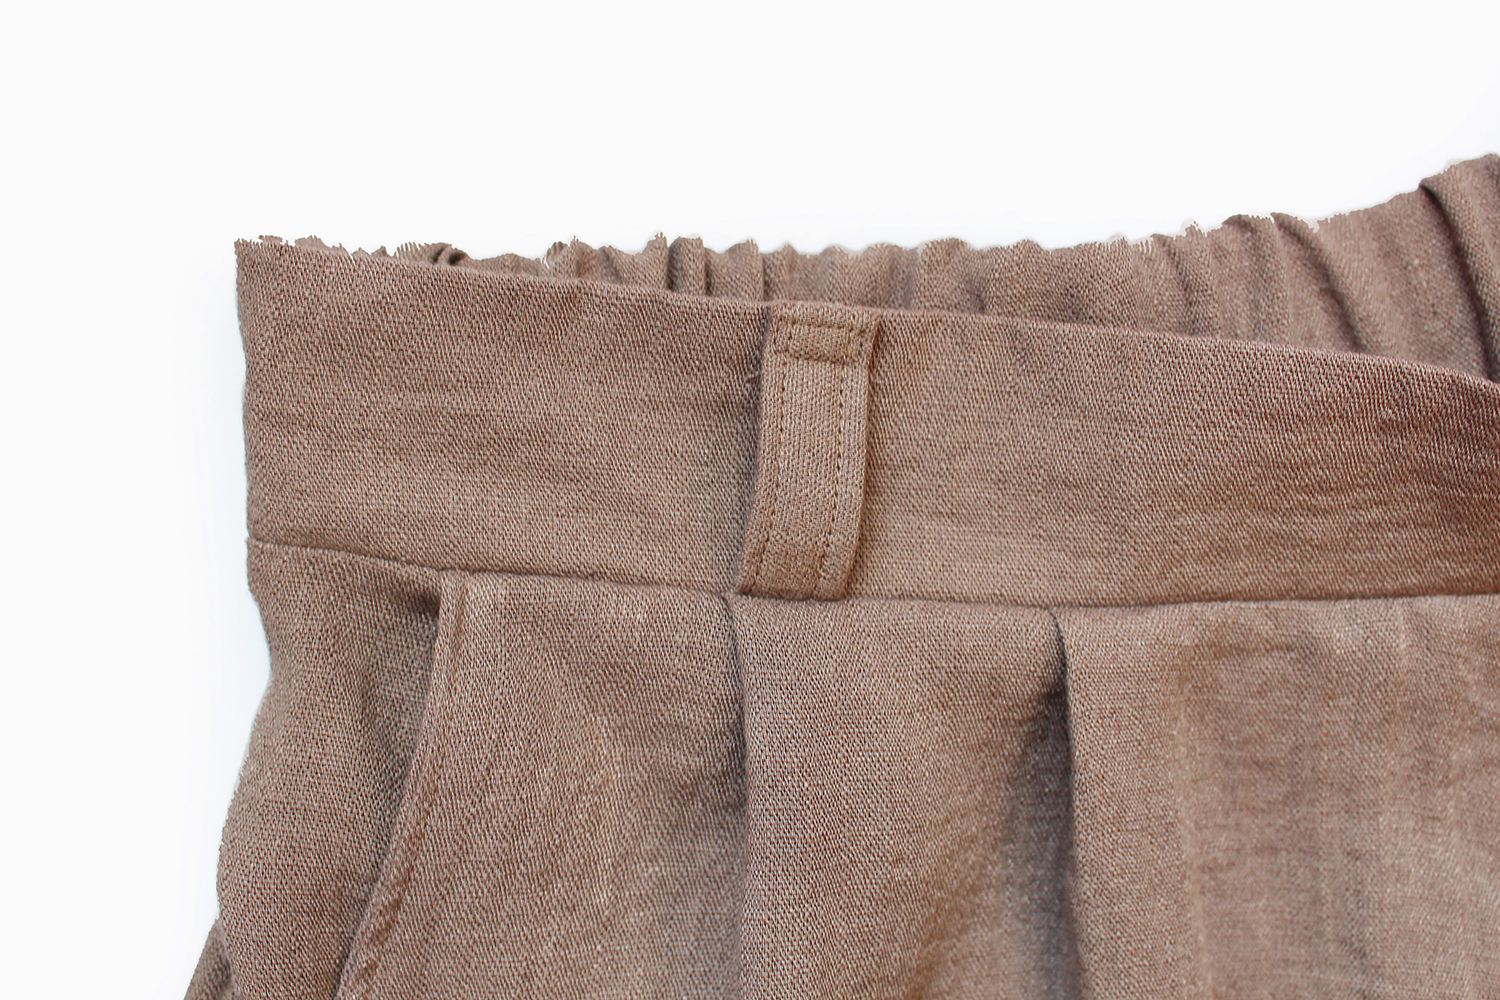
Pin the folded tab end at the top secure with a small stitched rectangle end encasing the raw tab edge.
WAISTBAND – METHOD 2(alternative method) where you encase the raw edges in the waistband.
So just like the previous method you sew the waistband together at the short sides with the RST.
Sew the elastic to the side seams, extend over the the back section.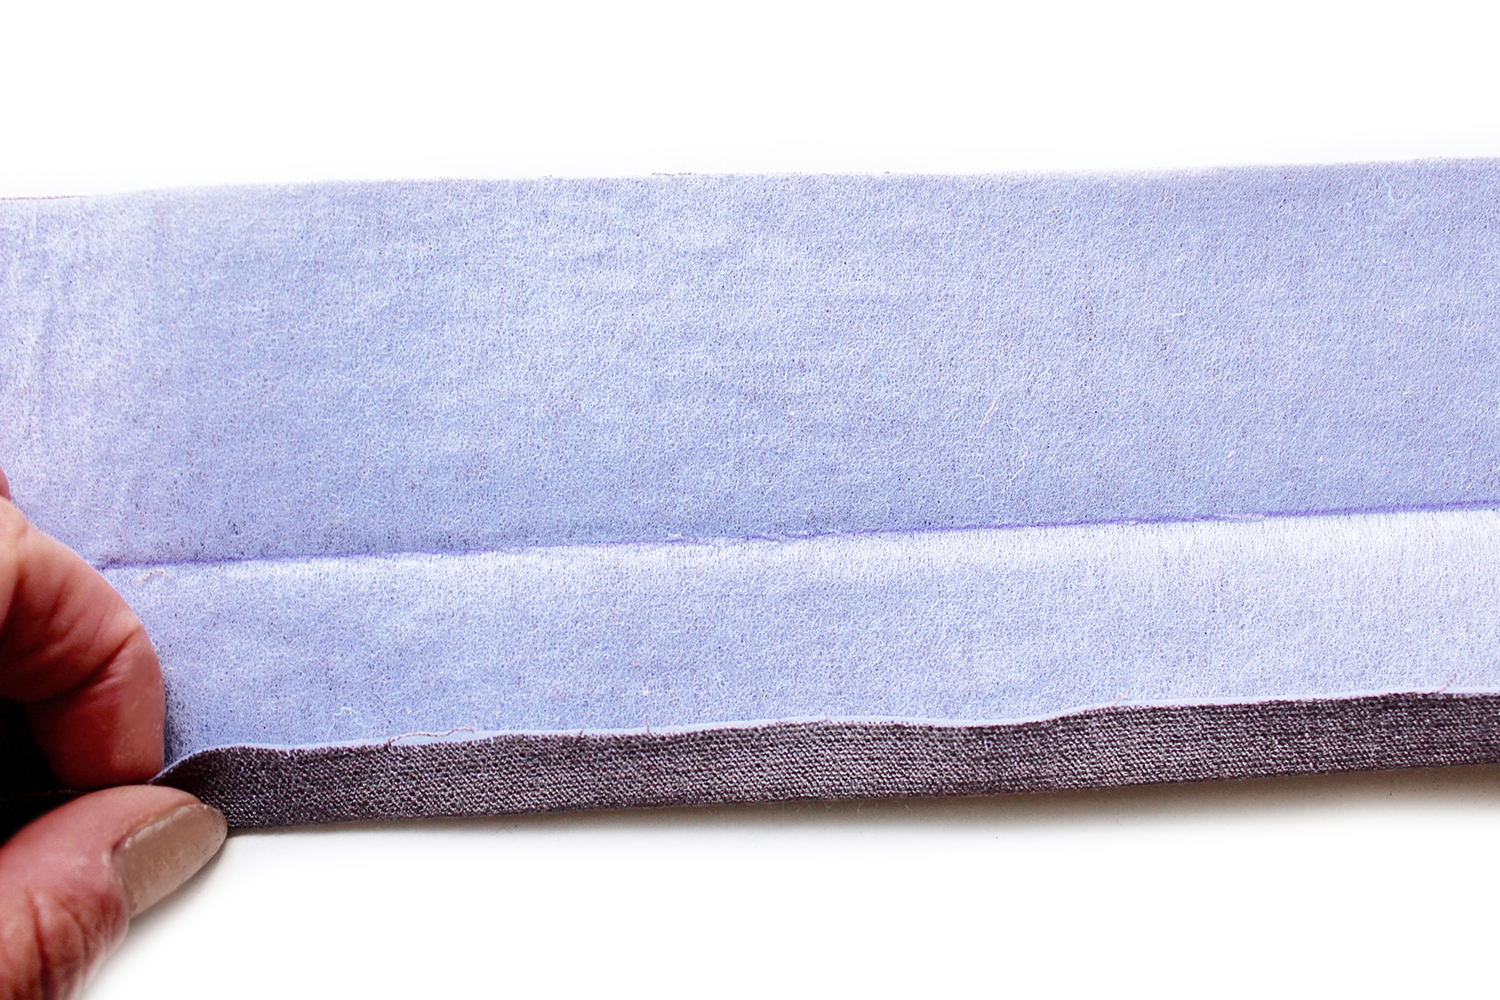 Fold over and press 1cm to the wrong side all around one long raw edge of the waistband.
 Pin the waistband unfolded edge to the trousers top edge., match up the side seams and align the back and front. Sew all around. Insert the tabs as in Method 1.
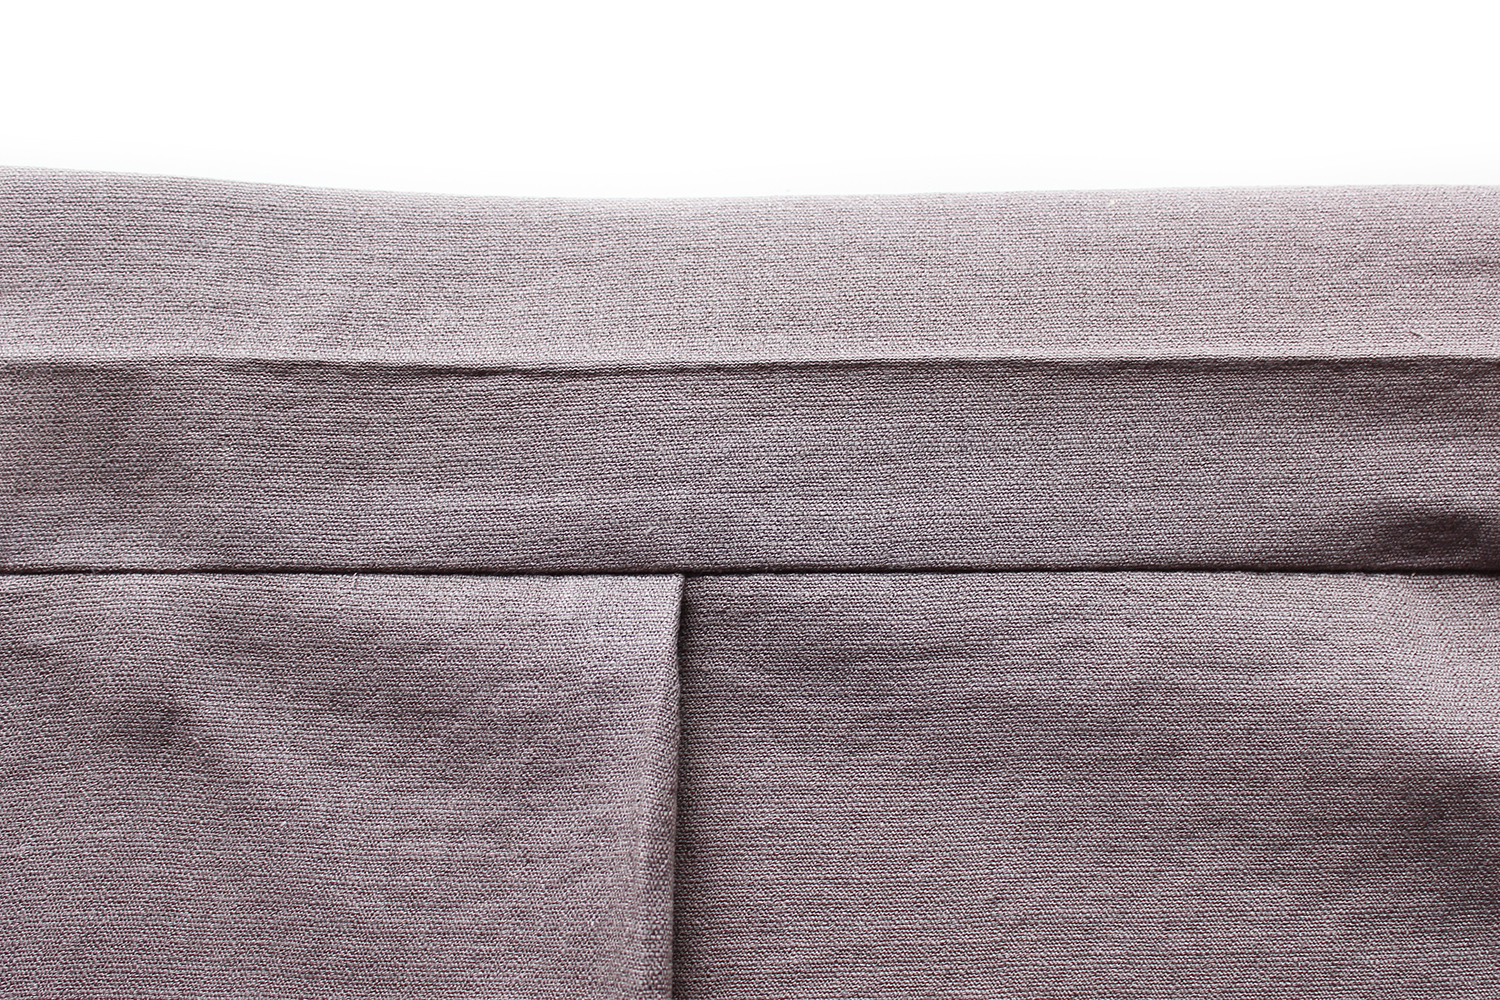 Fold the waistband up. Press at the seamline.
 Fold over to the reverse side of the waistband encasing all the raw edges, keep passing the fabric along the elastic so you are always working with a flat piece of waistband.
Pin all around then either ‘stitch in the ditch’ or hand sew all around with a small slip stitch to secure the waistband edge. Press.
TIE BELT (optional)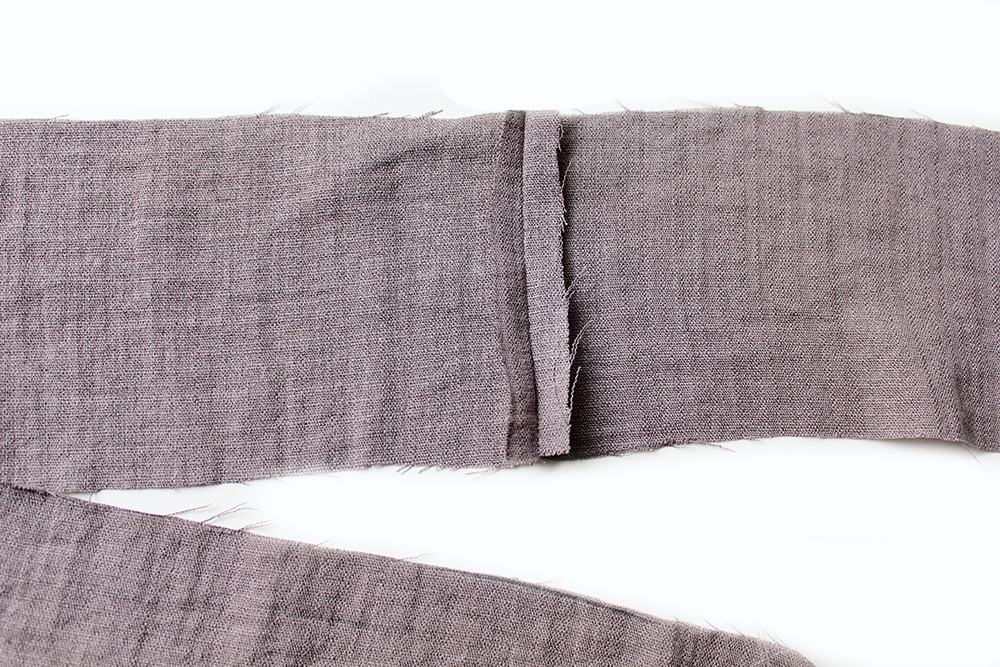 Join the tie pieces with the RST. Press the seam allowances open.
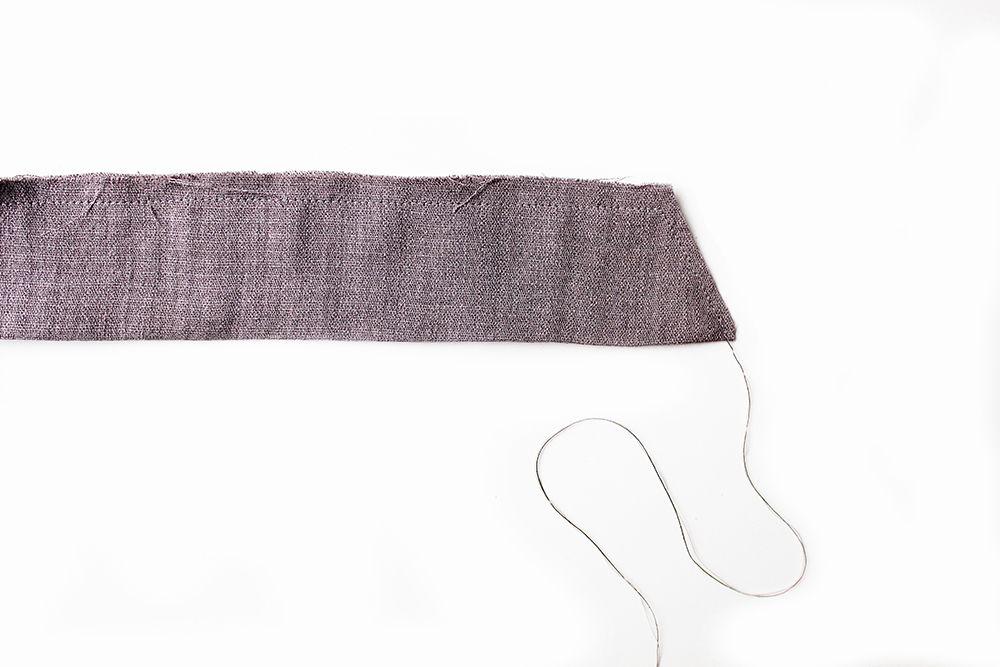
Fold the tie in half lengthways align the raw edges. Pin. Sew along one long edge and down each slanted edge leaving a 4cm approx opening at the centre join section. Leave a long end for turning. Trim the seam allowances to 5mm.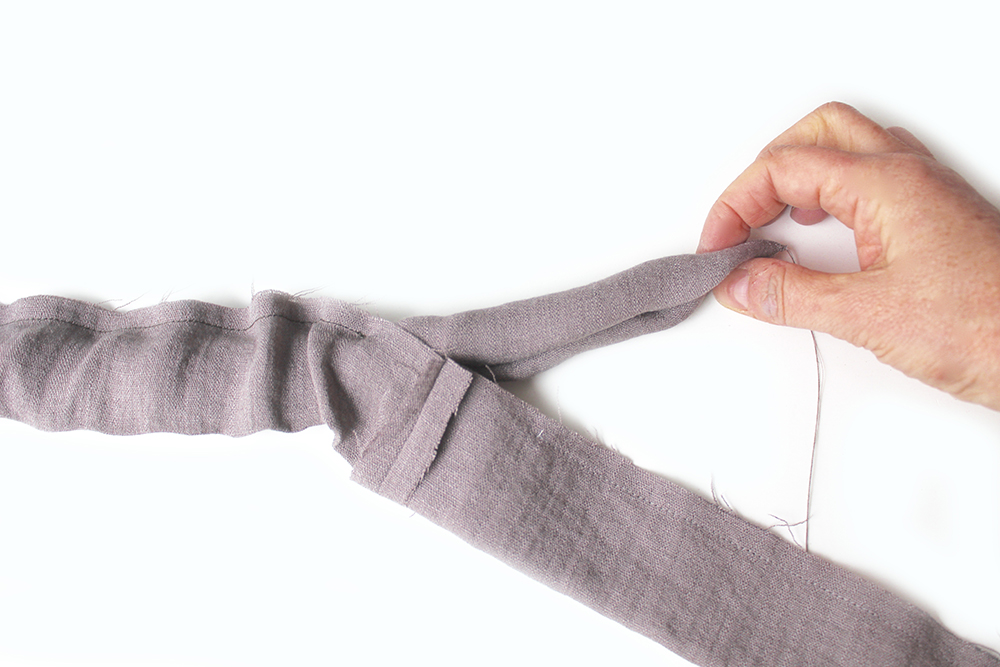
Tie the thread end on to a blunt ended chunky needle and pass in between the tie folds and out through the opening. Pull gently to turn inside out. Push out the pointed ends with a poking tool or tease out with a strong needle. Press so the fold is in line with the seam.
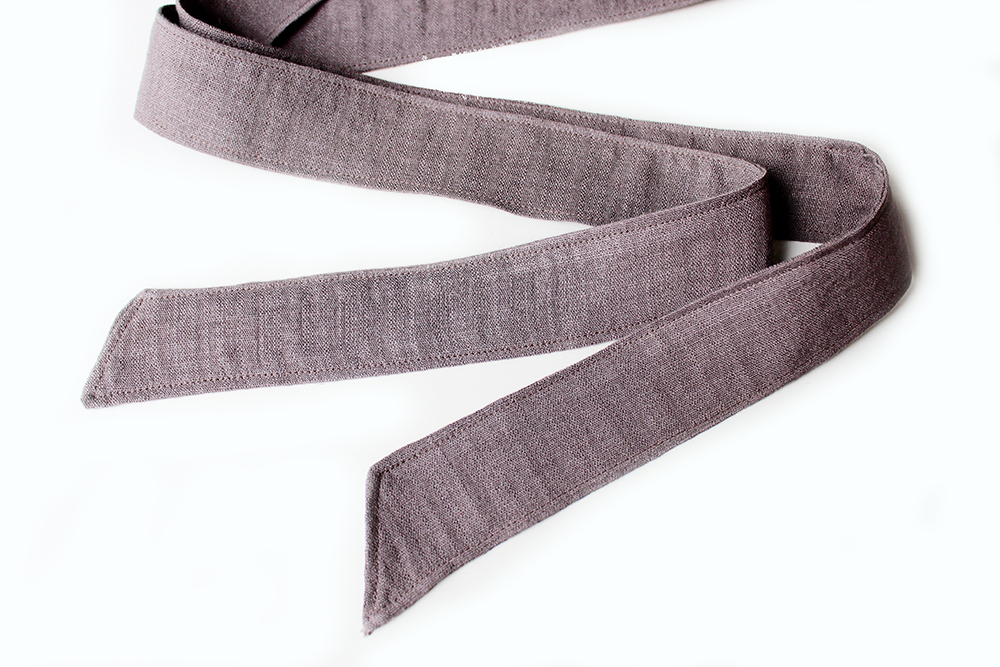
Top stitch all around which will close up the opening at the same time. Job done!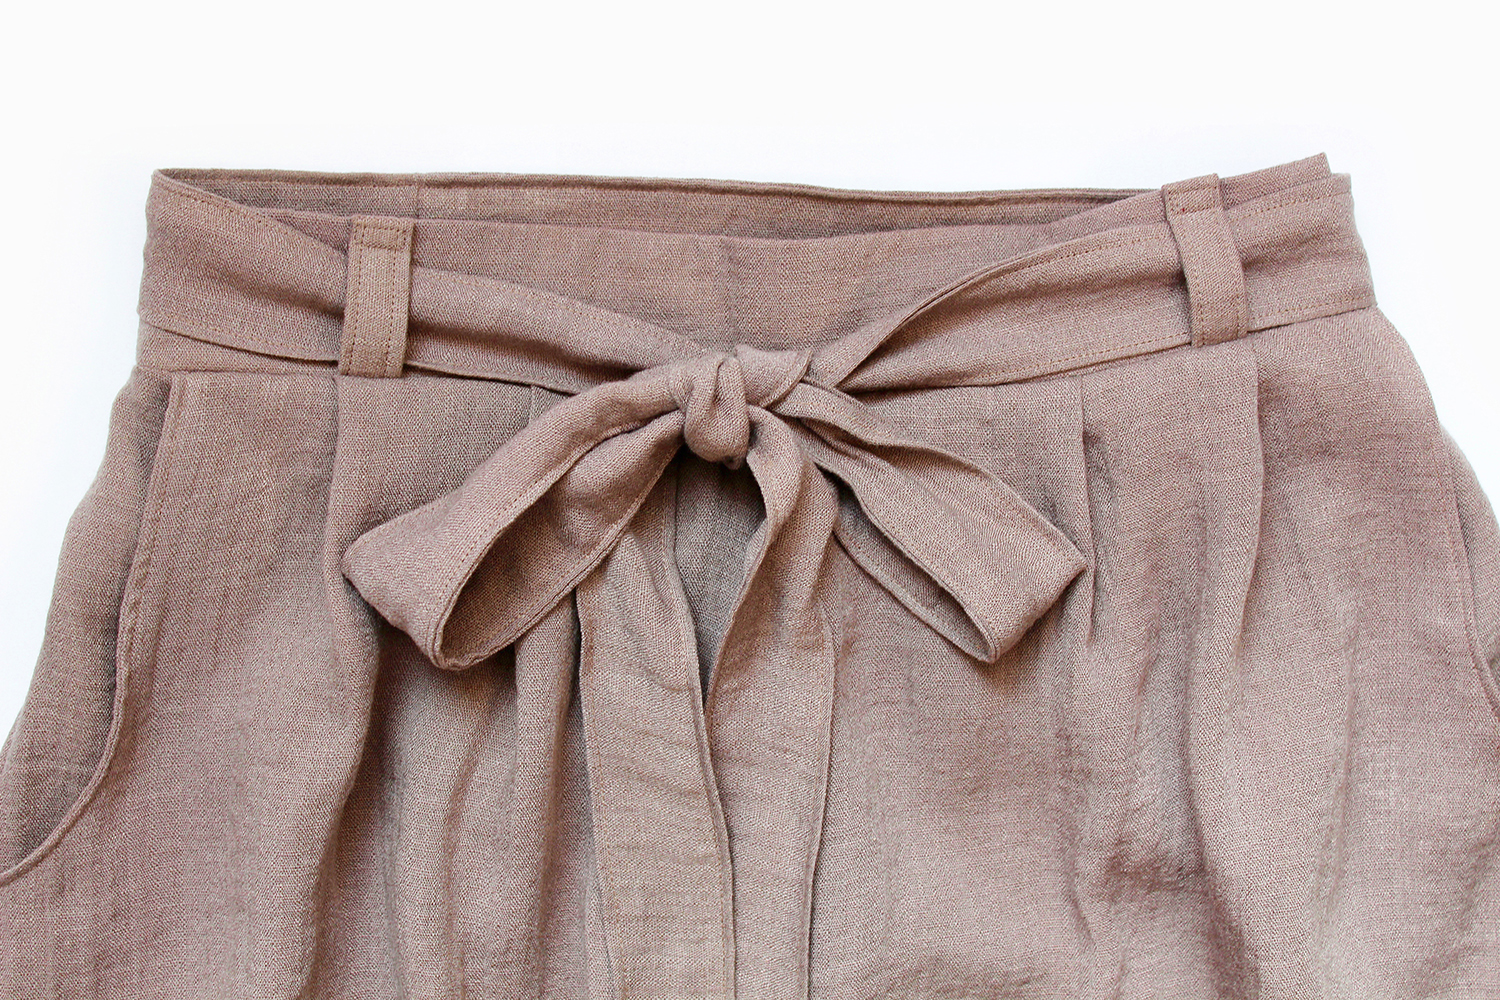
Insert through your little tabs and tie in a lovely bow. Esme would be proud. (this won’t make much sense if you don’t watch The Great British Sewing Bee!).
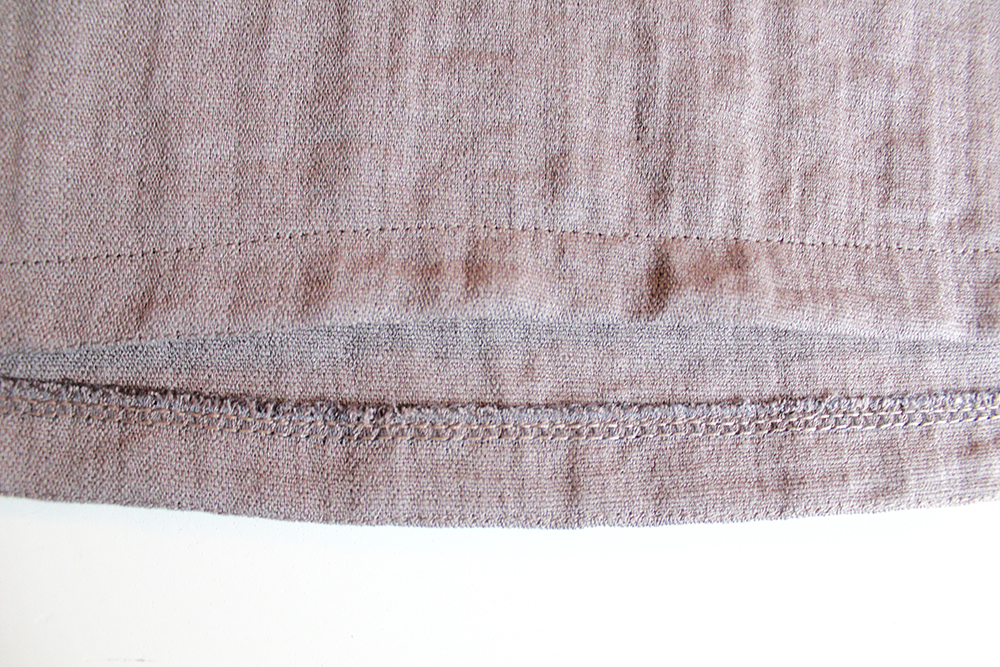
Lastly make a 2cm hem on the lower edge of your trousers.
Ta dah!
ELSIE DRAWSTRING HACK DOWNLOAD INSTRUCTIONS
If you would prefer to make Elsie as drawstring version instead of pleated at the front here are instructions to download and print on two pages of A4. Templates for Drawstring waistband (piece 10) and Drawstring Tie (piece 11) are on a
