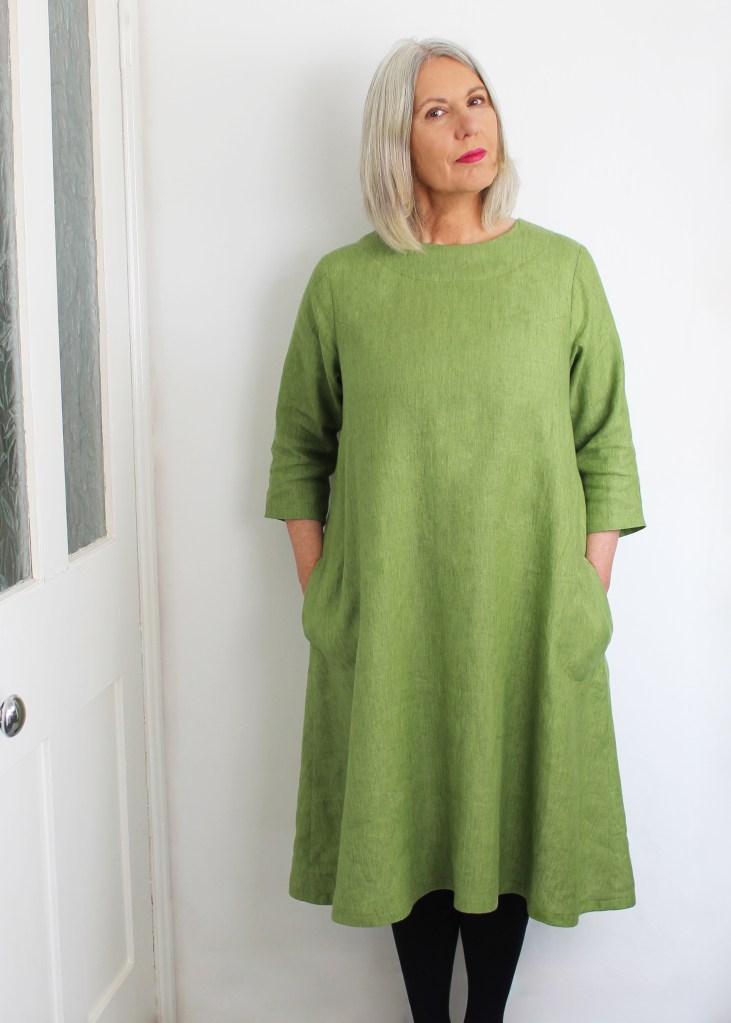
Orla with simple neck facing (option B) and long sleeves
Orla trapeze dress has become such a classic style, I decided it just had to join the Sewgirl collection.
So let me describe this dress, so as well as being insanely stylish, it is also a very easy relaxed dress to wear. Its trapeze shape allows you lots of movement, so you can eat what you like without feeling constricted. With two side pockets (who doesnt love a sidey) and a choice of two dress lengths and two sleeve lengths, the Option A has a buttoned placket detail at the neckline, edged with bias binding to give it a retro feel or Option B has an alternative simple neck facing.
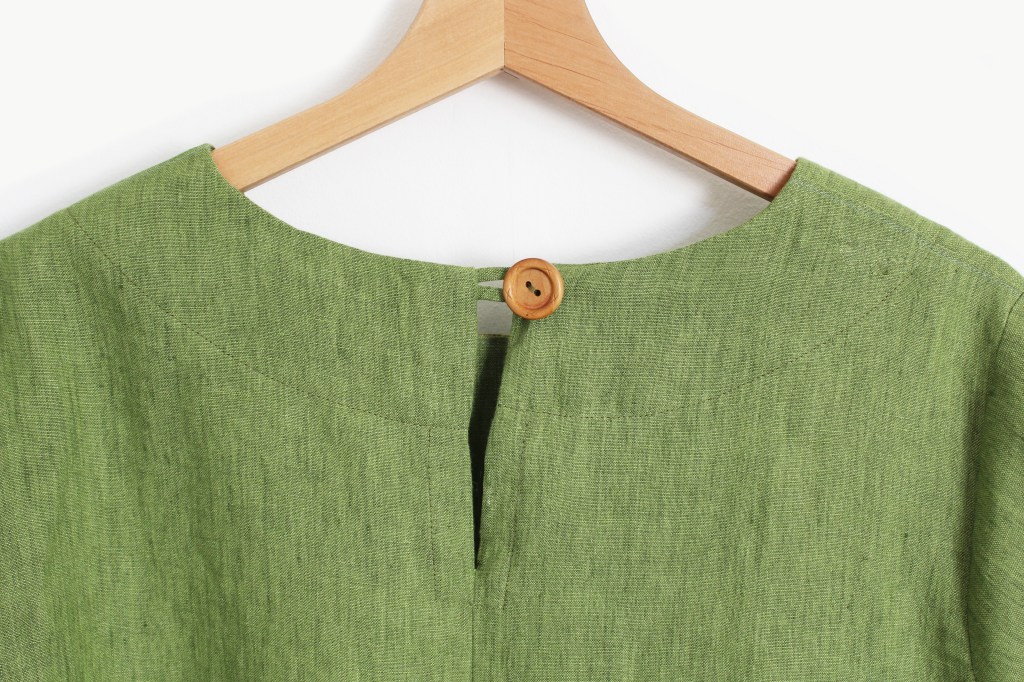
Both options have a back neck opening. Option A has a hand chain stitch loop, and Option B version you can use the rouleau loop method.
Option B back neck opening
This is an easy pattern to make up, however, the placket detail is probably a little more tricky, so if you have had some experience attaching bias binding you should be ok.
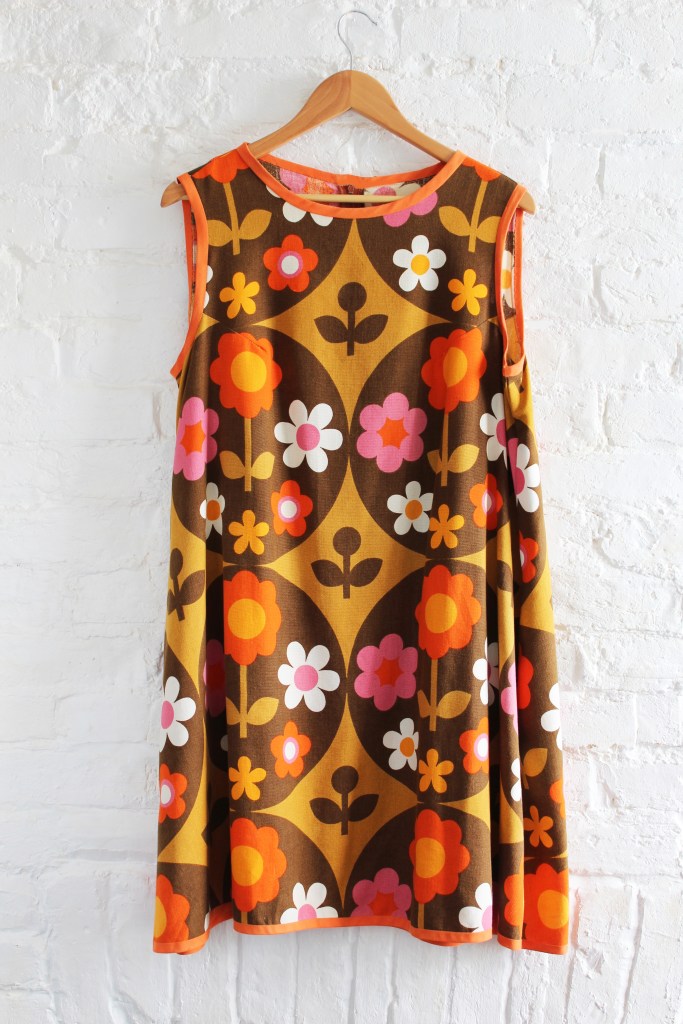
I would say this dress really suits bold prints but it also looks great in plain linens or viscose/linen mixes or the blue and white one (with red trim below) is a voile that I bought from slubbedprints.co.uk who have a wonderful collection of hand block print cotton fabrics from India. You can really play around with matching up one of the colours in your print or using a complete contrast colour binding as I have done here.
Some other versions of Orla that Ive made in bold prints.
Why not use the main fabric to make the binding And Orla can be made sleeveless!
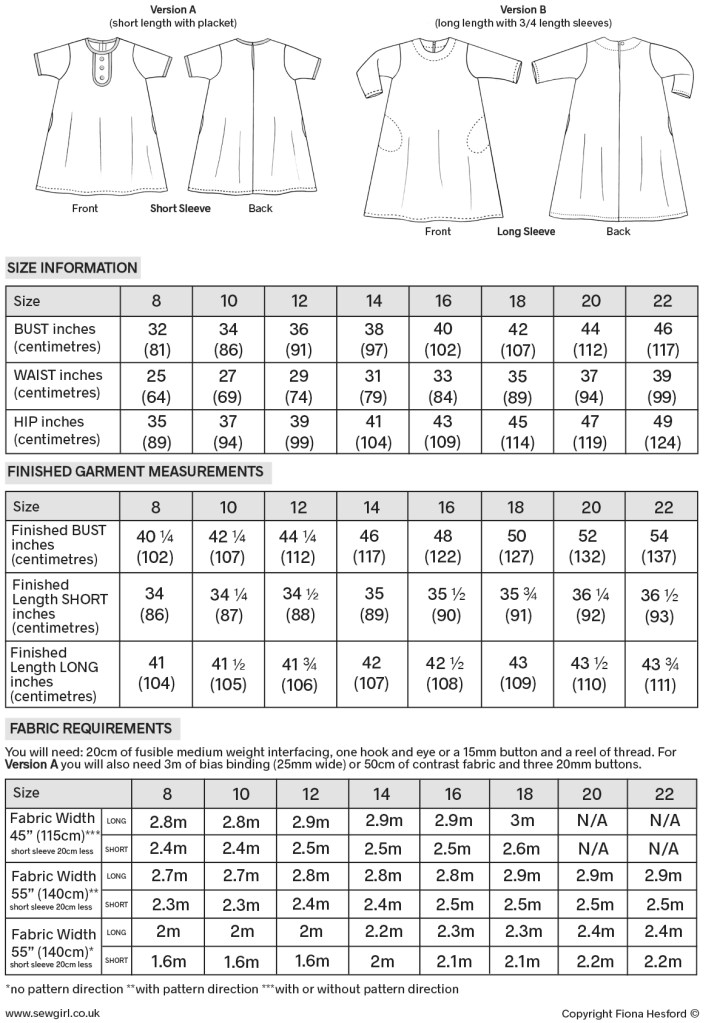
Here are details about fabric requirements, size info and finished garment details.
So you will also need some equipment like a loop turner or a large eye blunt ended needle, tacking thread and needle, an iron, a good pair of dressmaking scissors and a stitch ripper for any back tracking you may need to make!
HOW TO MAKE ORLA
Here are some pictures and text to give you an idea about how this dress is made before you buy.
CUTTING TIP FOR FABRICS 112cm WIDE SIZES 20 & 22
Just one tip before you start cutting out your fabric pieces on a narrower width fabric, if you are cutting out sizes 20+ you may not have the width at the lower edge, my advise would be to add a square of fabric extension on the lower selvedge edge to compensate.
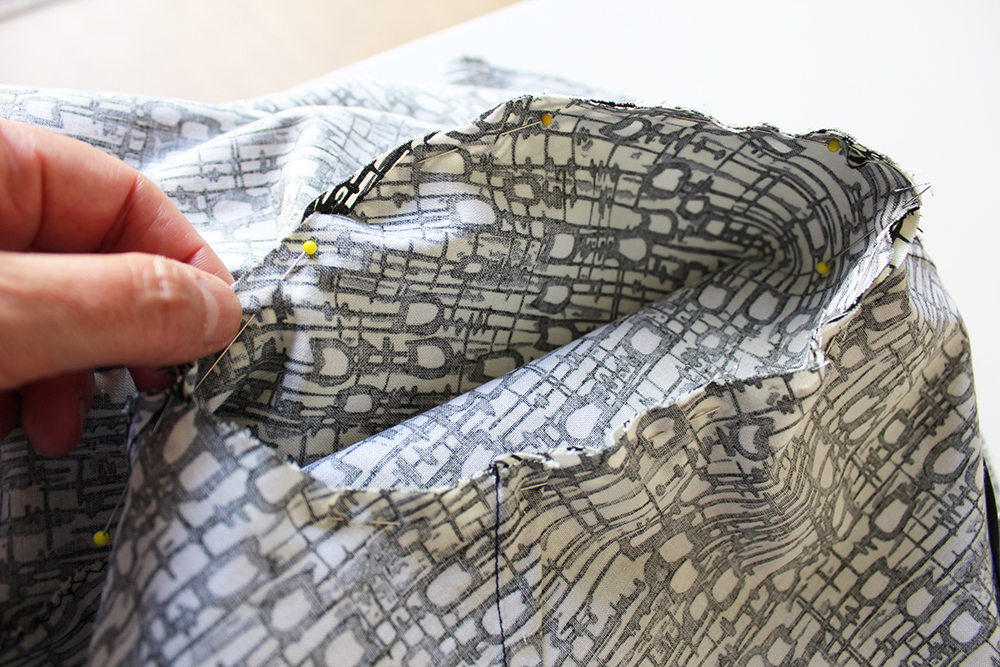
So the back pieces are joined together and seams pressed open, the top section is left unstitched for the back neck opening.
The Front and Back are joined at the shoulder seams and topstitched.
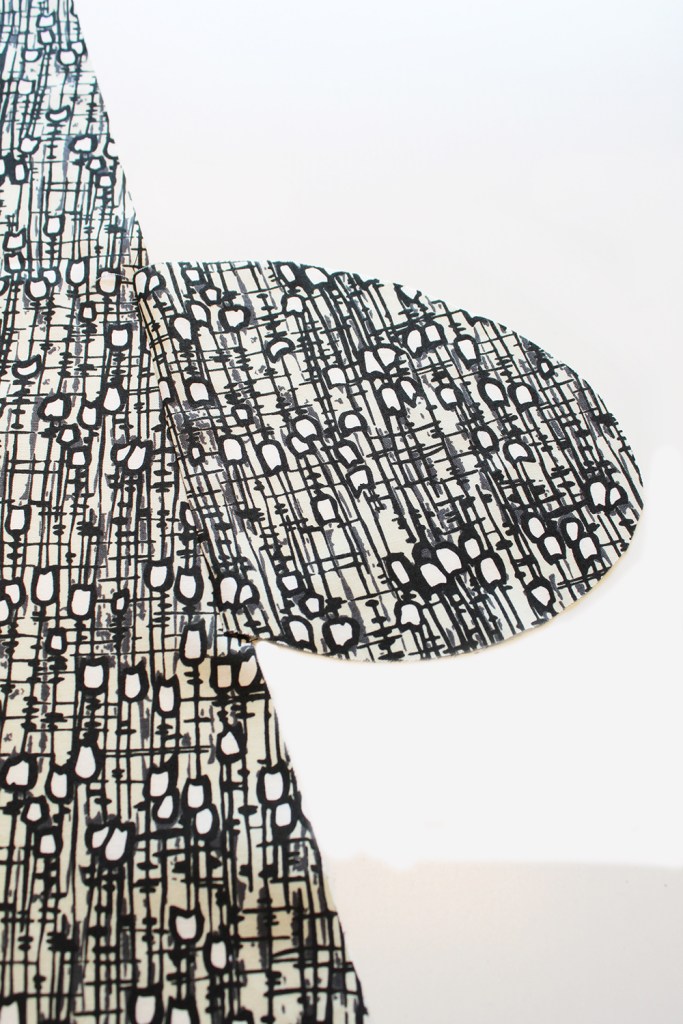
Side pockets are added each side and topstitched.
Then its on to the bias binding bit for Option A only. For Option B see below.
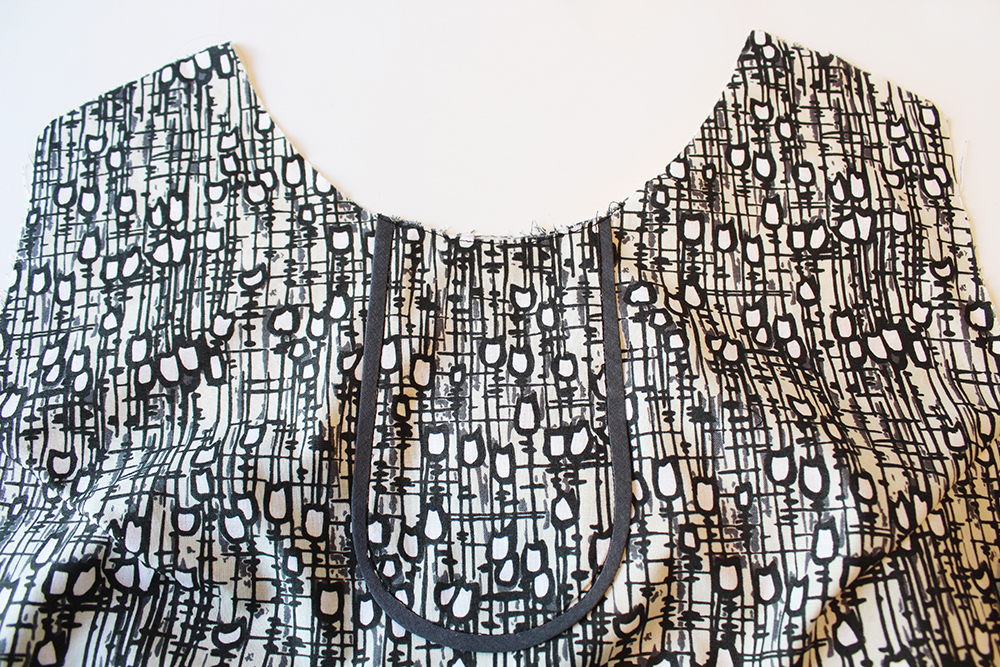
OPTION A
The pattern gives you lots more details about how to do the binding.
Bias Binding
Pin then stitch one side of the bias binding to the outer edge of the Placket.
First, trim off 1.5cm from around the neck edge. Pin the placket to the dress at the centre top neck edge. Stitch all around close to the binding outer edge.
Then pin the seam binding and stitch to the neck raw edge all around.
Sew three buttons on to the placket and attach a hook and eye at the back neck.
Pin the front to back at the side edges, align the pockets. Now sew all around from the underarm, all around the pockets to the lower edge. Finish the raw edge with a zig zag stitch or use your trusty overlocker if you have one.
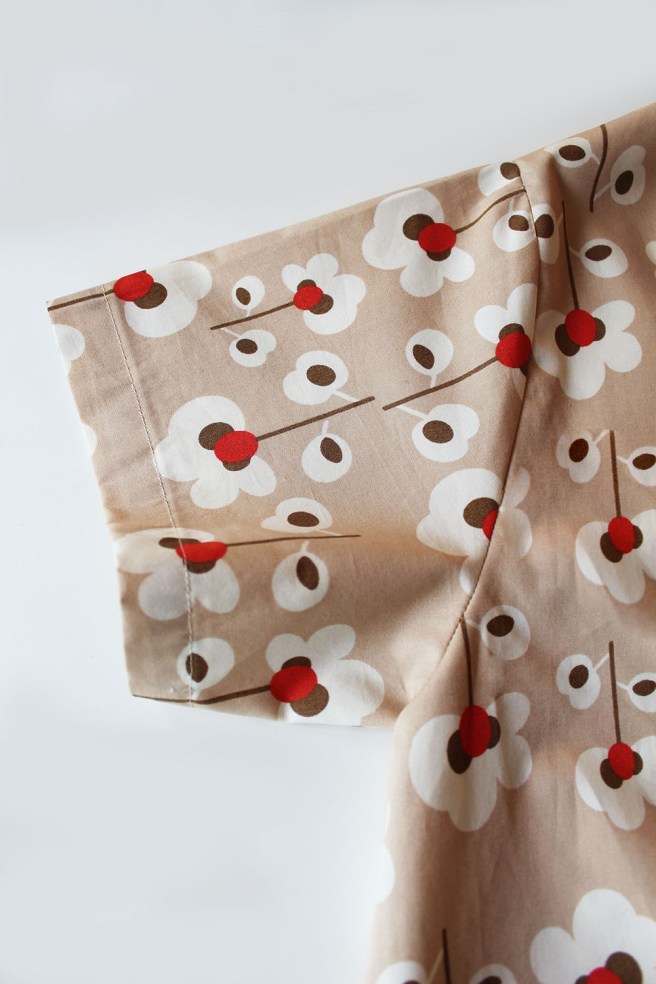
Pin the sleeve together at the side edges with the right sides matching.
Pin the sleeve head to the armhole, be careful to match the back section of the sleeve head (as marked on the pattern) to the Back section of the armhole.
Hand tack stitching really helps to ease your sleeve head in nicely to the armhole, it may need a little coaxing so be firm and show it whose the boss!
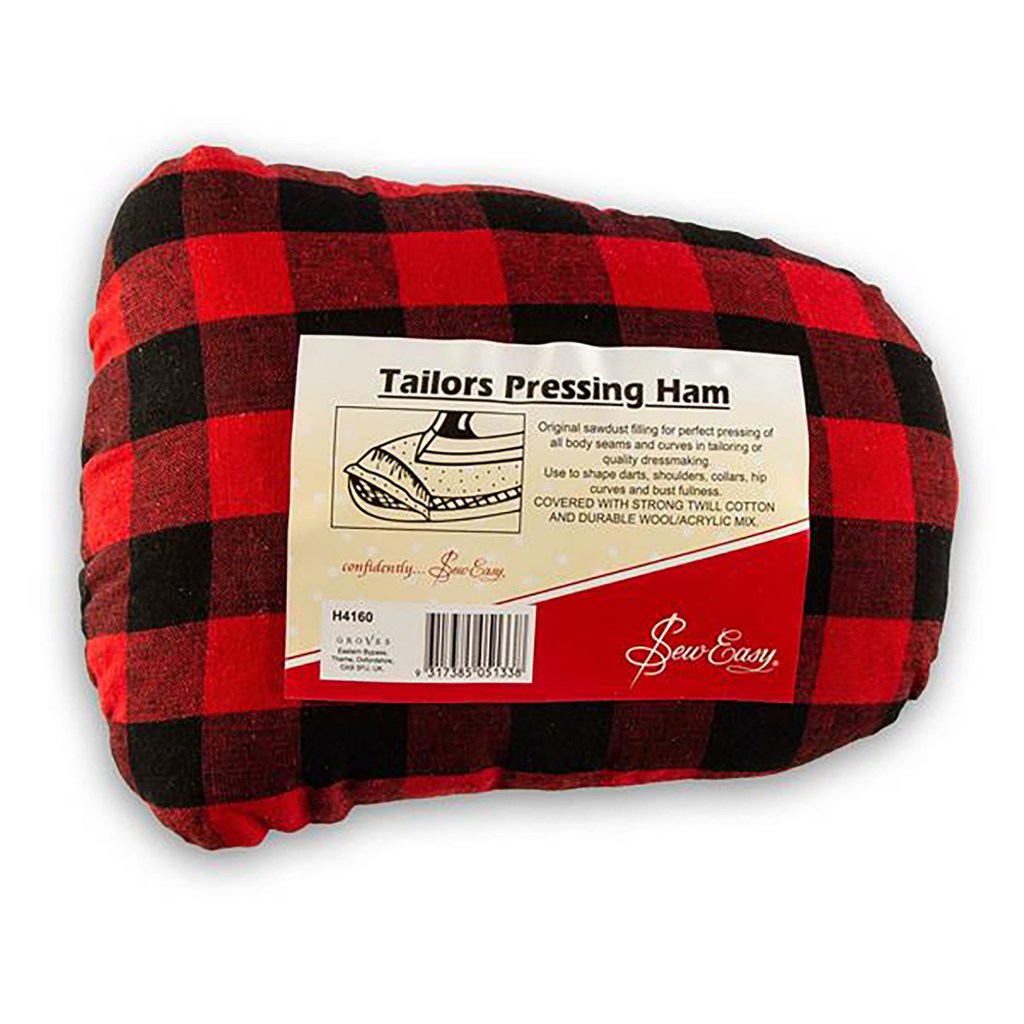
Stitch all around then finish the raw edges. Don’t forget to remove the tacking stitches and sometimes I like to nick at the cross seam allowance to allow a bit more movement. Press the sleeve head. I like to use a Tailors ham like this one, they are SO helpful when pressing sleeve heads (and hats for that matter). I have them available to buy in my Haberdashery listing on my Etsy shop.
You can topstitch the sleeve head or leave it without, its up to you. Hem your sleeve edge.
Bold prints certainly give the wow factor. This one is by Echino its a linen and cotton mix and a super duper print design that I love! I have made myself many Orla dresses as you can see because I just love bold prints.
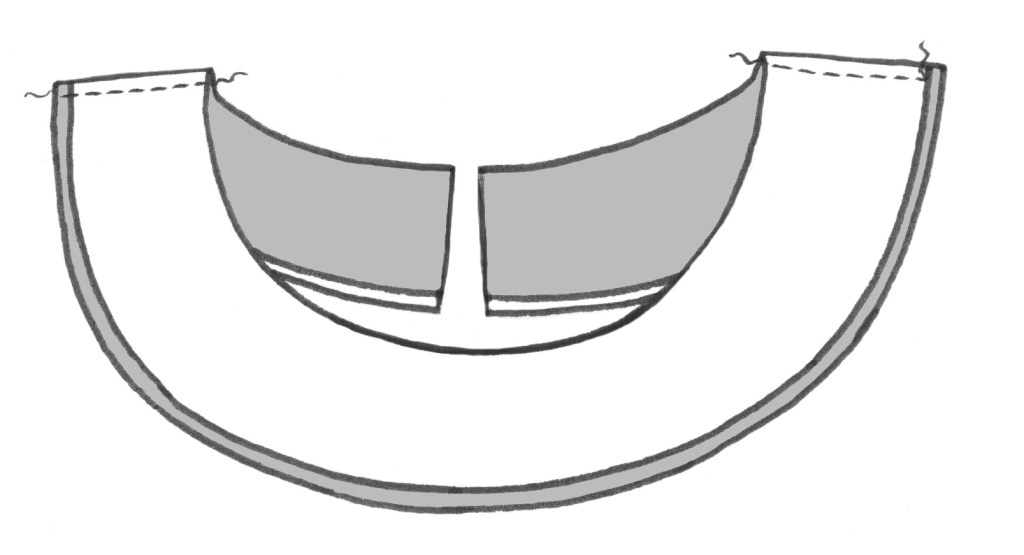
ORLA DRESS VERSION B (with a simple neck facing)
So with Option B you don’t insert a placket or use bias binding around the neckline like you do with Version A. I thought that some people would like to try it without the binding, so here are a few illustrations to give you an idea about how its done.
Sew the (interfaced) Front Facing to the Back Facing (with the right sides together), at the shoulder edges. Press the seam allowances open. You can make a small hem around the outer edge or just finish it all around with an overlocked or zig zag edge.
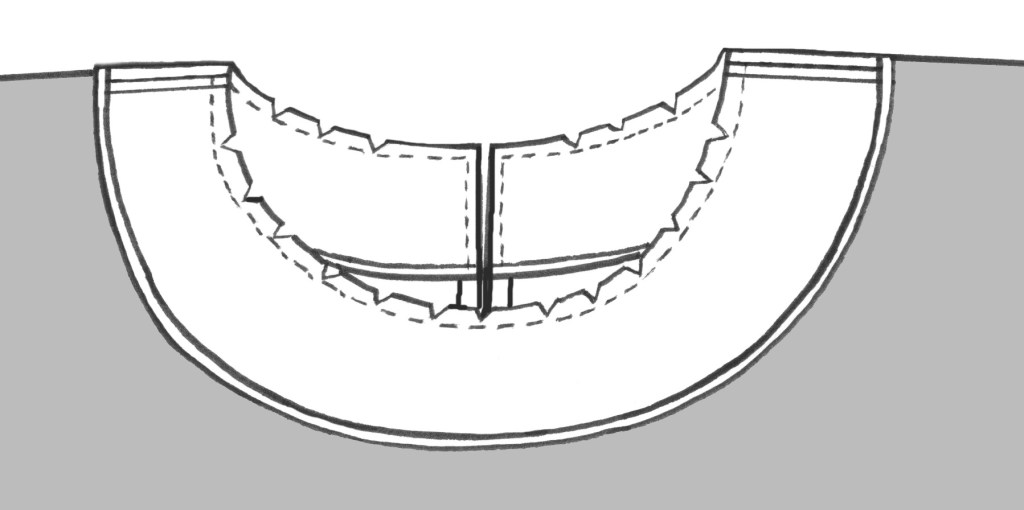
Nick the seam allowance all around. Before you stitch down the short edges, insert the loop.
Pop the loop under the back neck facing at the top edge, then sandwich it between the facing short edges and the back. and stitch down.
Trim off excess loop, seam allowance corners then turn it inside out and poke out the corners. Press. Pin the facing all around and stitch down.
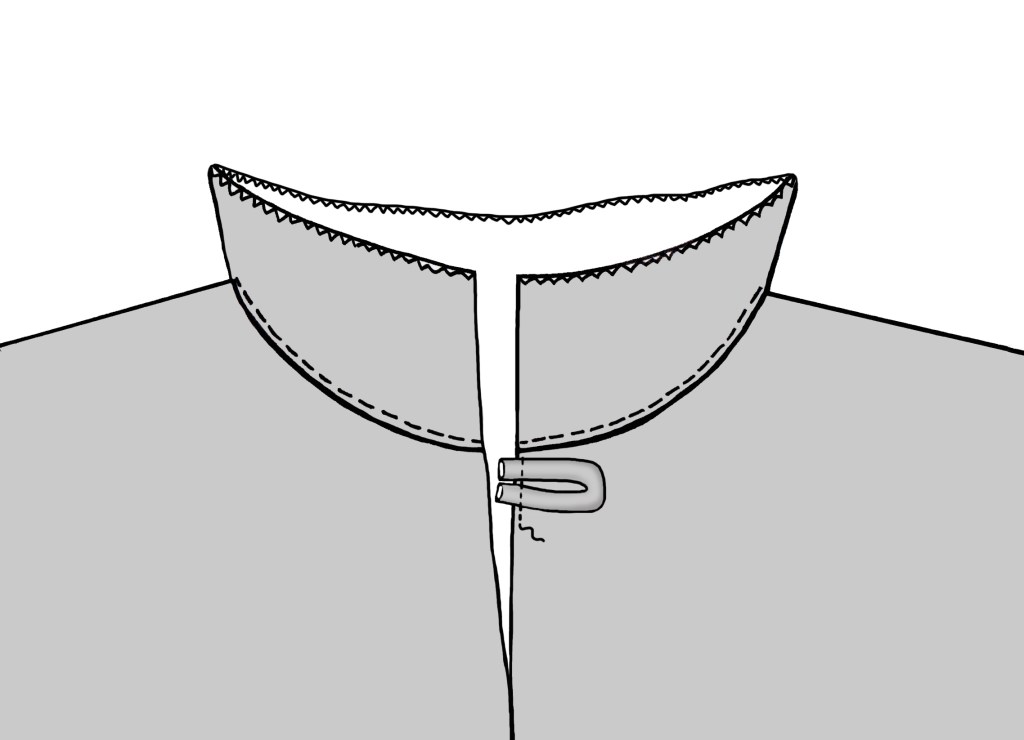
Sew on a button to match the loop and voila!
The finished article. Stylish, modern and practical and a great addition to your wardrobe for all seasons.