

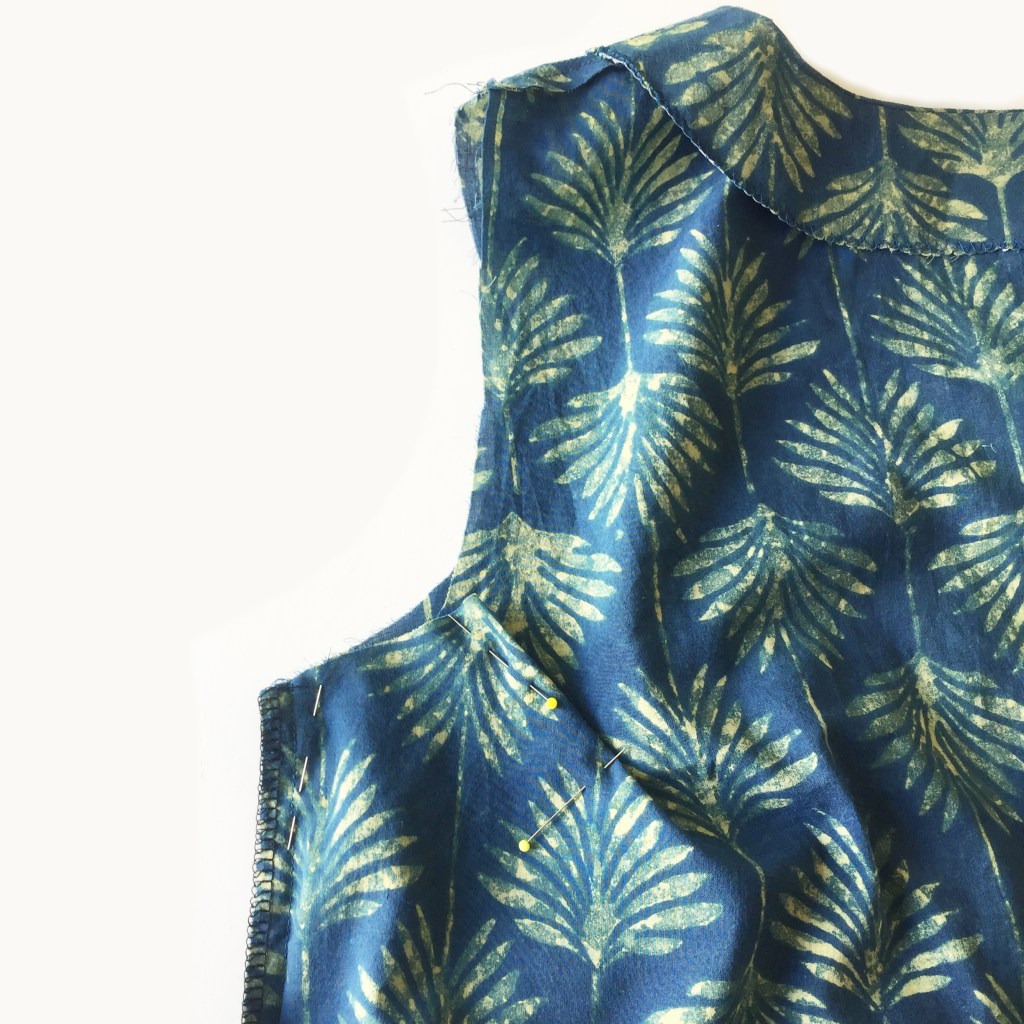
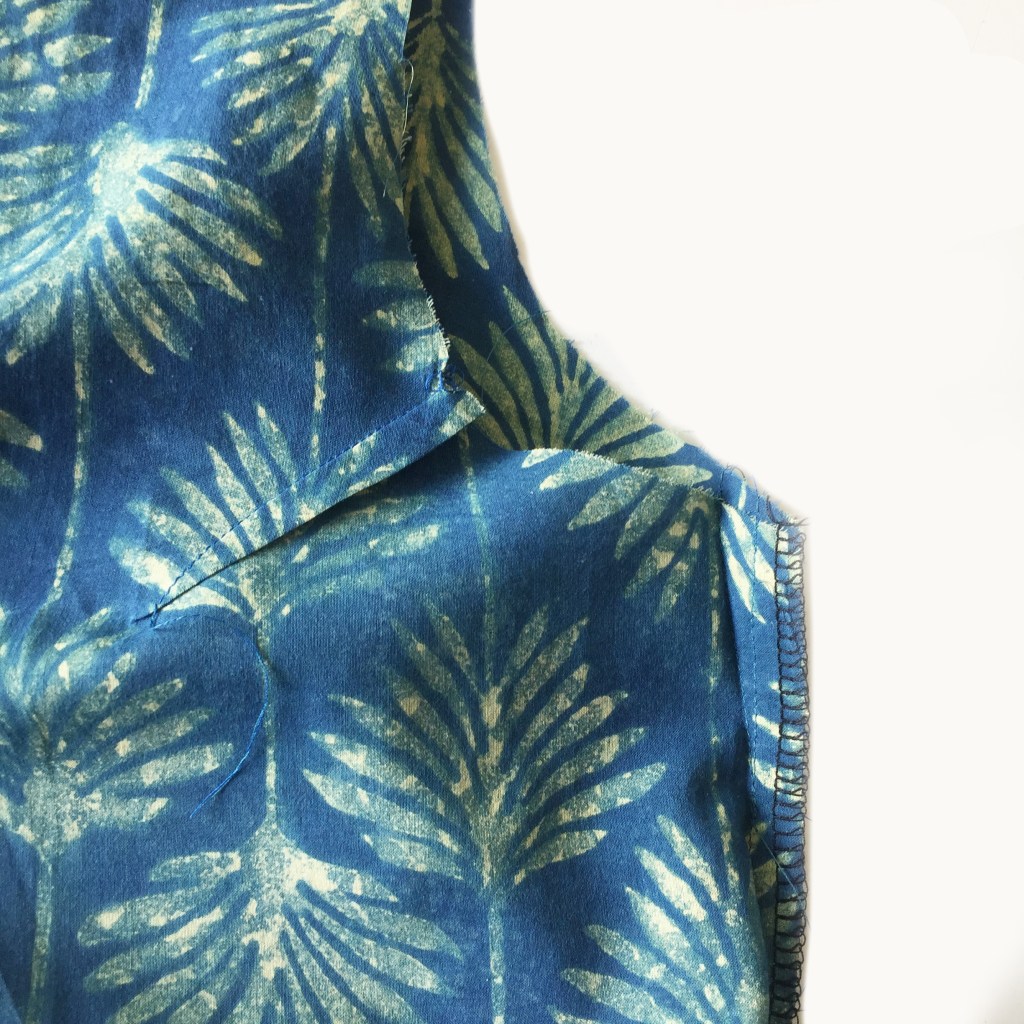
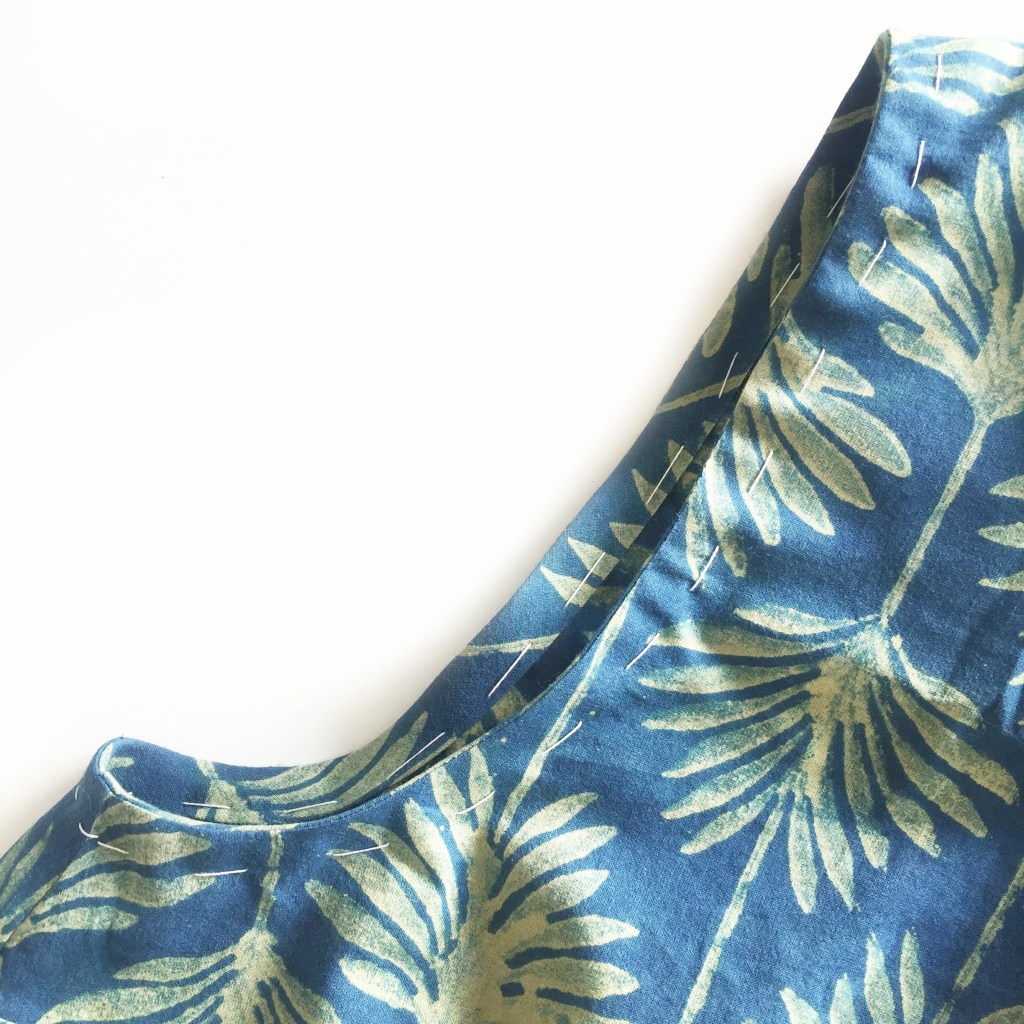
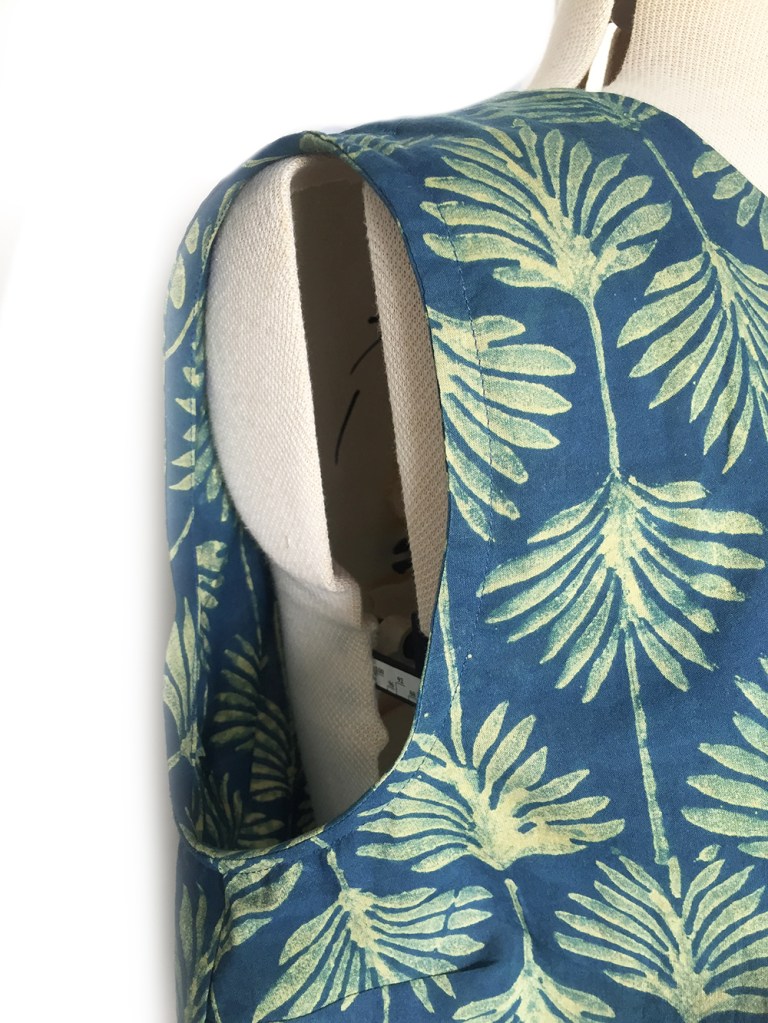
For a tutorial about how to adjust the armhole for a sleeveless version scroll to the bottom of the page
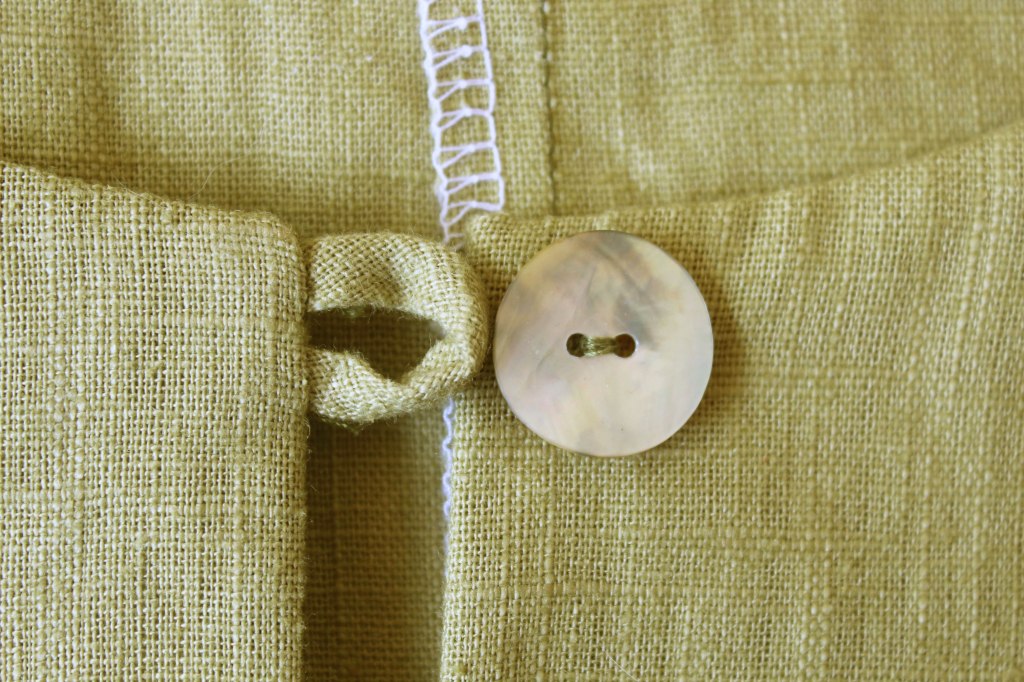
There are two neckline fastenings to choose from…..

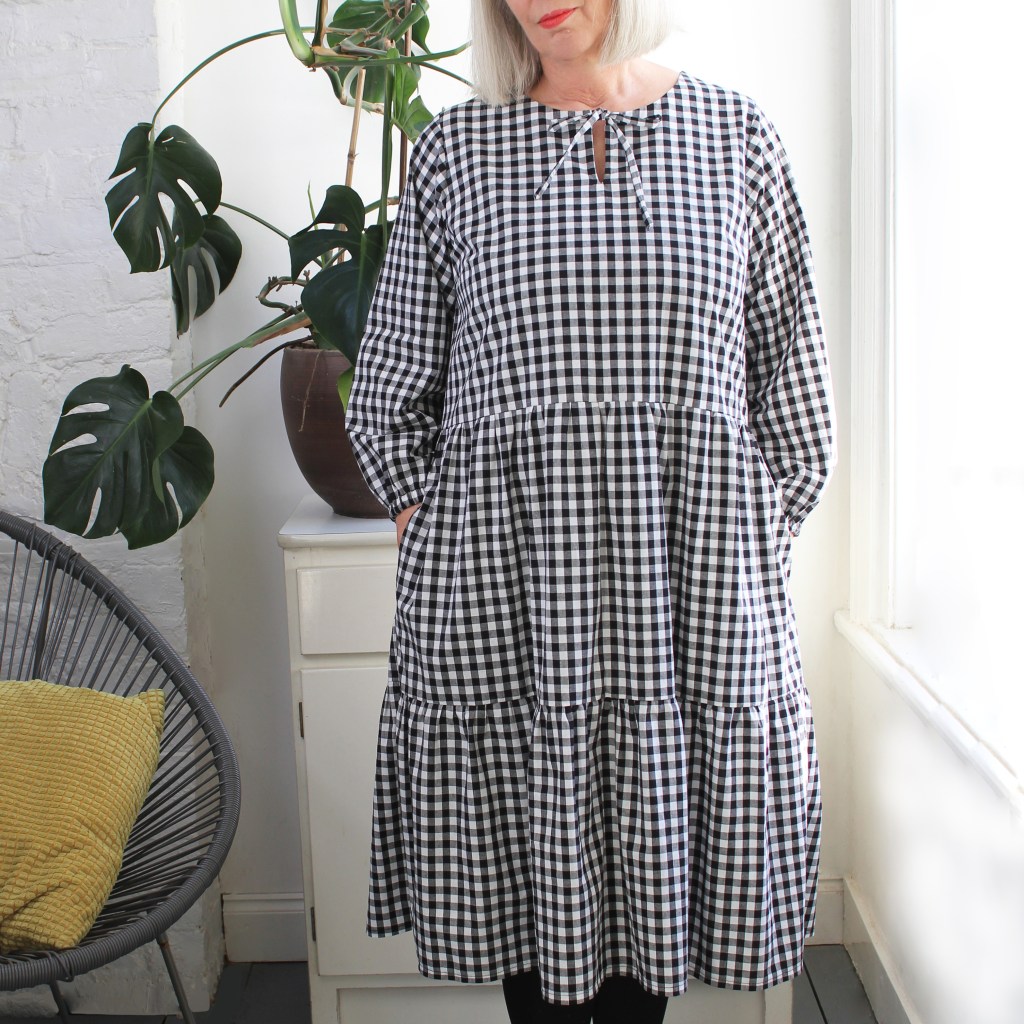
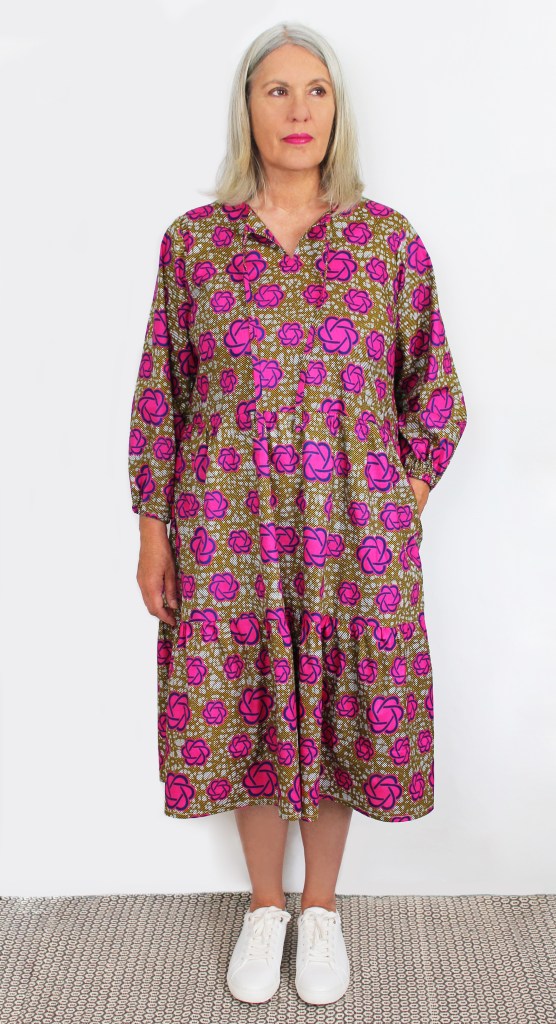
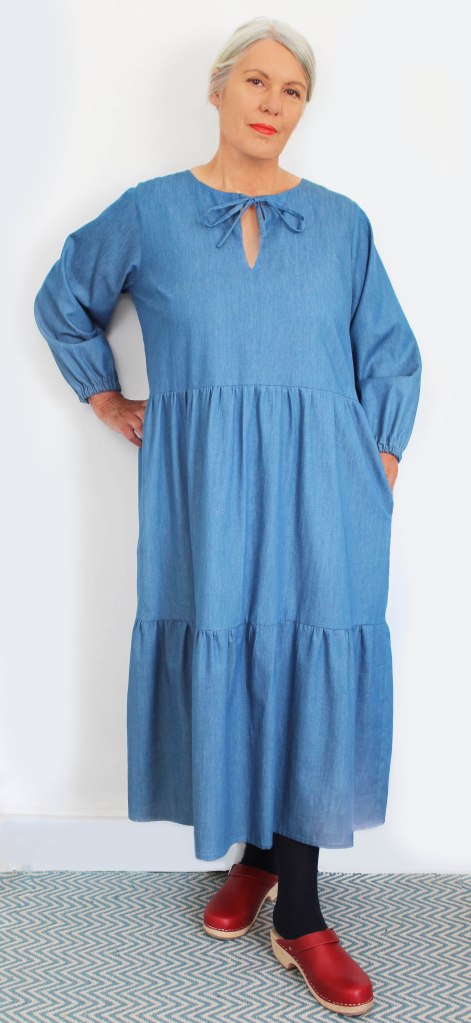
Frida dress named after the one and only Frida Khalo of course. A woman known for her fashion style as well as her work as a remarkable artist.
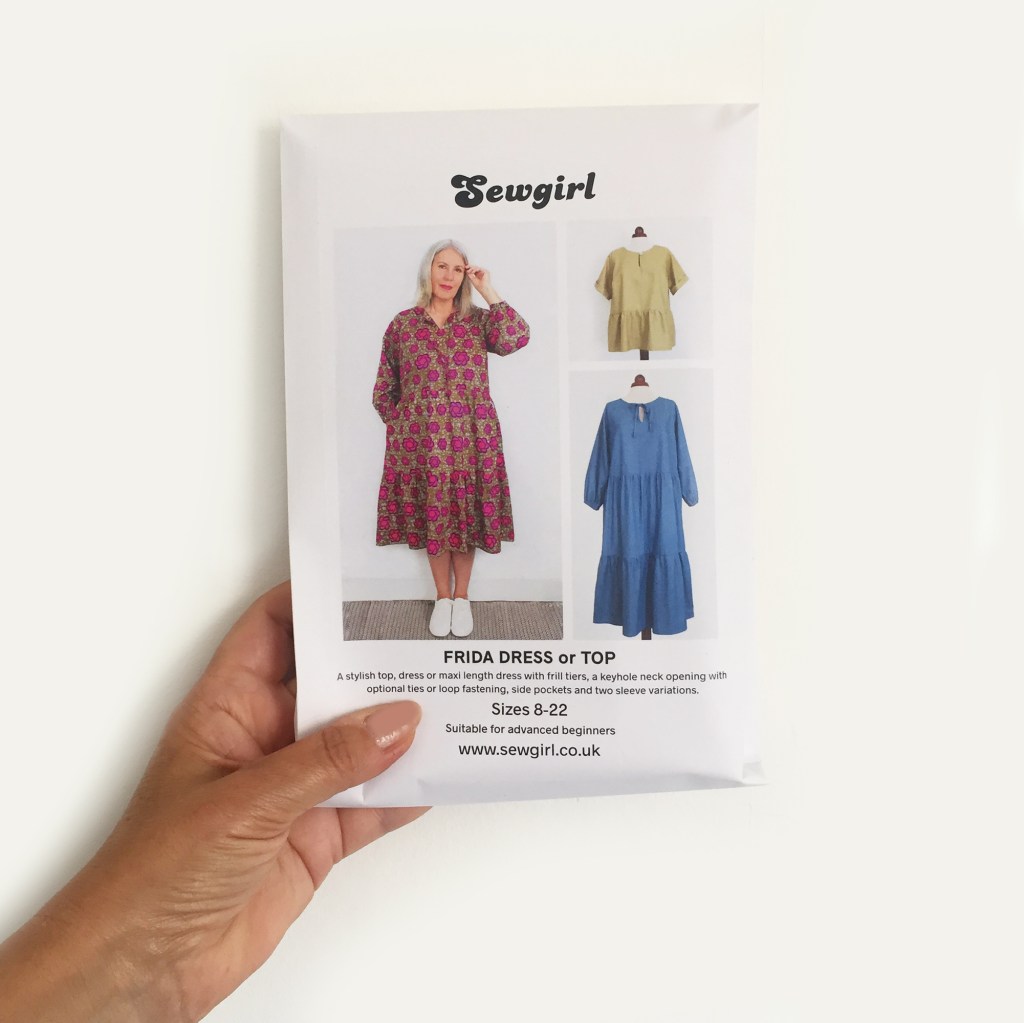
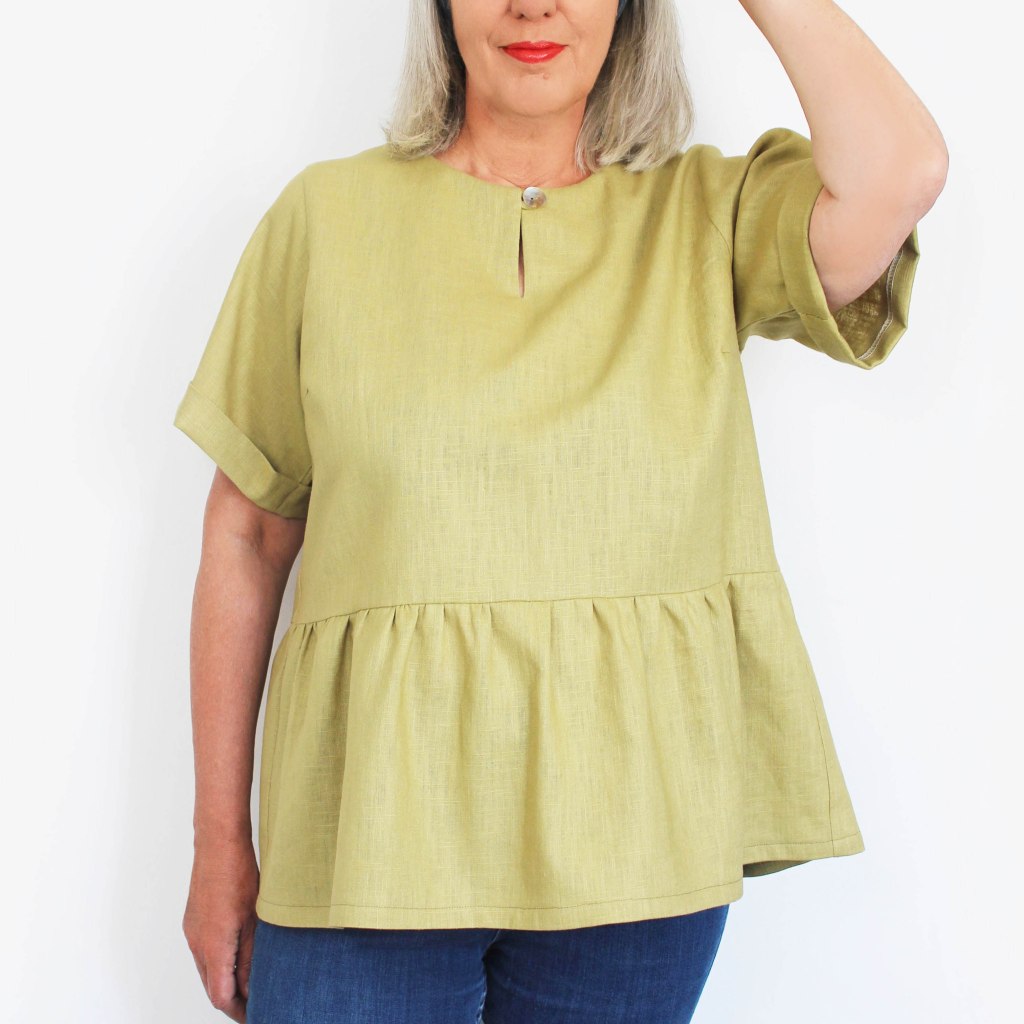
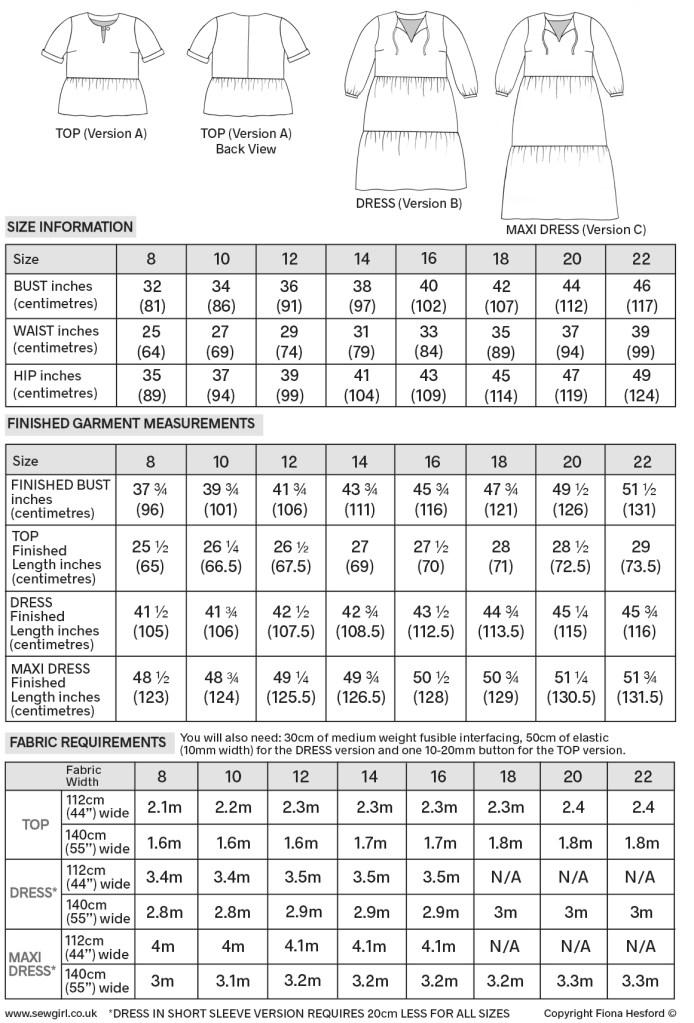
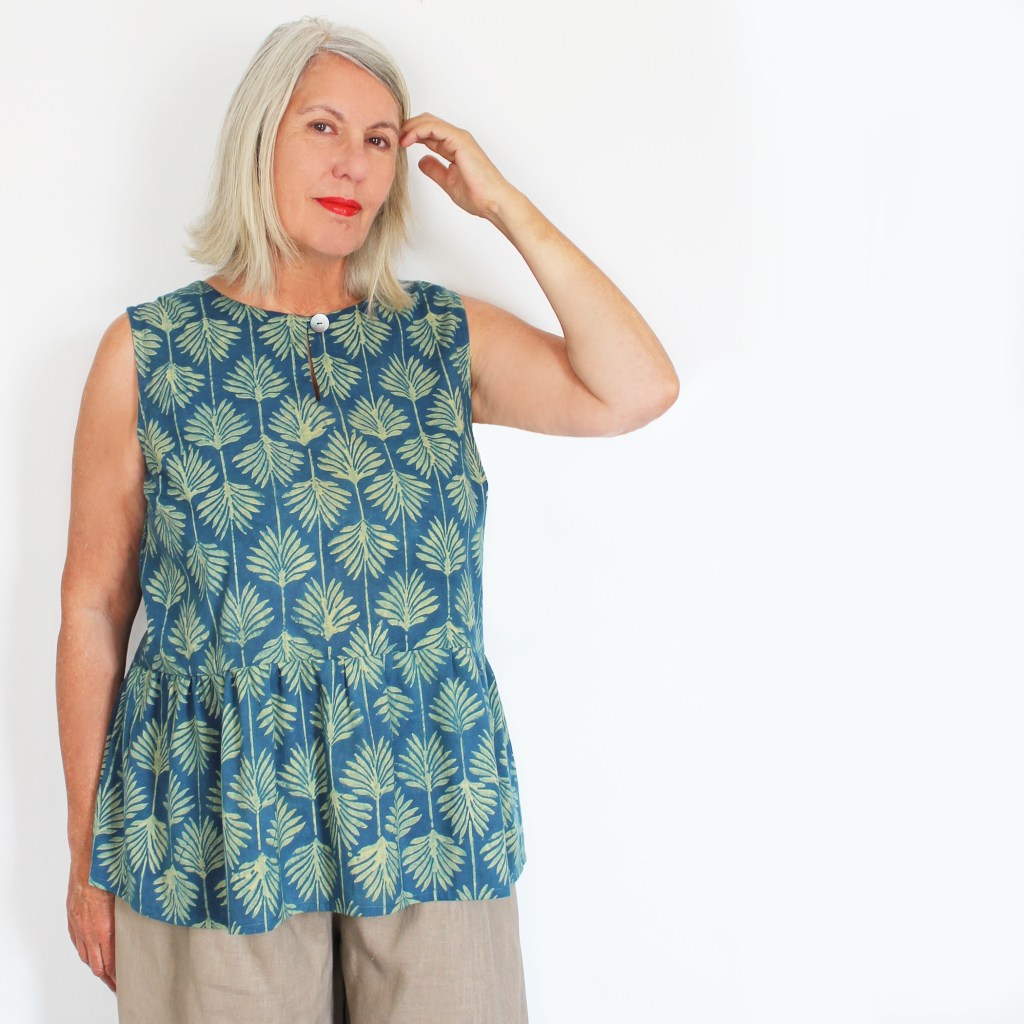
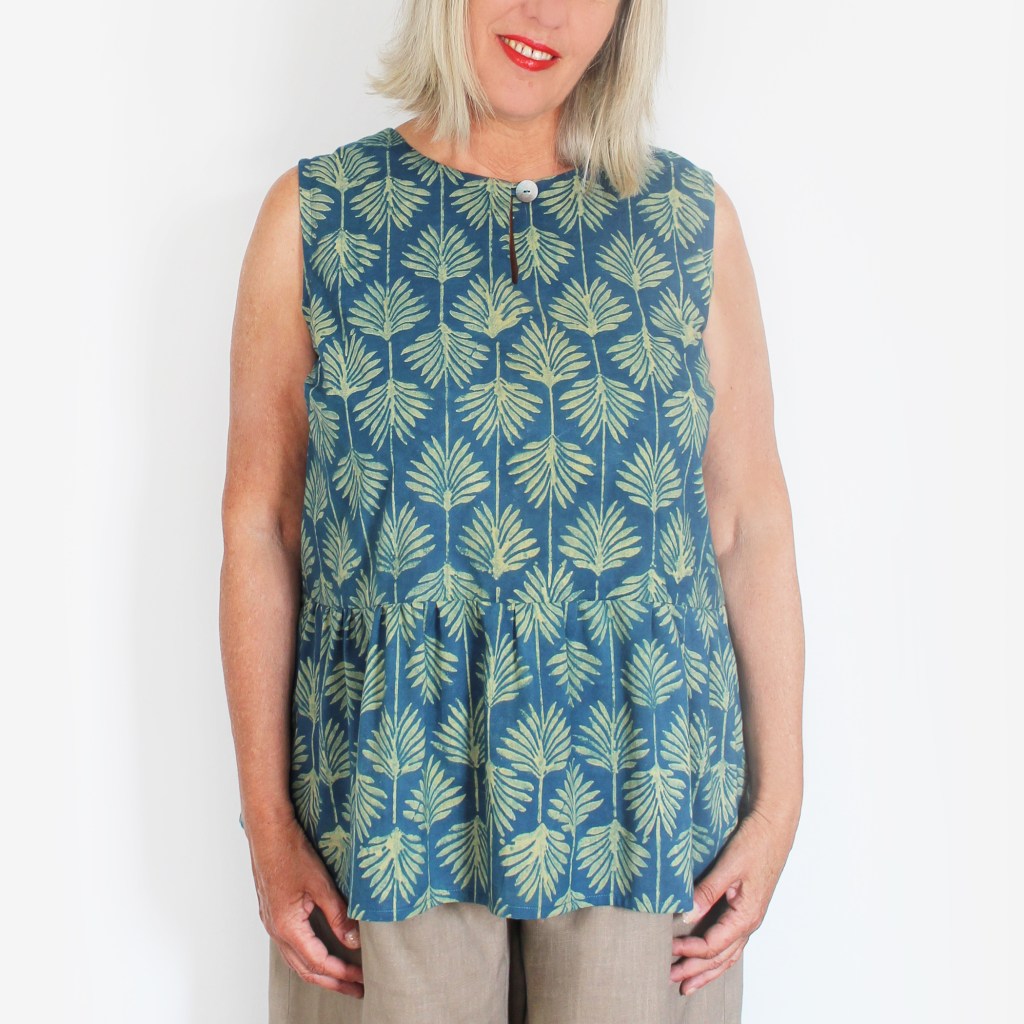
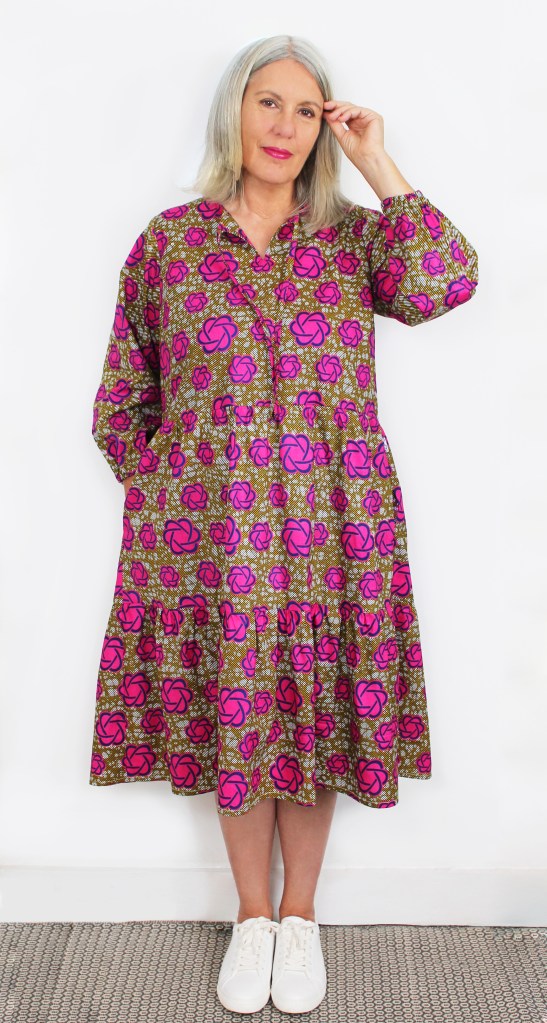
Frida can be made into a top, dress or maxi dress as shown in the pictures above. It has one (top version) or two frill tiers (dress version), with a keyhole neckline with either ties or a loop and button fastening at the neckline. There are two side pockets and sleeves which are three quarter length elasticated for the dress or short fold back cuffs for the top. Please see the chart below for the finished garment measurements.
This is an easy pattern for beginners with some previous sewing experience. Techniques involved are gathering up the frills, inserting ties, a facing, I think theres nothing too difficult involved – its a really fun project to sew. If you feel a bit daunted by the tie/loop insertion, take a peek at the video tutorial that I have linked to this blogpost.
Fabrics suitable for making Frida are cotton (African fabrics are great), denim chambray (4oz denim available from my Etsy shop is perfect for this project see SHOP link in menu), ramie, viscose and lightweight linen.
Please see the chart below for fabric requirements.
LARGER SIZES WITH NARROW WIDTH FABRIC
With sizes 20 and 22 in the dress and maxi dress, add on an extension at the side of the fabric to accommodate the Frill pieces. You should have fabric left over at the side of the Frill pieces 4b/4c.
The pattern instruction booklet will show you the pieces to cut out according to your fabric width, using the layplans as a guide.
SEAM ALLOWANCE IS 1cm
Here are some of the stages of making up Frida to show you how its done.
HOW TO MAKE FRIDA
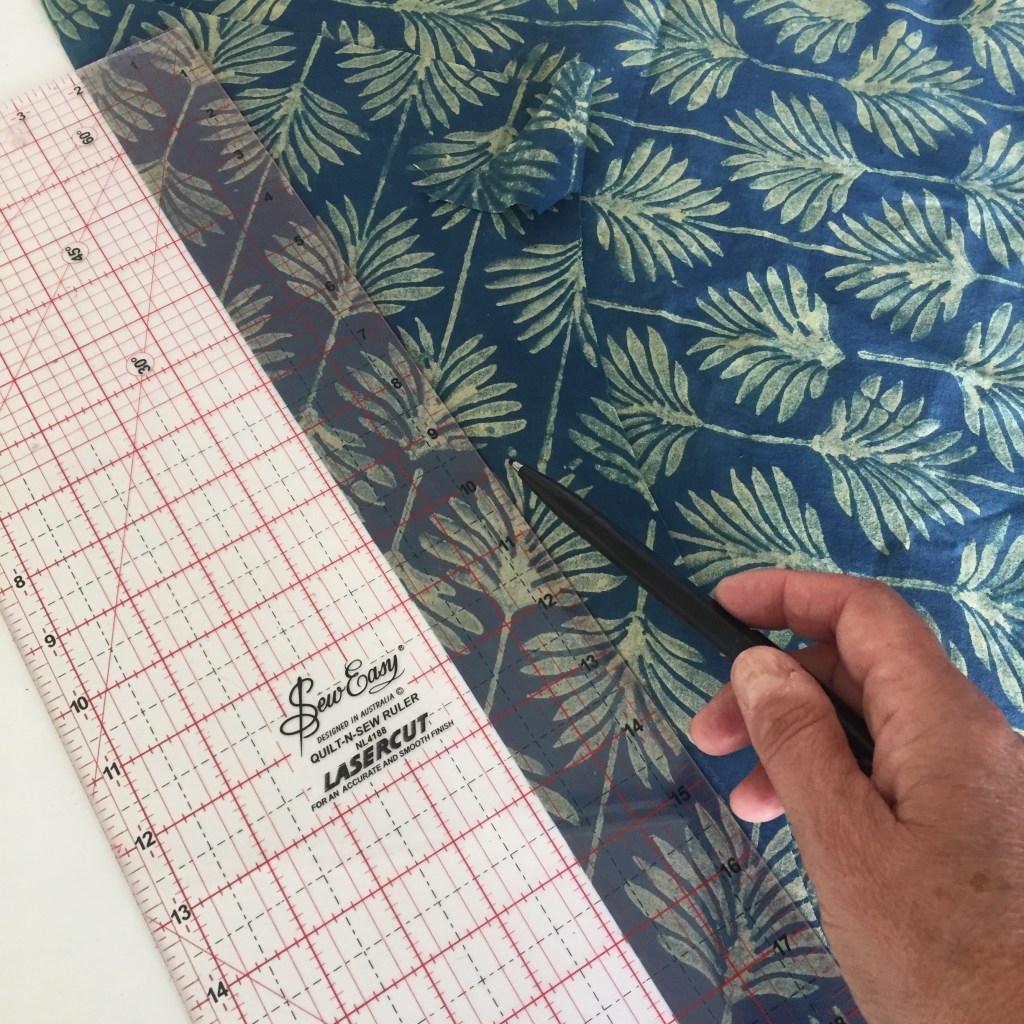
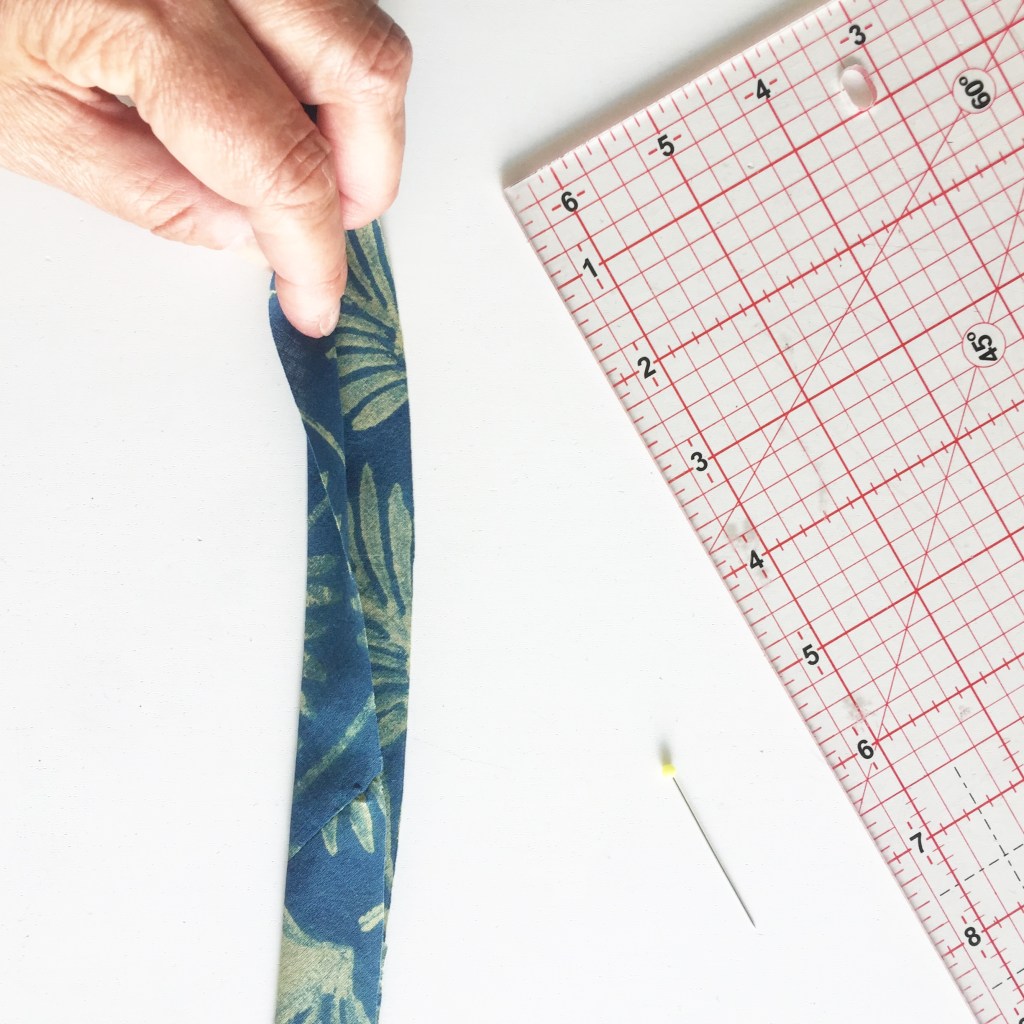
FIRST PREPARE THE TIES OR LOOP
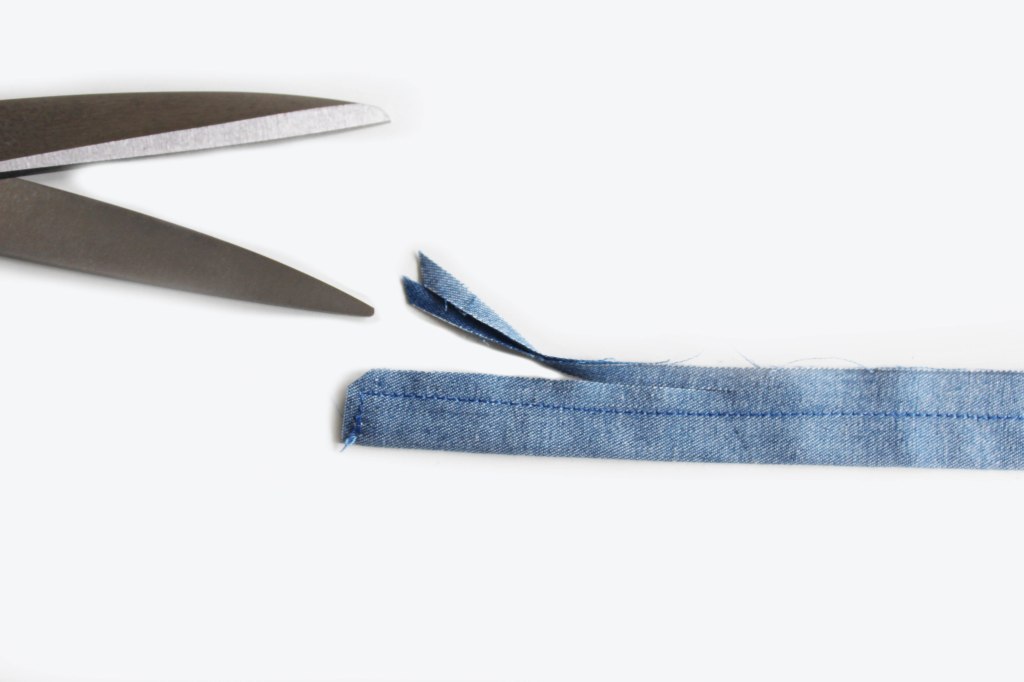
Place to one side.
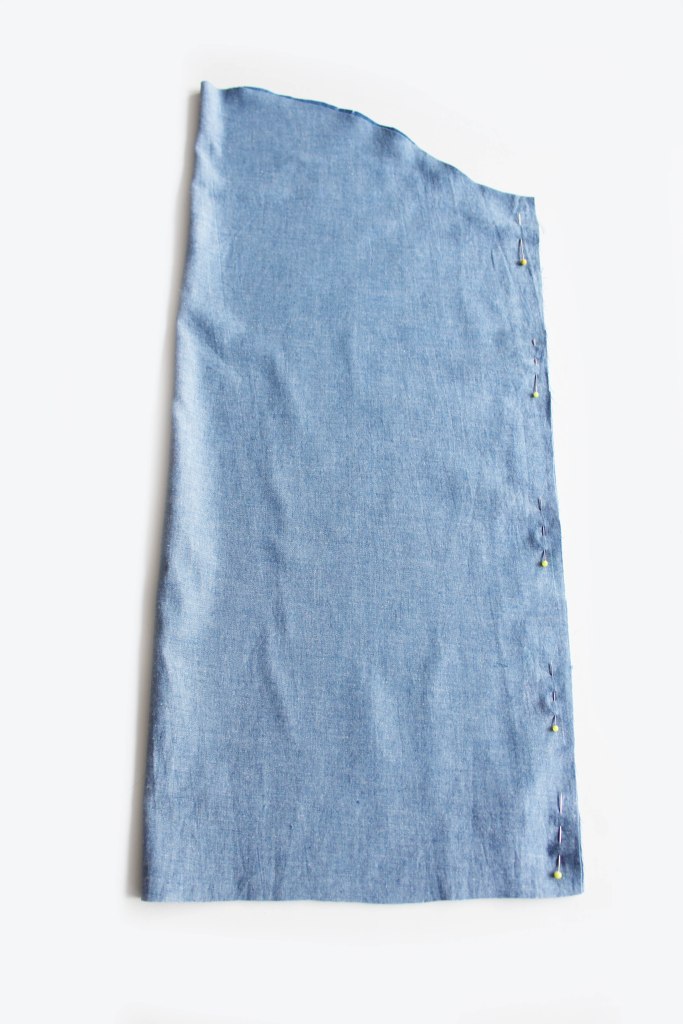
MAKING THE DARTS
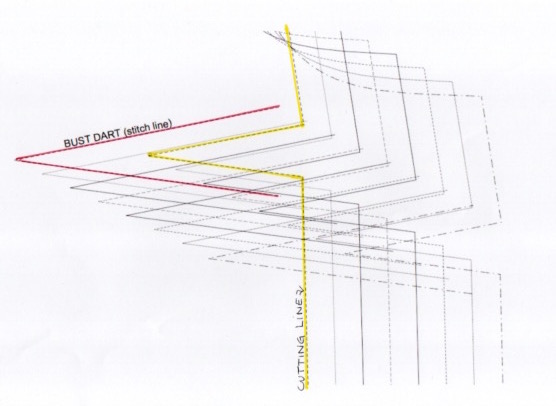
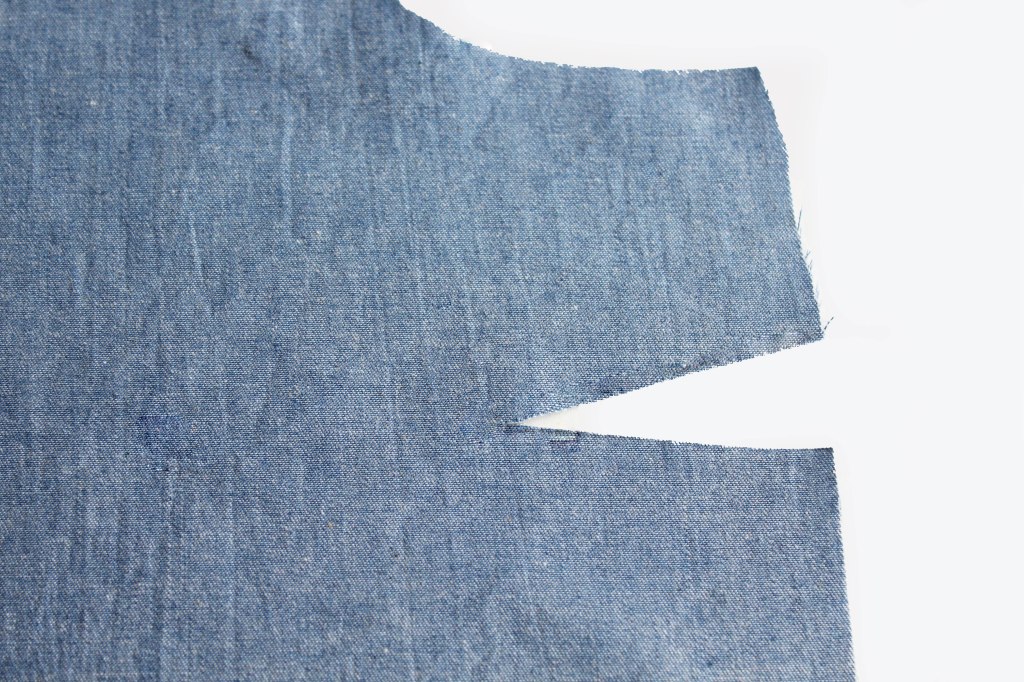
The dart has a cut out triangle at each side edge of the Front Bodice piece. 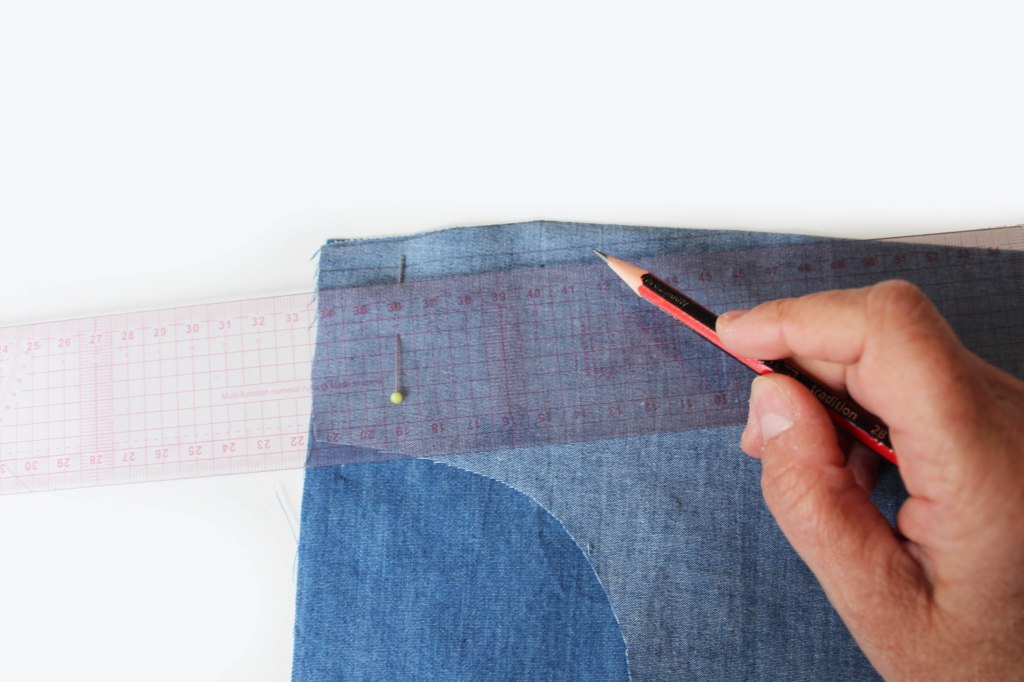
Use a ruler to mark the stitch line which is 1cm away from the cut line. 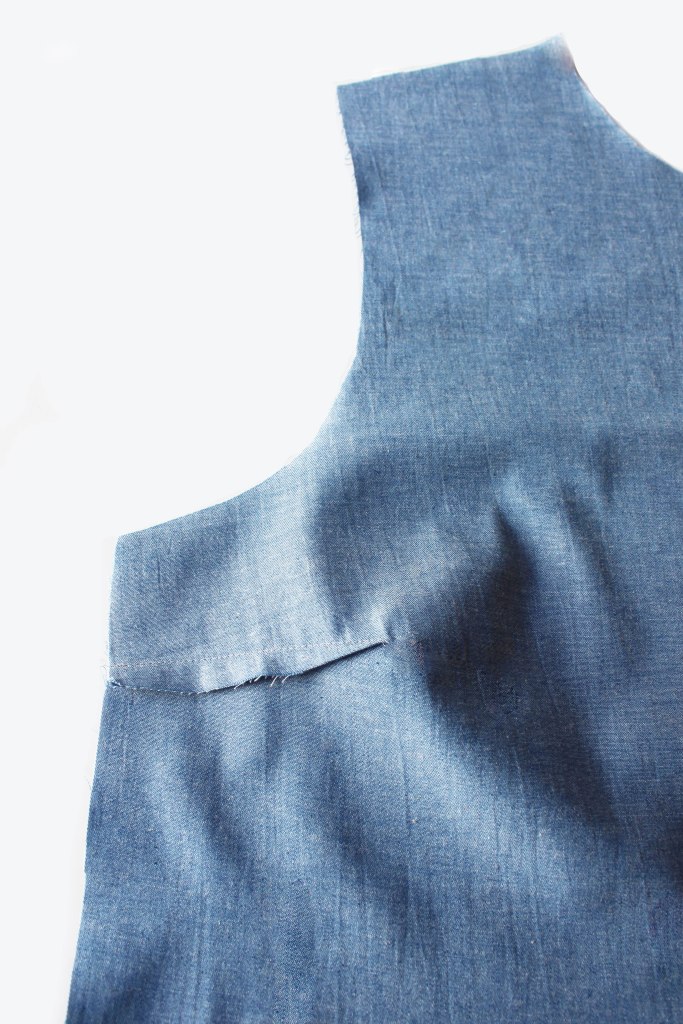
Sew along the marked line. Leave a long thread end. Tie the ends together.
Press the darts downwards.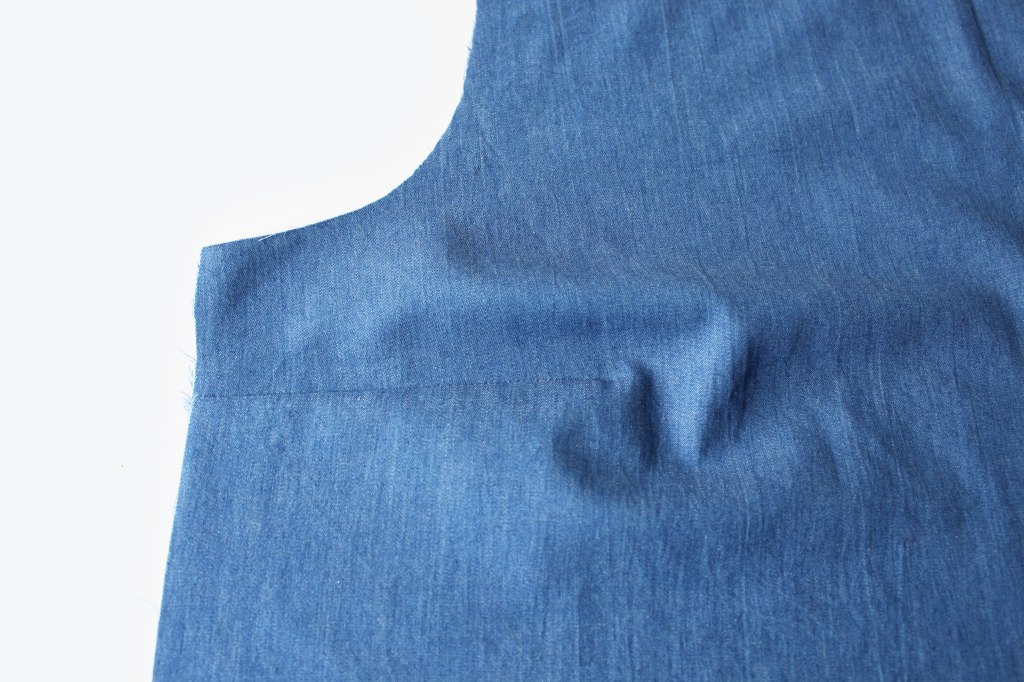
Dart (front view) 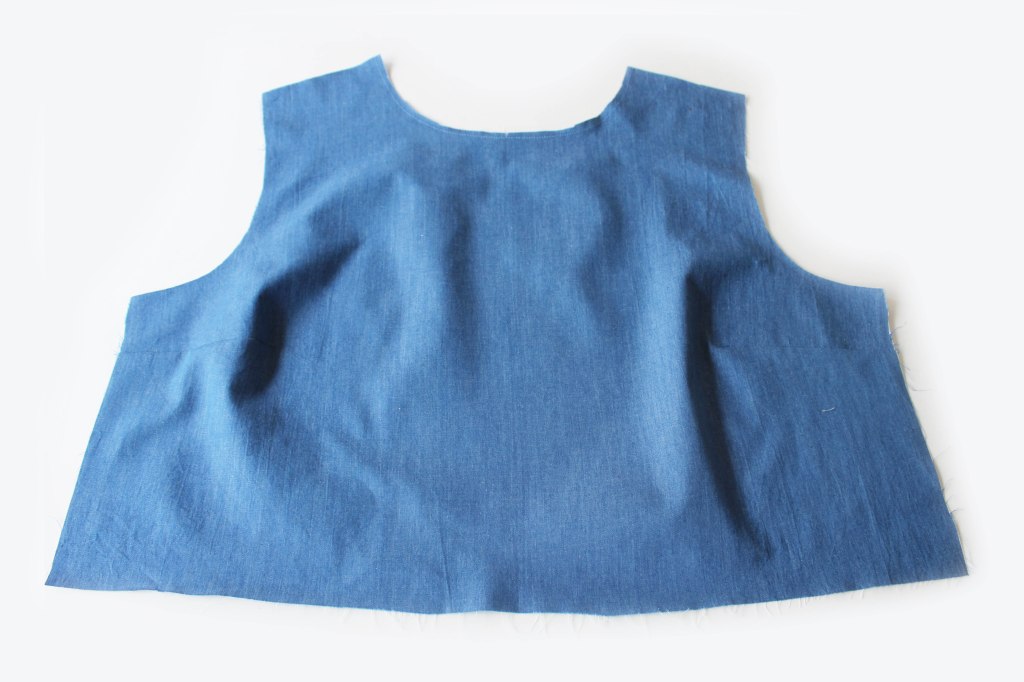
Both darts done and dusted!
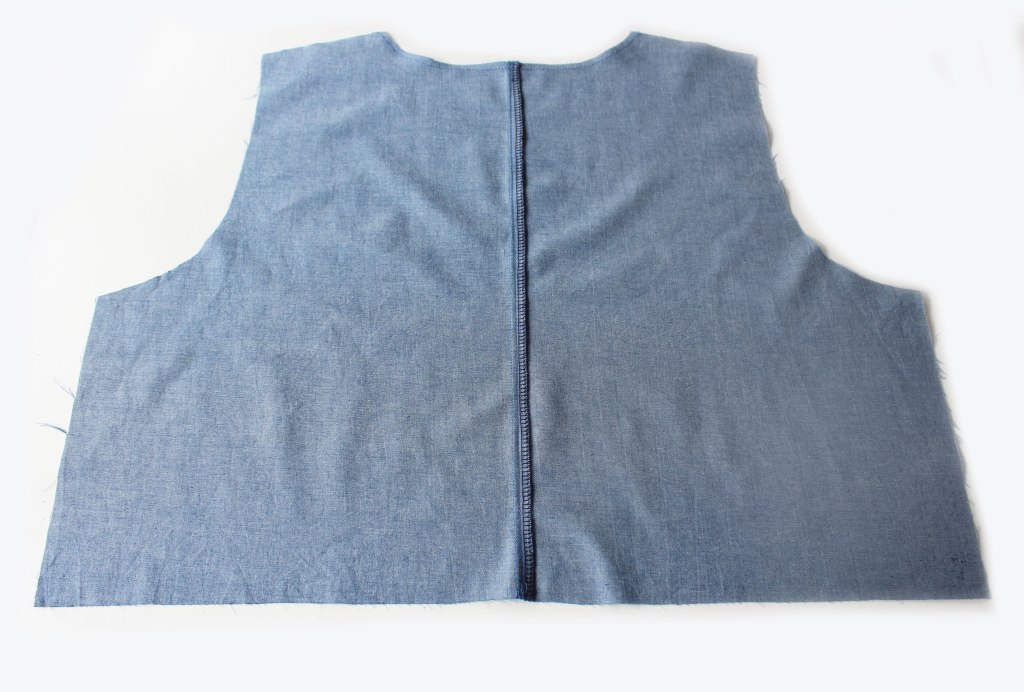
Join the back pieces together. Finish the raw edges, press to one side. Easy peasy!
JOINING THE FRONT TO BACK
Join the Front to Back at the shoulder edges. 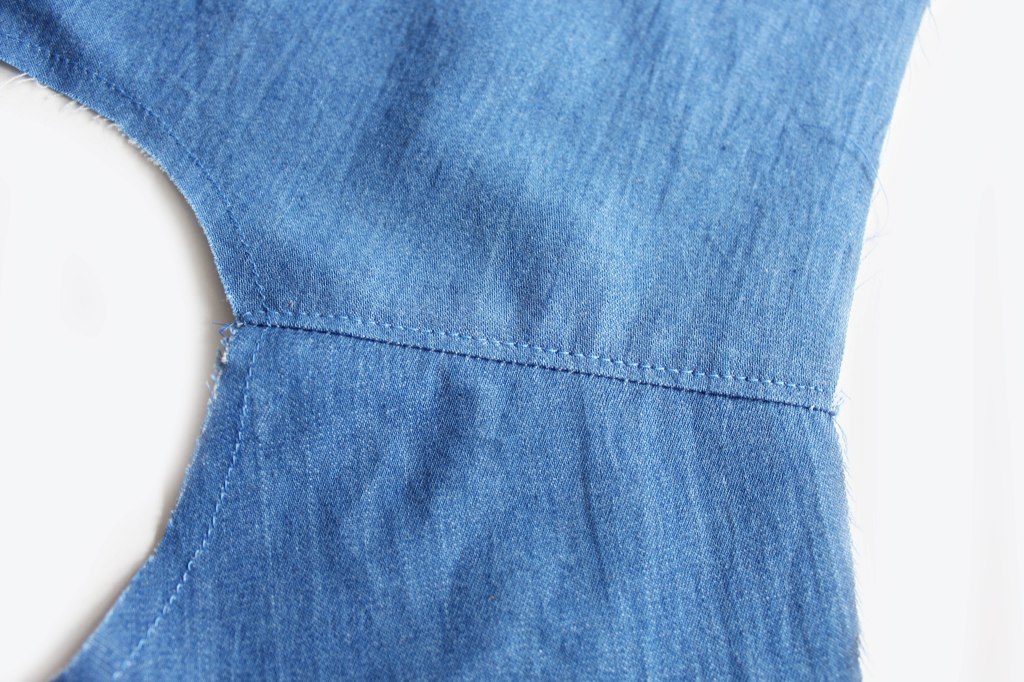
Finish the raw edges, press towards the back, Topstitch.
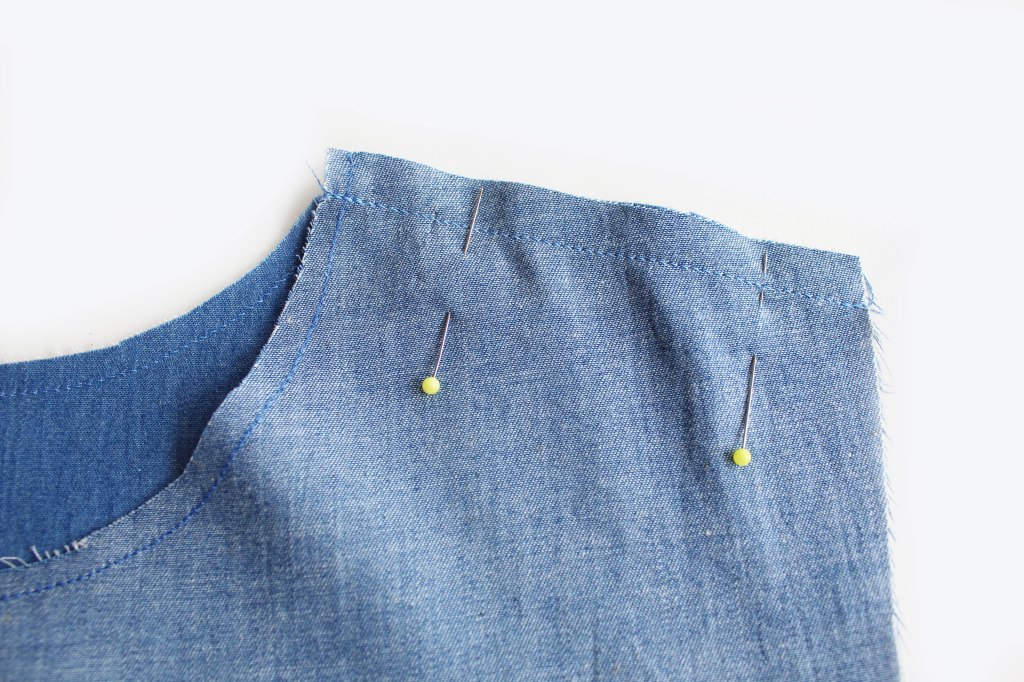
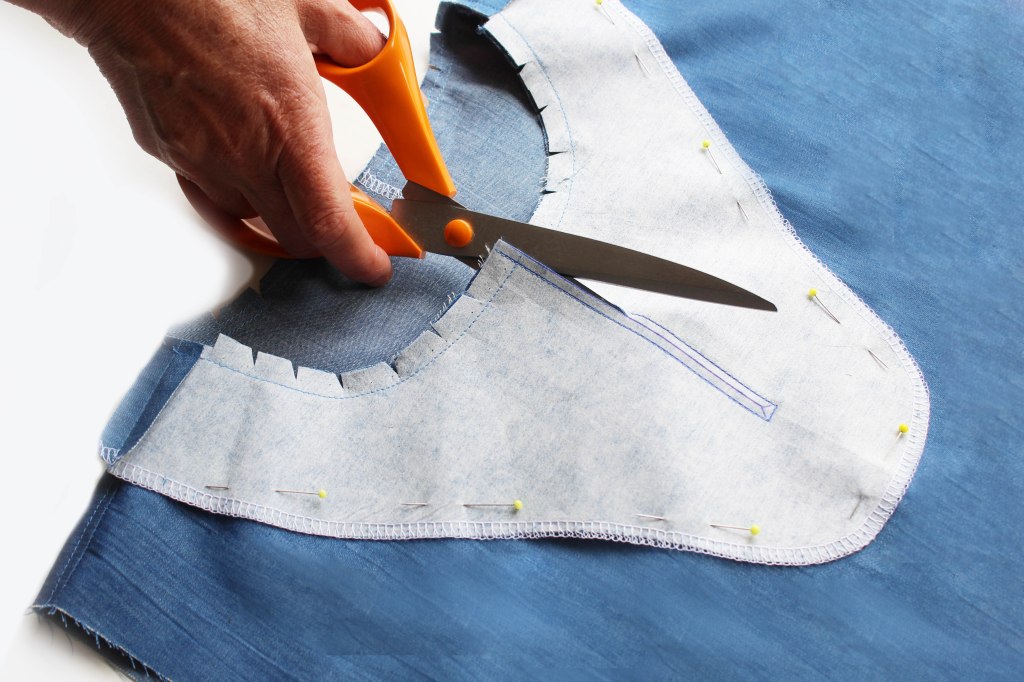
FACINGS
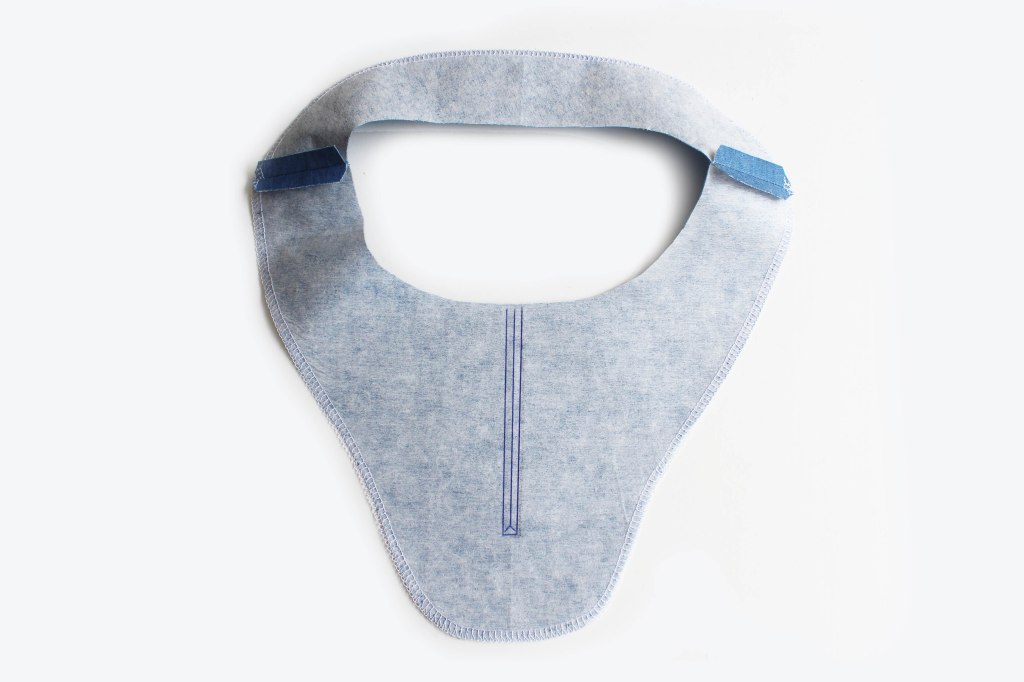
Join the Facing Front and Back at the shoulder edges. Press. Finish the outer edge all around.
Mark the front opening cut and stitch lines.
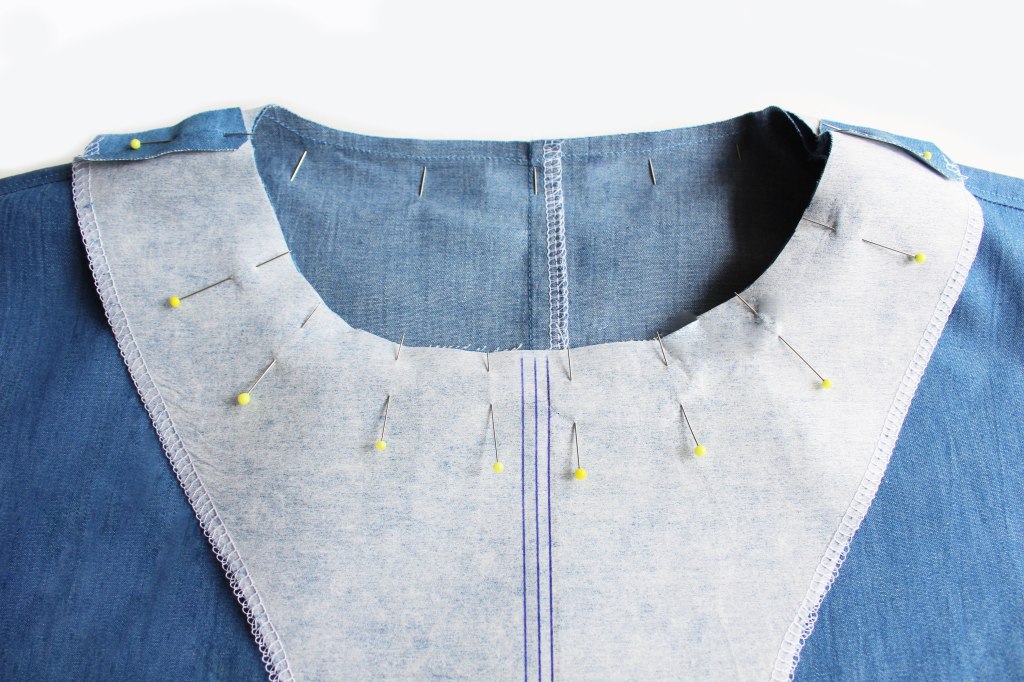
Pin the Facing piece to the Neck edge. 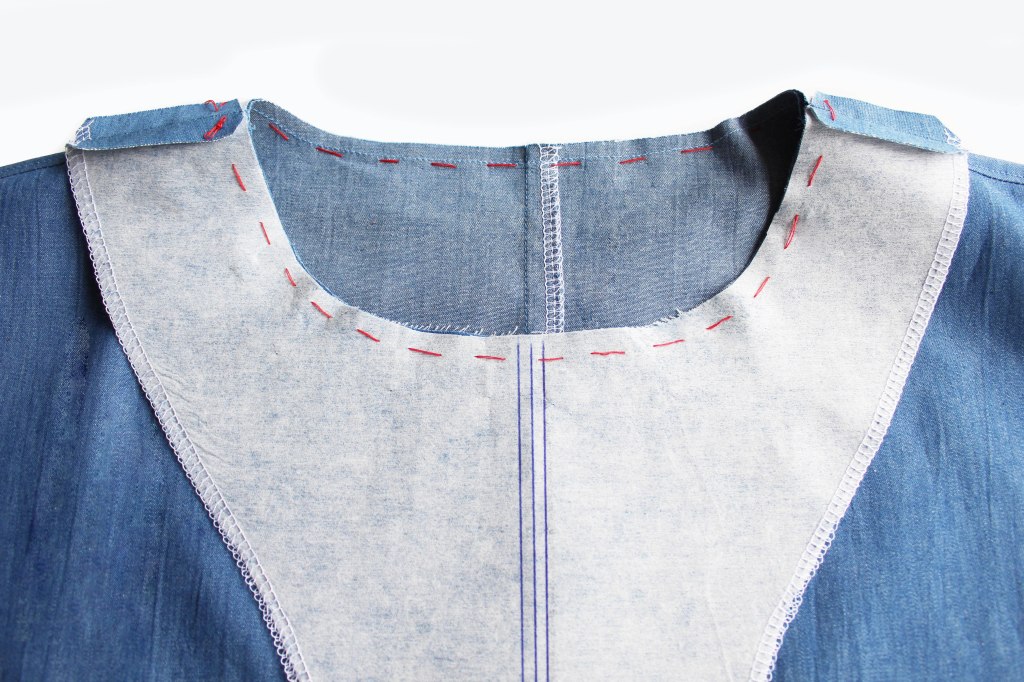
Hand tack. 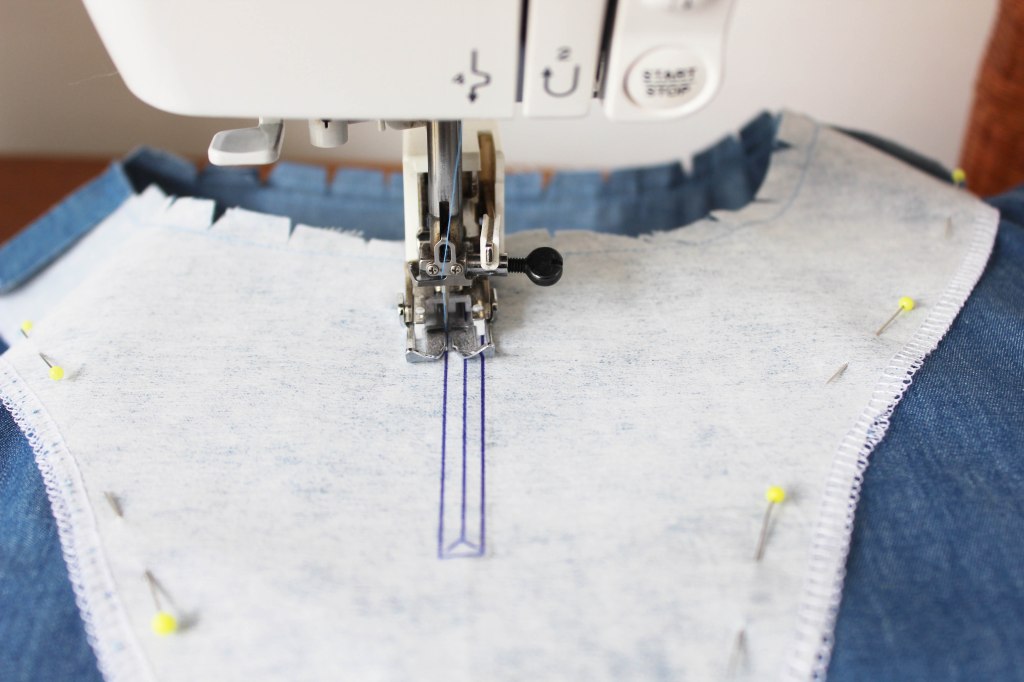
Sew around the front opening. 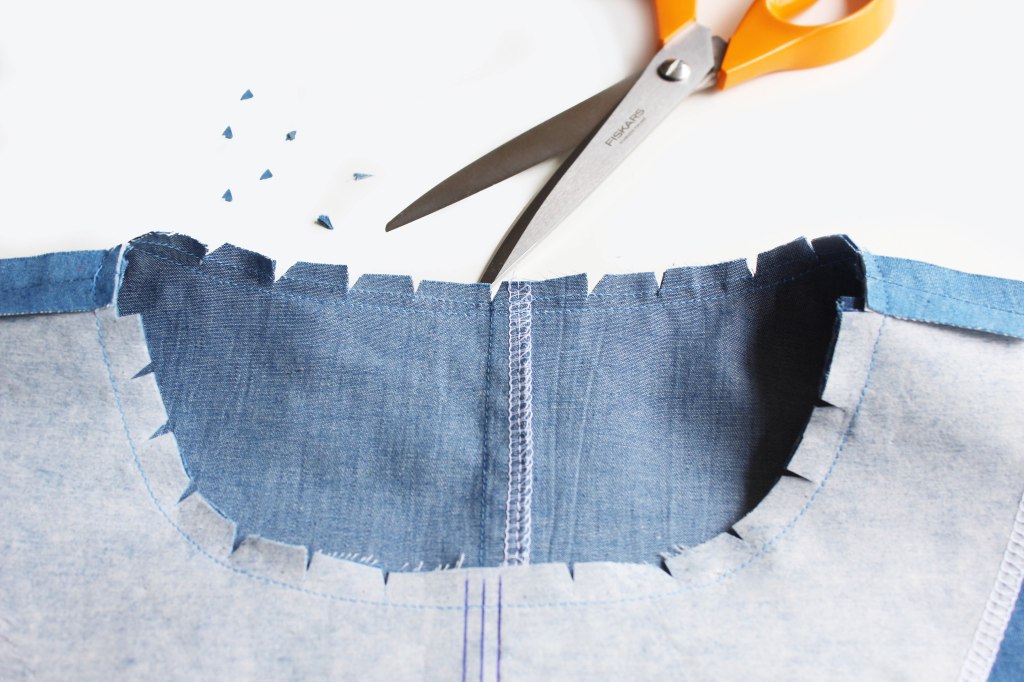
Nick the seam allowance all around.
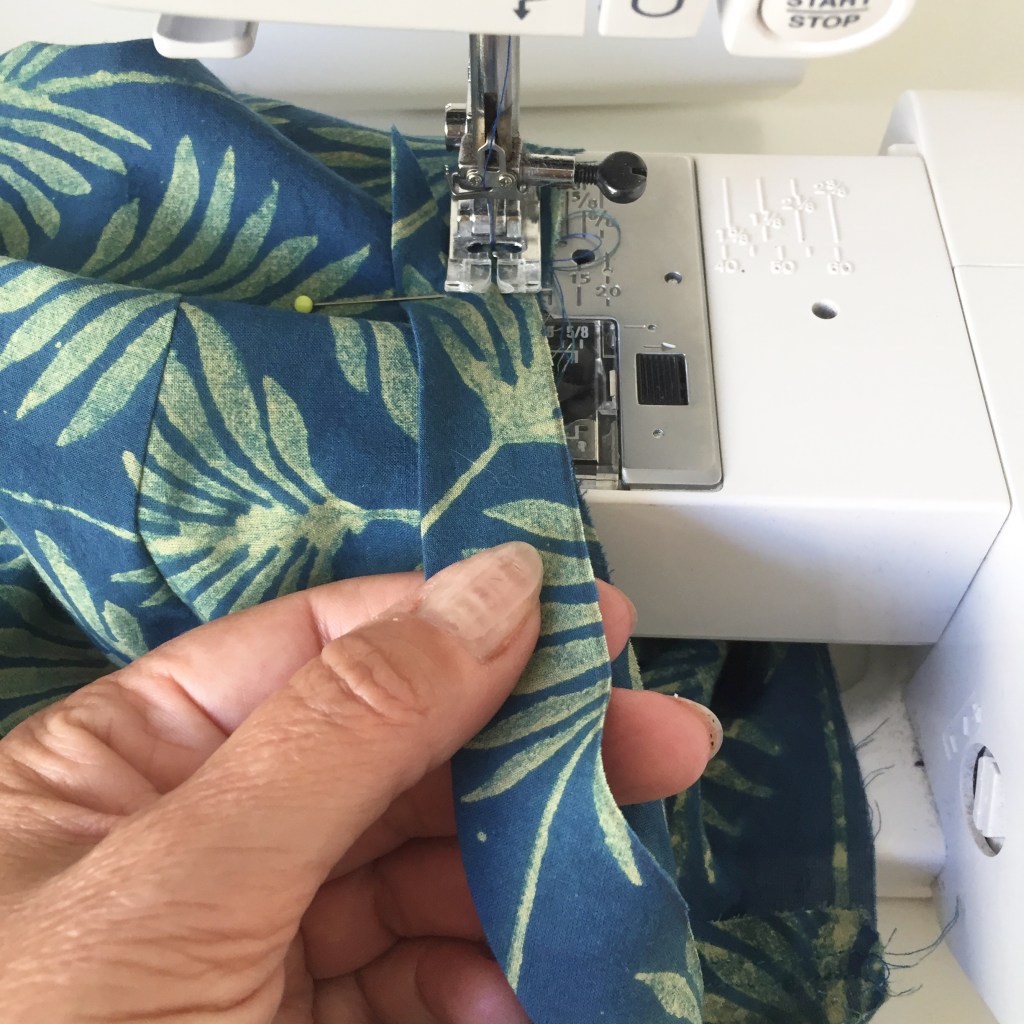
INSERTING THE TIES OR LOOP
Cut down the centre ‘Cutting’ line. 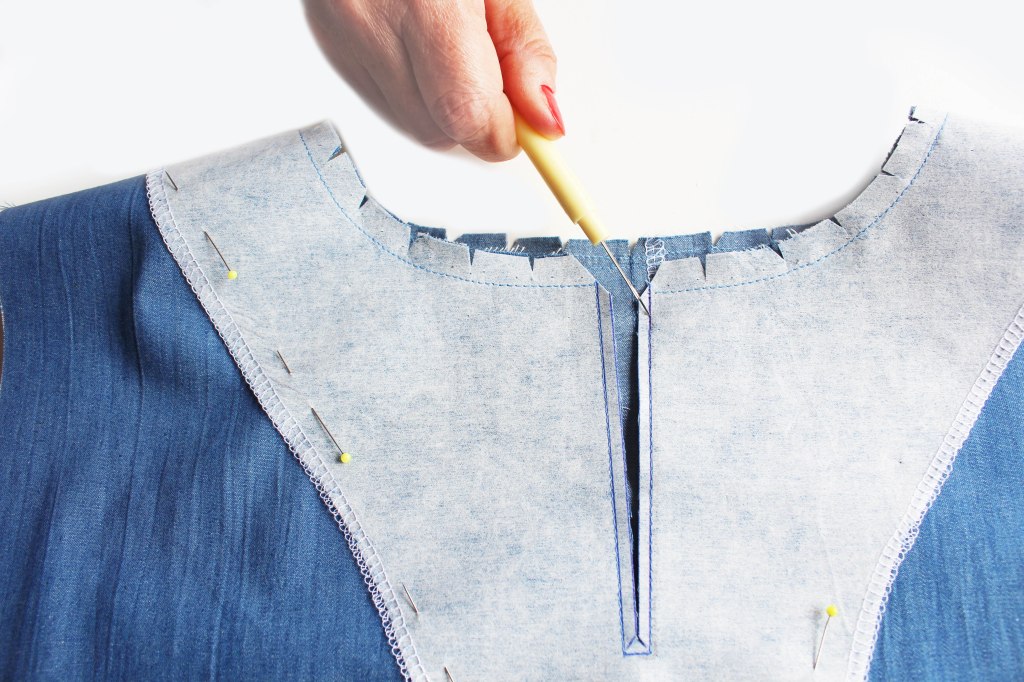
Nick a hole on each side (ties) or just the left side (loop). 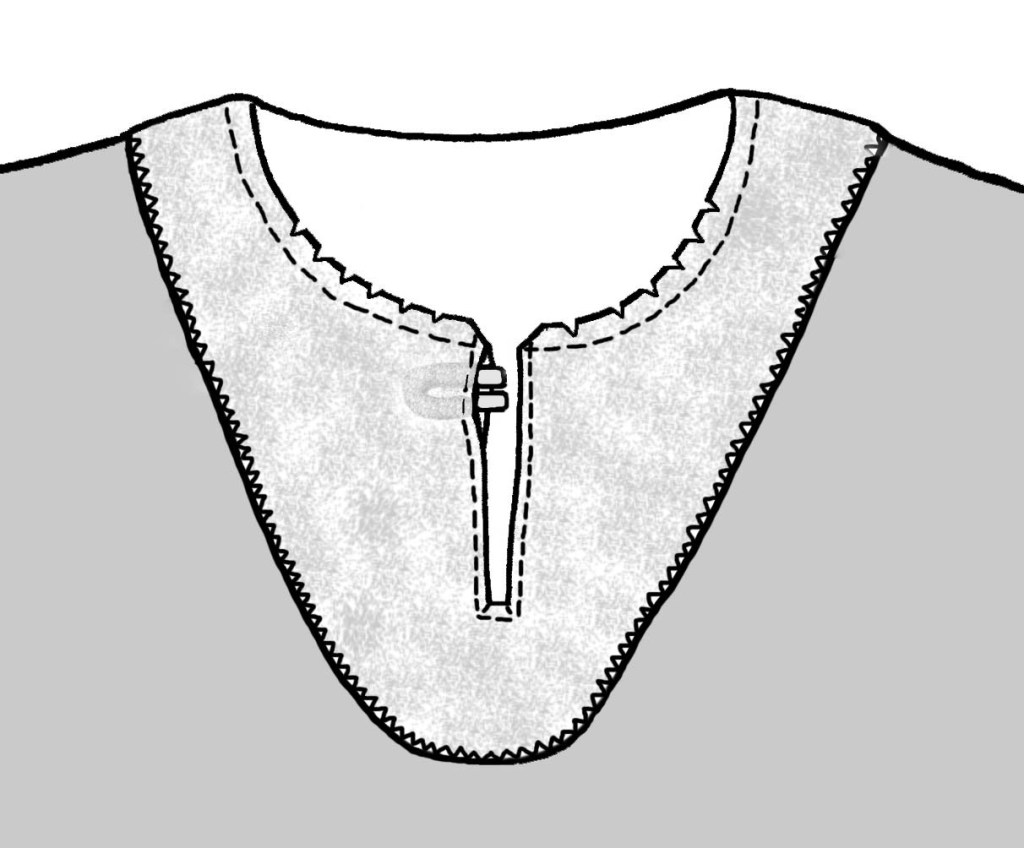
Insert the two loop raw ends through the hole. 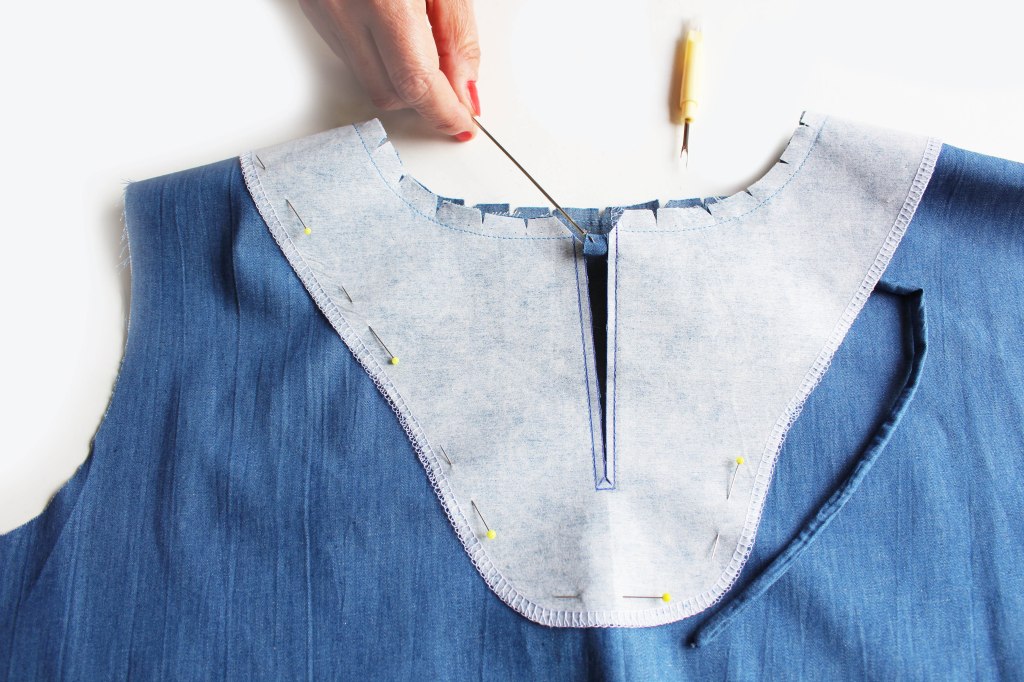
Or insert one raw end each side for the ties.
Restitch up the opening.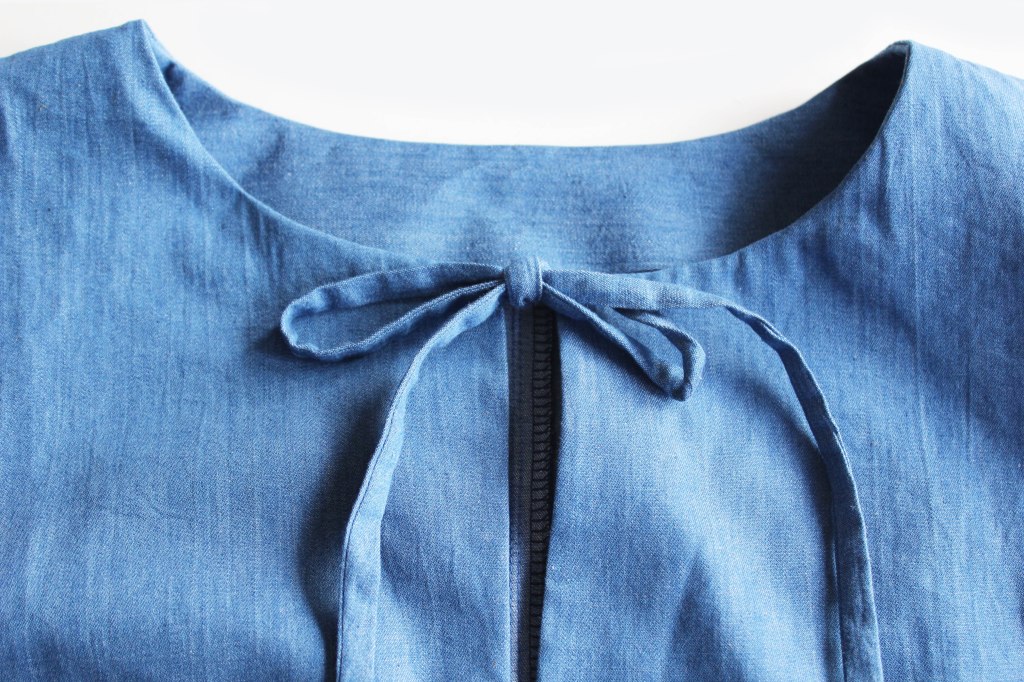
Turn the facing to the wrong side. Press.
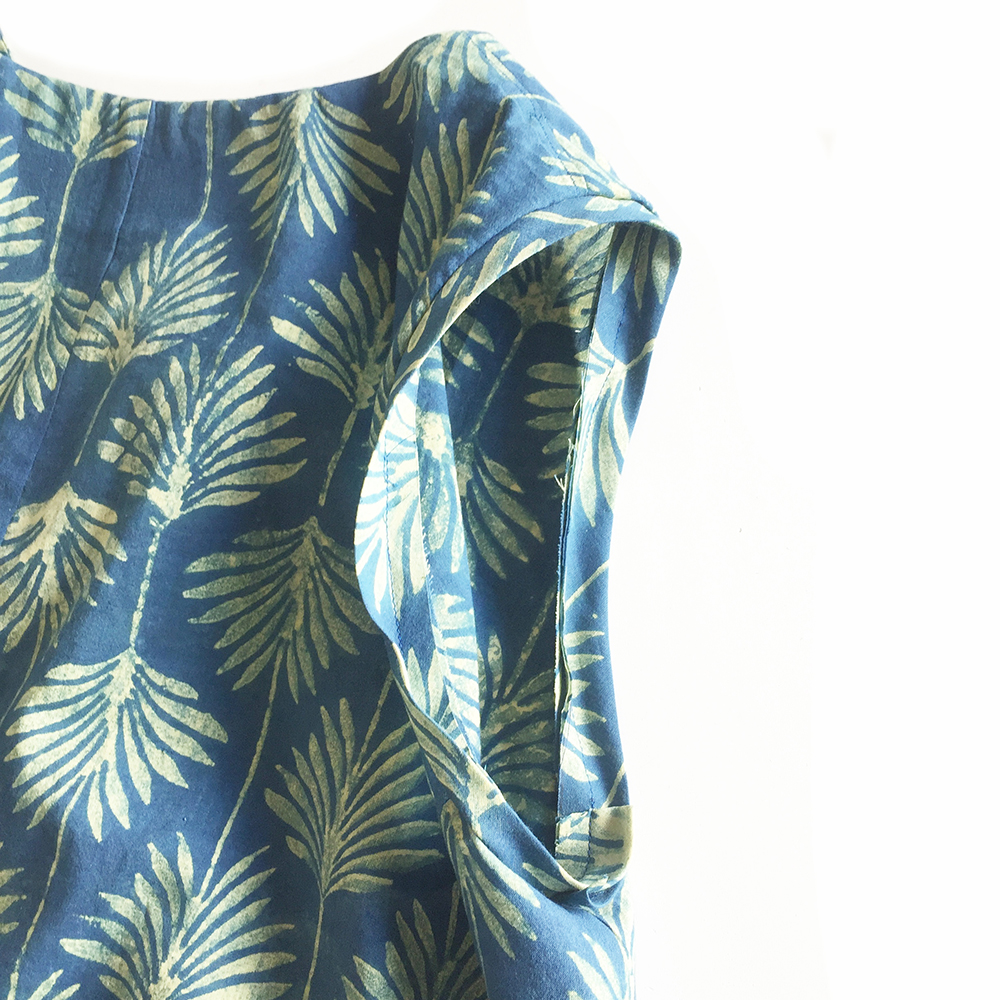
SLEEVES
Pin the sleeve long edges with the right sides together. Sew 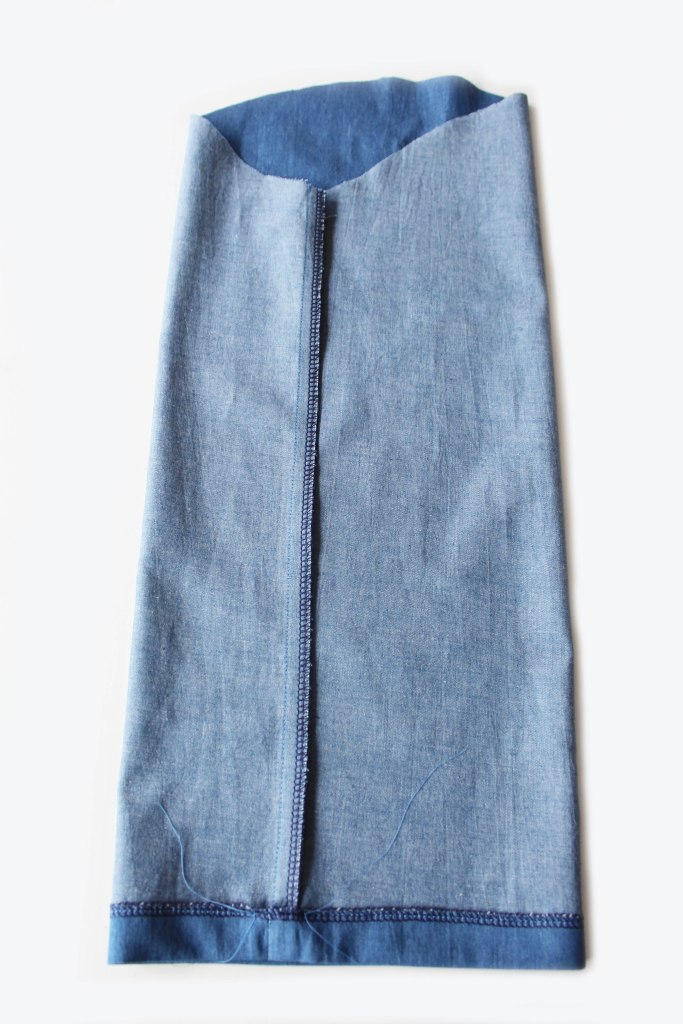
Make a hem at the cuff edge. (Dress)
Sew all around, leave enough room for the elastic.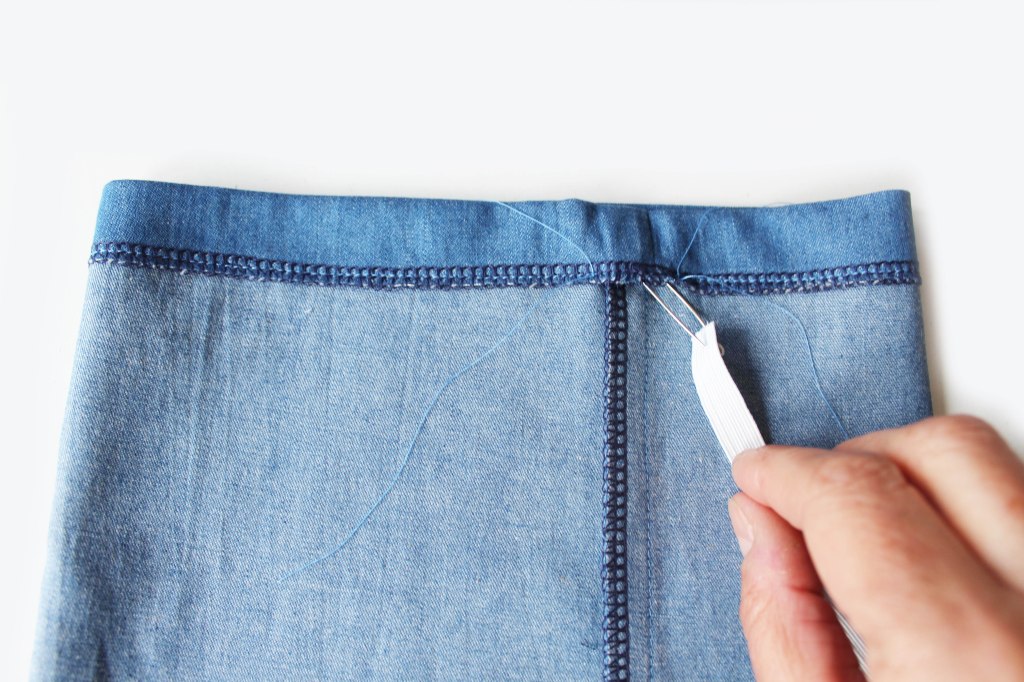
Insert the elastic into the channel. 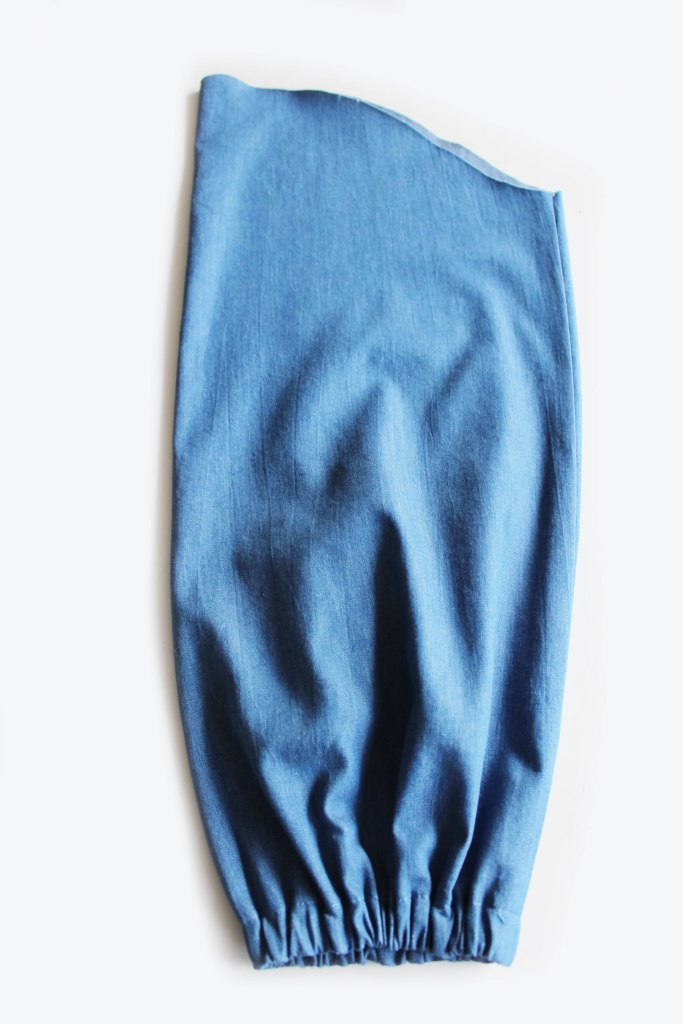
Sew the elastic together. Sew up the opening. 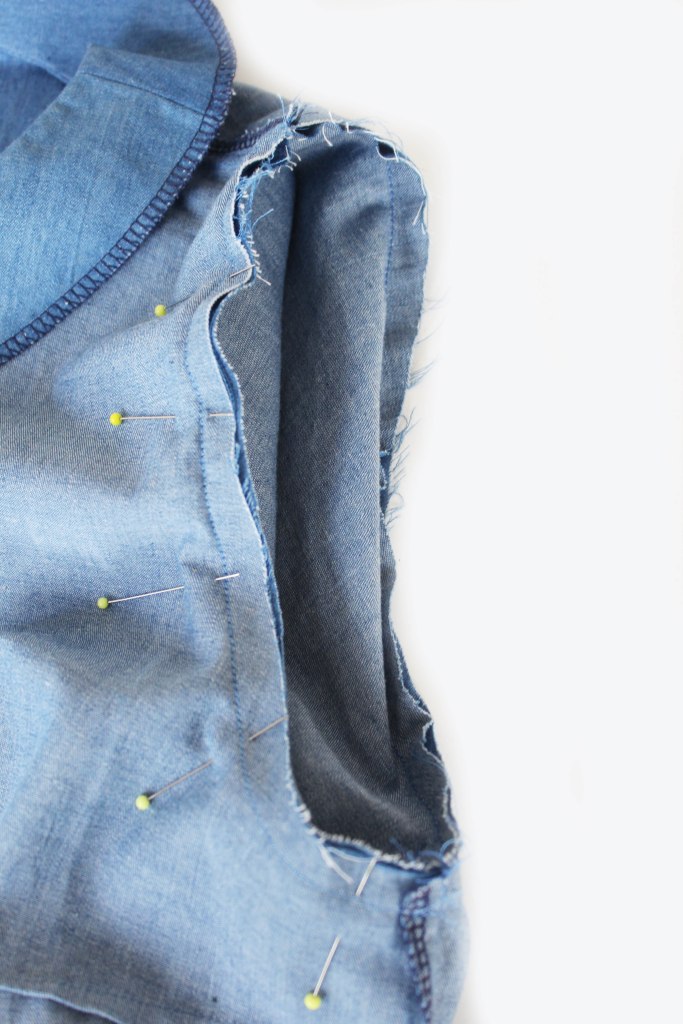
With the RST, pin the sleeve to the armhole, matching the sleeve head ‘back’ section to to back. 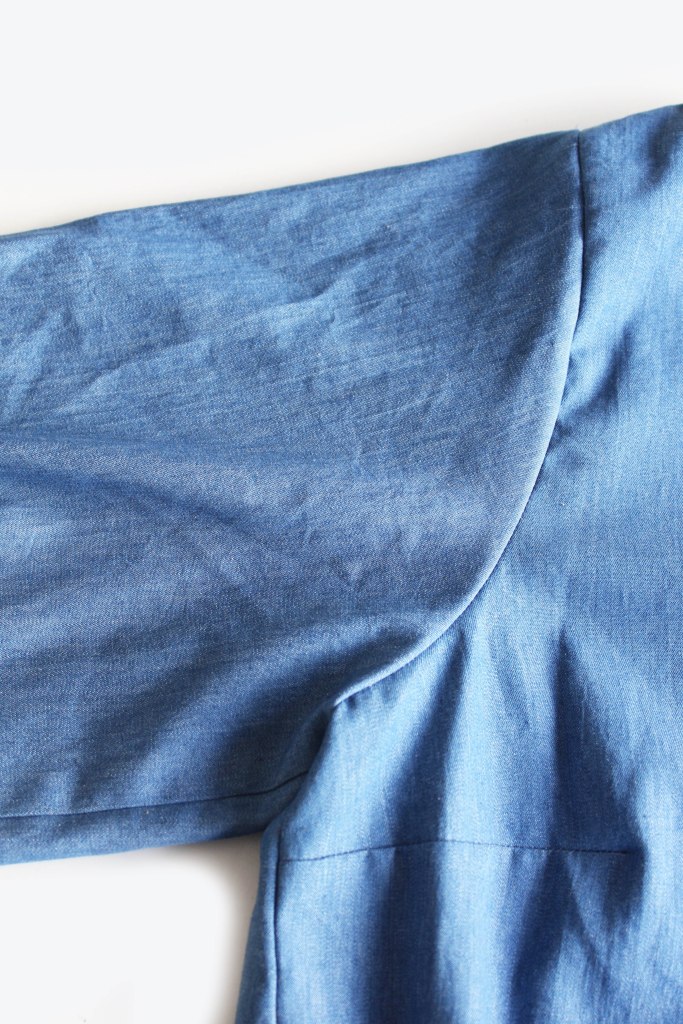
Sew. Finish the seam allowance. Press.
Repeat for the other sleeve.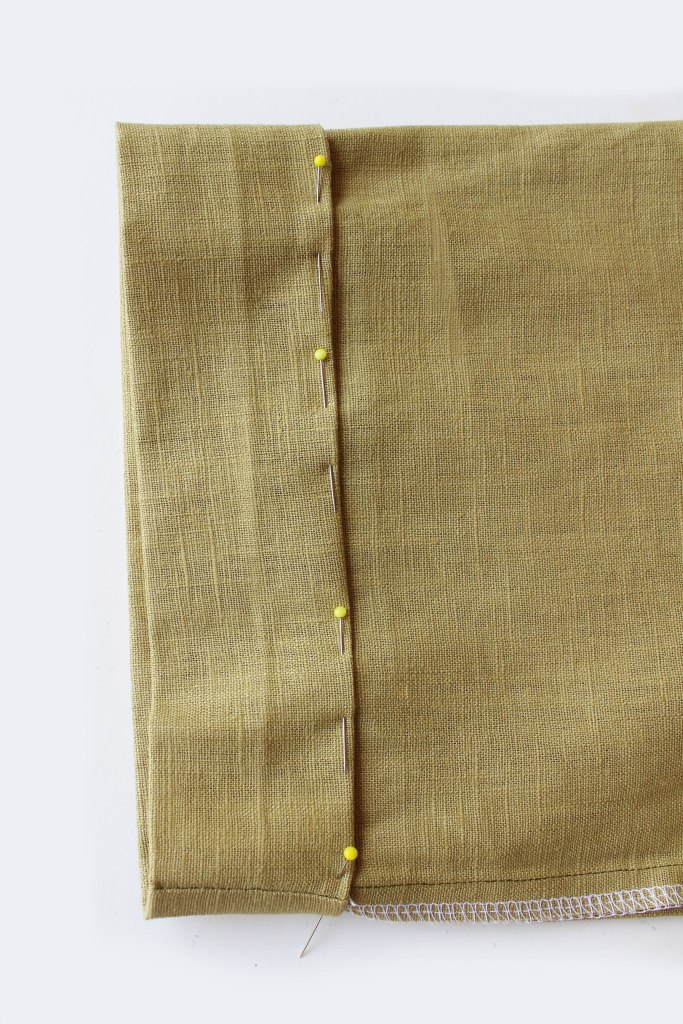
Top: Short turned back cuff. Press a deeper cuff hem. 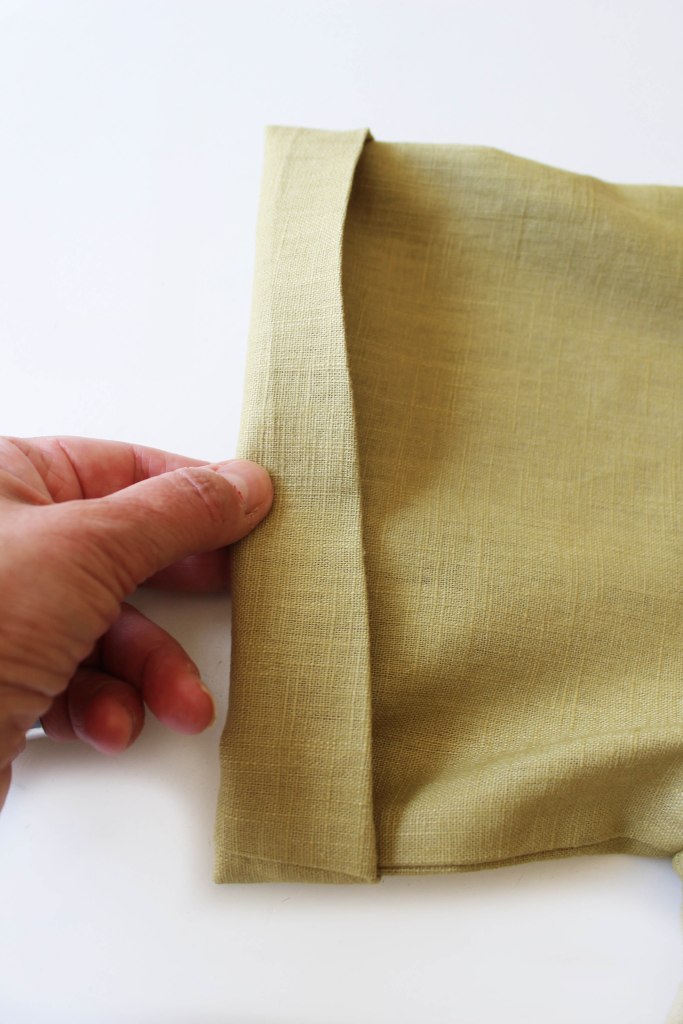
Sew. Fold back over to the right side. 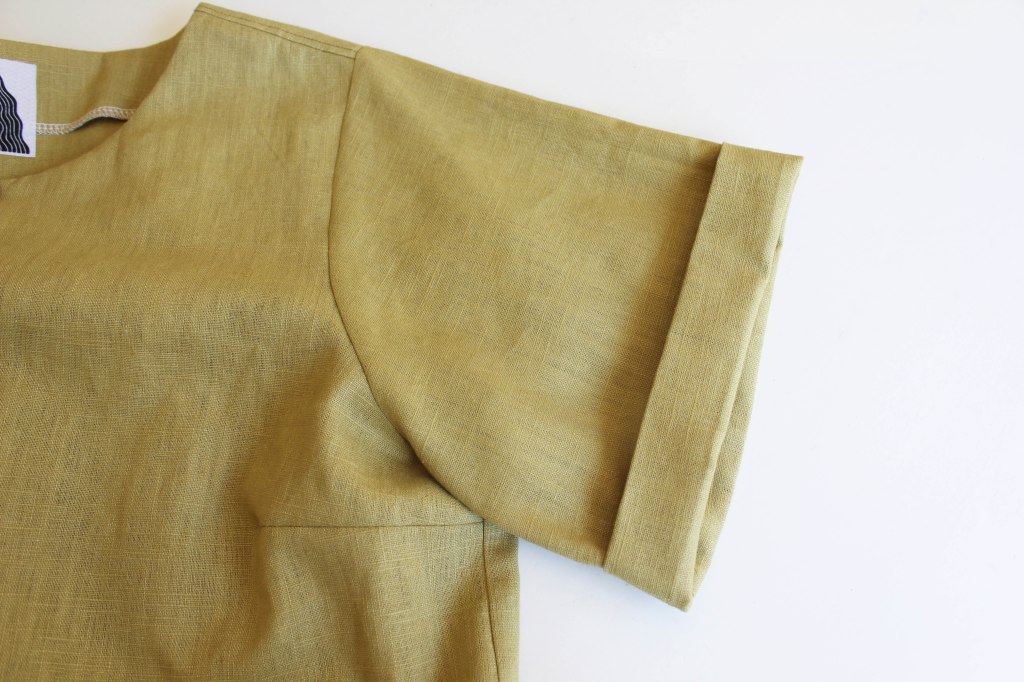
Press. A few hand stitches at the seam helps secure in place.
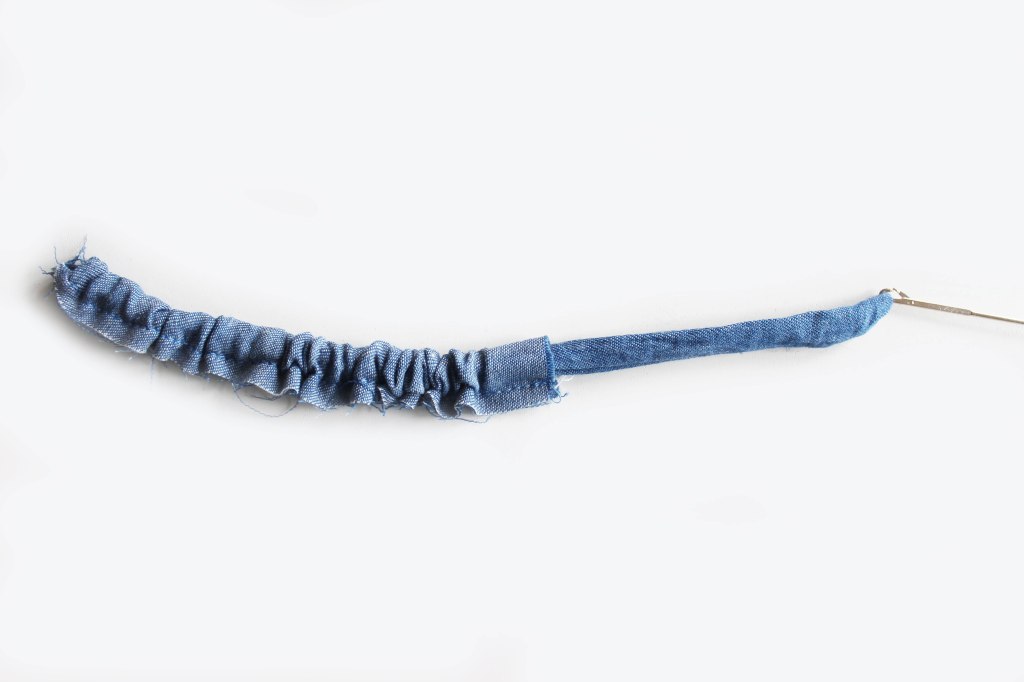
FRILLS
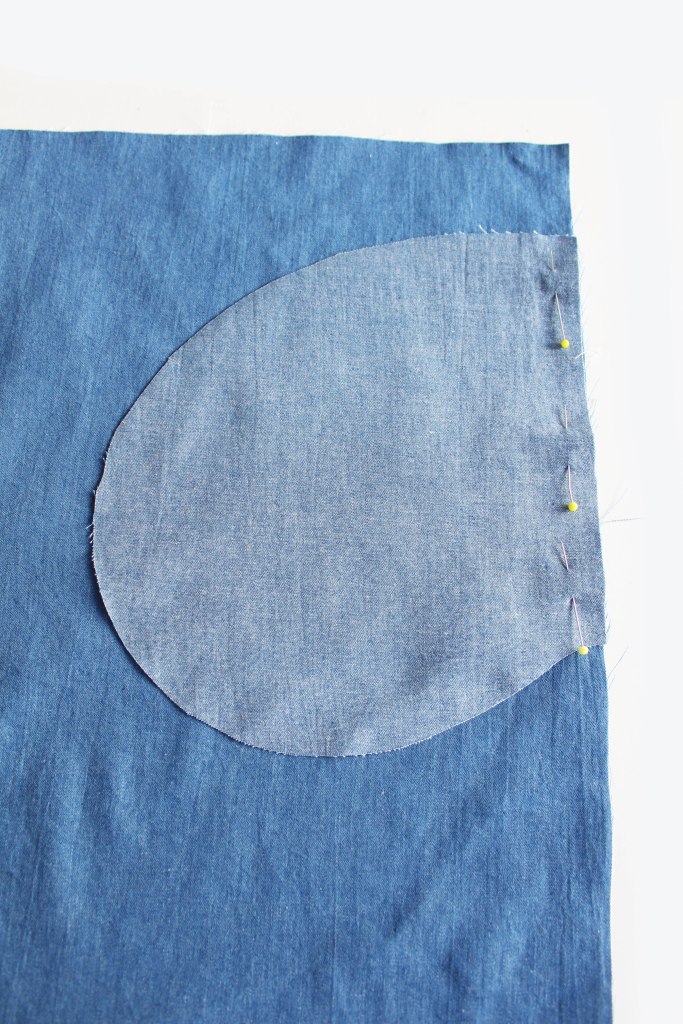
DRESS VERSION: Pin the pocket piece at each side edge of both Top Frills (4b or 4c). 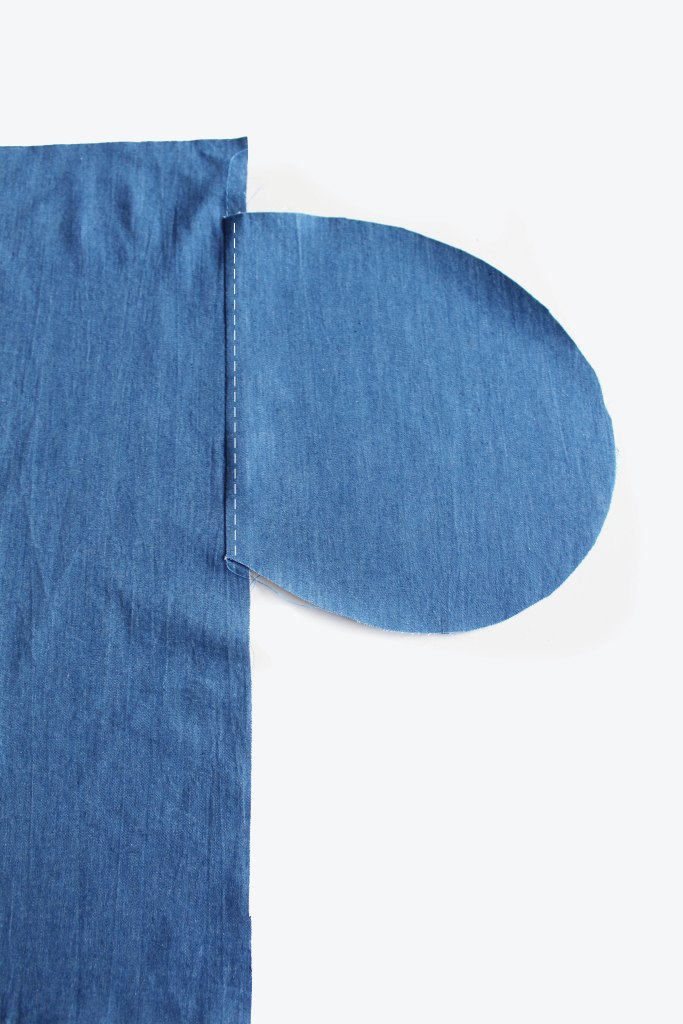
Press the pocket outwards and topstitch. 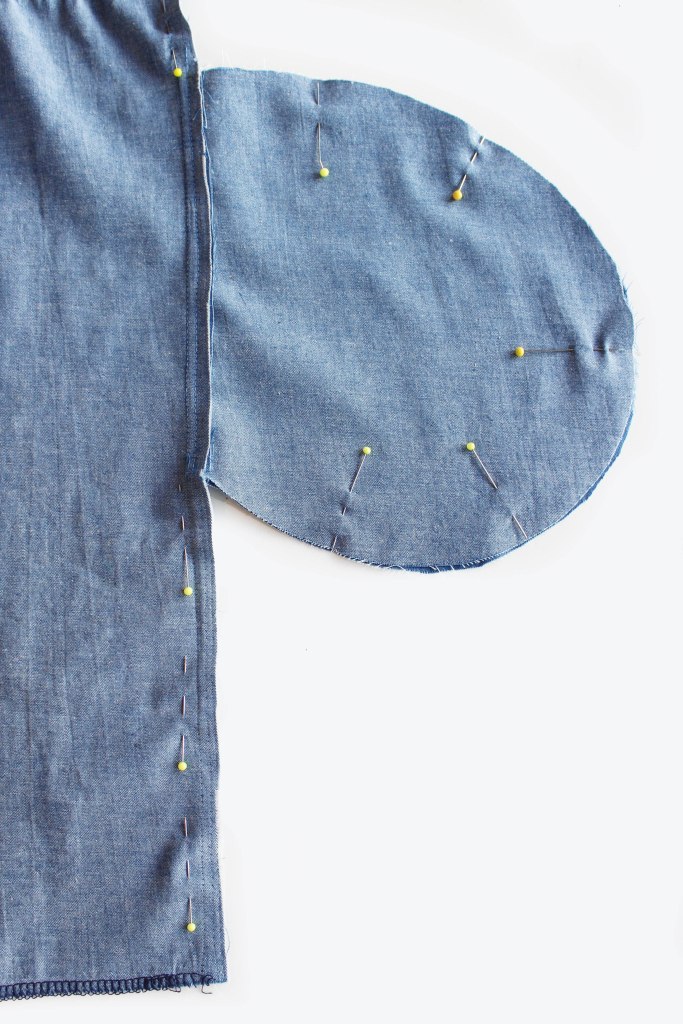
Place the two top frills one on top of the other. Pin all around the side edges and pockets. Sew. 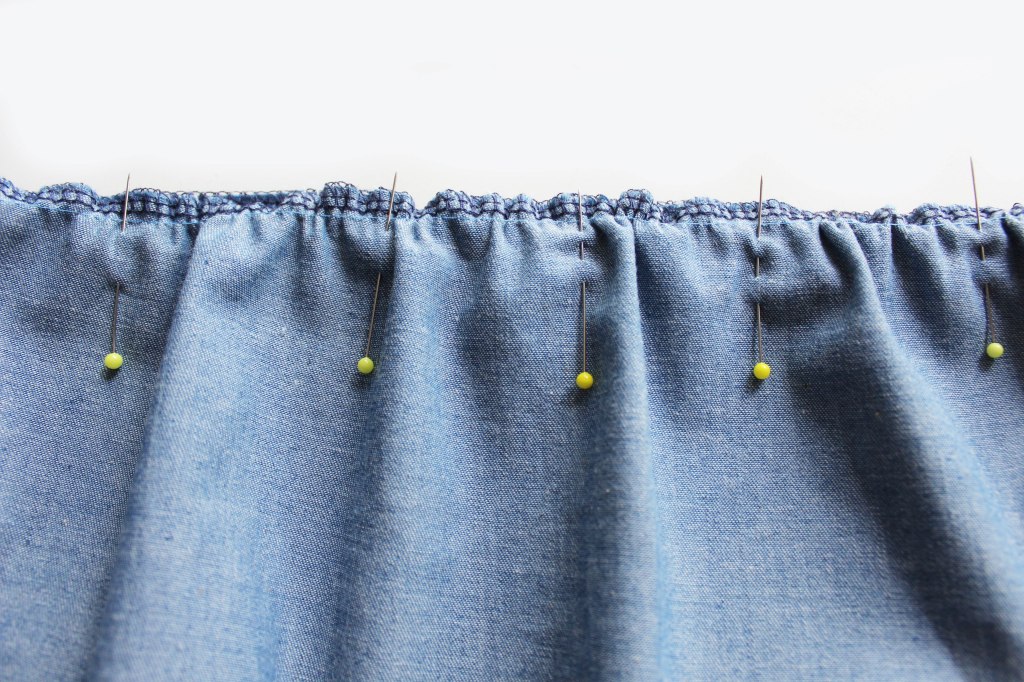
Evenly gather stitch the top edge of the frill all around. Pin to the lower edge of the bodice with the right sides facing together, match up notches and side seams. 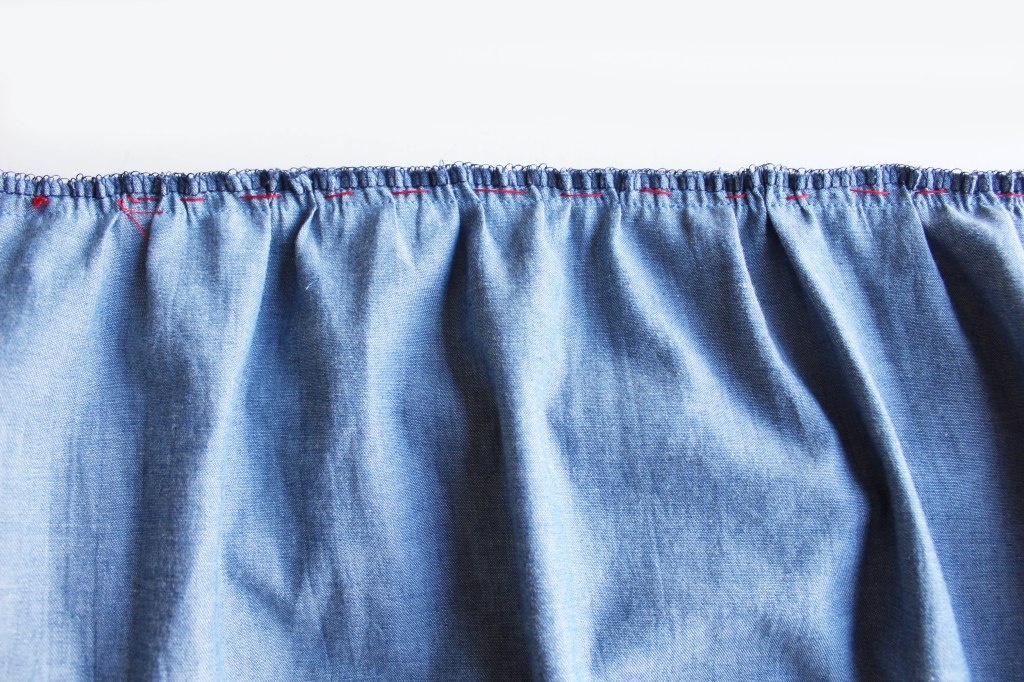
Hand tack (optional!) 
Sew all around. It should look like this. 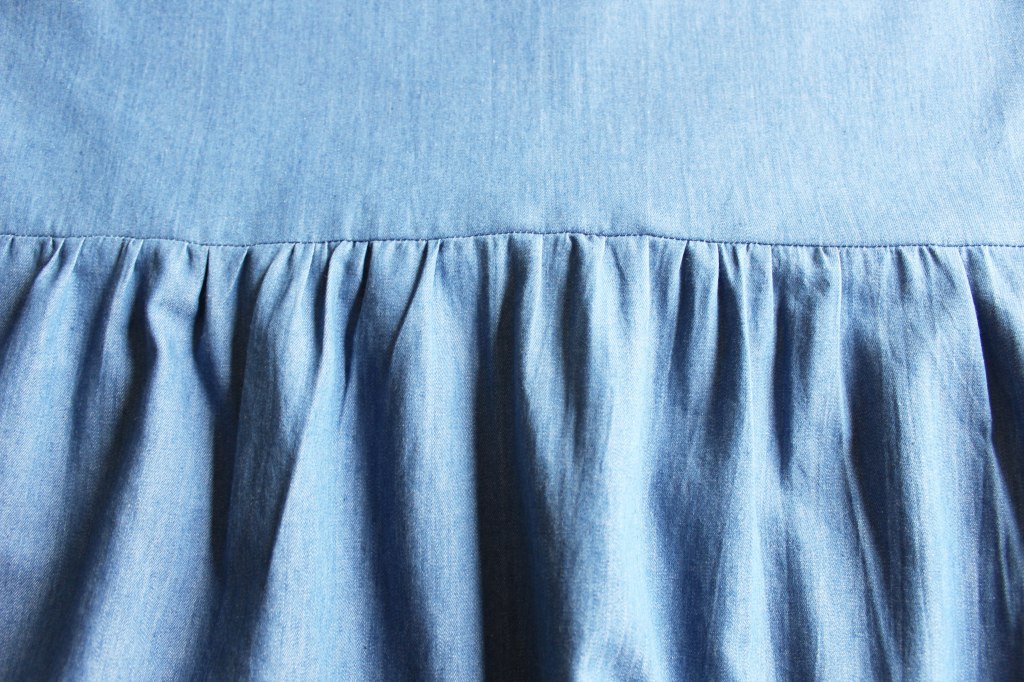
Press. Careful not to squash the lovely gathers 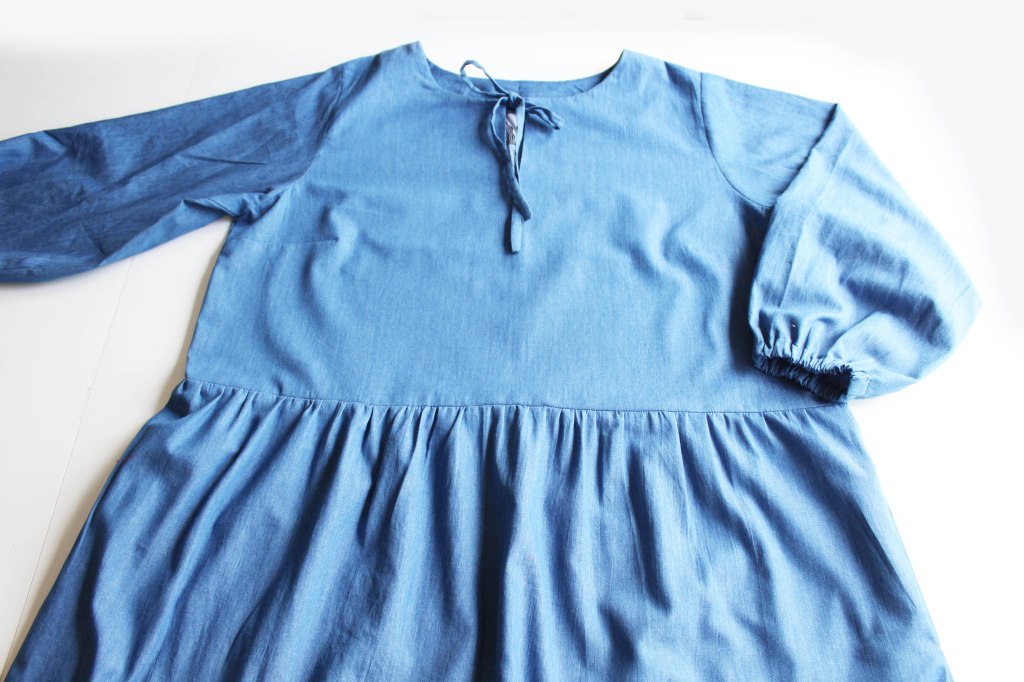
Ta dah! Repeat in the same way with the second frill. 
Finally hem the lower edge.
Fabric by Slubbed Prints

HOW TO MAKE ADJUSTMENTS TO THE ARMHOLE FOR A SLEEVELESS VERSION


All photos and text are subject to copyright by Fiona Hesford T/A Sewgirl .
Please ask permission before copying any imagery prior to use. Thank you.
