
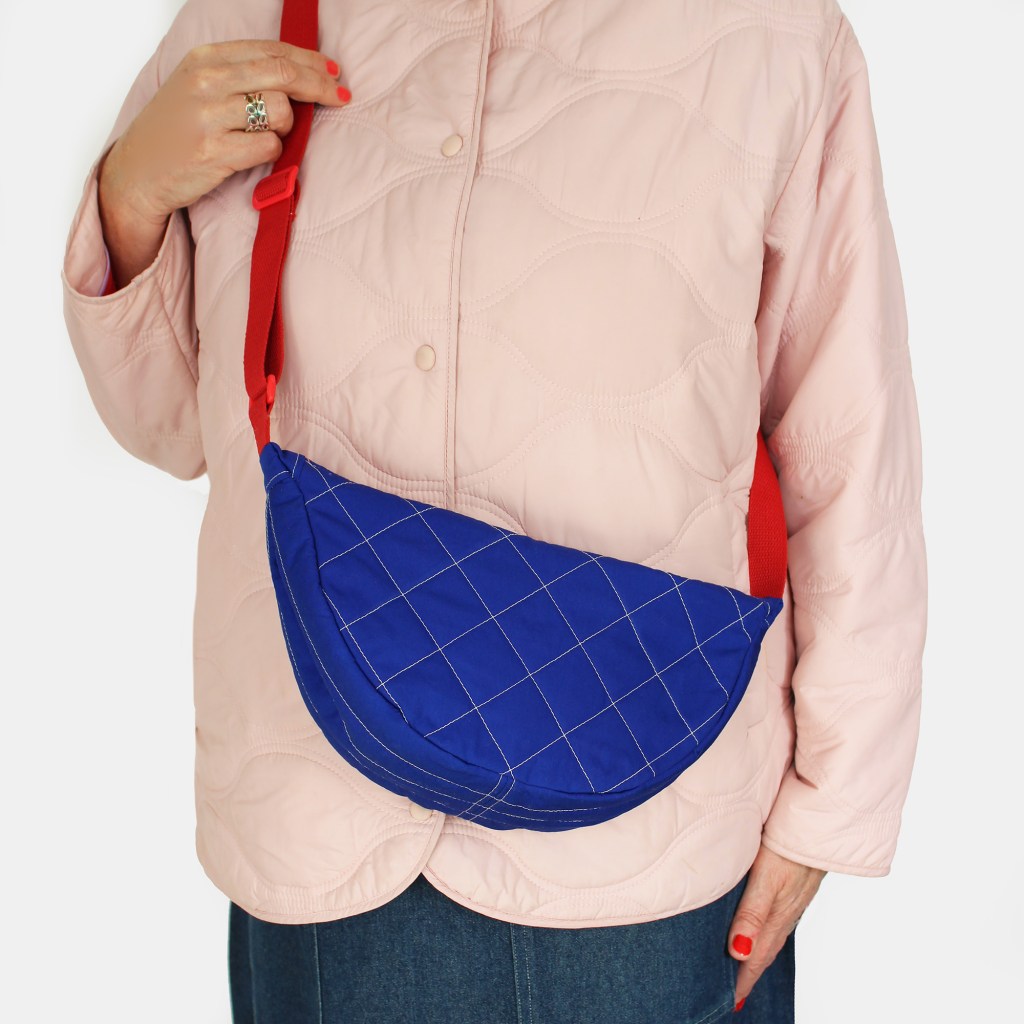
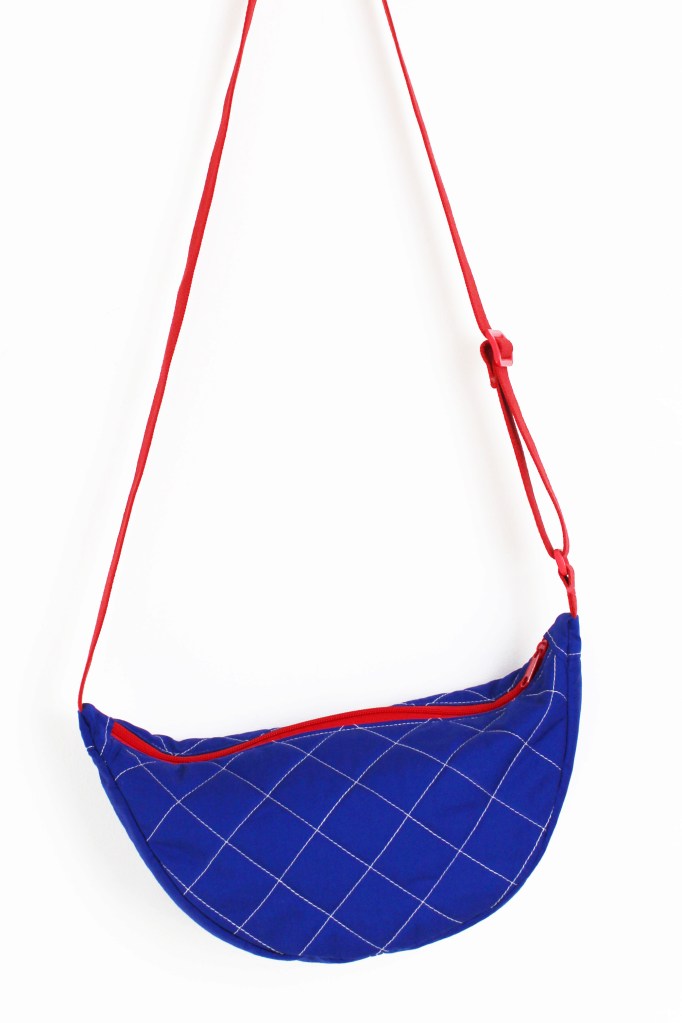

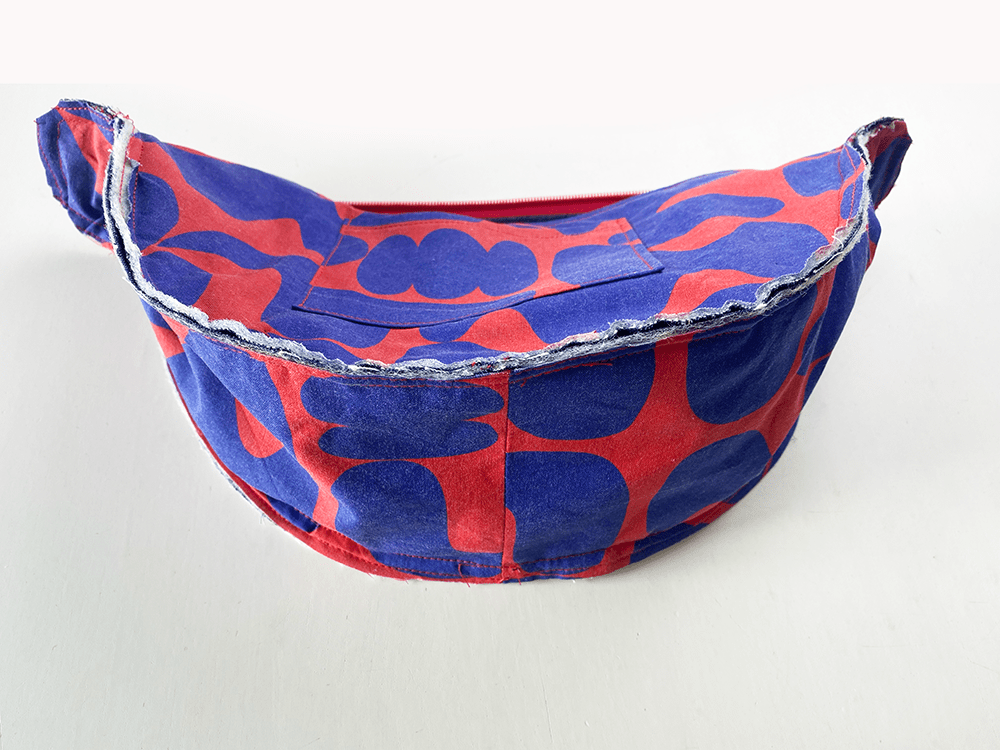
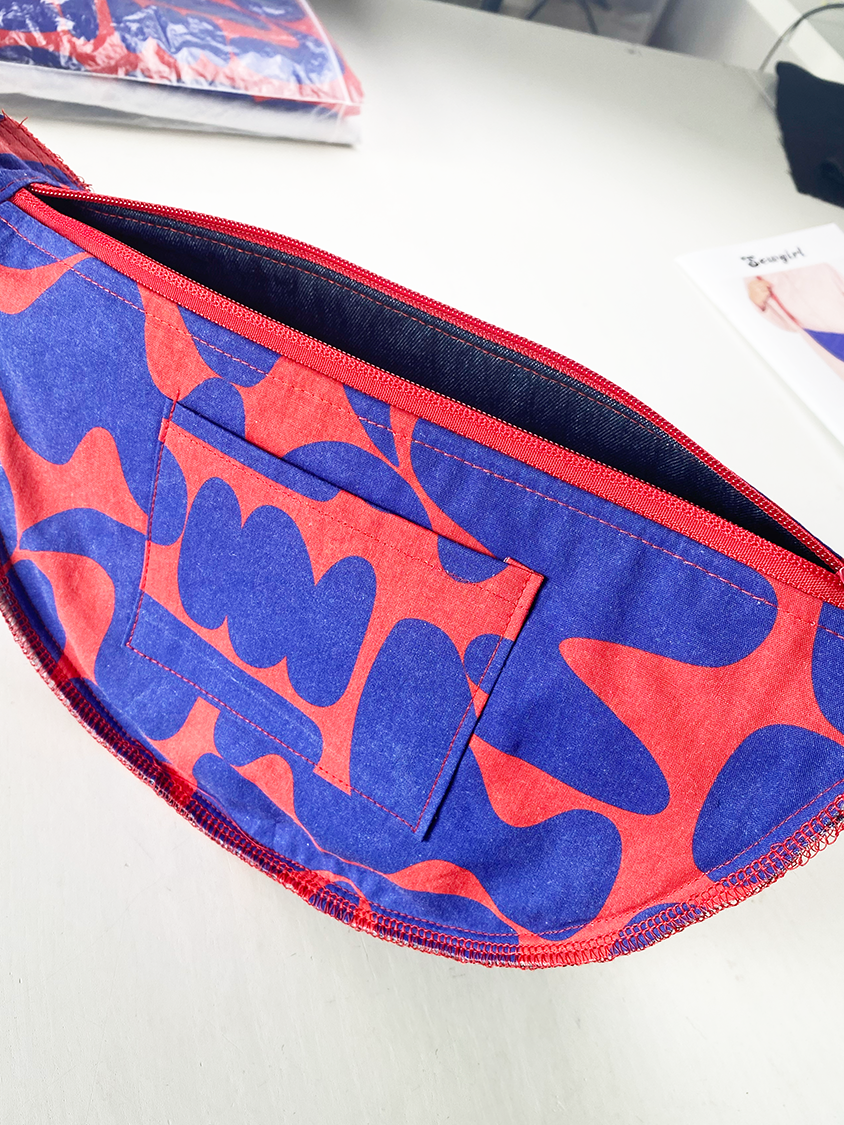
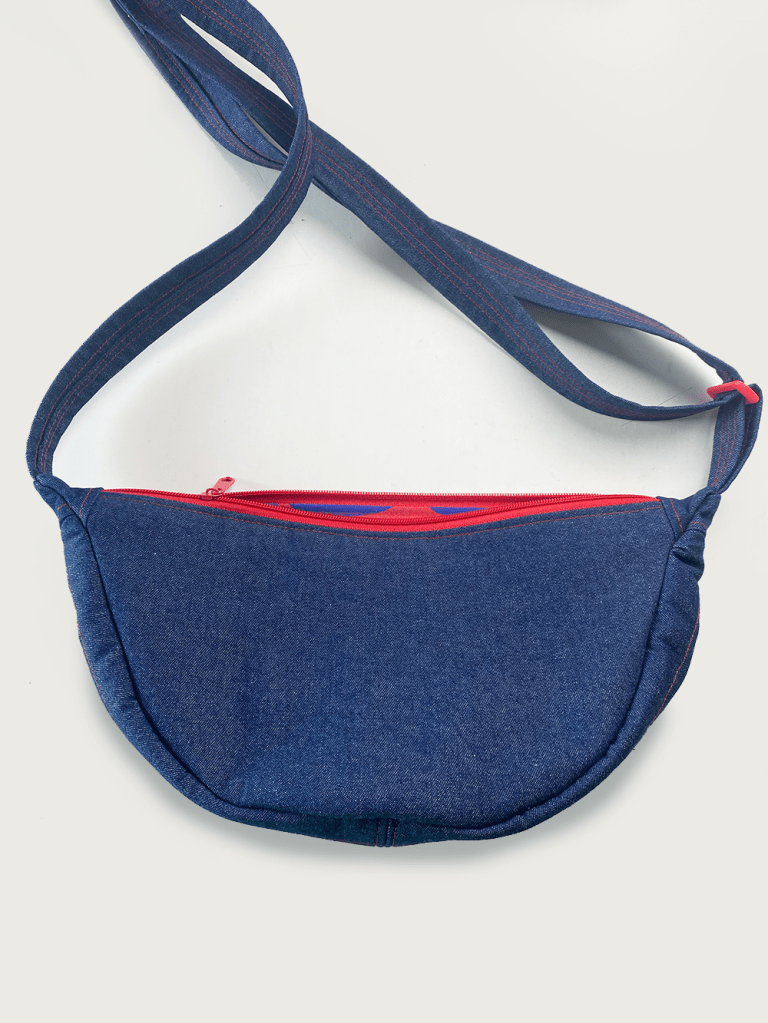
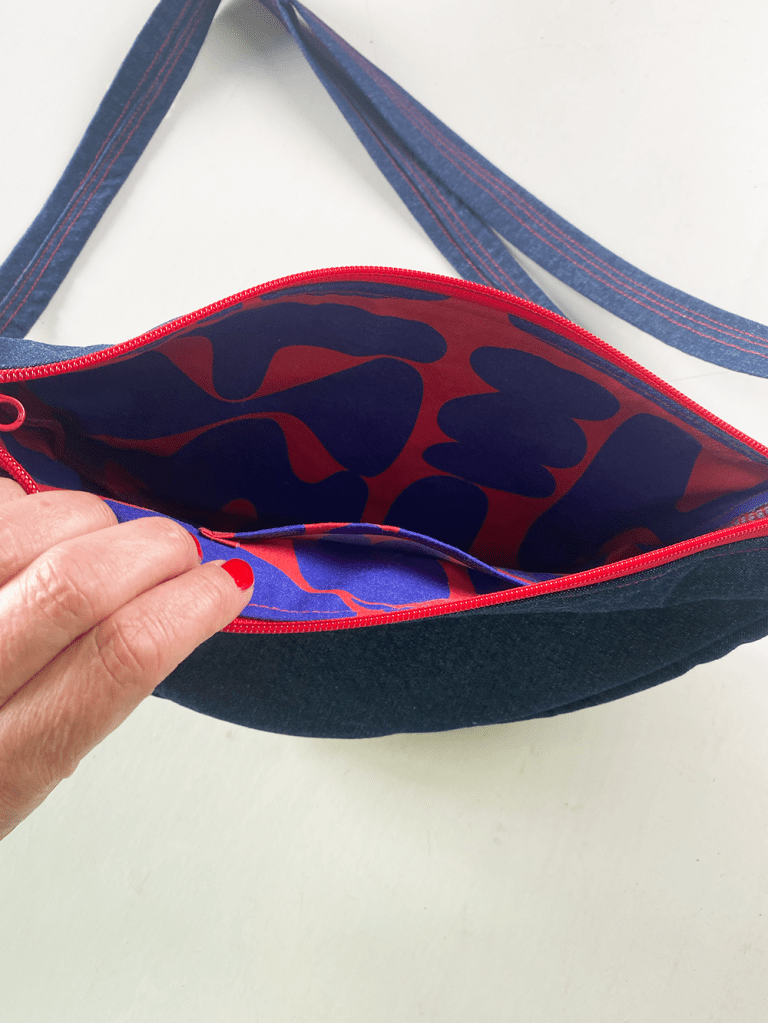
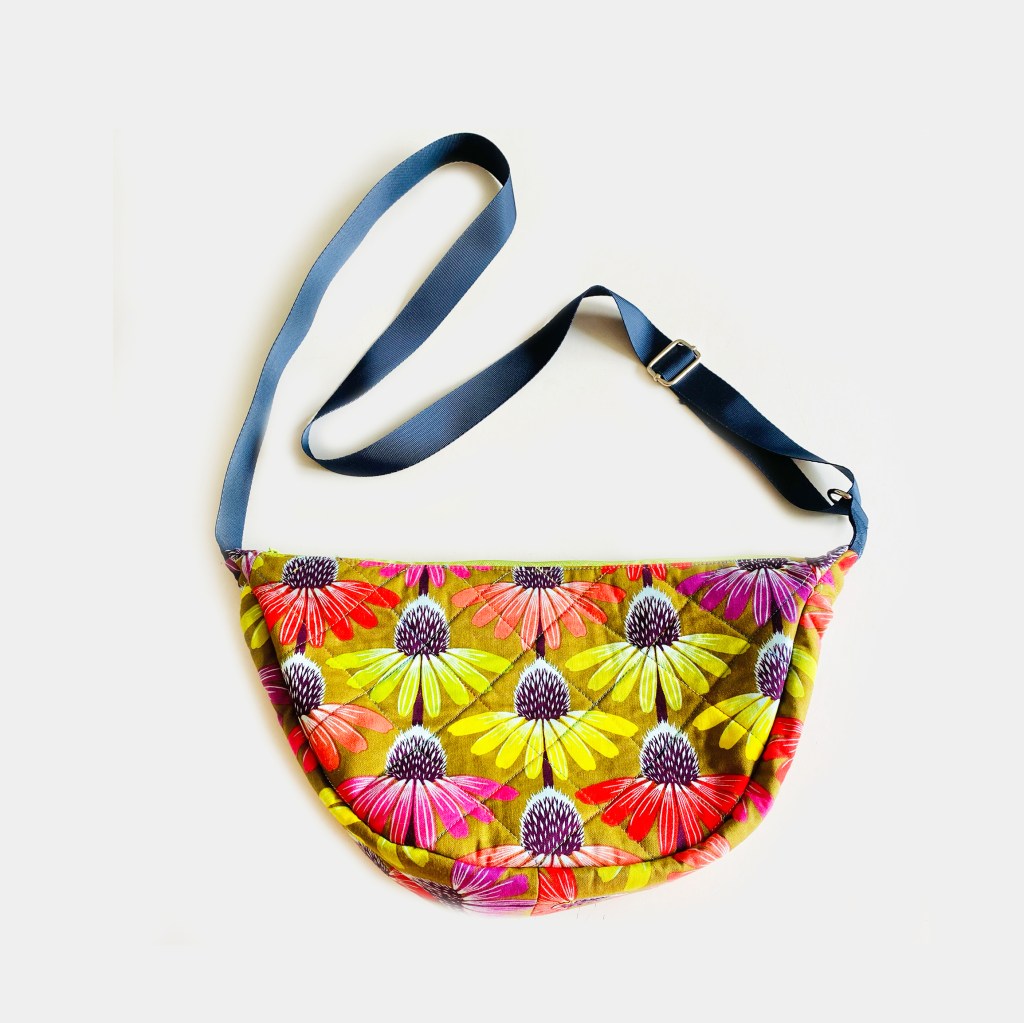
This useful, ergonomic bag, designed by Sewgirl, is great for everyday use. Its surprisingly roomy inside, with a zip fastening, inner pocket and a long adjustable strap. Make in your favourite gorgeous printed cotton fabrics or simple plain denim, corduroy, velvet or cotton with funky patterned lining.
Suitable for any medium-weight fabric, with cotton lining and fleece interfacing.
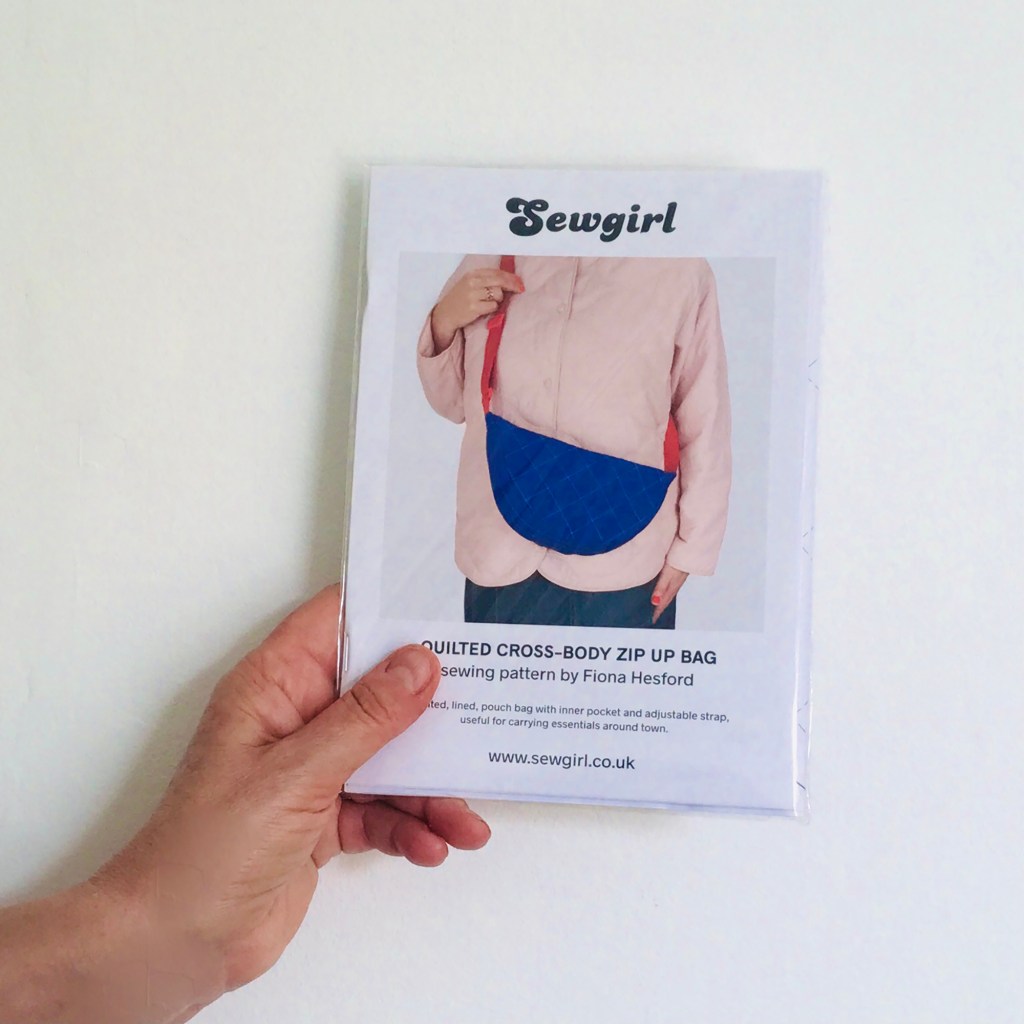
Cross body bag is available to buy both as a paper pattern and also a PDF download.
How to make the Cross Body Bag
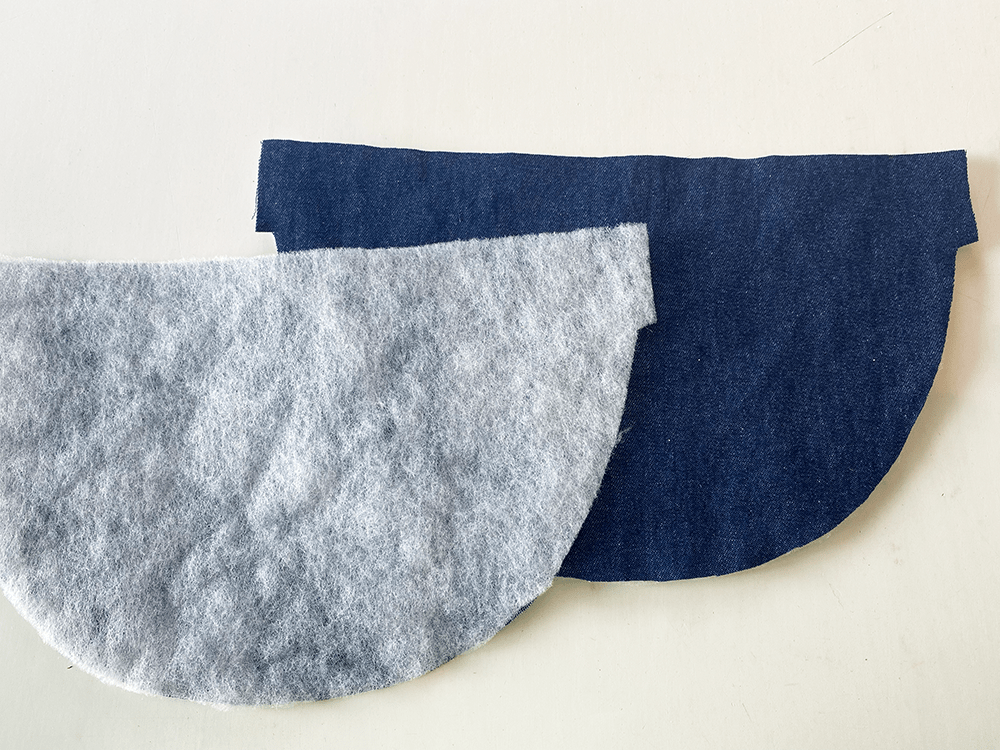
Add fleece interfacing to the Front and Back outer pieces and the Base outer pieces(Visilene H630 is good).
QUILTING: You can add quilting lines wherever you fancy such as trellis pattern on the outer bag and tramlines on the base which are marked on the templates, or why not cook up your own quilting line designs to make it unique to you? Alternatively, leave this bit out if you prefer and just leave plain and let the fabric pattern be the star of the show!
Tip; Iron or stick (with textile spray glue) to a larger piece of interfacing, then trim the excess around each piece. Lining and tabs do not need interfacing.
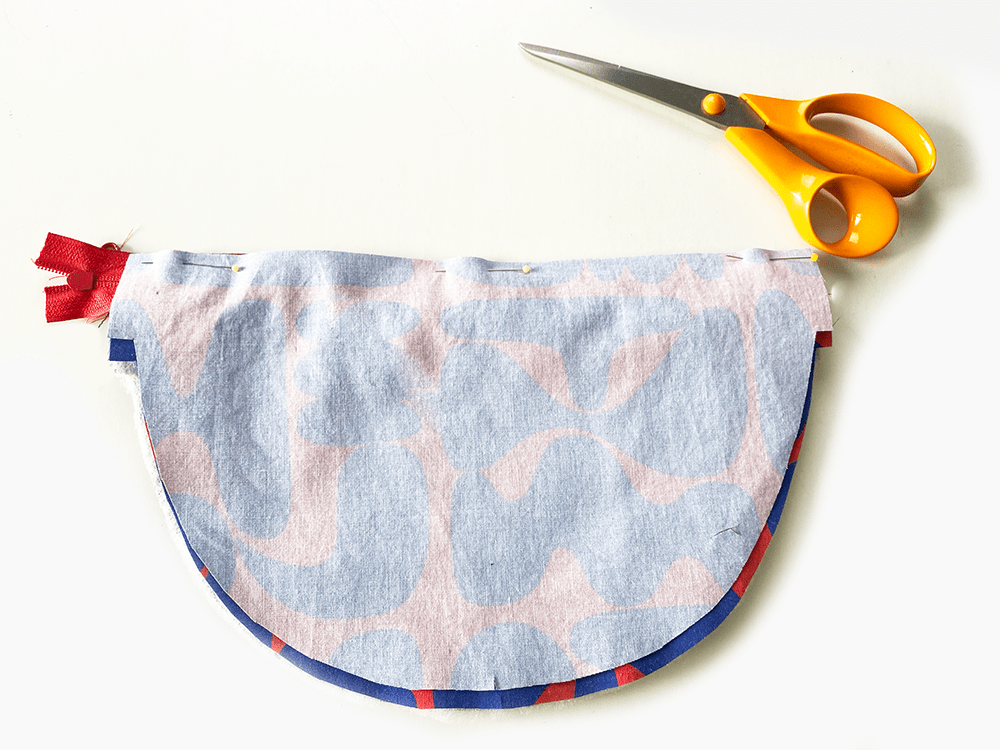
Base section
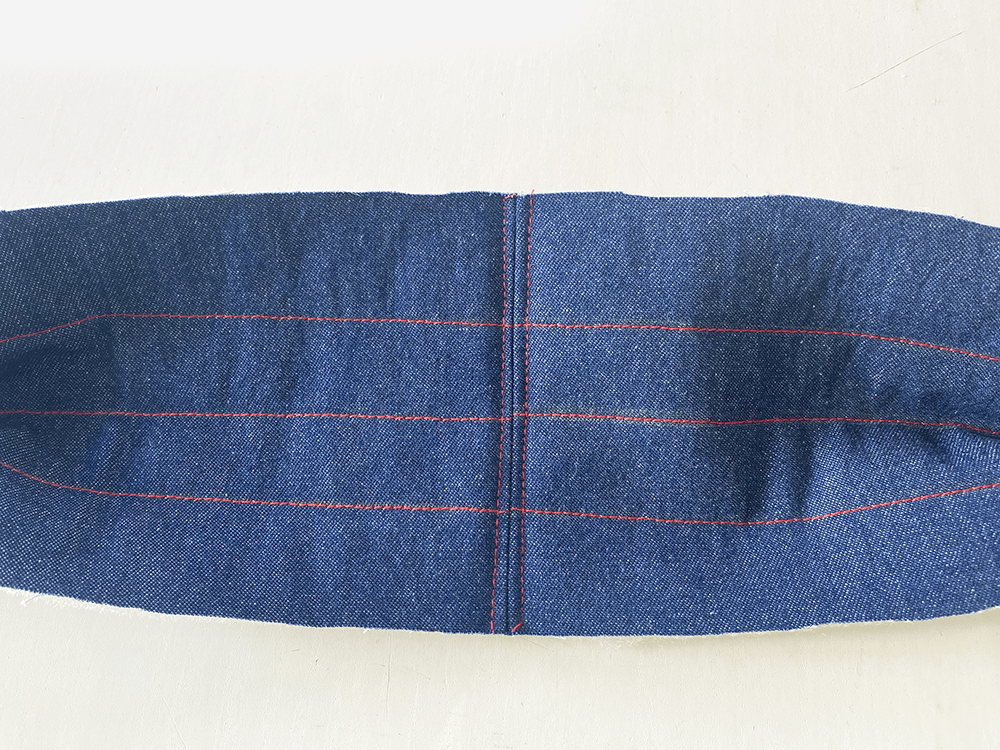


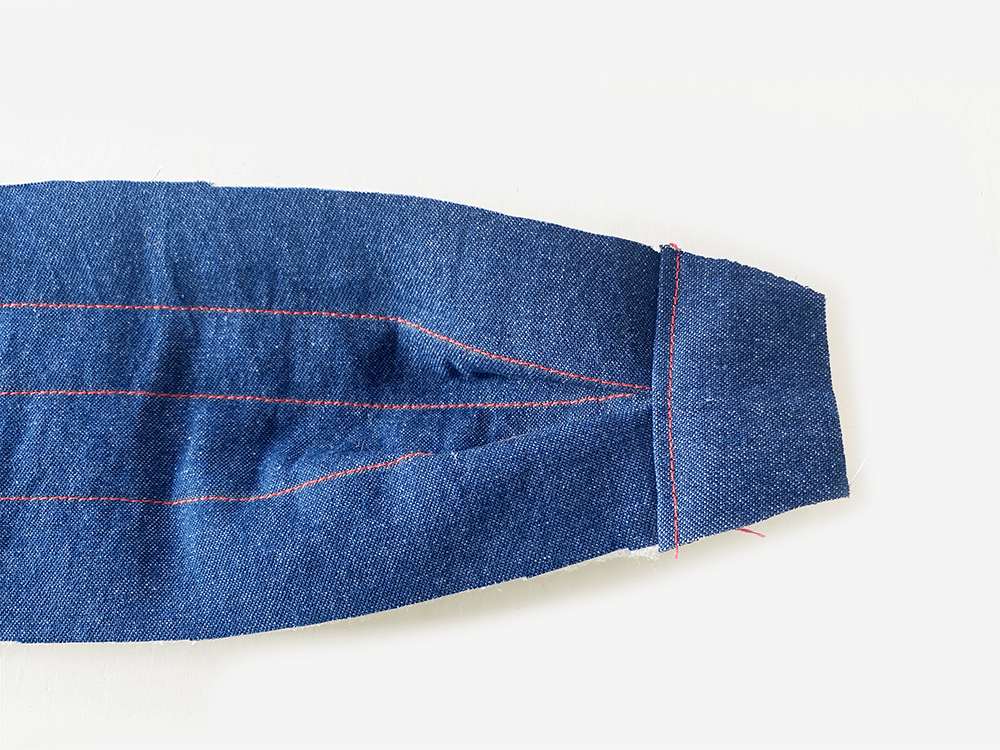
So you can see here that Ive added the fleece to the Base sections and stitched some tramlines exactly as marked on the template. (Pic 1) Then join the Base sections, pin right sides together. Stitch. Press the seam allowance open. Topstitch. (Pic 2) Make a pleat at each short side edge. Machine tack to hold. (Pic 3) Pin the Tab on top of pleats. Stitch across. (Pic 4) Press outwards. Topstitch on the Tab side of the seam.
Repeat these steps with the two Lining Base pieces and two lining tab pieces.
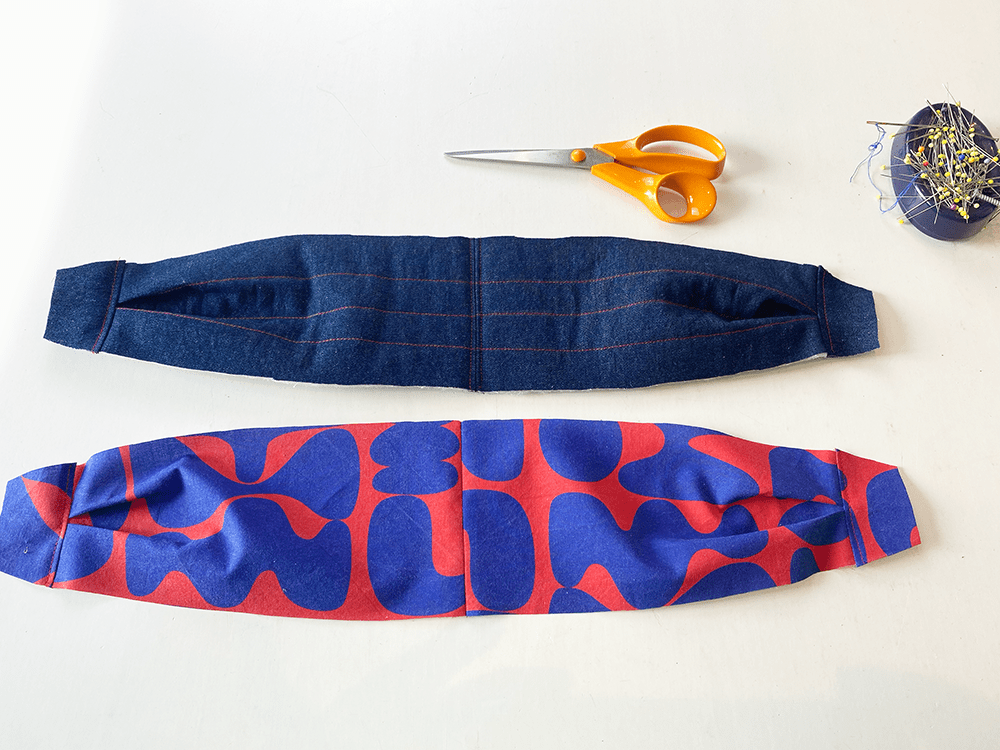
So you should have two pleated base sections: one in Outer fabric and one in Lining. Both with their tabs attached.
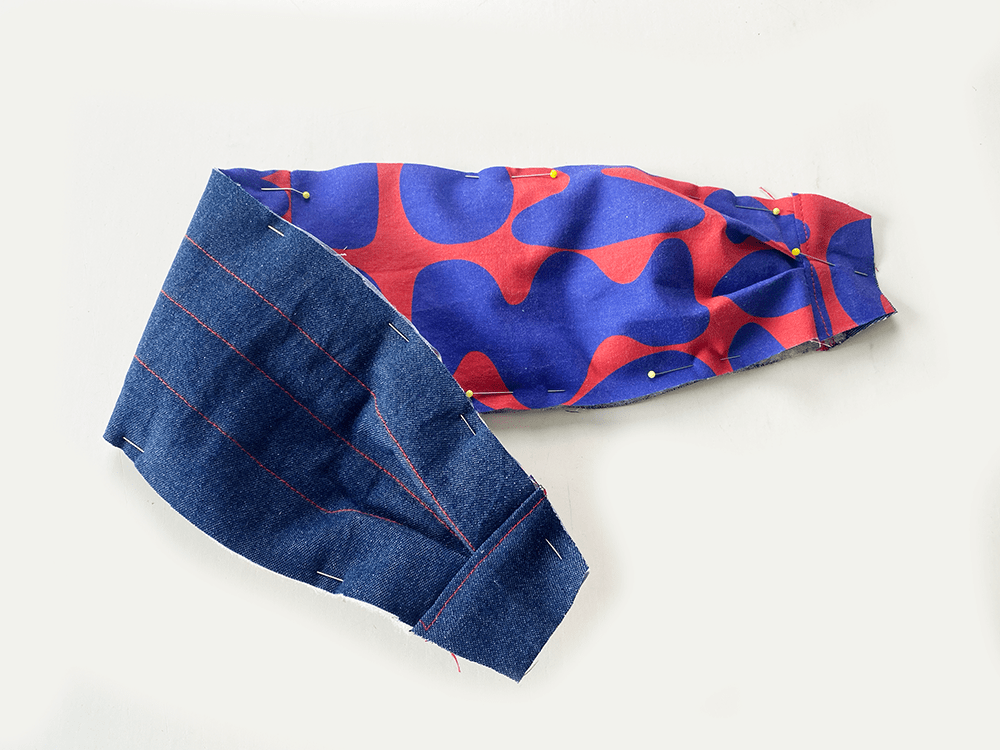
With the wrong sides facing together. Pin the two base pieces (Outer and Lining) together all around the other edge. Machine tack within the seam allowance all around the outer edge to secure them together.
Lining Pocket

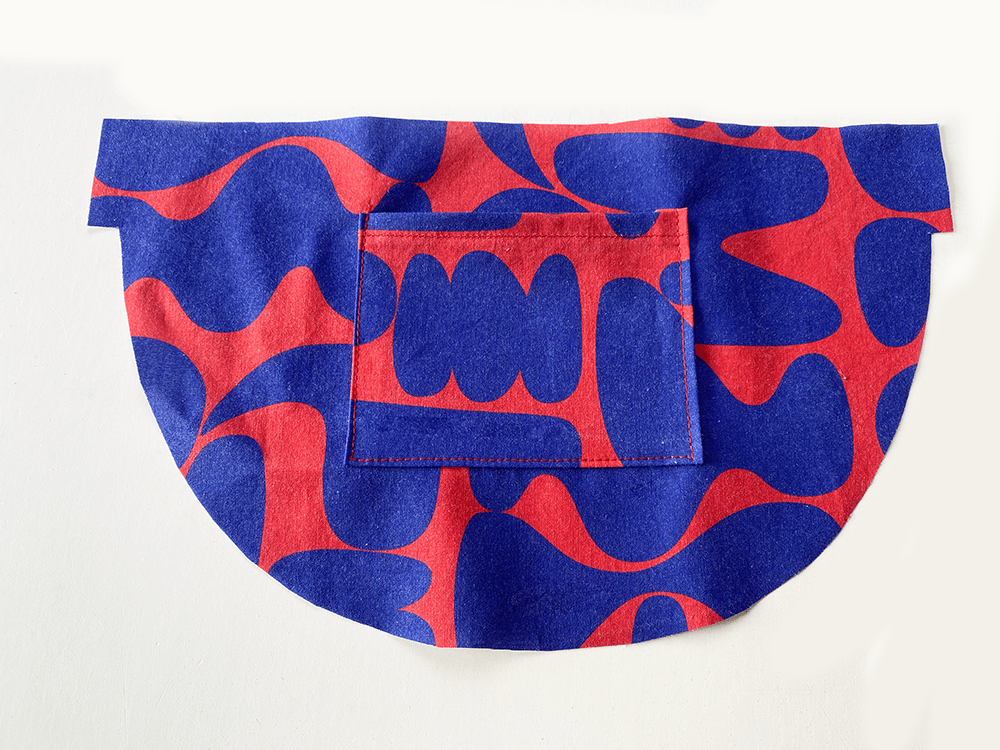
Fold over and press the top (long) edge of the pocket. Sew. Fold over and press the remaining three pocket sides. Pin to one Lining Bag piece. Topstitch around the three folded edges.
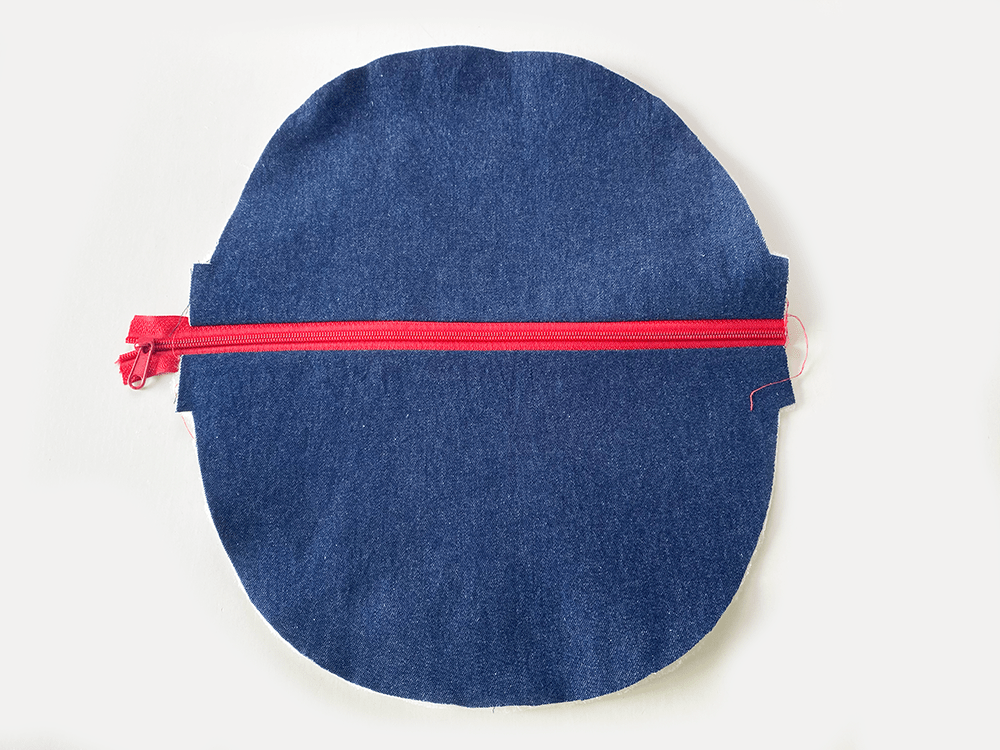
Attaching the Zip
I like to use no 5 continuous zipping but you can use a standard dress zip instead (not open ended).
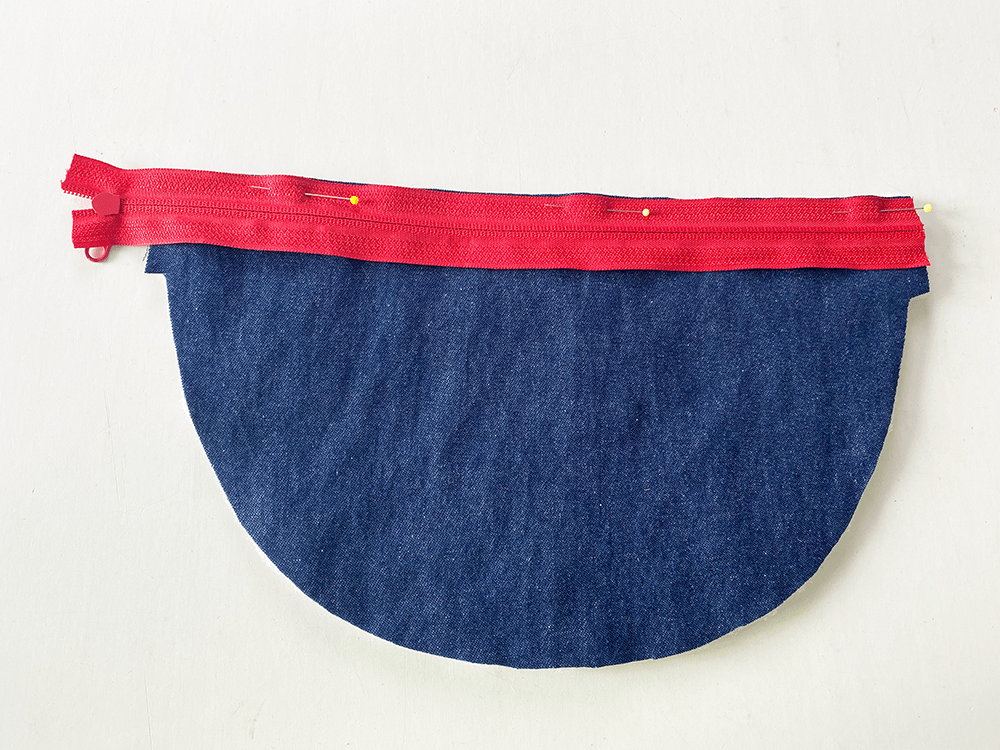
With the zip right side facing downwards, pin the zip fabric edge to one Outer Bag top edge right side. Sew 1cm from the raw edge. Press. (Tip: swing the needle position towards to zip teeth or attach a zip foot).

Pin the Zip fabric edge to the top raw edge of the second Bag Outer piece. Make sure the right side of the zip is facing the right side of the fabric.
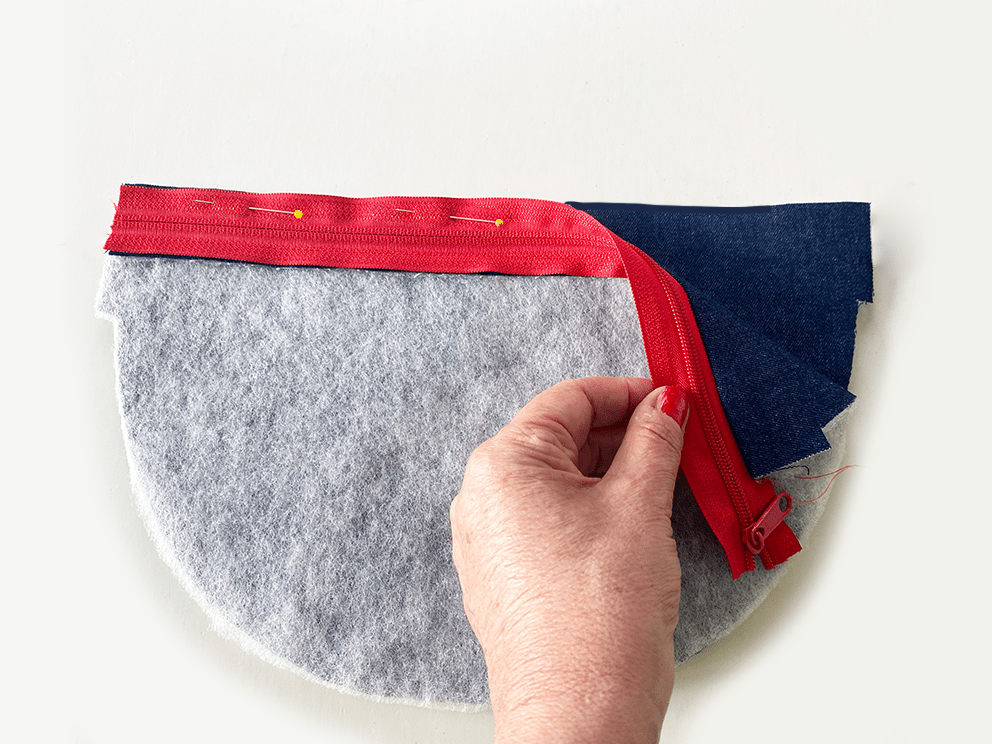
Now repeat with the Lining and the other side of the Zip tab ….think “zip sandwich’.
Then repeat with the remaining lining piece and the other side of the zip on the opposite side.
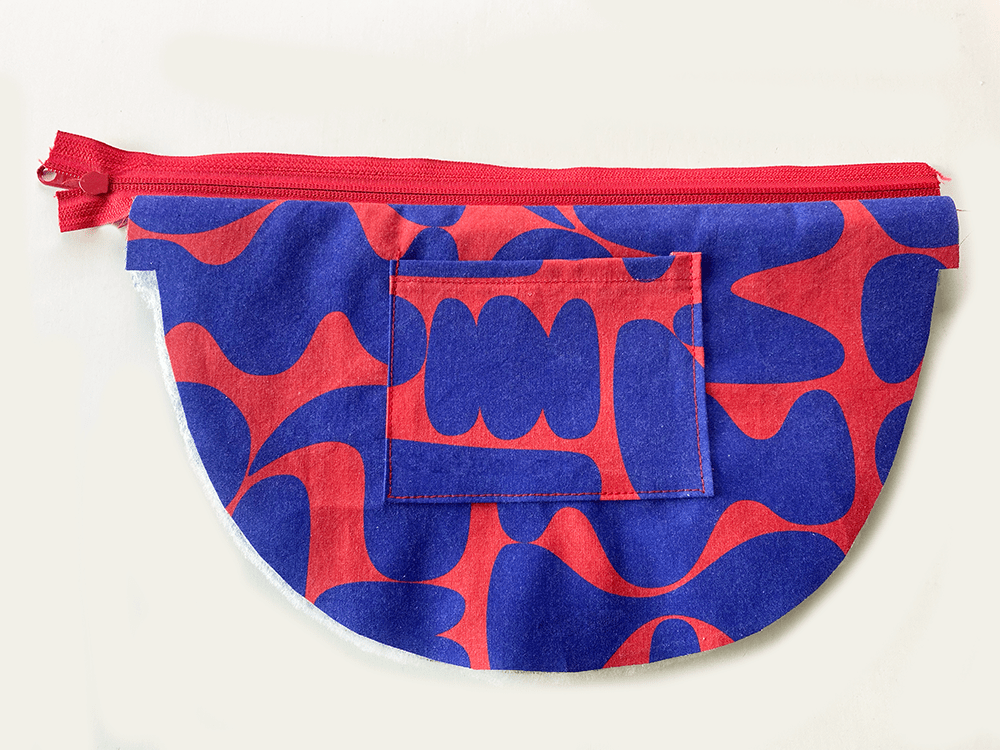
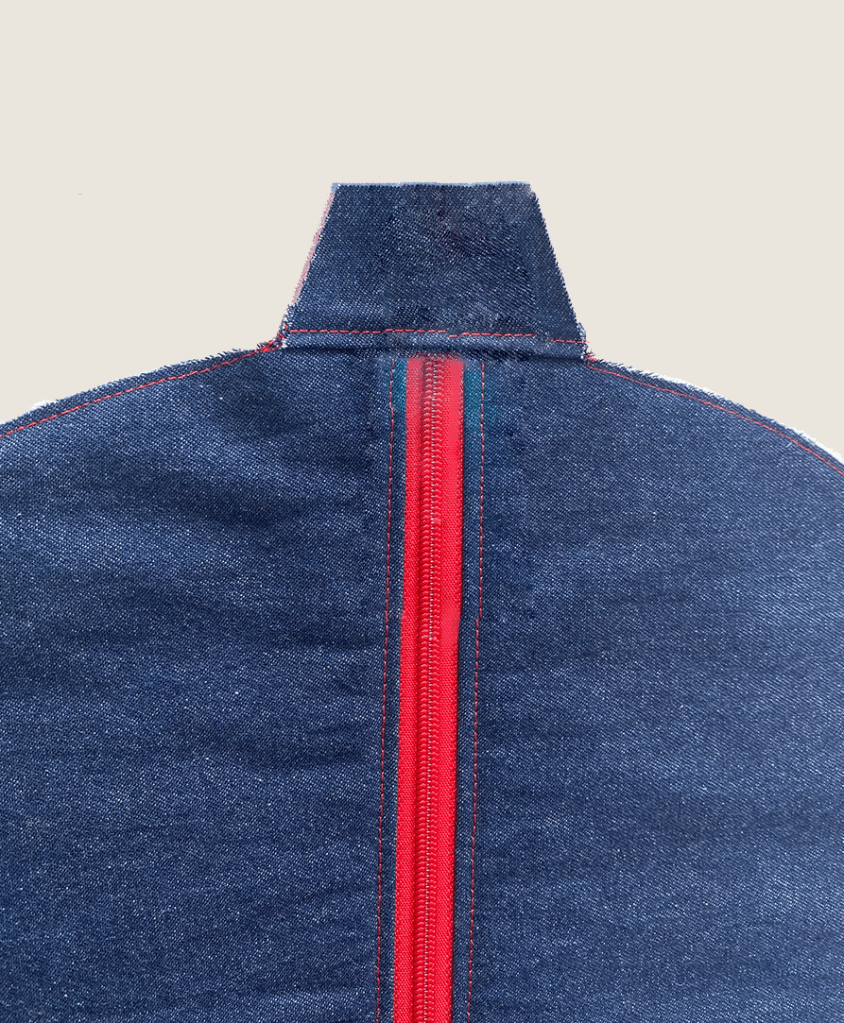
Front and Back Outer.
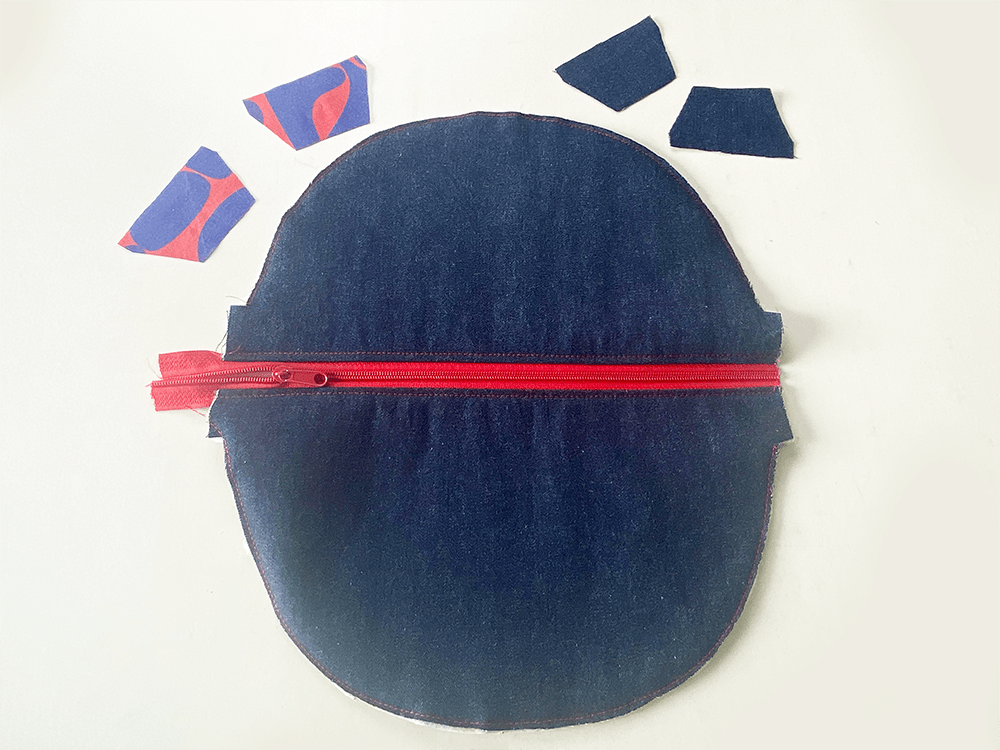
Topstitch either side of the zip with the Lining pressed open on the reverse side. Machine tack the Lining and outer together all around. Push the Zip head into the bag section, secure the zip ends together. Now grab your tabs…..
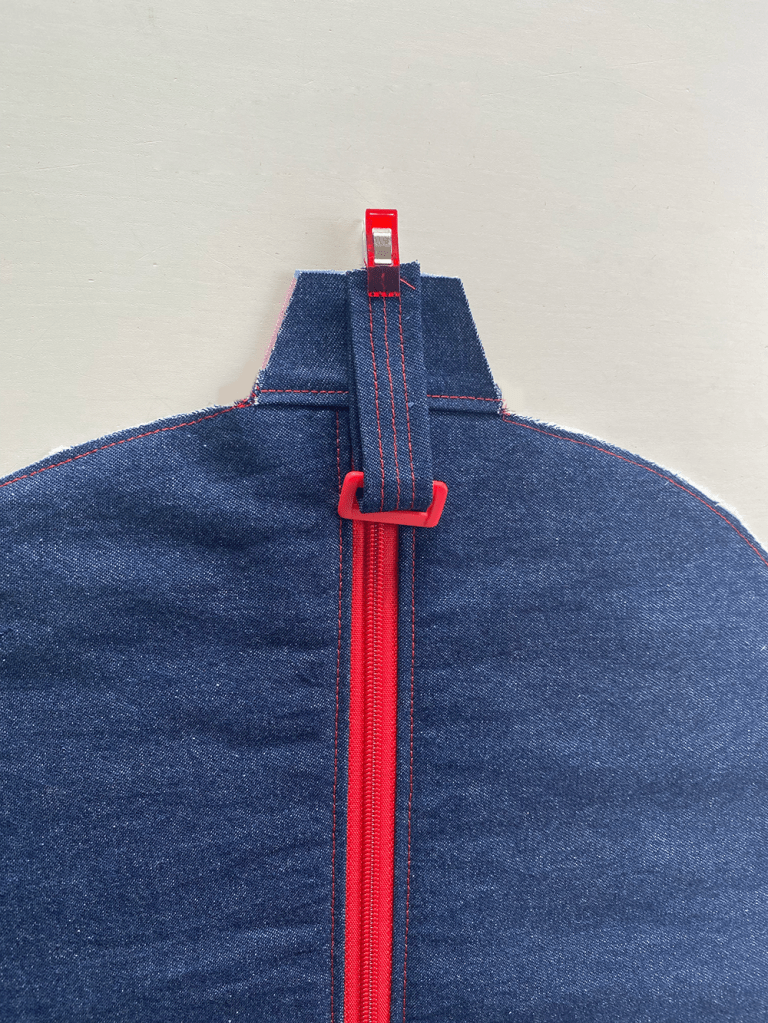
Tabs
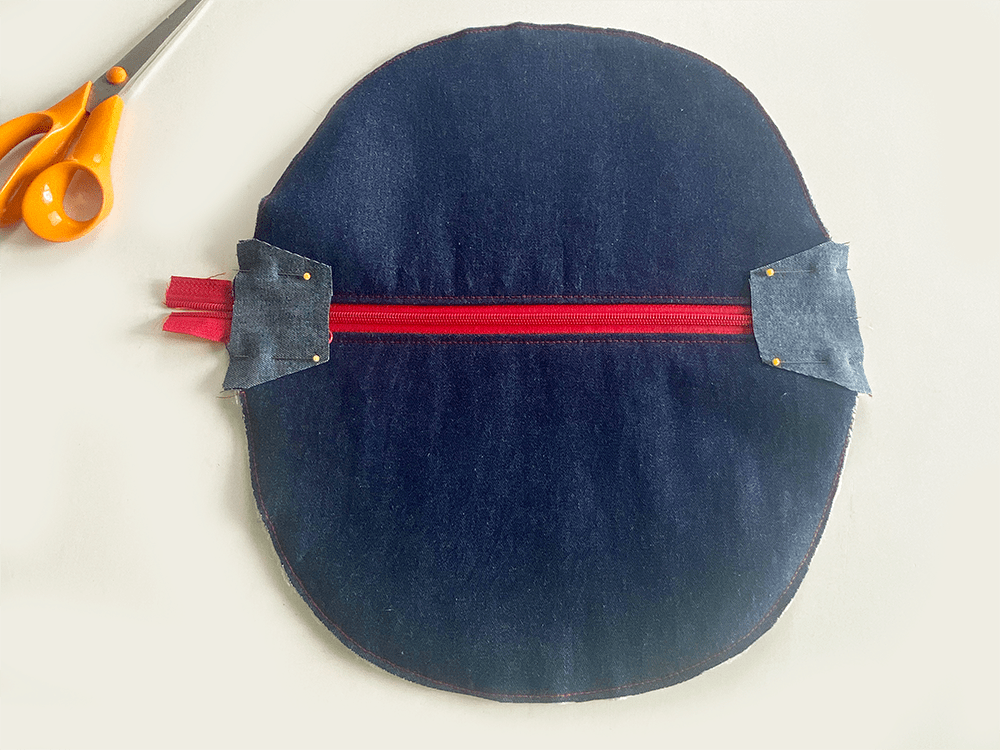
Pin the Outer Tabs at each side. Ensure the zip open ended sides are together.
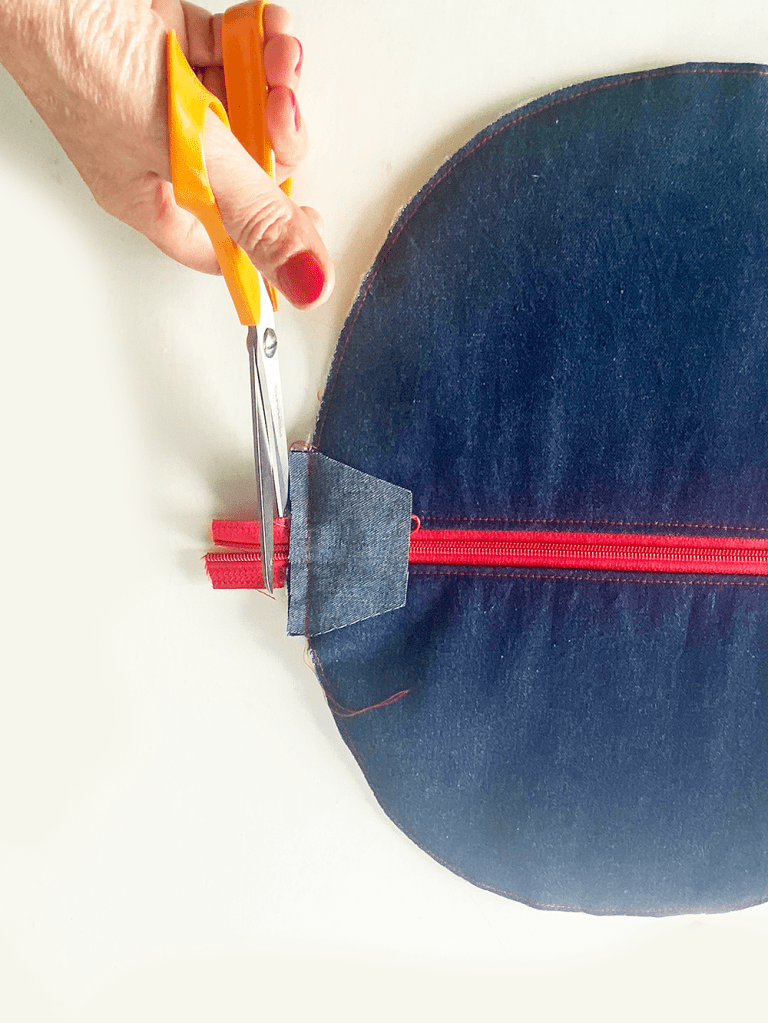
Sew across the Tab. Trim off any excess zip extending beyond the bag. Press the Tab outwards.
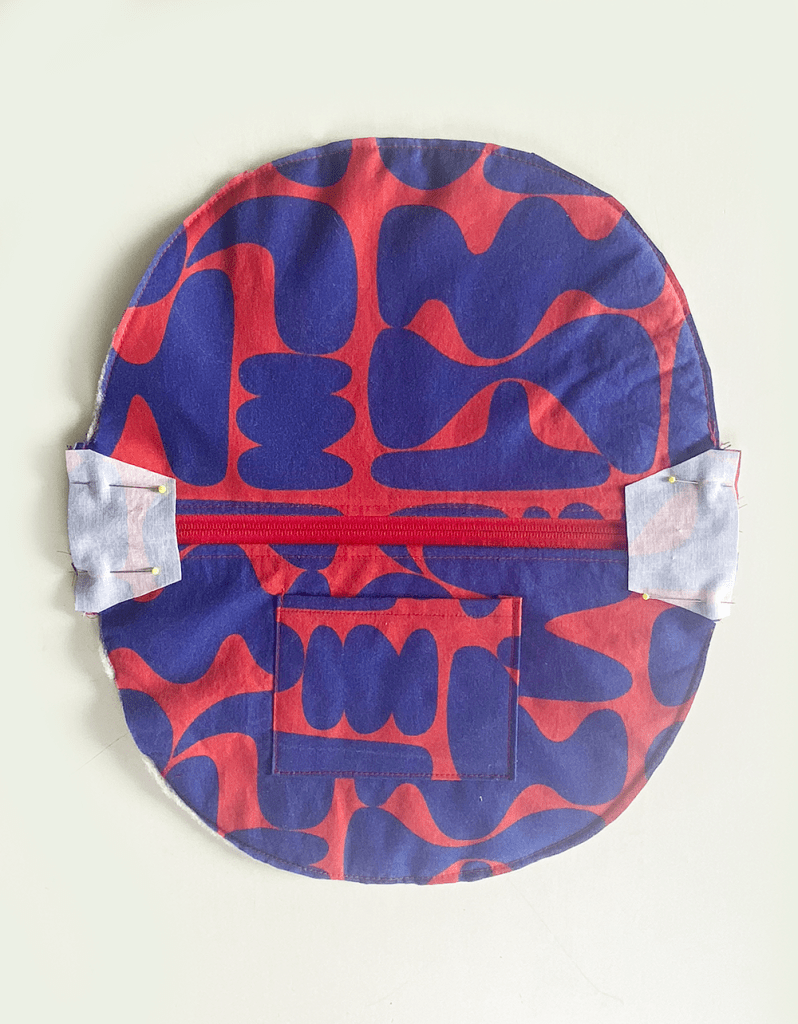
Pin the Lining Tabs to the Lining inside. Sew. Press the Tabs outwards.
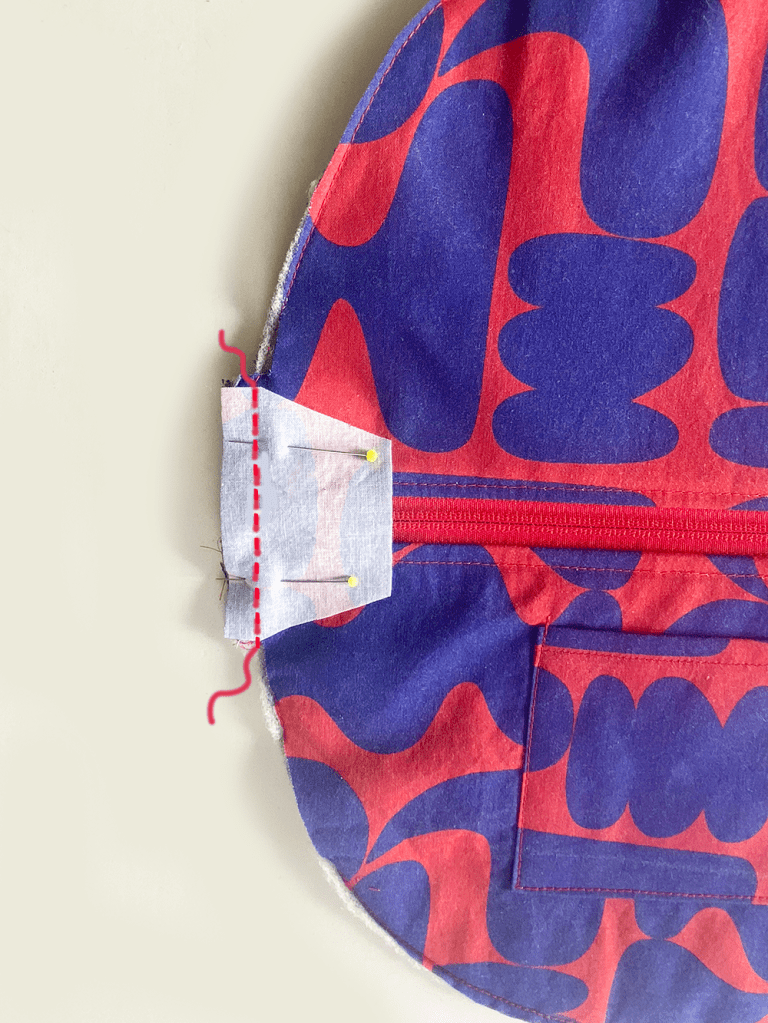
Stitch across the Tab. Press outwards. Topstitch across the Tab on the Right right close to the seam line.
Attaching the Strap
You can make your own strap or use a pre bought woven 1″ /25mm cotton webbing. If making your own strap you will need to cut a strip of outer fabric 7cm wide by 140cm/ 150cm (55″-60″). Fold in the outer long edges each side by 1cm, press. Now fold the strap in half aligning the long folded edges. Press. Sew.
Insert the rectangle ring or D-ring to the Strap short piece. Fold in half. Pin the raw edges to the Tab short edge, positioned centrally.
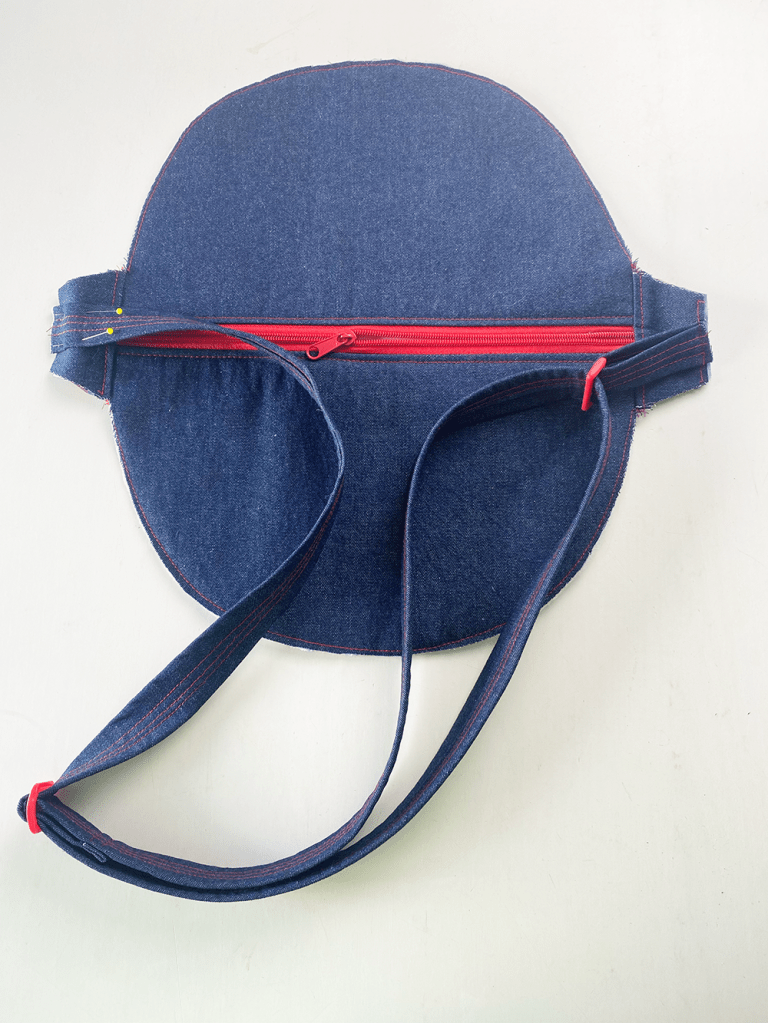
Insert one end of the long strap piece into and out of the Rectangle slider. Sew to the strap to secure the slider. Then insert the opposite end into and out of the attached ring, pass it up and over the slider centre bar, then extend out to the opposite Tab end, positioned centrally. Pin. Sew.
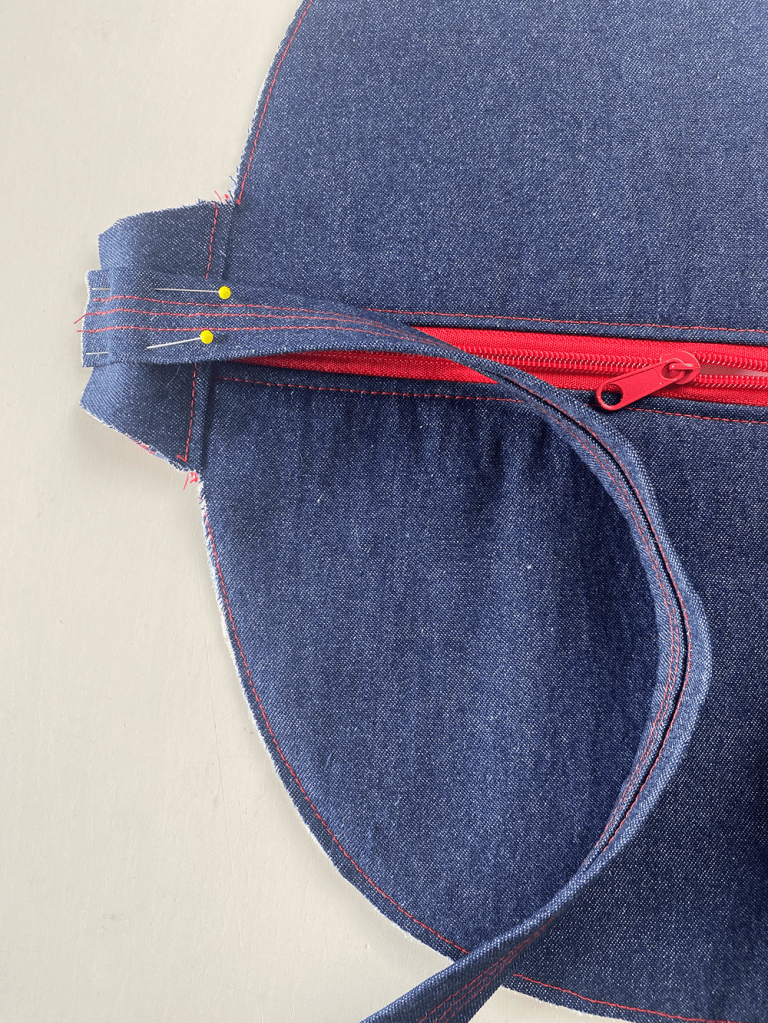
Joining the Bag to the Base section
Pin or clip the Base to the bag, aligning the outer raw edges. Tip: work on one side at a time, matching up the centre points and the Tab ends. Hand tack to secure temporarily. Sew each side from the bag centre to the Tab each side. Remove tacking after sewing. Tip: it helps to swing the needle position over to the left to make sewing easier.
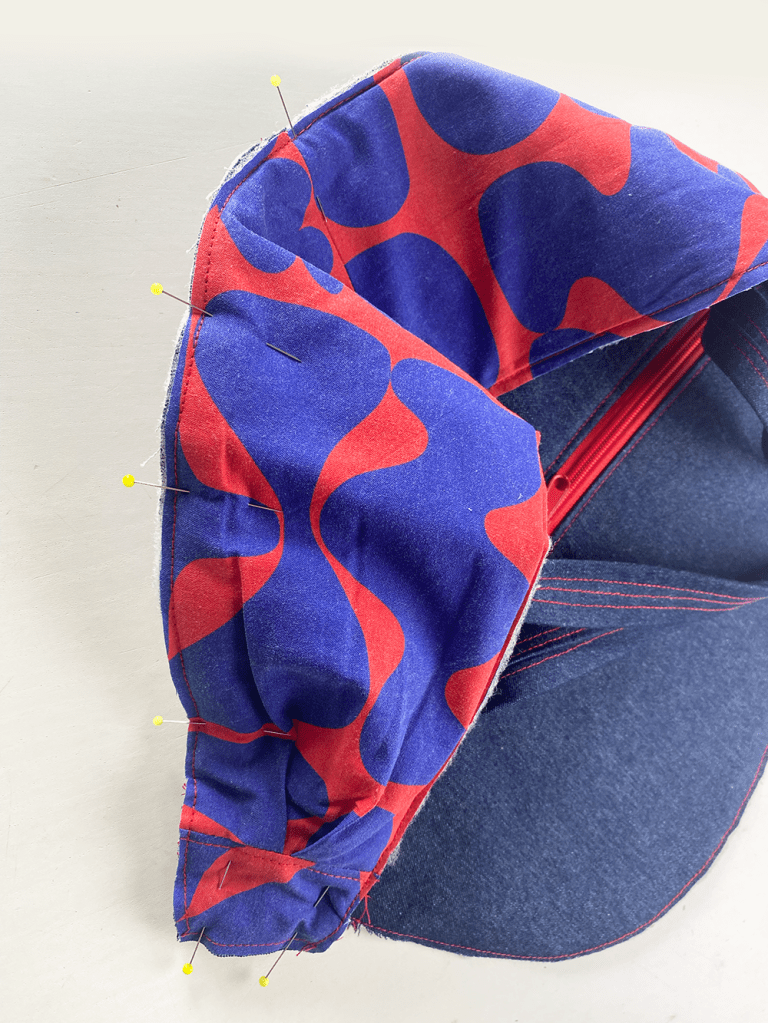
The bag is left with two raw edges inside which can be finished with an overlocker or, for a much neater finish, use a length of bias binding.
BINDING THE RAW EDGES: You will need a 1m (1 yd) length of 25mm (1″) binding into two equal lengths. Sew one unfolded side to one side of the seam. Fold the binding over the raw edge, then stitch down the other side. Trim the excess binding.
Turn the bag inside out, push out the tab ends by pulling the strap.
Press the bag, poking out the seam edges from the inside with a poking tool such as a chunky knitting needle or a chopstick.

All images and text are subject to copyright. Sewgirl 2024
