PETULA TOP is a super simple pattern that is SO versatile because it not only is easy to make but you can run it up in a variety of fabrics to suit all seasons.
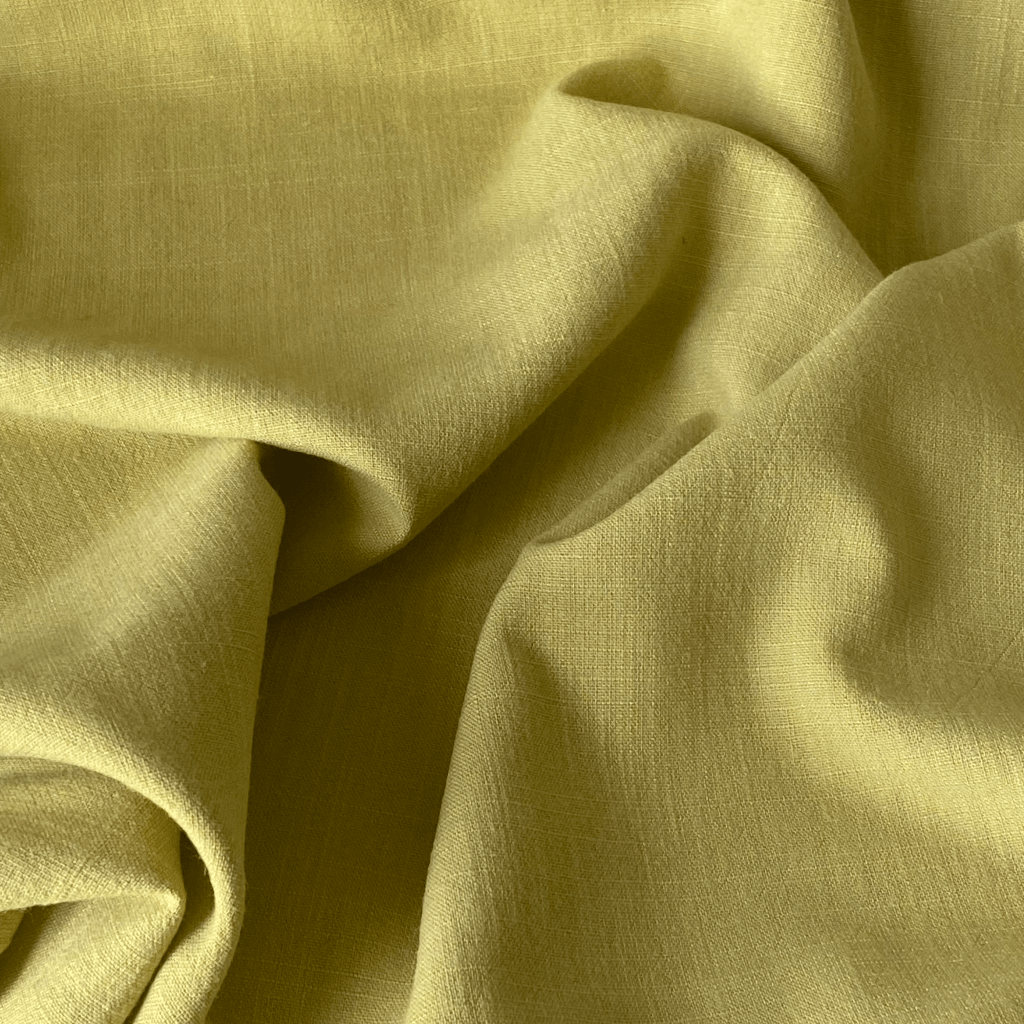
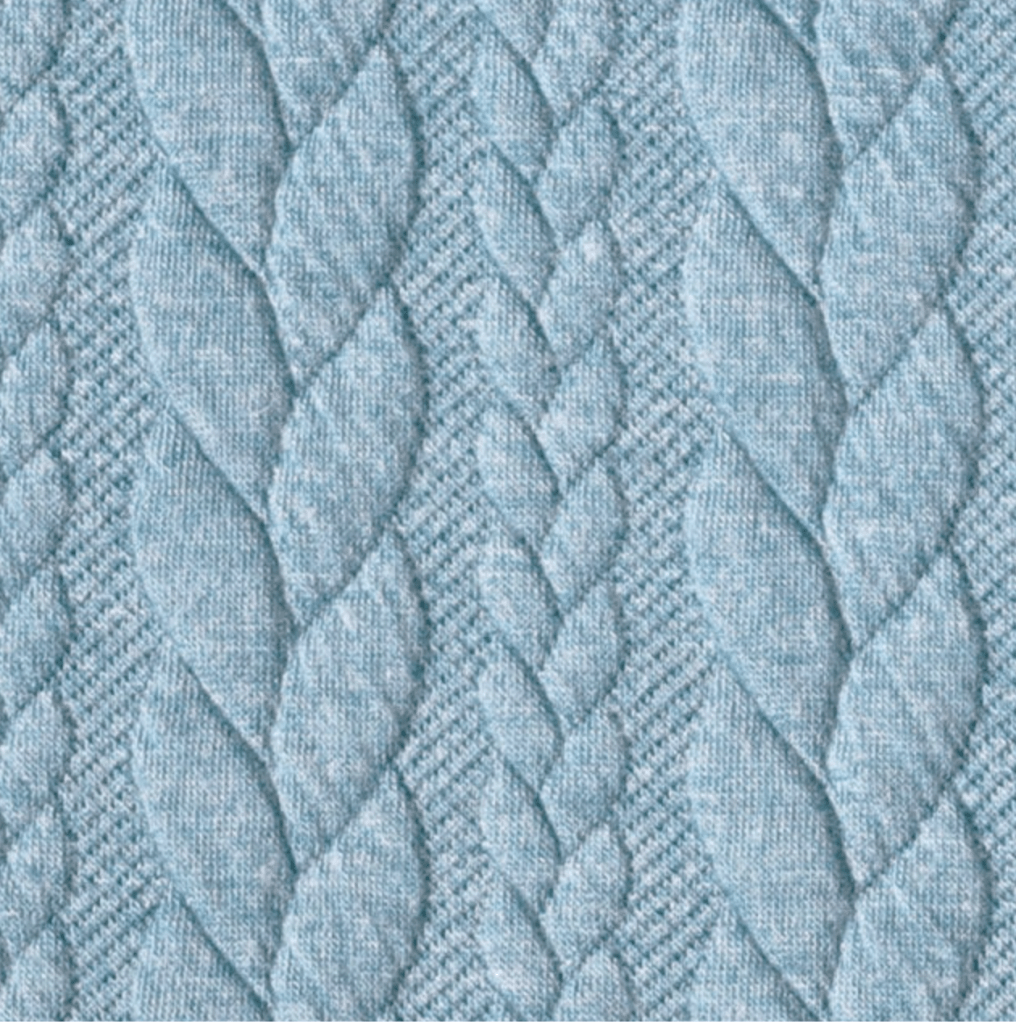
Make one for spring/summer in a linen viscose slub (available at Sewgirl-shop), cotton, viscose, lightweight linen, cotton, broderie anglais or double gauze, then in Autumn /Winter make one in cable knits, or sweatshirting . It would also be nice to make a sleeveless version in Autumn and wear a long sleeve shirt or teeshirt underneath or even in slinky velvet for a party top.
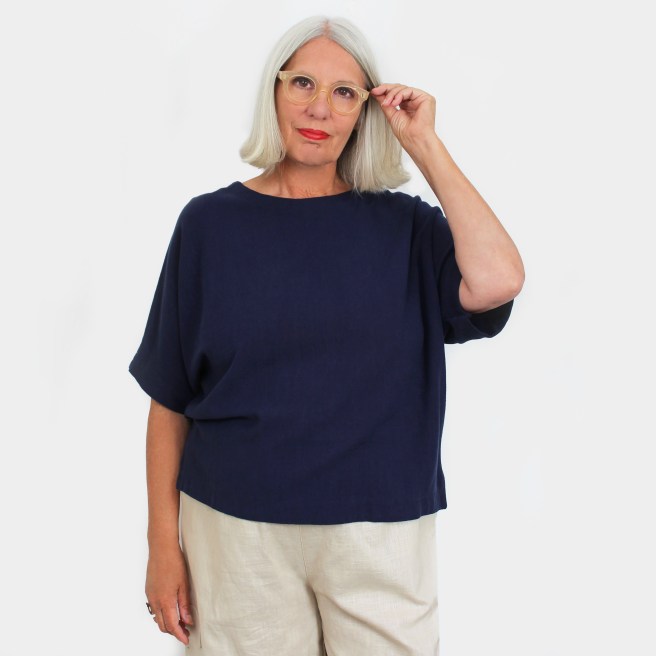
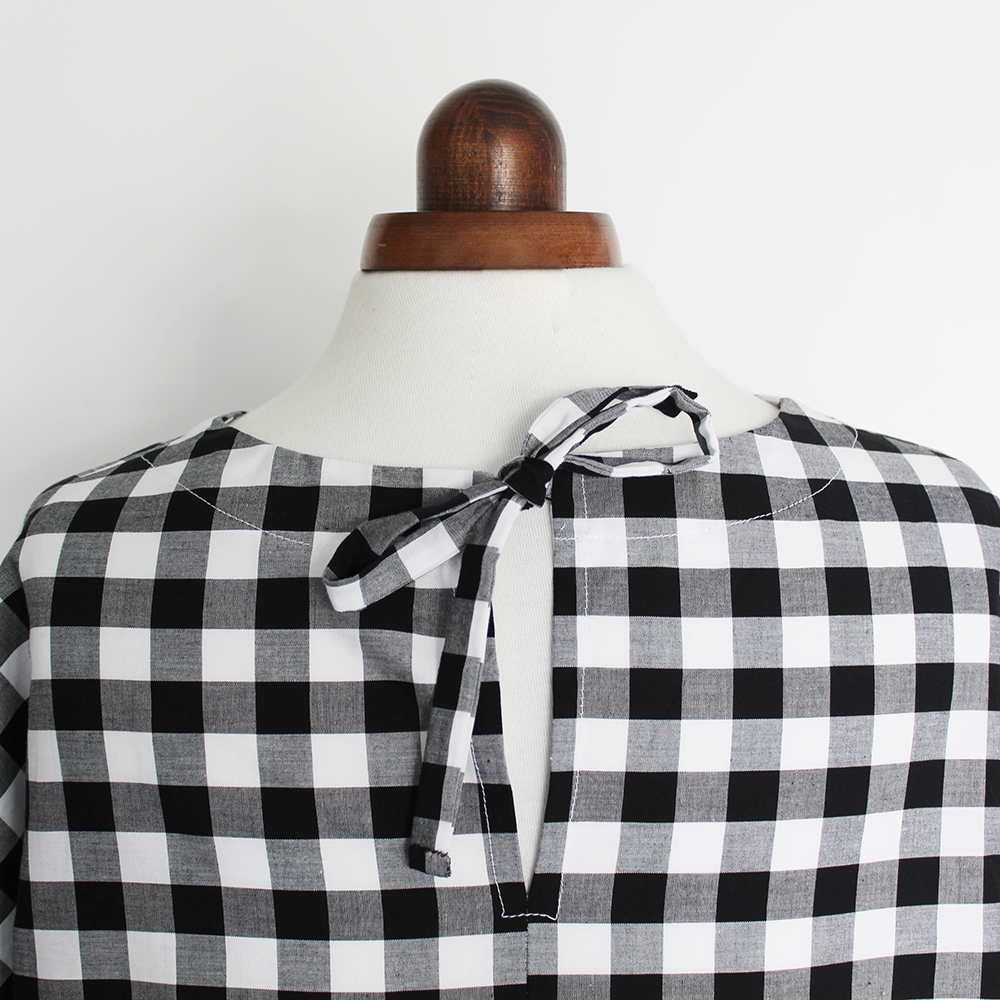
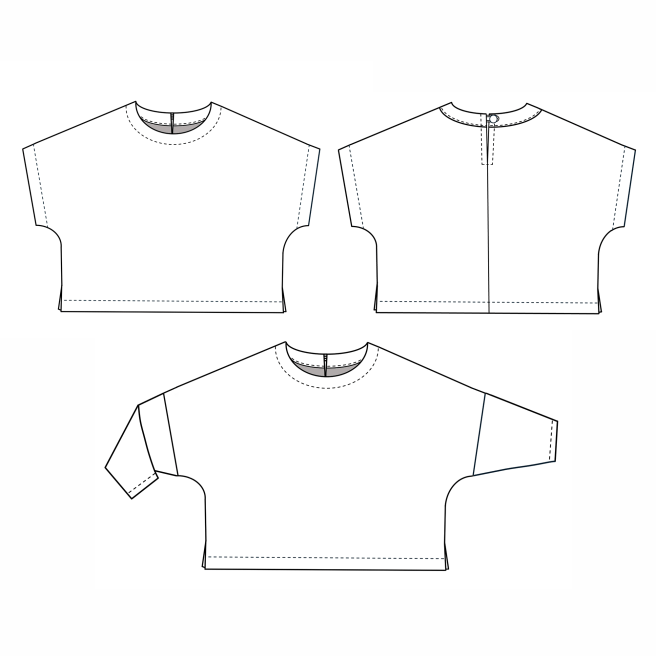
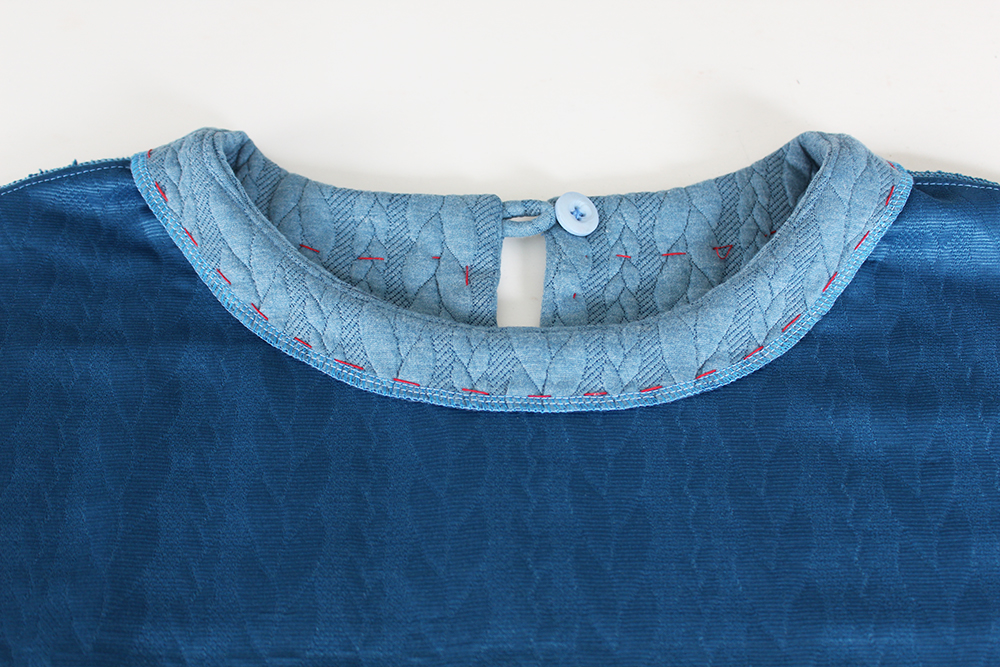
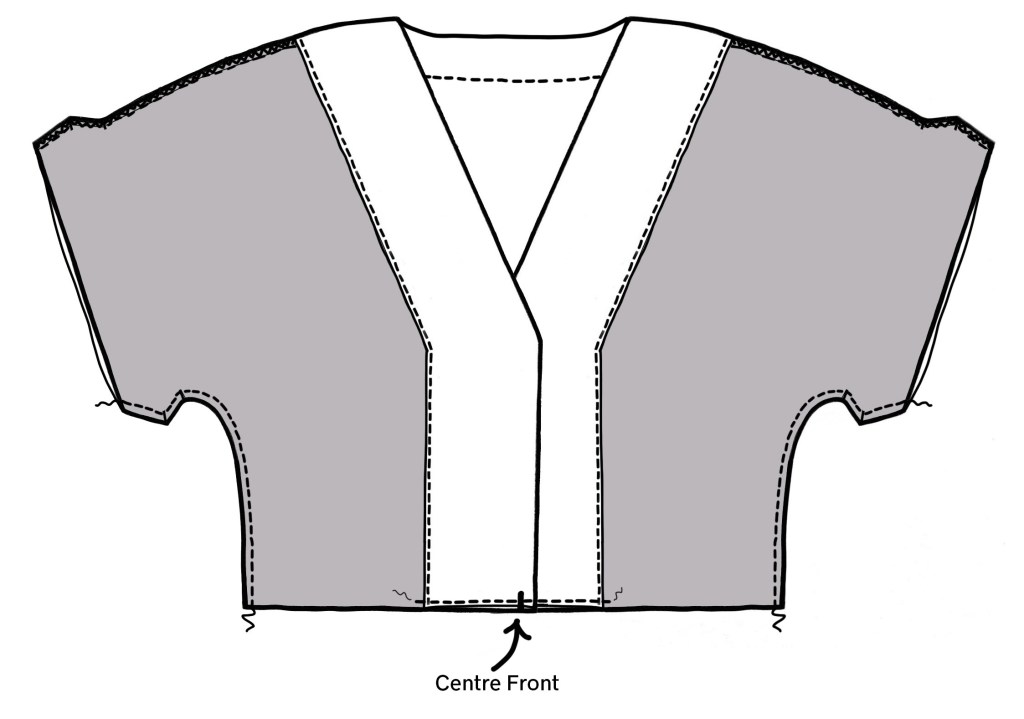
Petula top is a boxy shape with a round neck, a back neck opening which can be fastened with either loop and button or ties.
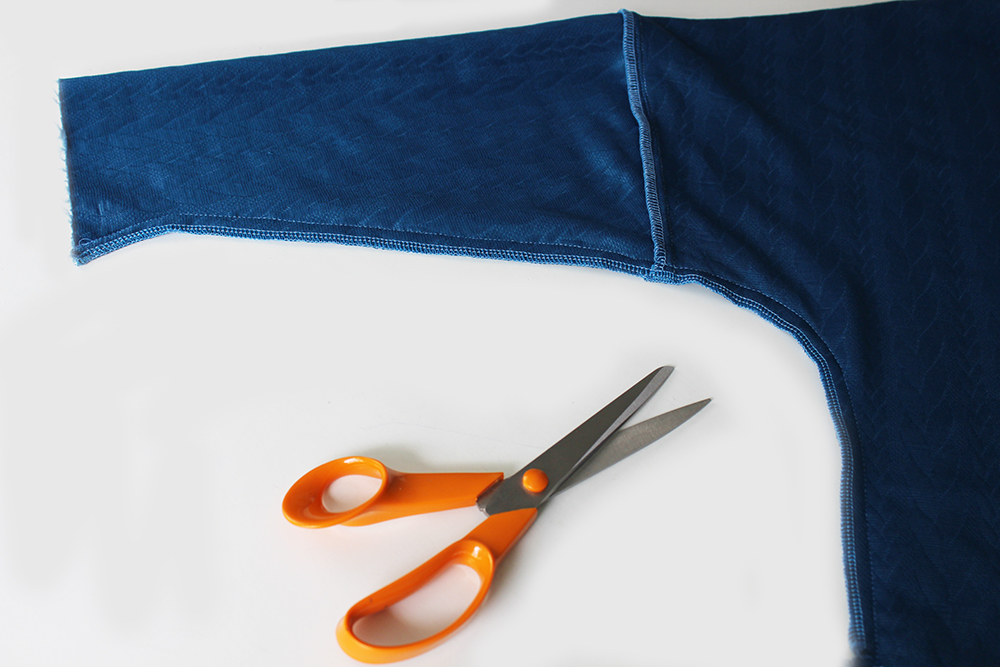
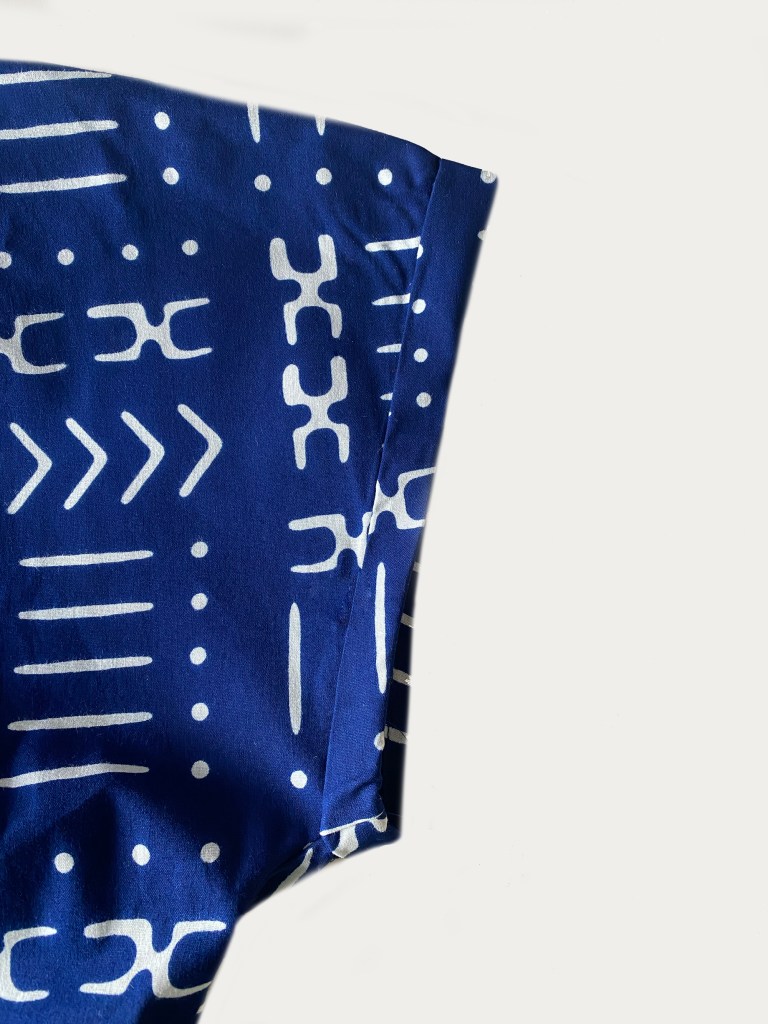
Shoulders are sloped giving it a chic silohette with a slightly cropped length. The hemline and short sleeves have facings to make it hang well, with a small vent opening at each lower side hem. The long sleeve version has a ‘batwing’ style silhouette.
Petula Top is available in multiple sizes from 8 to 30., an easy to sew pattern, suitable for beginners. This blog gives you an overview about how the top is made. Full step by step instructions are included with the pattern as well as large format multi sized templates on sturdy paper.
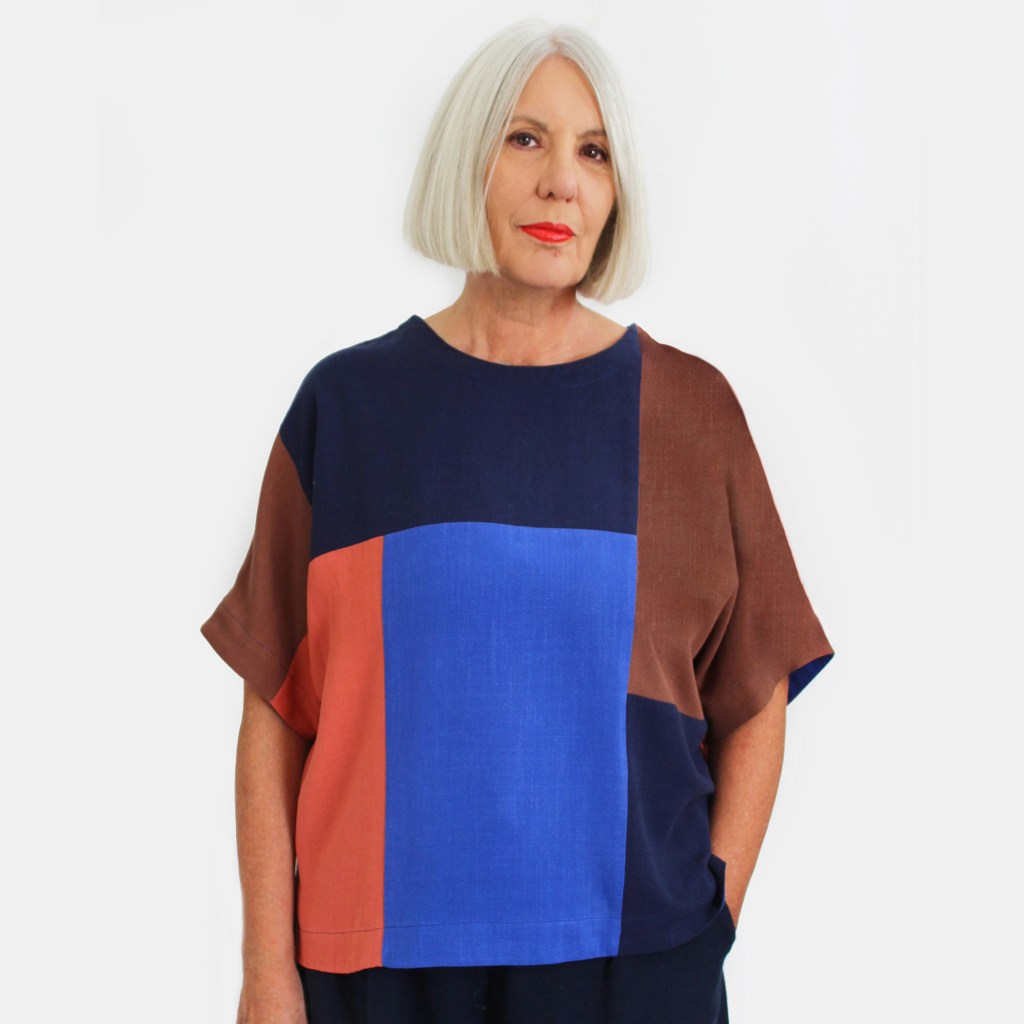
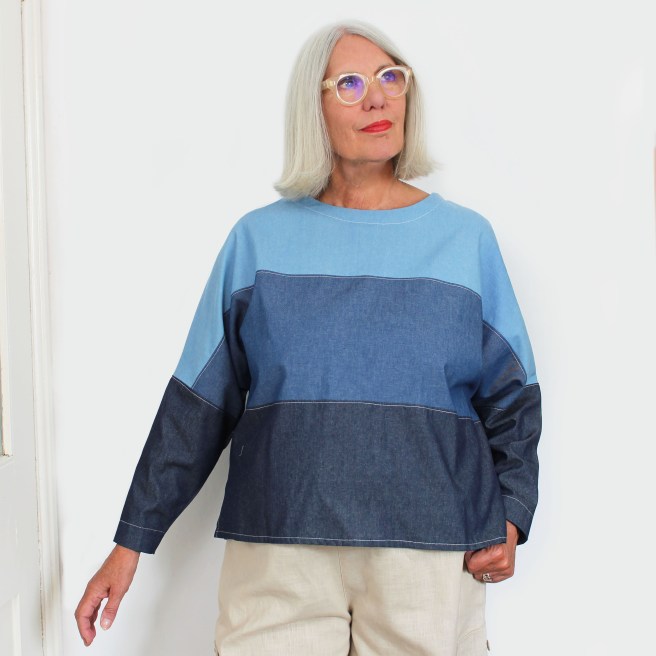
PATTERN ADD-ONS- The pattern also comes with two hack add-on instructions about how to colourblock or stripe the fabric before cutting out.
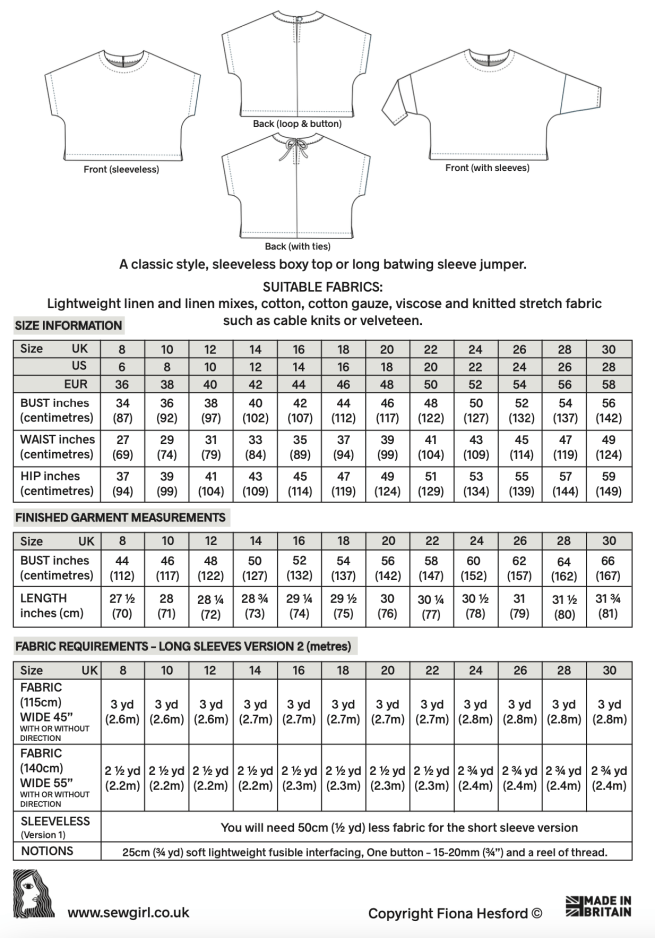
Here are the details showing the size guide and fabric requirements.
LINEN/VISCOSE SLUB
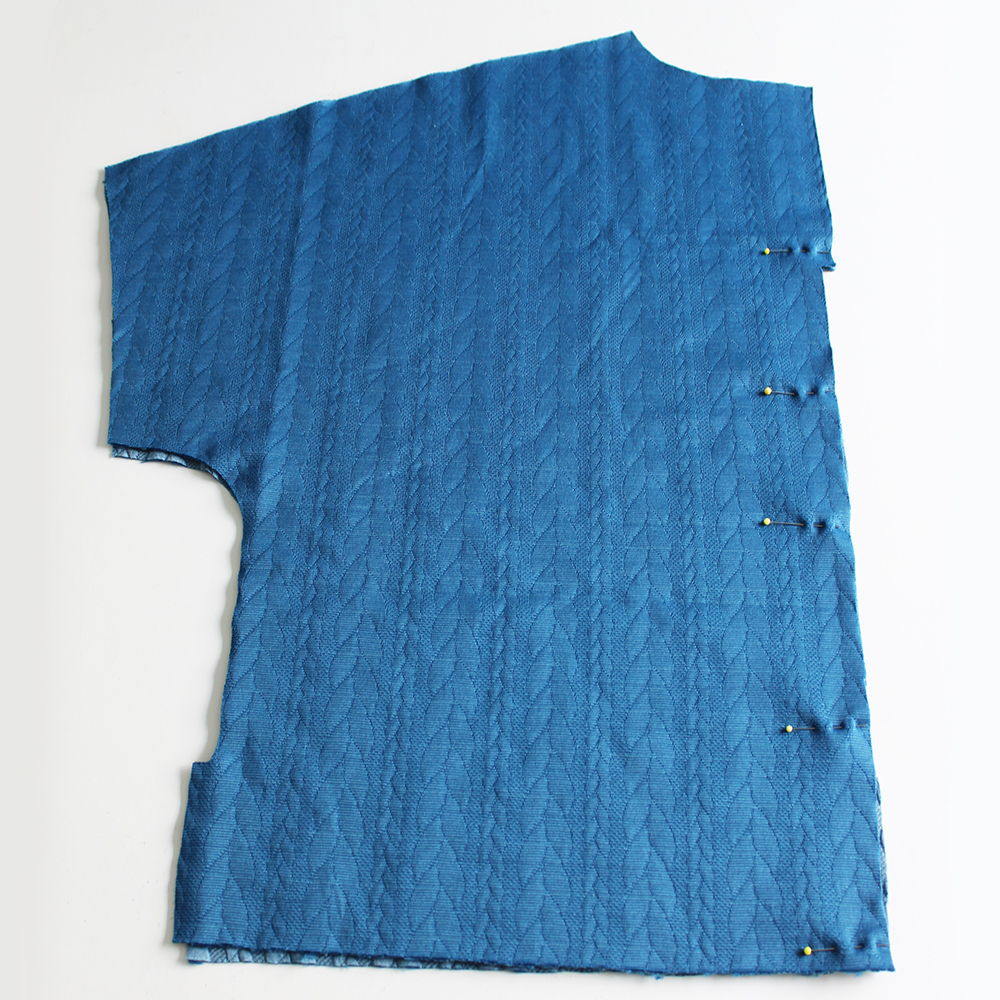
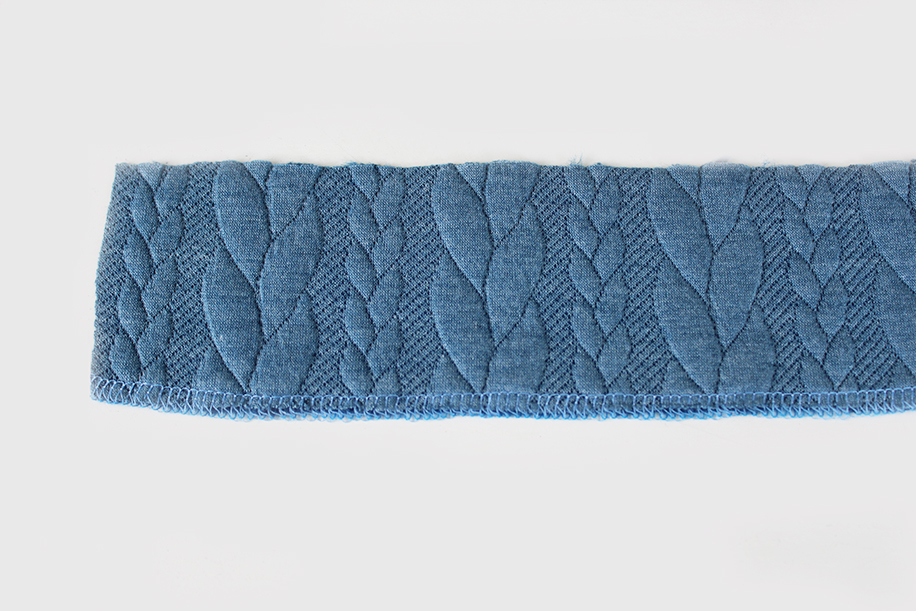
CABLE KNIT
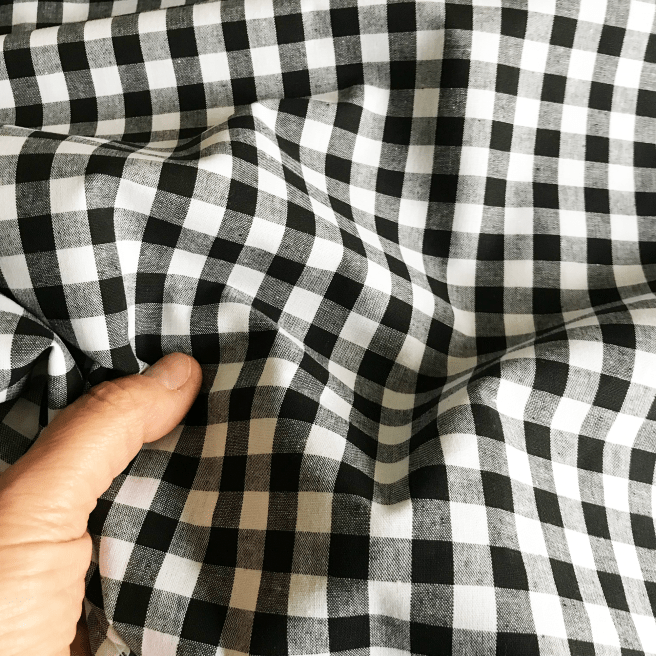
COTTON GINGHAM
Here are some of the stages of making the Petula top. The pattern contains more in depth illustrations and instructions
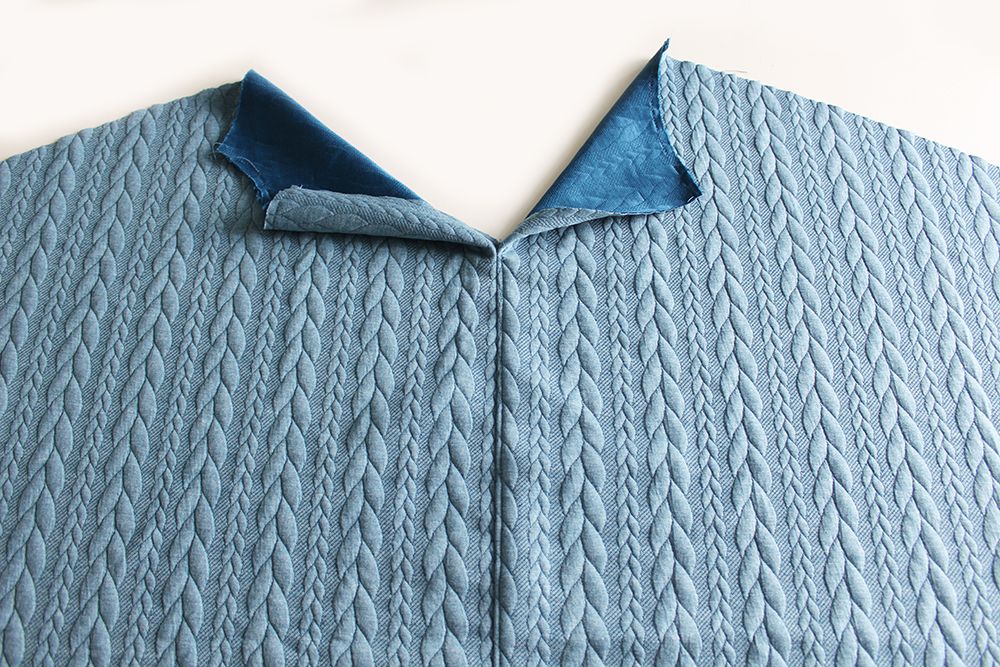
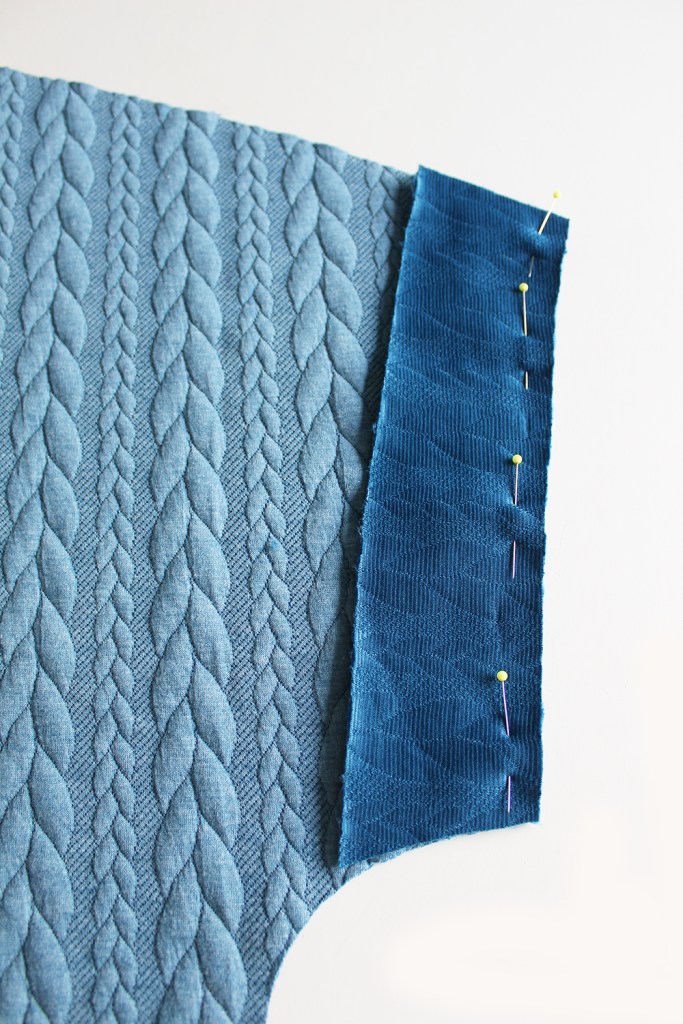
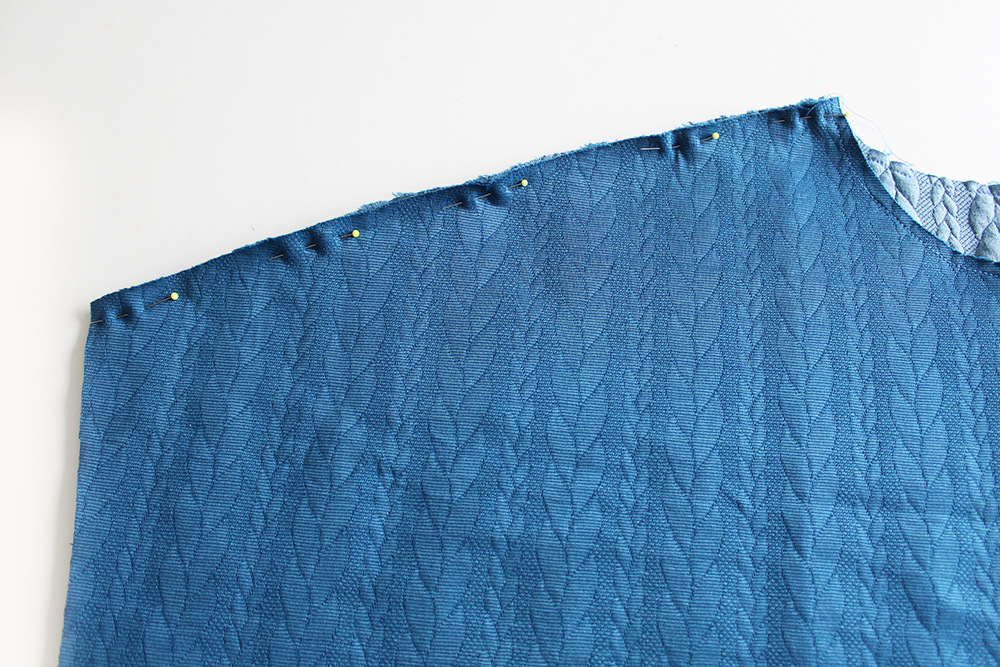
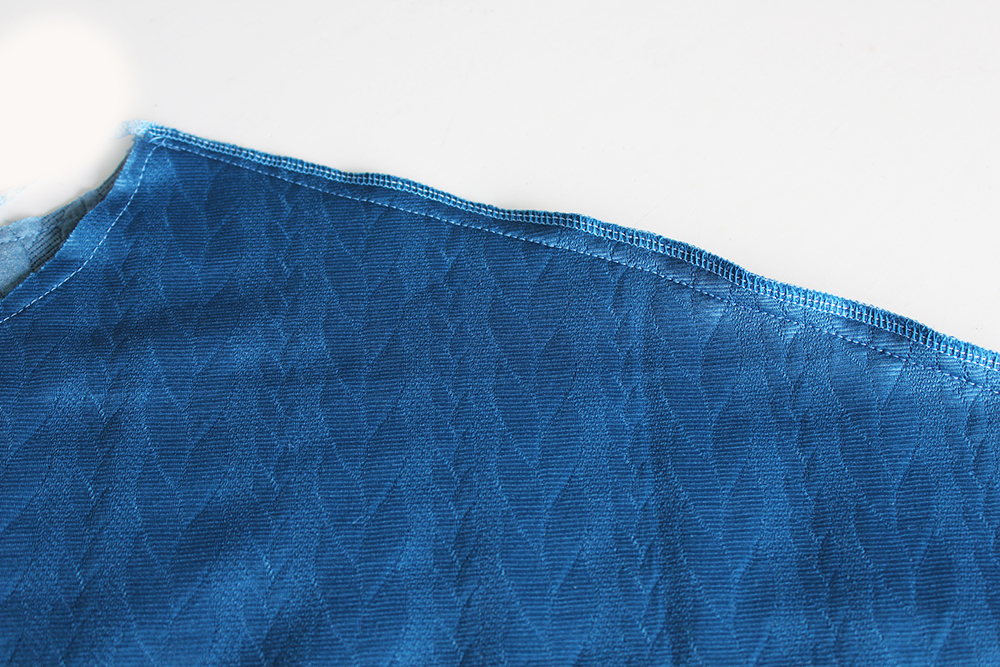
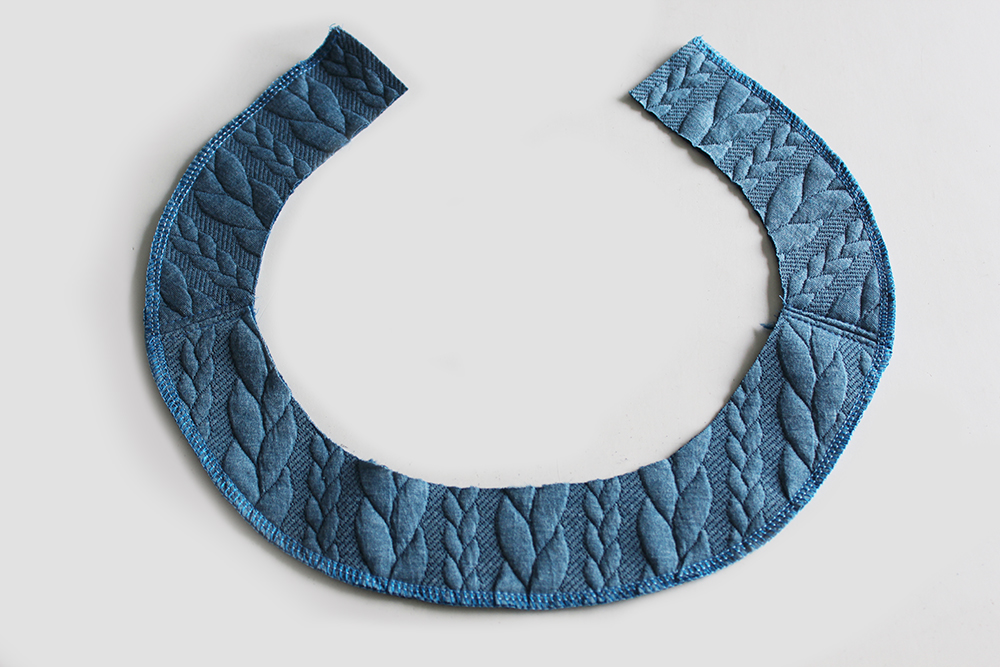
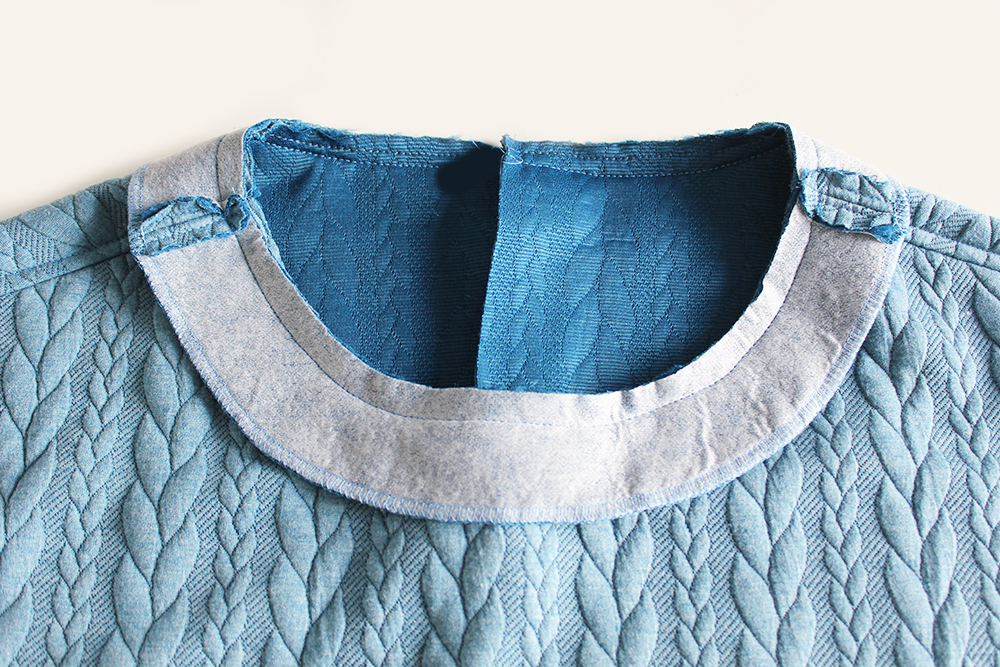
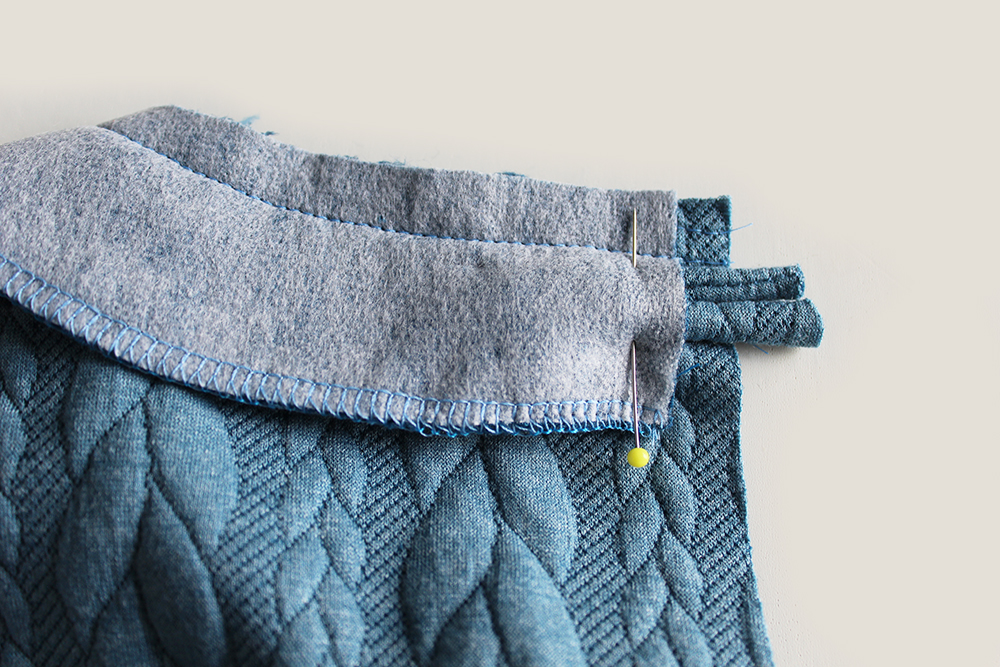
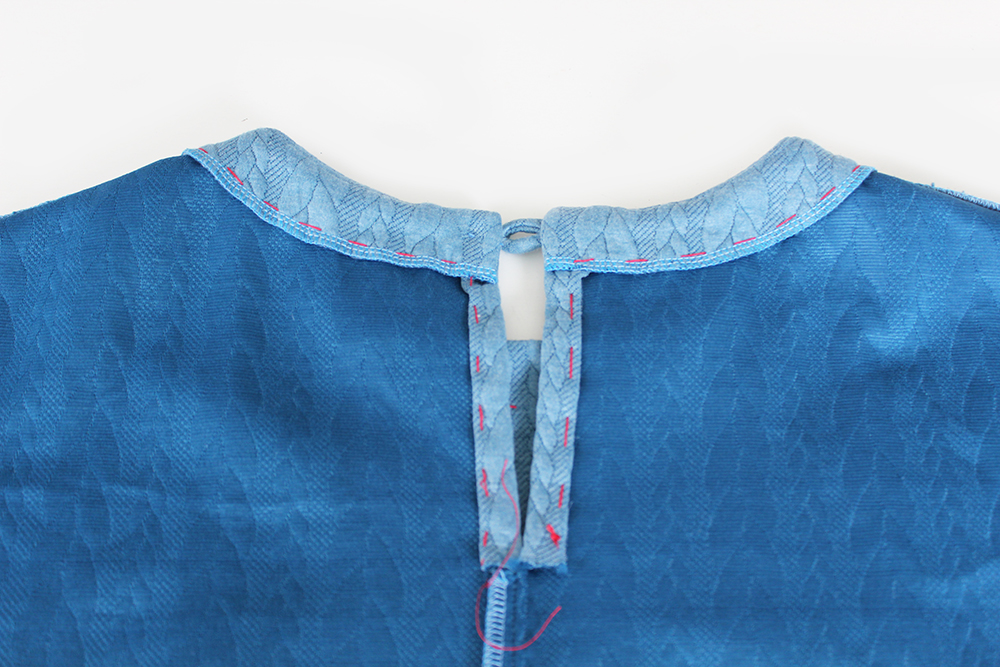
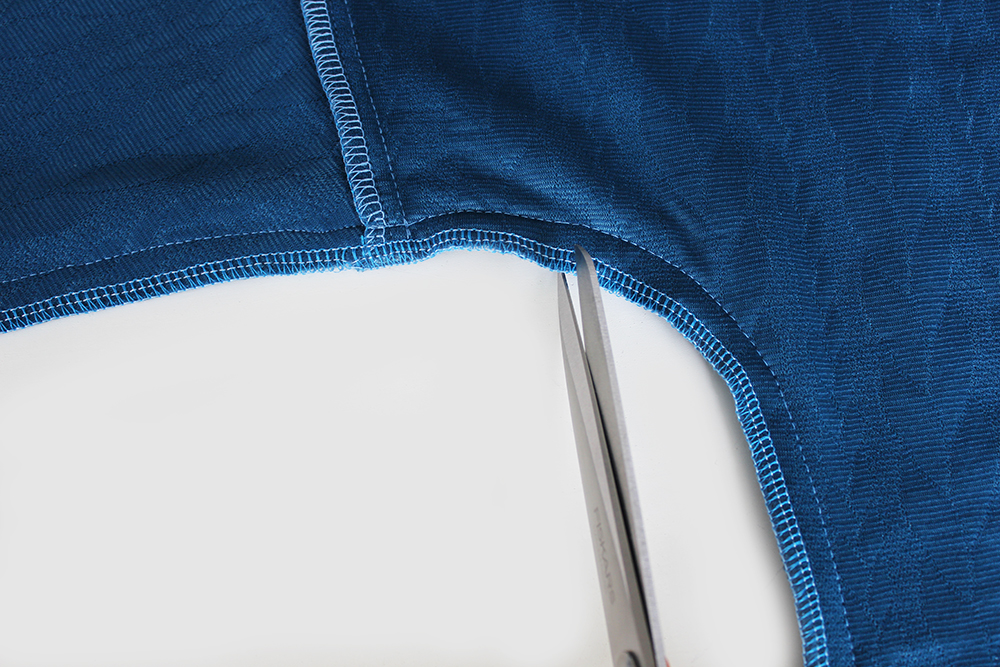
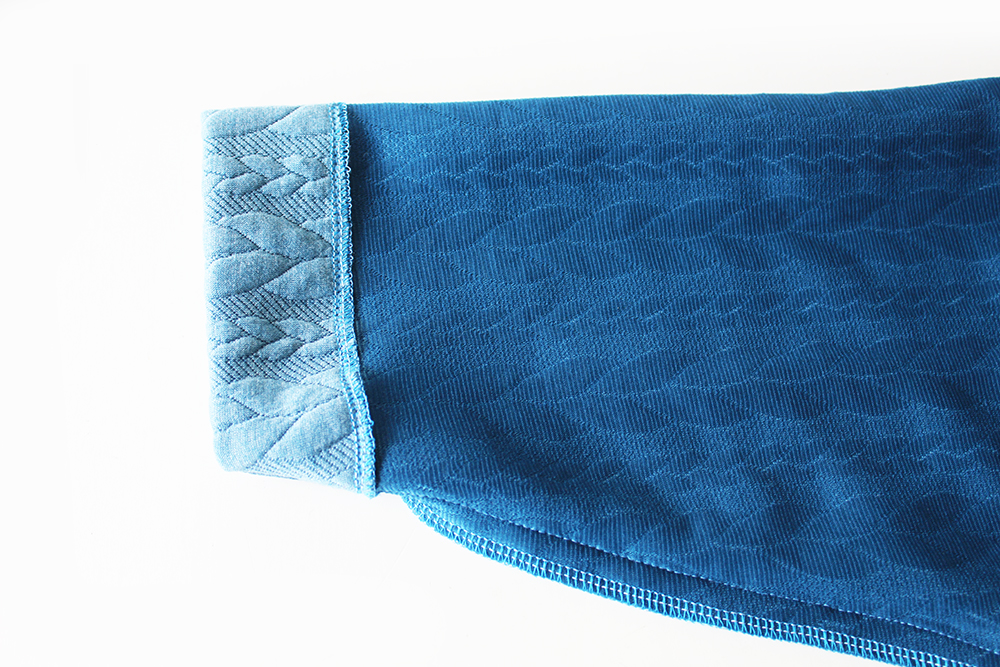
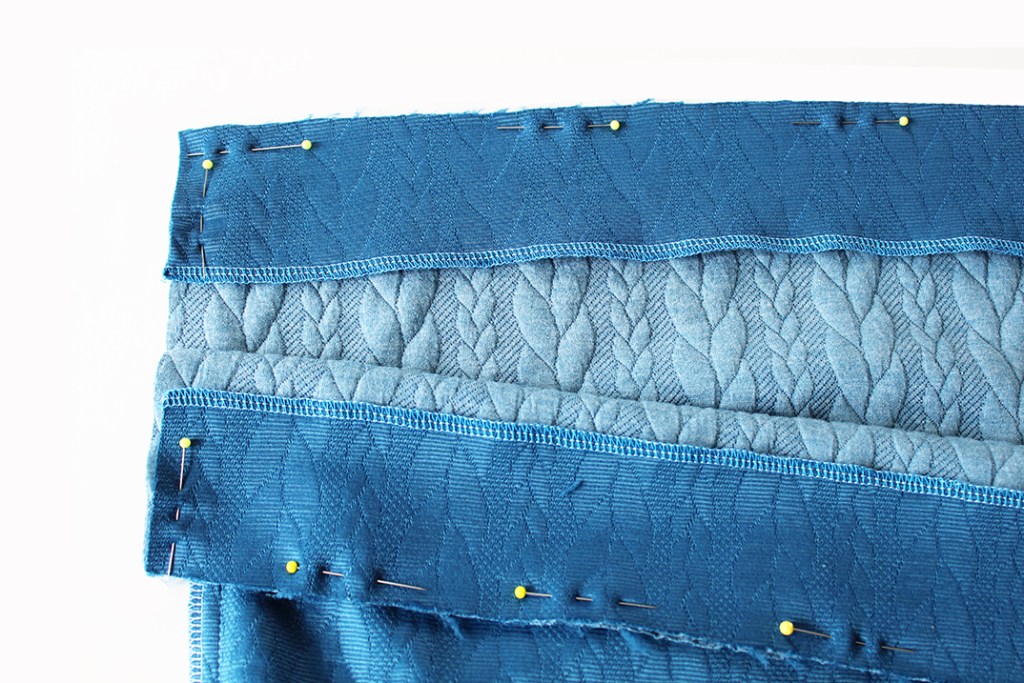
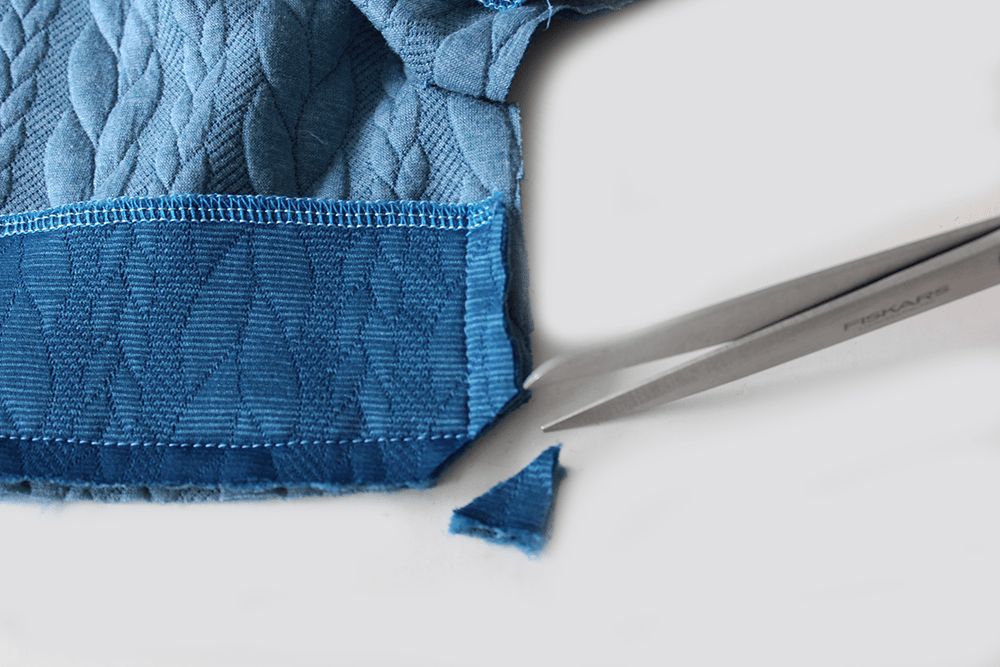
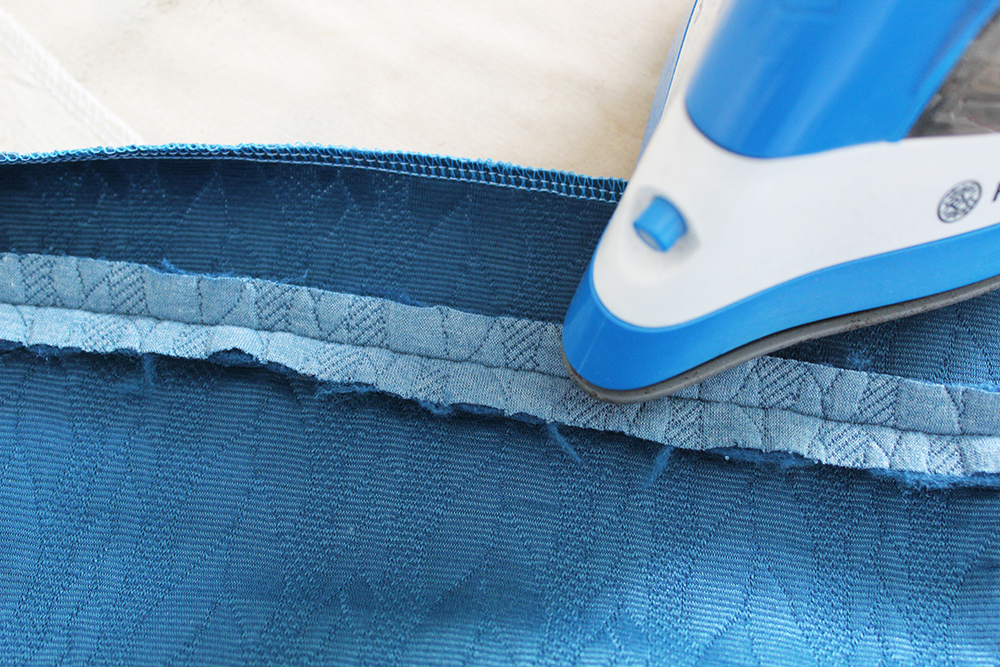
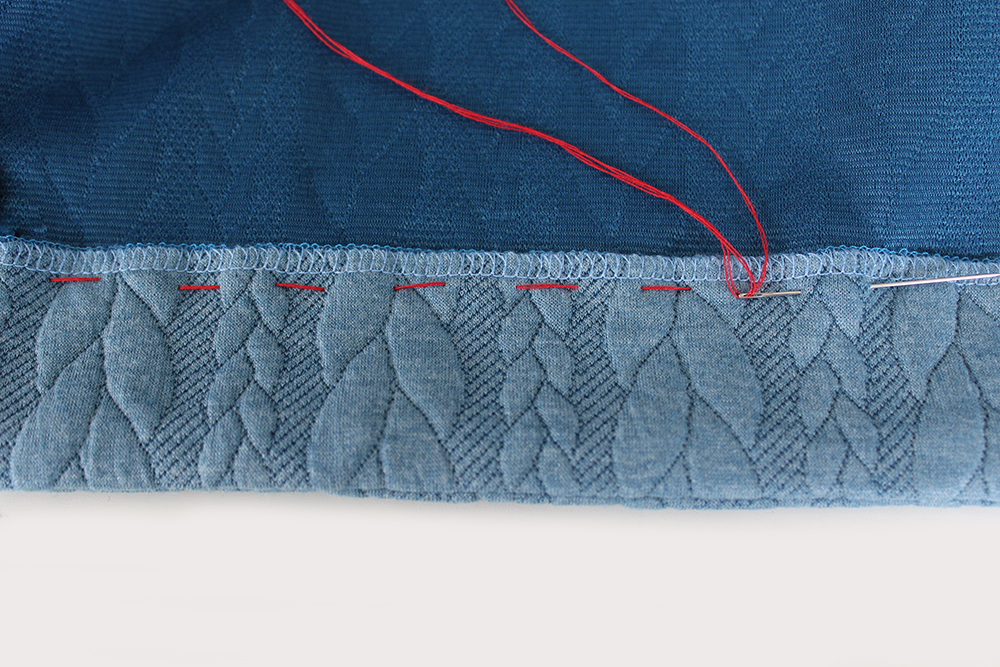
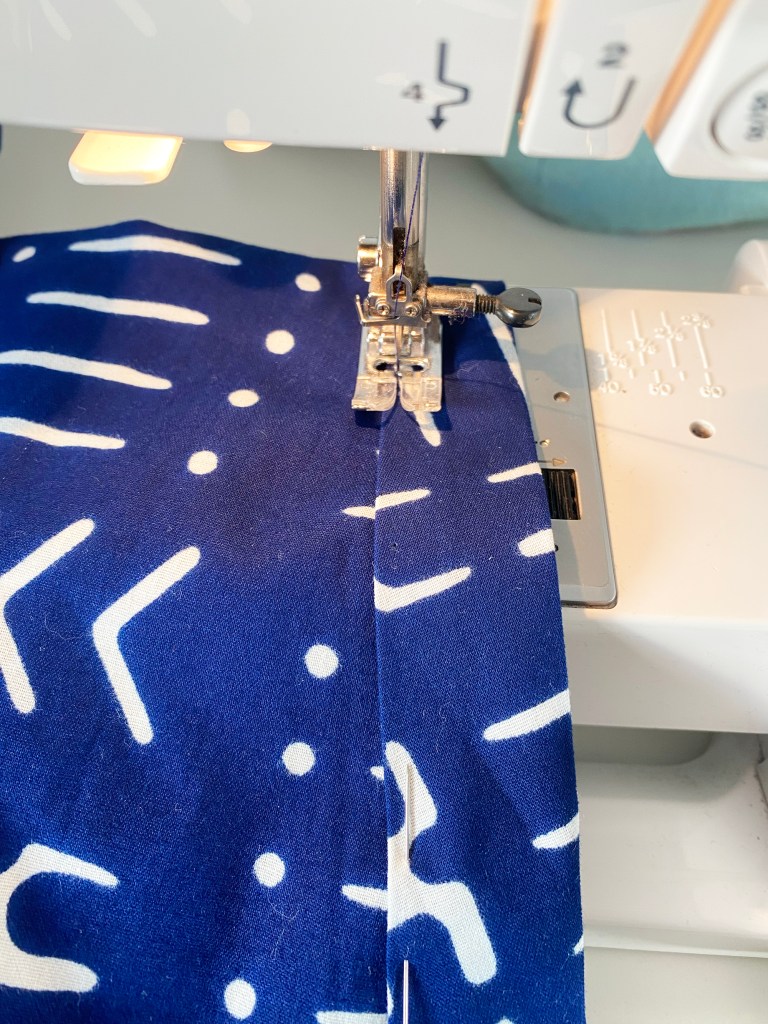
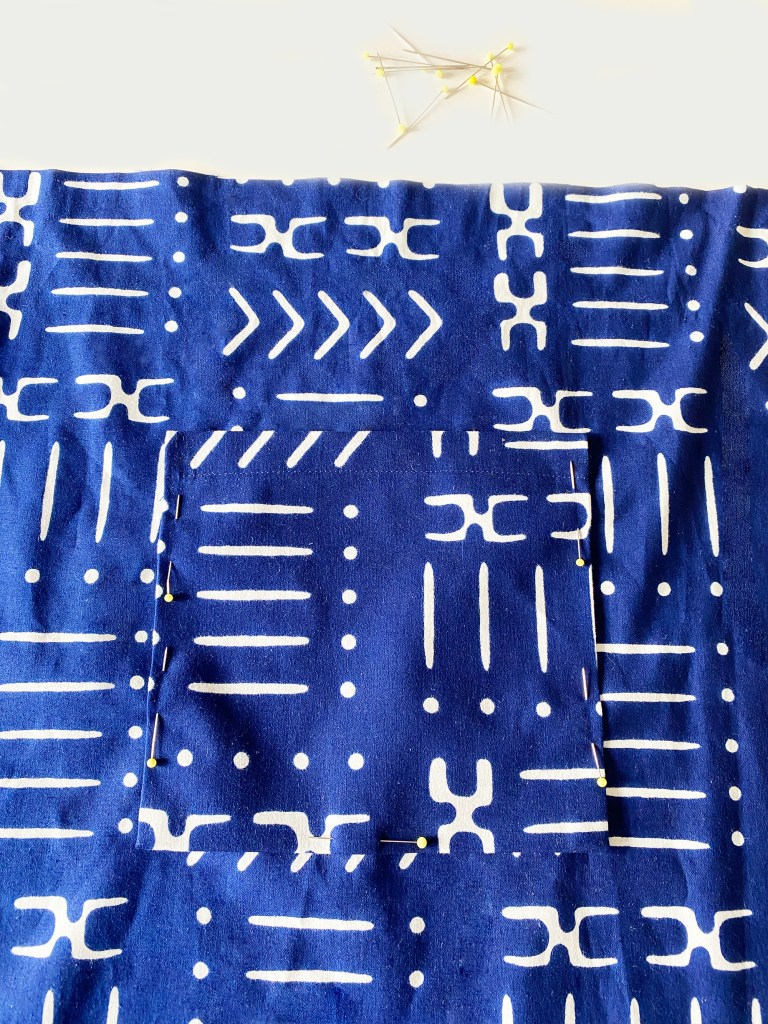
Sew the back pieces together.Topstitch.Attach the Sleeve facings (short sleeve version only).Pin the Front to Back at the shoulder edges.Sew. Finish the raw edges.Sew together the Front and Back Facing pieces.Press. Topstitch.Pin the Facing to the neck edge.Stop 1cm in from the centre back vertical edge, insert the loop or tie. Fold facing over. Hand tack facing.Attach the sleeve. Pin the Front to Back. Sew.Nick the underarm seam allowance curved section. Fold back Sleeve cuff (long sleeve version only).Lower hem facing. Finish one edge.Pin to the Front/back lower edge. Sew.Nick the corner seam allowance.Press the seam allowance open.Fold the Facing to the wrong side. Pin.Hand tack all around.
All images are subject to copyright. Please ask permission if you would like to use any of the text and images on this page.
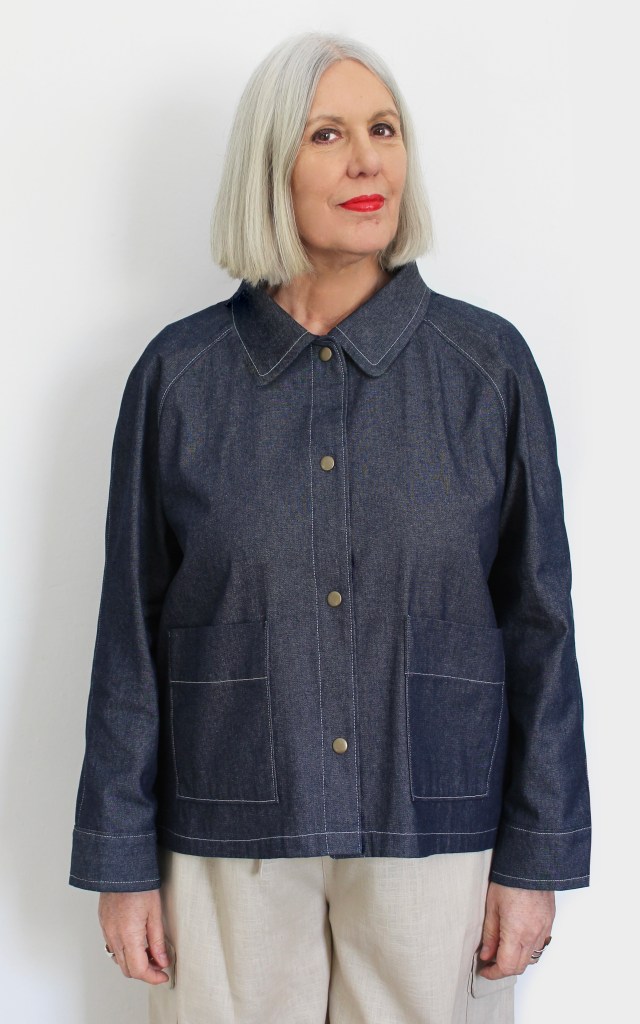
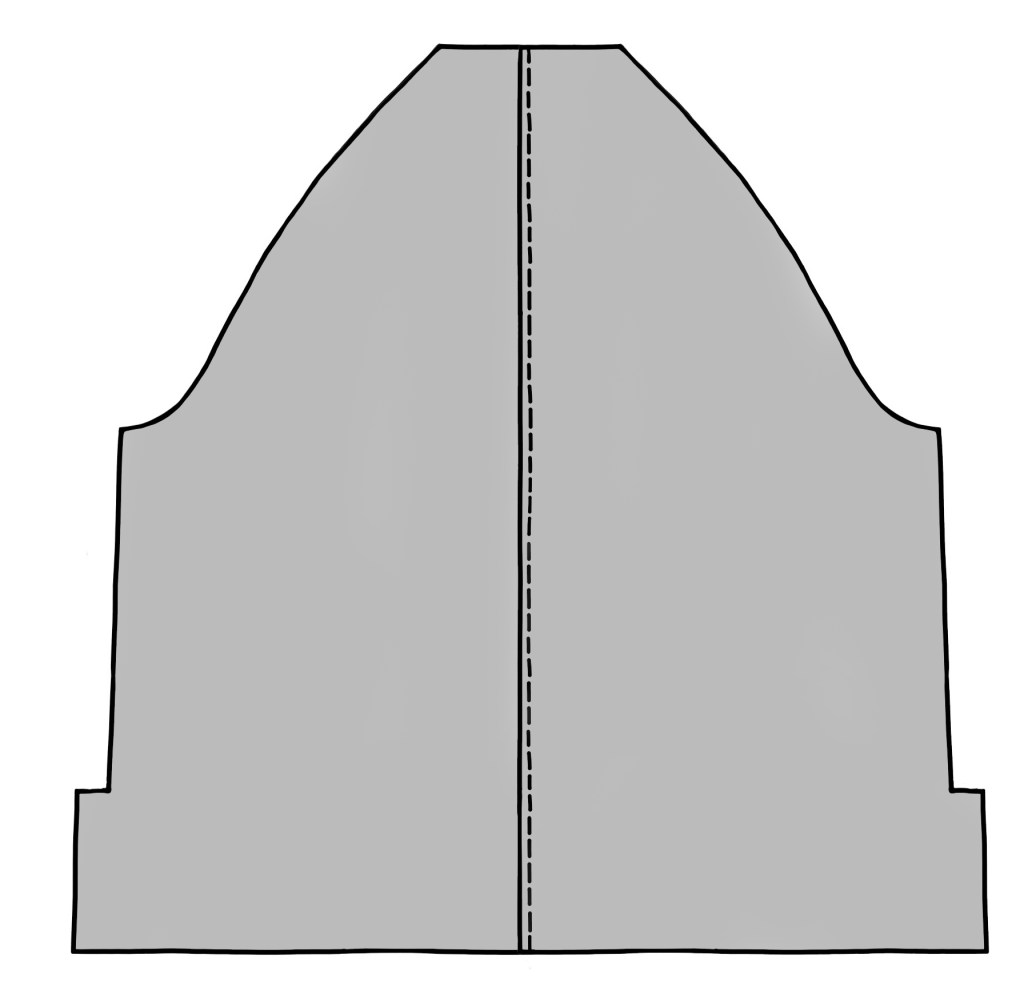
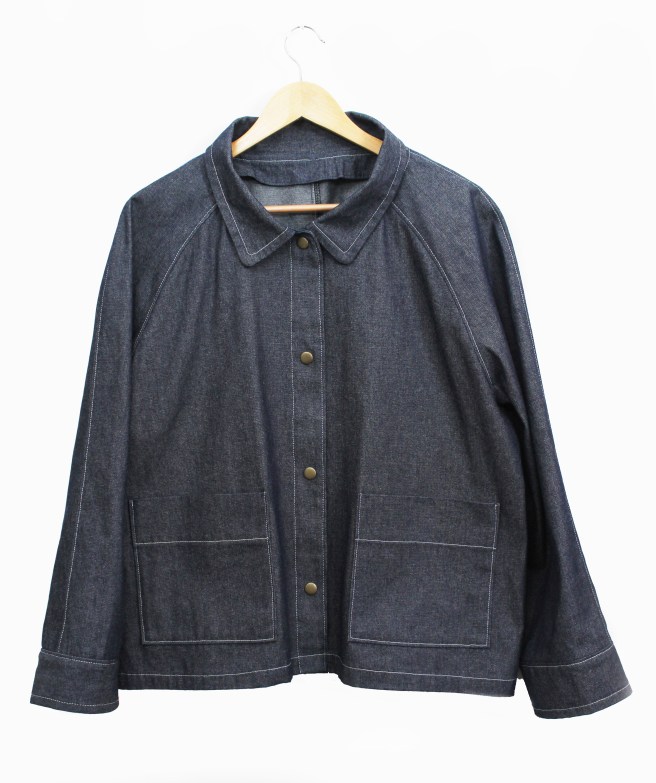
JOSIE JACKET pattern by Sewgirl- a lovely addition to any wardrobe. Chic and stylish, team up with skirts (Cecily or Dotty) or trousers (Elsie or Nora) for a timeless style and comfortable fit. Boxy in shape, with easy to insert raglan style sleeves, collar, cuffs and two large patch pockets. The jacket is fastened up by four buttons (as top image) or alternatively snap press studs (lower image).
Small (UK 8-10), Medium (UK 12-14), Large (16-18), XL (20-22) and 2XL (24-26).
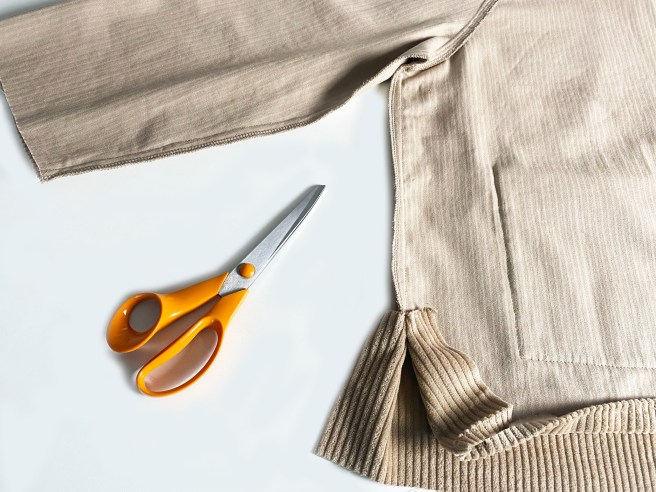
Suitable fabrics to make Josie are 4.5 whale cord, 8oz denim, cotton canvas, or any medium weight cotton fabric.
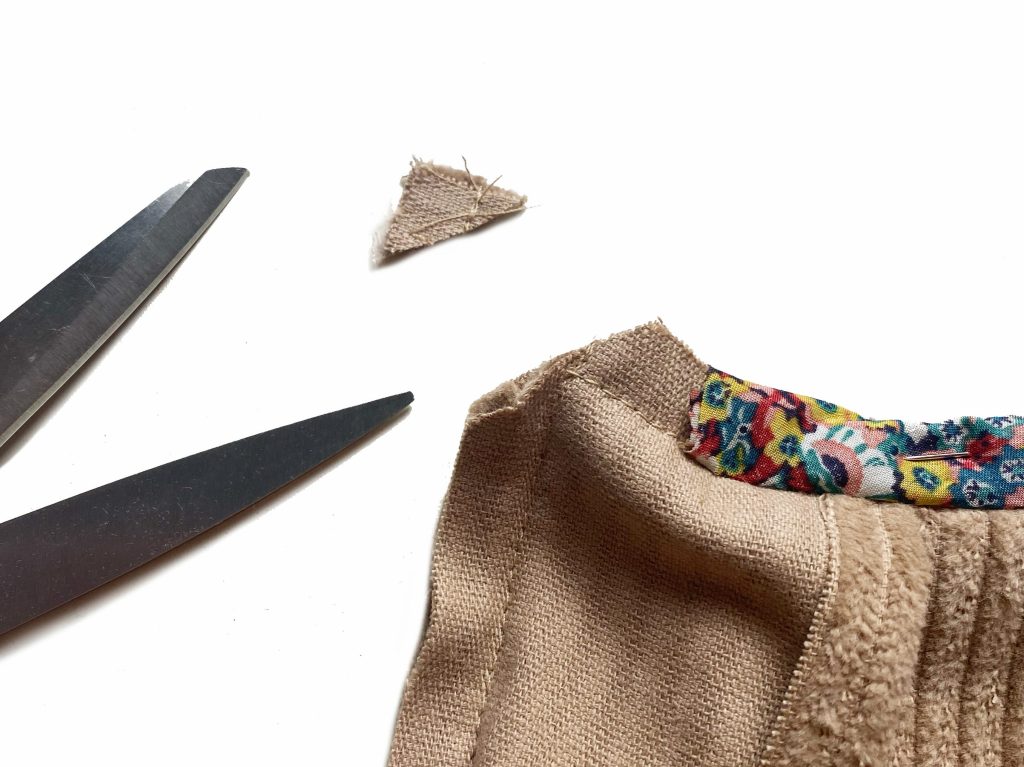
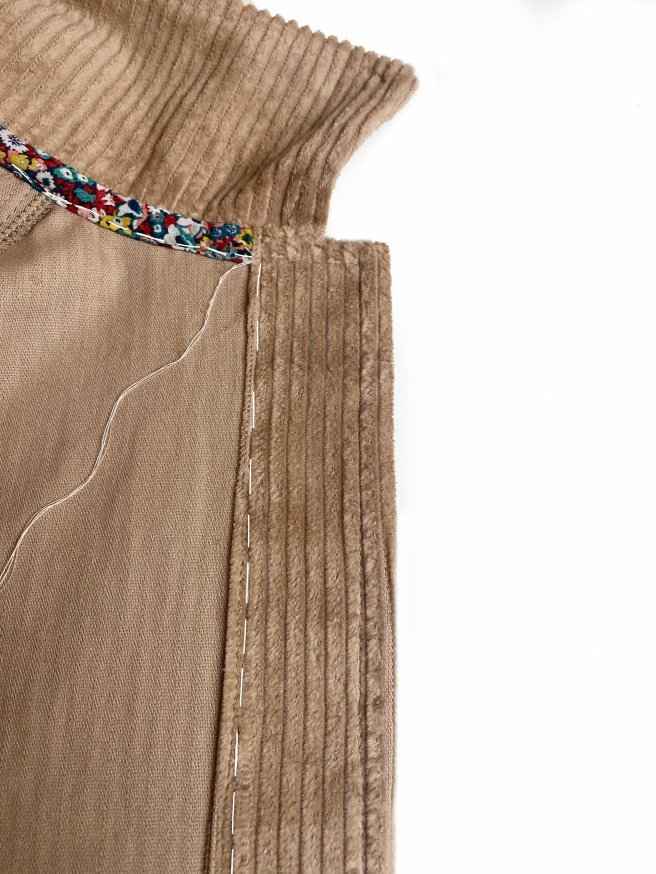
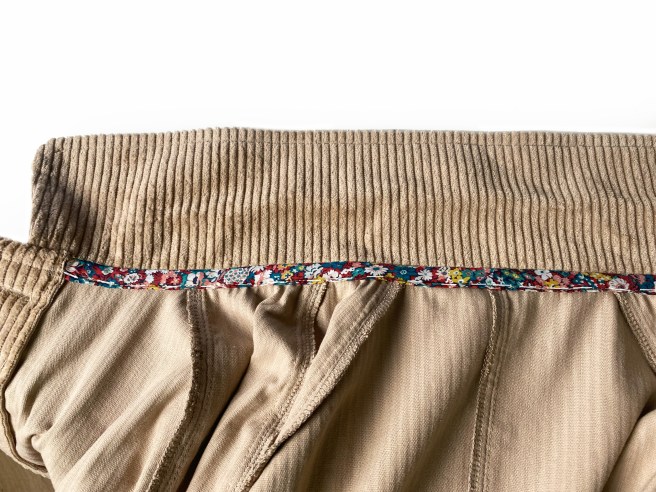
You can see with this picture that I’ve used a piece of Liberty fabric to make the bias binding for the neck seam raw edge. I’ve also made a double line of stitching around the pockets and with the denim version, stitched a single line with contrast thread instead. I used a standard sewing thread in an off white colour. Sometimes I like to use two ends of thread together for extra stitch definition, by putting a second reel on the feeder, a topstitch thread could be used but I prefer a more subtle line of stitching.
Josie Jacket measurements and info..
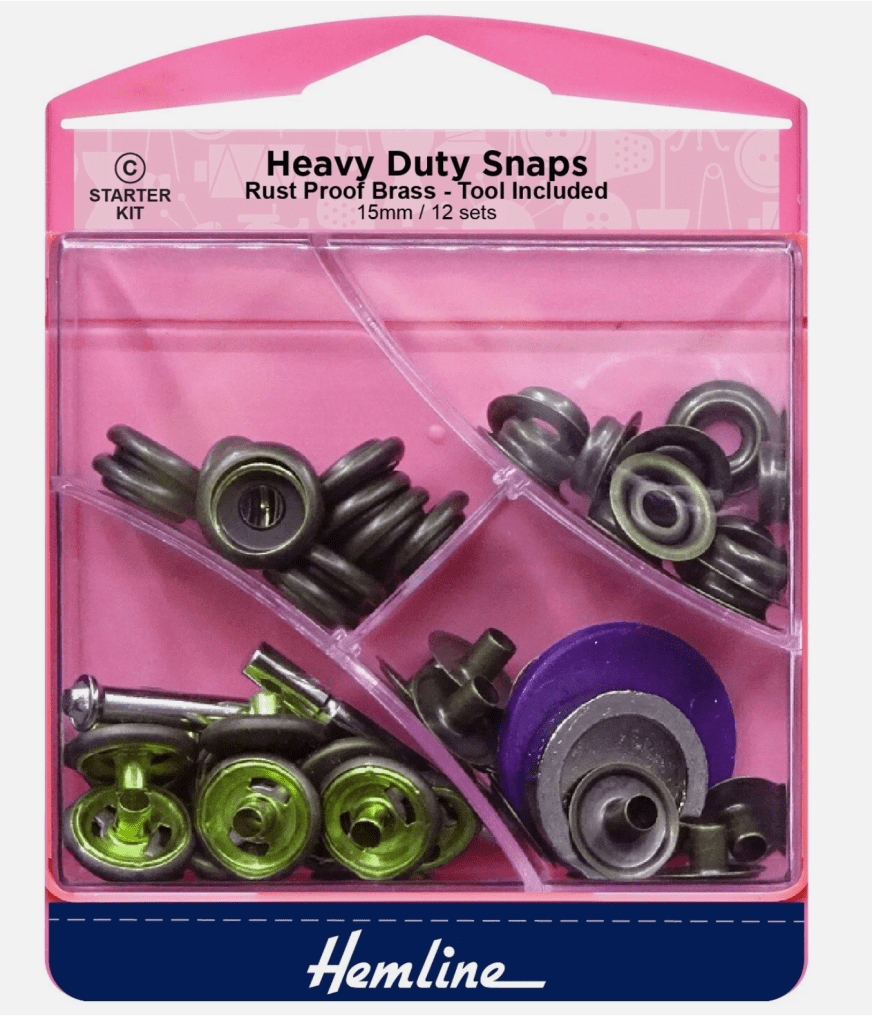
Instead of using buttons, I made the denim jacket version with these heavy duty snaps. They come with a tool, all you need is a hammer and one pack makes 12 sets, enough for 4 jackets!
HOW TO MAKE JOSIE JACKET
Here are abridged step by steps about making Josie. The pattern includes a fully illustrated booklet with more in-depth instructions and glossary. Seam allowance is 1cm (3/8″).
All pattern pieces have notches which should be transferred to the pattern after cutting out. Buttonhole positions should be marked on the Front with some tailor tack stitches or an invisible marker pen.
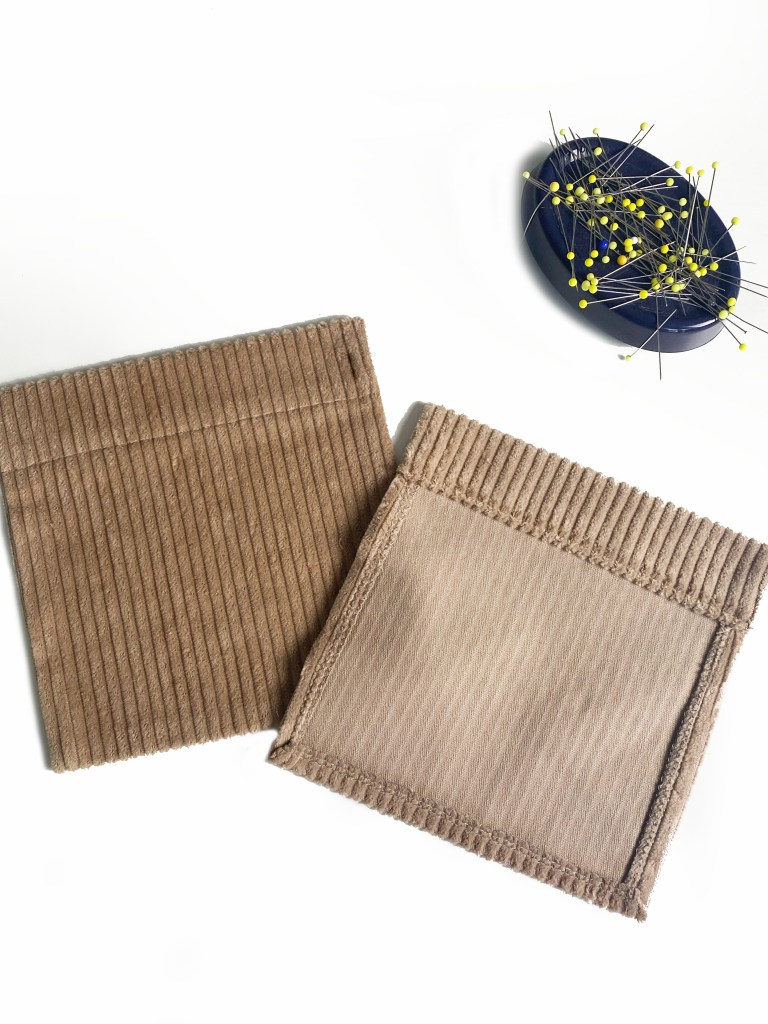
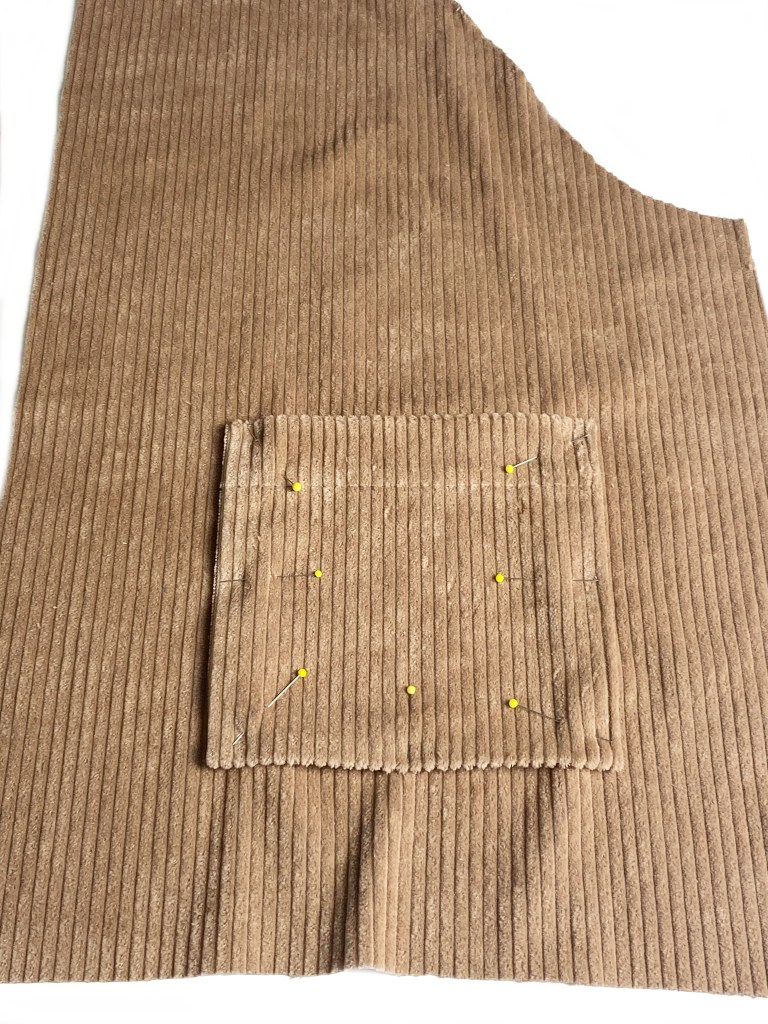
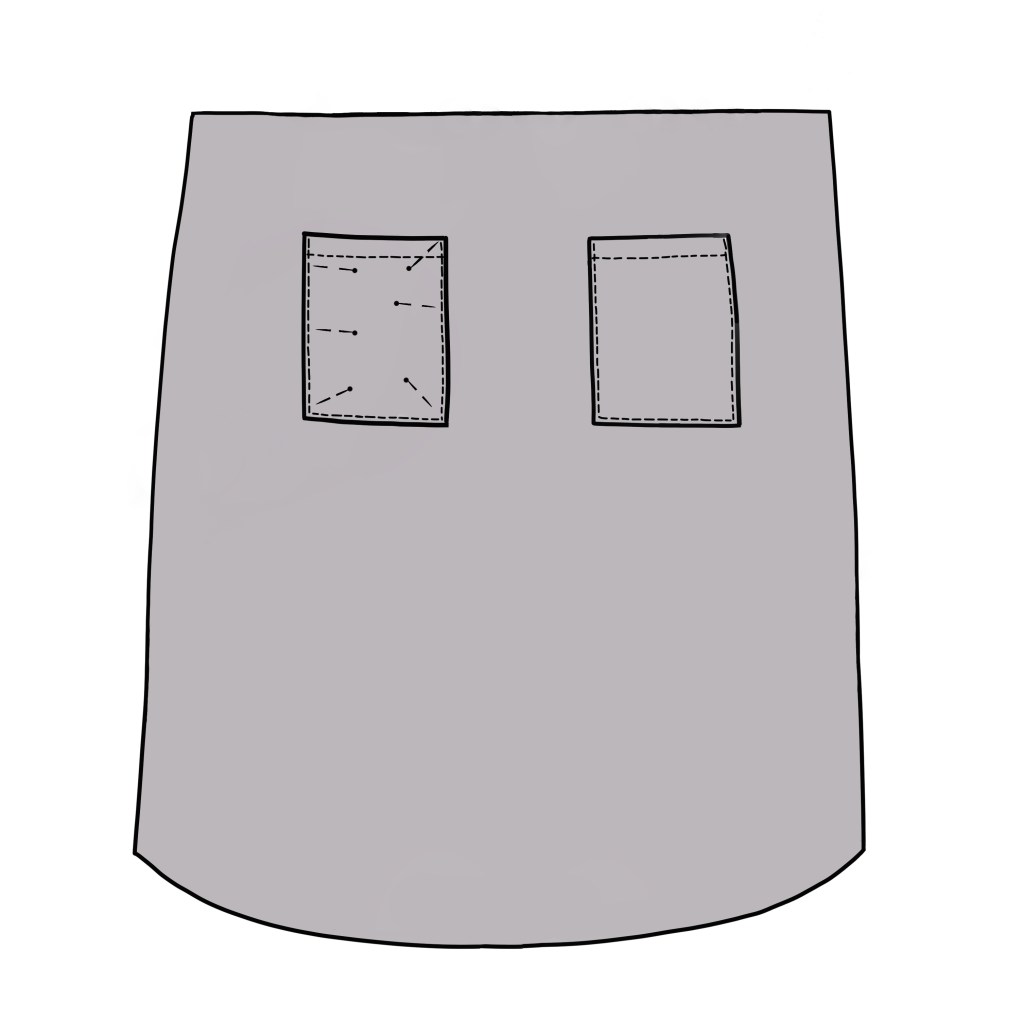
POCKETS
First make up the pockets. Pin to the Jacket front pieces and stitch in place. The pattern templates show you where to place them.
Click image to open
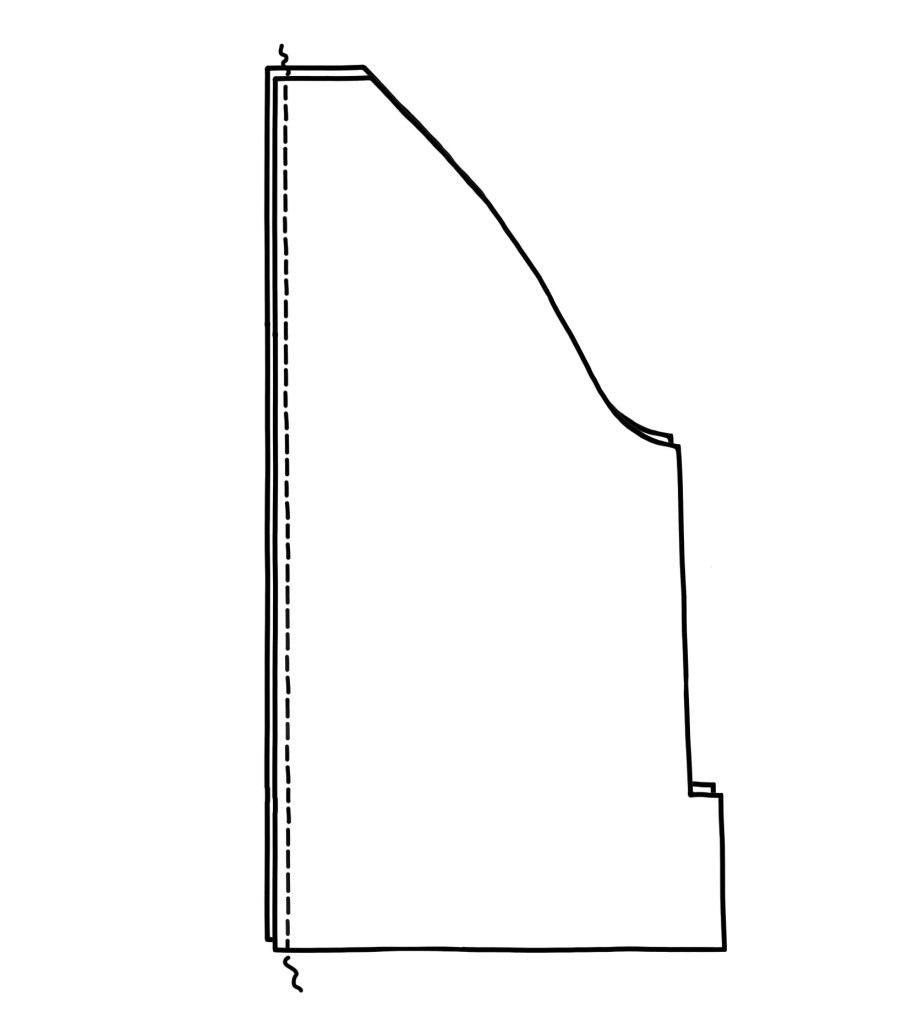
JOINING THE BACK PIECES
Sew together the Back pieces, finish the seam allowance raw edges then press to one side. Topstitch.
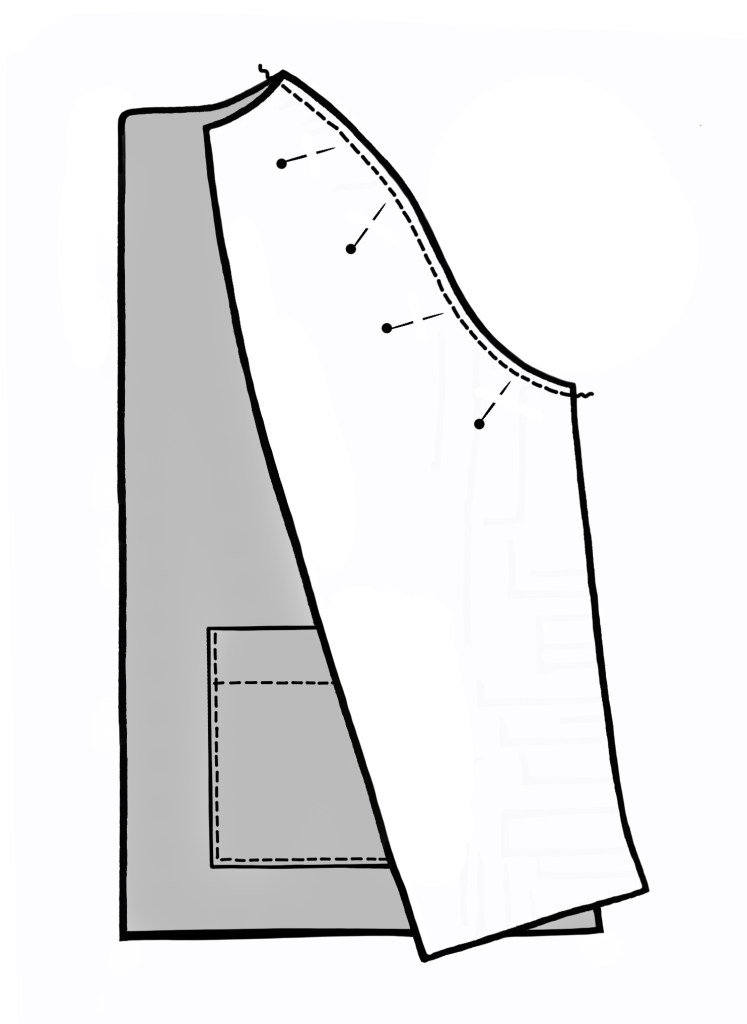
ATTACHING THE SLEEVES
Join the Front Sleeve to the Front on each side.
Join the Back Sleeve to the Back on each side.
Join the Front to Back at the Sleeve top edge.
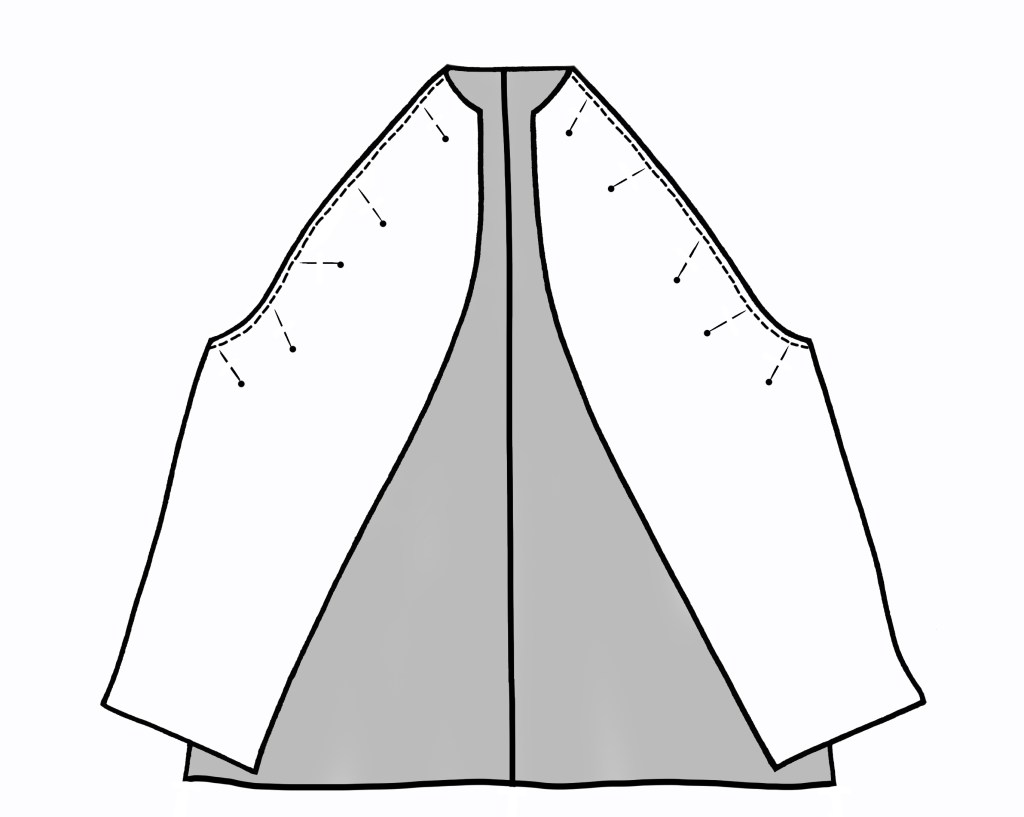
JOINING THE FRONT TO BACK& SIDE SLITS
Join the Back Sleeve to the Back on each side.
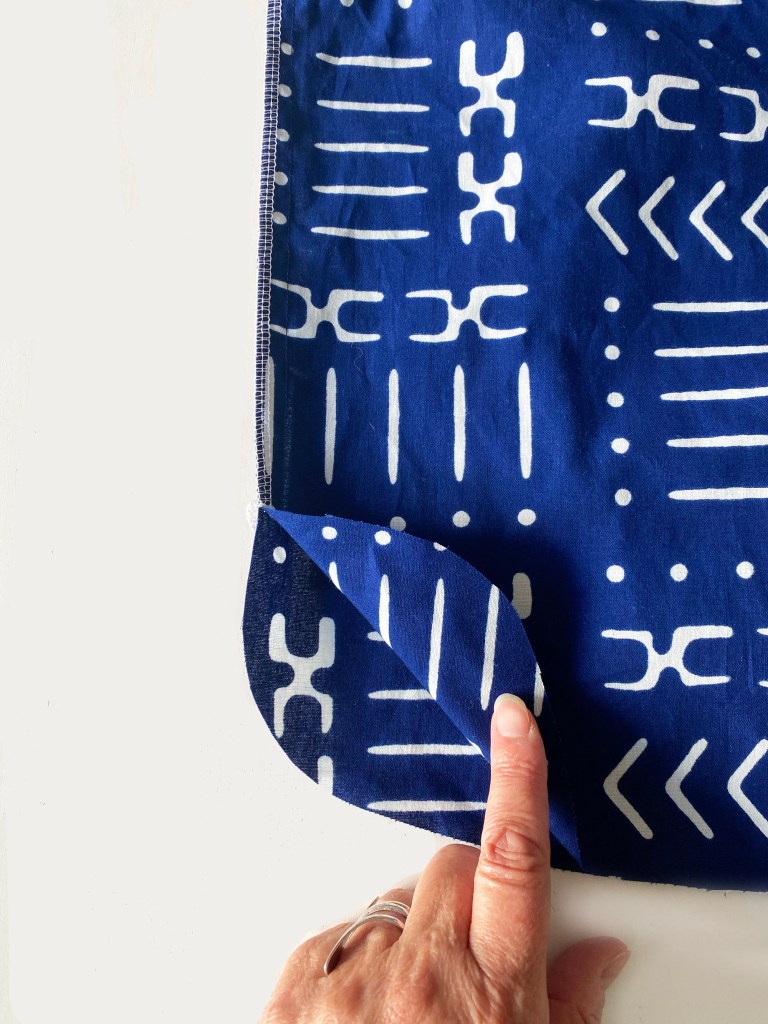
Sew the Front to Back leave the seam open below the notches. This is for the side slits.
Turn under a small hem at each side slit edge. Sew all around.
COLLAR
Staystitch around the neck edge. It prevents it stretching.
Make the Collar.
Pin the Collar to the back neck right sides together. Hand or machine tack.
FACING
Fold over 1cm on opposite long edges of the Facing pieces. Pin to the Front. The Facing is shorter at the lower edge so don’t worry! – this is to accommodate the hem. Sew.down the long outer edge and across the lower short edge.
Attach the Binding to the Neck seam raw edges. Clip the seam allowance corners each side.
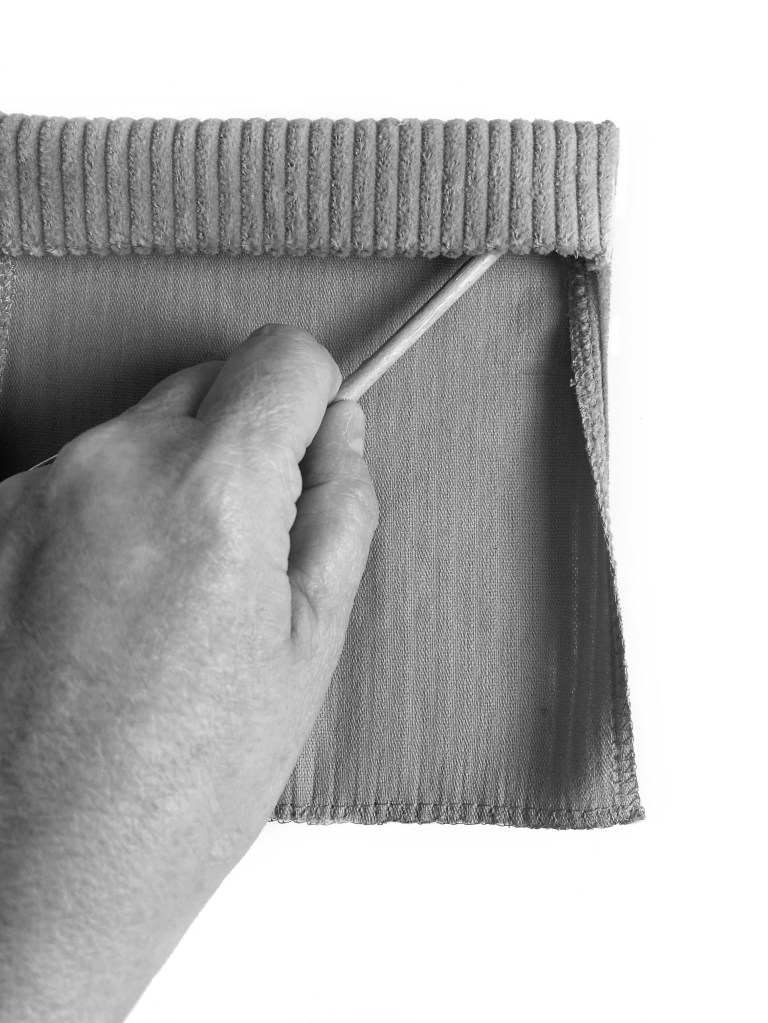
Turn the Facing to the wrong side, pushing out the corners from the inside with a poking tool. Turn under the hem at the lower edge. Hand Tack. Sew all around. Remove tacking.
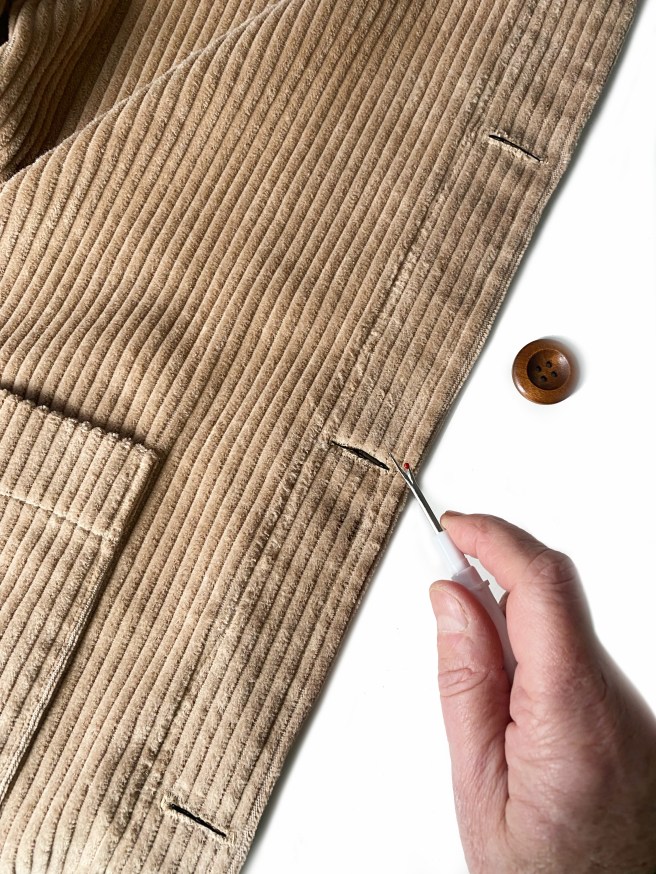
BUTTONHOLES
Make the buttonholes in the marked positions or use snap fasteners as shown below in the denim version. Sew on buttons if you have made buttonholes.
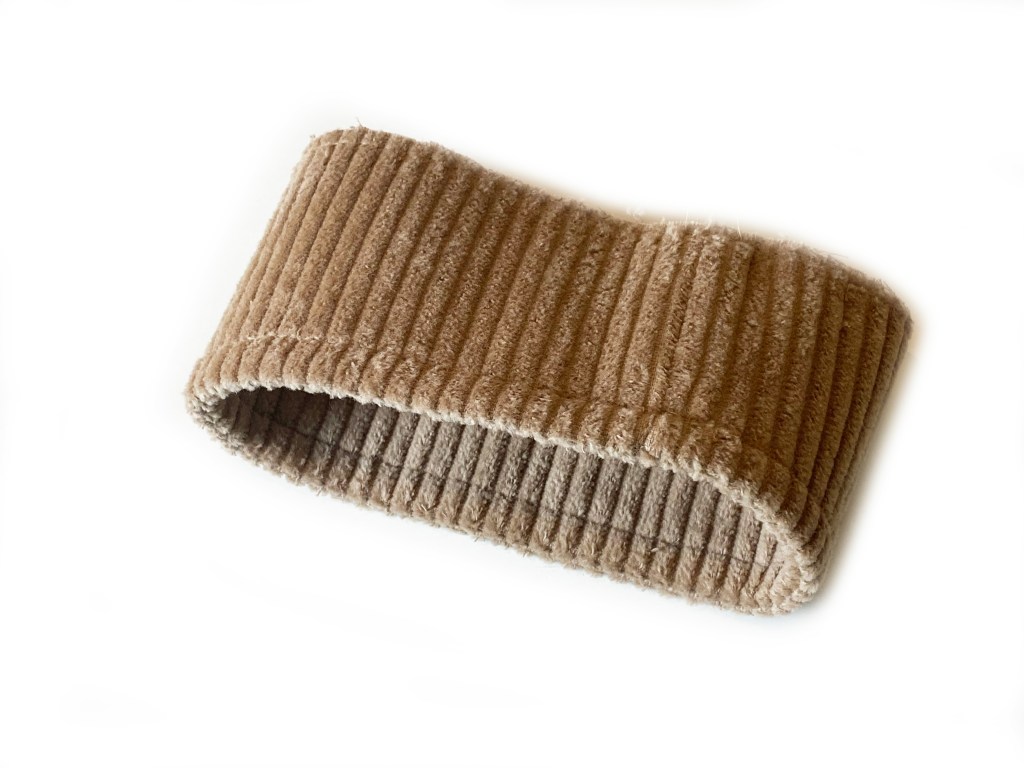
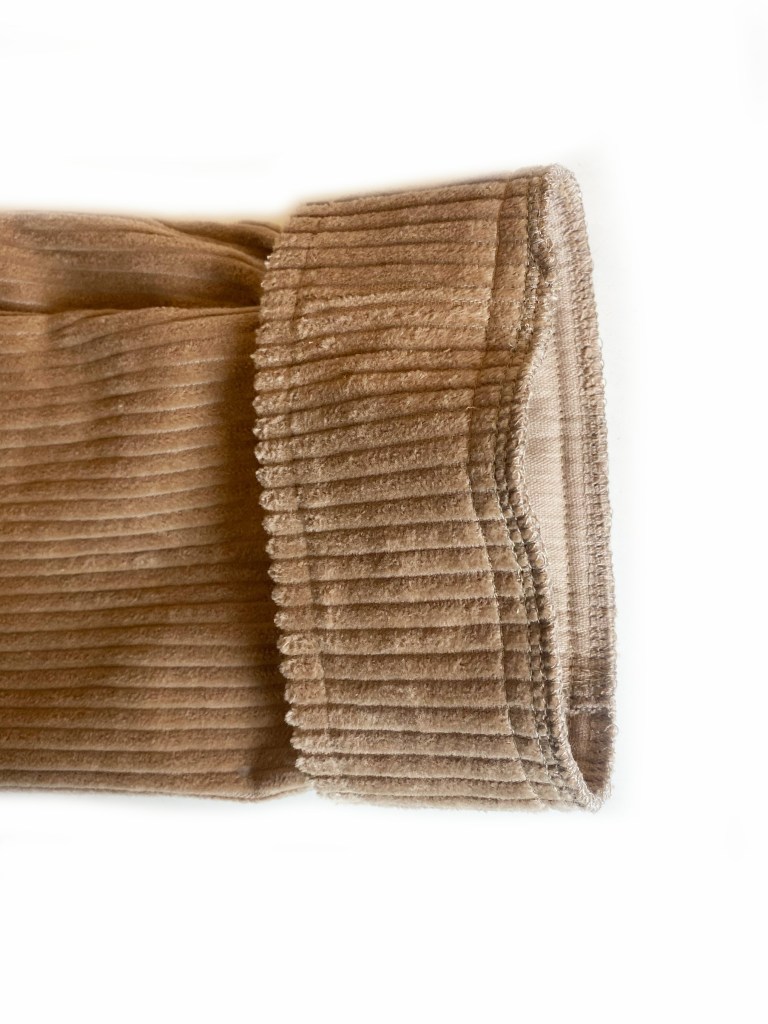
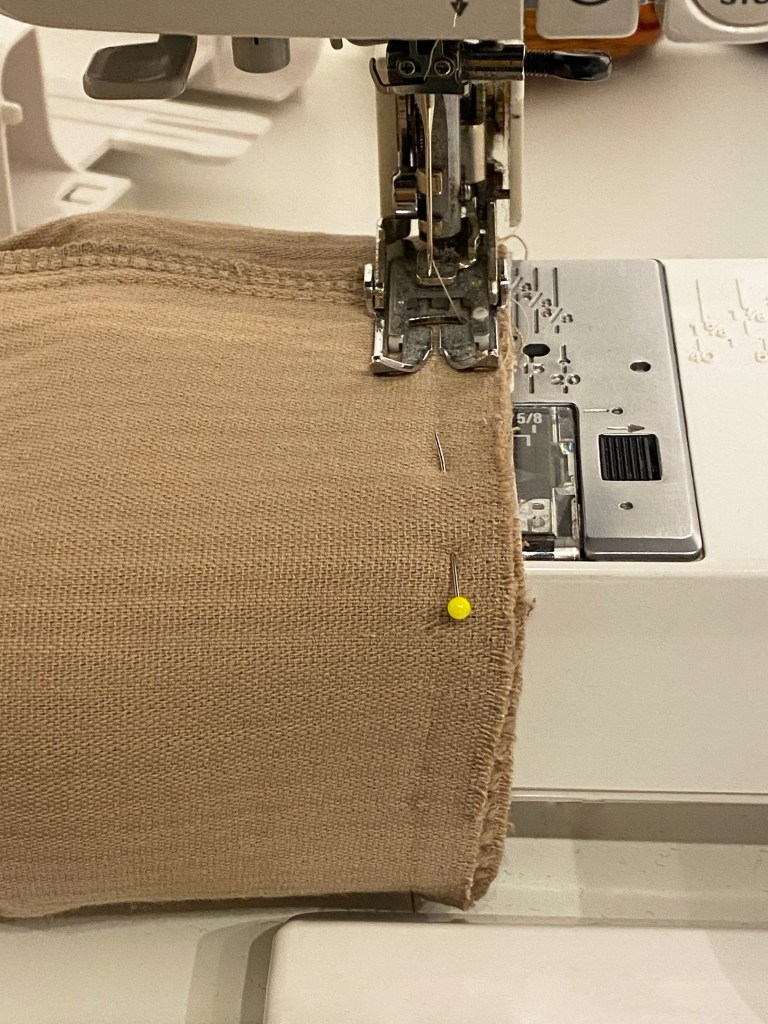
CUFFS
JOIN THE CUFF PIECES LONG EDGESJOIN THE CUFF SIDE EDGESFOLD THE CUFF SO THE WRONG SIDES ARE TOGETHER. TOPSTITCH 1CM (3/8″) AWAY FROM THE FOLDED EDGE ALL AROUNDATTACH THE CUFF TO THE SLEEVE EDGEIT HELPS TO REMOVE THE MACHINE TABLE TO INSERT THE CUFF
Press the cuff away from the Sleeve and topstitch.
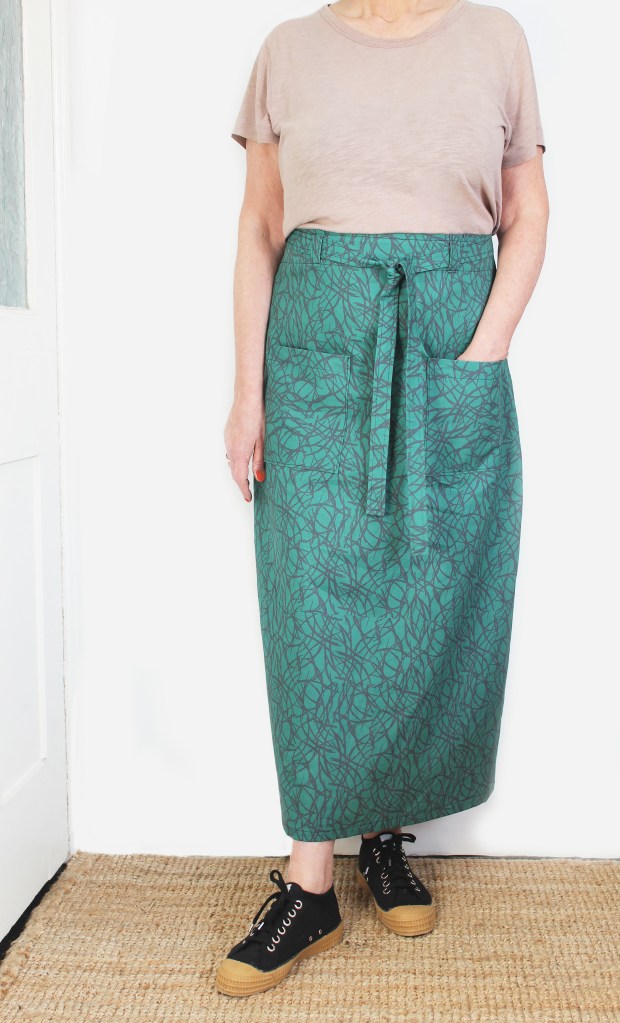
DOTTY LONG SKIRT – a new skirt pattern by Sewgirl, perfect for holidays and comfortable for everyday wear – a lovely addition to any wardrobe with its timeless, elegant style and flattering slimline silhouette. I love wearing this skirt with sandals or trainers in Spring/Summer and ankle boots in the Fall. Its a simple sew but one that I’m sure, like me, you will want to make again and again.
Oh and don’t be put off by the zip!- this one is easy peasy. Once mastered this easy ‘centered’ method, you will never sew a different kind of zip again. And with one in the centre back seam, it allows you to adjust at the side seams so that it fits you like a glove. An optional tie belt covers any tums – and having a facing at the top means theres no uncomfortable waistband (I’m not a big fan).
*length can be adjusted using the lengthen lines on the template.
Dotty Long Skirt is available in all sizes from UK 8-22 for size information, finished garment details and fabric requirements please check out the chart below.
Suitable fabrics to make Dotty are 6-8oz denim, medium weight cotton fabric and corduroy or woven jacquards.
HOW TO MAKE DOTTY LONG SKIRT
Here are abridged step by steps about making Dotty skirt. The pattern includes a fully illustrated booklet with more in-depth instructions and glossary. Seam allowance is 1.5cm (5/8″).
All pattern pieces have notches which should be transferred to the pattern after cutting out. The zip, tabs, and side slit positions should be marked on the Front with notches or an invisible marker pen.
Finish all vertical raw edges to Front and Back pieces before sewing.
DARTS
Make tailors tacksFold the dartStitch the dartPress the dart flat and tie the thread ends.
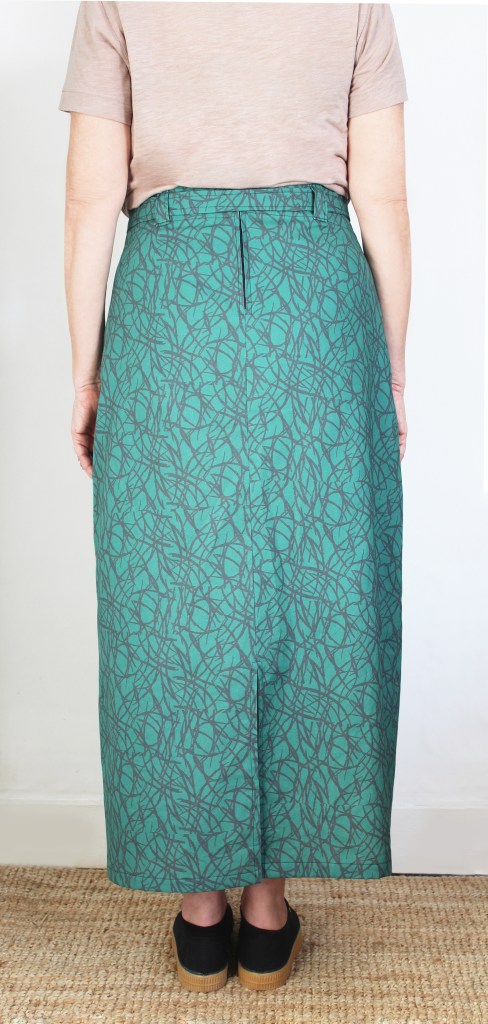
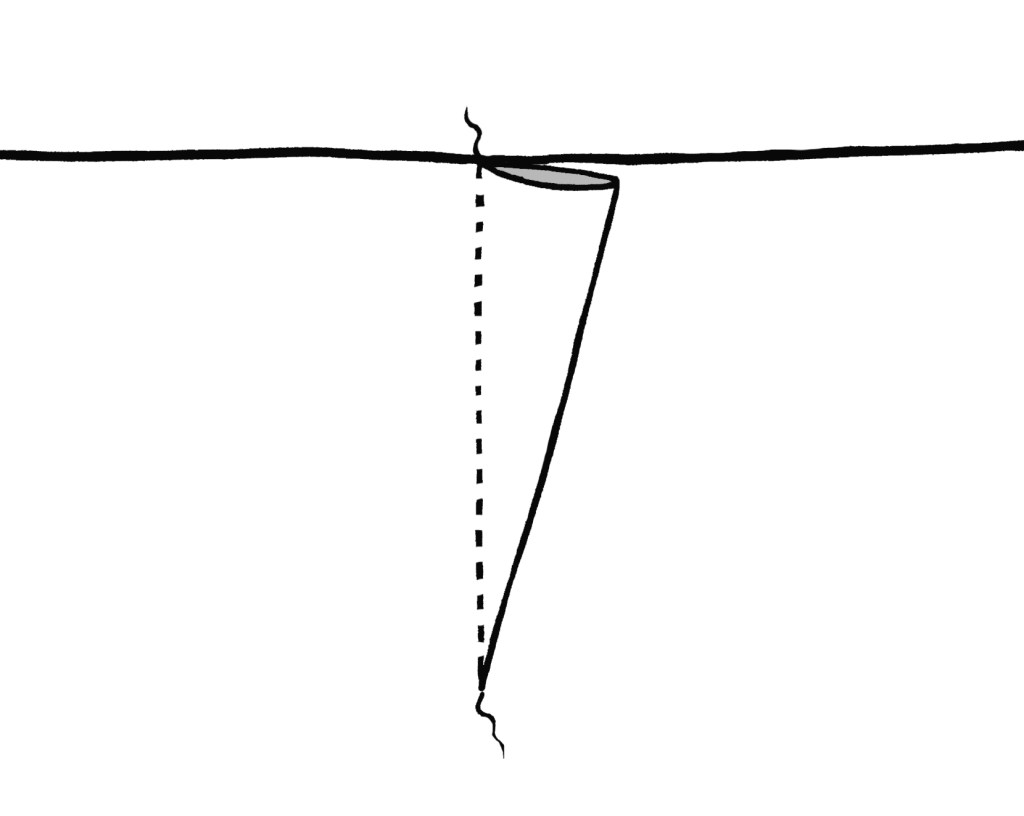
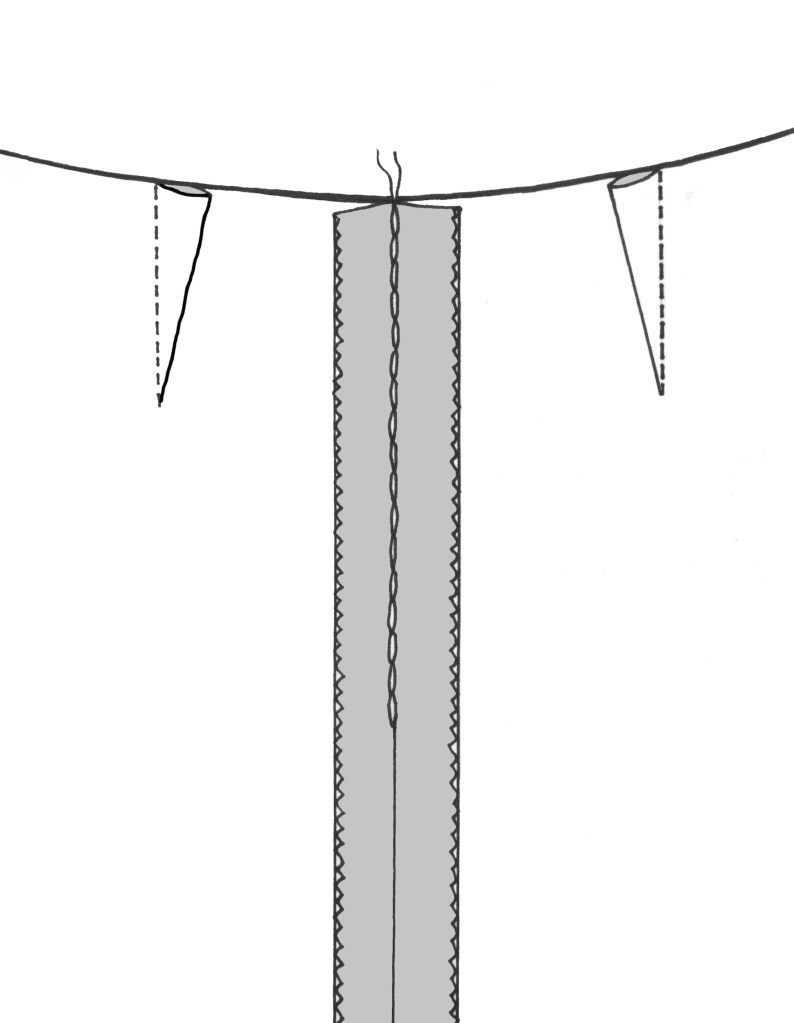
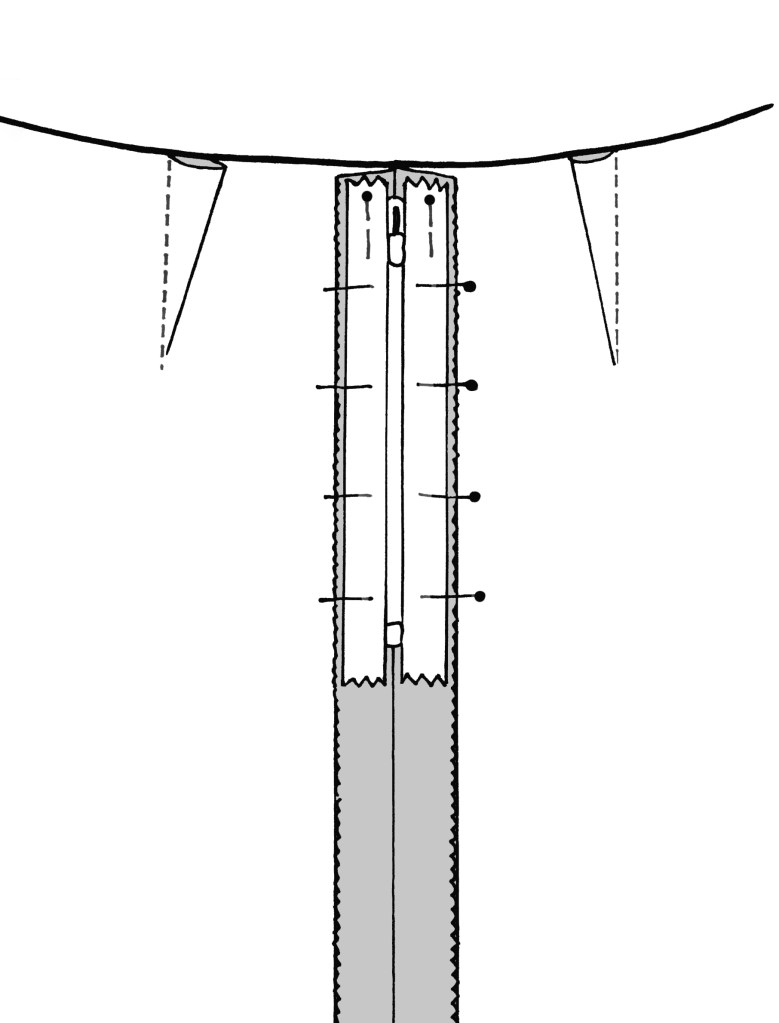
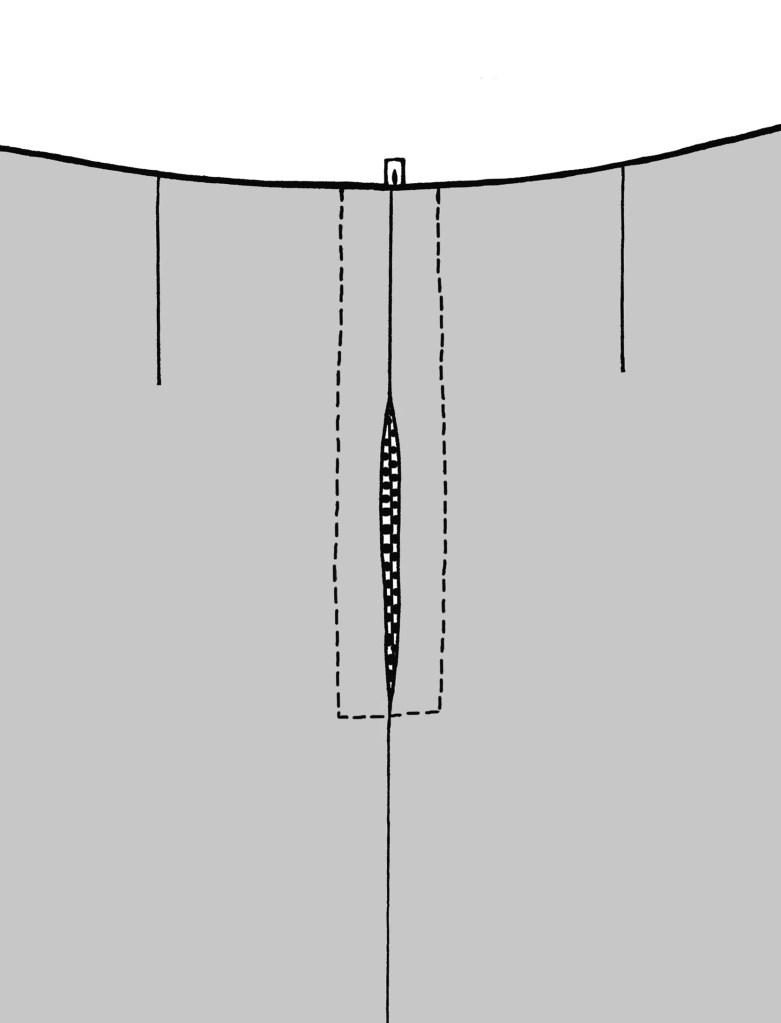
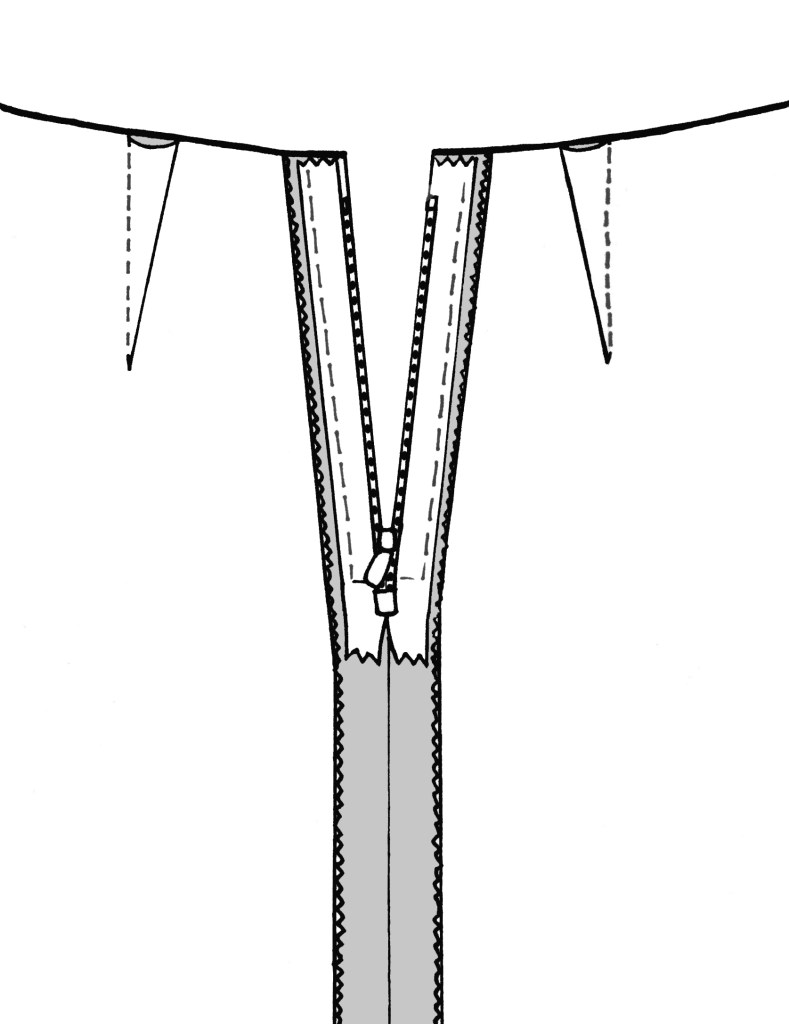
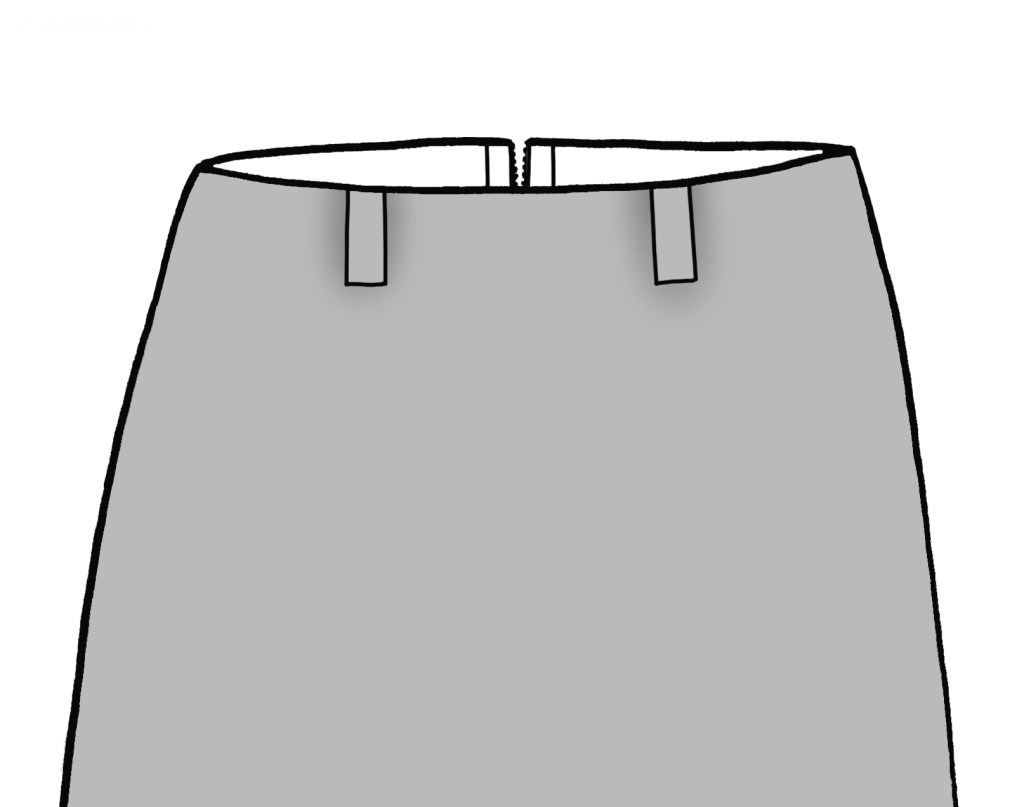
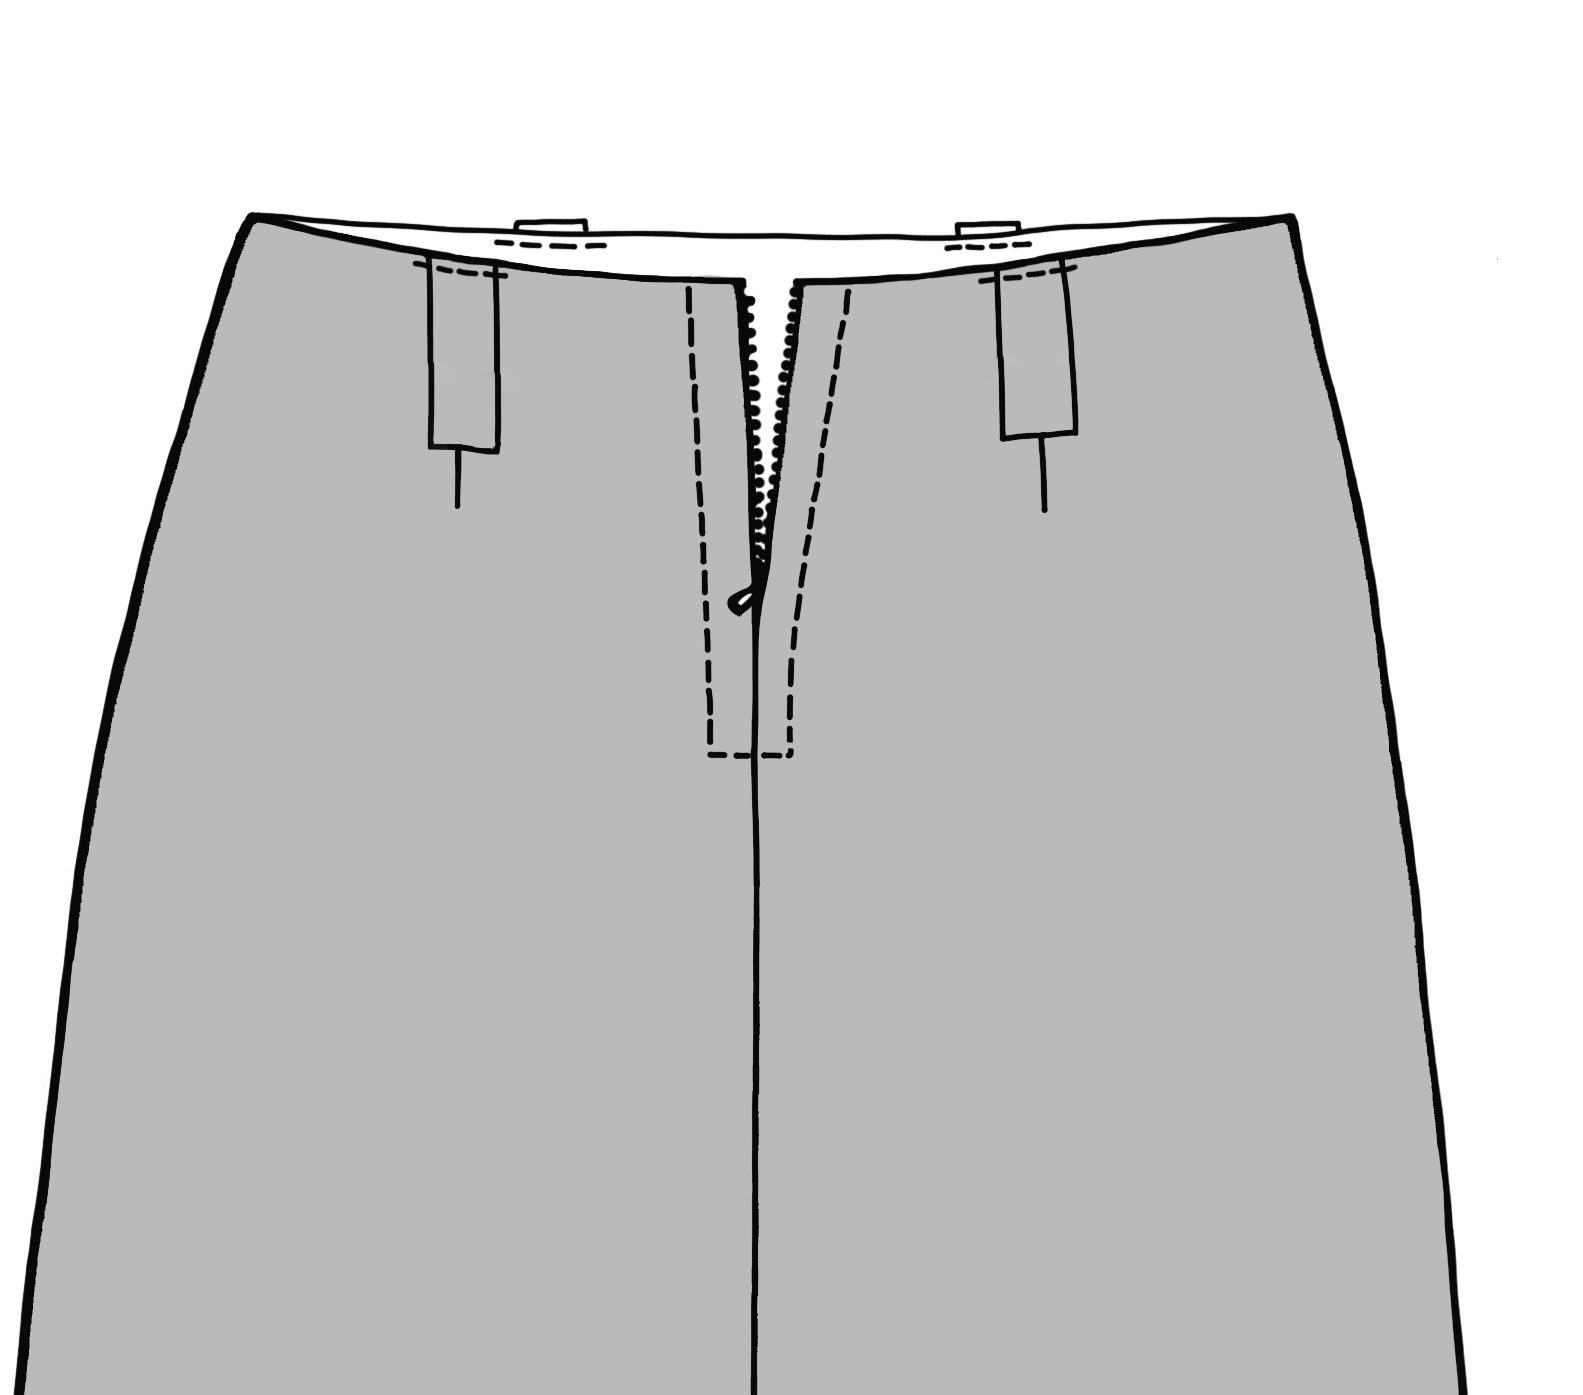
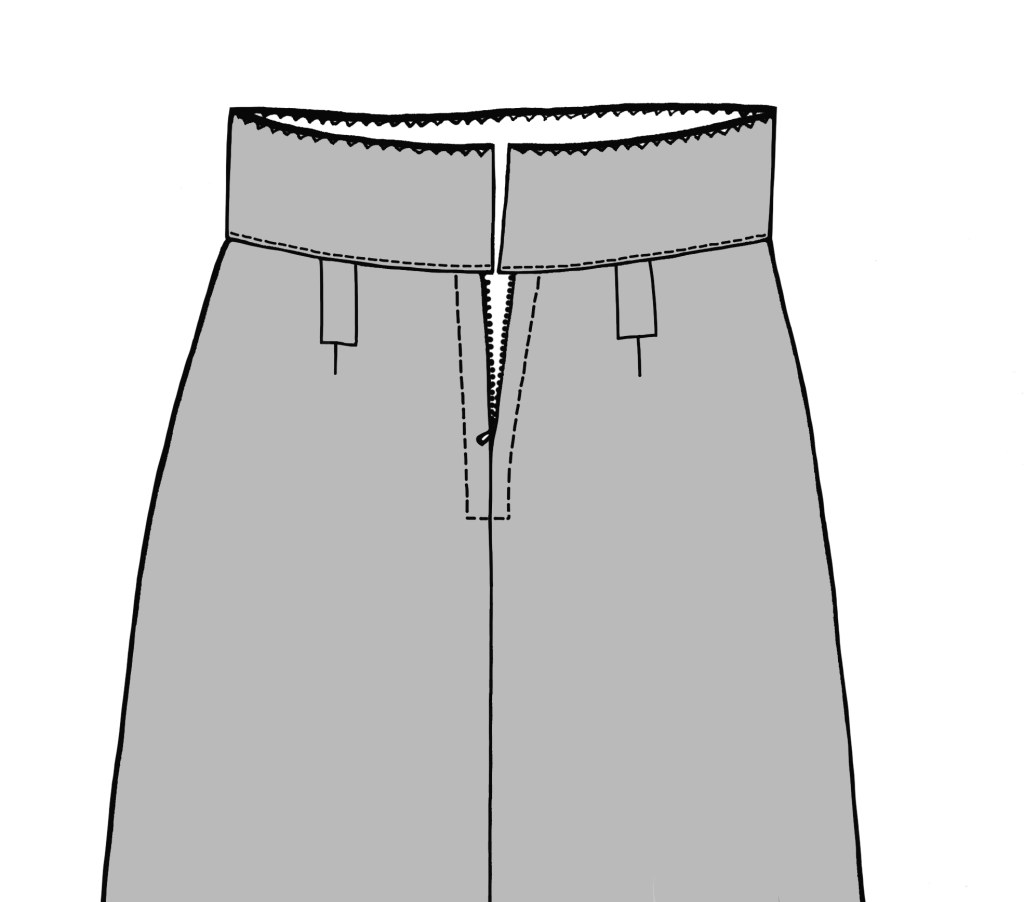
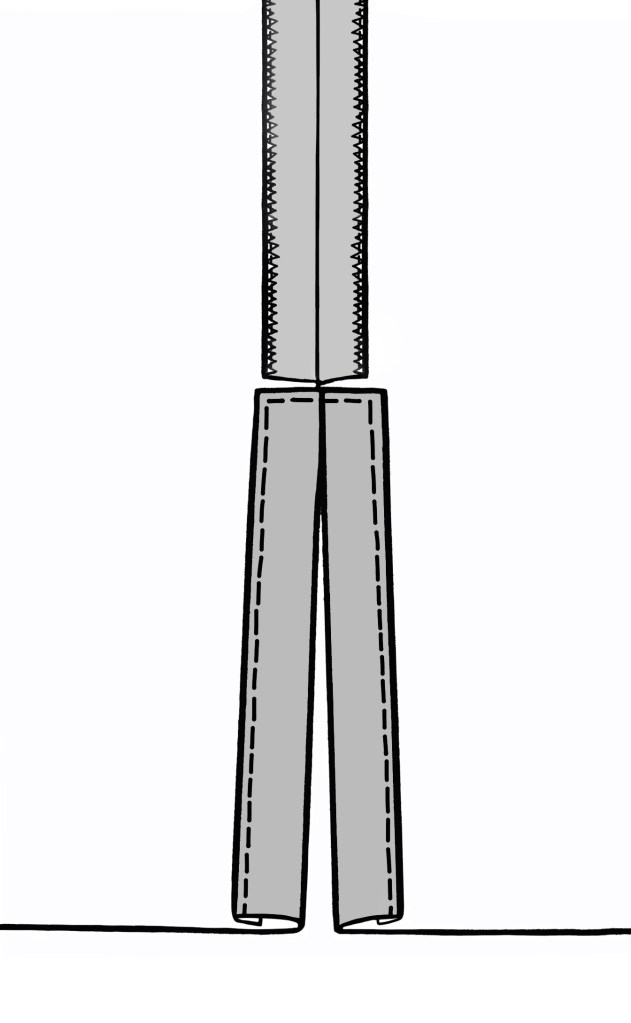
ZIP INSERTION (CENTRE BACK)
Sew the centre back seamPlace the zip face down to the back of the seamStitch all around using a zip footOpen the seam with a stitch unpickZip all done!
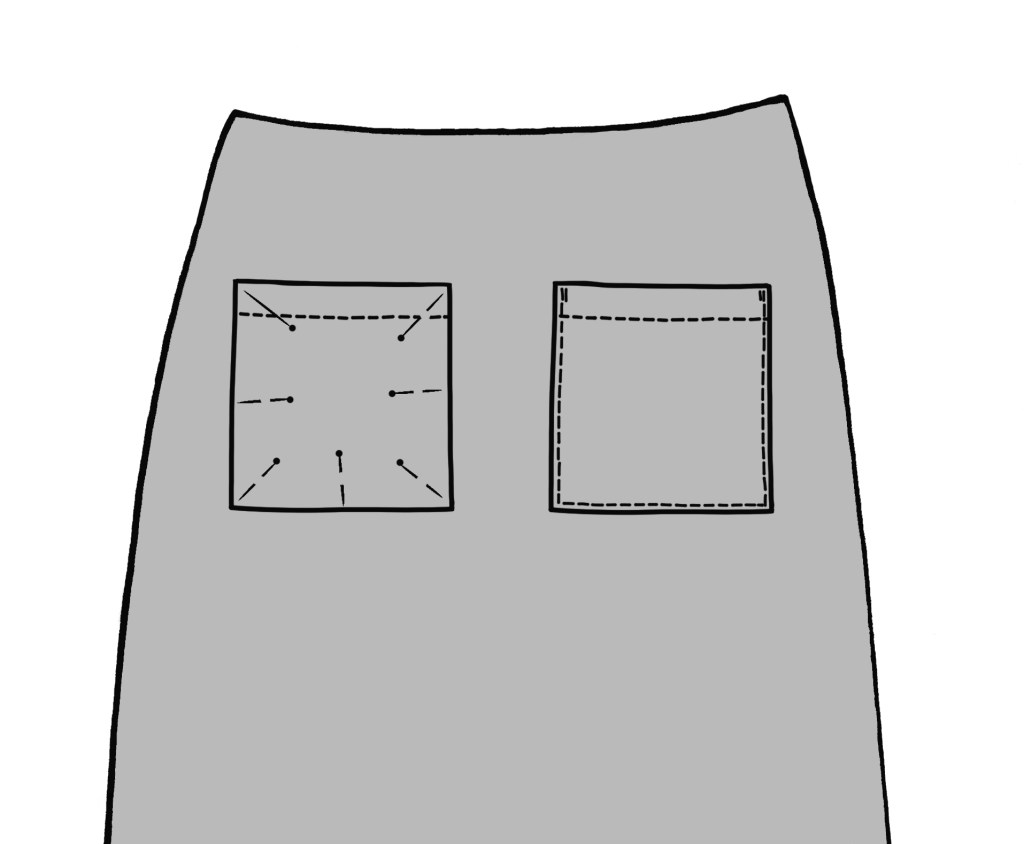
POCKETS (FRONT)
Make the pockets then pin to the Front in position as shown on the template.
Sew the Front to Back at the side seams. Press the seam allowances open.
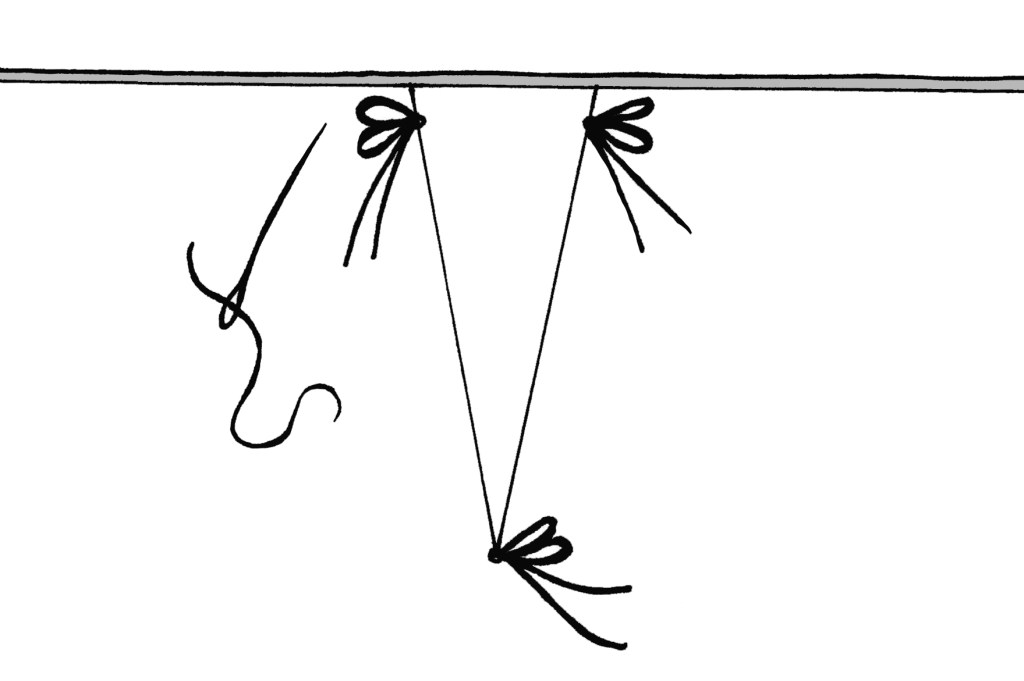
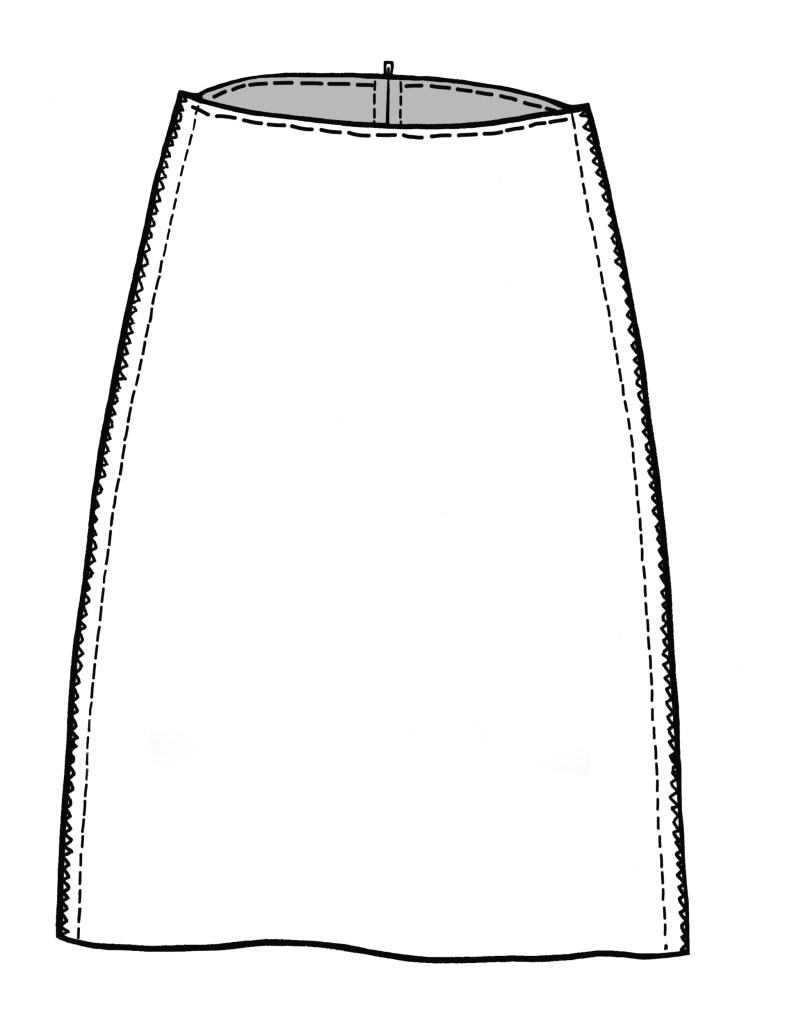
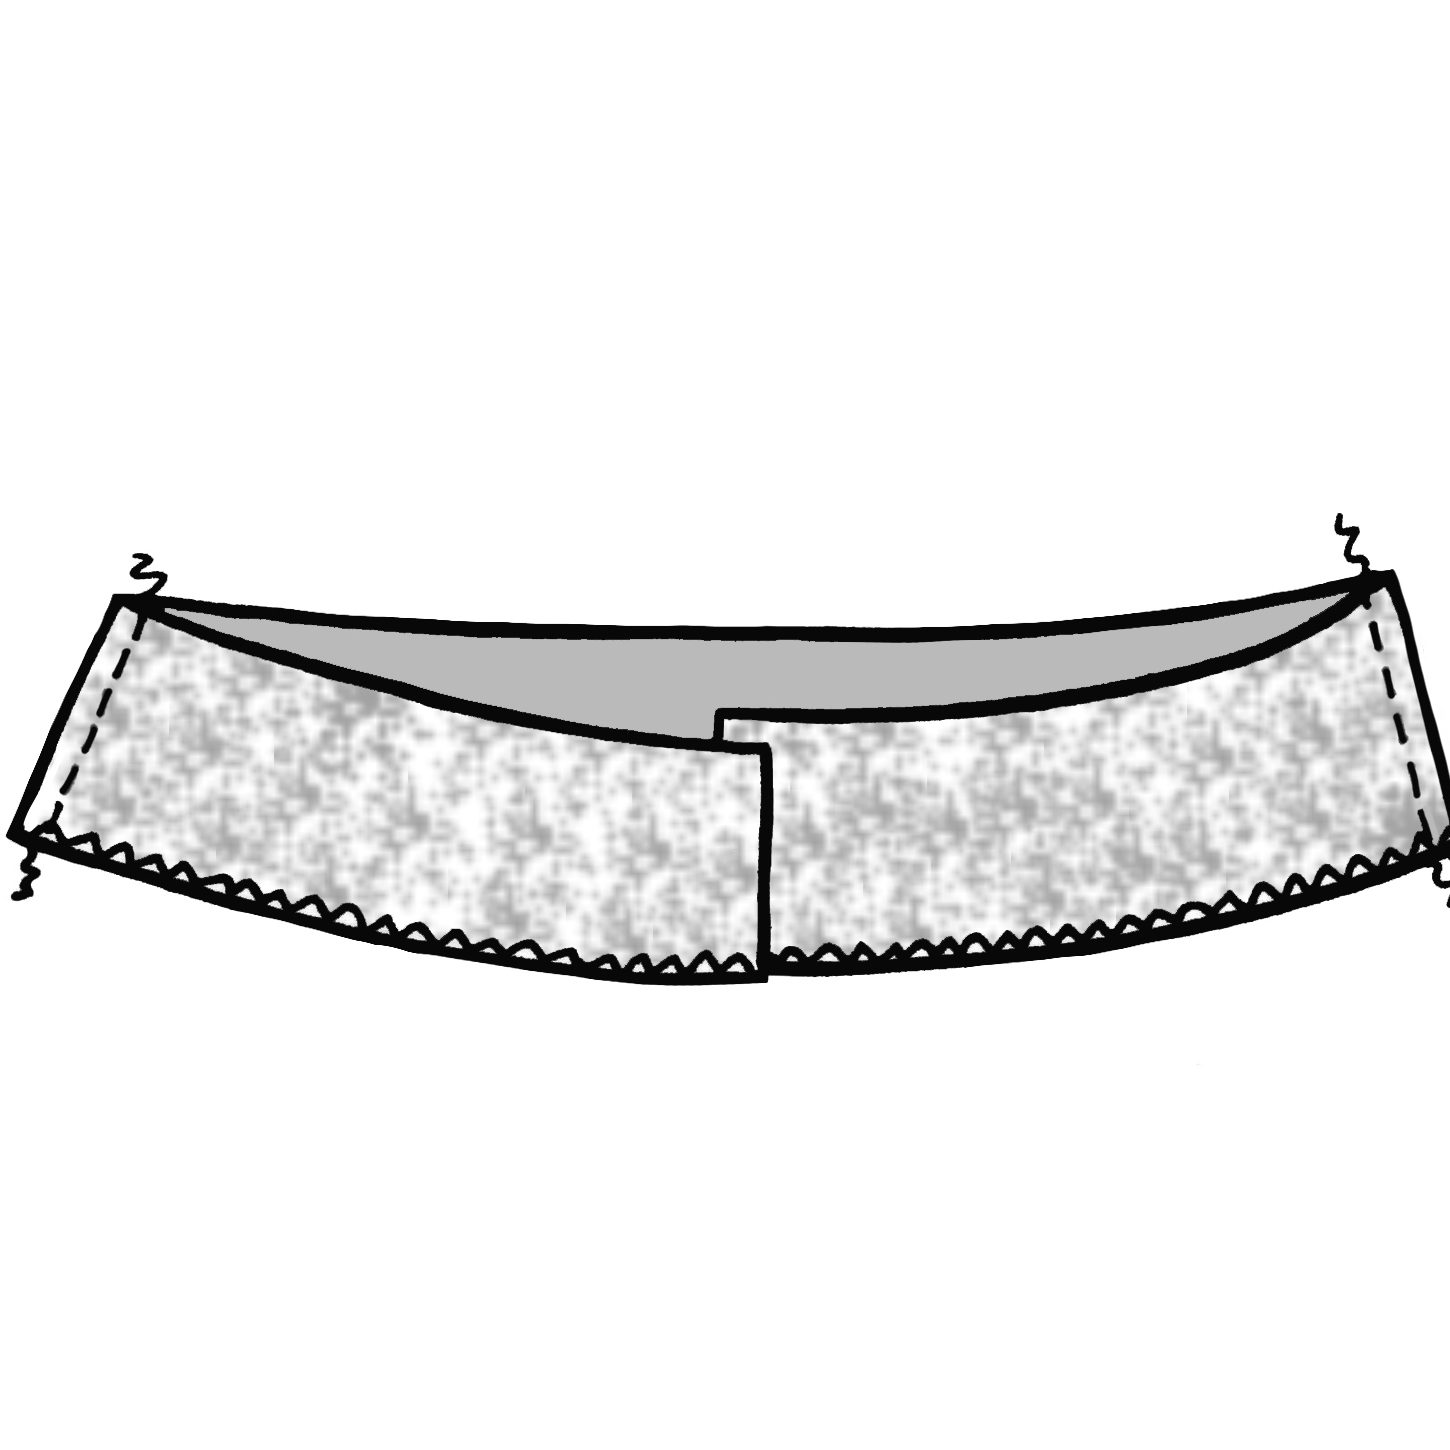
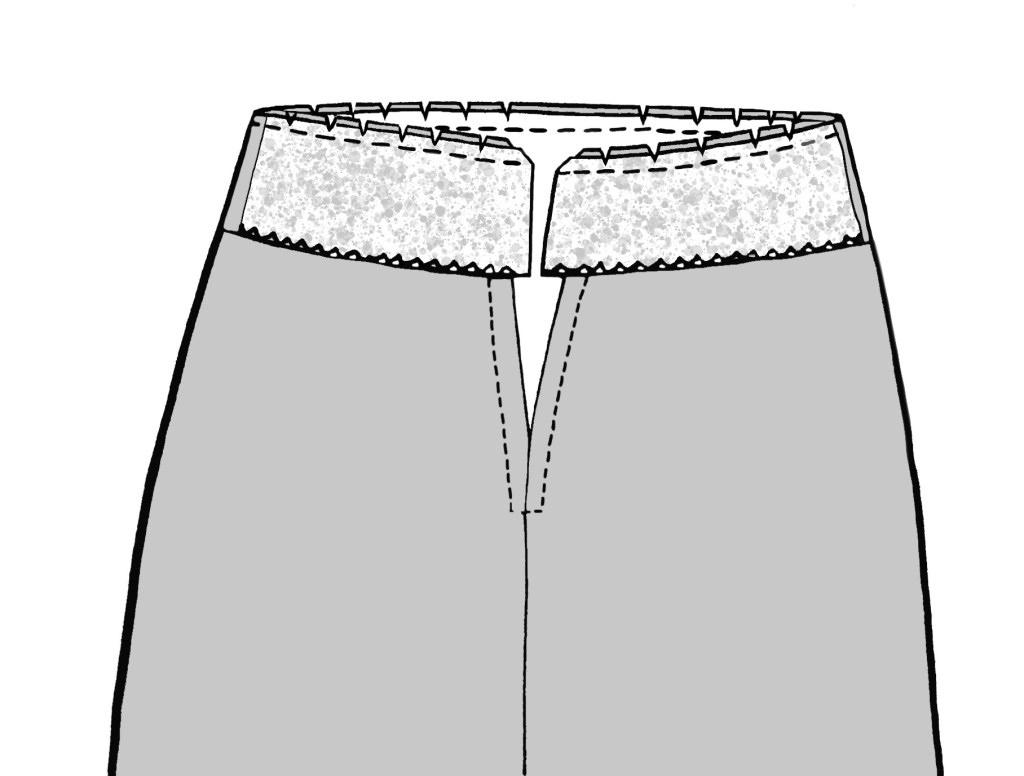
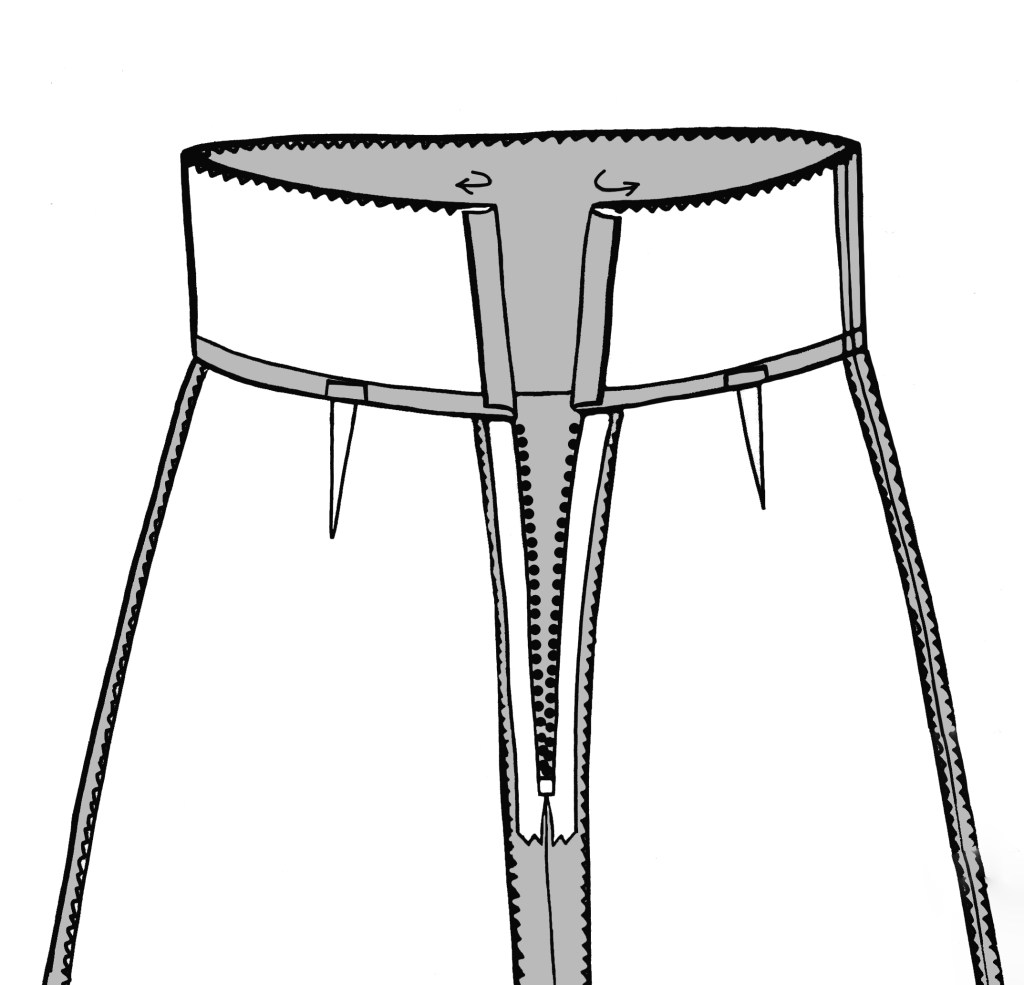
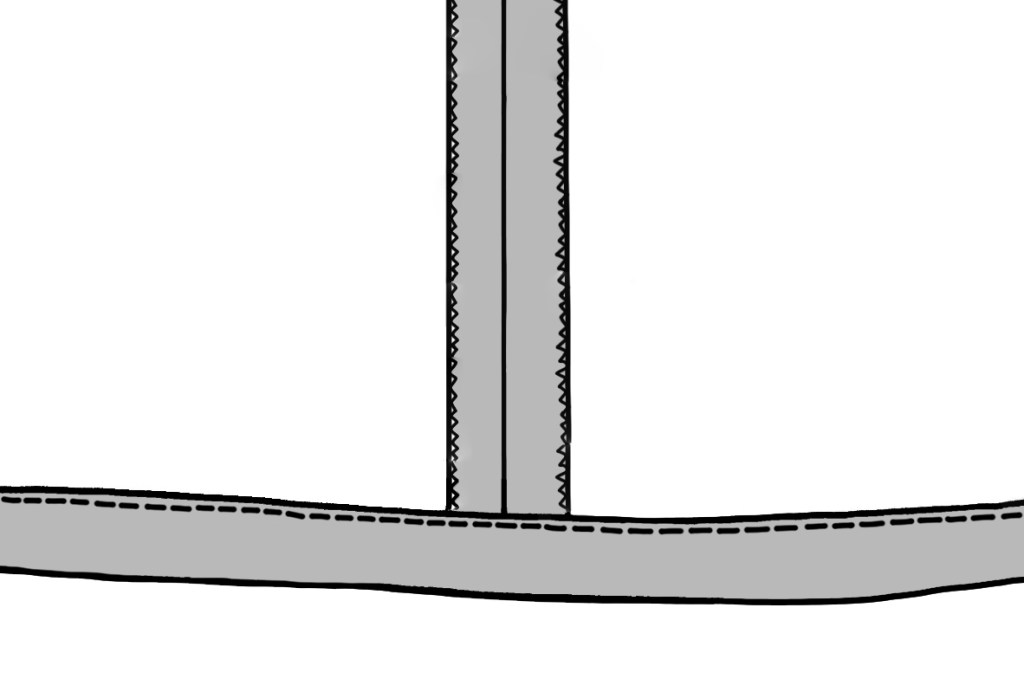
FACINGS
Make the Tabs following the instructions in the booklet.
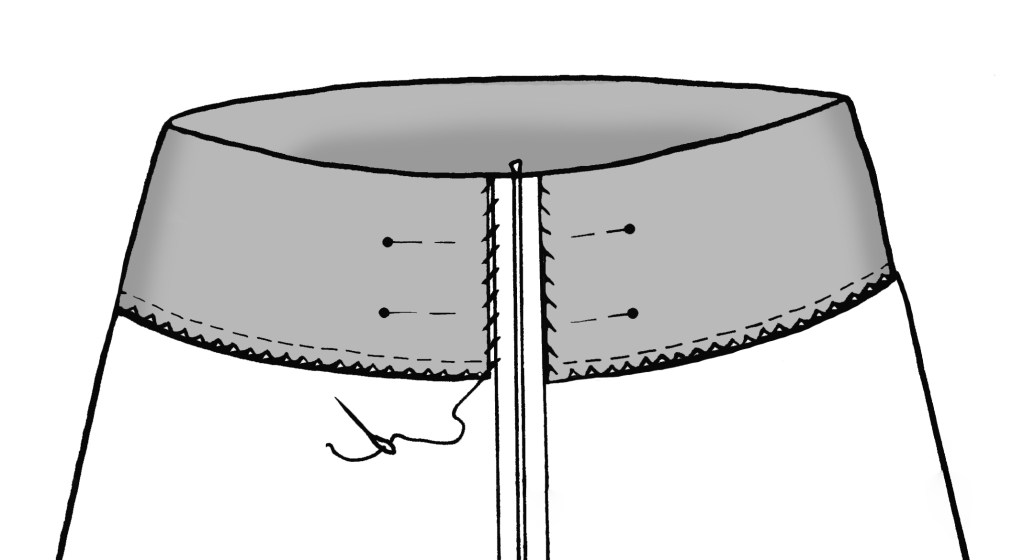
Attach the tabs at the raw top skirt edge.Repeat for the Back. machine tack to secure them.Sew together the Facings at the short side edgesPin the Facing to the Skirt op edge. Allow 1.5cm (5/8″0 to overhang at each far side.Press the Facing away from the Skirt. Understitch all around.Fold under the short edge of the Facing. Fold the Facing over and press. Pin the Facing in position all around. Hand stitch the Facing short edge. Sew the facing around the outer edge, securing the Tabs on the right side.
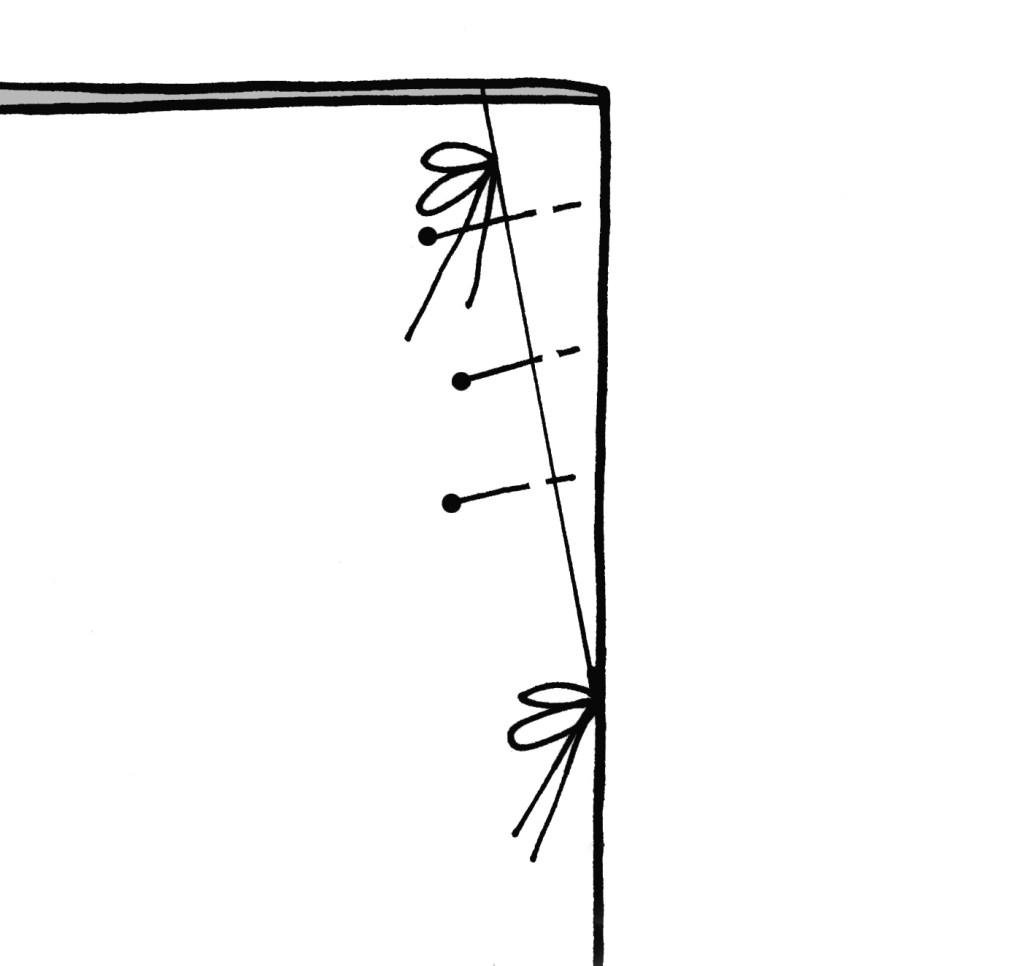
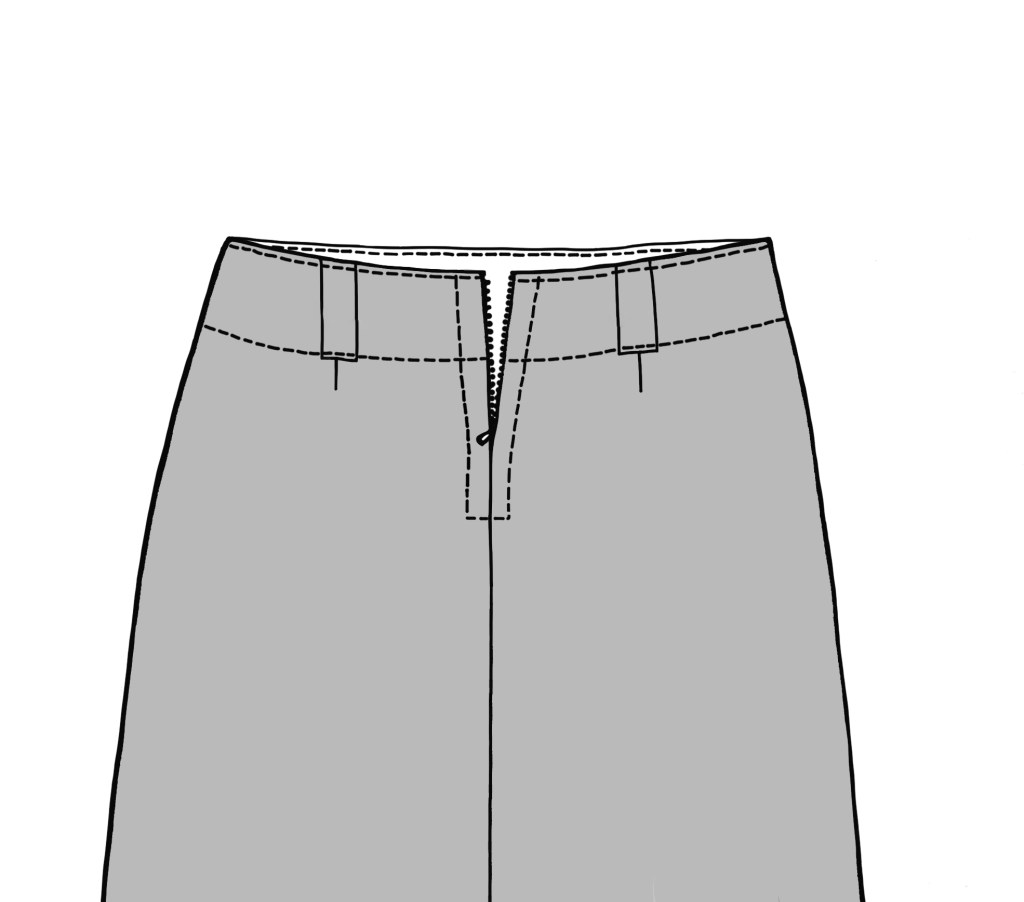
HEMMING
Hem the Side slit. Hem the lower edge all around.
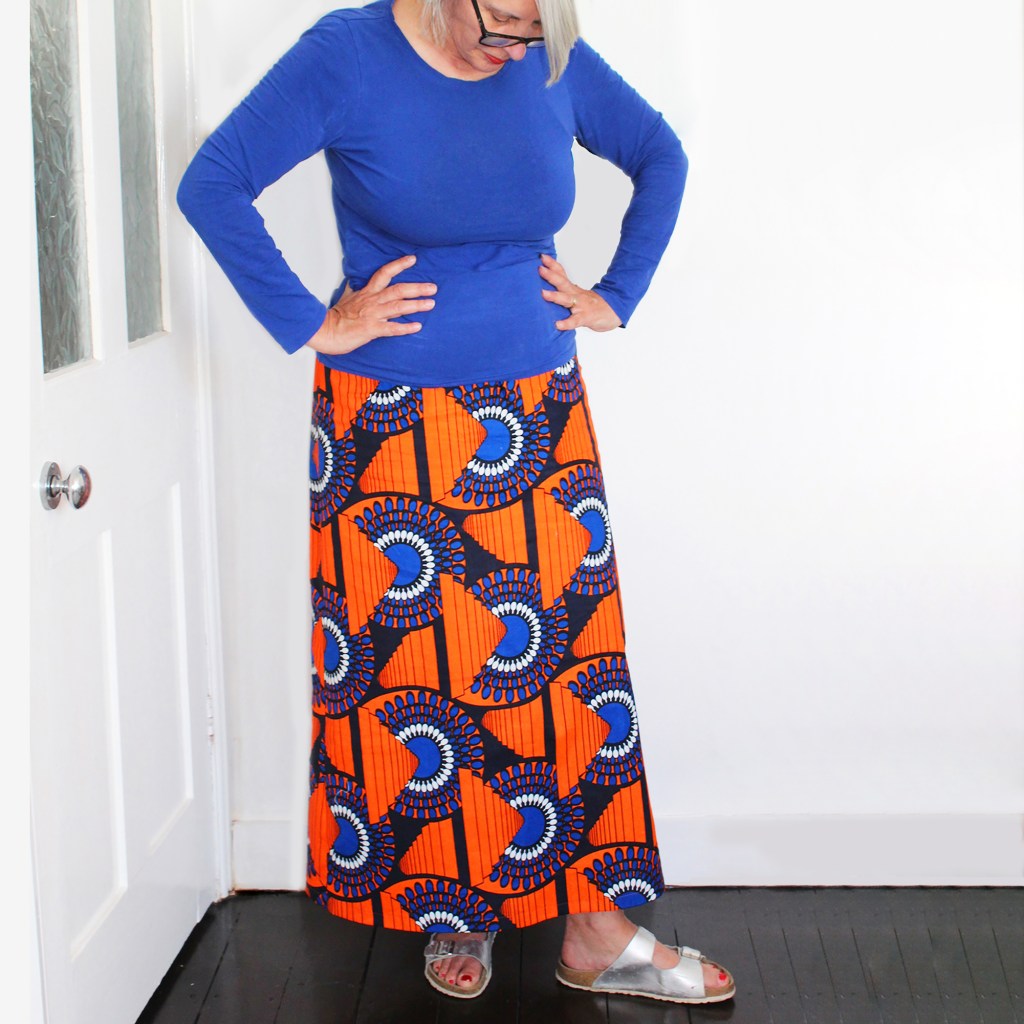
Dotty skirt without pockets in African fabric, worn with sandals.
Dotty skirt worn at Field Day Festival in Hackney, London. Get on down!
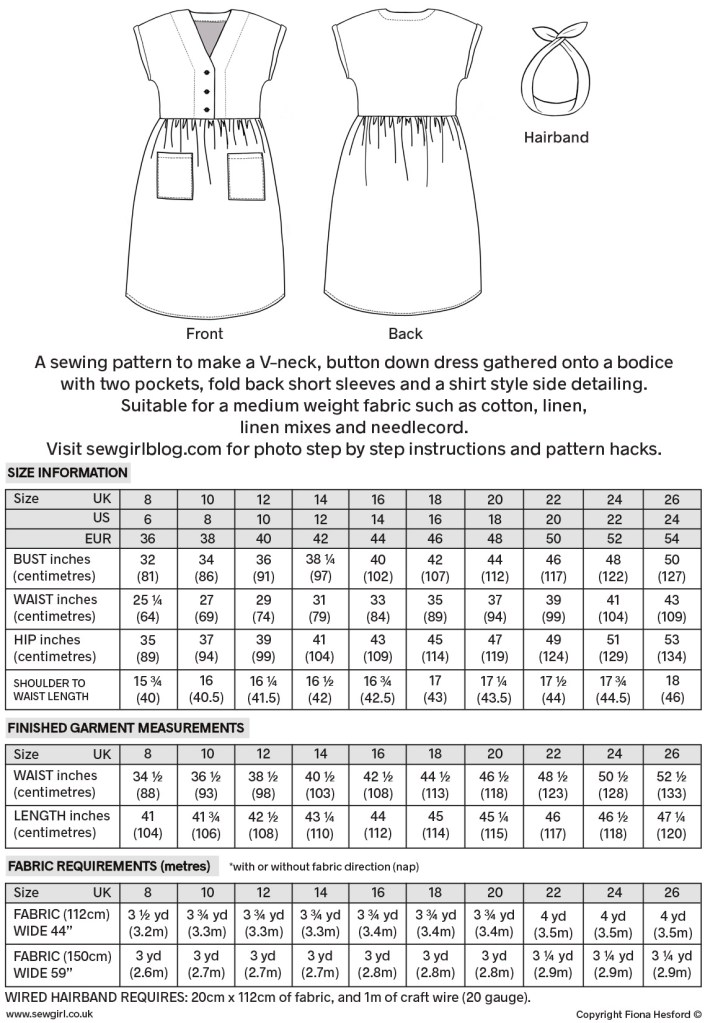
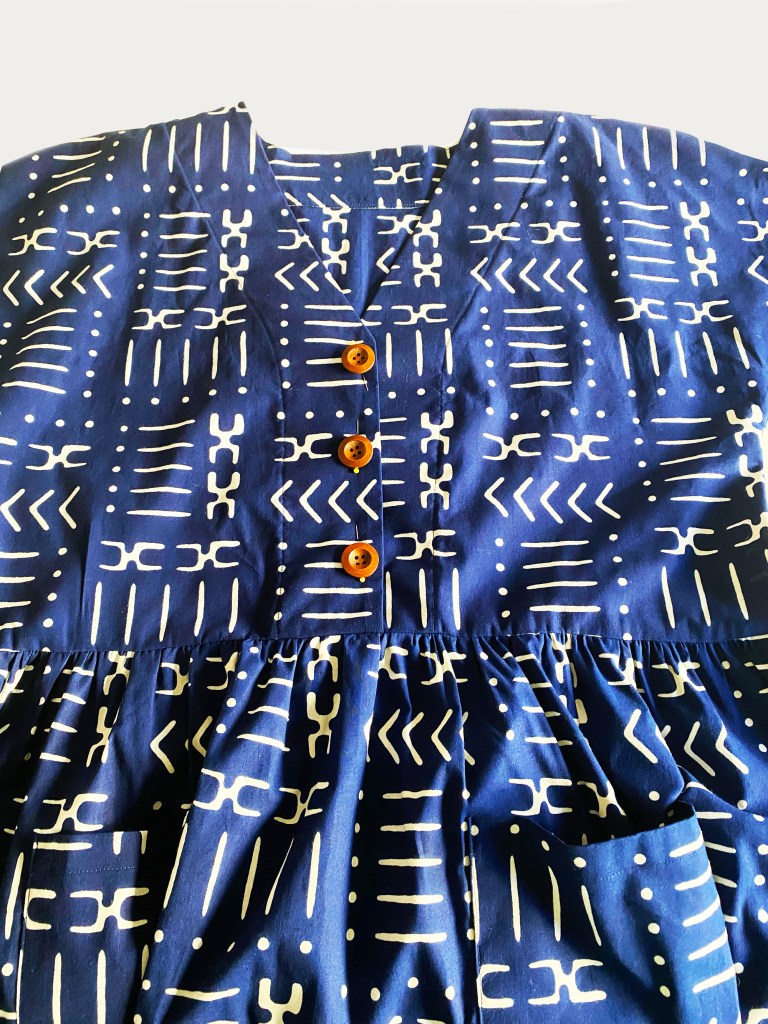
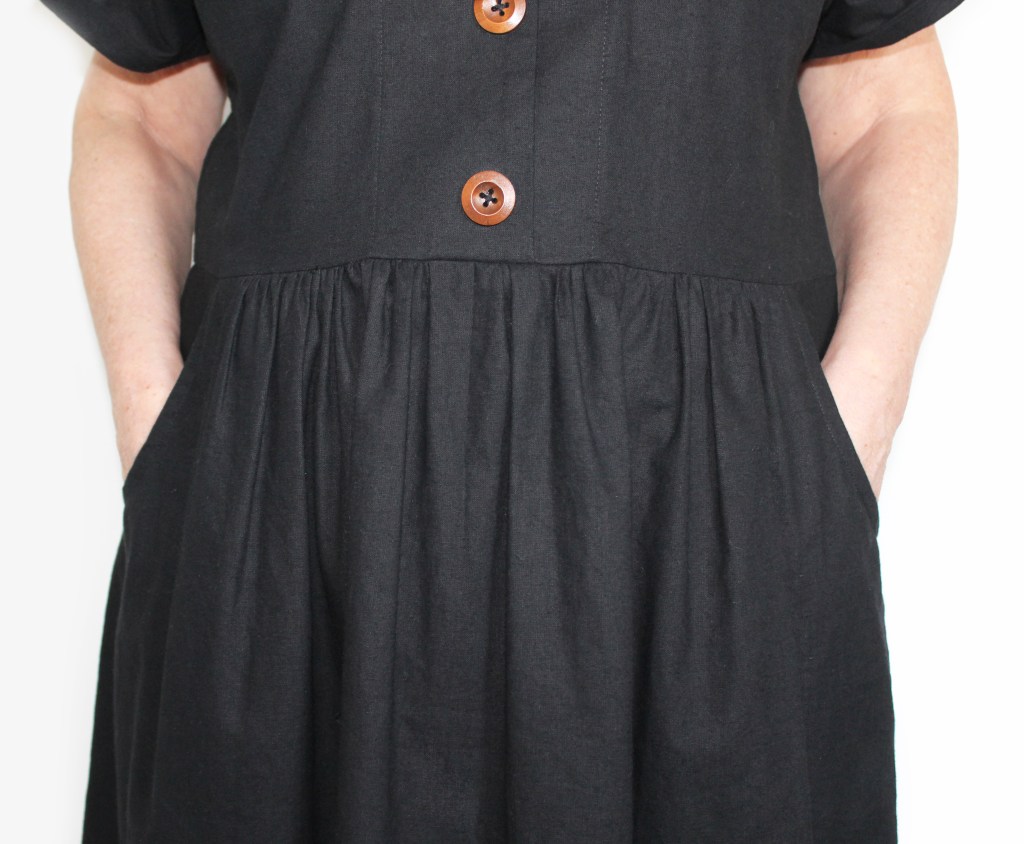
Beatrice dress has a V-neck, button down bodice with ‘cap’ style grown on sleeves, with fold back hems, great for wearing with cardigans and jackets.
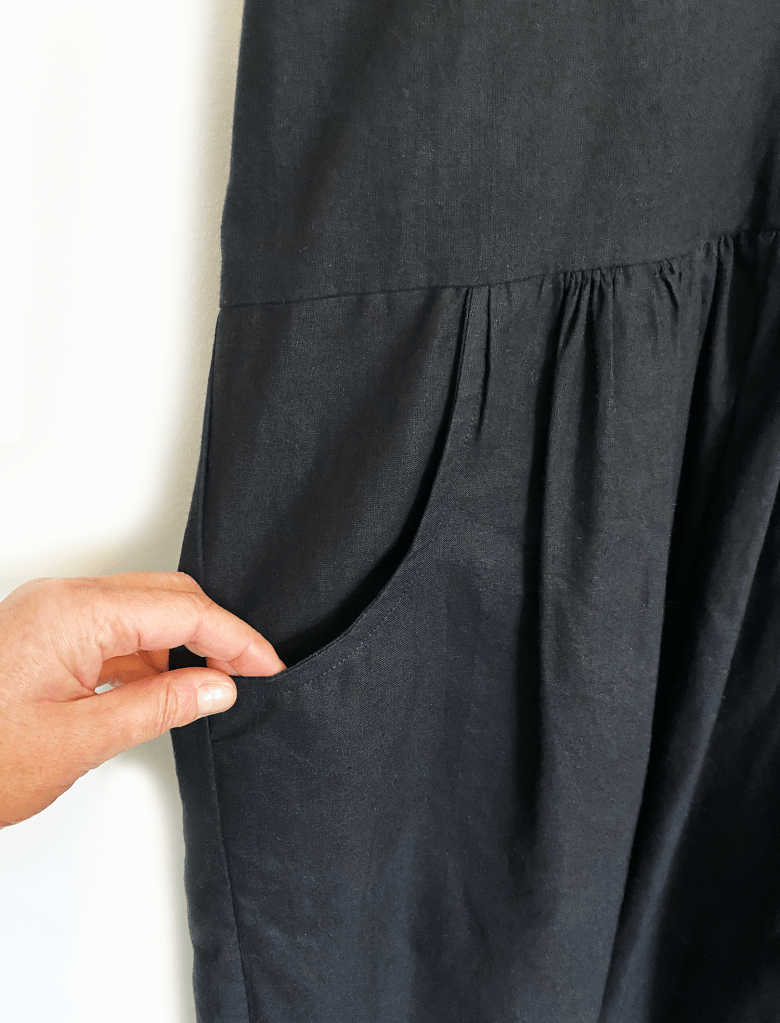
The skirt section is gathered on to the bodice, with a shirt style curved hem detail at each lower far side.
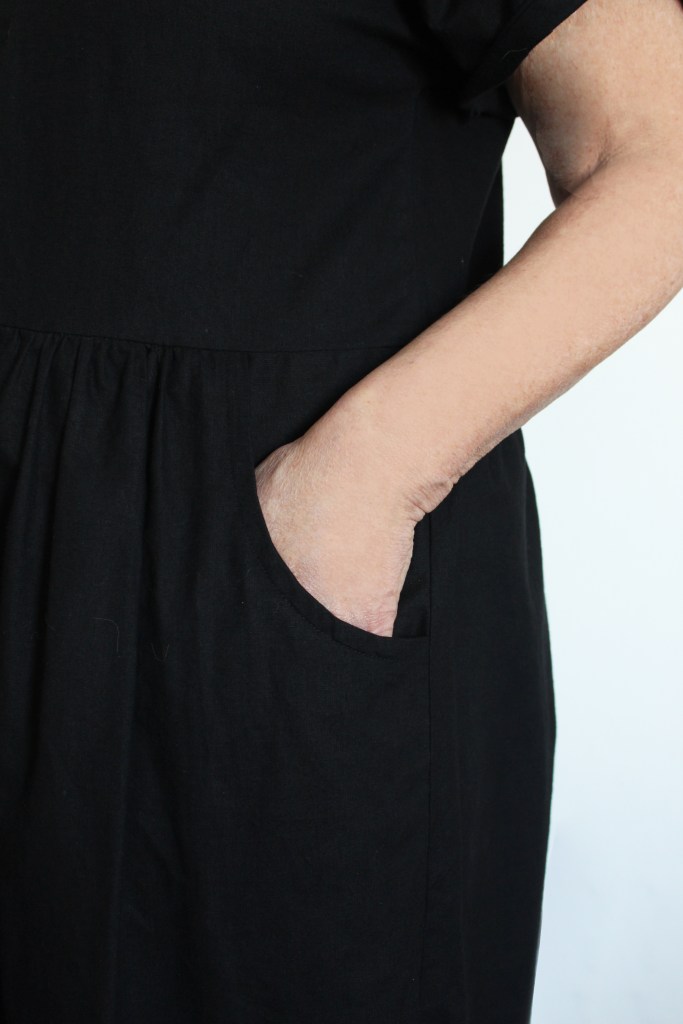
Patch pockets are a must, with an alternative downloadable pocket hack pattern (see the end of this page for details).
Beatrice is a loose fitting, stylish, comfortable dress, suitable for everyday wear as well as special occasions.
Sizes 8-26.
Suitable for beginners/intermediates.
The beauty of the grown on sleeve is that you don’t have to insert a sleeve which can sometimes be rather tiresome (although frankly, I really enjoy setting in sleeves and find it very satisfying). Anyway, I digress….. Beatrice has three feature buttons at the front of the bodice…..however if you fancy leaving off the buttonholes and just sewing them on to the centre front overlap then feel free to do so (I won’t tell on you!) because, hey presto! its possible to pop the dress on easily over your head without having to open up the buttons. How fab is that?
Beatrice looks great in plain cotton or linen as well as patterned fabric. That Italian mama look is a classic!
And one other thing- you get the instructions to create a matching wired hairband included in the pattern.
Ta dah!
Here is a copy of the info you find on the back of the pattern.
The inspiration behind Beatrice is a French actress called Beatrice Dalle.
In 1986 I moved to Paris to live and work in the fashion industry for 6 years. When I arrived the film ‘Betty Blue‘ had just come out, starring the incredible Beatrice Dalle. She embodied the Parisian style that was an inspiration to a young English girl starting out her career in the industry. I truly can’t believe I’m still working in fashion almost forty years on. Thanks Beatrice!
How to make the Beatrice Dress.
This page shows you the basics- the pattern instructions contain more in depth text and illustrations.
Seam allowance is 1cm.
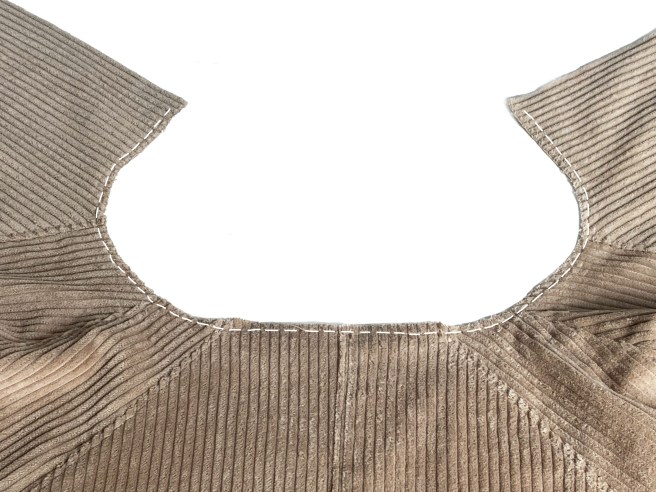
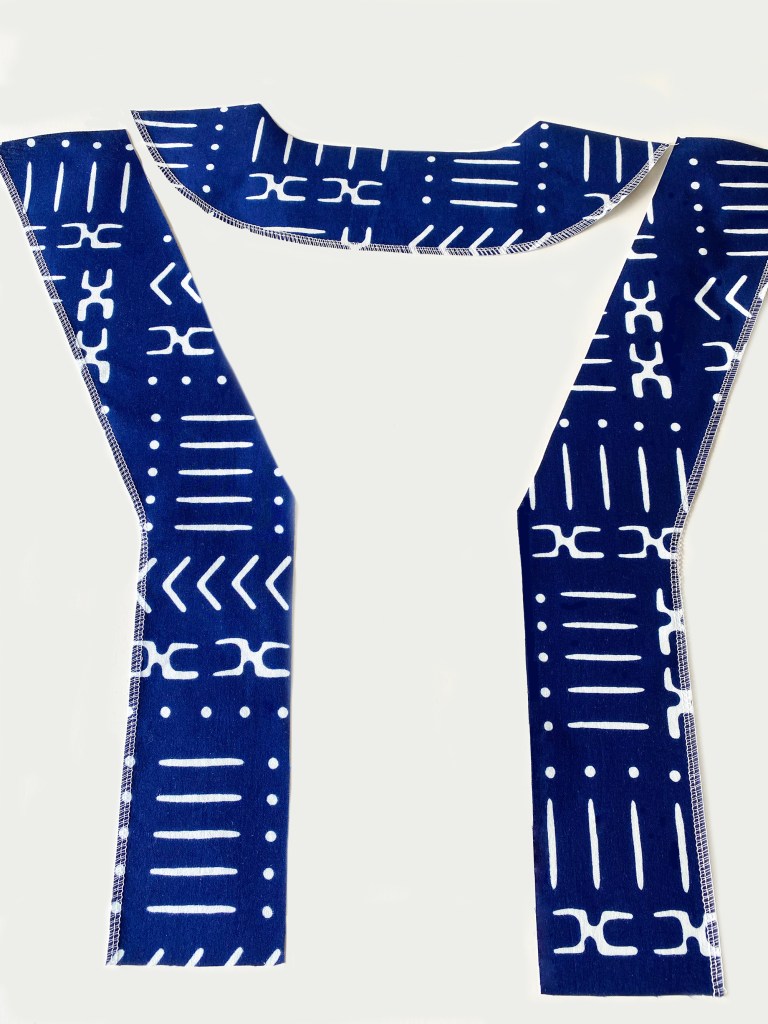
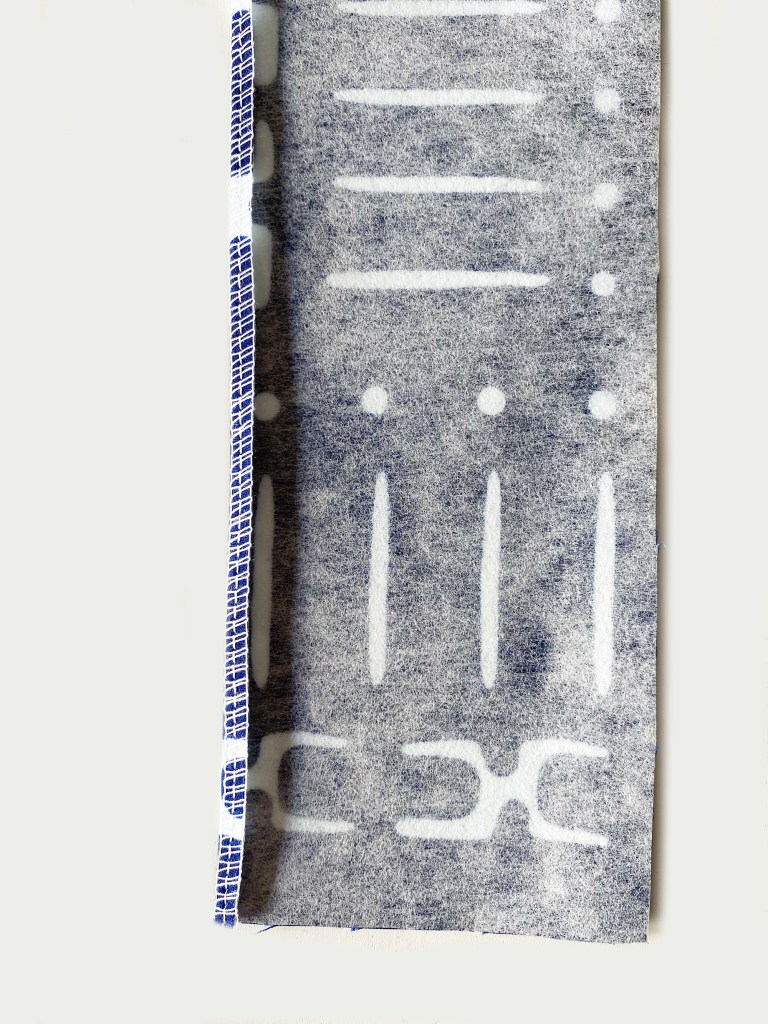
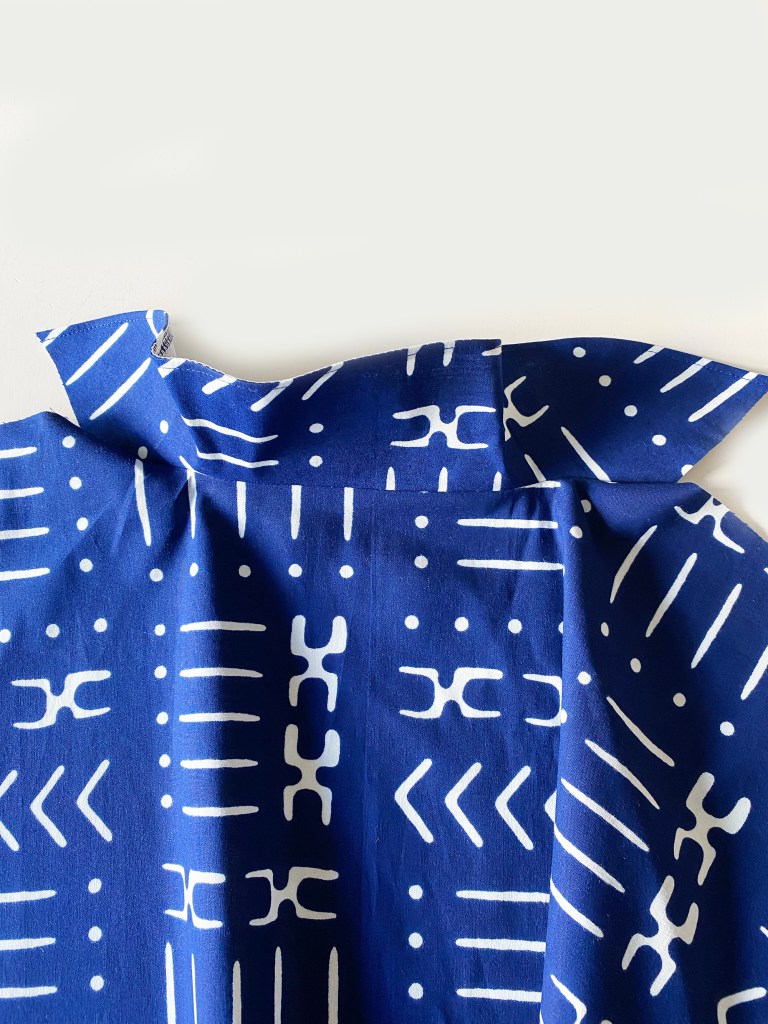
FRONT & BACK NECK FACINGS-After Staystitching* the Front and Back Bodice neck edges, the Facing pieces are folded and pressed over 1cm at the outer raw edges. Do not stitch them at this stage. (* see the pattern glossary for instructions about staystitching).
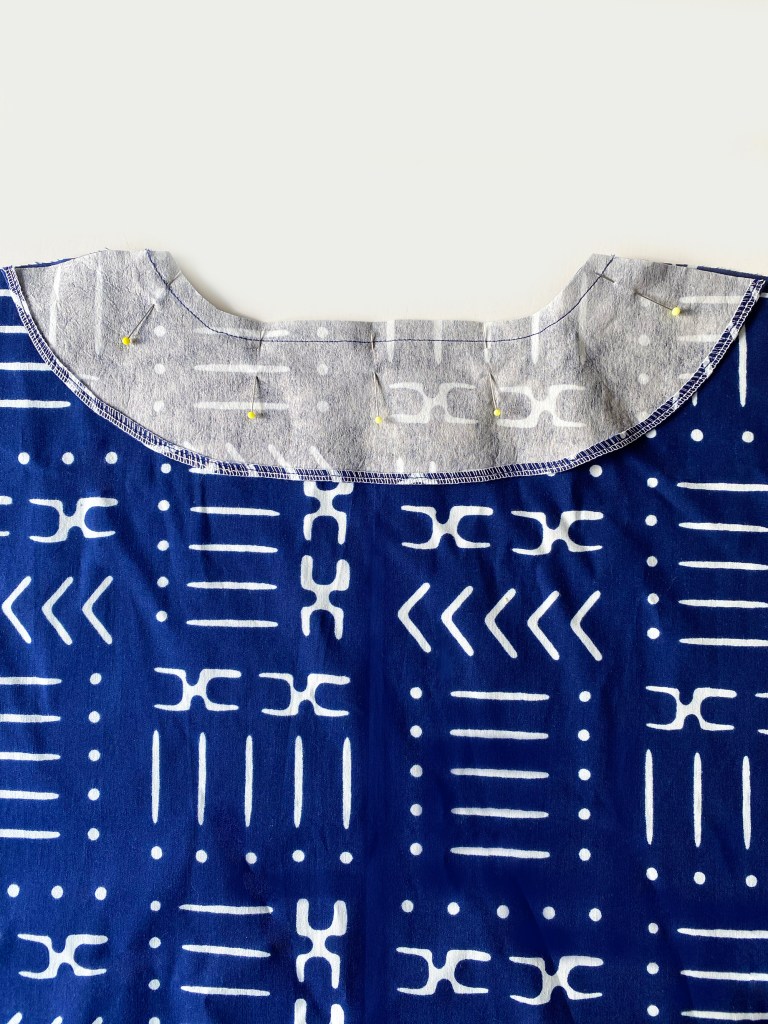
Back Neck Facing
Pin the Back Neck Facing to the Bodice Neck edge with the right sides facing. Sew along the neck edge only.
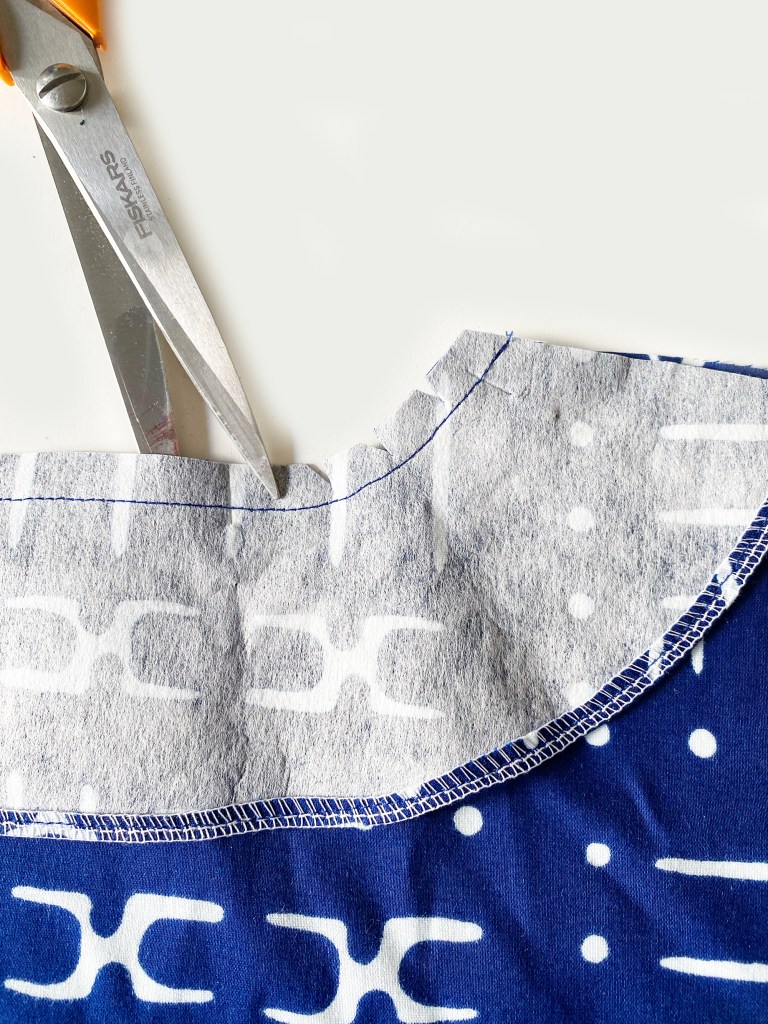
Nick the seam allowance curved sections.
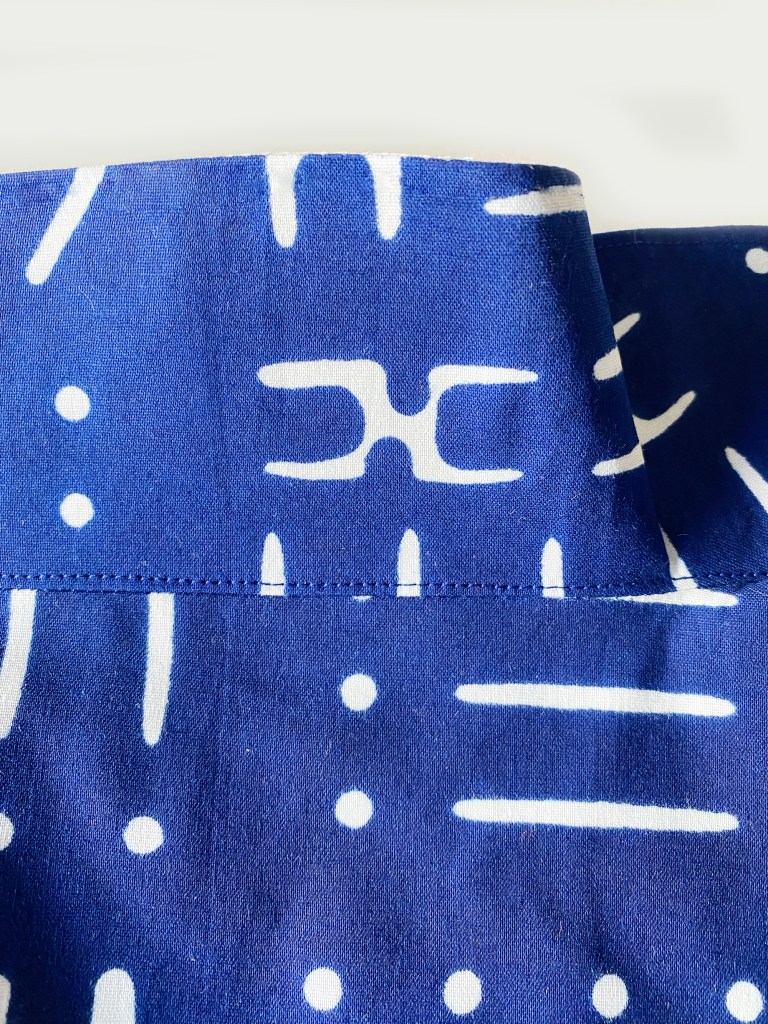
Press the Facing upwards.
Understitch*
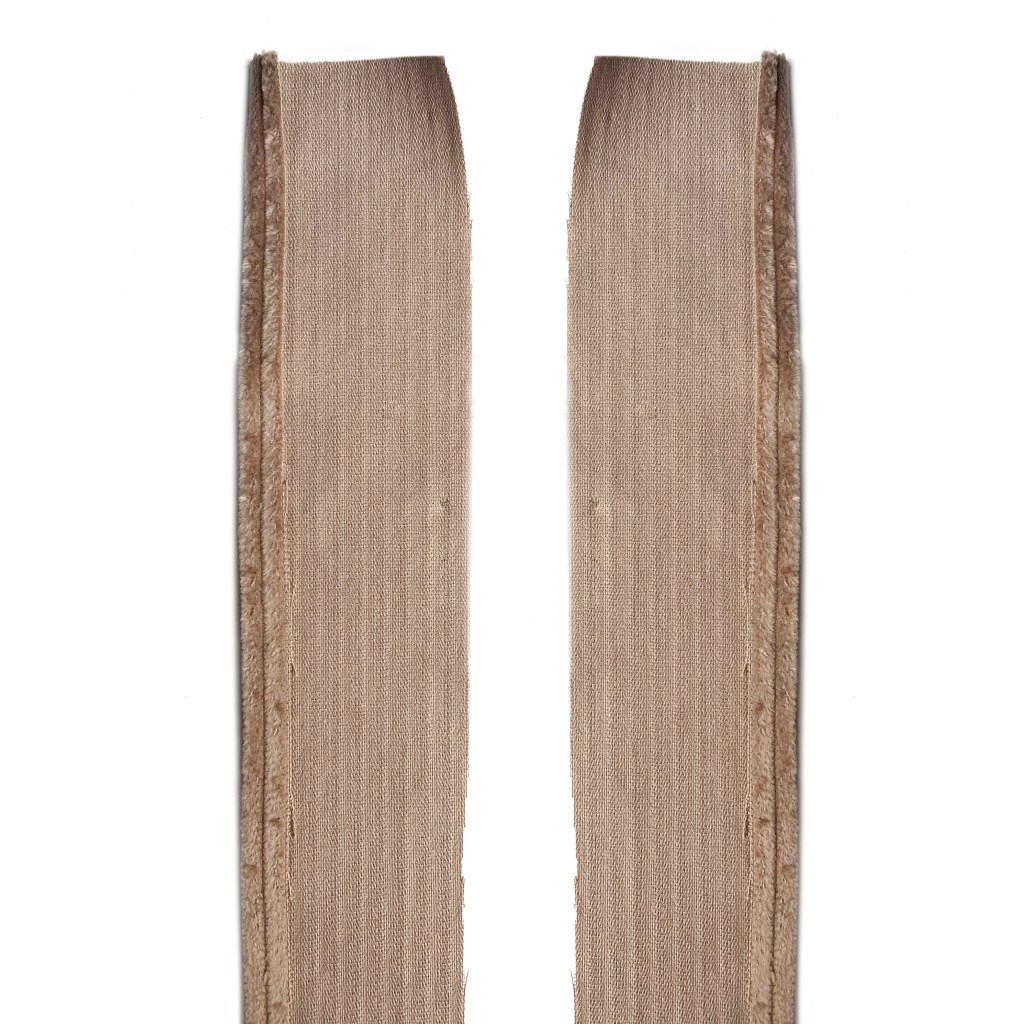
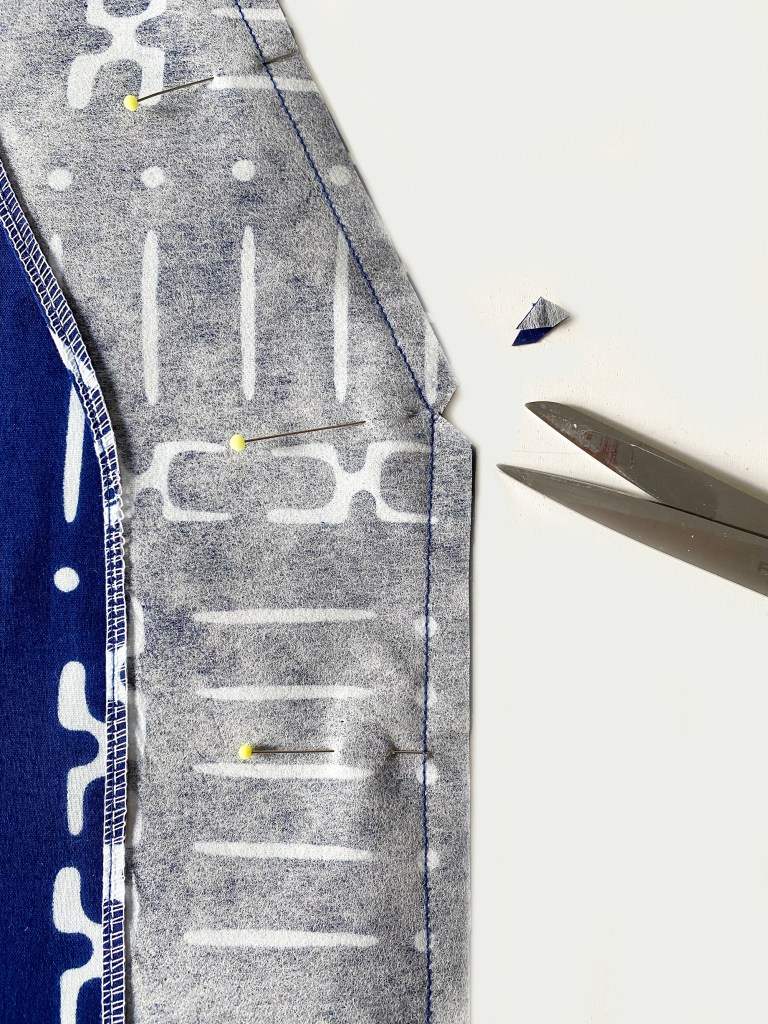
Front Neck Facing
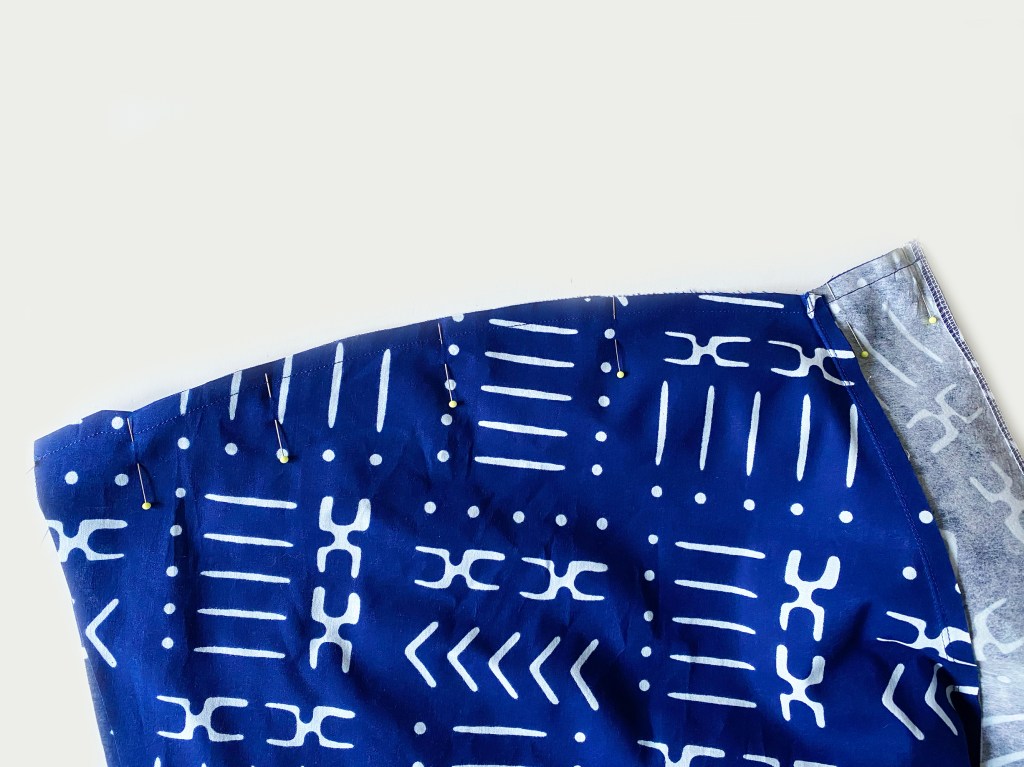
Pin the Front Neck Facing to the Front vertical edge. with the fabric right sides together.
Sew down the outer edge only. Nick the slanted section with a small V.
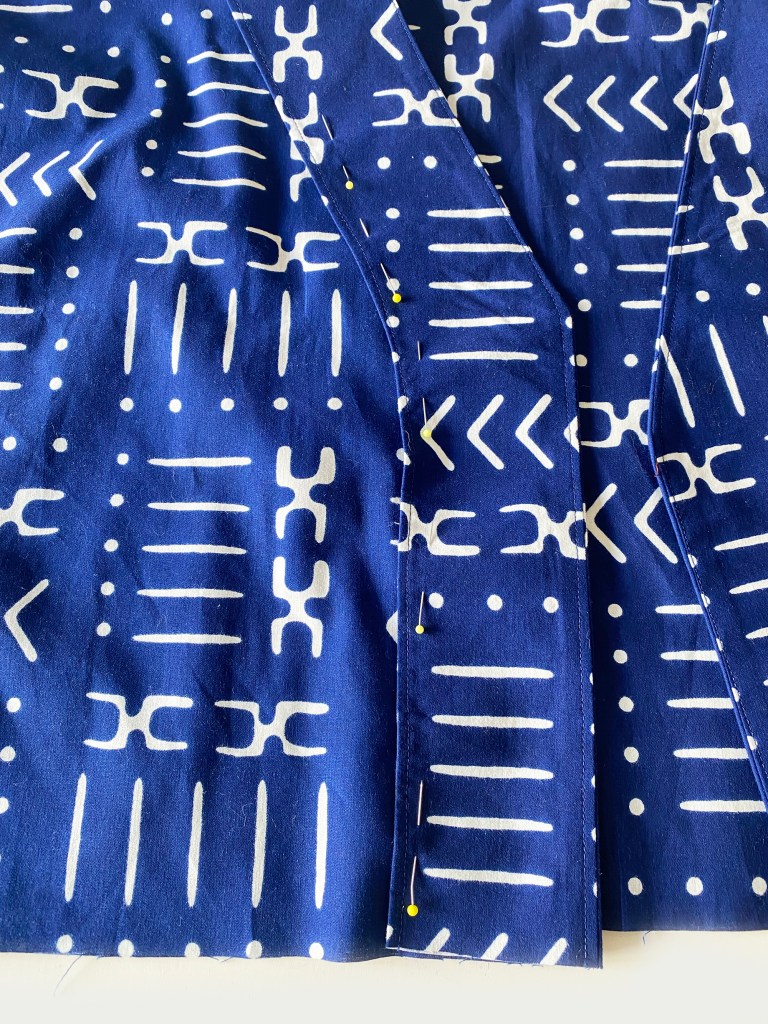
Press the Front Neck Facing away from the Bodice. Understitch on the Facing side.
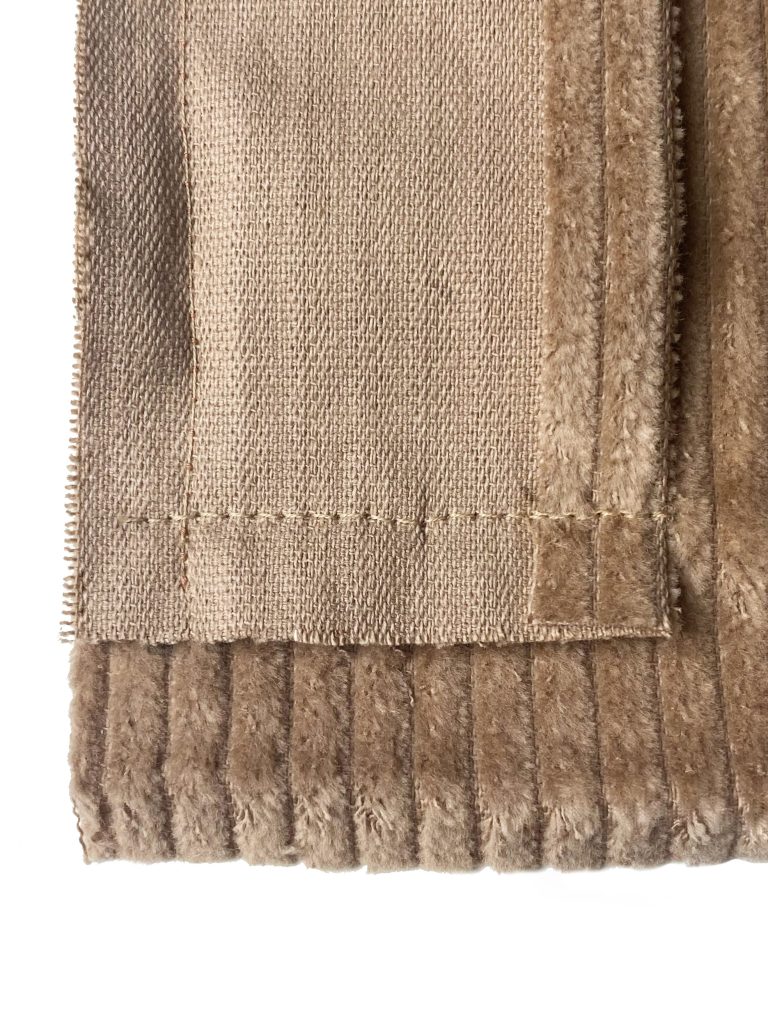
Join the Shoulder edges and Facing short edges. Fabric right sides facing together. Finish the raw edges together. Press he seam allowance towards the back. Topstitch the shoulder seam on the right side of the fabric.
Finally, pin the Facing to the Bodice at the folded, outer edge all around. Tack stitch. Topstitch close to the Facing outer folded edge all around.
Press.
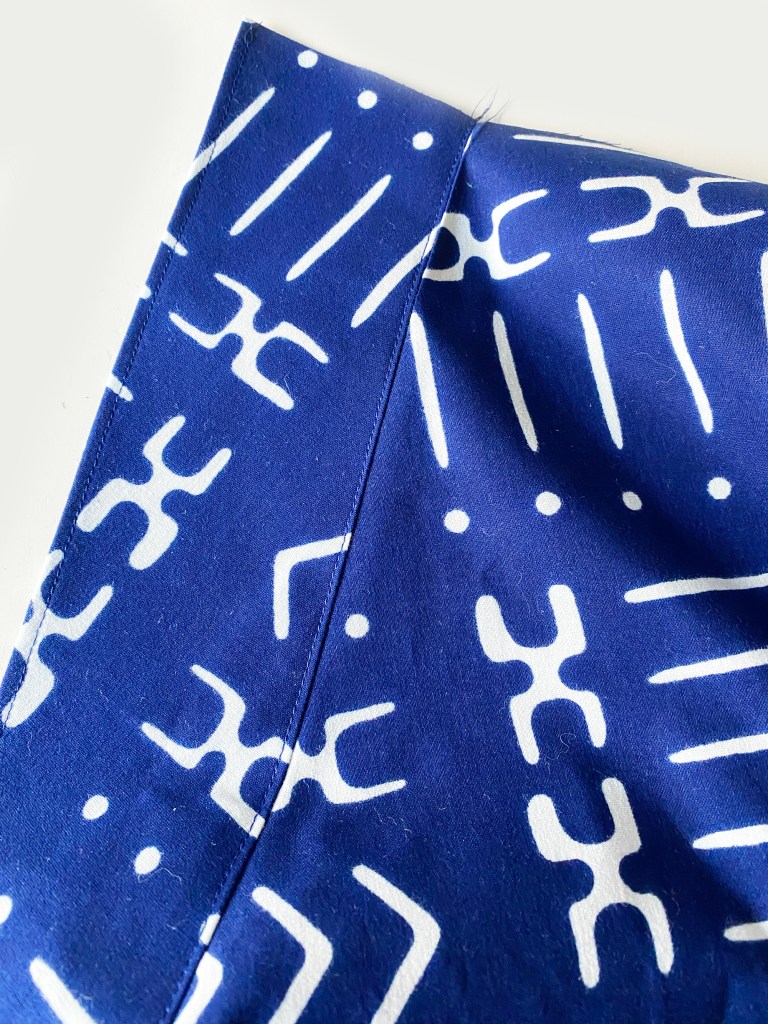
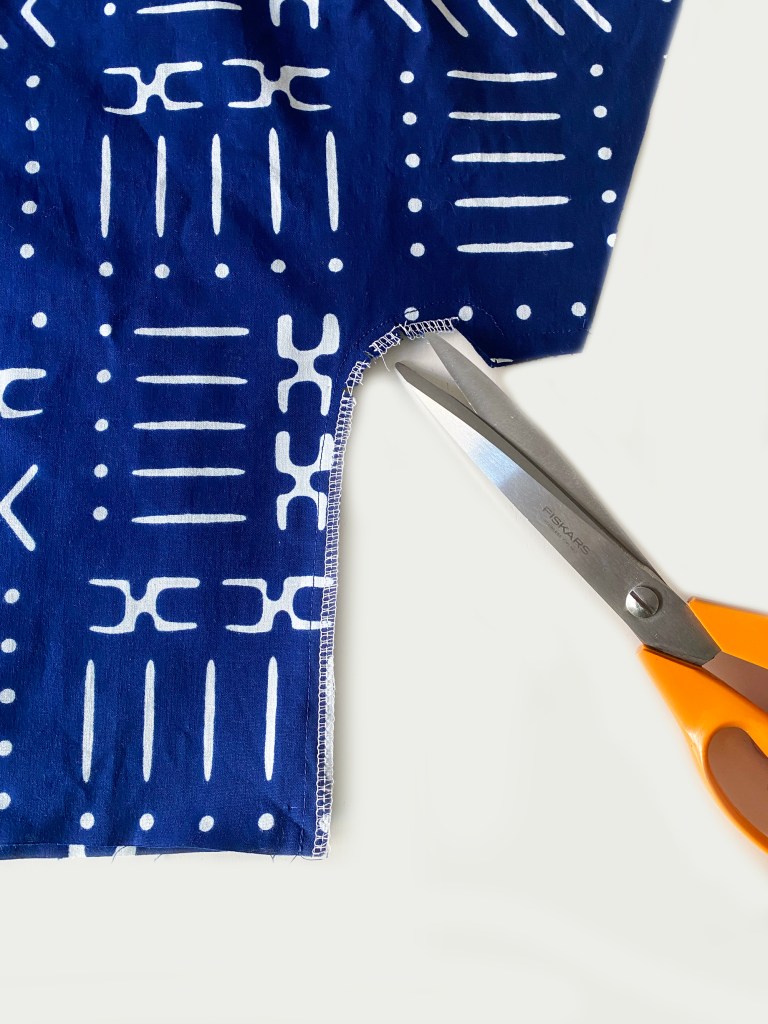
Join the Front to Back at the underarm edges. Finish the raw edges, Nick the curved underarm seam allowance.
Fold over and press a hem at the sleeve edge. Stitch.
Tip: remove the machine table to insert the sleeve around the Free arm.
Then fold it back 2cm approx. on the right side. Press. Make a few hand stitches on the underarm and shoulder seams to secure in position.
Mark out and sew the buttonholes with a buttonhole guide. Open them down the centre with a stitch ripper. Alternatively, if you are a complete beginner, or don’t fancy doing buttonholes, fear not! leave them off and just sew on buttons at the end.
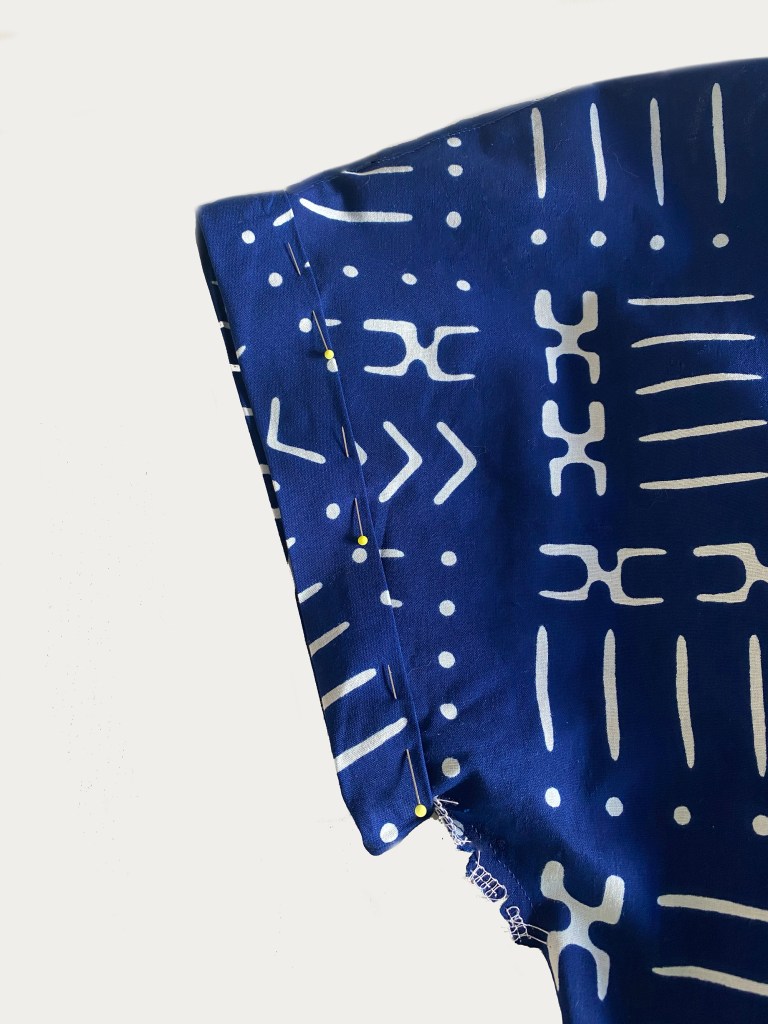
With the right sides facing together, match up the centre front points. Machine tack the facings together. Pin together the Front to Back at the side edges. Sew. Finish the raw edges together. Press them towards the Back.
Skirt section/pockets
If you want to do the Inserted Pocket hack version. Follow the Dowloaded instructions from this point (at the end of this page).
Make the pockets following the pattern instructions and pin them in position.
Sew around the pocket three edges, leave the top hemmed edge open.
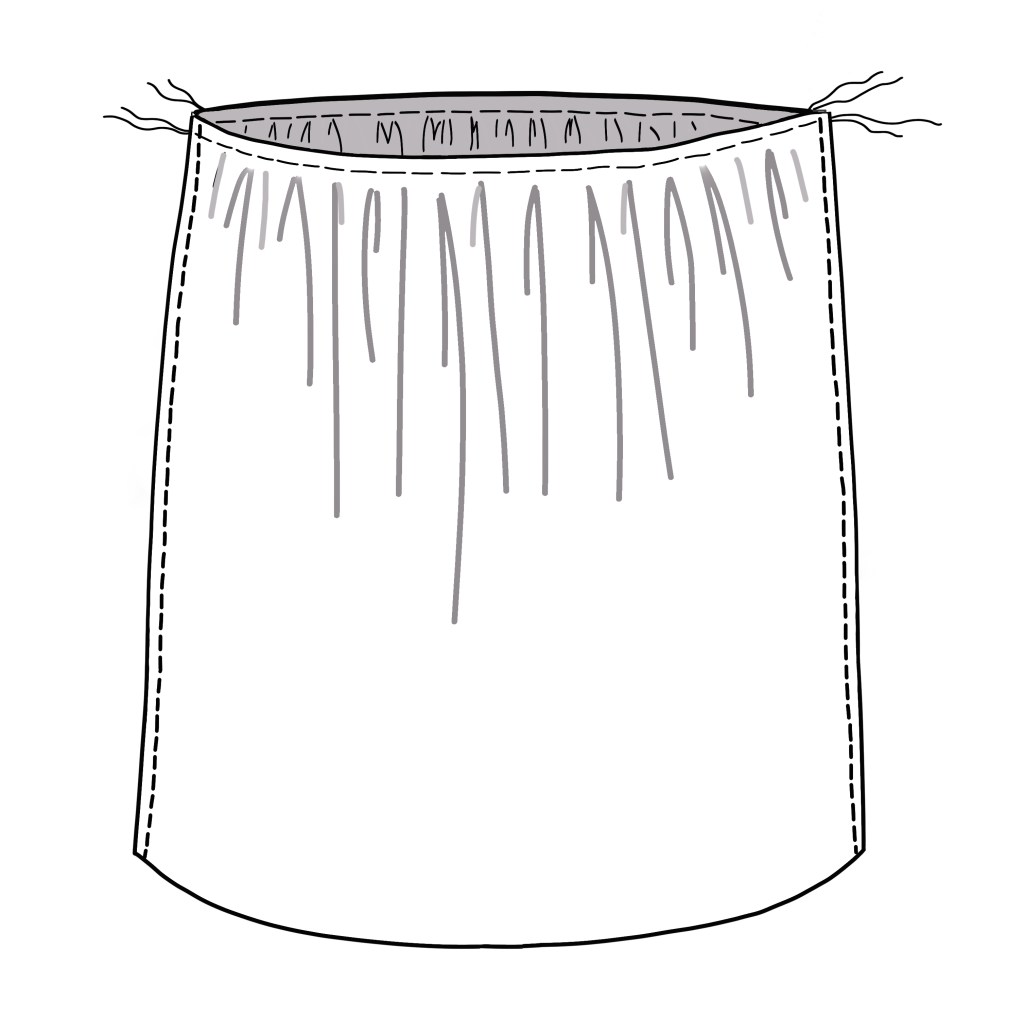
Join the Front and Back skirt pieces at the side edges. Sew down to the dot marker on each far side. The side curved section below the dot marker should be left open.
Pull up the gathers and distribute the gathers evenly.
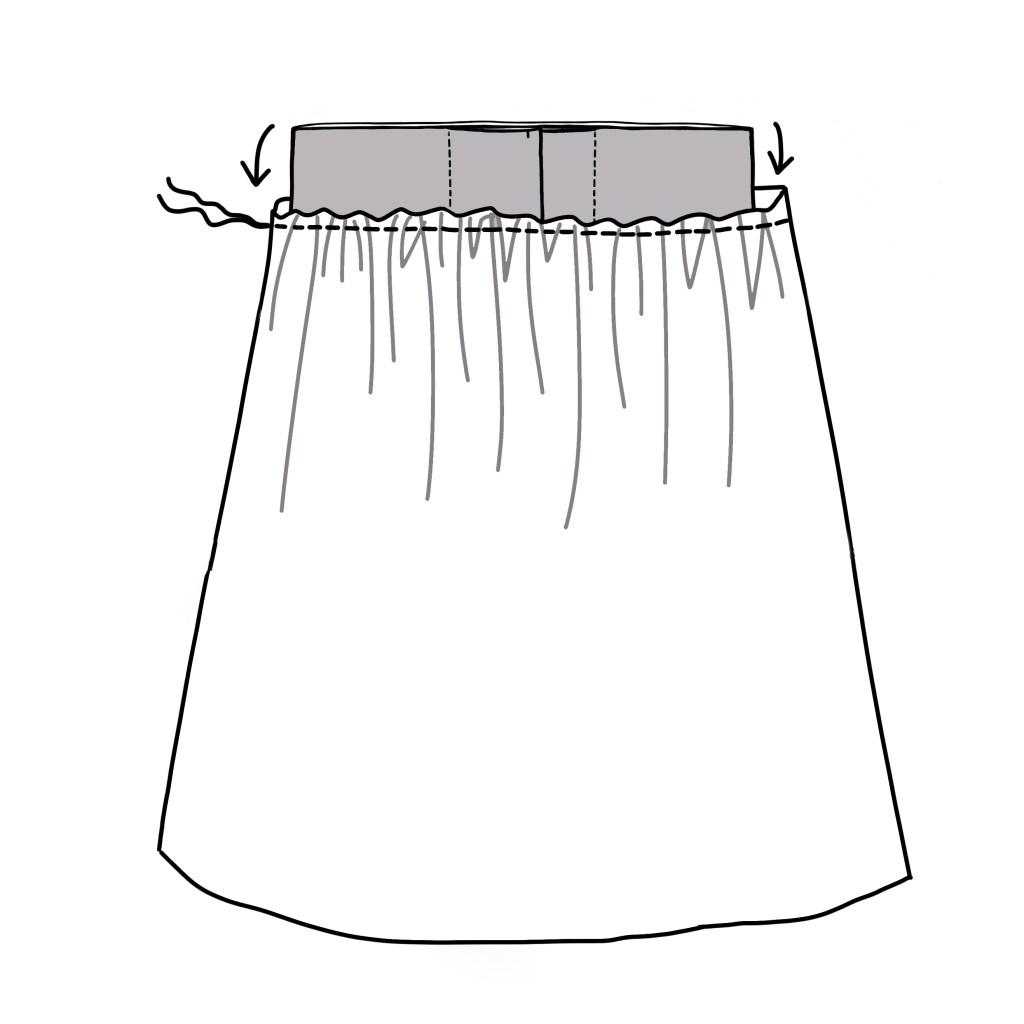
With the Bodice right side outermost and the Skirt wrong side outermost, pin the top gathered edge of the skirt to the lower edge of the Bodice, matching up the side seams and the centre points. Sew. Tip: Hand tack first for ease of sewing.
Sew the buttons in positions as marked on the template, to match the buttonholes.
There you have it.
POCKET HACK
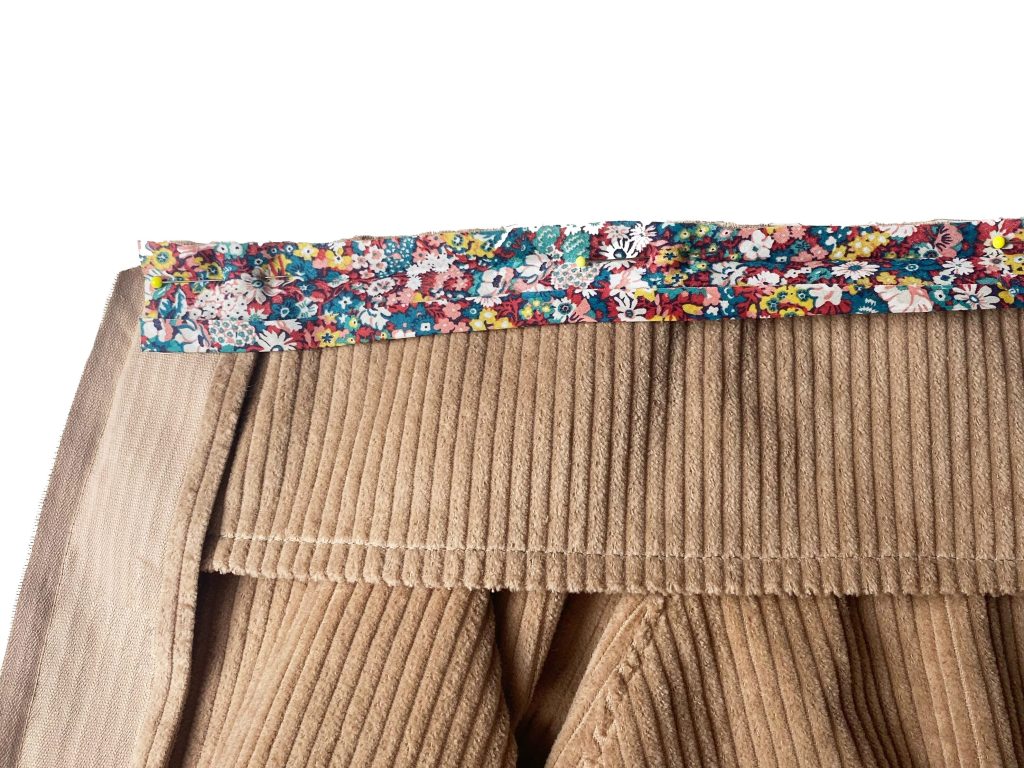
So do you fancy a different style of pocket? Well here goes! This one is a super way to update your dress. Its an inserted style of pocket. Easy to make with a couple of templates and step-by-step instructions which you can download below.
You could also do some really creative things with it, like making the Pocket Lining in a different fabric or edging it with a bit of Liberty binding, even matching it up with binding around the neck edge and sleeve cuff. Oooo….. endless possibilities. Its so nice to customise a pattern and make it unique.