
ADJUSTING A BUST DART POSITION AND SIZE
Patterns that have a Bodice Front with darts, such as Cecily Dress by Sewgirl, are for a bust size B. As with most patterns of this type, they are designed for a 20 year old with a B-cup size bust. Obviously as we get older, our bodies change, so the pattern dart size and position are intended as a guide which can be altered easily to suit your size and shape.
So, for example, you may need to move the dart position up or down (Step 1), or increase or decrease the bust size to say a bra cup size C or D (Step 2). This blog post, shows you how to alter both the position of the dart and alter the cup size.
First of all you will need to find your Apex* point and mark it on your pattern.
So what exactly is the Apex*? Well, it is the middle of the fullest point of the bust (aka nipple!). To find this, (wearing your normal bra) just measure across from one apex to the other, so with me for example its 18cm that means its 9cm each side of the centre line. Then you need to measure how far down it is situated, so measure from the top shoulder to your Apex* (it usually helps to wear something with a shoulder seam and measure from there). Mine measures 33cm, so I mark on my pattern an X – 33cm down and 9cm away from the centre line of the bodice front. Now a quick way to check its correct, is to place the pattern up against you, and see where your apex* is situated. If it matches with the one you’ve marked then you are all good to go to the next stage i.e to move the dart position or do a bust size alteration (or both).
1. MOVING A DART POSITION
To tell whether your dart is too high or low, you need to see if the line that runs right through the middle of the dart hits the apex point. You can see from this diagram that it is too high, so it will need to be lowered.
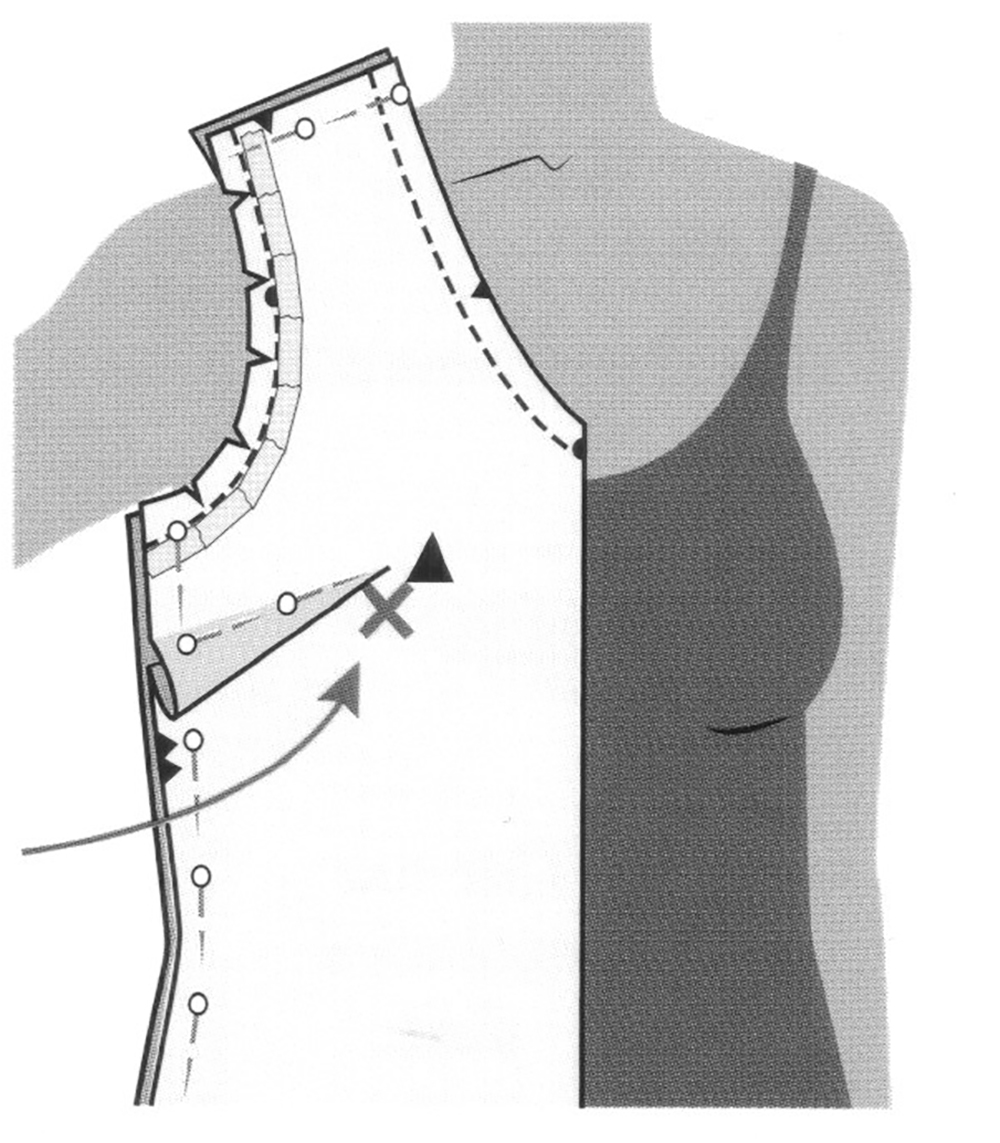
It needs to line up as shown in the diagram below…..the angle is not important. To move a dart position up or down you can do by one of two methods:
- Slight Adjustment – if you just need just a slight adjustment, you can do this by changing the angle of the dart. So, firstly outline your size dart triangle in red pen, so that you can see it really clearly. Then change the angle and redraw the dart so that it points towards the new apex point. NB. The dart tip needs to be at least 2.5cm (1 “) away from the apex.

2. Larger Adjustment To adjust the dart position more than a centimetre or so, you will need to use a cut and paste method. So, as in the previous method, outline your dart in red pen so that you can see it more clearly.
To maintain the angle of the dart, draw a box around the dart and cut out the box. Move it to the required position, then secure with sticky tape. Fill in the cut out section with paper and tape. NB make sure you keep your box straight and not slanted when you move it. 
STEP 2. ADJUSTING THE SIZE OF THE DART (aka FULL BUST ADJUSTMENT).
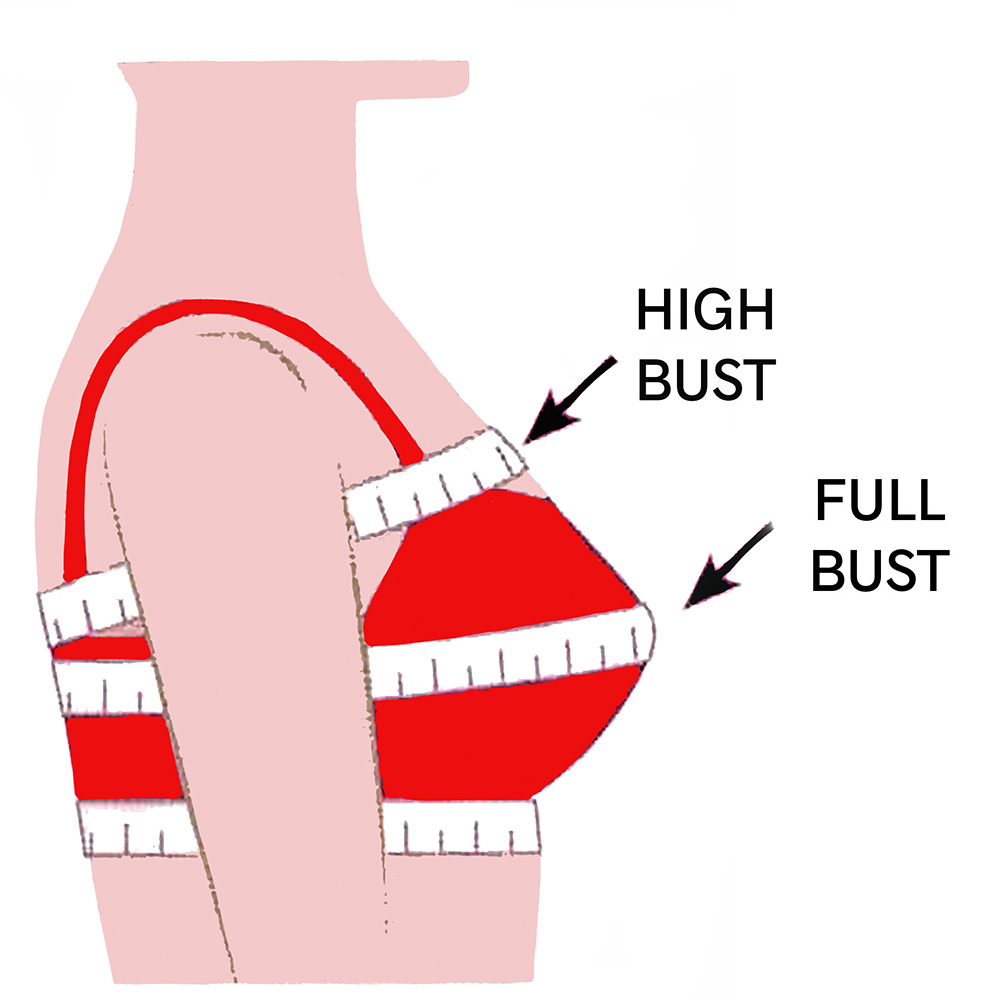
KNOW YOUR BRA CUP SIZE!
Measuring for your bra cup size- you will need to take two measurements of your bust – High Bust and Full Bust. Then subtract the high bust measurement from the full bust measurement (see the diagram A).

If you are:
less than 2.5cm /1″ then you are bra cup size AA
2.5cm /1″ then you are bra cup size A
5cm /2″ then you are bra cup size B
7.5cm / 3″ then you are bra cup size C
10cm / 4″ then you are bra cup size D
12.5cm / 5″ then you are bra cup size DD
15cm / 6″ then you are bra cup size DDD or UK size E
18cm / 7″ then you are bra cup size DDDD or UK size F
20.5cm / 8″ then you are bra cup size G/H or UK size FF
23cm / 9″ then you are bra cup size I or UK size G
25.5cm / 10″ then you are bra cup size J or UK size GG
The pattern is normally drafted to a size B, so you will need to reduce/increase each dart by the following measurements:
AA cup= reduce by 1cm on the
A cup= reduce by 1.25mm/ 1/2″
B cup = NO CHANGE
C cup= add 1.25cm / 1/2″
D cup = add 2.5cm/ 1″
DD cup= add 3.75cm/ 1 1/2″
DDD cup (UK E) = add 5cm / 2″
DDDD cup (UK F) = add 6.25cm / 2 1/2″
G/H cup (UK FF) = add 7.5cm / 3″
I cup (UK G) = add 8.75cm / 3 1/2″
J cup (UK GG) = add 10cm / 4″

INCREASING A BUST DART SIZE
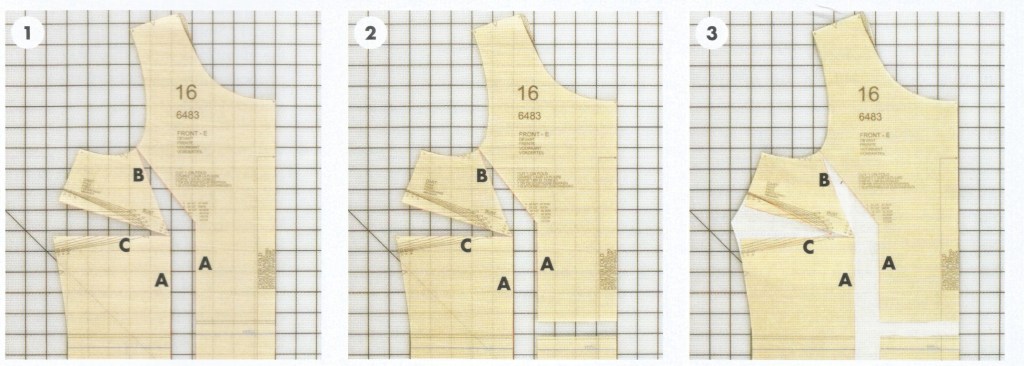
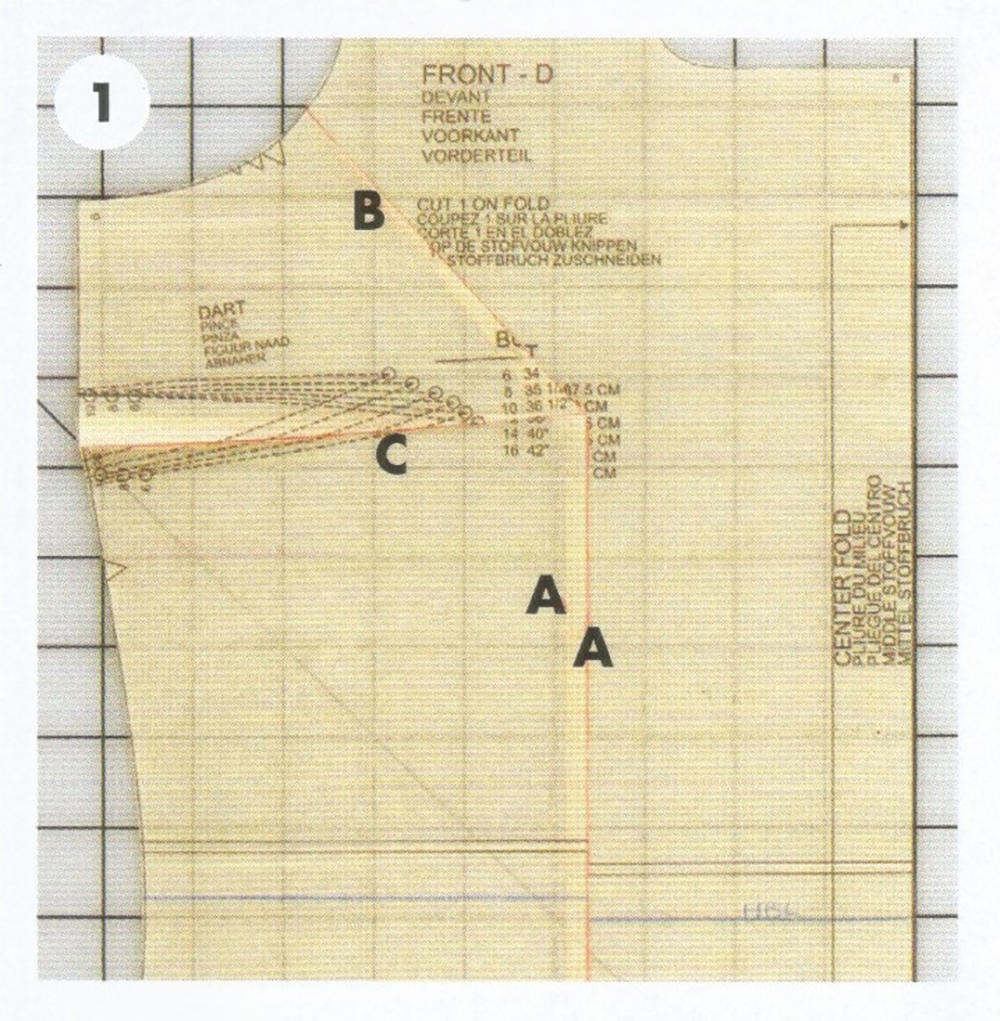
1. Firstly, draw three lines as shown by the red in the picture A, B and C (below)
Line A: extends from the Apex point* vertically to the lower edge.
Line B: extends from the Apex point to a point a third of the way up on the lower armhole.
Line C: extends from the Apex point to the side seam through the middle of the leg of the dart.
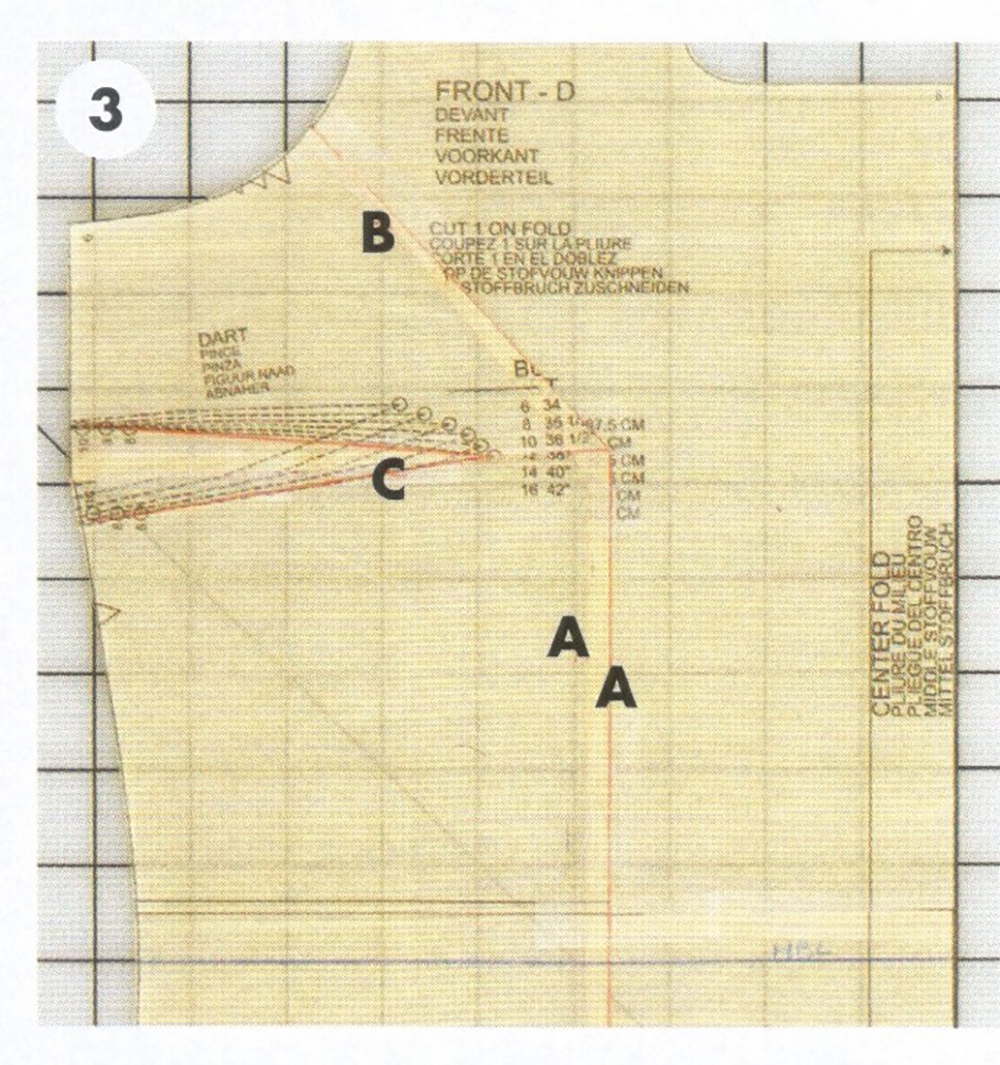
2. Cut the lines as follows:
Line A: cut from the apex to the lower edge.
Line B: cut from the apex to the armhole edge but stop a few millimetres before the edge.
Line C: cut from the side seam to the apex but stop a few millimetres before the apex. 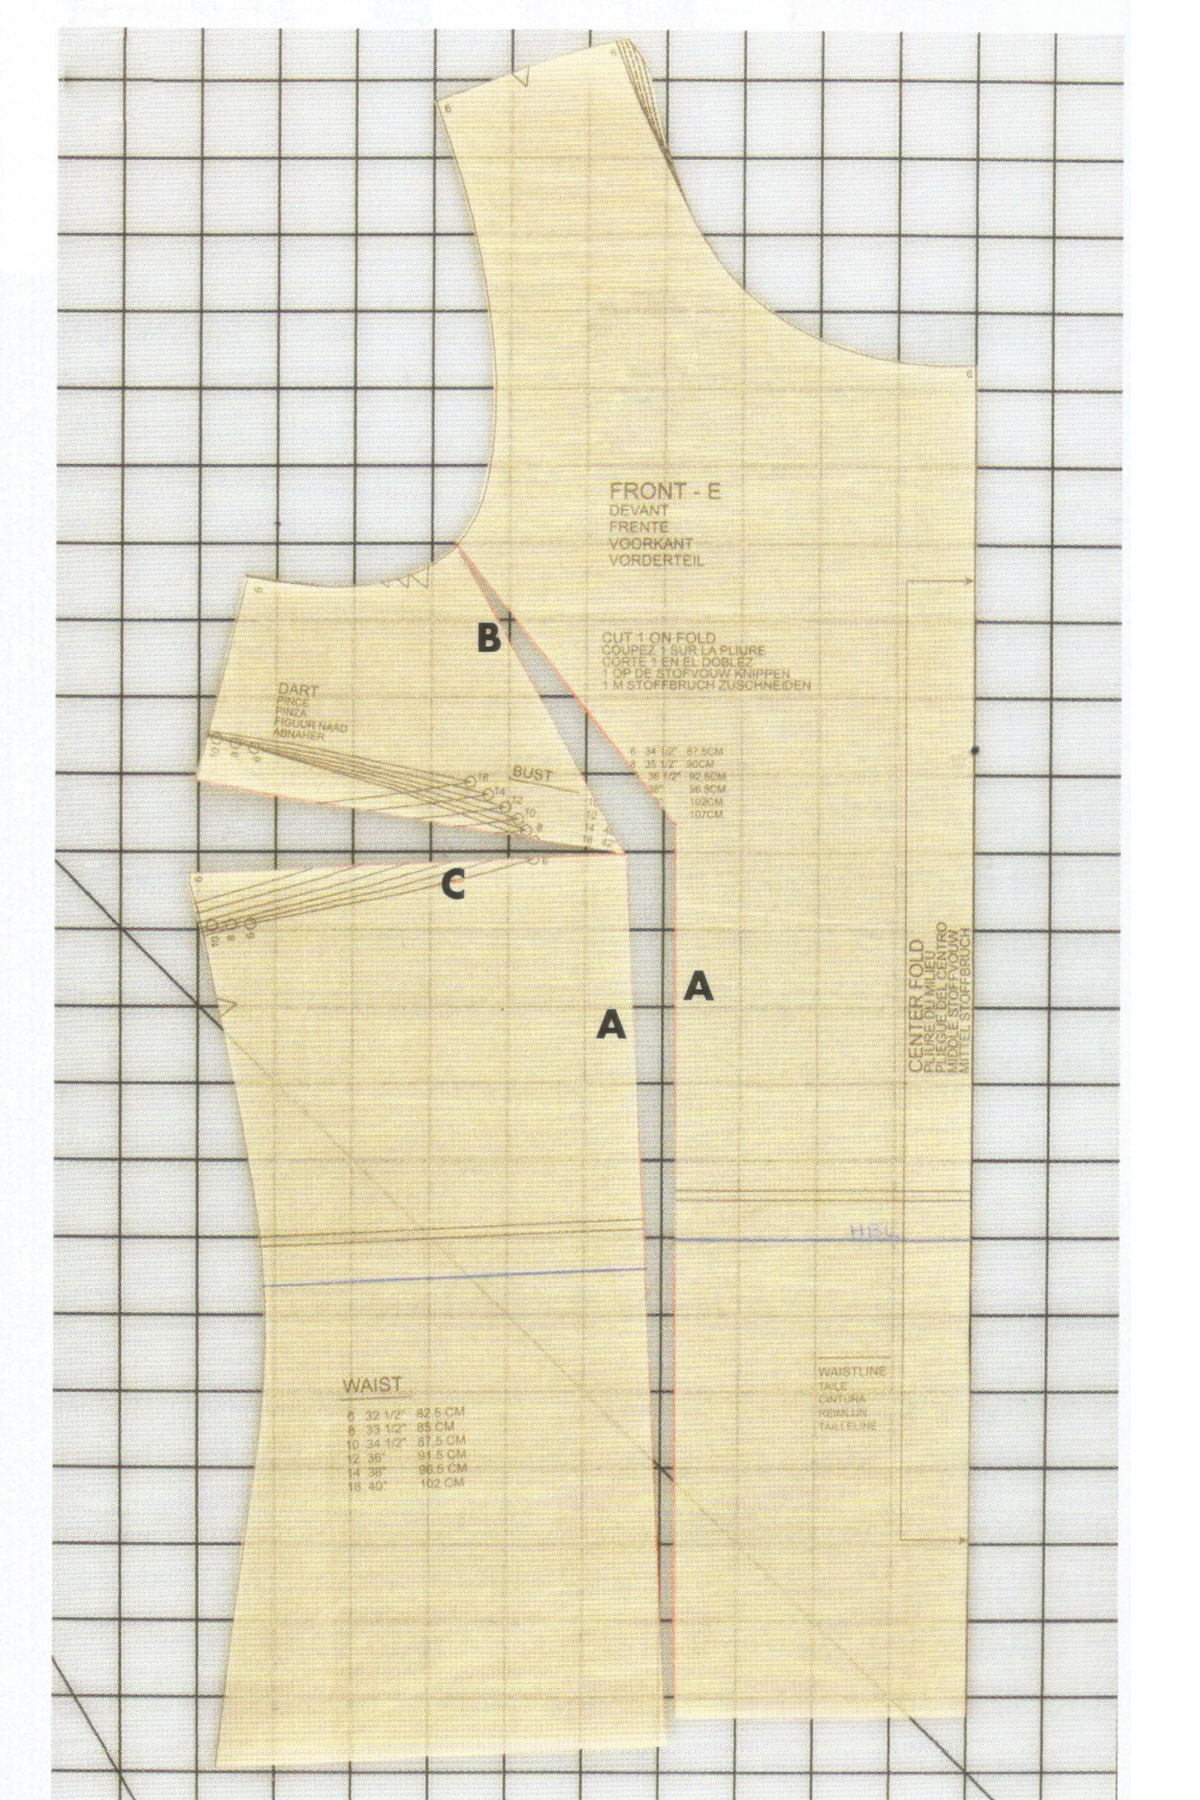
3. Spread the pieces apart adding on extra, according to your cup size shown above in the size guide. NB. Keep the pattern pieces together at the lower side, you don’t want to add on extra width at the bottom edge.
 Cut a line across perpendicular to the line A, move so the pattern is aligned at the lower edge. Place a piece of paper behind each open section and tape in position.
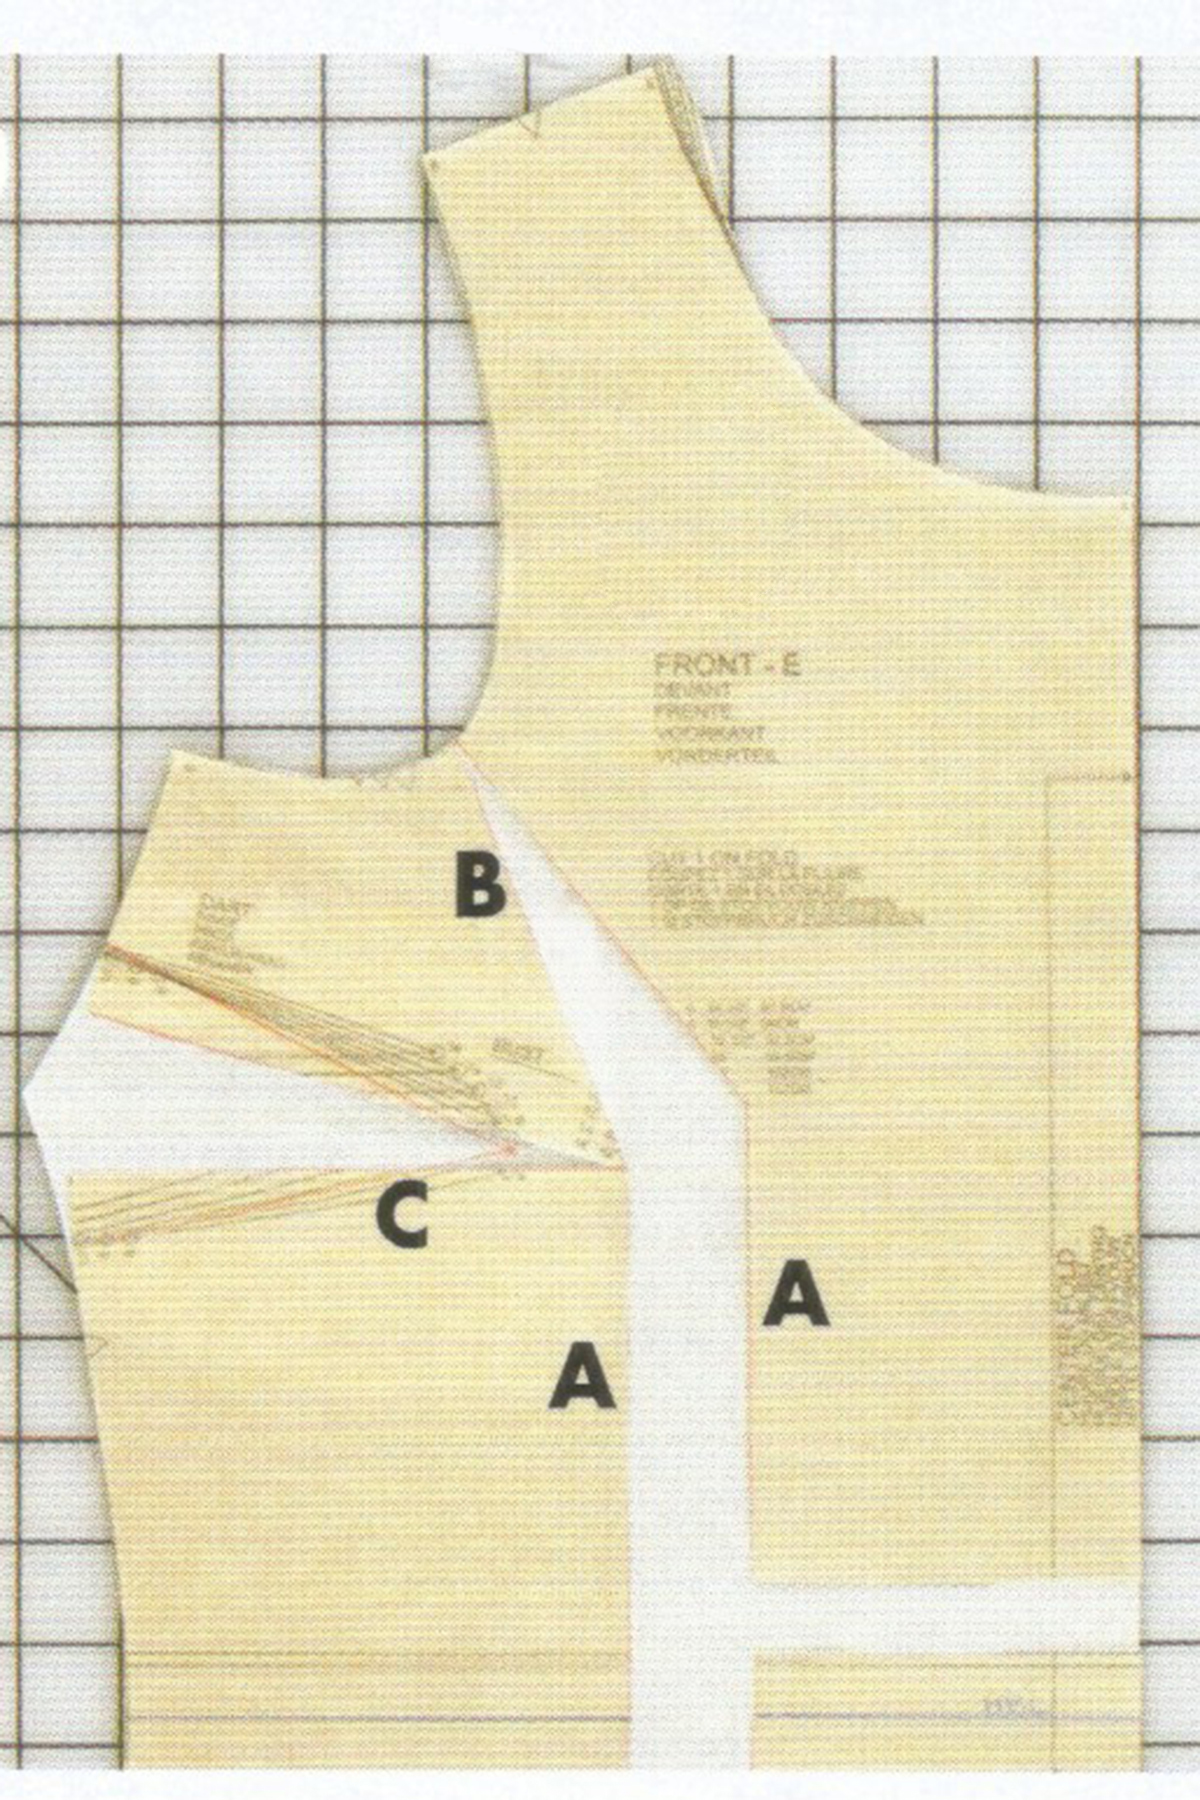
This is now an increased bust dart. You will need to adjust the side line to match your lower pattern piece if necessary.
REDUCING A BUST DART SIZE
For cup sizes AA and A, you will need to reduce the size of the dart according to the measurements in the Size guide above. Instead of opening out the sections A, B and C you will need to close them, overlapping the pattern as shown below.

The dart is adjusted in exactly the same way as increasing the dart but in reverse. Secure the overlap sections with sticky tape.
So, with a bit of know how, you can see its easy to make adjustments to your pattern. It pays to spend a little time prior to making your garment to get the fit just right. After adjusting your pattern, why not make a test garment out of cheaper fabric, or make up just a section of the garment beforehand such as just the Bodice Front and Back, It will allow you to relax in the knowledge that, being tried and tested, your project fit will fit correctly and will be a joy to wear. And, of course, after you have made your pattern adjustments, you can use the pattern piece again and again.


All images and text are subject to copyright. Please ask prior permission if you wish to use any of the content of this blogpost.

Hi
This may be a stupid question but when you refer to cup size are you referring to bra size or the difference between upper and full bust measurements (I’m sure I’ve read somewhere that that’s how it should be measured). And which cup size refers to which difference in measurements? Hope that makes sense, many thanks in advance. Joanne
LikeLike
Ive just added a bit more info to the Dart adjustment blog post which may help you with bra cup sizing x
LikeLike
If I’m not mistaken, I believe you’ve left out a final step in your Full Bust Adjustment. You show the new, larger dart pointing toward where the apex WAS. But when you cut and spread the pattern piece, the true apex remains as indicated on the front center portion of the pattern tissue. The apex on the side front piece is no longer the correct position and is now too low and too wide.
LikeLike
Yes I’m sorry I think it is missing the last section where you have to level up the lower line to and retrace the side edge to match the original lines. X
LikeLike
Please delete the previous comment – it sent before I spellchecked it.
Okay so I am making the ORLA trapeze dress. It has a bust dart at the armhole so I am now totally confused about how to do a full bust adjustment. Should I close and pin flat the dart at the armhole, and just create a whole new and bigger new dart at the side steam? At first my neck seam was pulling to the back so I re-cut my toile and added 1.5 cm to the back shoulder seam and brought the shoulder seam forward and re-sewed the sleeve after re-positioning the arm scythe shoulder notch. But now I see the side seam pulls to the front and it seems it’s a full bust adjustment that I need too. It’s a whole lot of frigging about on the simplest of patterns and it makes me want to put the whole thing in a bag under the bed and wish I never started. A simple line of this dress needs to fit really well and it just isn’t.
LikeLike
Hello
So this is not a bust dart. It’s to help prevent gaping at the upper bust area. The dress is not fitted at the bust and with no bust darts it can’t be adjusted. As it’s A- line dress, you can see that the side line flares out at the underarm and should accommodate the largest of busts. If not go up a size. Hope that helps. Fiona
LikeLike
So the problem I have is if I cut for my full bust size it’s massively too big across the upper bust and hanging off my shoulders, but a small size means the side seam is fine at the arm scythe (after a slight bicep adjustment) but swerves towards the front from that point. Maybe A-line is not for me. I have done a full bust adjustment now and added a bust dart to at least be able to wear it. I did make a toile and it’s had so many adjustment to try to make this sit well it’s time to stop. I do love this dress on you Fiona – it’s beautiful.
LikeLike