

Bibi Quilted Jacket is a timeless garment that you will want to make again and again in lots of different fabrics. It is edged with binding and has curved side edges, two easy quilted pockets and button up fastening. Make in patched fabric, single fabric or pre-quilted- the choice is yours. Its great for making a Kantha style jacket unique to you!
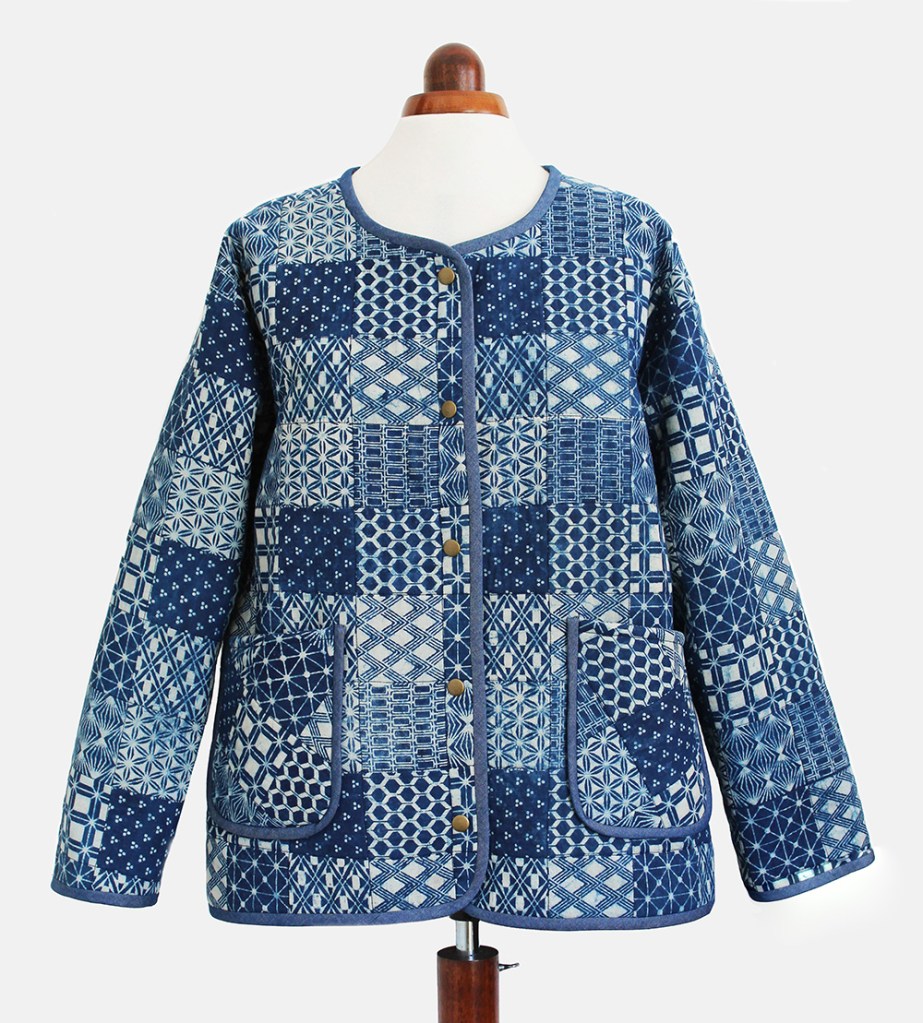
The blue jacket above has been made in pre printed indian block printed patchwork fabric with heavy duty snap fasteners in bronze. Click on the image below to take you to a supplier.


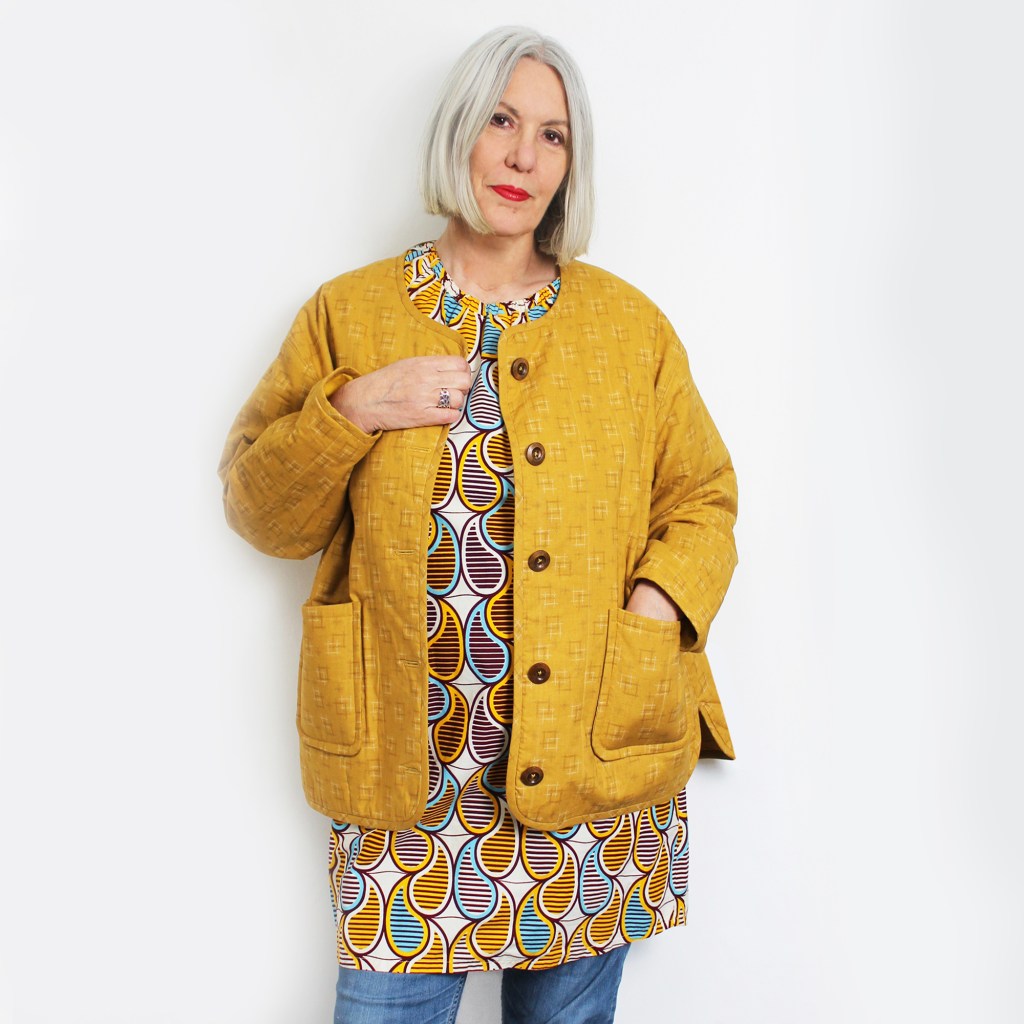
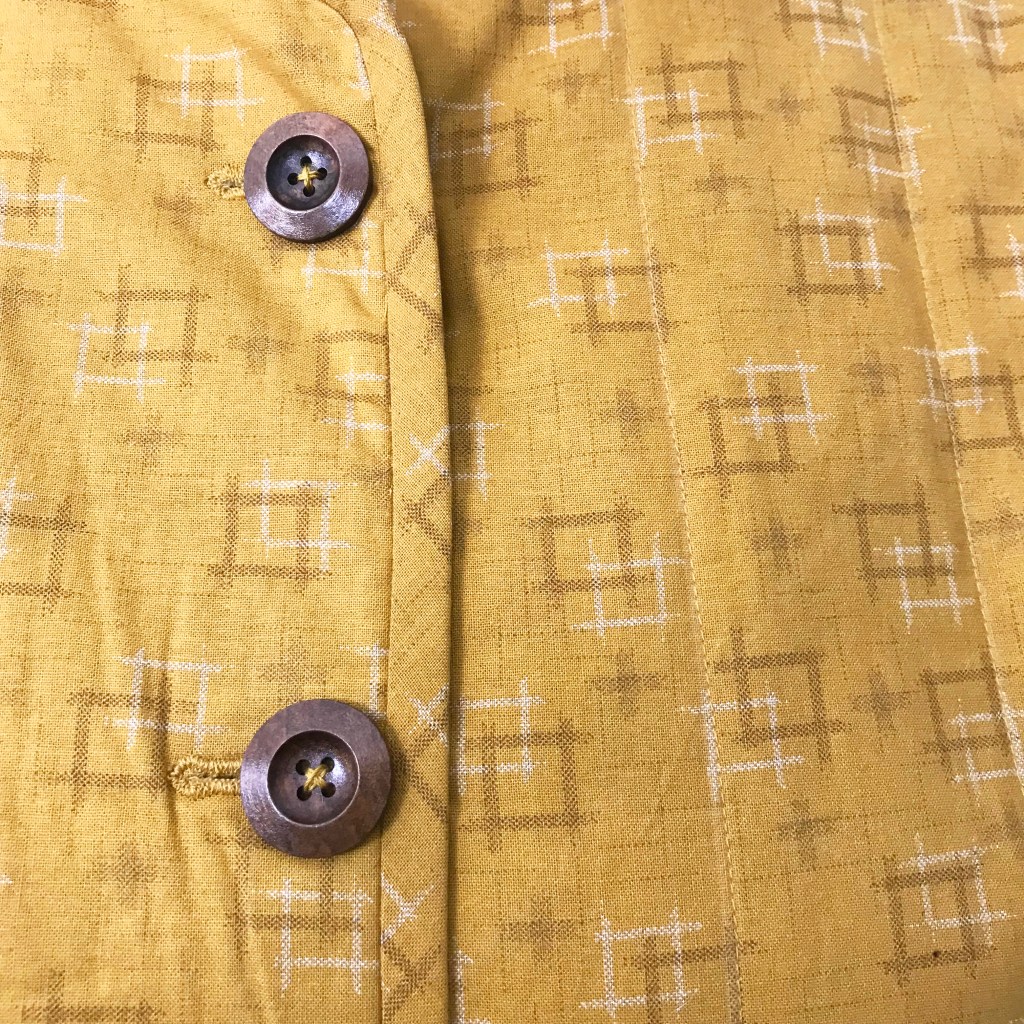
I’ve made this jacket in a lightweight denim with an African fabric lining (as shown above) and another in a mustard cotton in an Ikat design for the outer fabric with a plain cotton lining (left pic). Bibi is a very comfortable relaxed garment suitable for all seasons. It’s a simple make and oh so snuggly to wear.
Here are some measurements and info you will need to know from the back of the pattern.

Making the Bibi Jacket involves some simple quilting. You can choose from sewing tramlines or criss-cross quilt lines its up to you, both are marked out on the pattern. Of course, you could make your own style of quilting lines- or even go freestyle, or why not make a jacket from a piece of patched fabric? Maybe you were going to make a quilt but never quite made it that far. Why not use it for something to wear?

….just sayin!
LETS TALK WADDING!
Ok, so you can buy pre-quilted fabric, but its so much more fun to create your own. You can use just about any type of medium/lightweight fabric for the outer and lining. Remember that it doesn’t want to be too heavy- think light!
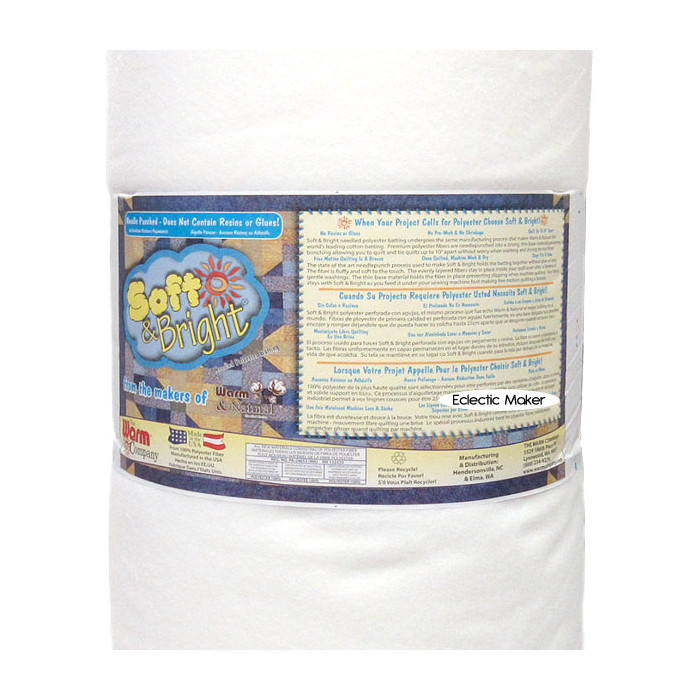
Here are some examples of wadding that Ive used….
- Vilene H640/H630 fusible Fleece (loft)- its fusible, made of polyester, very practical because you can just iron it on, but it is on the pricey side, as its not very wide (36″). You would probably need about three metres depending on size. You can get this from Empress Mills.
- 2oz Polyester wadding– cheap as chips and a good alternative- use spray textile glue to fix in place or lots of tacking, with a wide width (54″). You would probably need a couple of metres of this depending on size. You can get from Empress Mills .
- Quilting batting such as a basic ‘warm & white’ polyester one is a great alternative as its usually very wide you wont need as much. This one ‘Soft & Bright’ available from Empress Mills is 90″ wide so probably 1.5m would suffice depending on size. This one is much thicker and heavier than the other two and not so easy to work with but still makes a good jacket.


HOW TO MAKE THE BIBI JACKET
SEAM ALLOWANCE IS 1CM (3/8″)
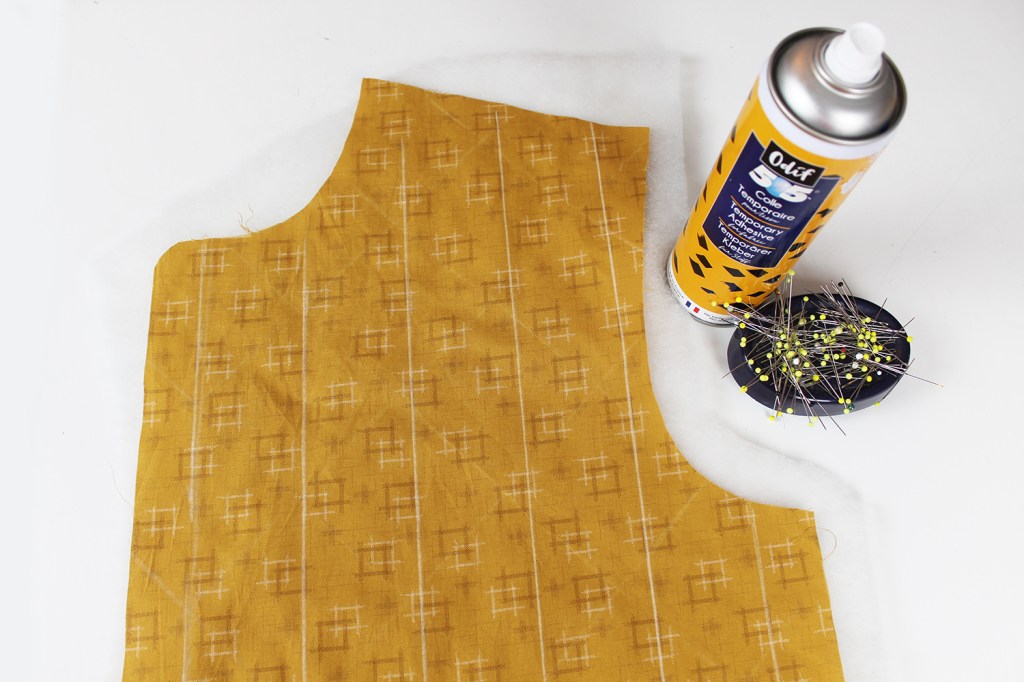
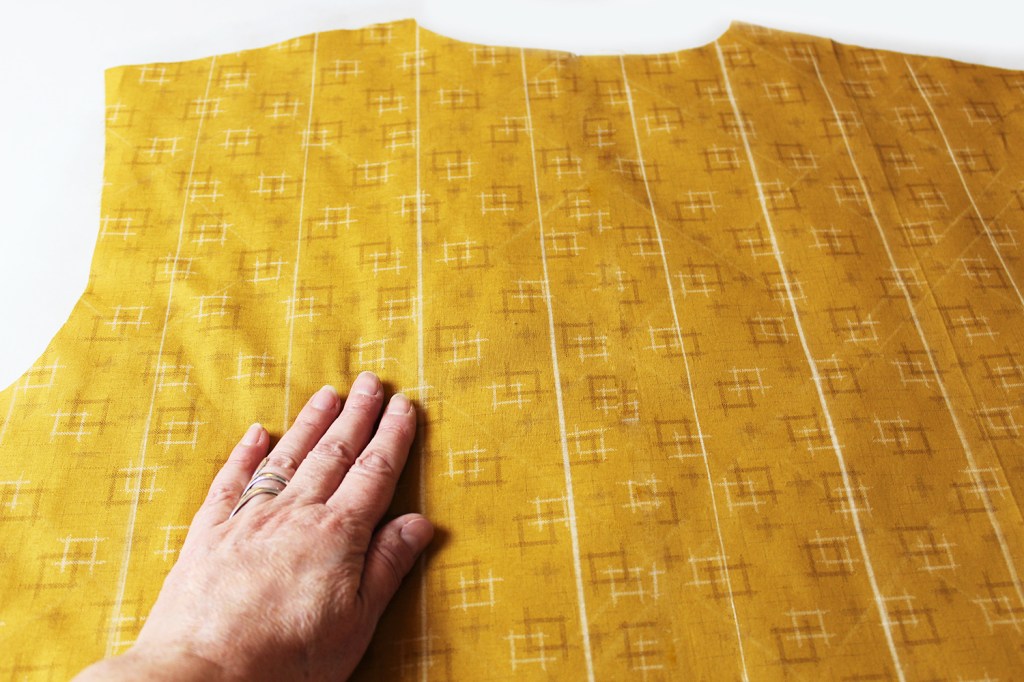
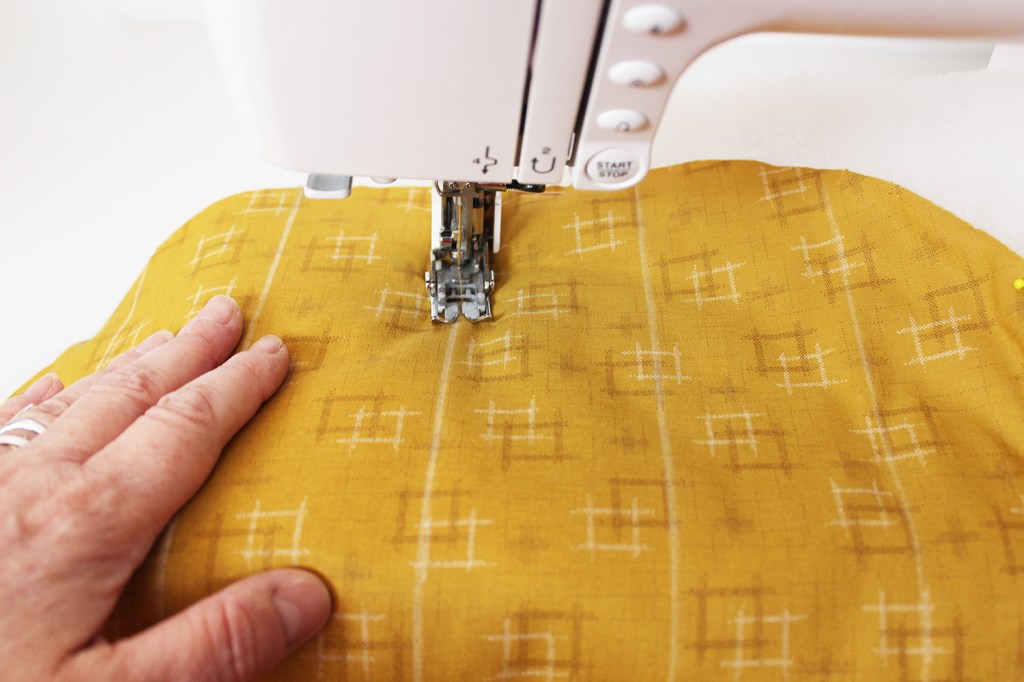
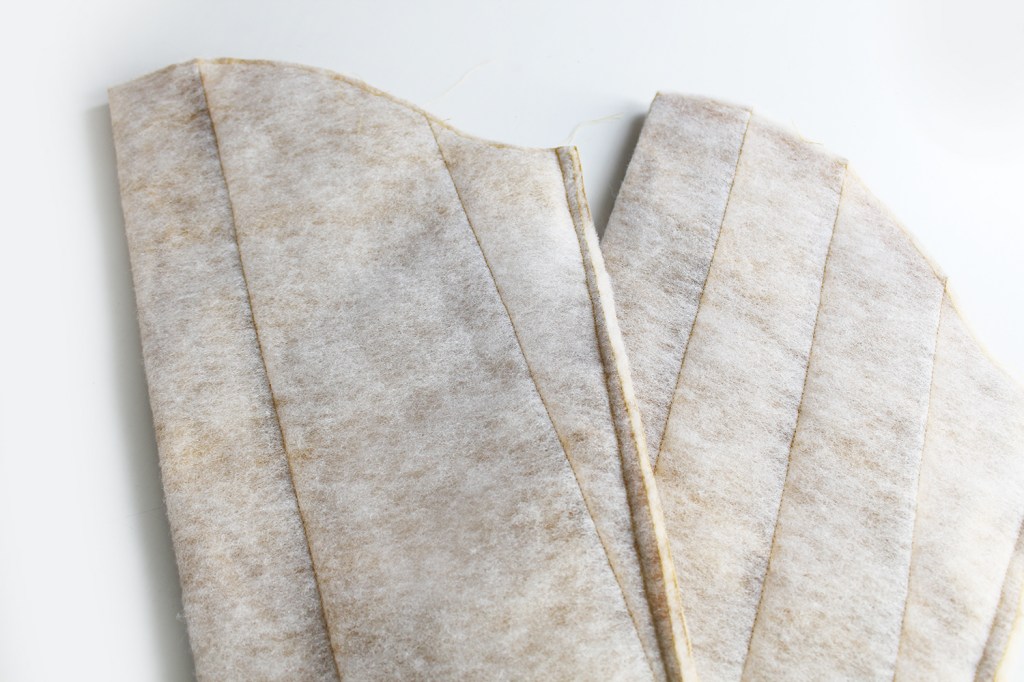
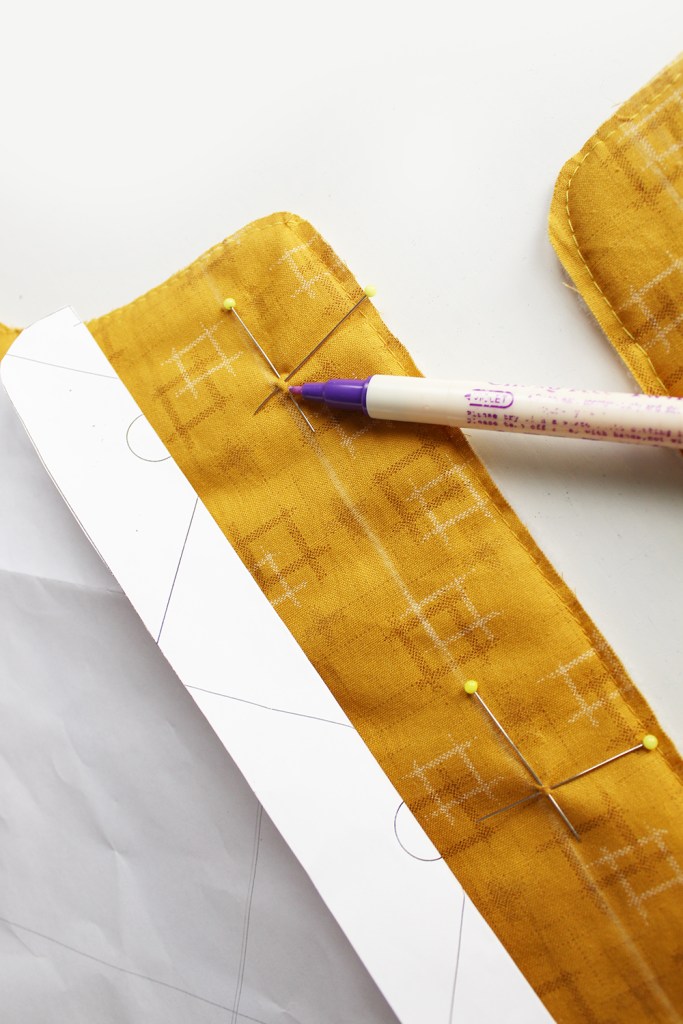
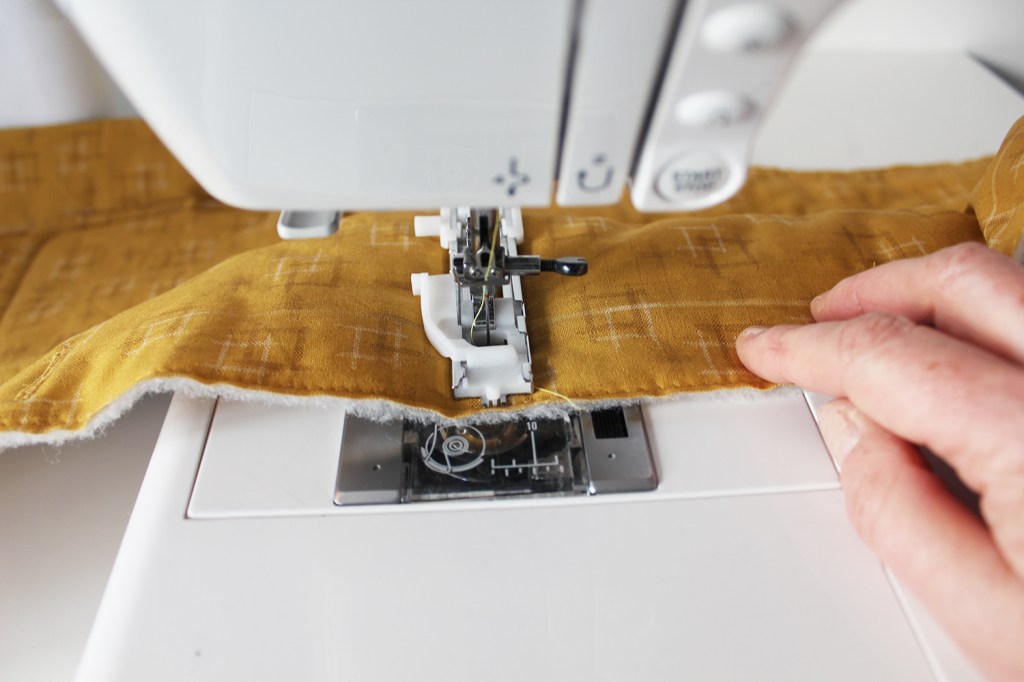
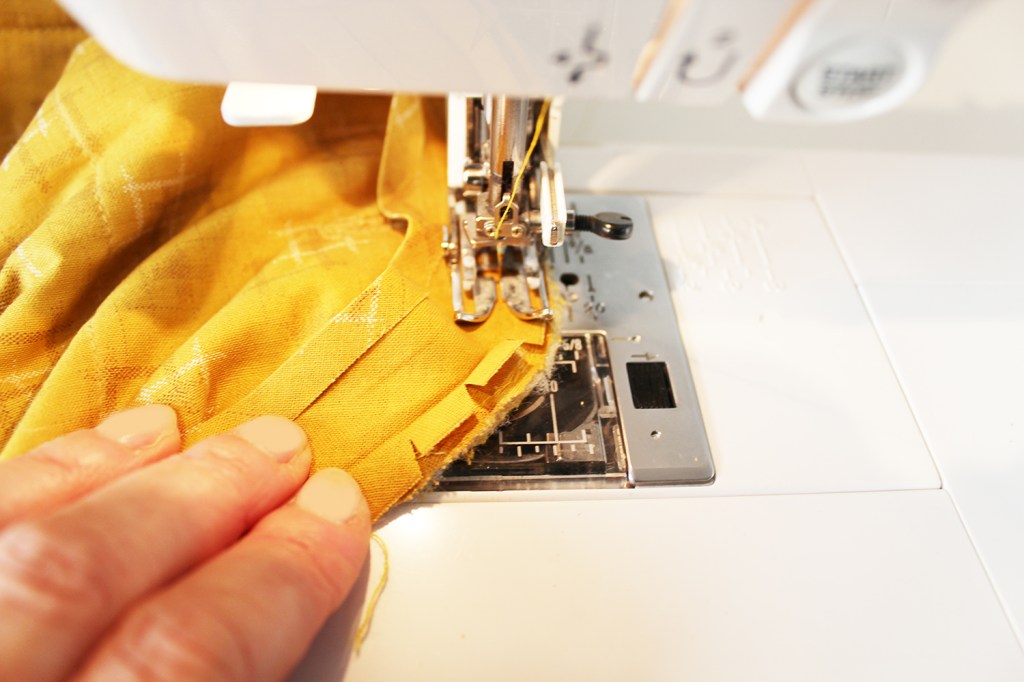
First cut out the fabric pieces from the pattern templates. Mark out the quilt lines with chalk or a fabric marker. Fuse the wadding or fusible fleece to the reverse side of each piece (Fronts, Back, Sleeves and Pockets).
Stitch along the lines with a longer stitch length (2.8mm). Stitch on the right side of the fabric to secure the two layers together. Quilt all the pieces backed with wadding.
QUILTING THE FABRIC

POCKETS
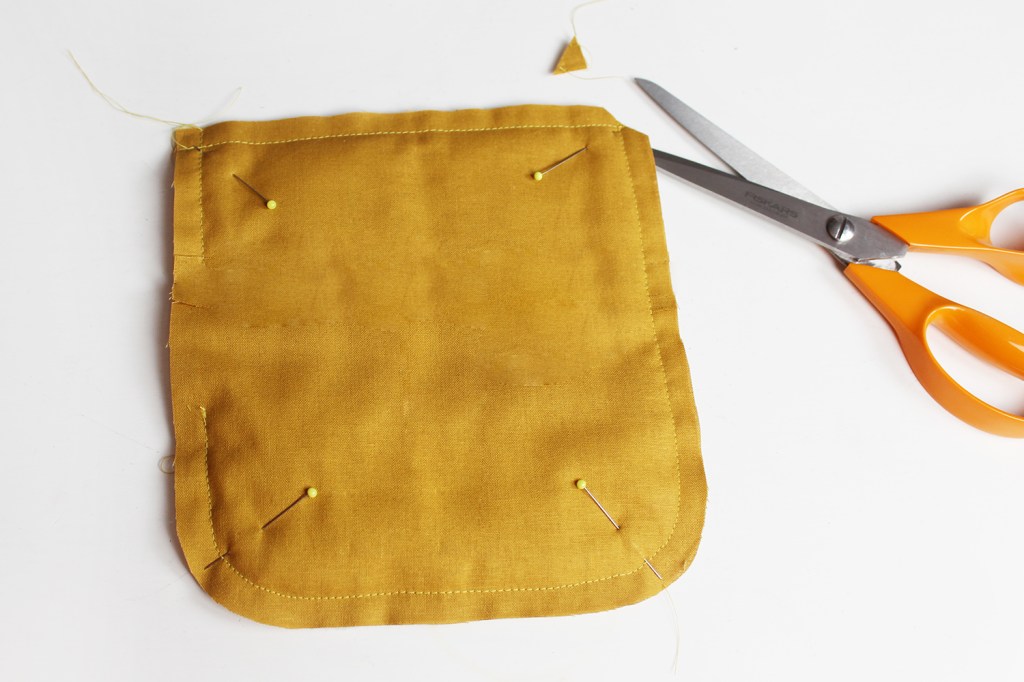
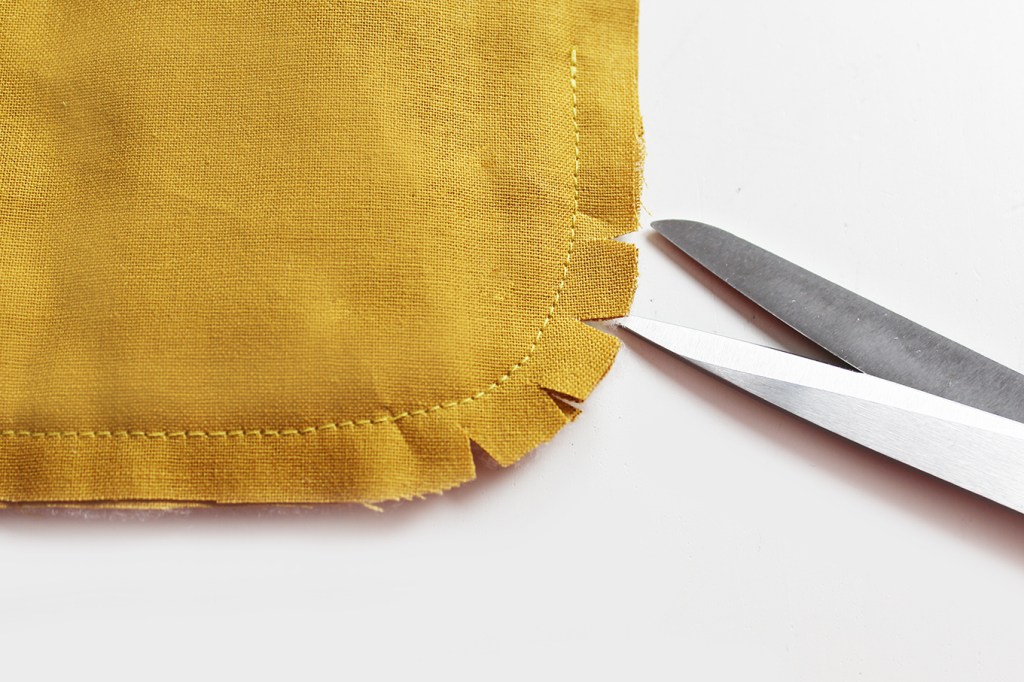
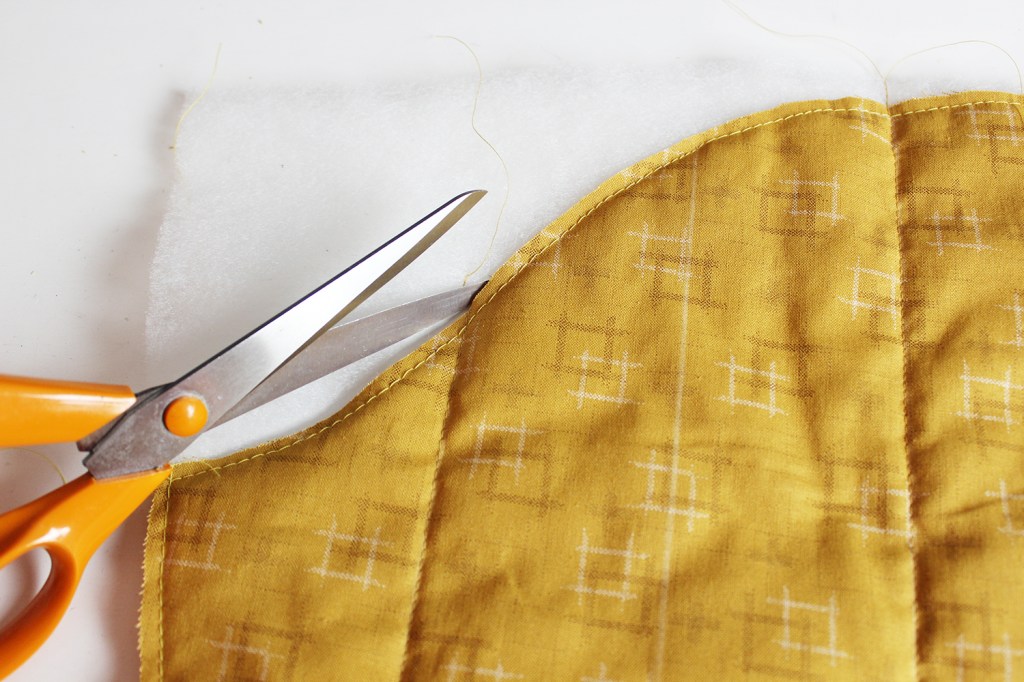
Lay the pocket lining together with the pocket, right sides facing together. Sew all around, leaving an opening on the short side edge of approx 4cm (1 1/2″). Trim across the seam allowance corners. Nick the curved seam allowances. Turn inside out through the opening. Press, pushing out all the edges from the inside with a poking tool. Hand sew up the side opening.
Repeat with the second pocket and lining.

Pin the pocket to the jacket front. See the Pocket position on the template.
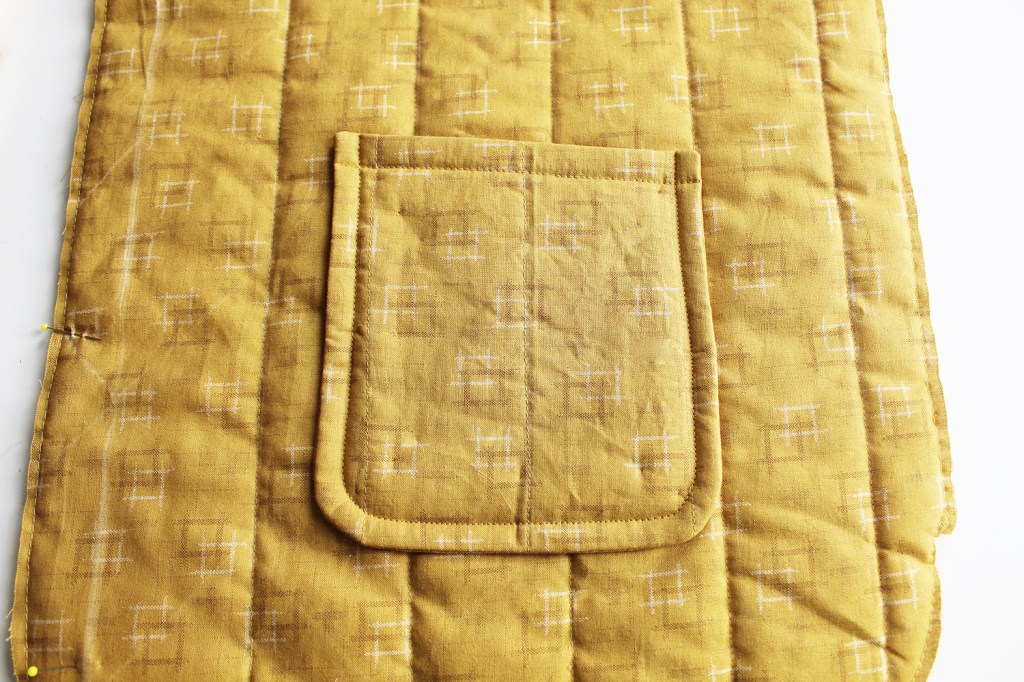
Topstitch the Pocket 1cm away from the outer edge all around leaving the top edge open. Press. Repeat with the other Pocket.
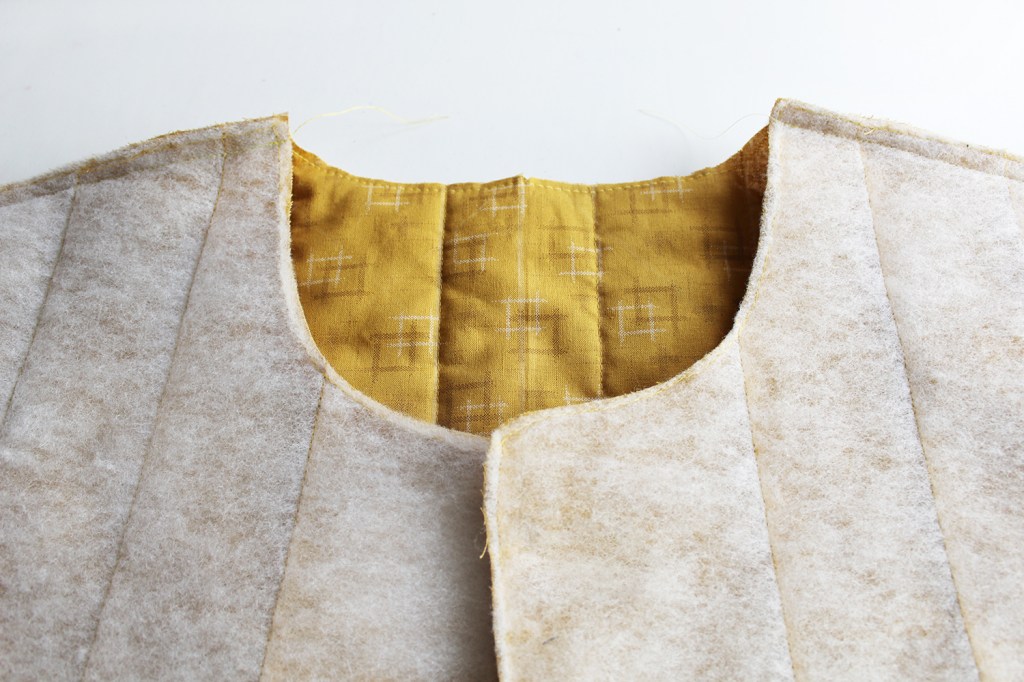
Join the shoulder edges with the right sides together. Press the seam allowances towards the back. Topstitch.

Join the side edges of the front and back below the armhole to the notch. Press the seam allowances open.
SLEEVES
Fold the Sleeve piece in half aligning the long vertical raw edges. Pin. Sew. Press the seam allowances open.
With the right sides facing together, insert the sleeve to the armhole, aligning the raw edges and the back and front sections. Pin. Hand tack. Sew.

Topstitch the sleeve seam. Repeat with the other sleeve.
LINING
SEW THE LINING FRONT TO BACK AT THE SHOULDER EDGES. ATTACH THE SLEEVES IN SAME WAY AS BEFORE WITH THE OUTER FABRIC.
INSERT THE LINING INTO THE OUTER JACKET WRONG SIDES TOGETHER. PIN ALL AROUND MATCHING UP THE RAW EDGES.
Machine tack around the raw edges to secure the three layers together.
BUTTONHOLES
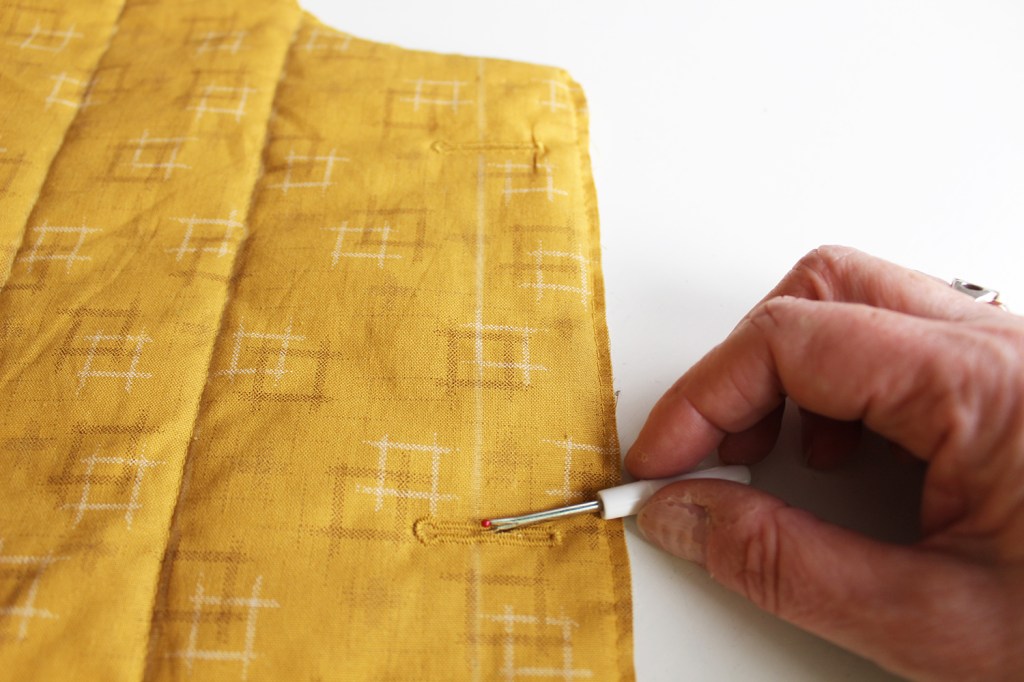
Mark out the buttonholes in position as shown on the template. Sew the five buttonholes. Tip: make a ‘practise’ buttonhole with a leftover piece of the three layer fabric. When you are happy with the size compared to the buttons, use this to mark out the starting point each of the buttonhole positions so that its centre aligns with the jacket centre (as shown by the notch at the neck centre front). Sew the buttonhole away from the centre front raw edge.
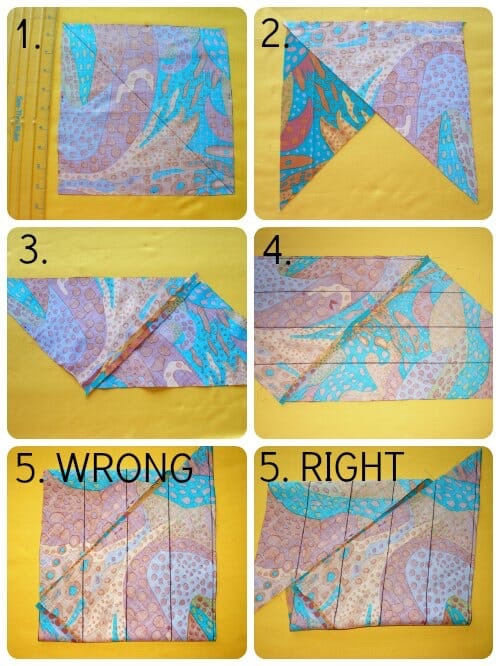
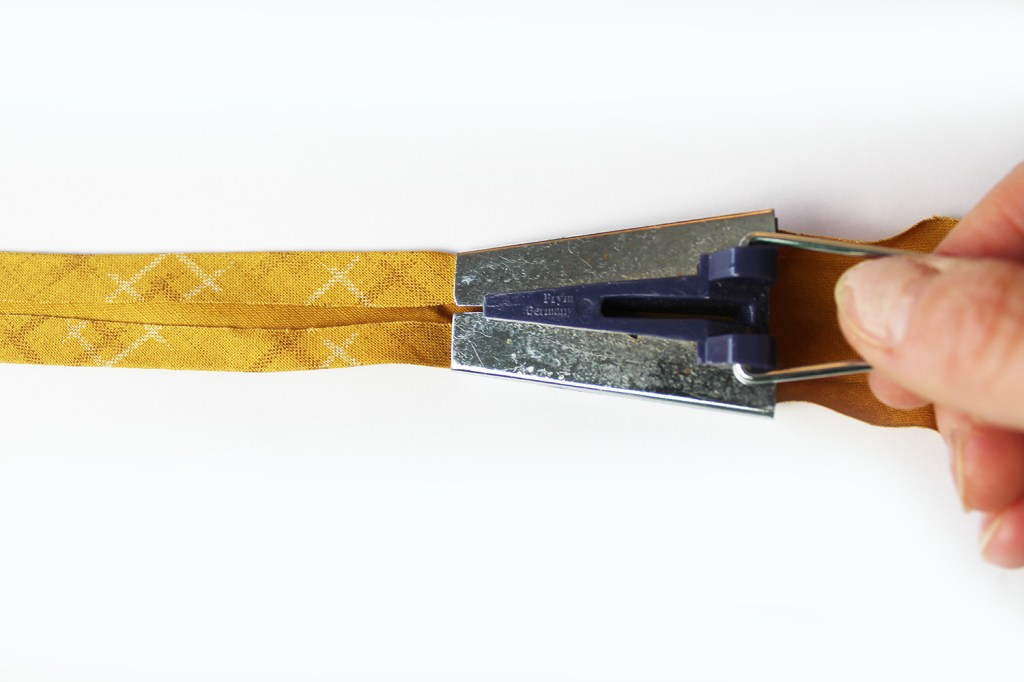
BIAS BINDING
Making Your Own (buy ready made 1” (25mm) bias tape as an alternative).
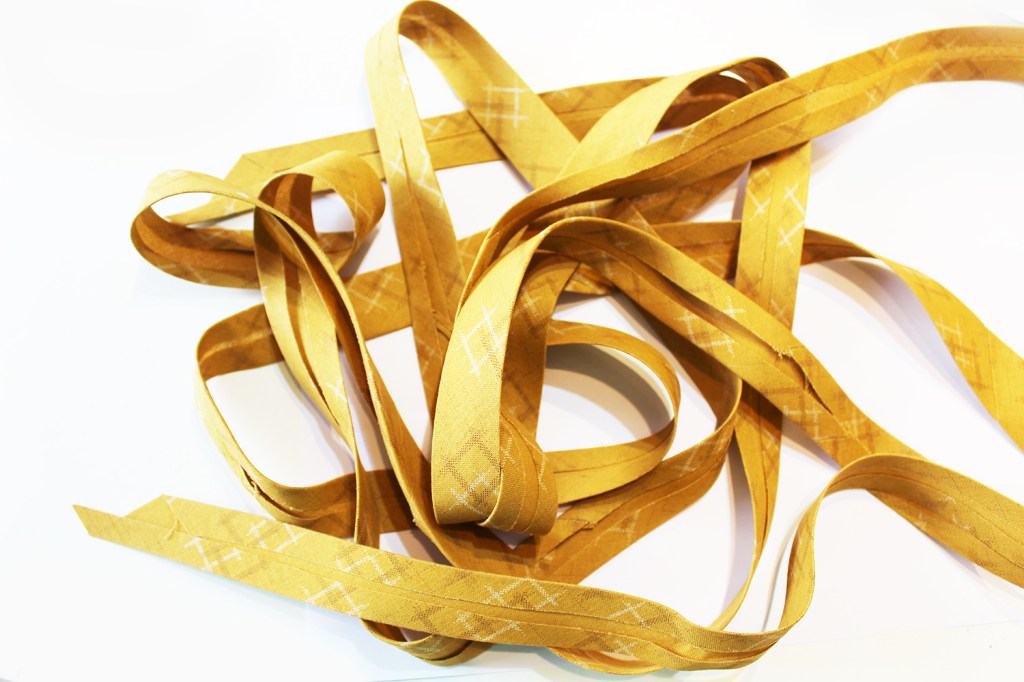
The image below shows step by steps about how to make up to 200″ of bias binding from just a half metre of fabric. It’s a really useful method for saving money and getting the most of your fabric.
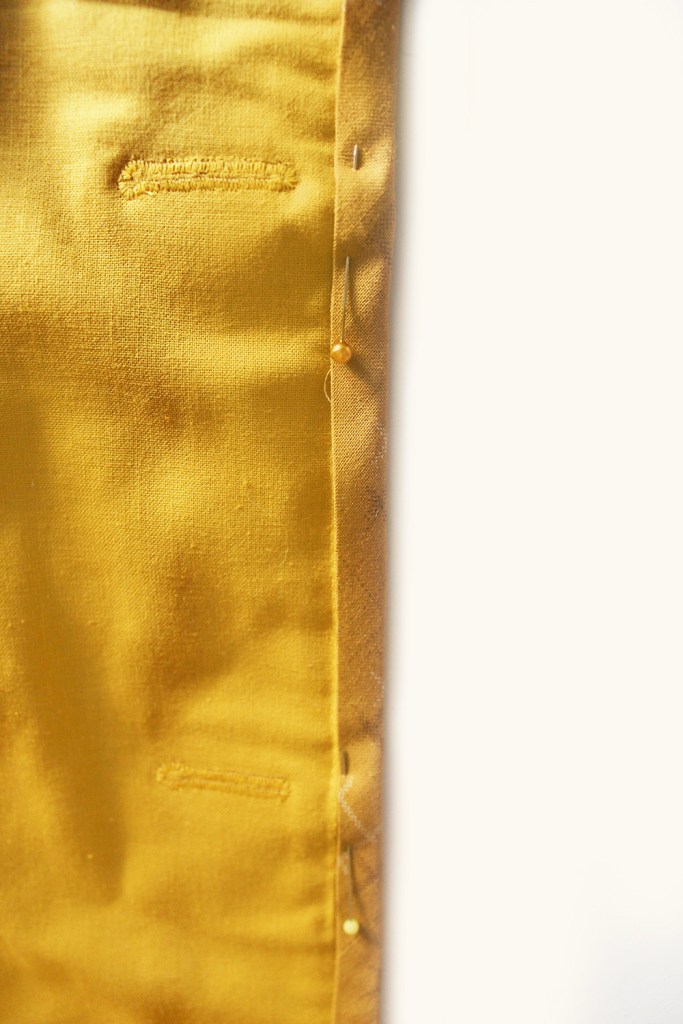
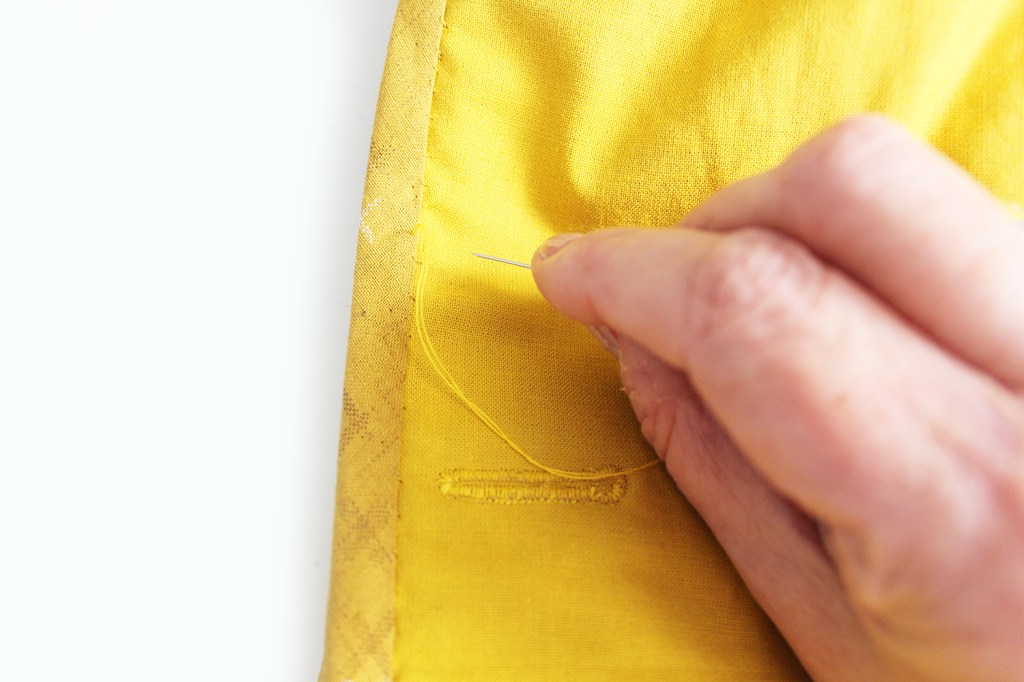
After making your binding strip, using a binding tape maker tool (see below image), fold over the edges of the binding. Pin the binding to the raw edge, starting at the shoulder seam. Sew all around. Fold the binding over to the reverse side. Press. Pin. (Hand tacking really helps to secure the edge before hand stitching all around). Sew the binding edge by hand on the reverse side with small over-stitches to secure the edge all around.

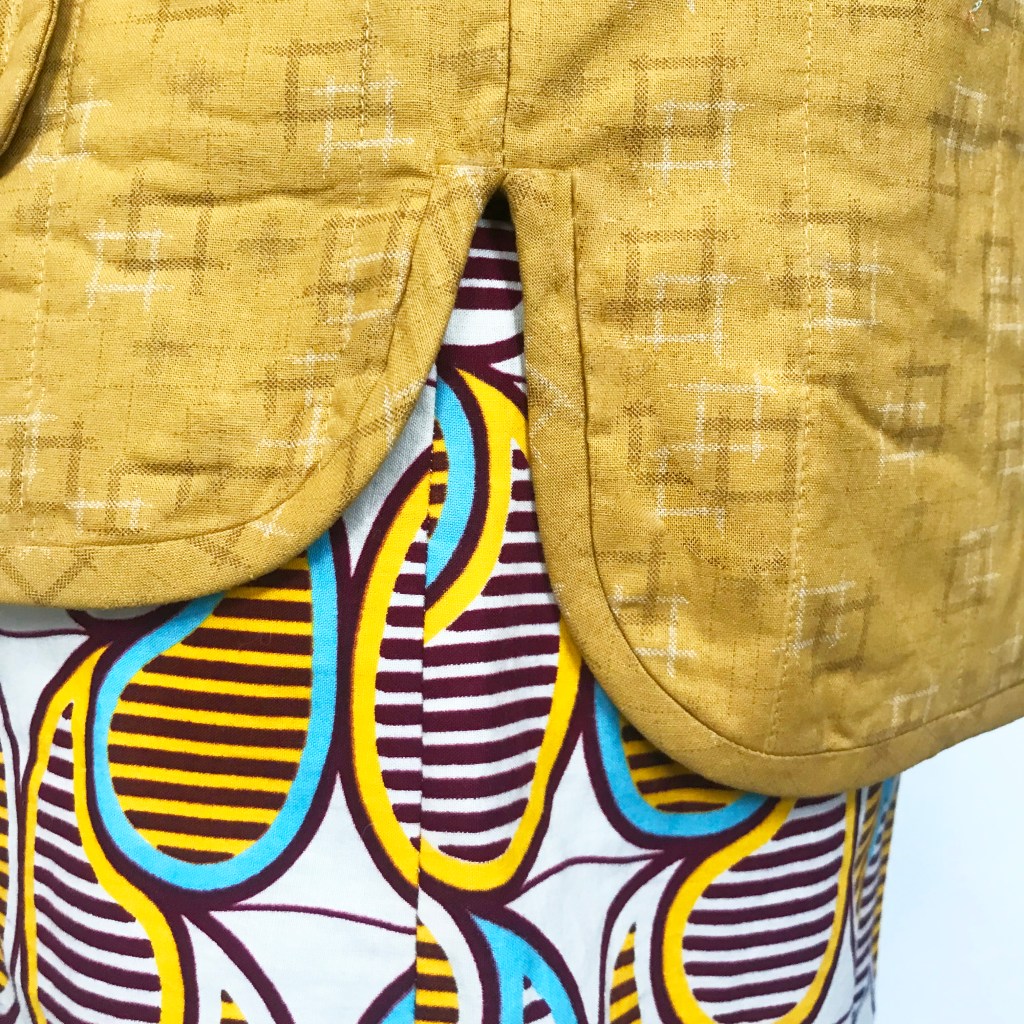
Tip: When you reach the side seam, trim the binding with a small fold under at the far end, then start again on the back with a new binding piece, folding it under at each side seam.
Attach the cuff binding to the cuff edges in the same way as before.
Sew on the five buttons.

And off you go!

All images and text are subject to copyright by Sewgirl. Please ask permission if you wish to use any of the images.

Can you let me know when this pattern (Bibi Jacket) is back in stock please.
Many thanks
Sue
LikeLike
Hi Sue it’s still in stock on my Etsy shop at
http://www.etsy.com/shop/Sewgirlintheuk
Or click the shop link in the menu
LikeLike
Hi
I’m currently making up the Bible jacket. Can you explain how you’ve bound the 2 curved edges at the junction to the side seam please.
Loving it so far
Sharon
LikeLike
Hi Sharon if you look at the side hem detail picture on the Bibi page on this blog you can see that I stopped at the side edge, turned under the binding raw edge then started again on the other side with the binding back piece to the other side edge, again turning the binding raw edge under again at the far end.
LikeLike
Hi just received the Bibi quilting jacket,cut out back and sleeves, there is a plain piece of paper left but there is no front pattern?please advise.
Linda Jones.
LikeLike
Hi Lynda
I tried to contact all the Bibi customers a week ago to ask if they could check their patterns because we became aware that some of them had templates missing. You obvs didn’t see my email and I’m so sorry for the inconvenience this may have caused. We have the missing parts that we are sending out as we hear back from people. I’ll get them posted to you today by first class post .
So sorry again
all the best Fiona
LikeLike
Just finished my bibi jacket. brilliant. Making another .fits like a dream thank you so much Lynda .
LikeLike
Thanks for your message- so glad you like your jacket- I live in mine pretty much all the time! 🤣 send some pics over – would love to see it!
LikeLike
Thank you for featuring my Bibi jacket- x
LikeLike