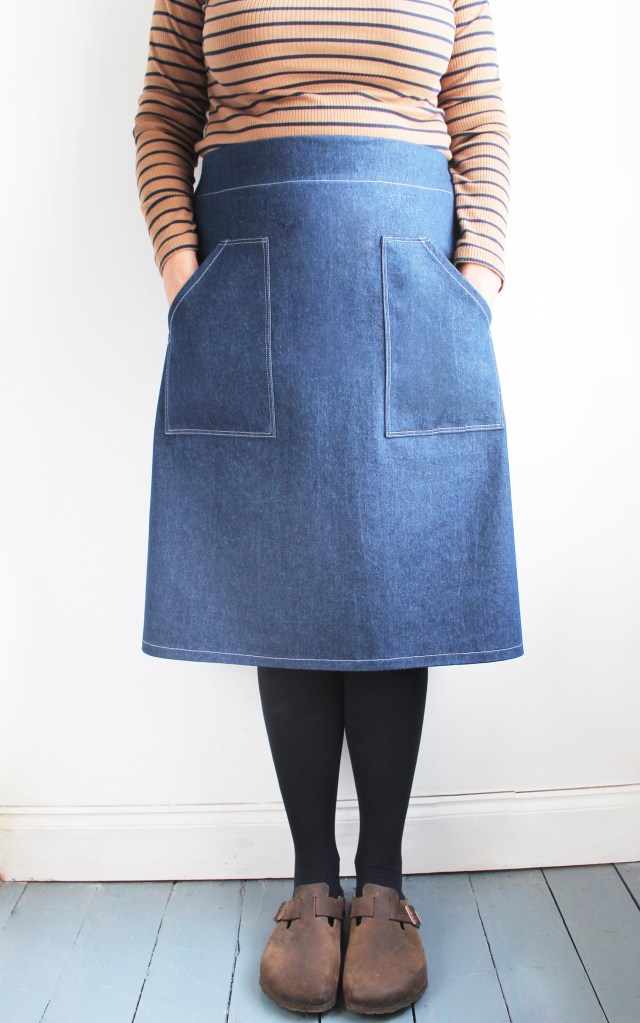
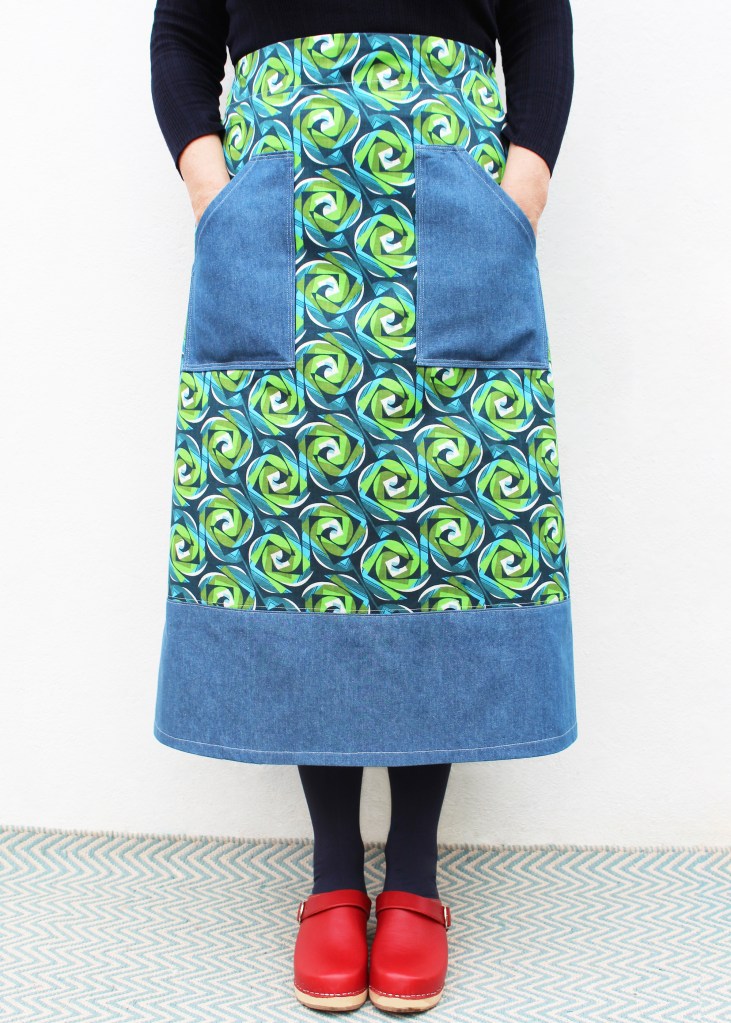
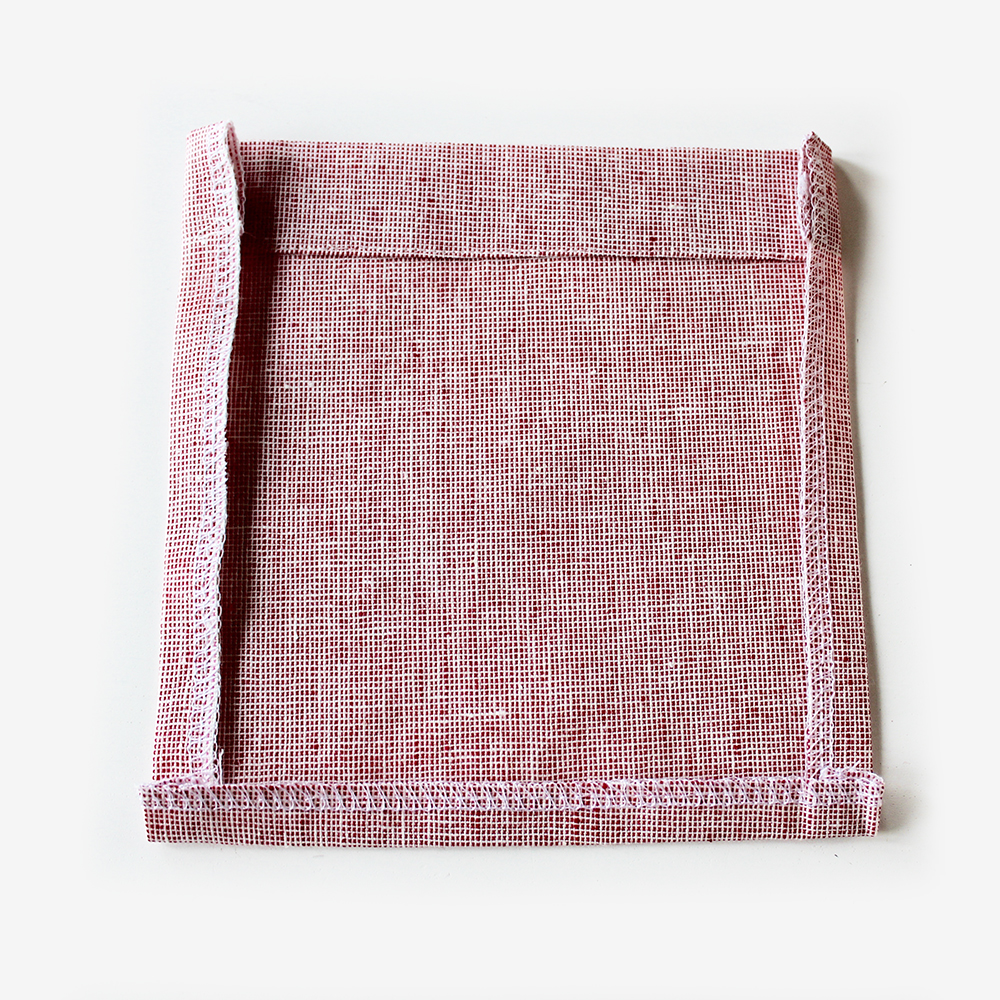
So this skirt was inspired by a one I made for myself that I literally wore out, I loved wearing it so much. It’s my go to skirt for knocking about everyday, working in, going out on my bike, walks, you name it.
And those pockets are just SO practical!
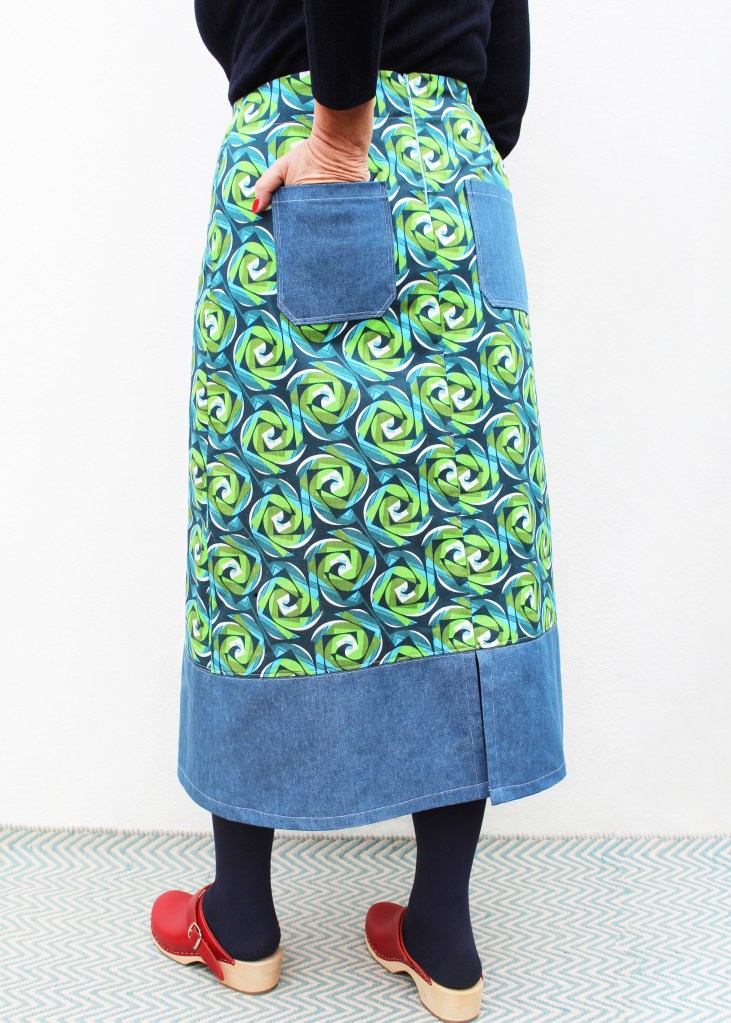
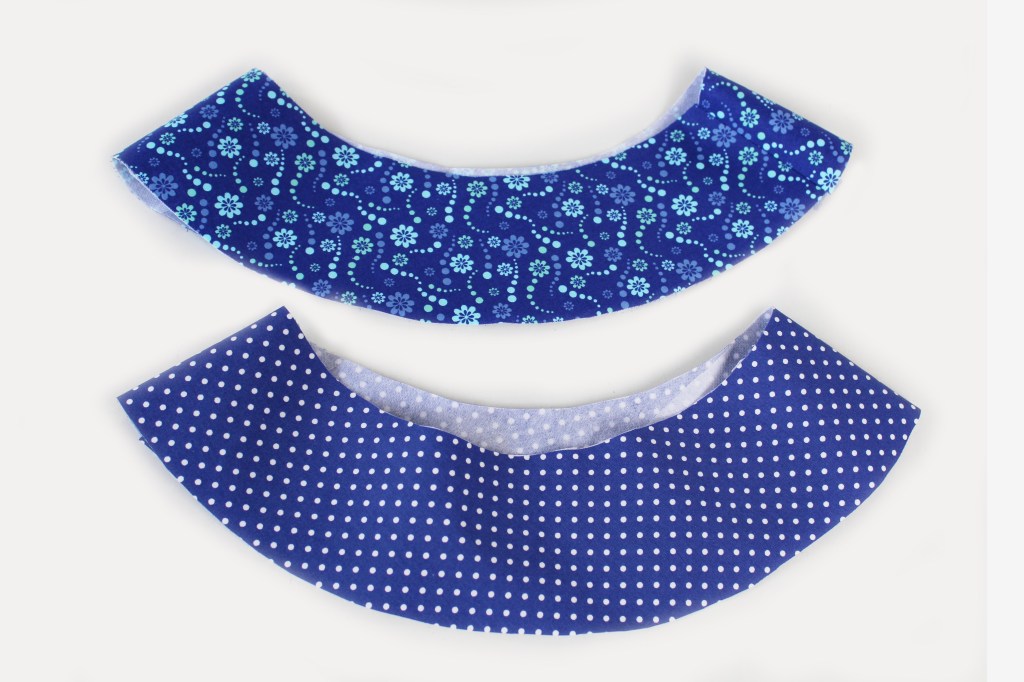
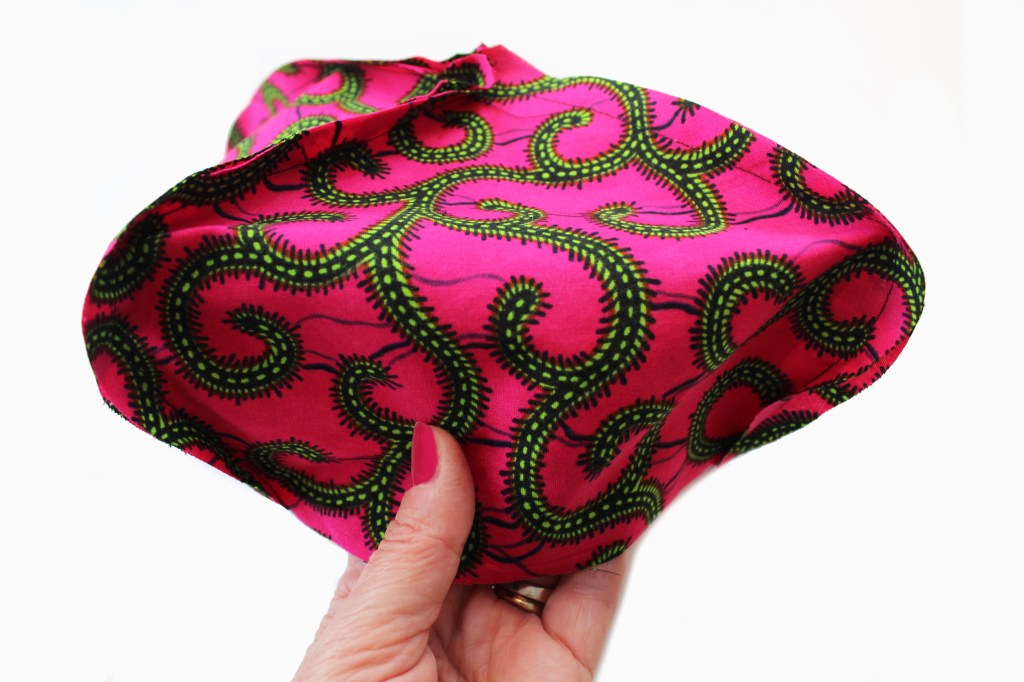
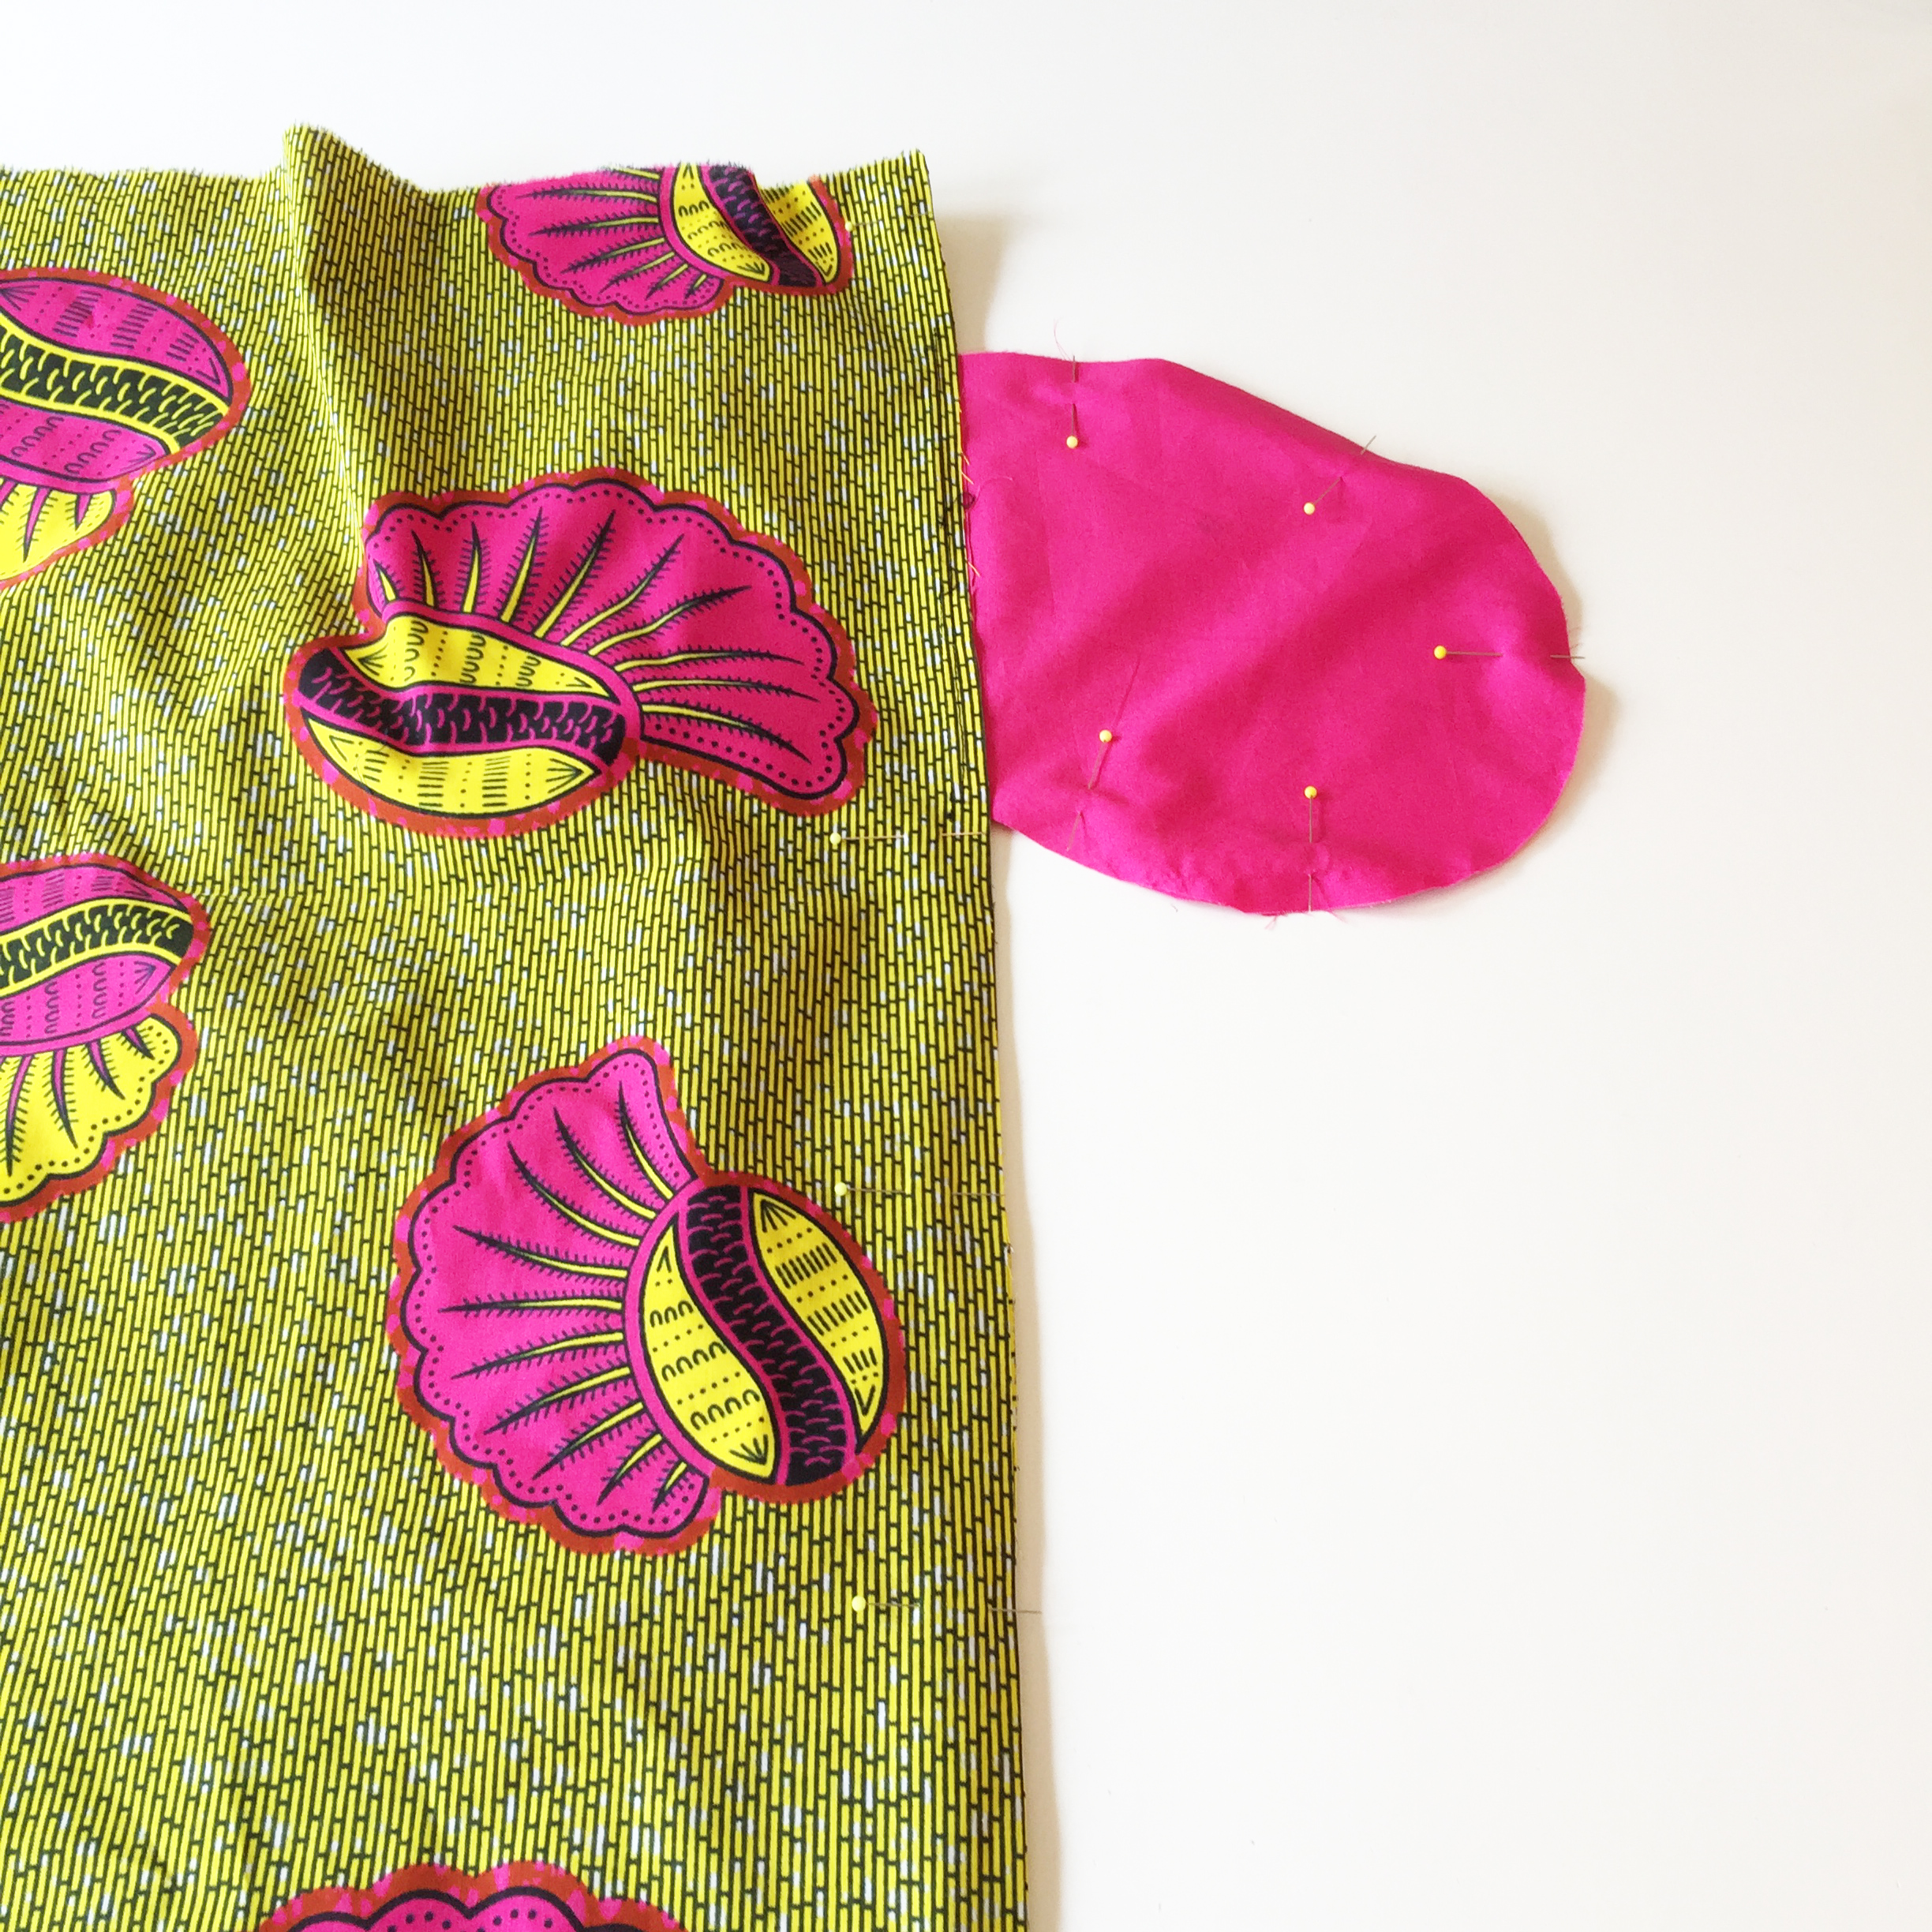
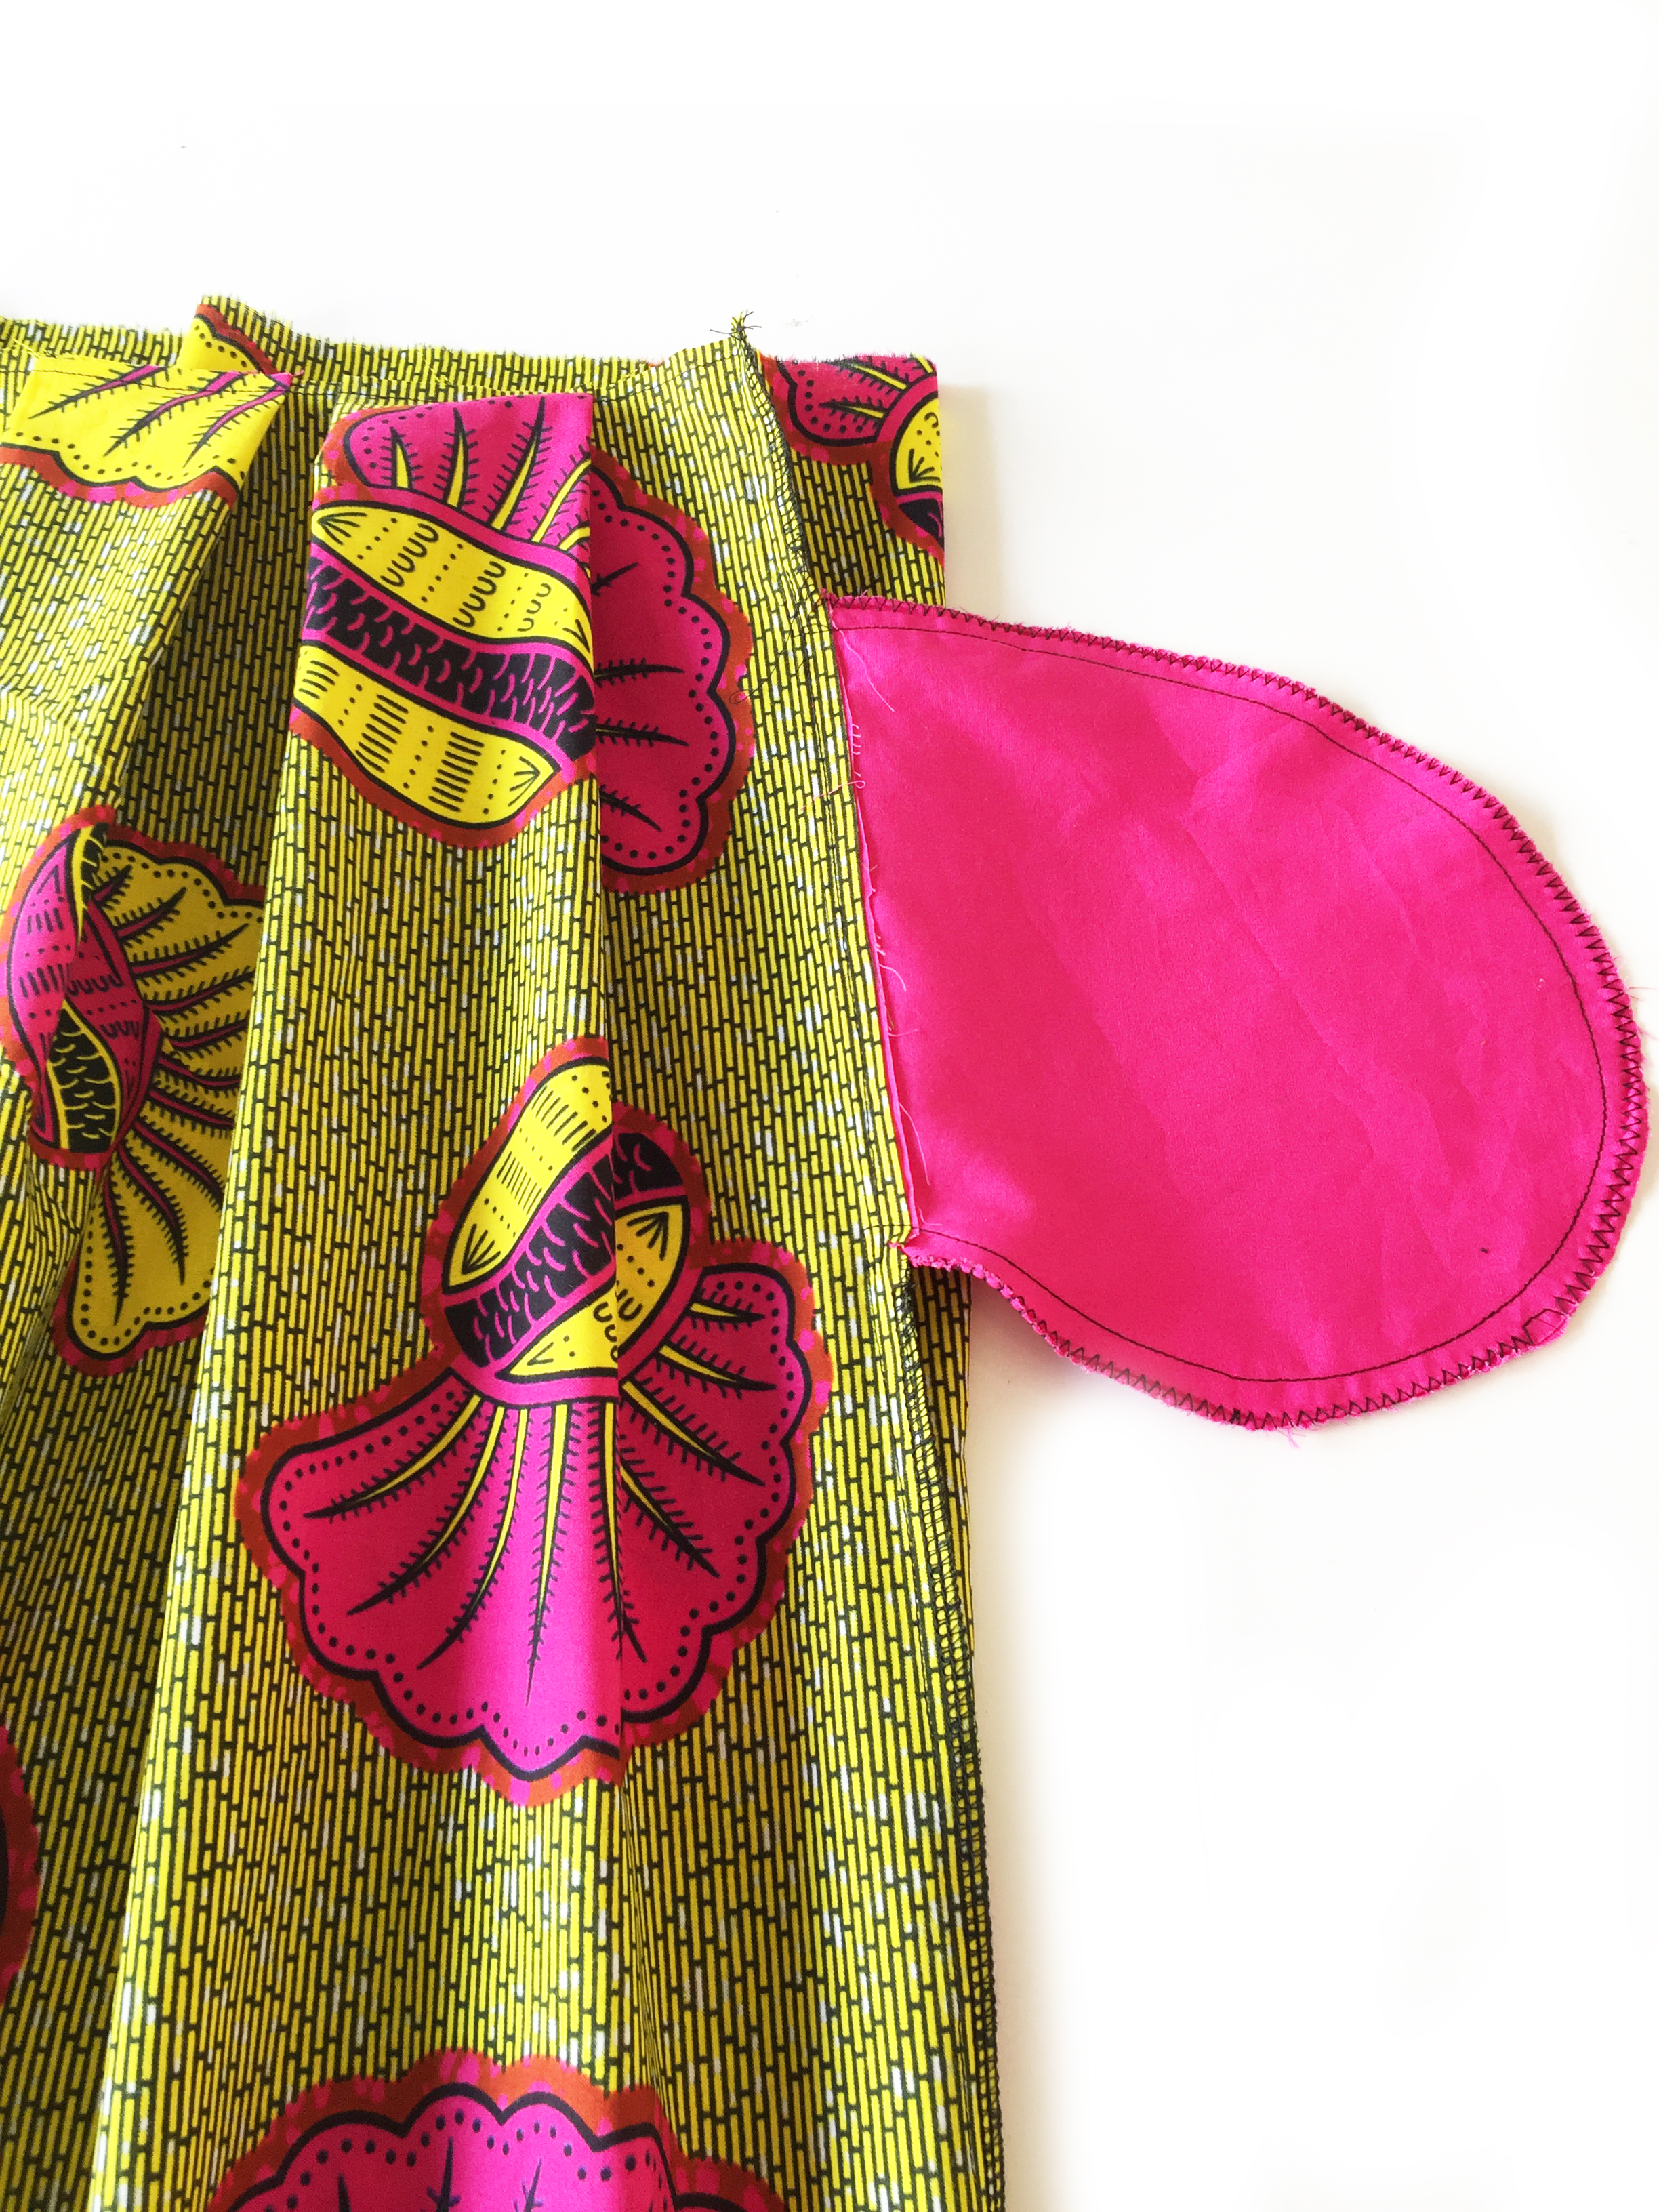
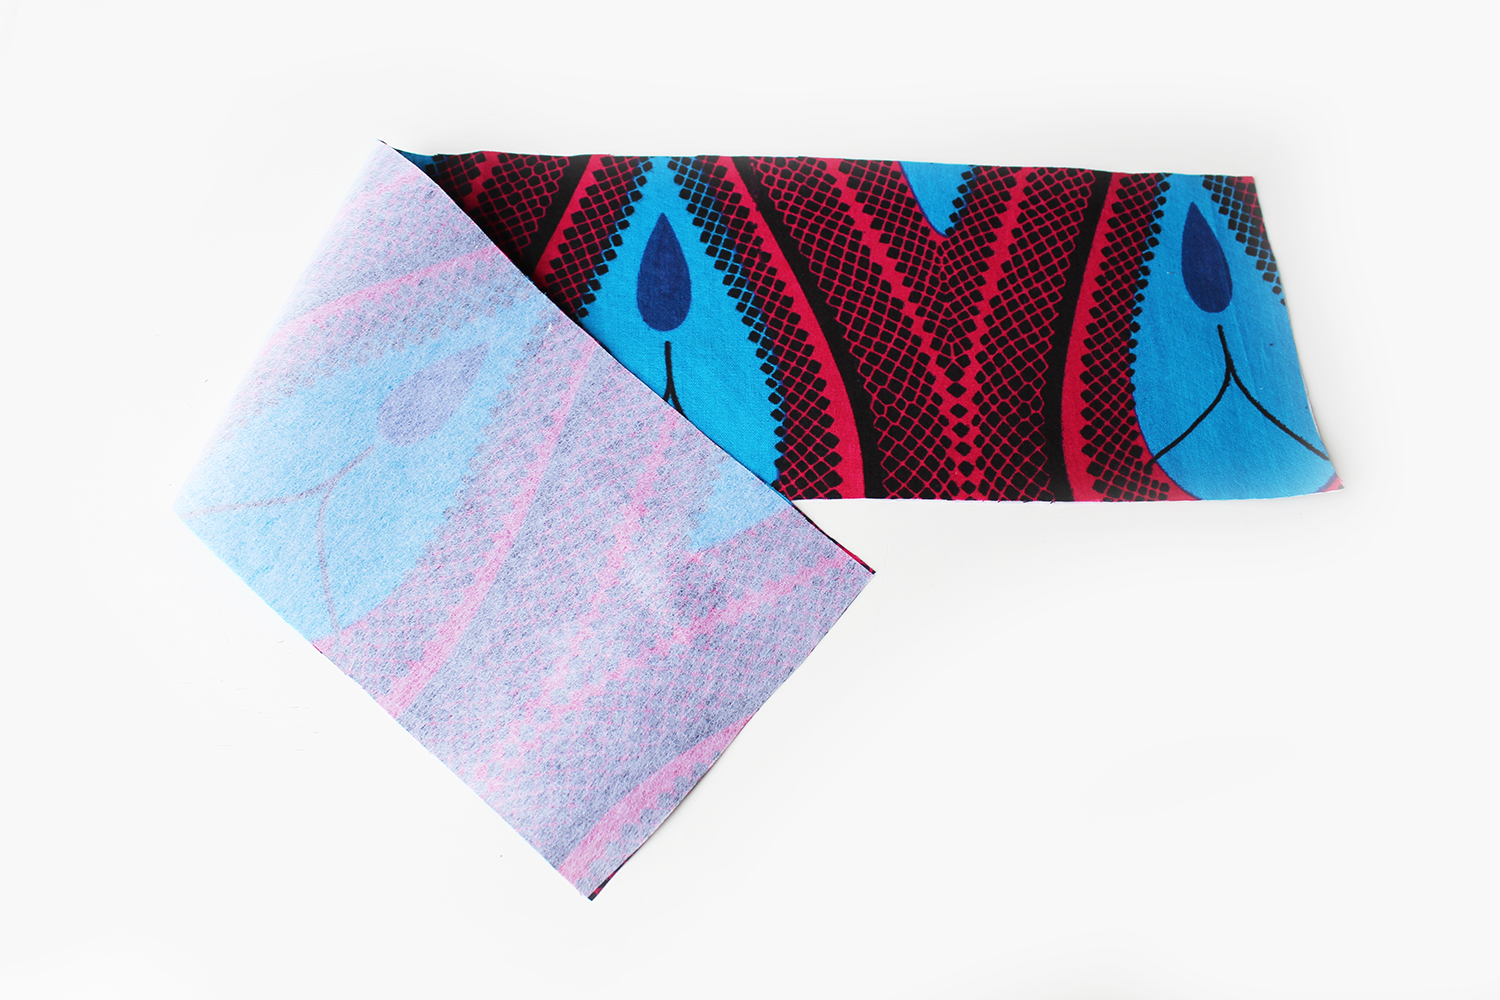
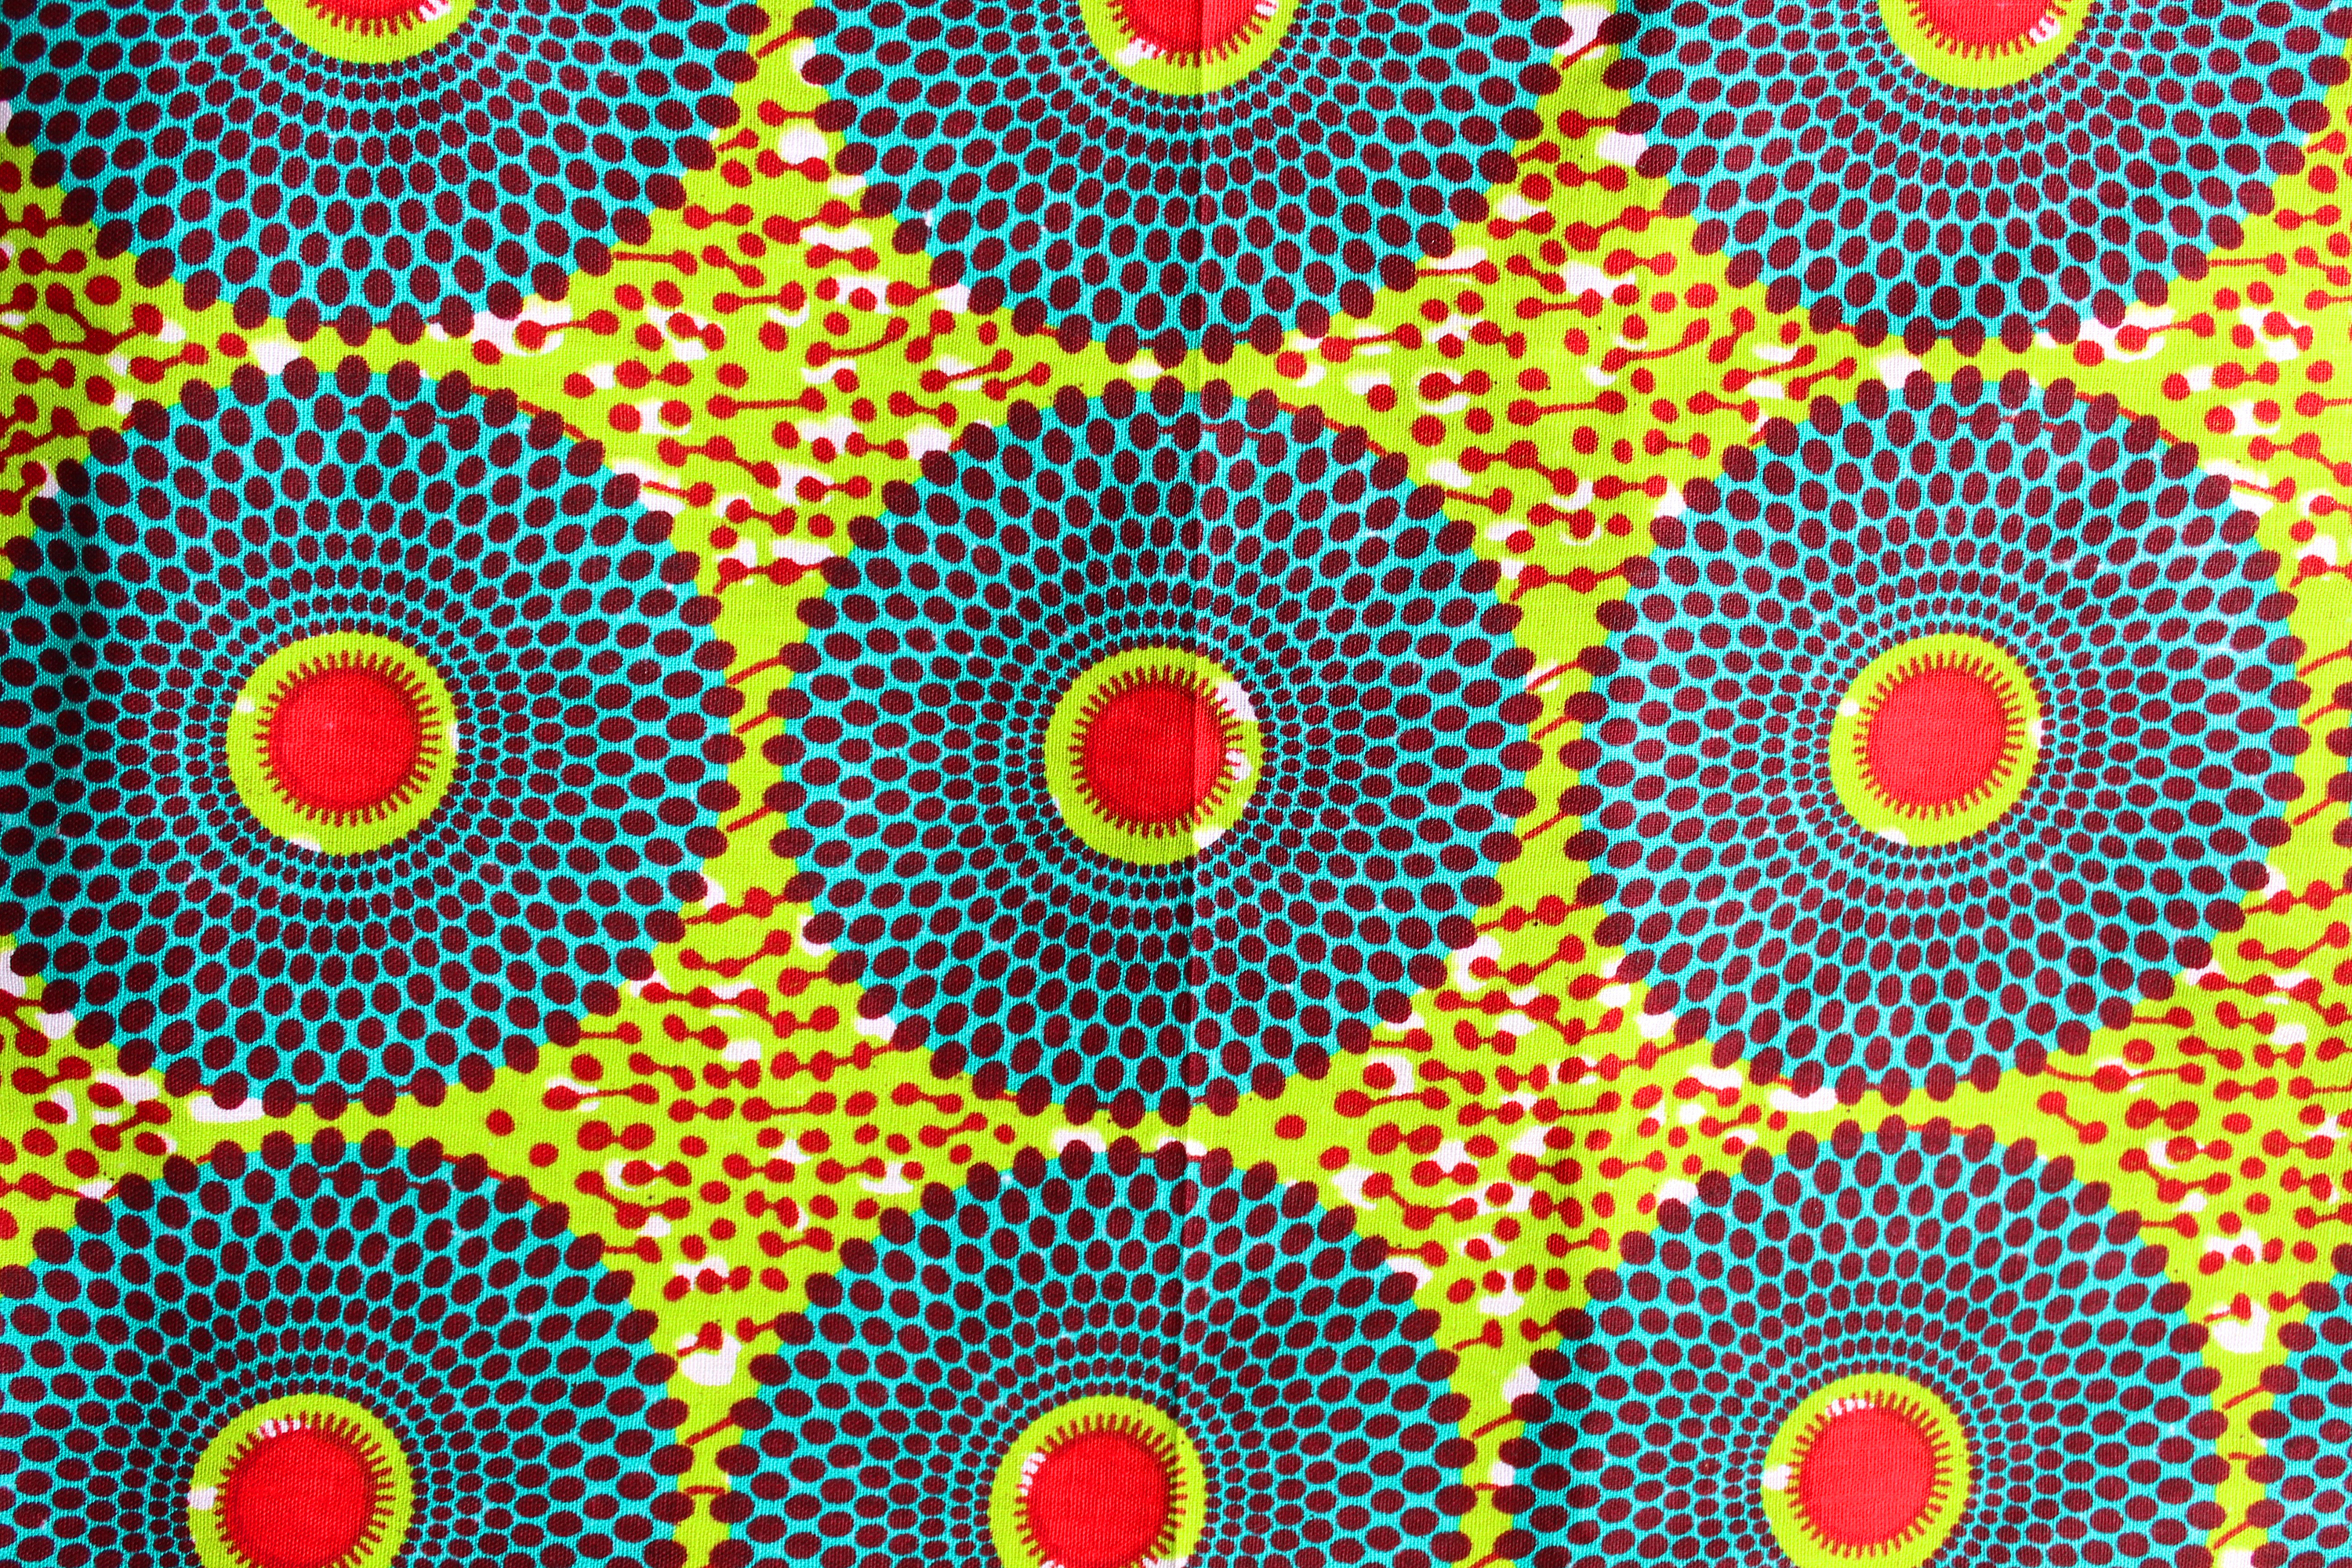
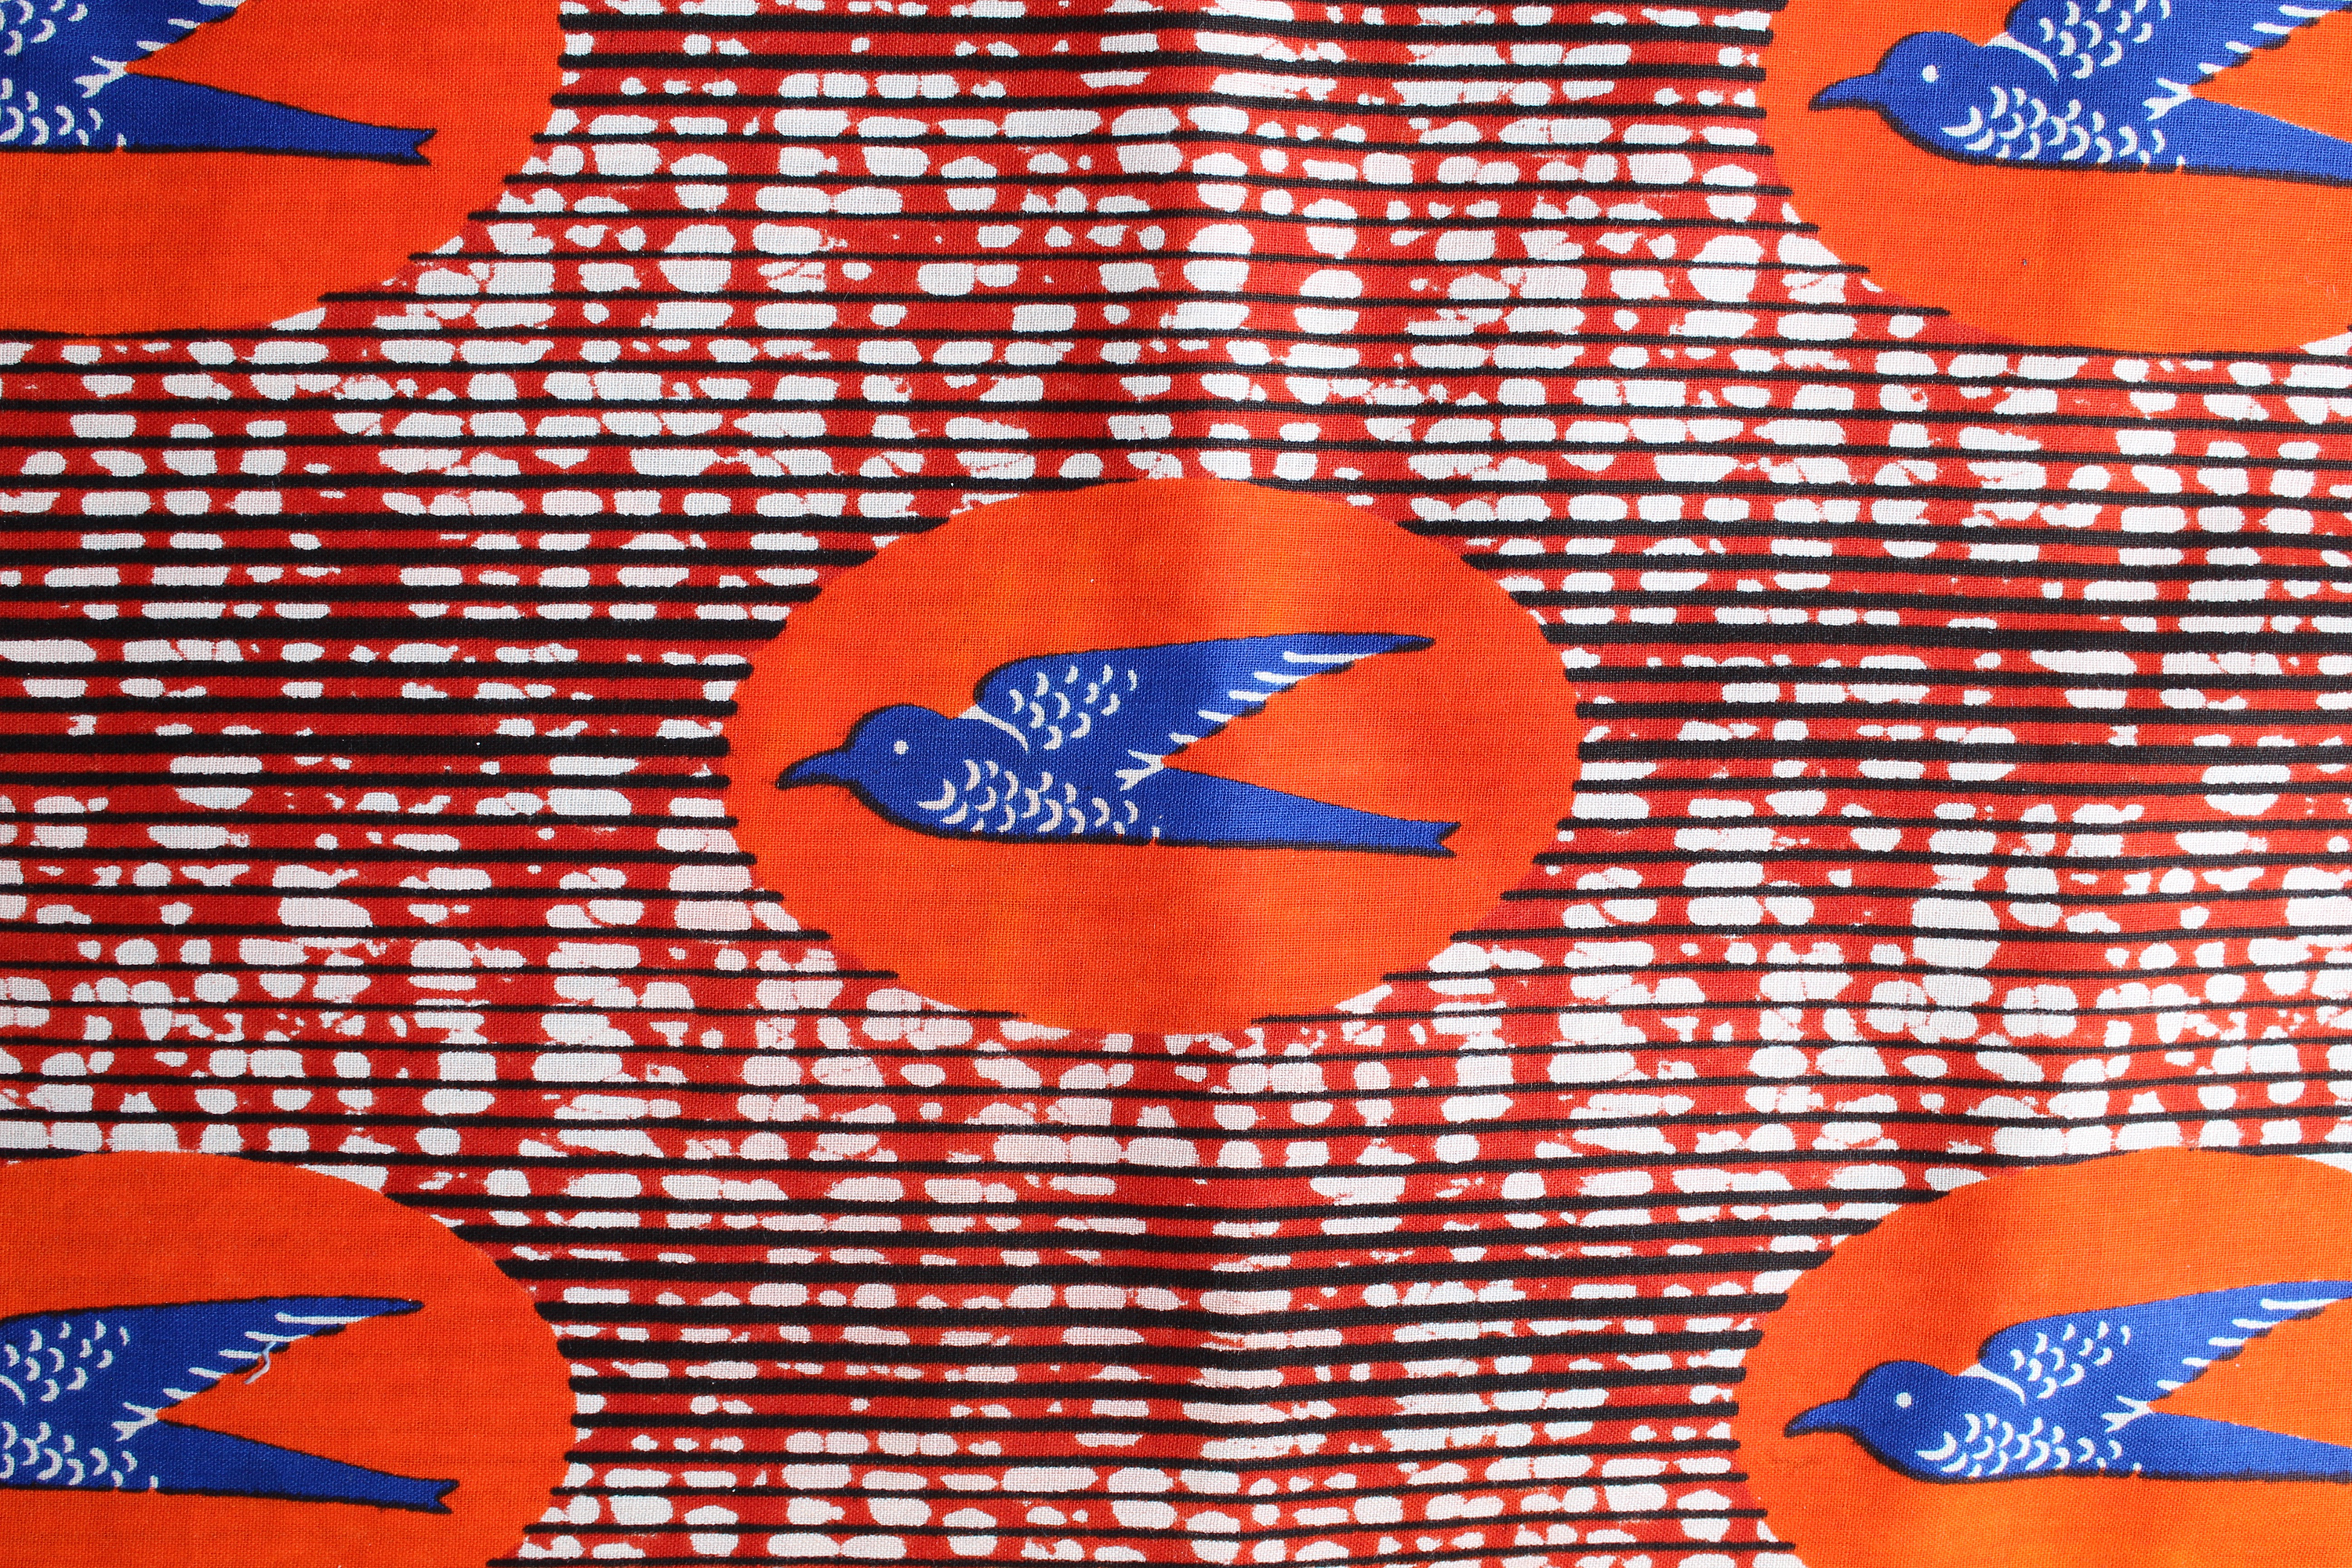
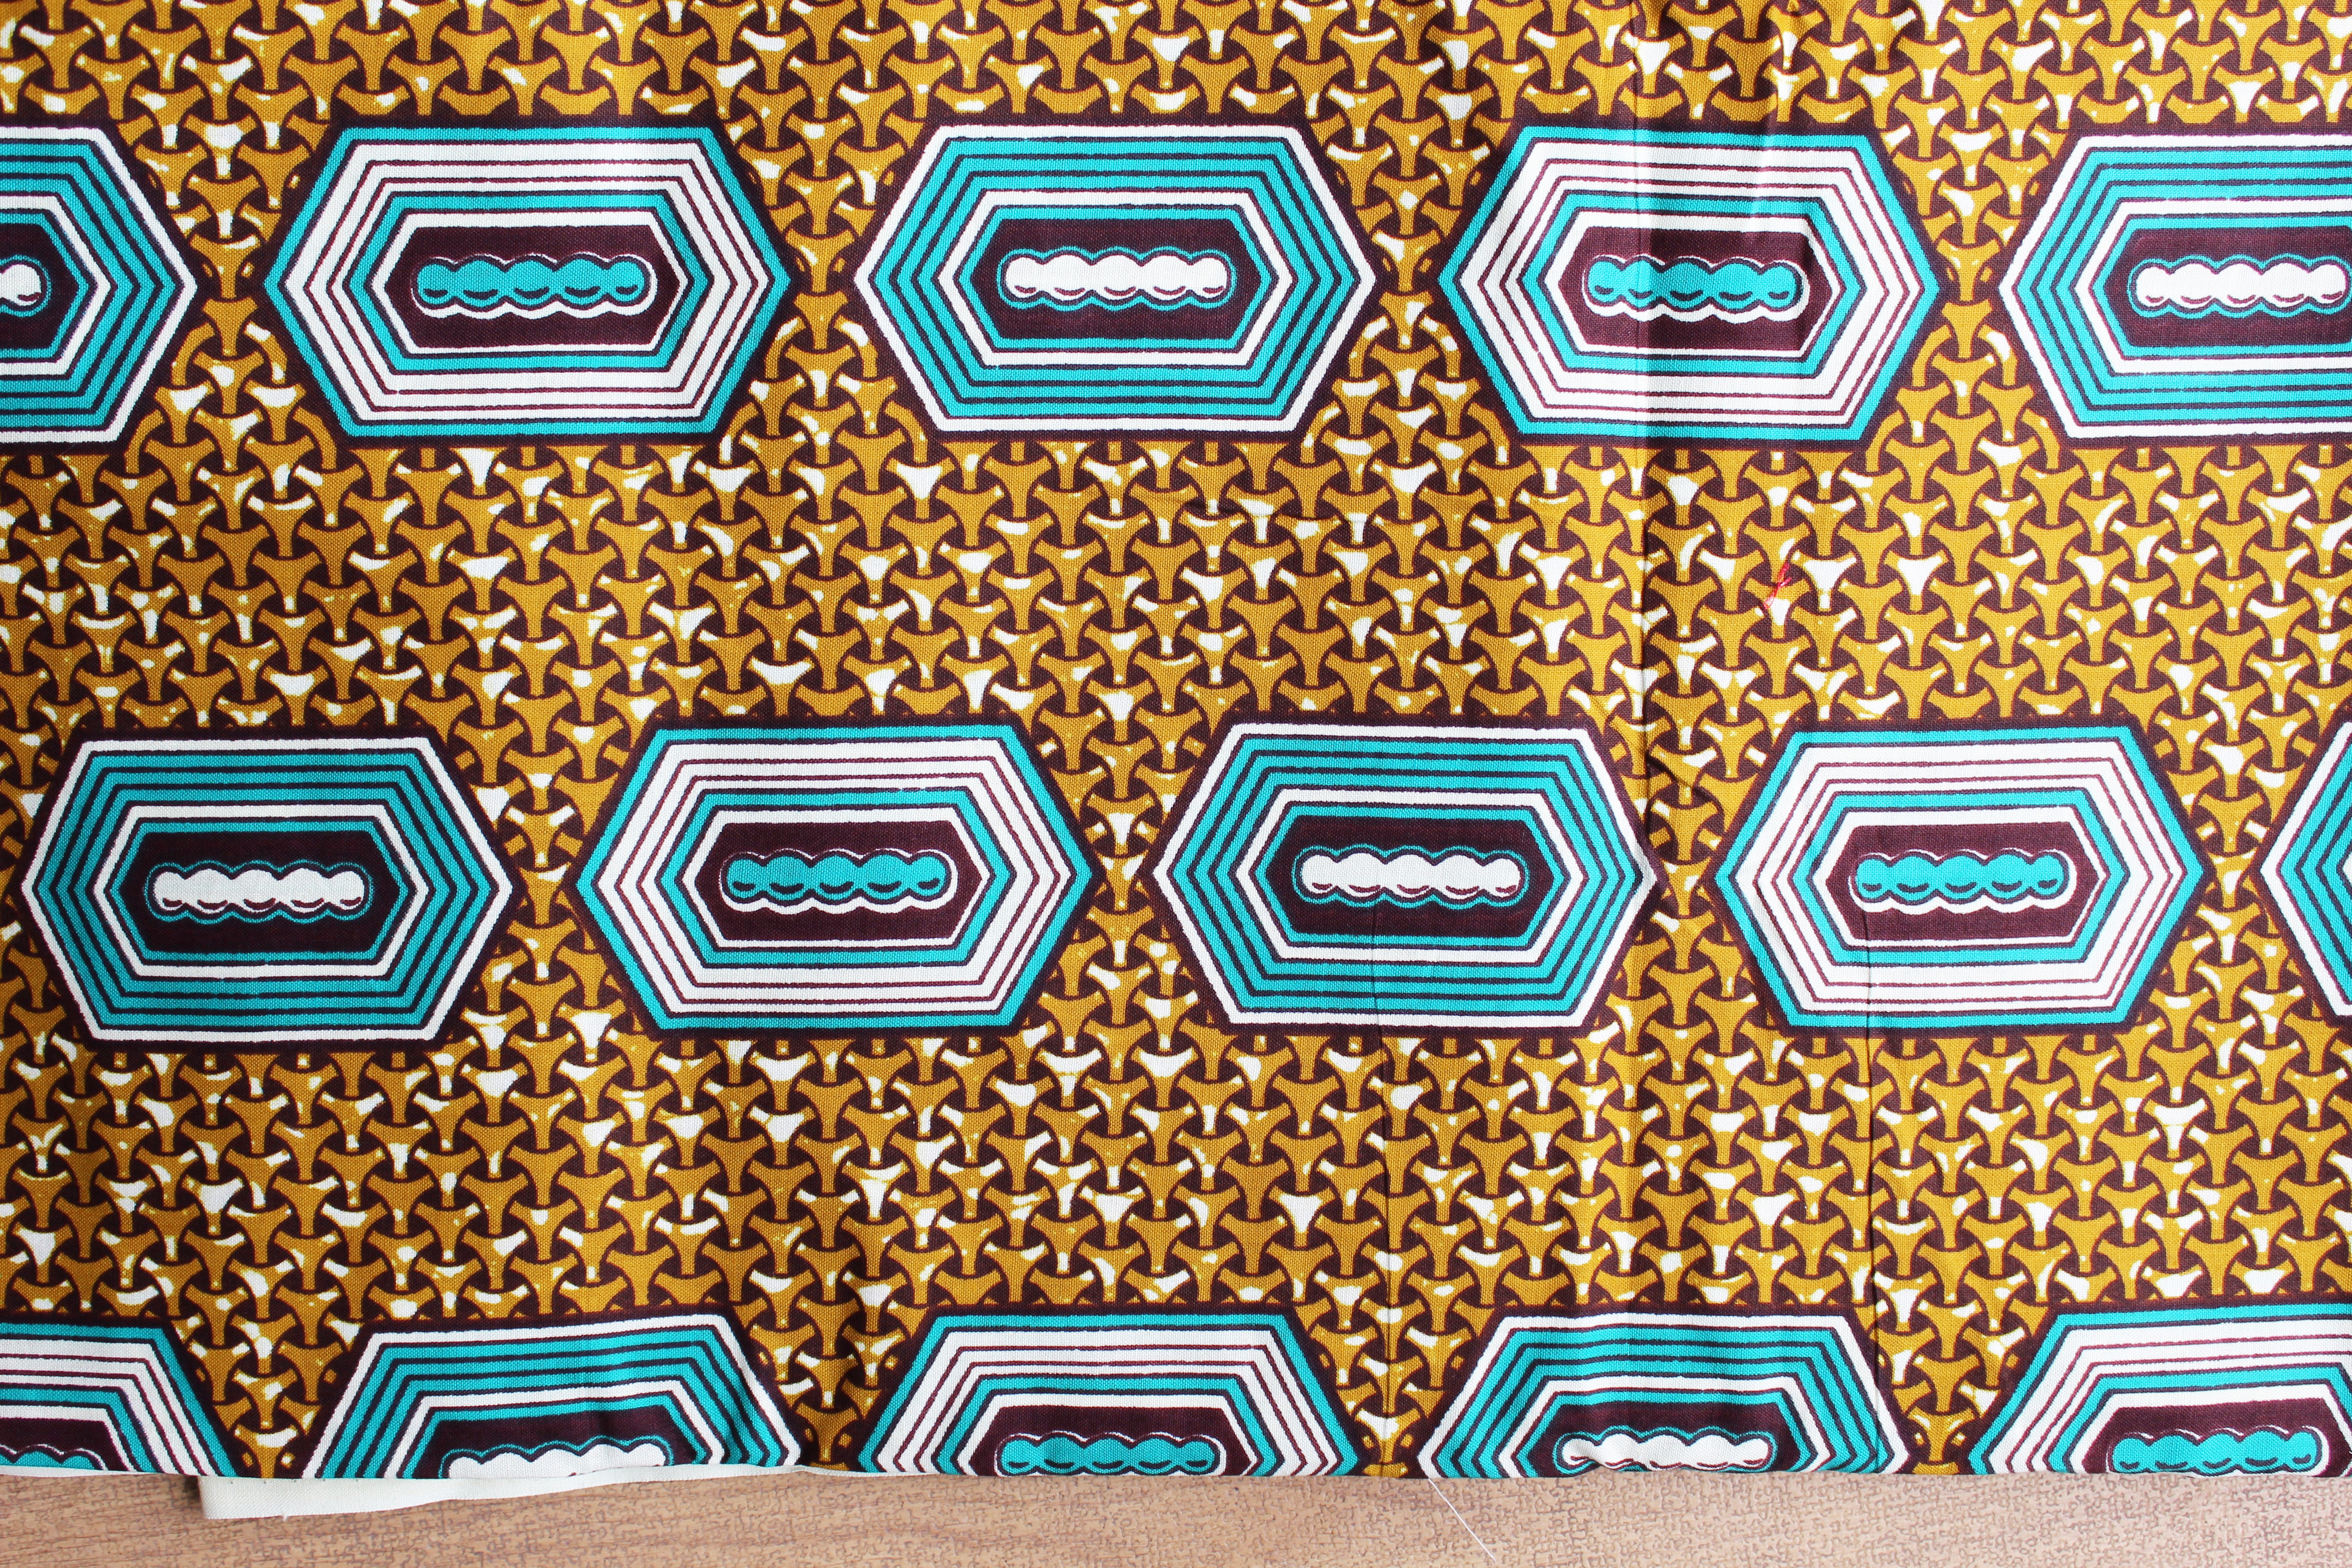
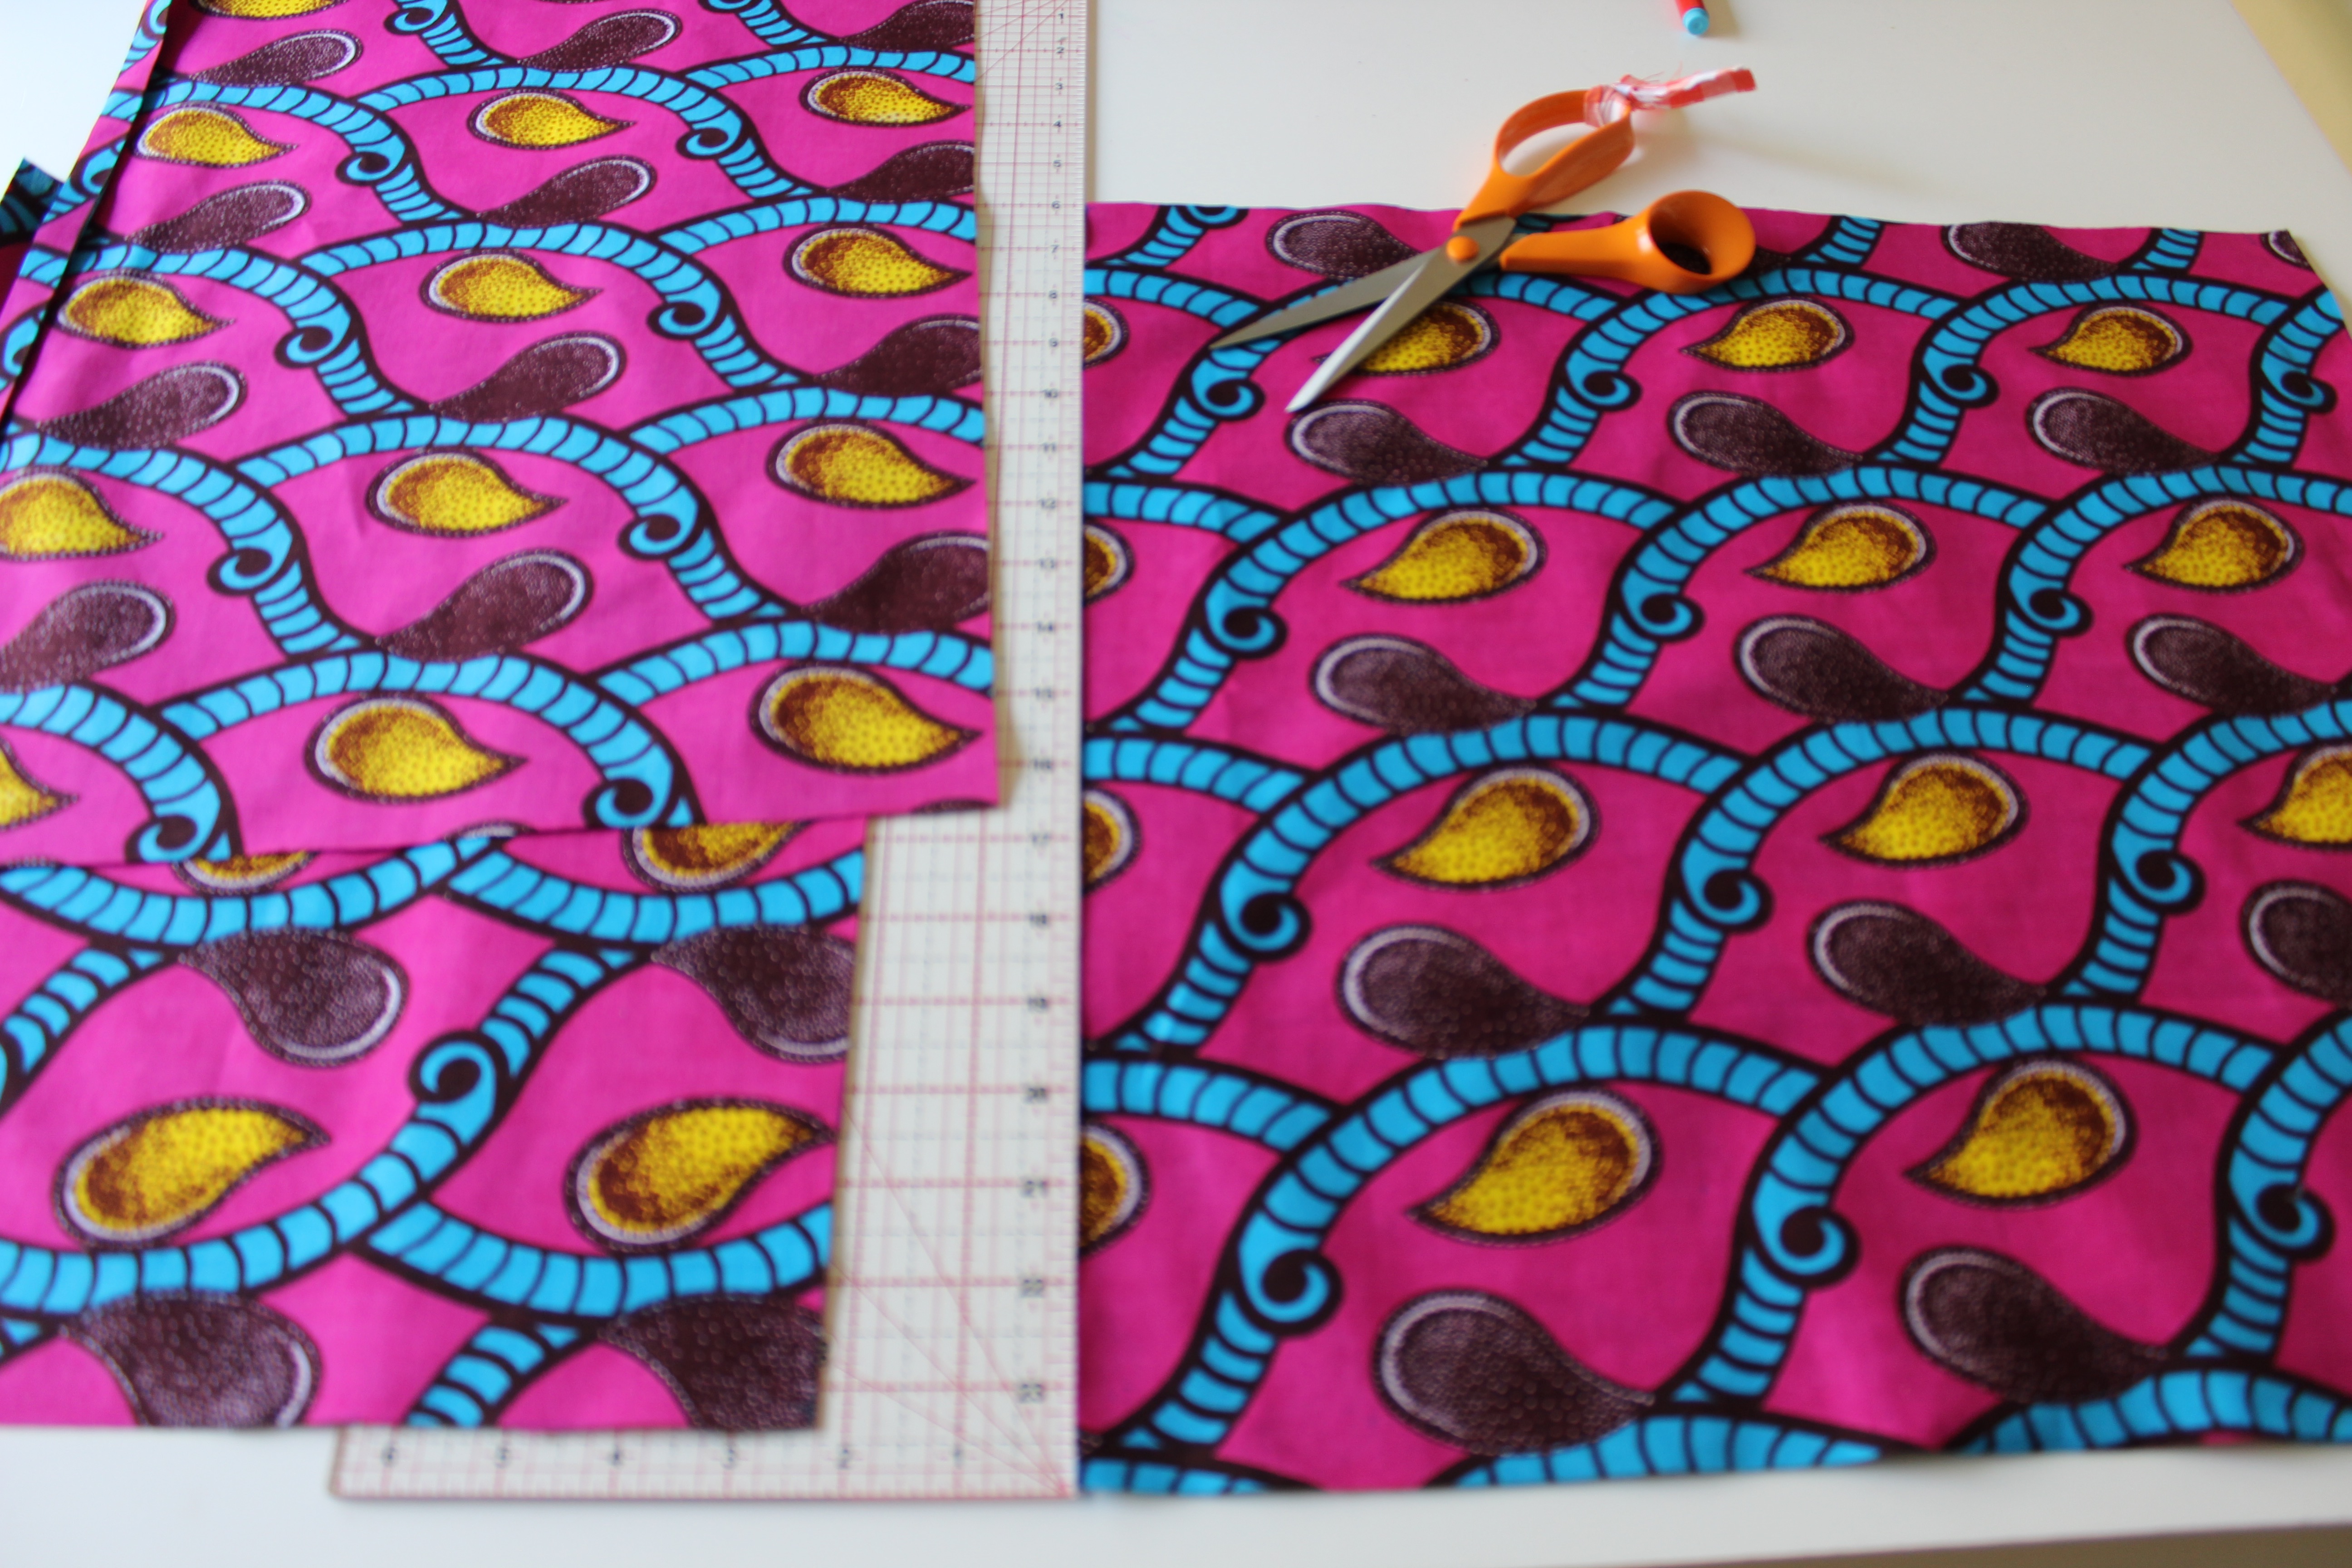
Martha Skirt is a great denim project or, as you can see from the pictures, perfect when using a dynamic printed cotton teamed up with a plain fabric for the band and pockets. This print is an african Wax print which (for those that know me) I’m a big fan of.
I find such pleasure choosing the colour to match the print. In my books, this is one of the things that makes sewing such fun. You are going to have a unique garment that you have created for yourself! What’s not to love!
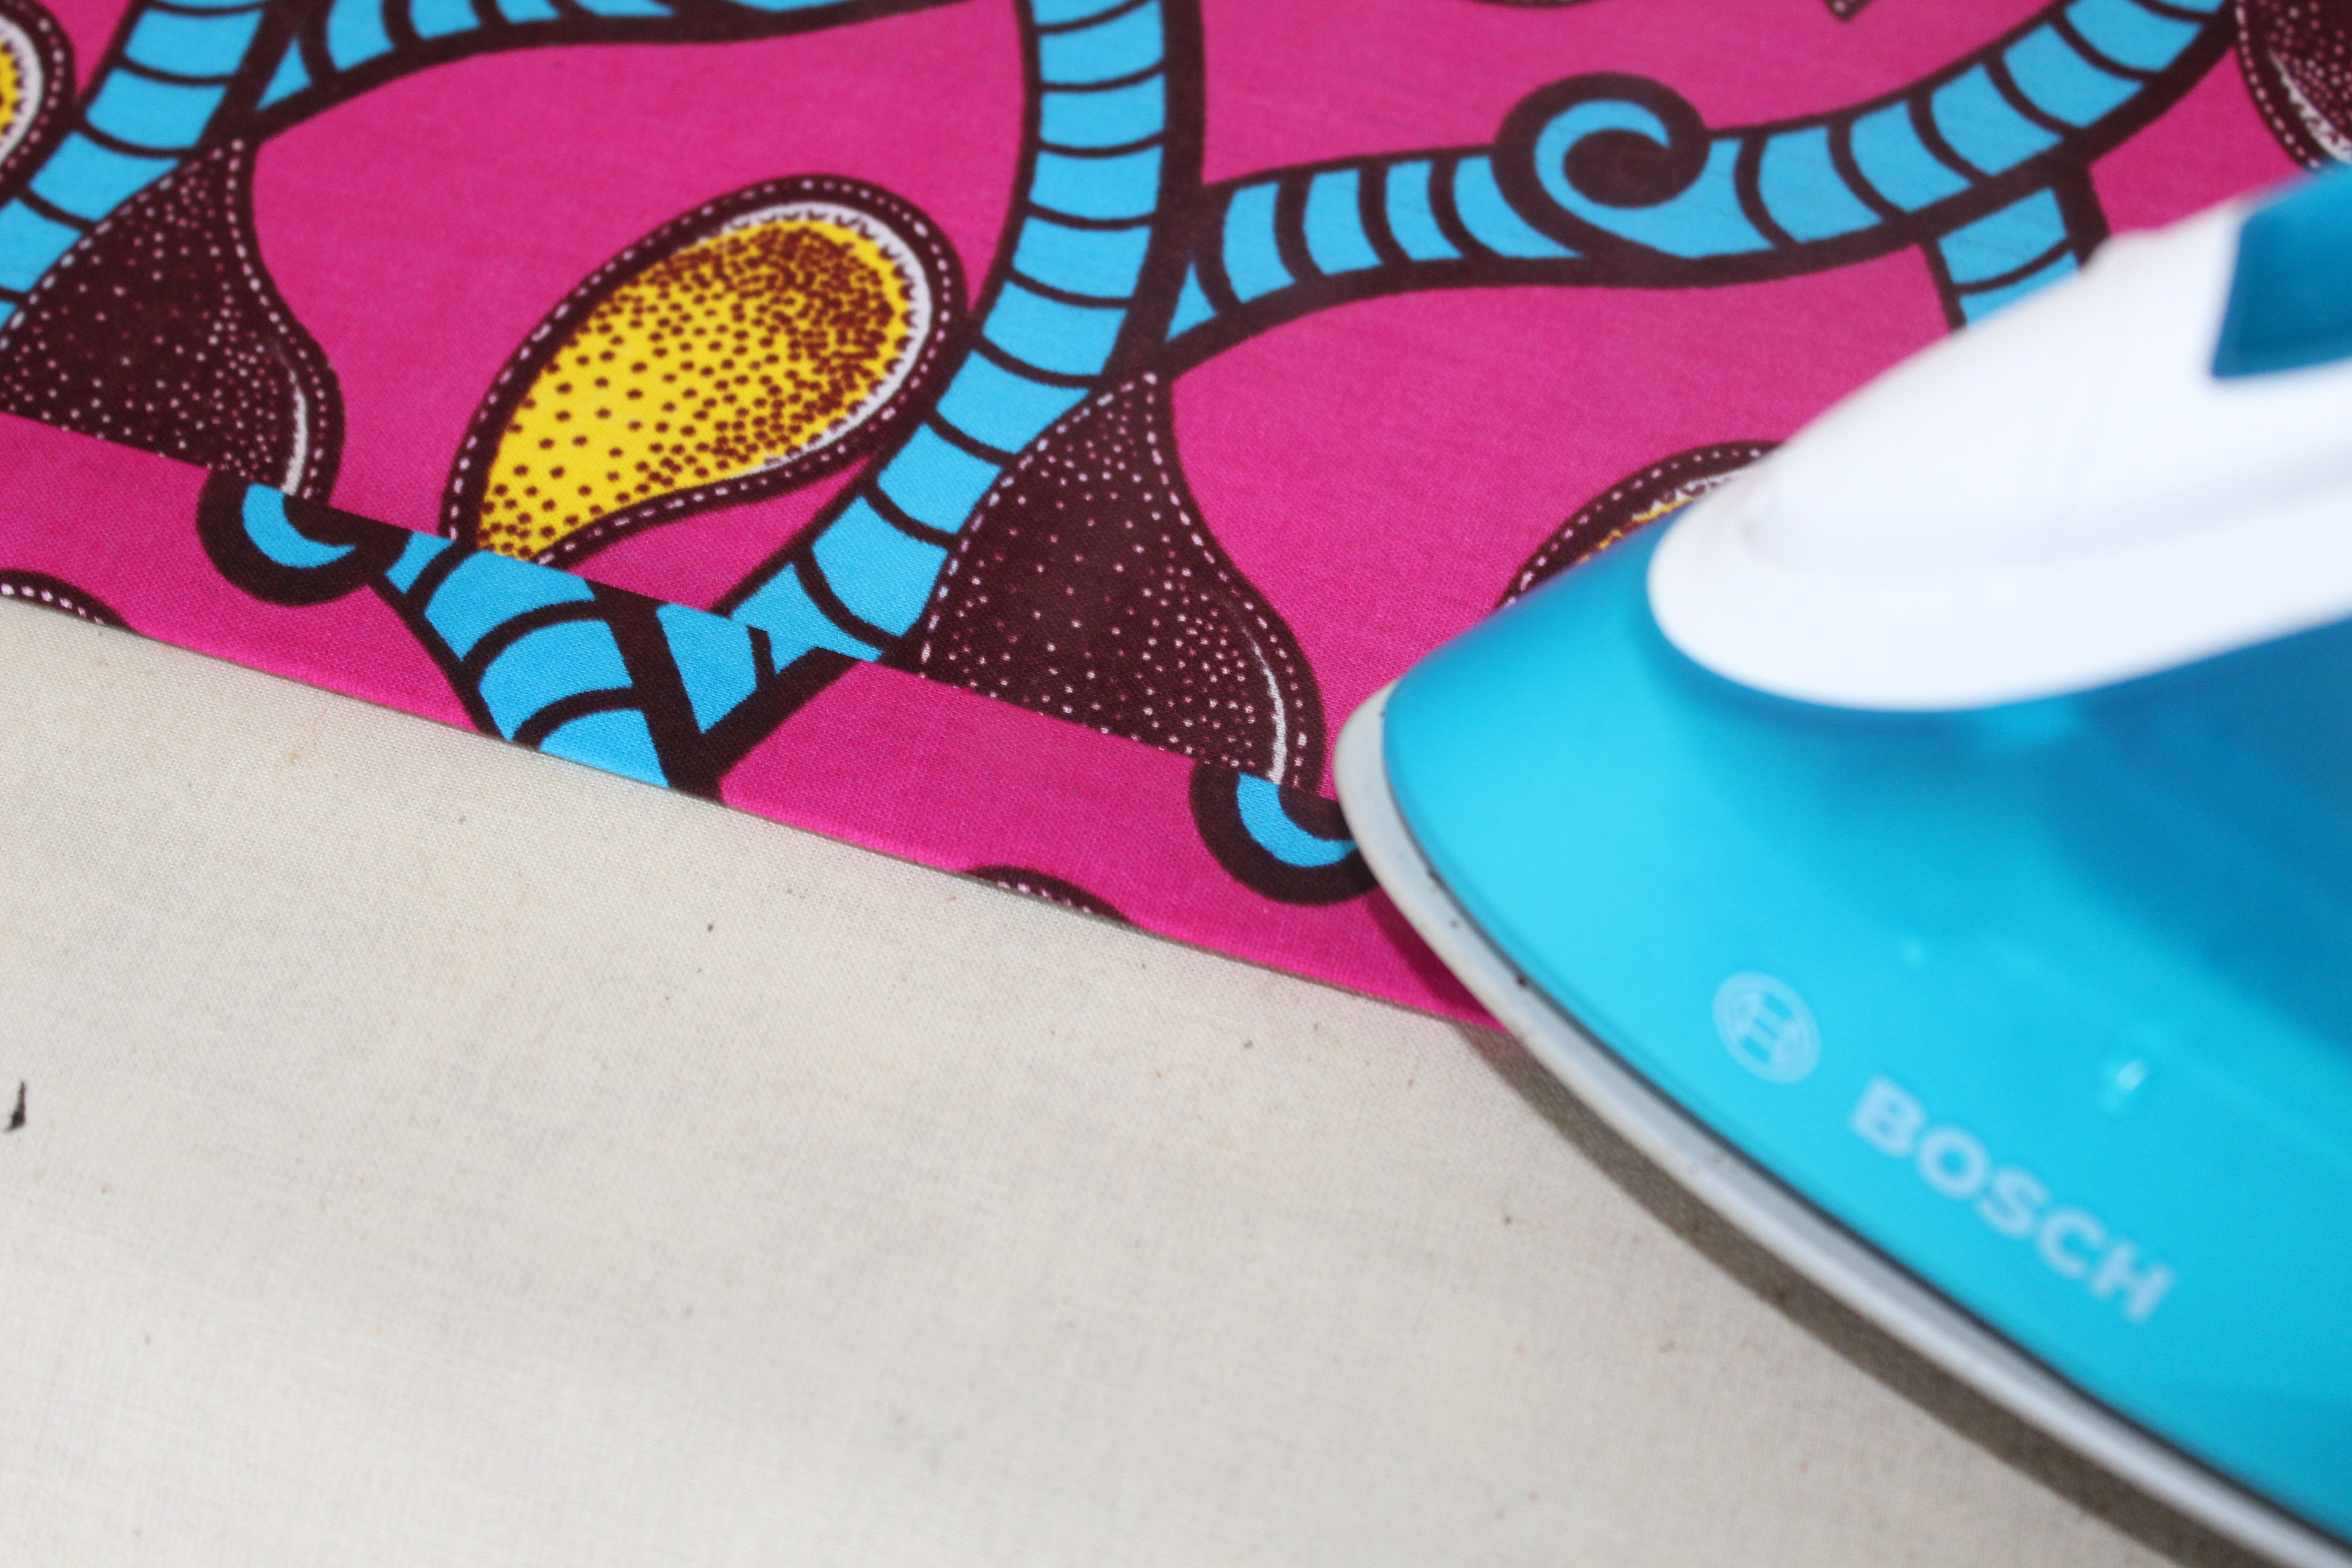
So, if you have chosen to use two different fabrics, make sure to use similar weights, but if you. like me, want to use something a bit heavier for the band (i.e. 8oz denim) then just balance out the main fabric with some lightweight lining fabric like a cotton voile or maybe even some woven fusible interfacing. I just cut out another upper Front & Back skirt piece only, pin to the reverse side of the three pieces, stitch together all around at the sides, then continue as if its one piece of fabric.
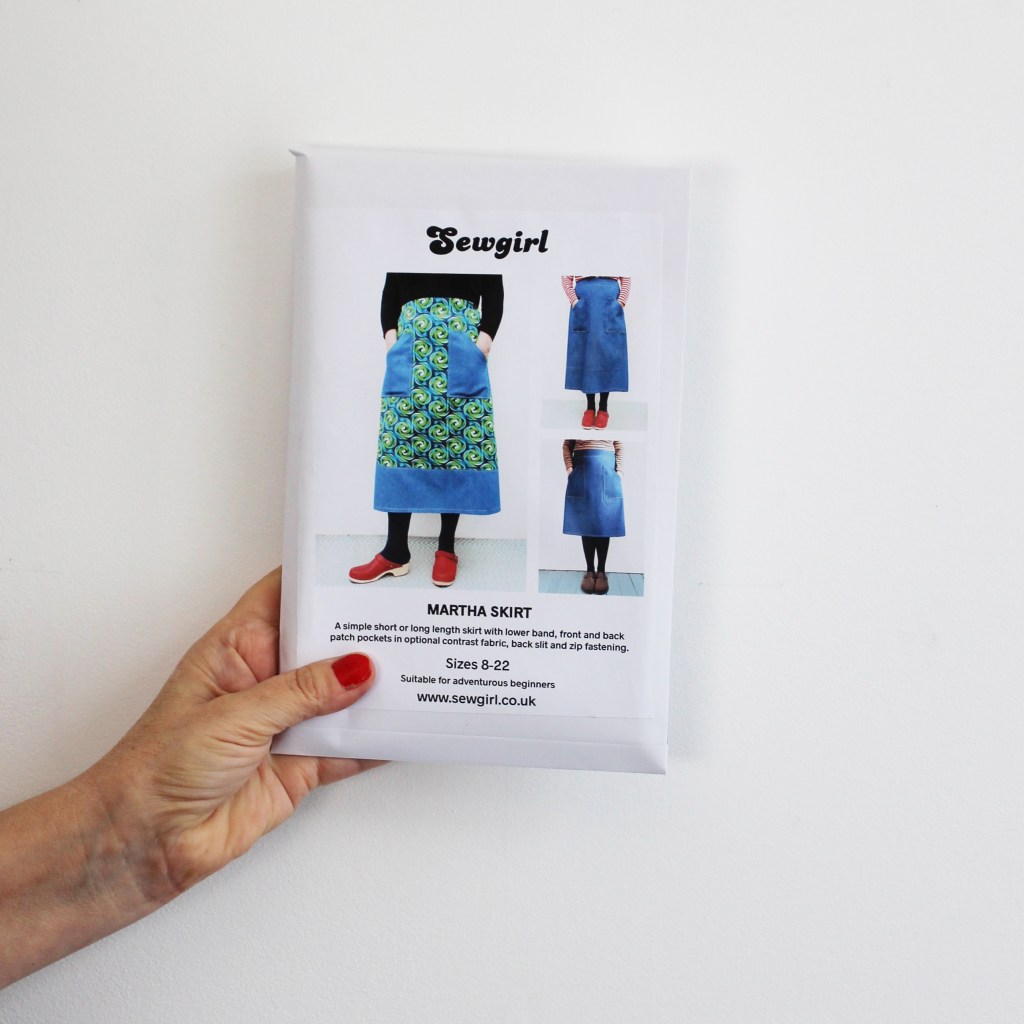
Martha Skirt pattern
Here is the info you need about sizing, finished garment measurements and fabric requirements….
You also need an 18cm (7″) zip and 20cm of medium/lightweight interfacing and a reel of thread.
Equipment: A zip foot machine attachment, poking tool. I like to use a tailors ham too but its not essential.
Zip foot
SEAM ALLOWANCE IS 1.5cm
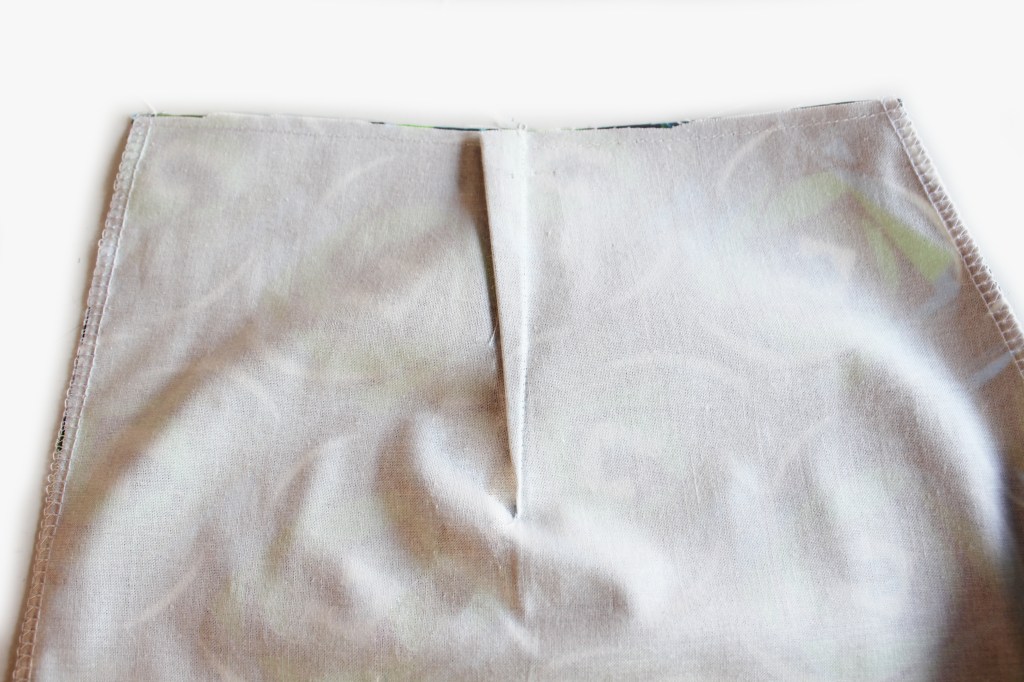
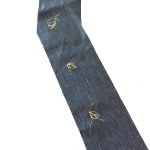
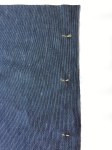
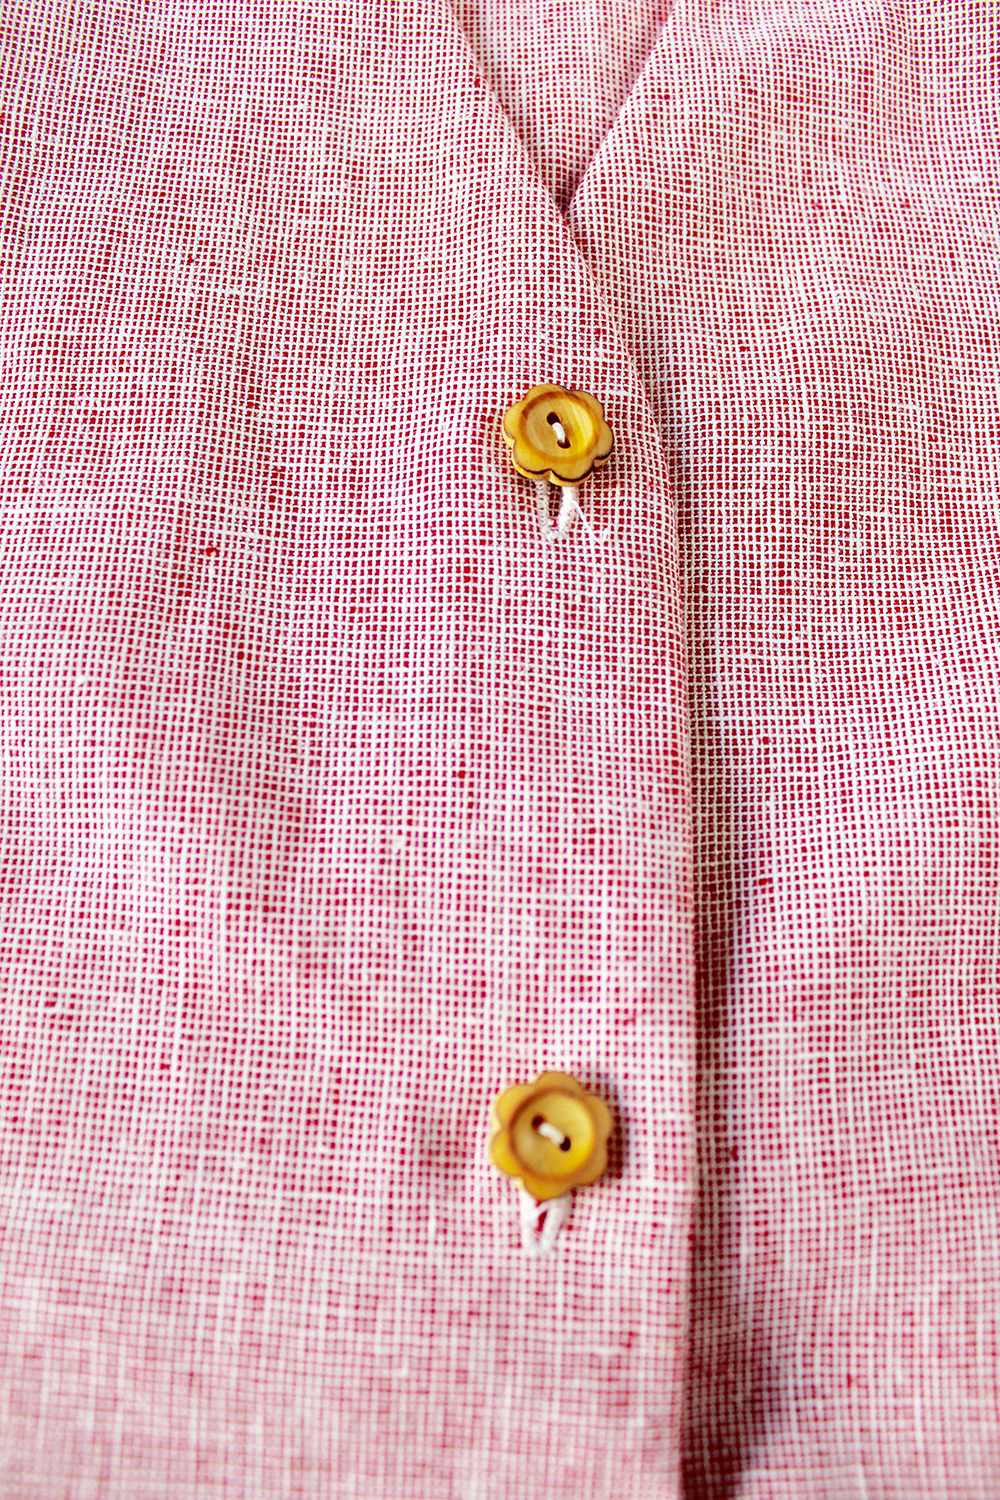
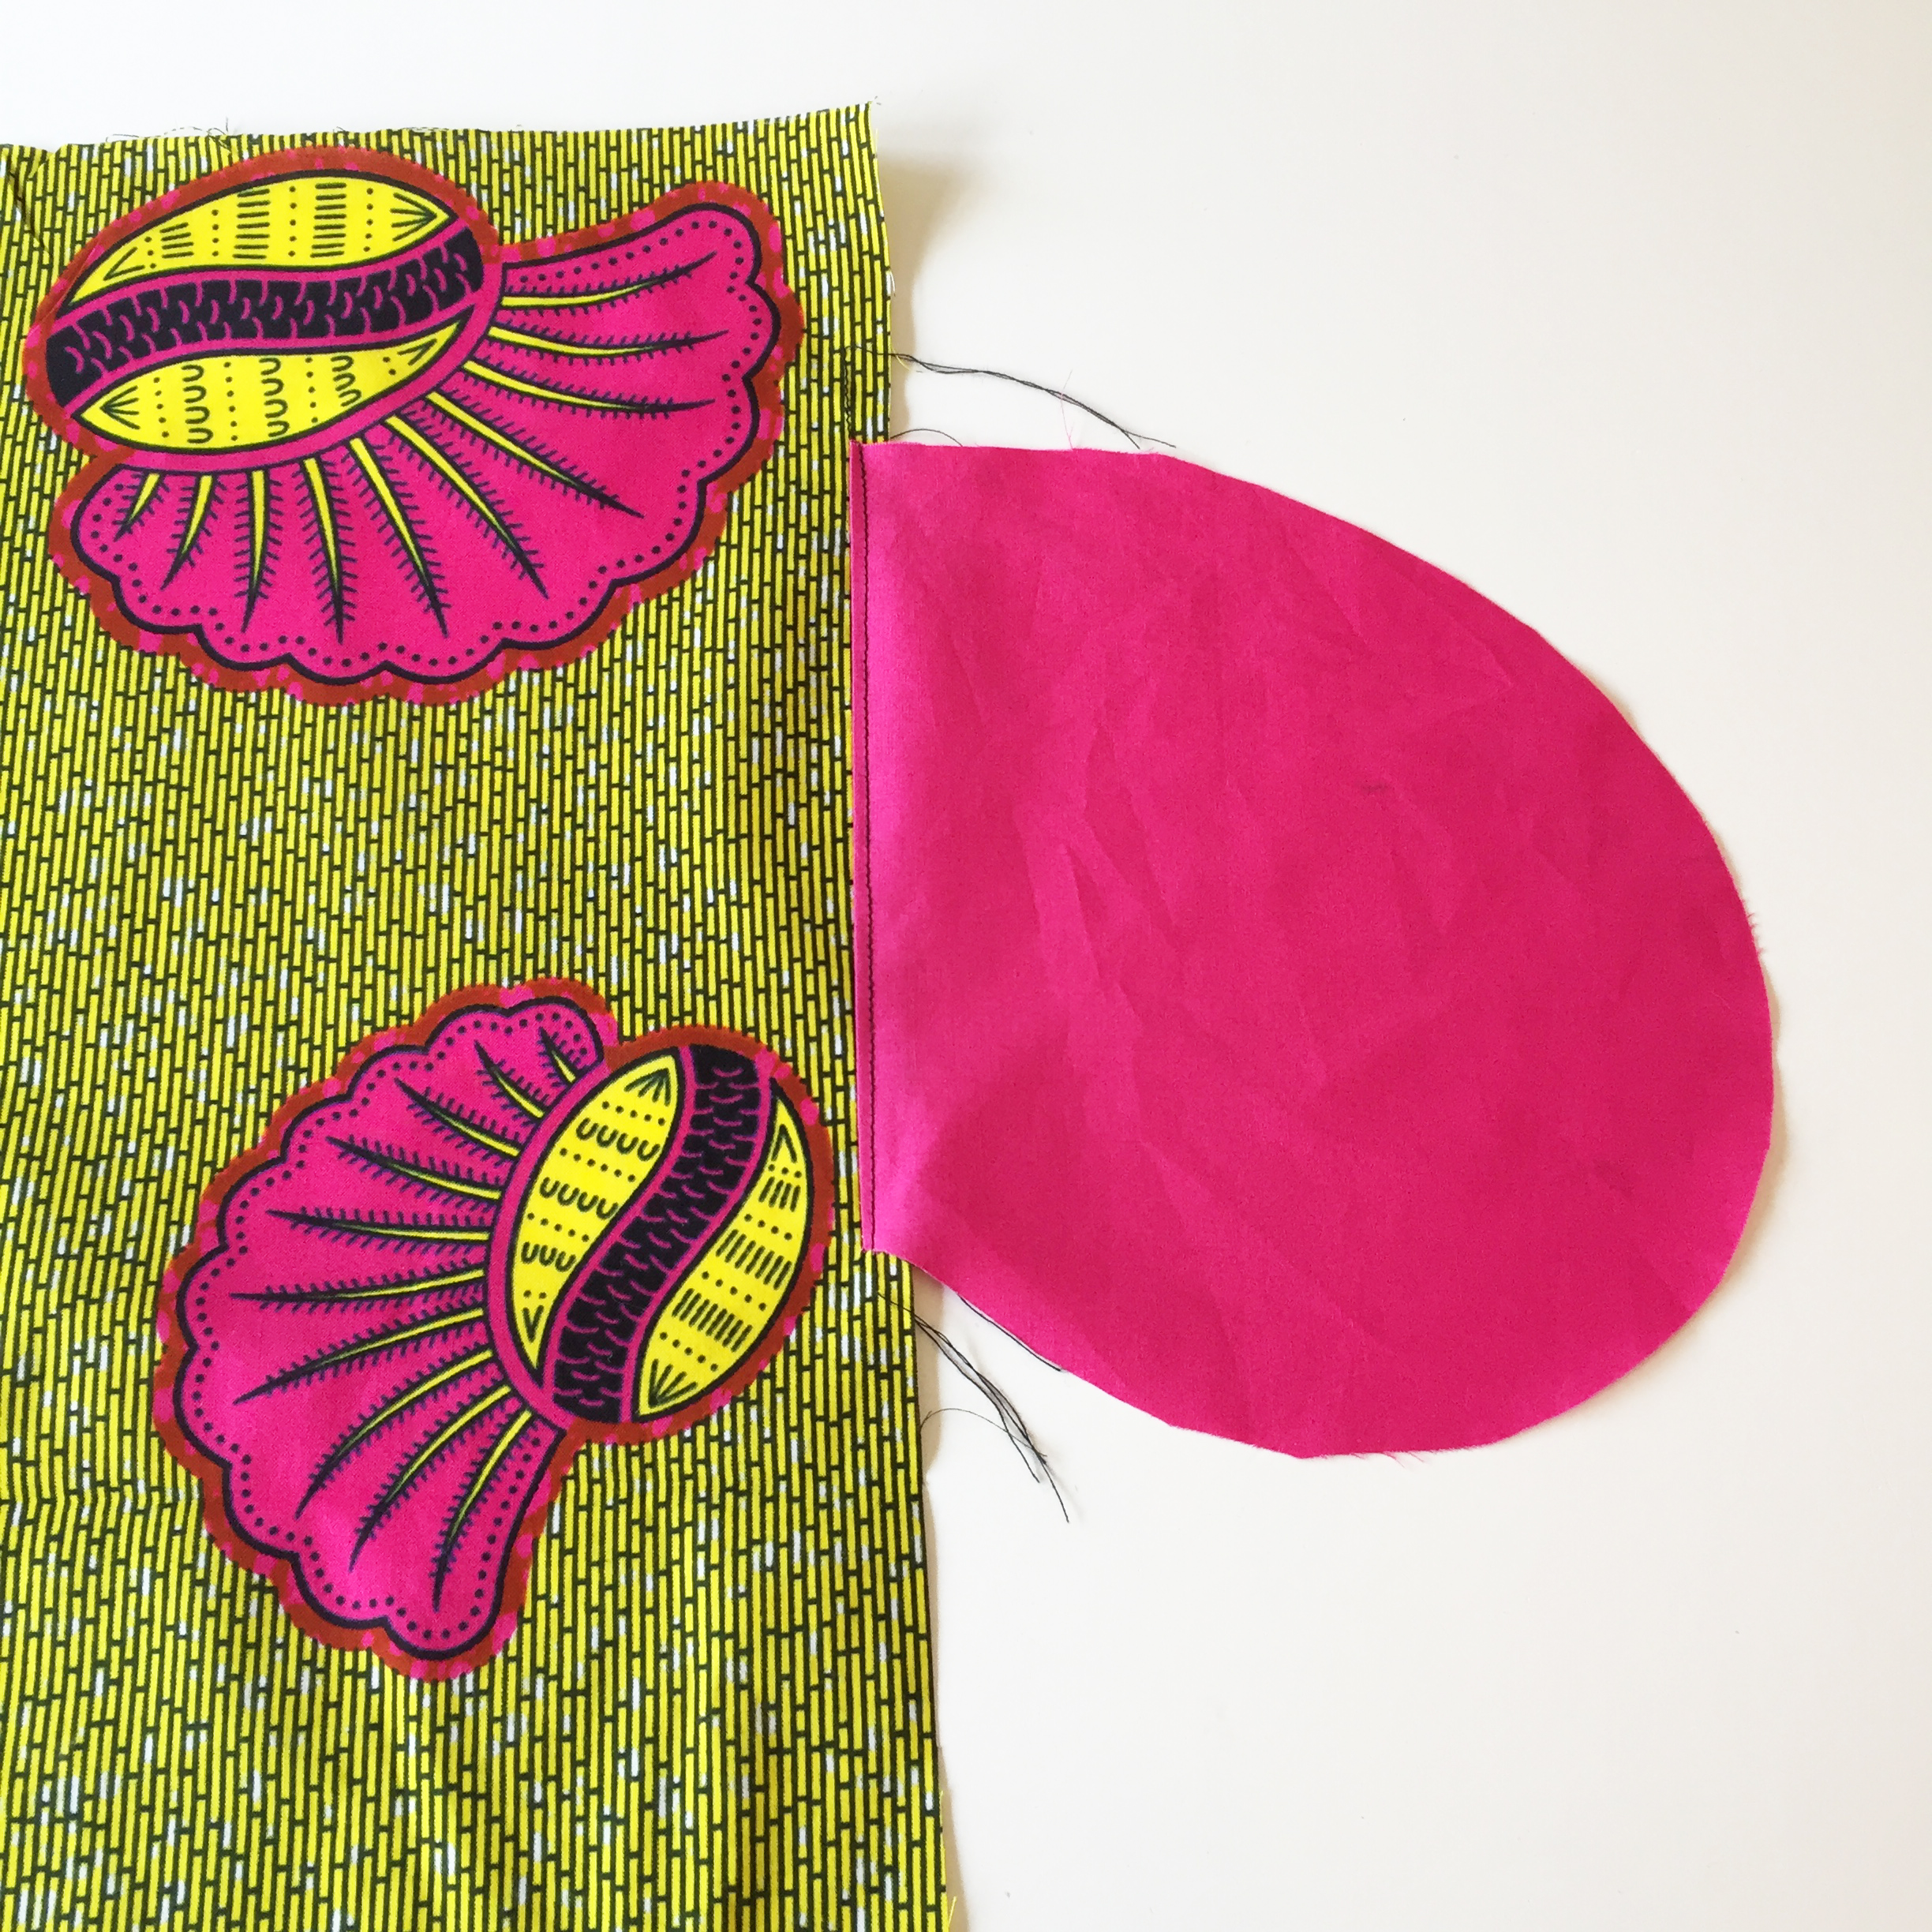
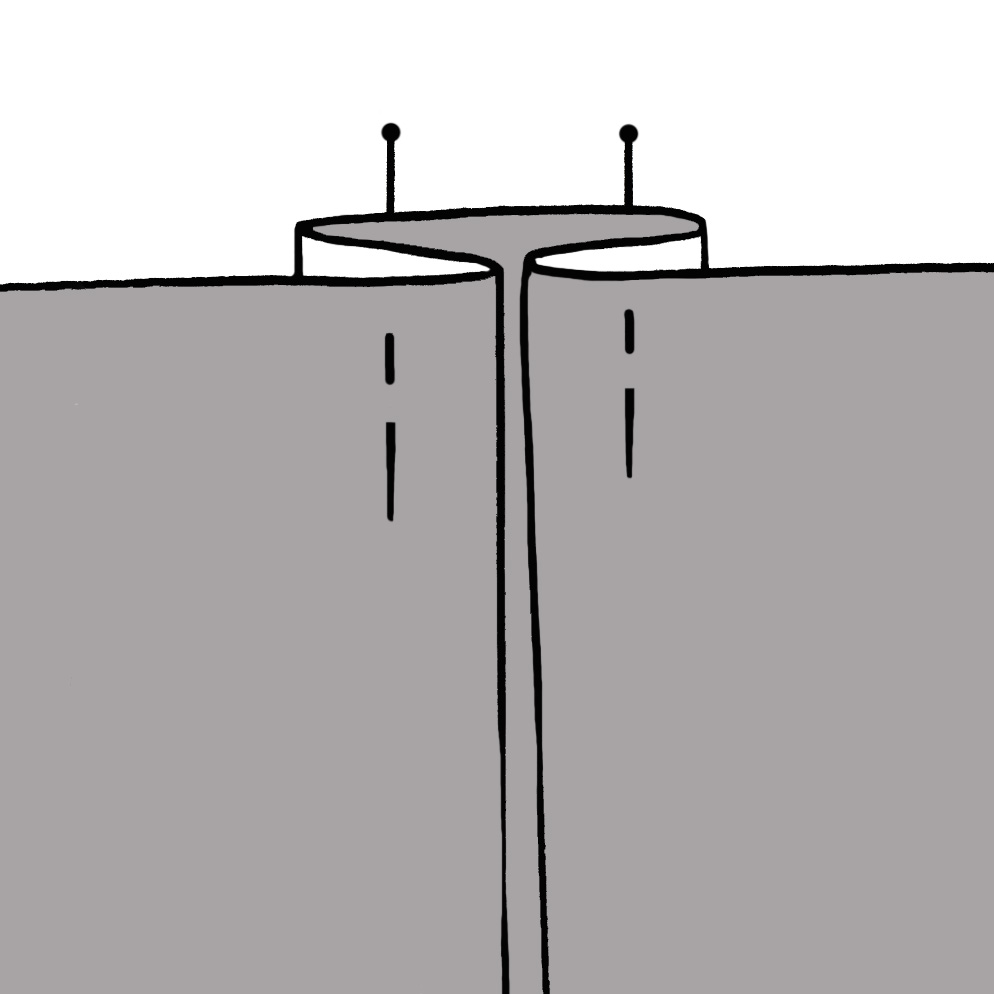
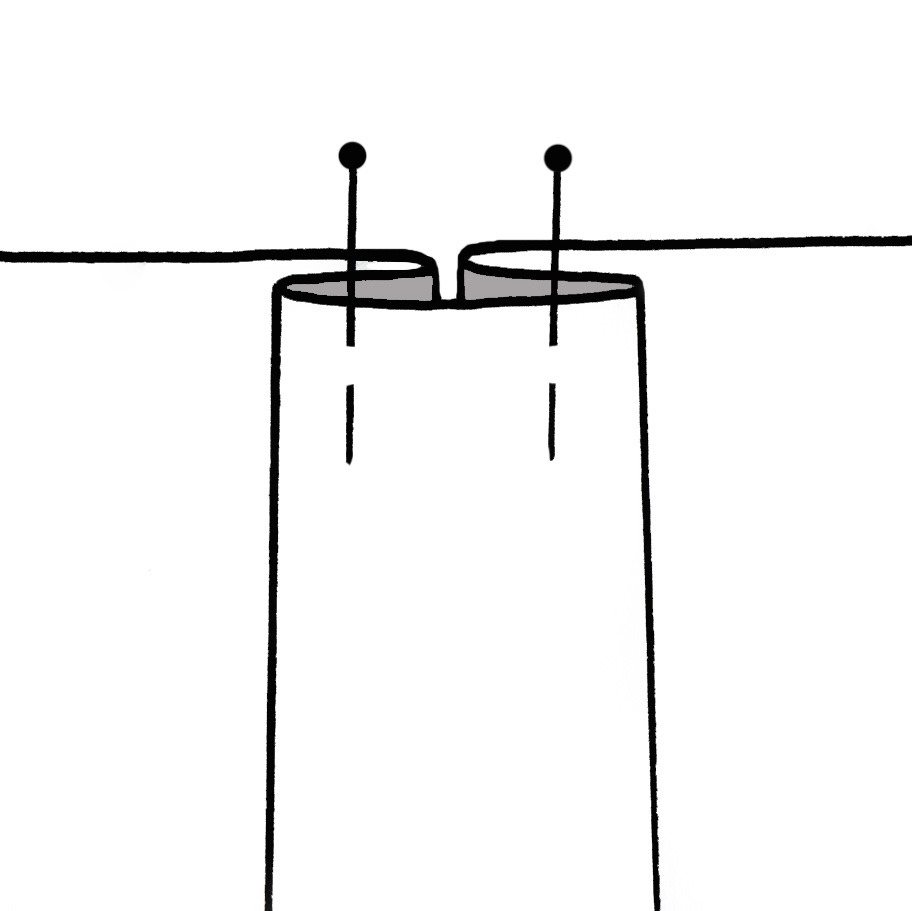
So, kicking off, Martha Skirt has two darts on the Back piece top edge.
DARTS
inserting the back darts
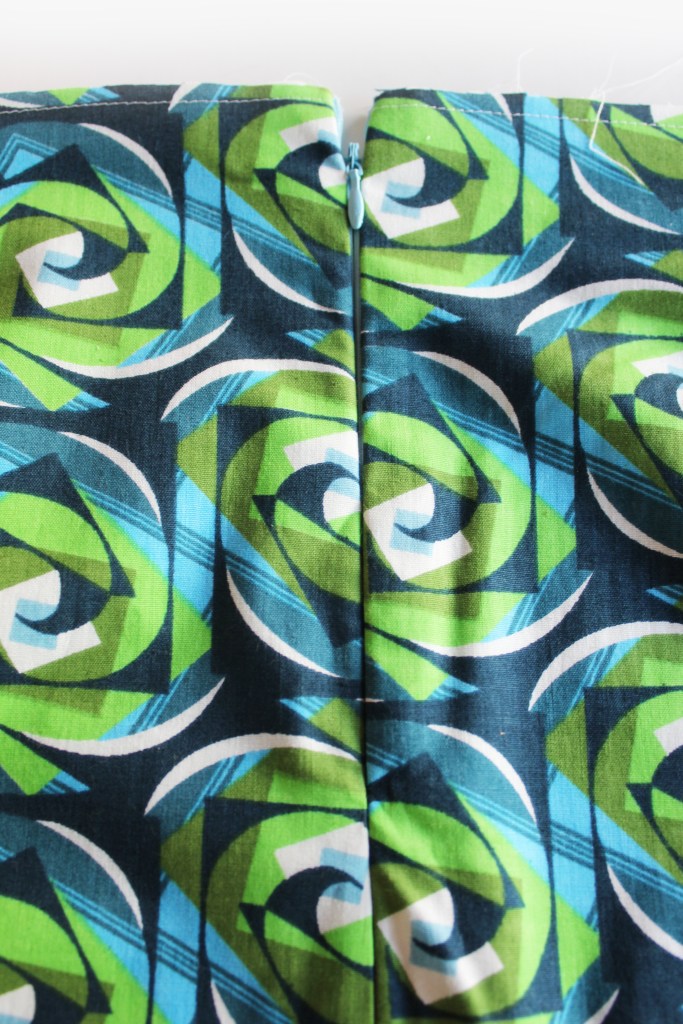
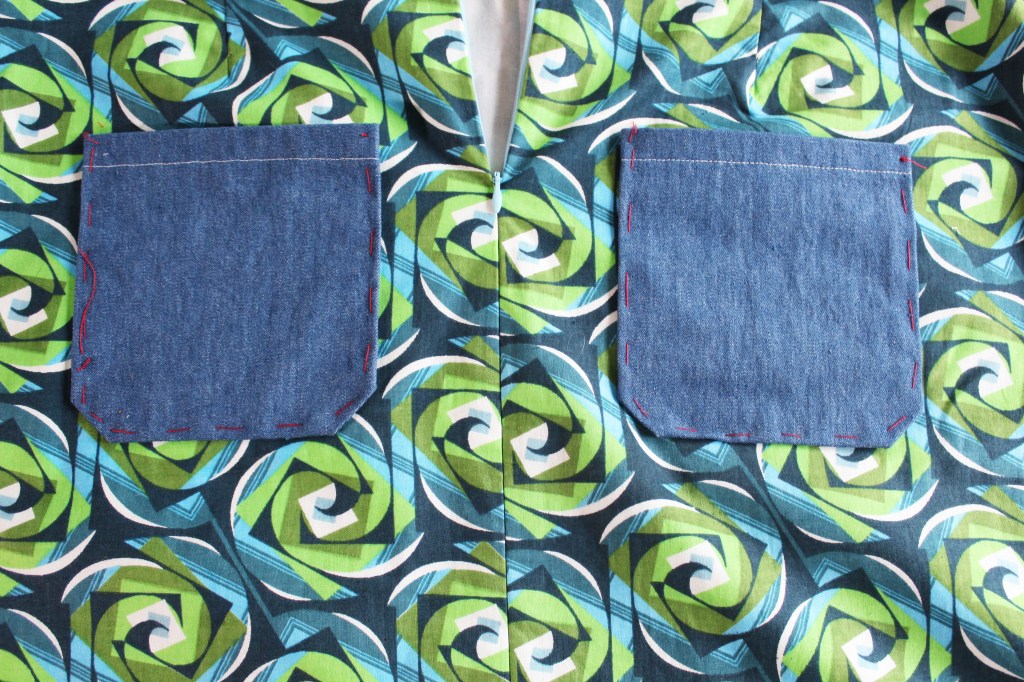
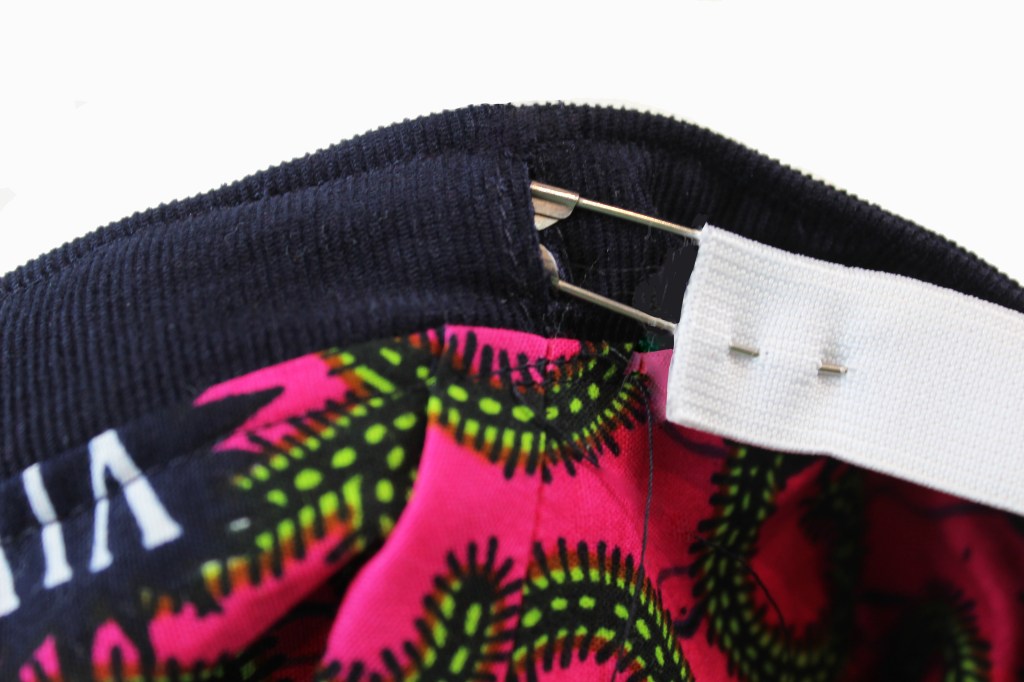
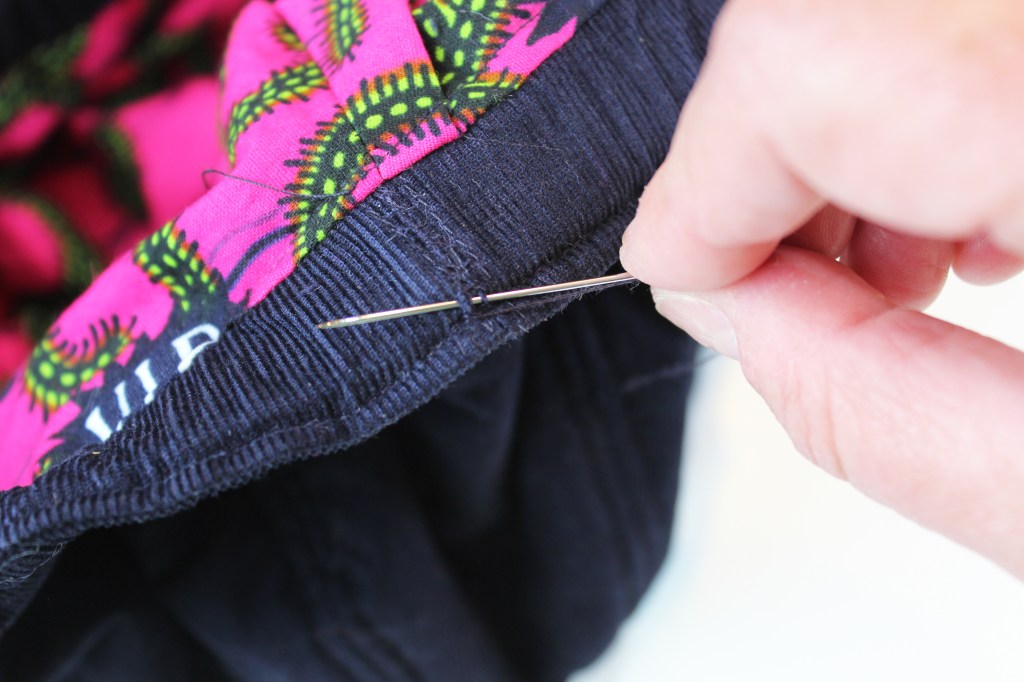
Insert a zip.
ALL ABOUT THE ZIP
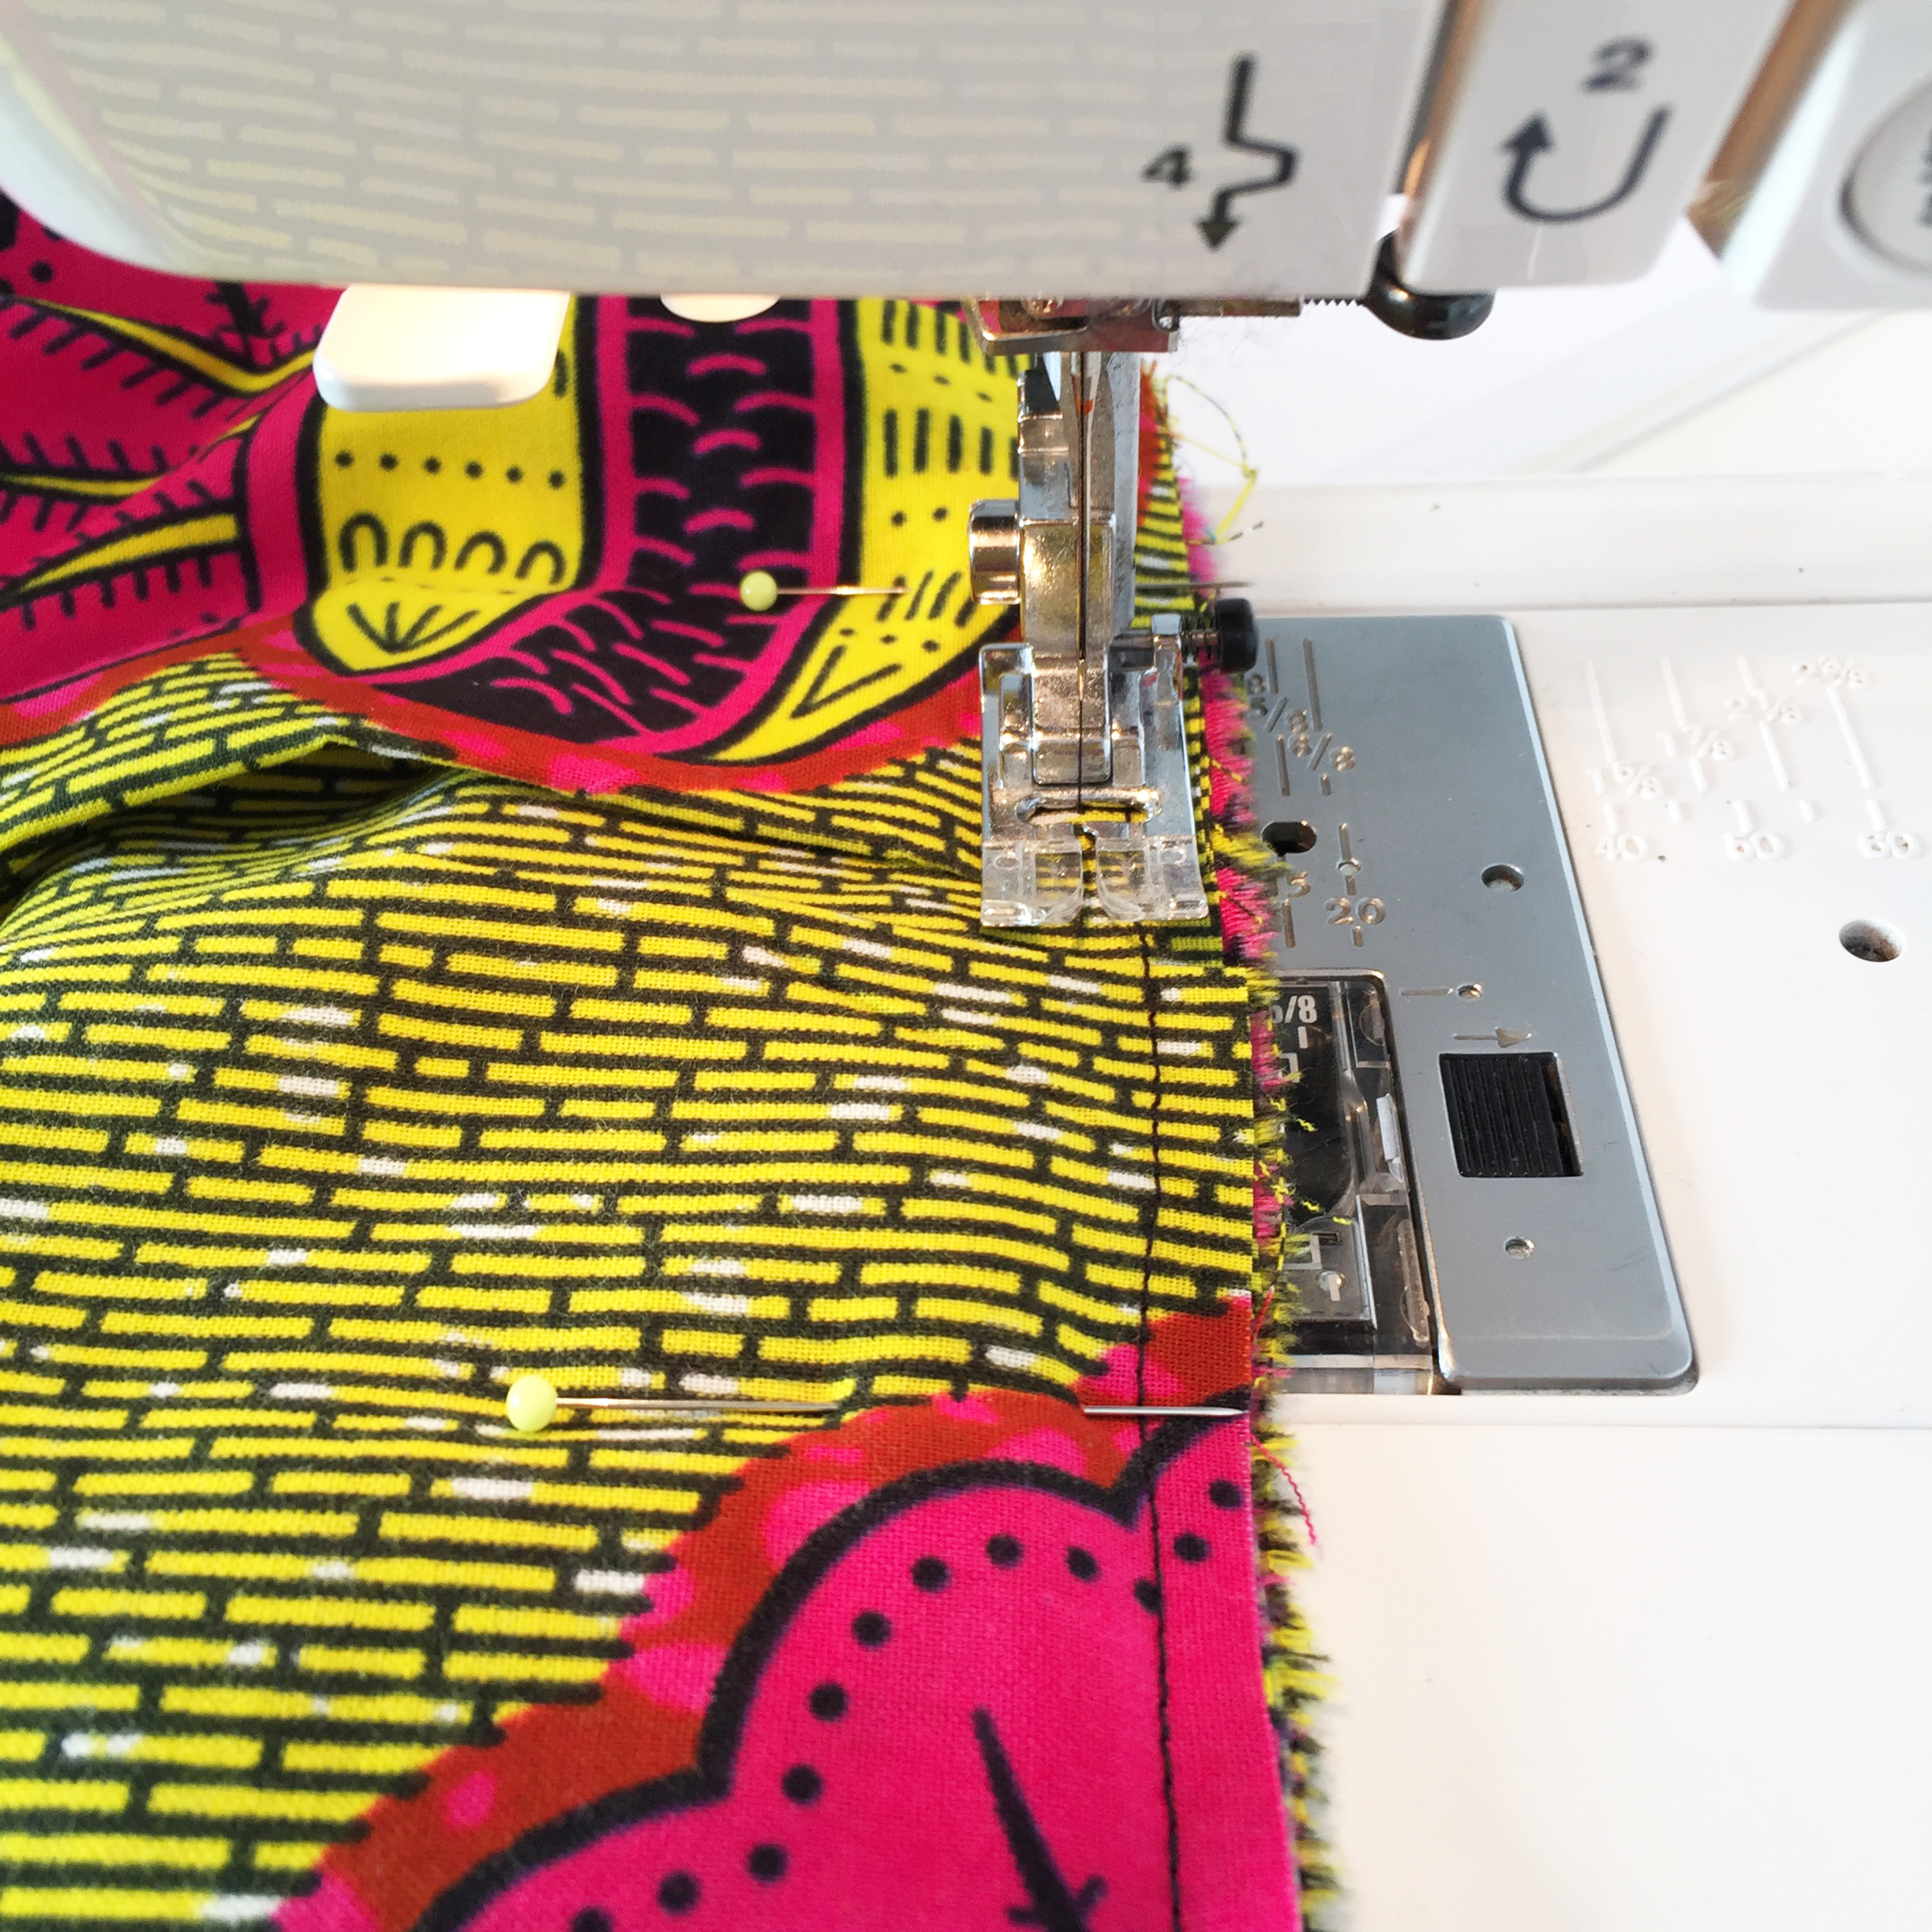
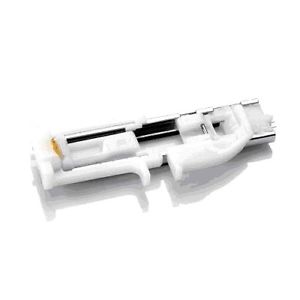
Martha has a zip inserted into the back seam, so you will need to pop your zip foot on your machine. If you don’t have a zip foot you can always hand sew a zip into the back seam.
a typical zip foot attachment
The pattern gives instructions about how to insert a ‘centred’ zip into the back seam, which I think is the simplest zip insertion of all, but you might prefer to use a ‘lapped’ zip technique or better still a concealed zip.
I have a separate blogpost called ‘How to insert a concealed zip’ which will show you how to do one, using just a standard zip foot attachment.
Inserting zips is not difficult when you know how. Once mastered your (sewing) life will be transformed and hopefully (like me) it will be the bit you look forward to the most (not kidding honest!).
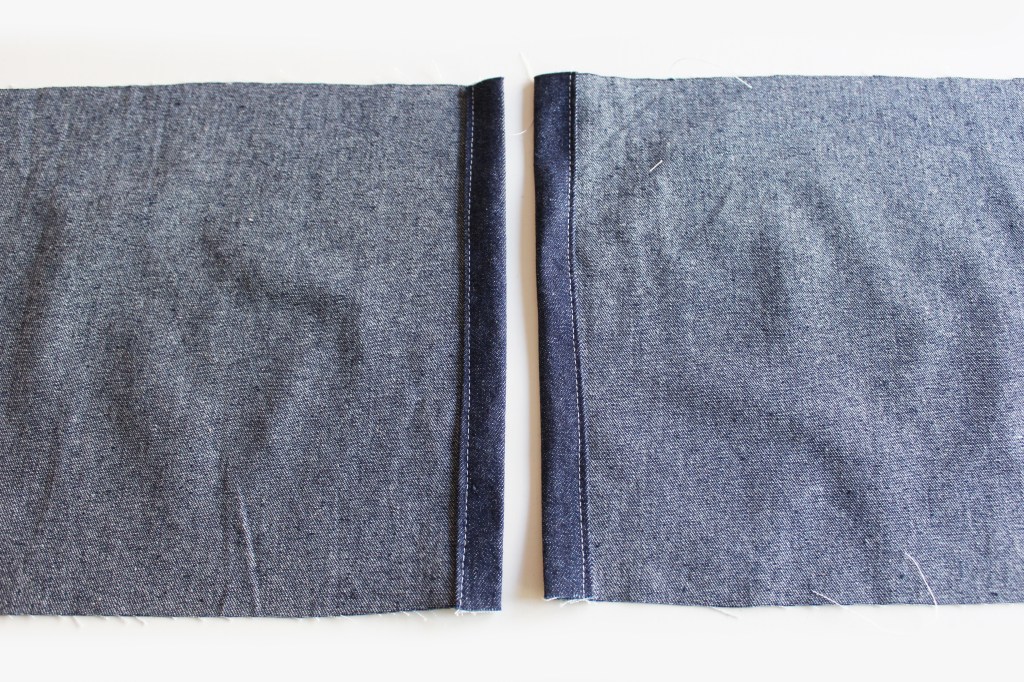
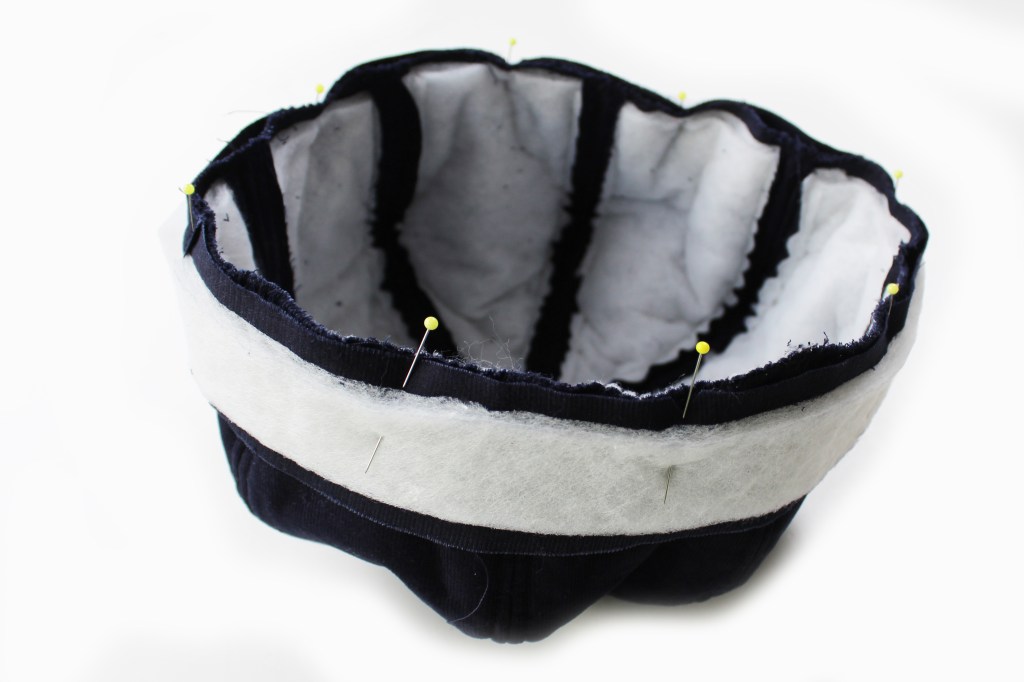
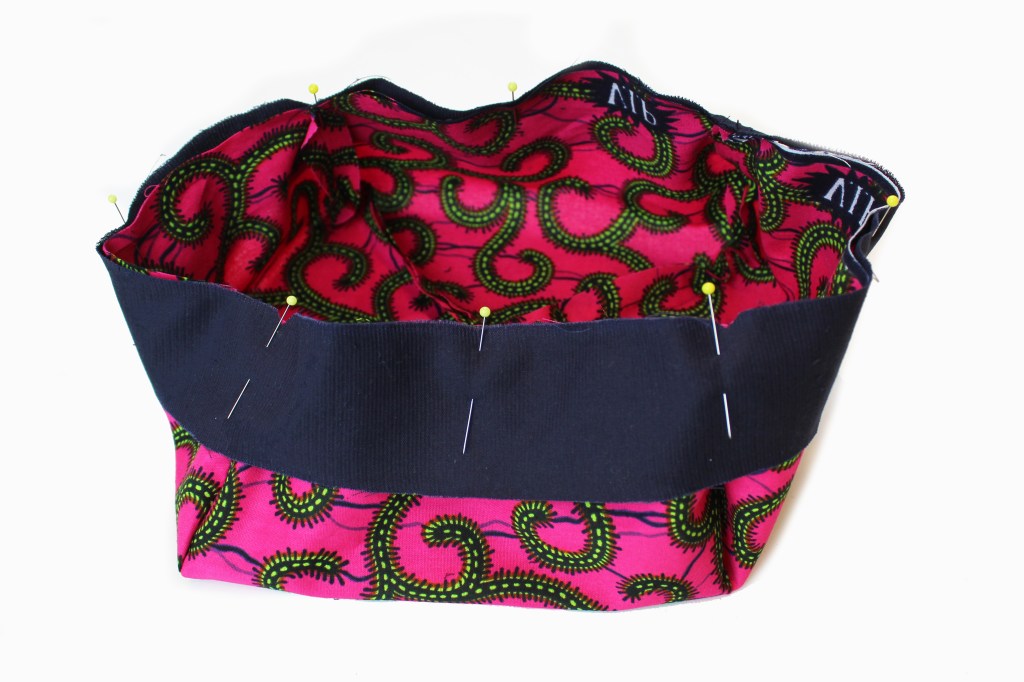
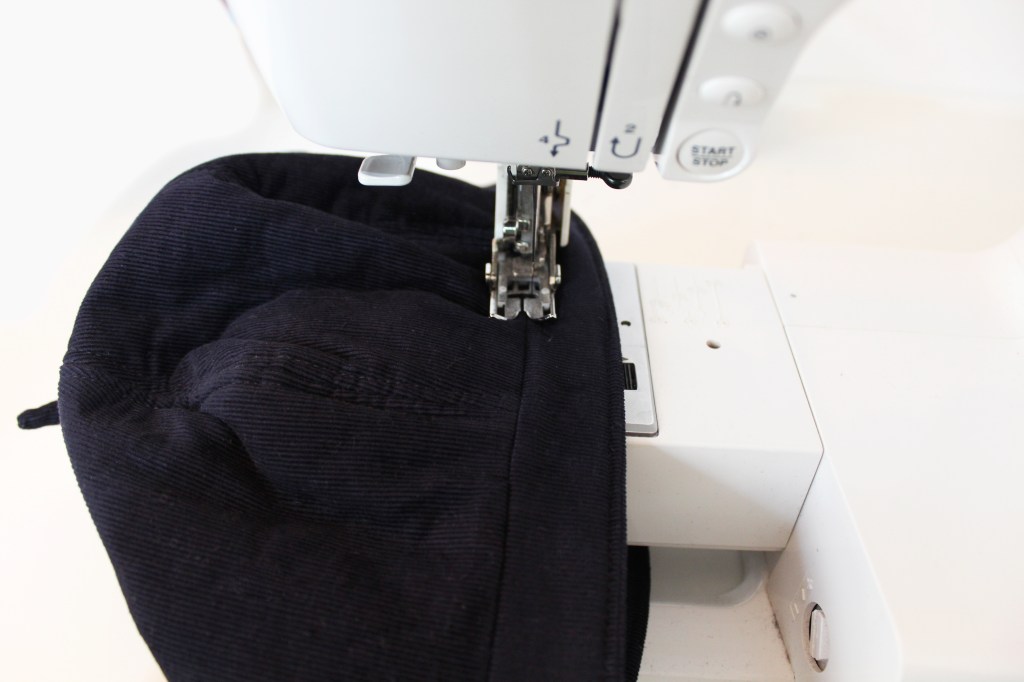
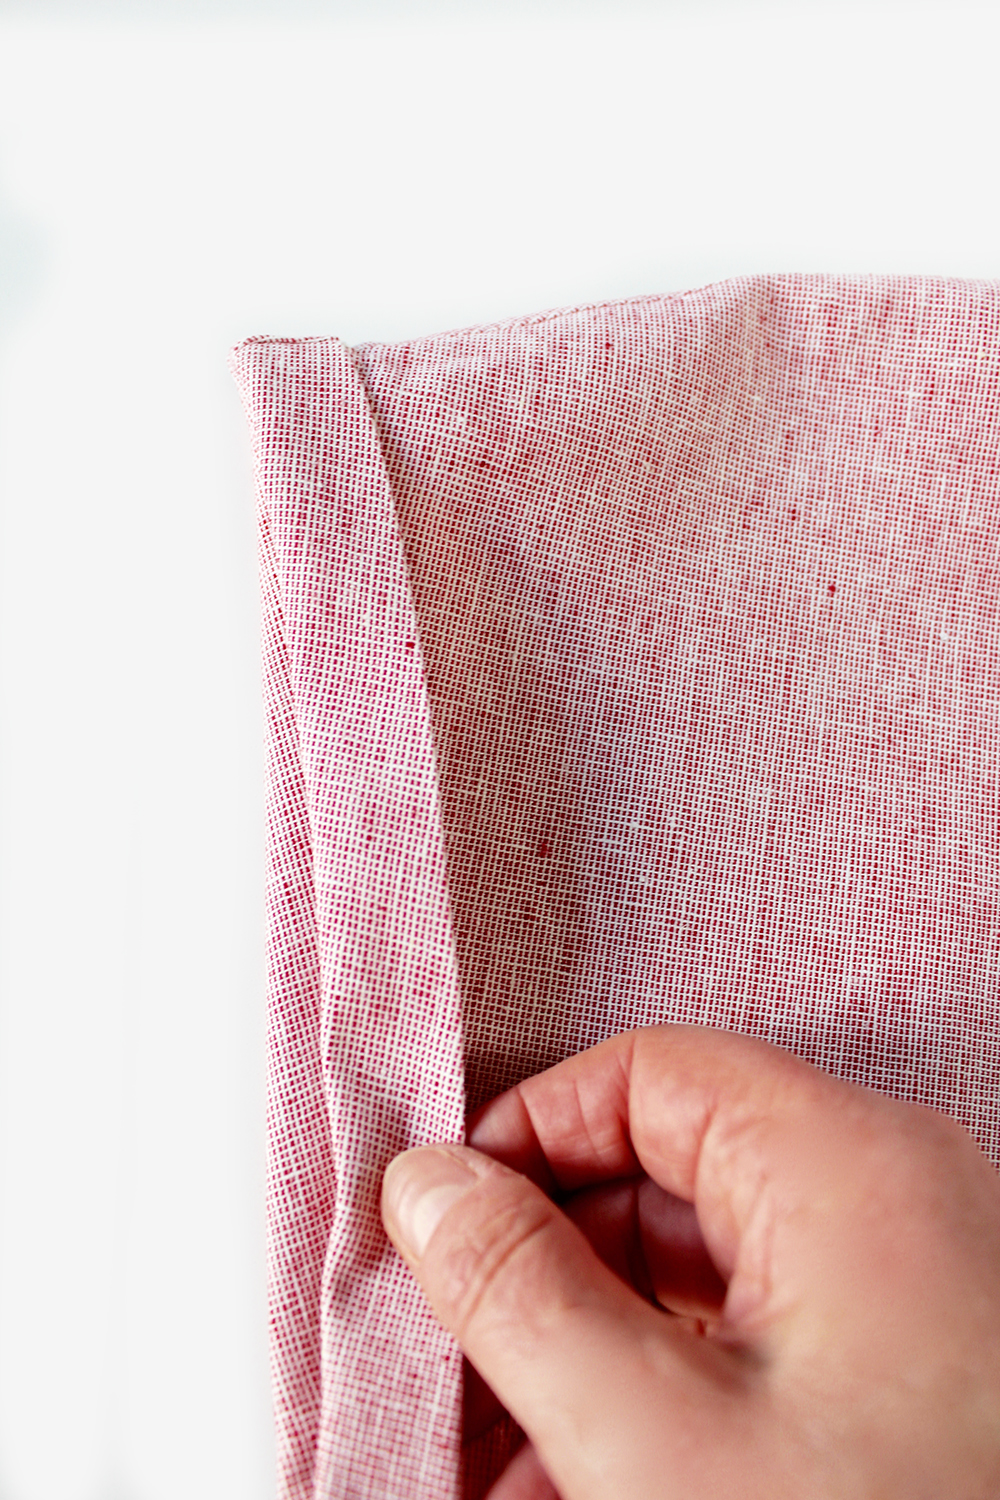
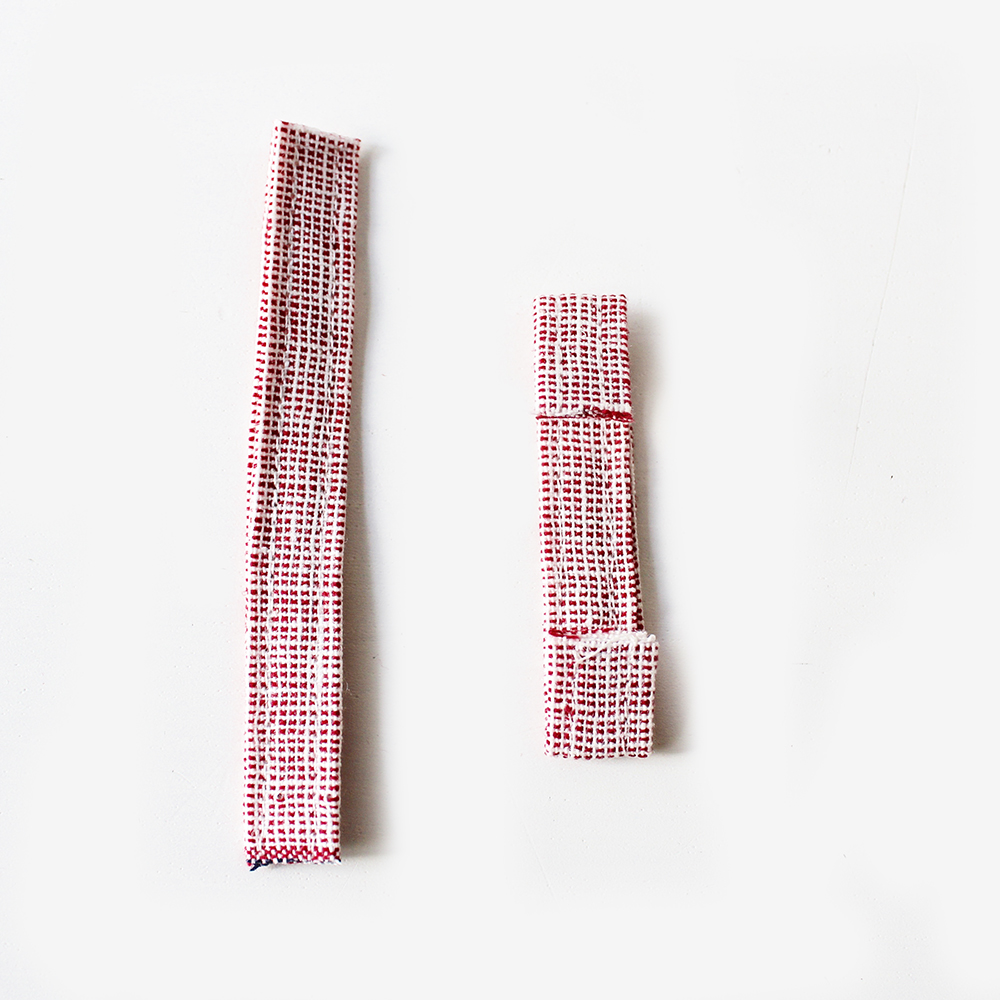
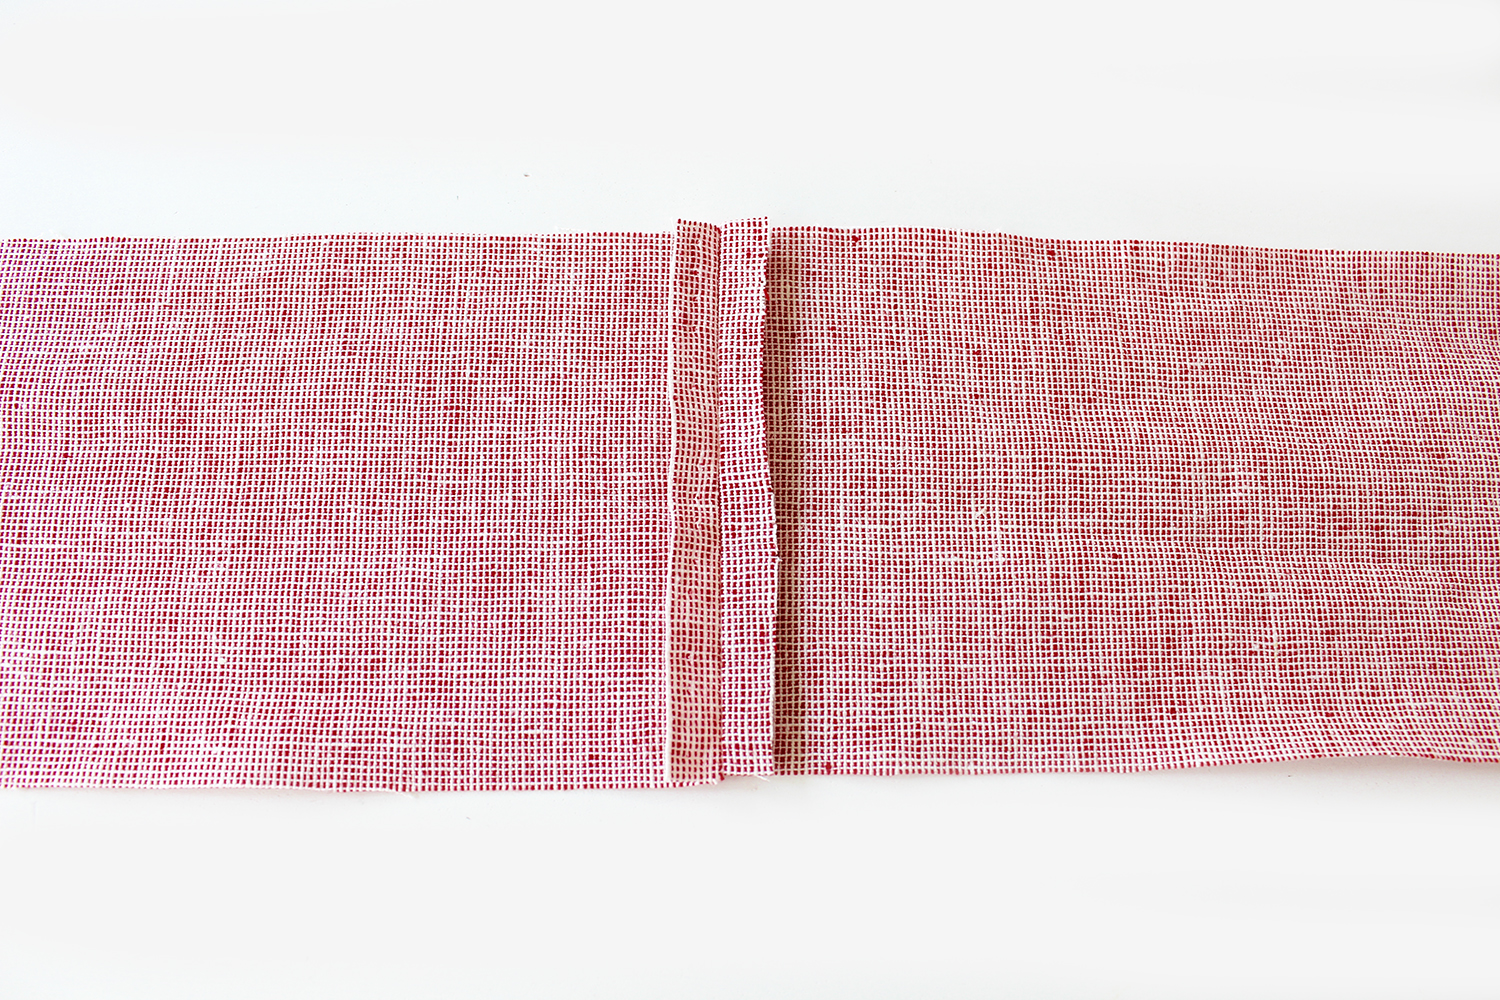
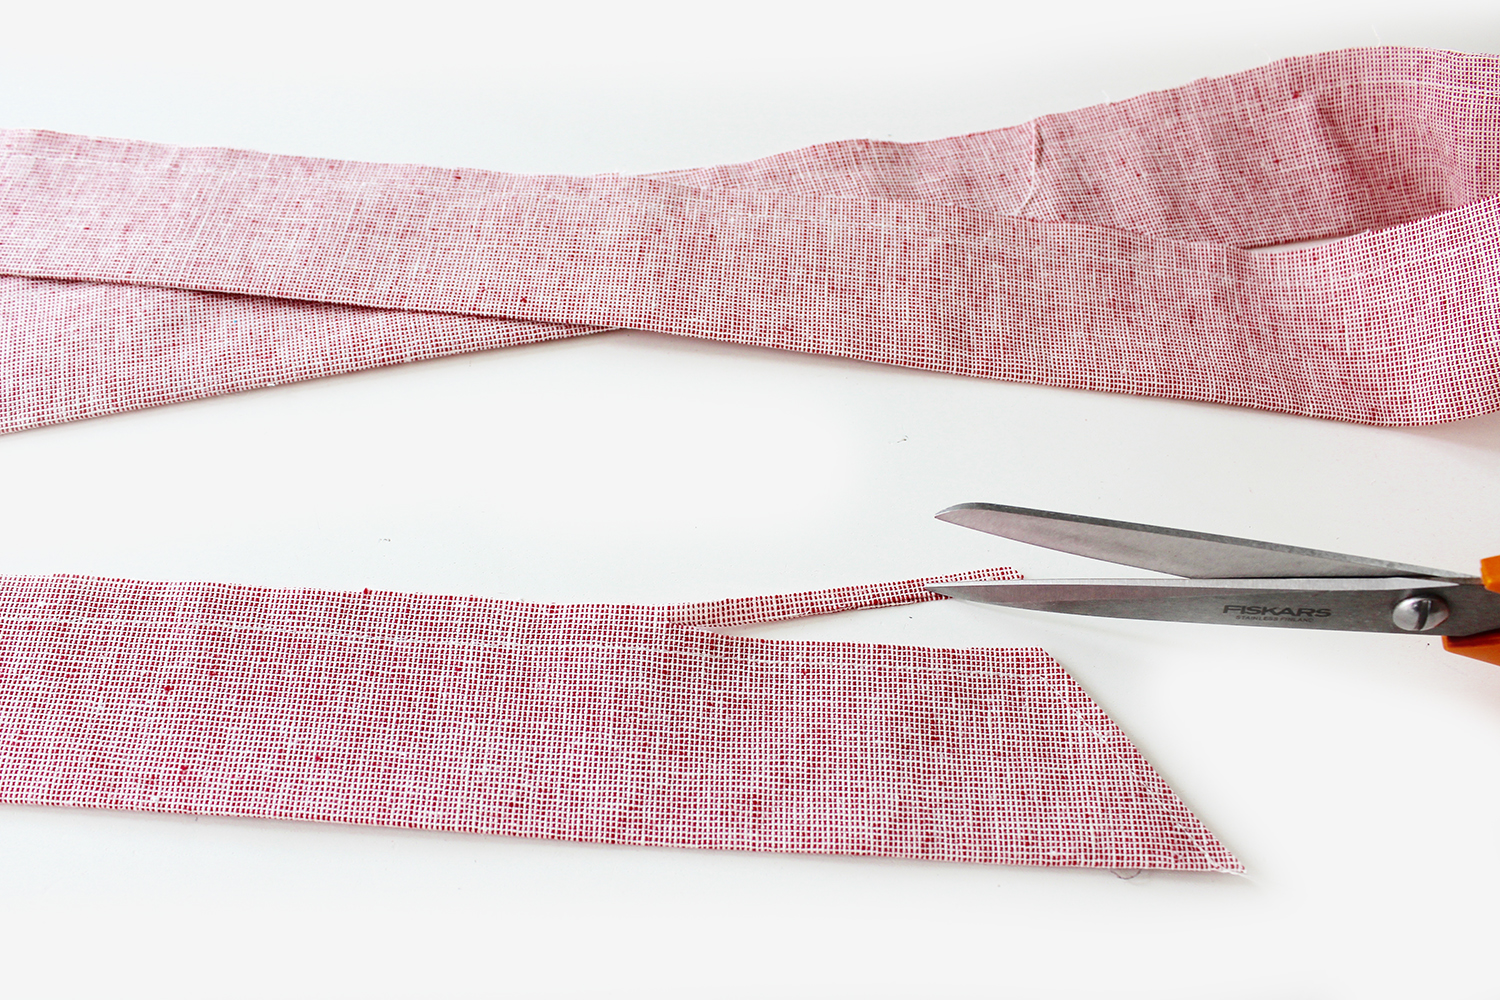
So, if you have chosen to add a lower band for the longer length version, either in contrast fabric or main fabric, you will need to first hem the Lower back band pieces at the side edges.
For the Short Skirt version continue to the Pocket section.
Hem the two lower back Band pieces at the side edges.
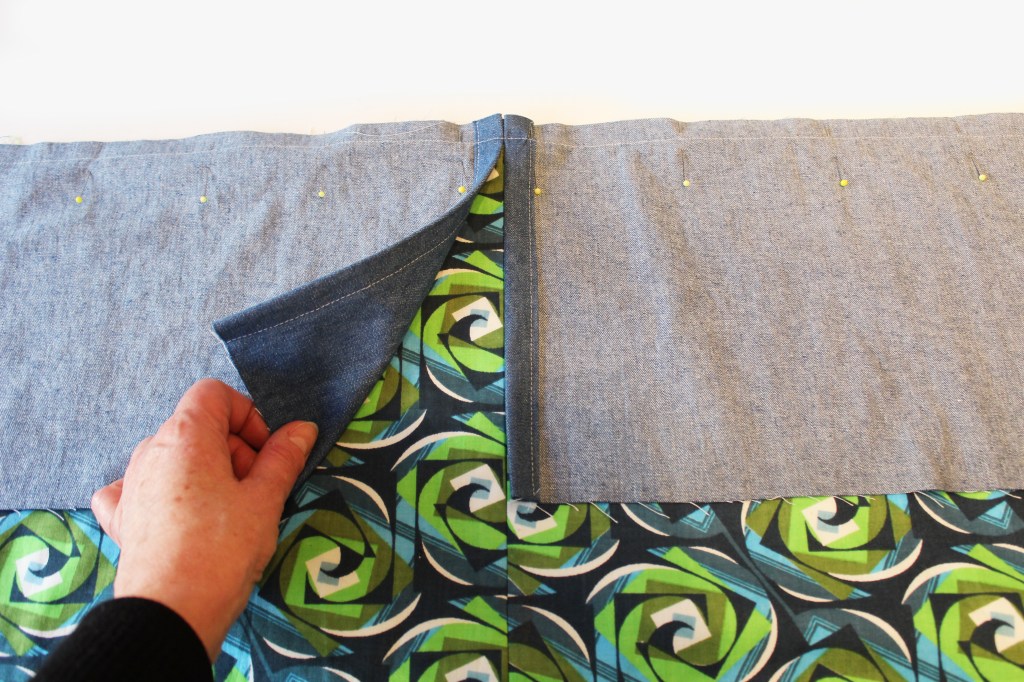
Pin to the Skirt lower edge. Sew.
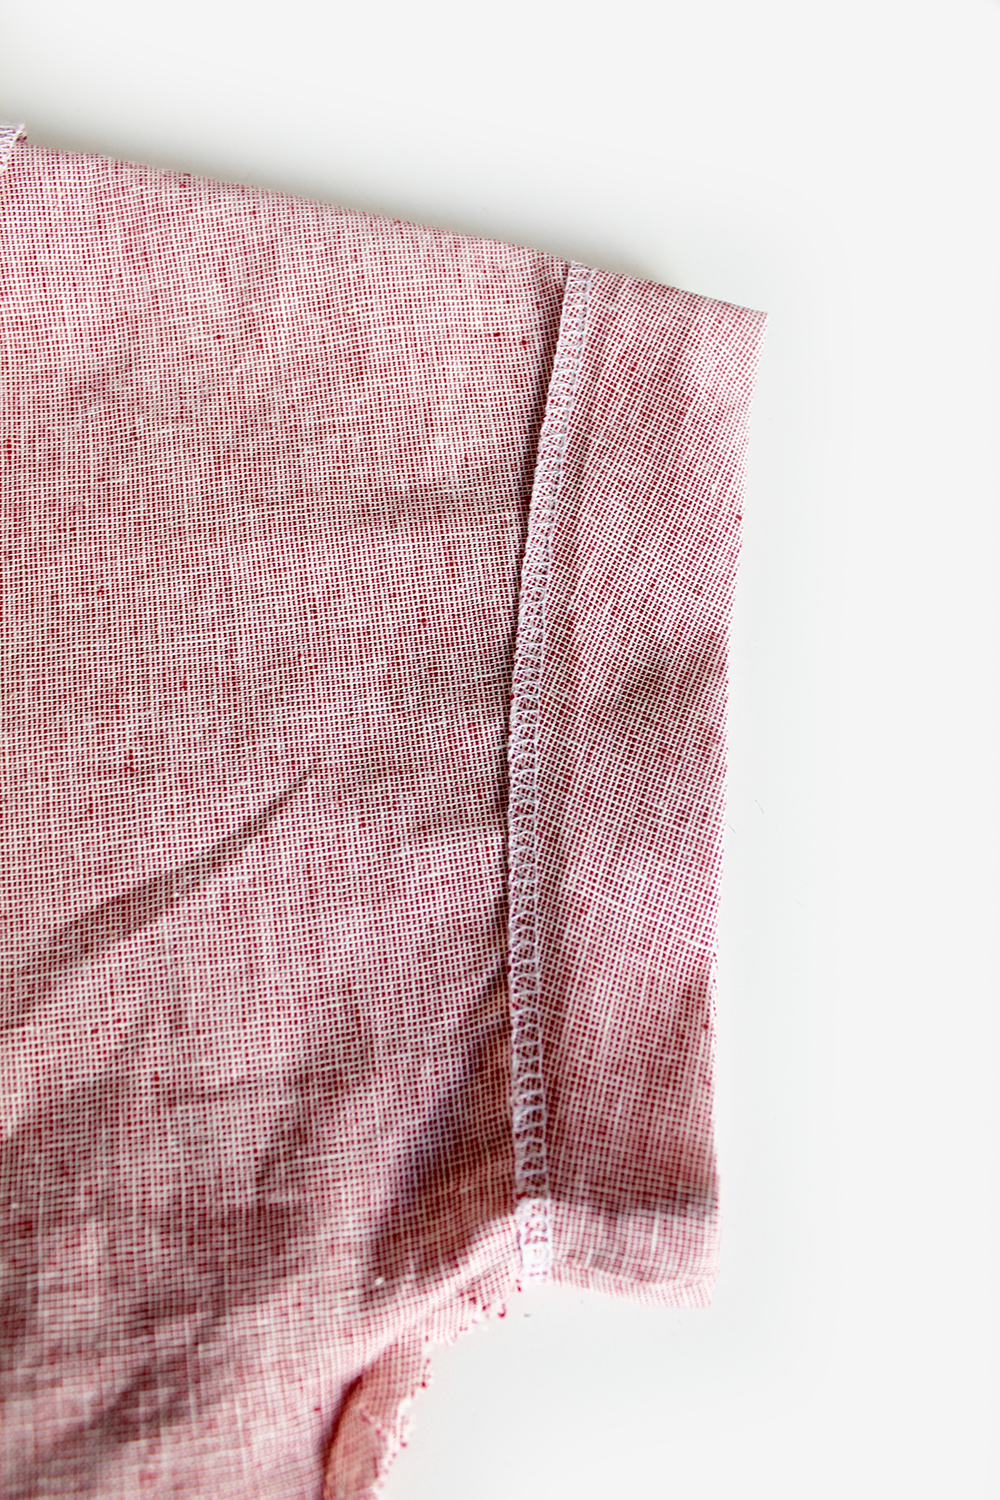
Finish the raw edge, press the band downwards with the seam allowance upwards on the reverse side.
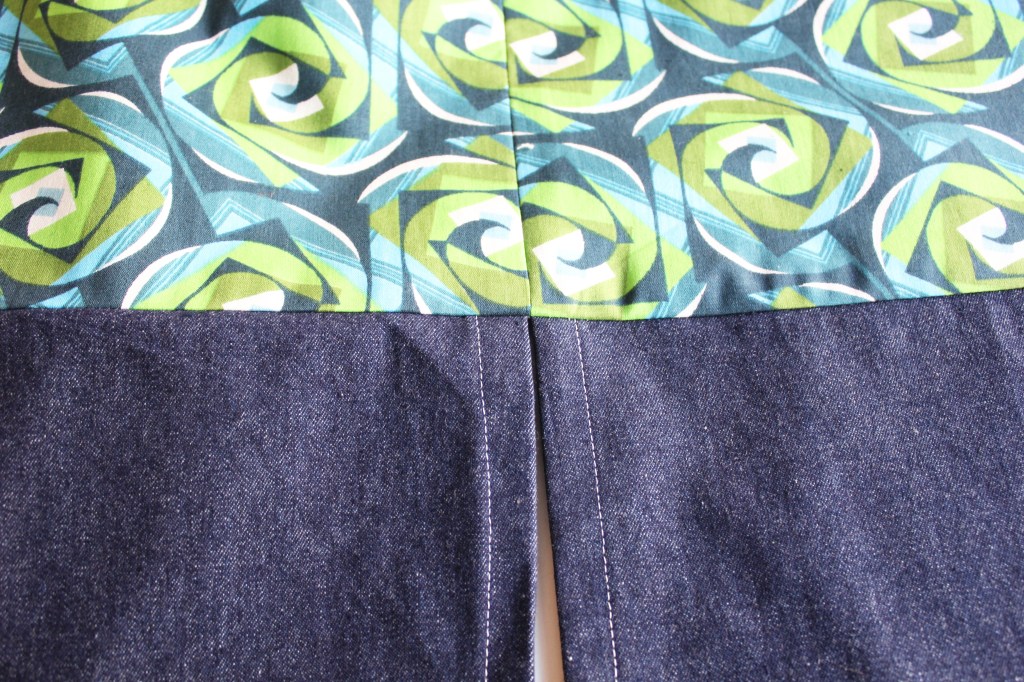
Attach the Band to the lower edge of the Front Skirt piece. Topstitch the seams on the band side. Tip: use a contrast colour thread to enhance the stitching detail.
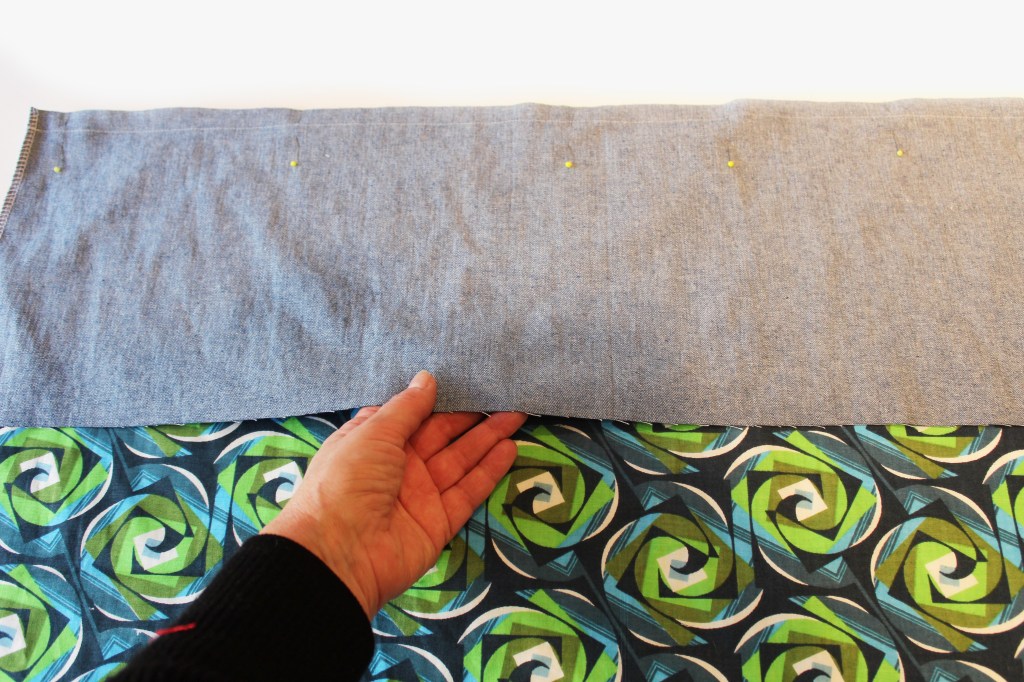
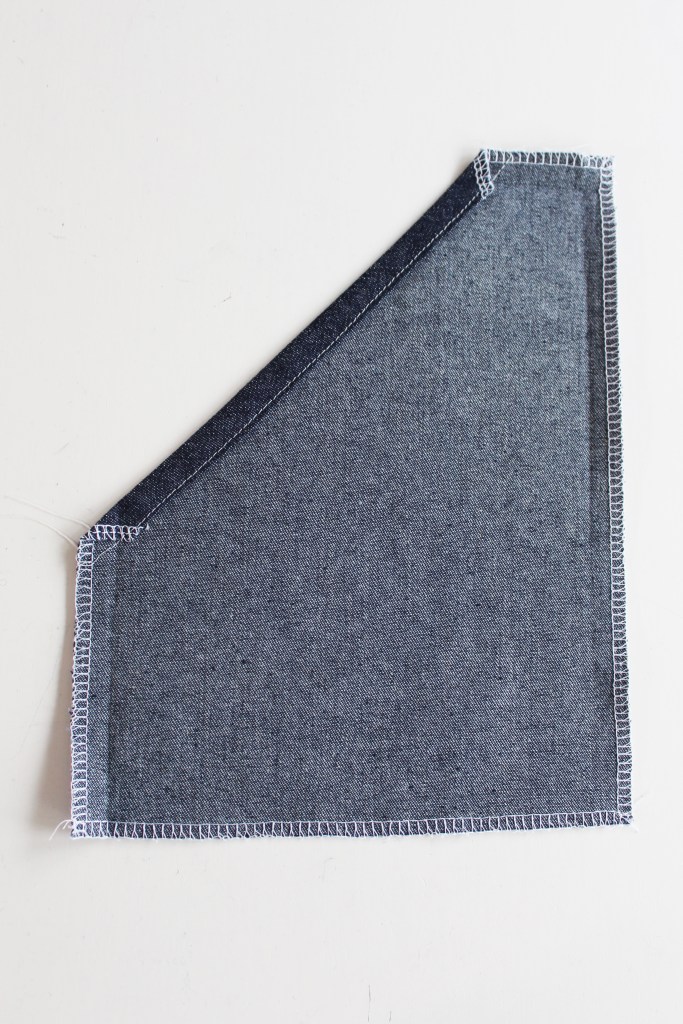
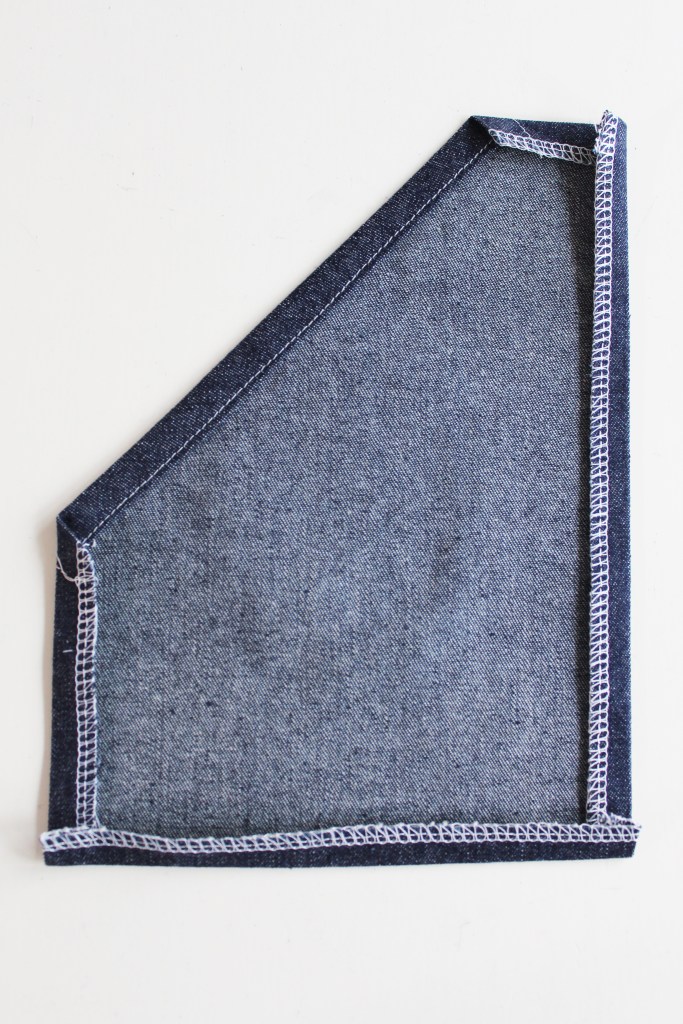
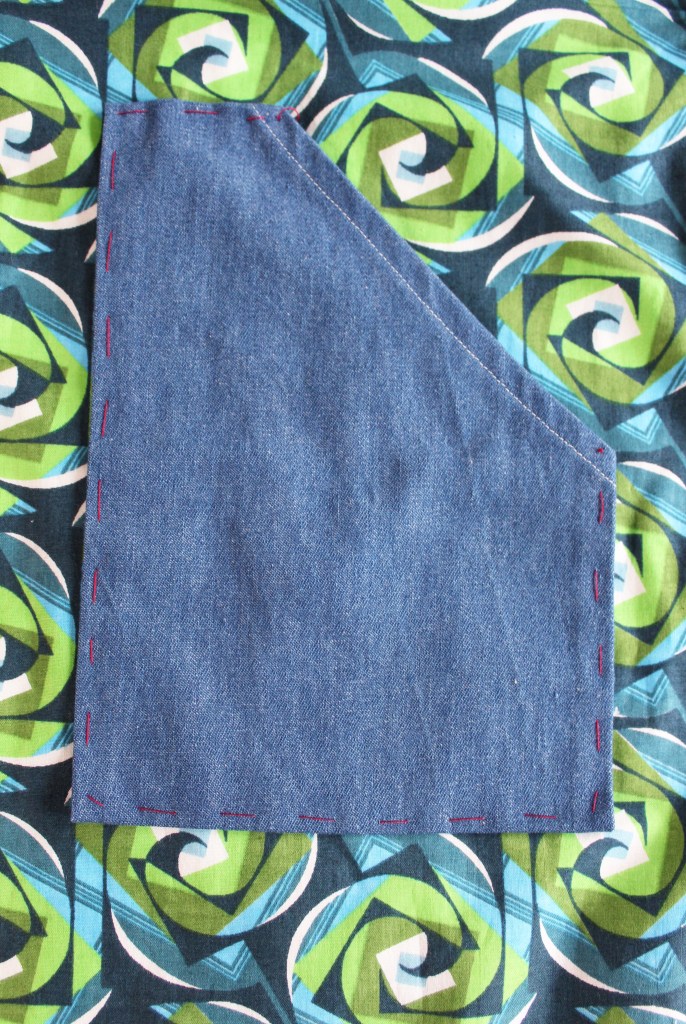
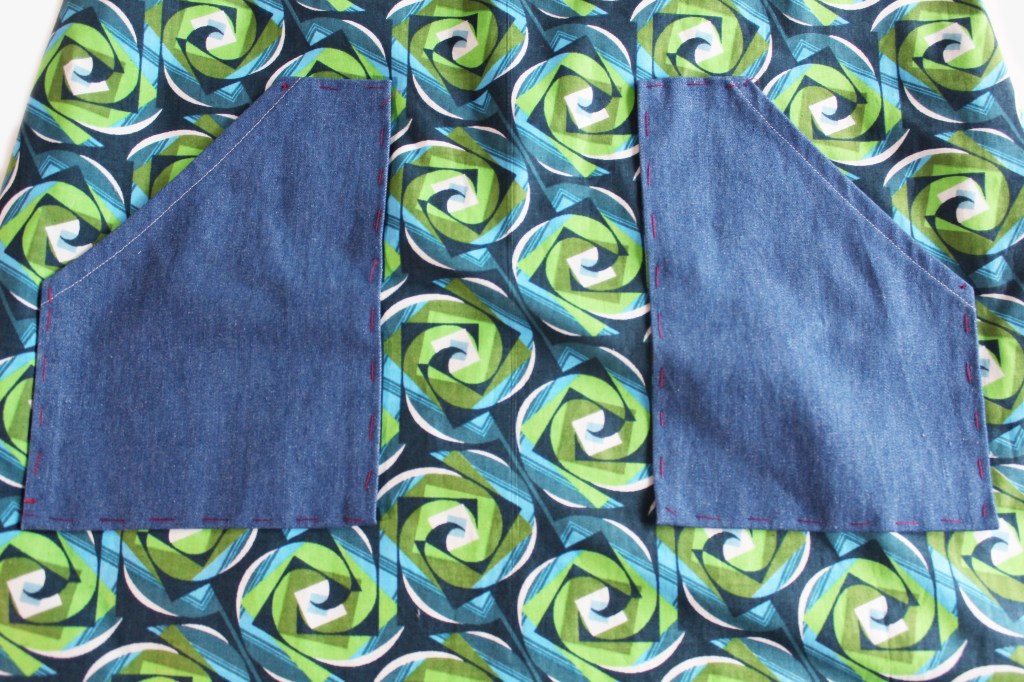
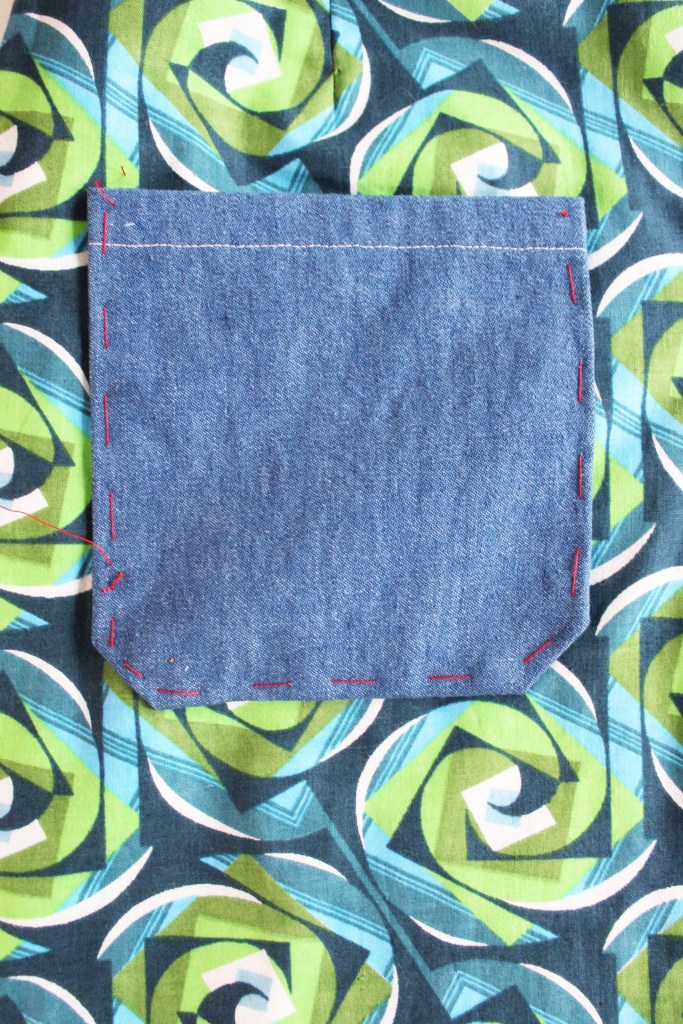
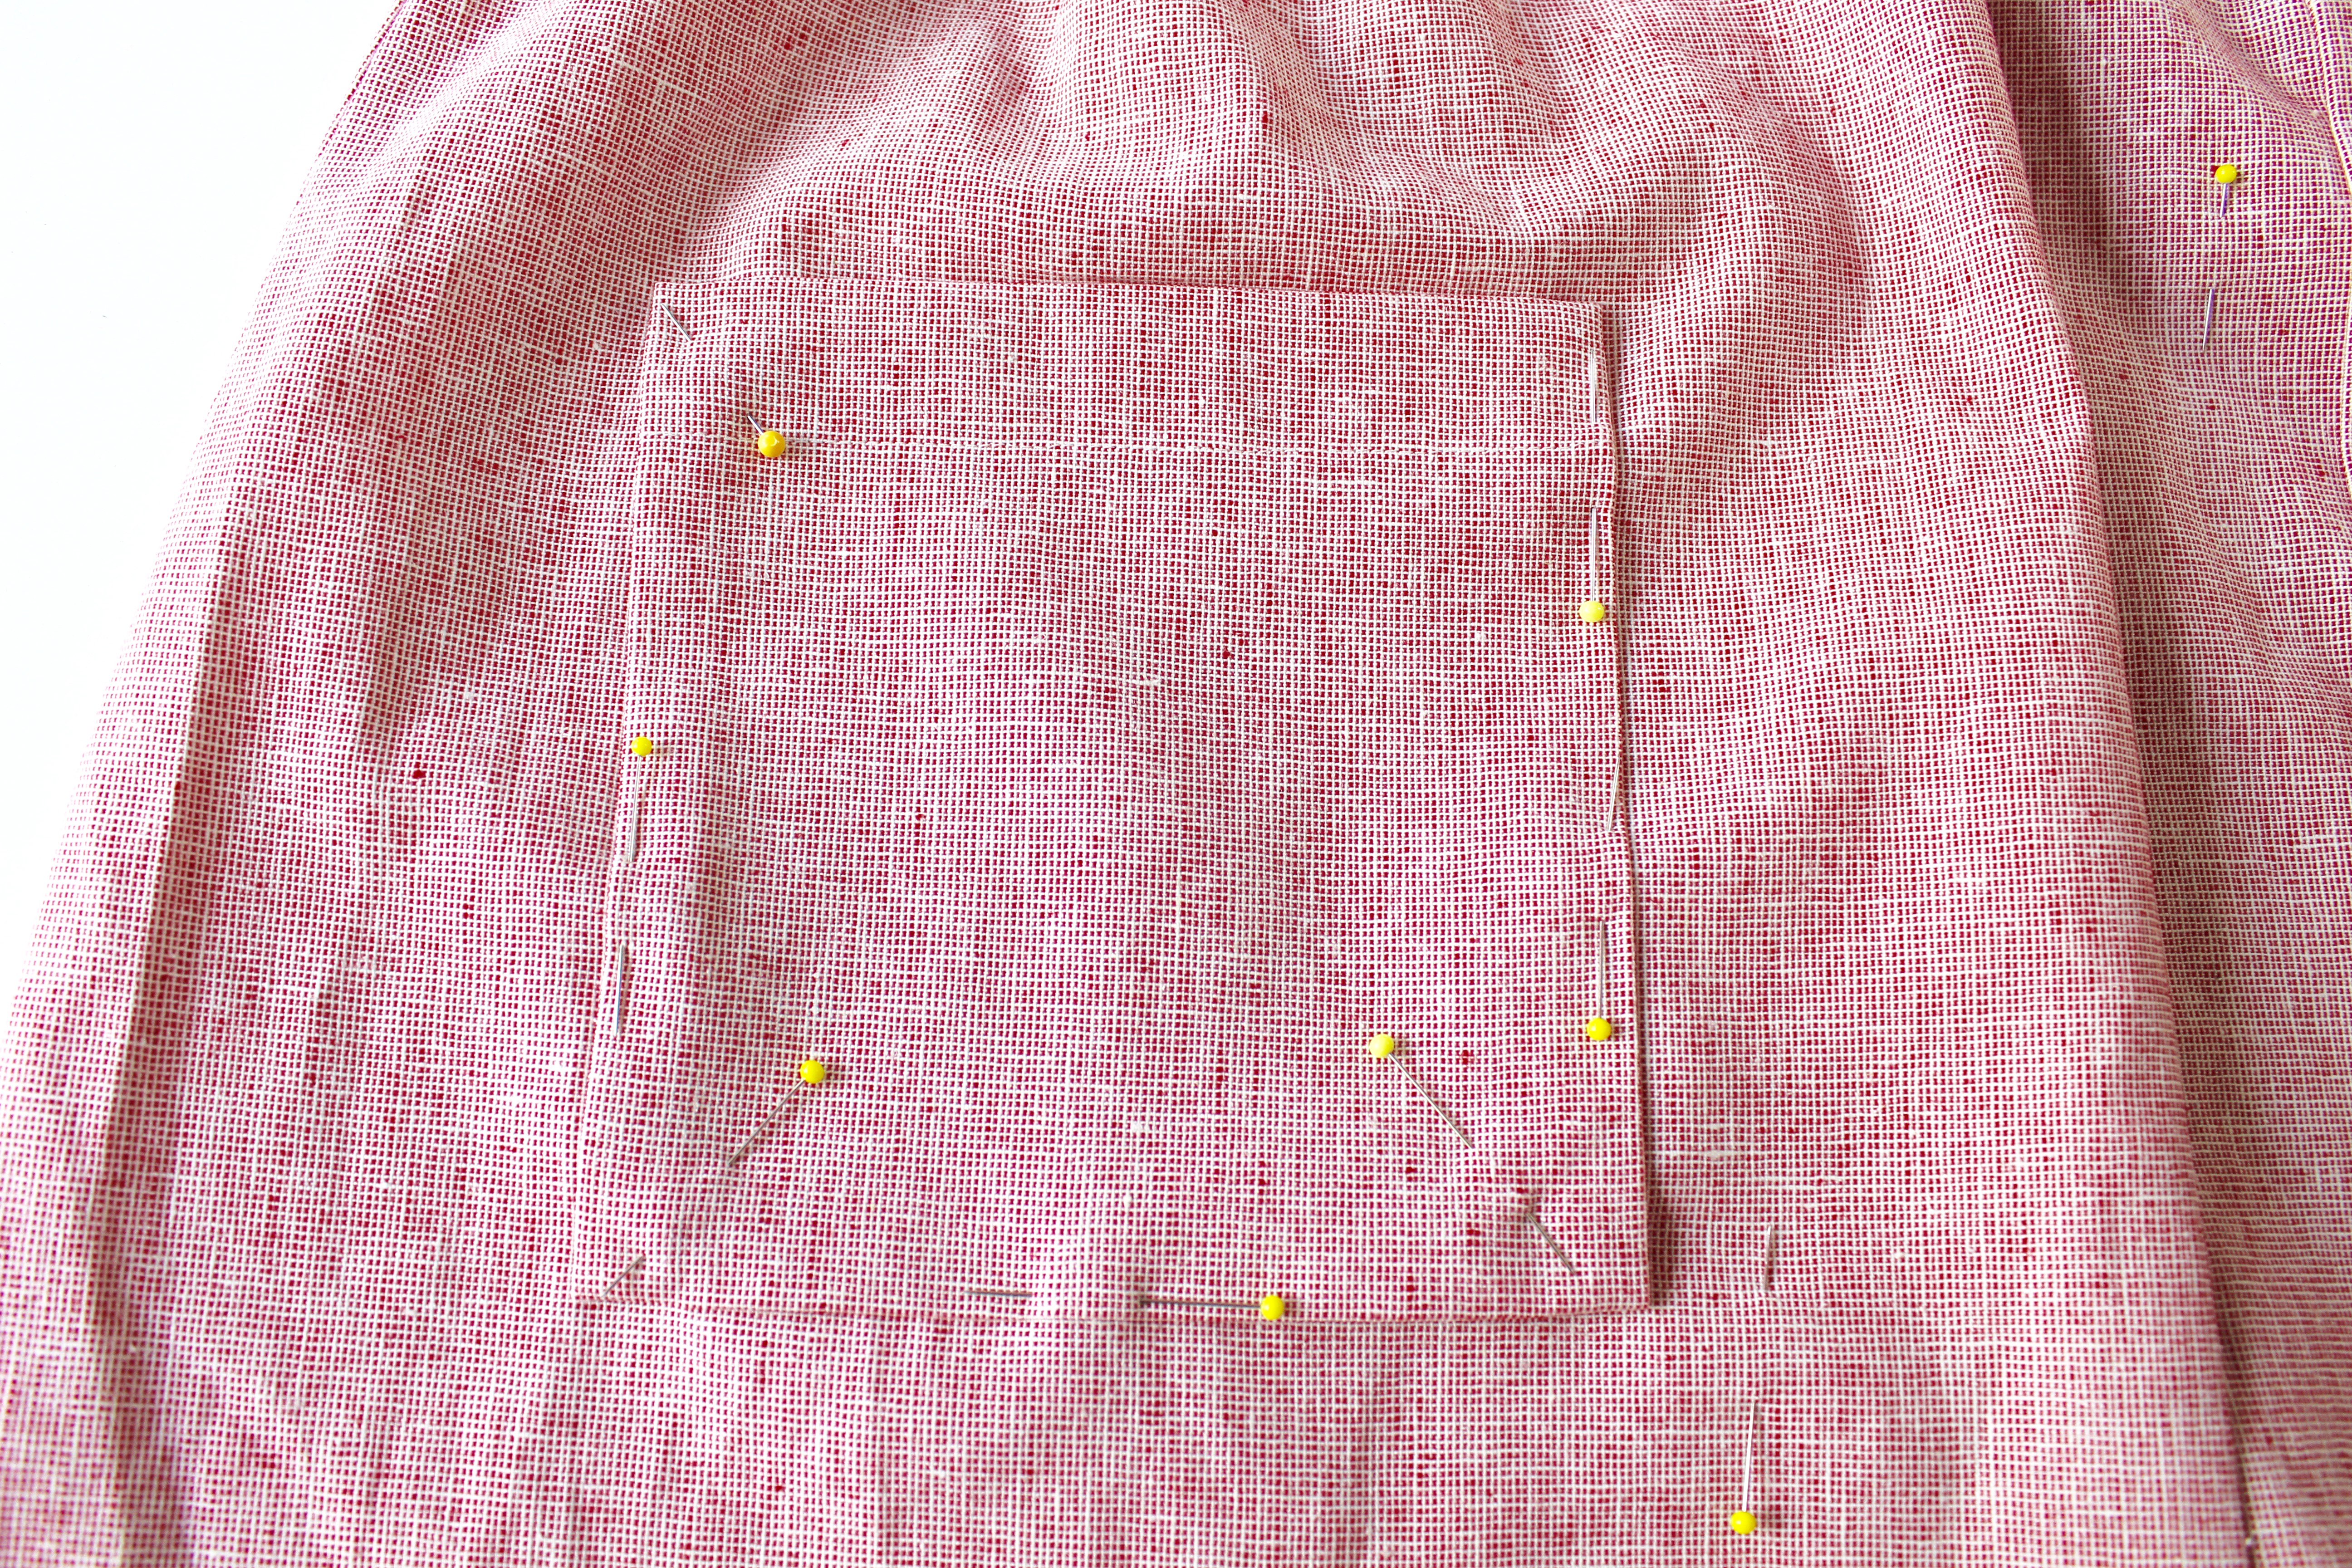
POCKETS
Hem the slanted edge of the Front pocket and the top edge of the Back Pocket
Fold over 1cm and press the remaining edges.
Pin to the Front and hand tack. Topstitch.
Pin the Back Pocket to the Back in position as shown on the template. Hand tack. Topstitch.
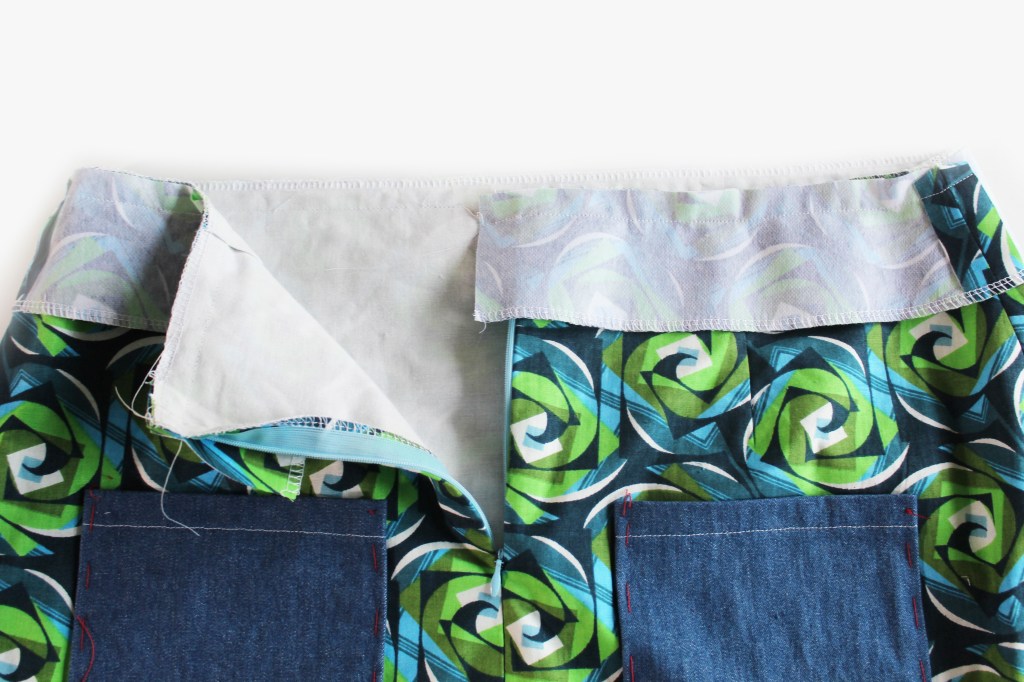
FACINGS
Join the (interfaced) Front and Back facings at the short edges.
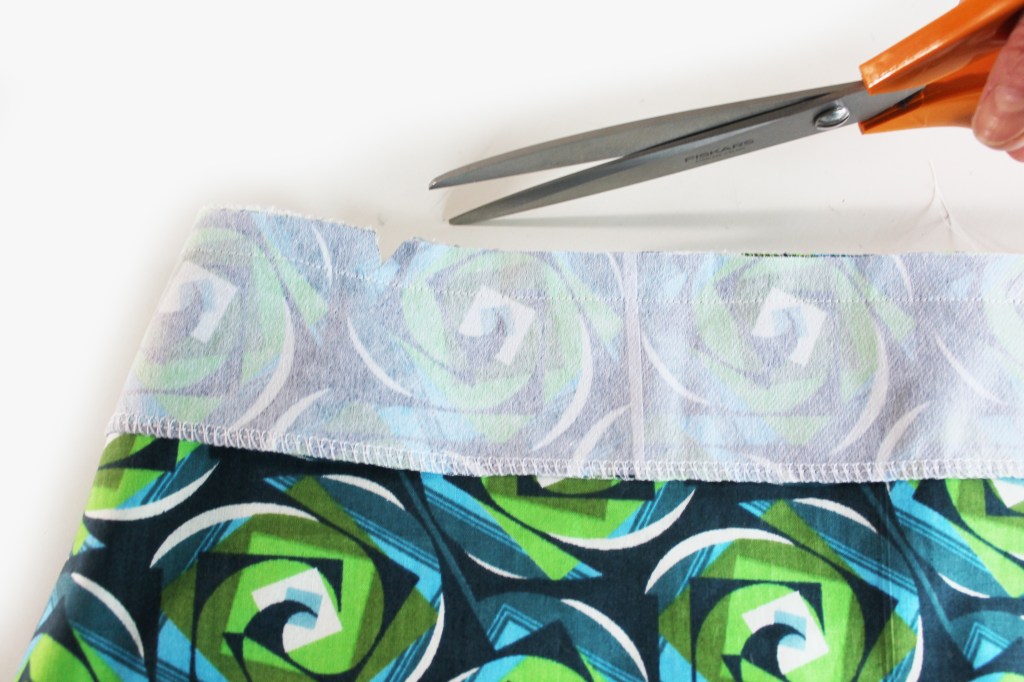
With the right sides facing together, pin the facing piece to the skirt, matching up the side seams and allow 1.5cm overhanging at each far end.
Sew all around. Nick the seam allowance every 2cm approx.
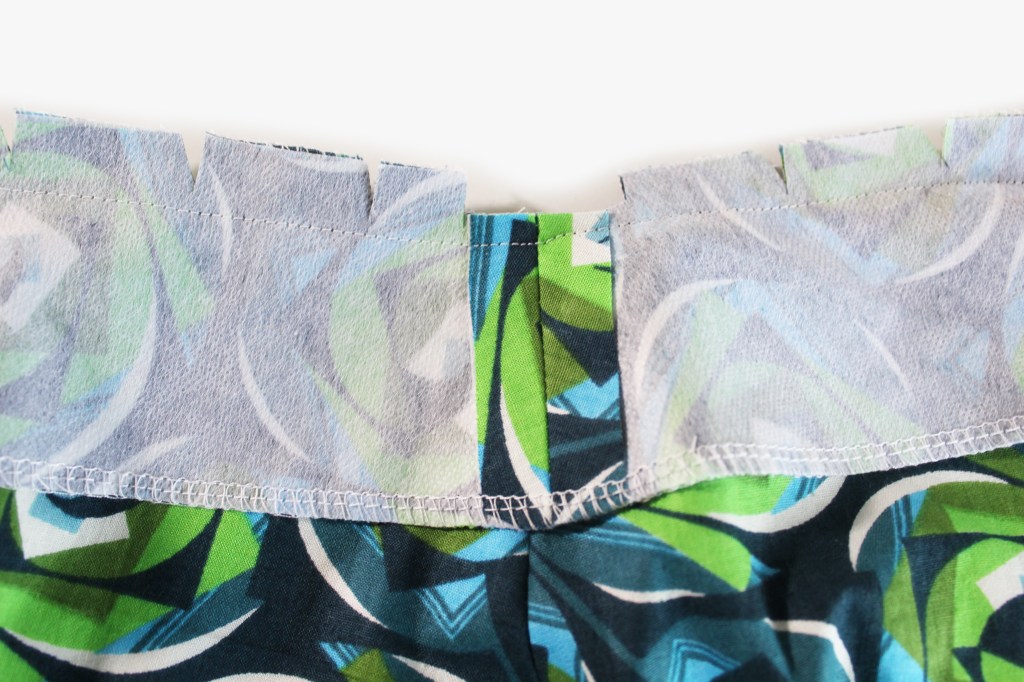
Trim the bulky cross seam allowances.
Press the facing upwards, with the seam allowance pressed towards the facing. Understitch on the Facing side.
Stitch the facing to the side of the zip at each side. Trim the seam allowance and across the corners.
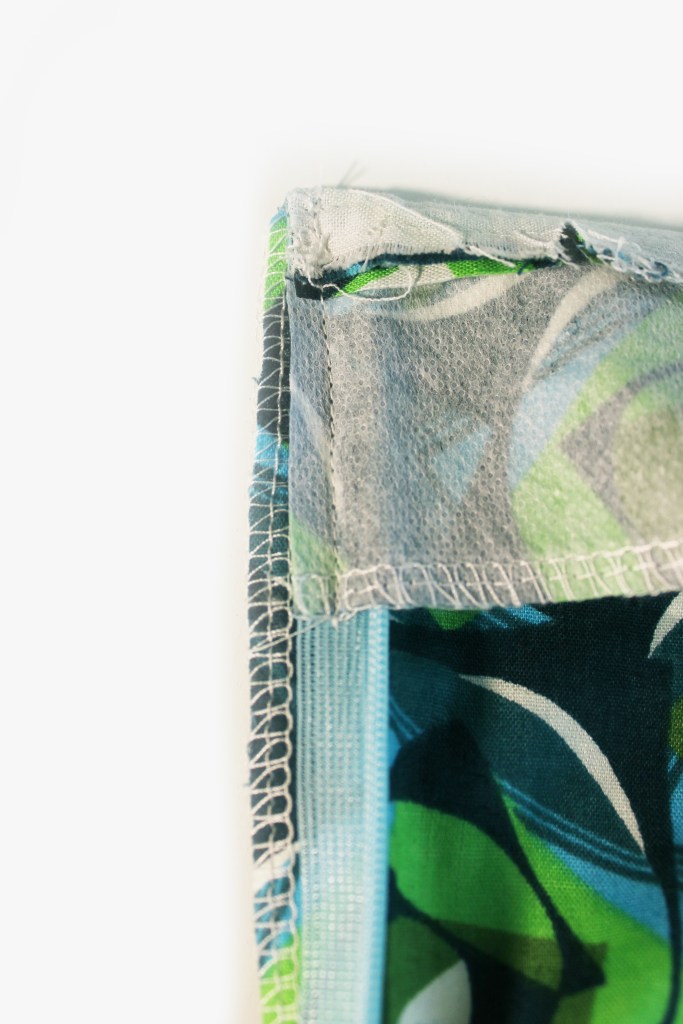
Fold the facing to the reverse side, pushing out the corners at the top of the zip.
Pin the facing to secure it on the reverse side. Stitch the facing all around, close to the outer edge. Press.
Finally a bit of hemming on the lower edge of the skirt and bobs your uncle! There you have it!
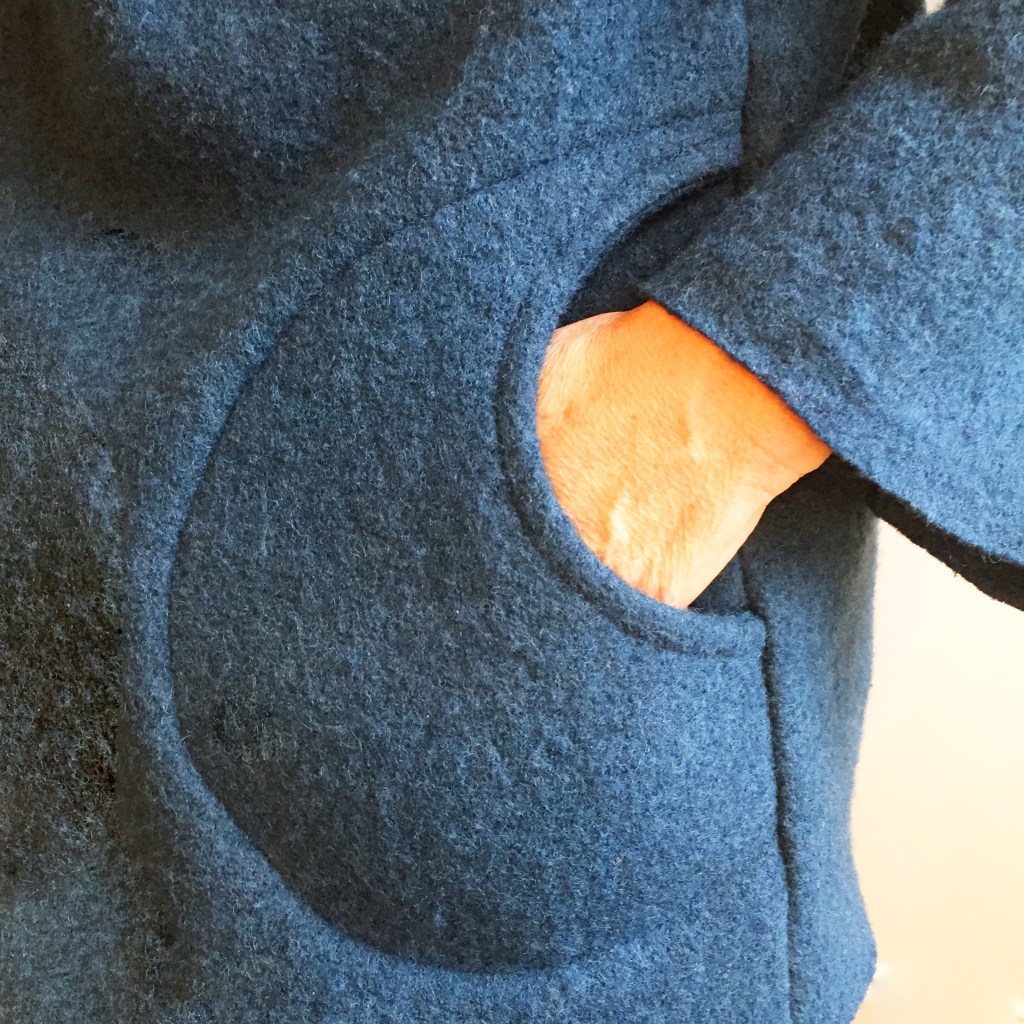
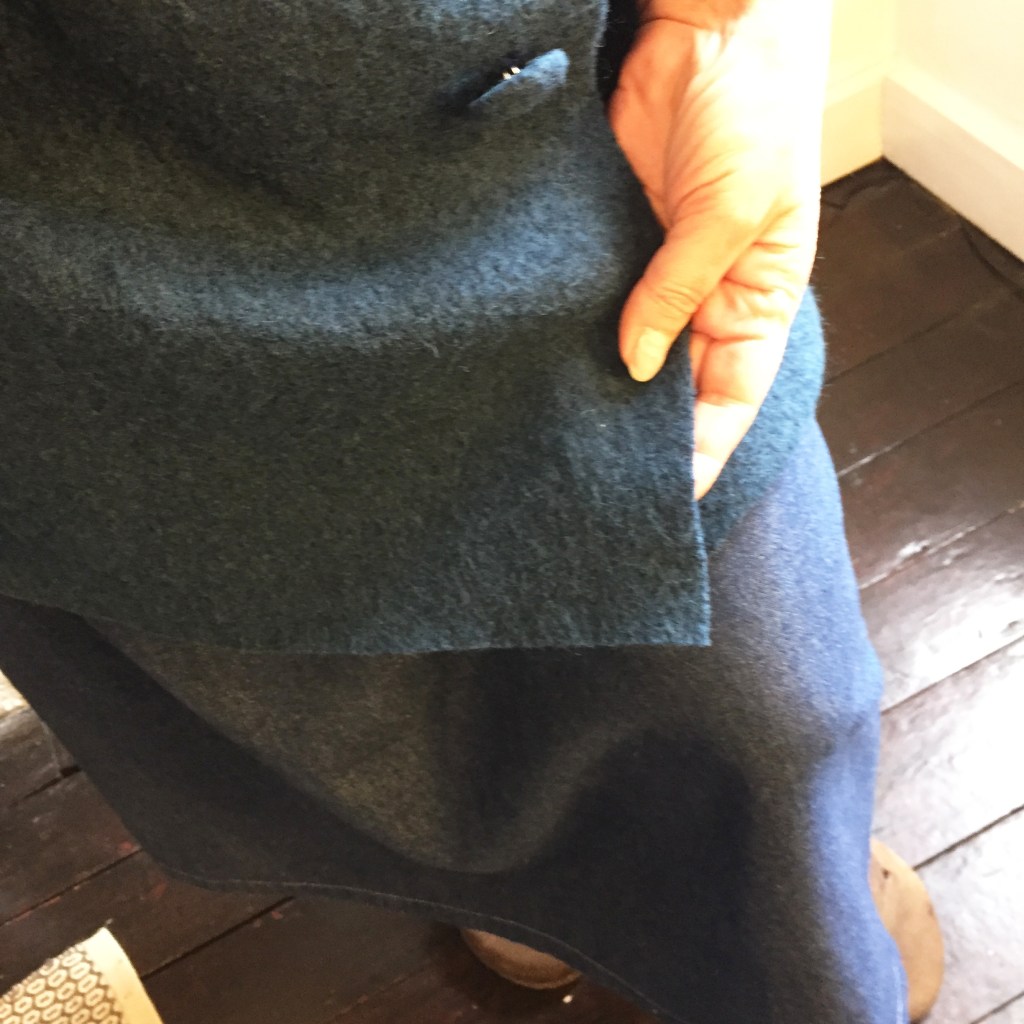
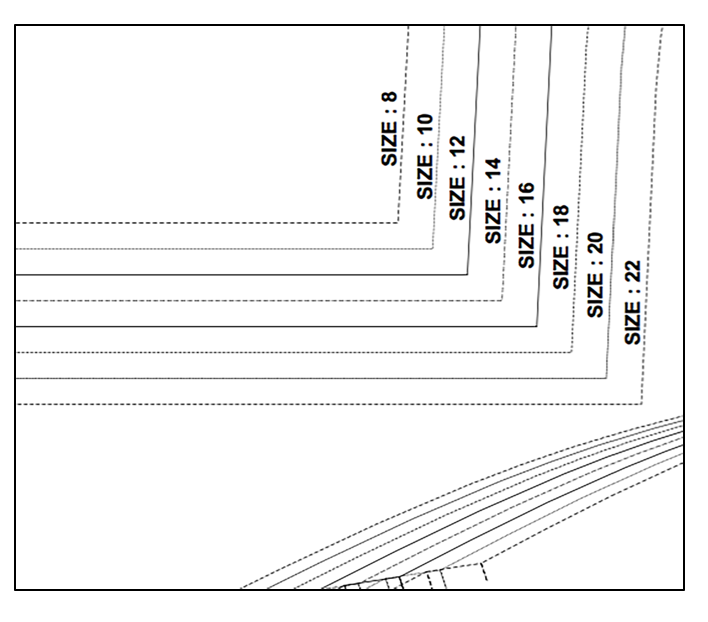
This post shows a hack that Ive done using Ursula coatigan pattern. Its got a very different neckline which makes a more over sized coat/jacket with a stylish relaxed feel.If you are making an Ursula from Sewing Street boiled wool, you might like to hack the pattern by adding a collar on to your coat or jacket.Some boiled wool fabrics don’t fray and look the same on both sides, perfect for adding on a back collar on to the back neck, instead of the facings.You can still do the lovely pockets as instructed on the pattern. I left the sleeve cuff un-hemmed. And…. I didn’t finish ANY of the raw edges on the reverse side- I just left them to look after their well behaved selves! No fraying- no fuss!I also left the lower edge raw!!! Radical!So, instead of sewing on the front and back facing piece, I just added one rectangle of fabric, cut to the specifications shown below and stitched it to the wrong side of the back and front neck. The seam is apparent on the right side, however, as the collar is turned over, it covers it. I did trim the seam allowance down to 5mm though.This diagram shows you what I did. Easy peasy!
So the one rectangle you need to cut depends on the size you are making as follows:
Size 8= 9cm x 49cm
Size 10= 9.5cm x 50cm
Size 12= 10cm x 51.5cm
Size 14= 10.5cm x 53cm
Size 16= 11cm x 54cm
Size 18= 11.5 x 55cm
Size 20= 12cm x 56.5cm
By the way, if you are getting pilling with your boiled wool, Ive read that it helps to spray the fabric with hairspray- I haven’t tried it myself but Im going to give it a go.
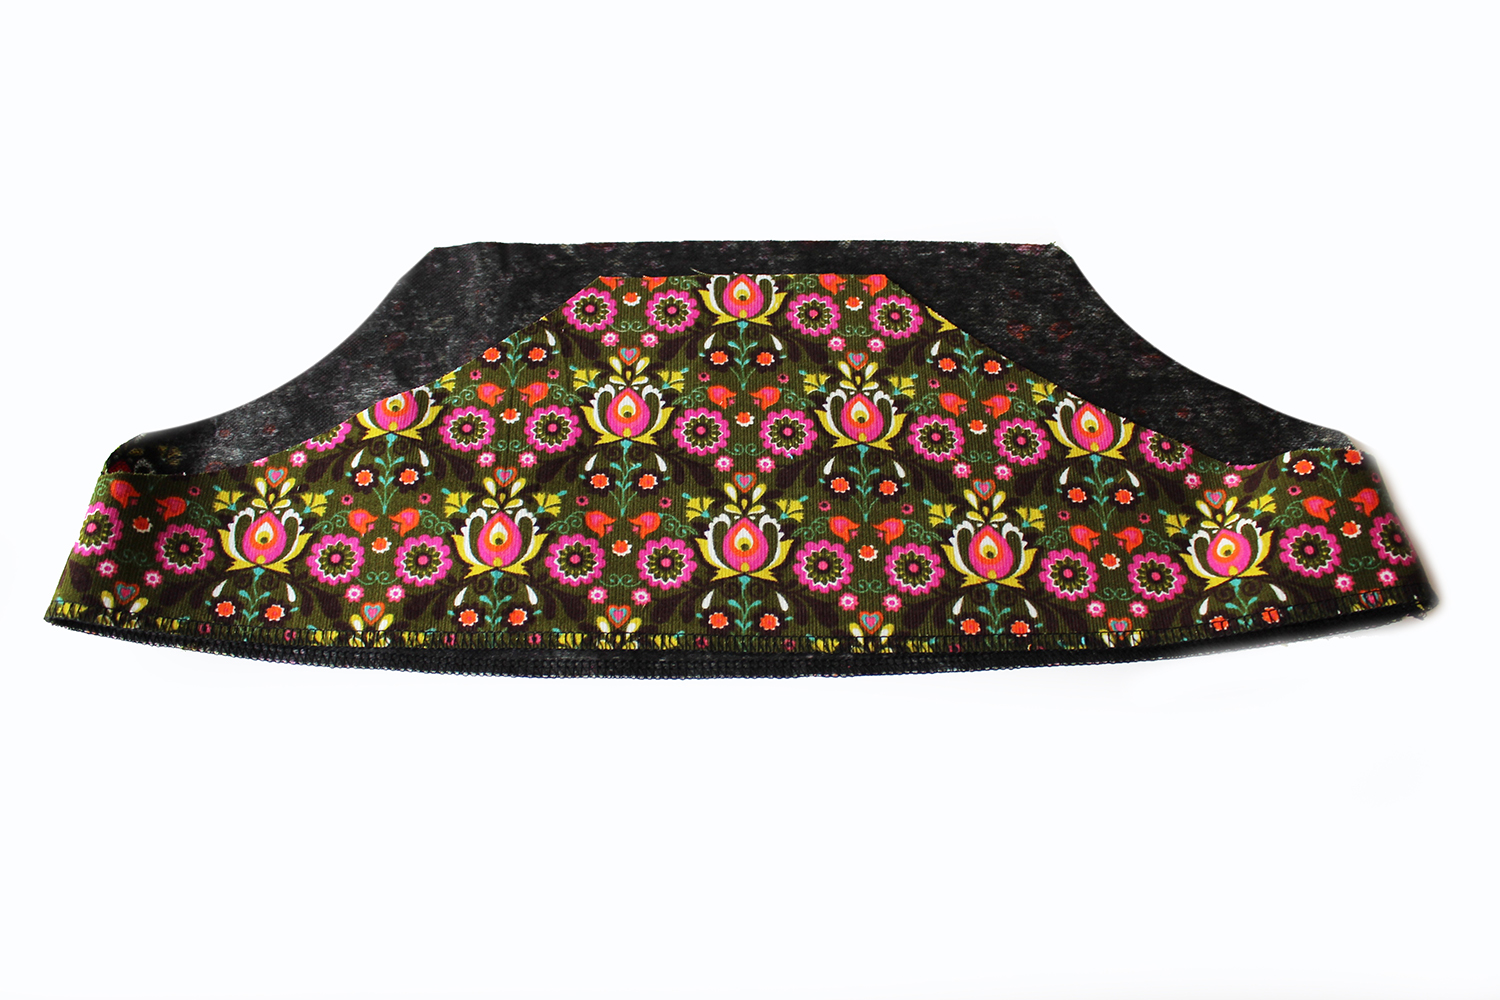
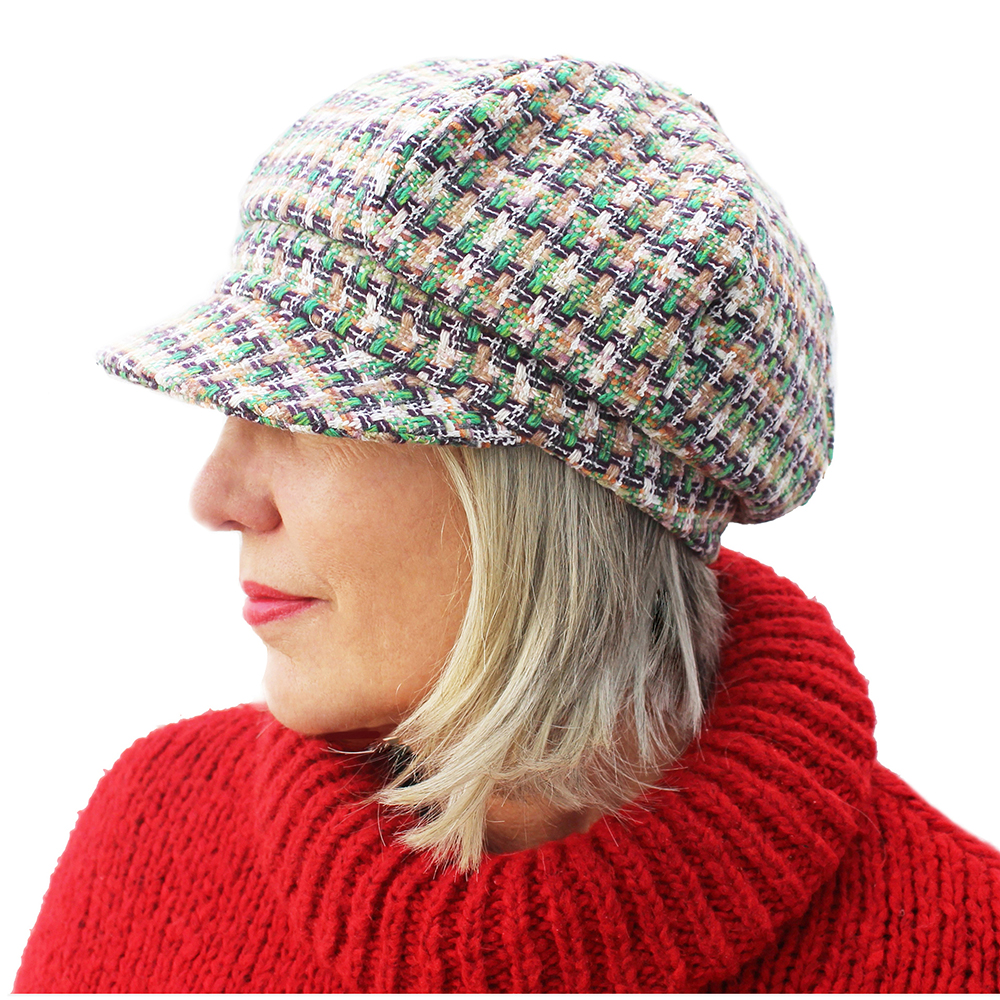
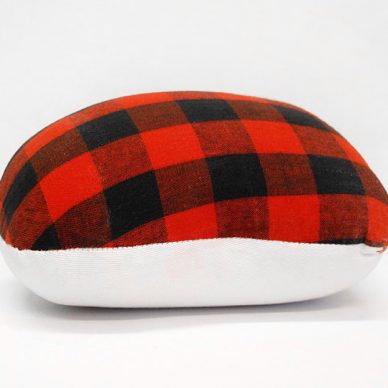
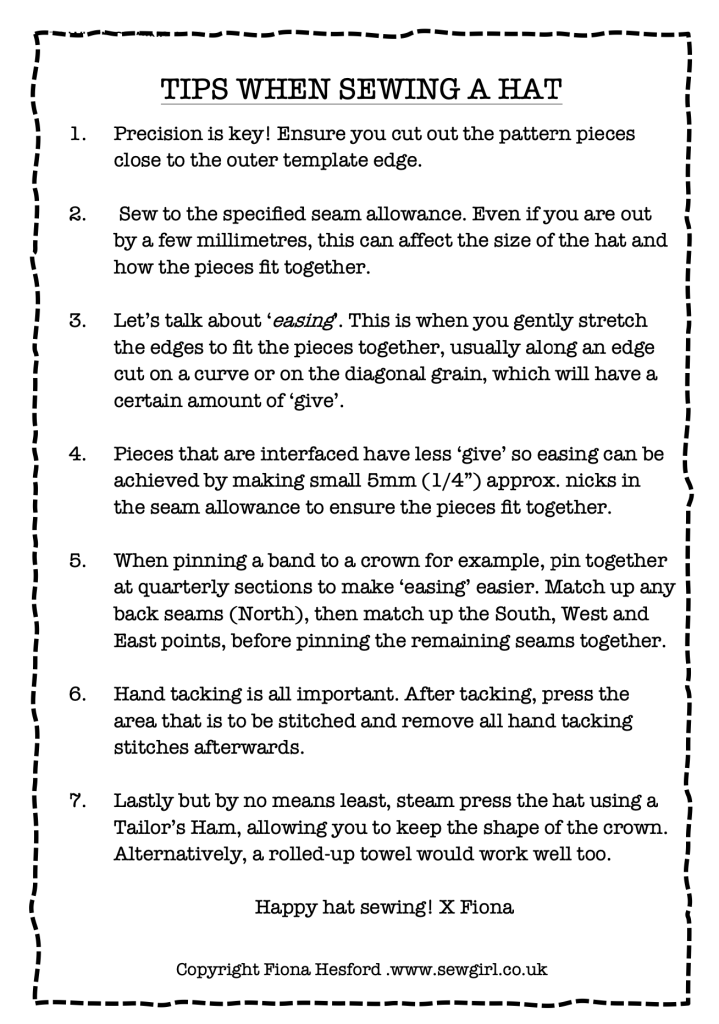
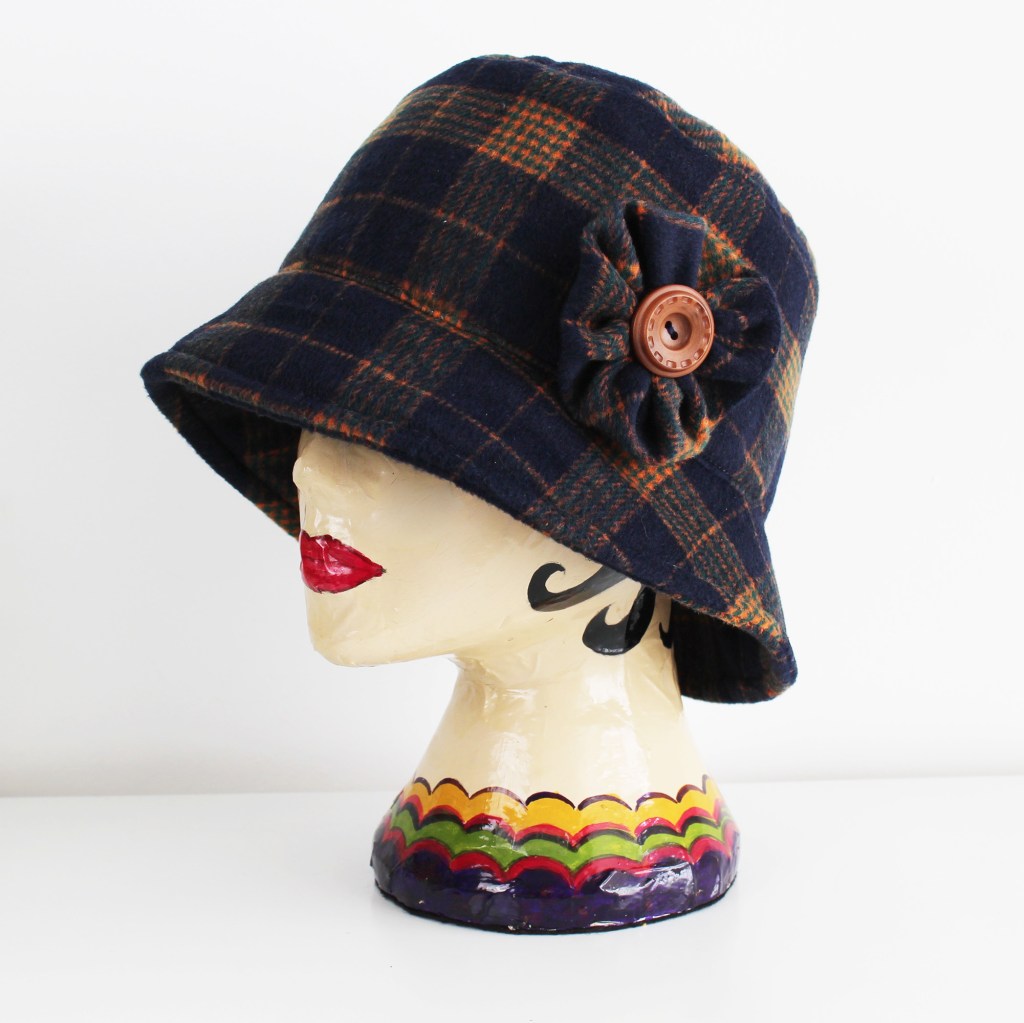
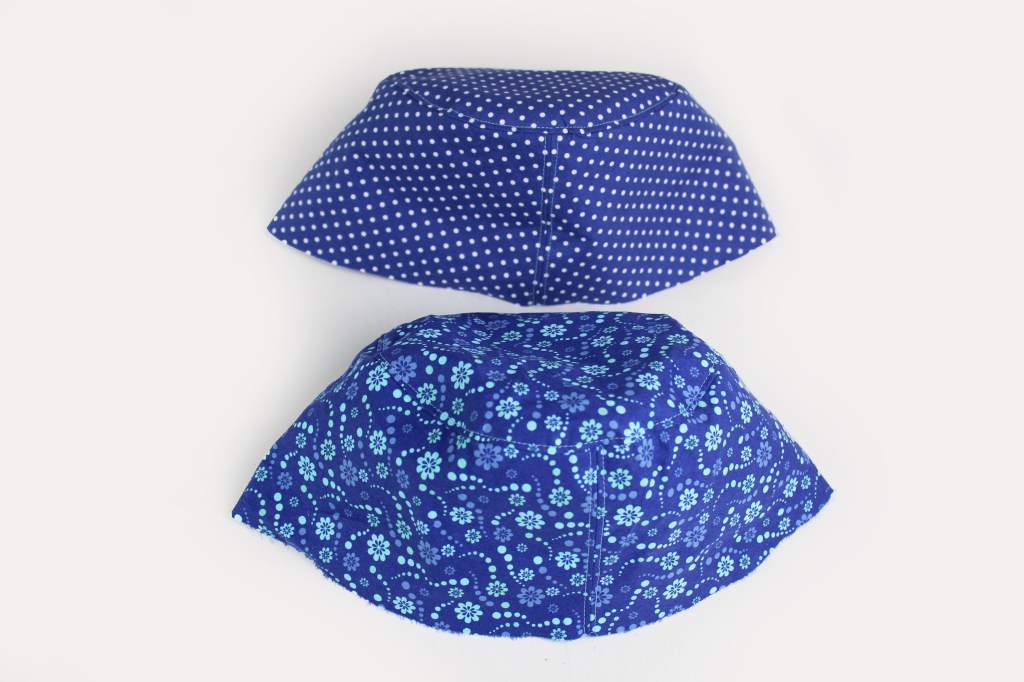
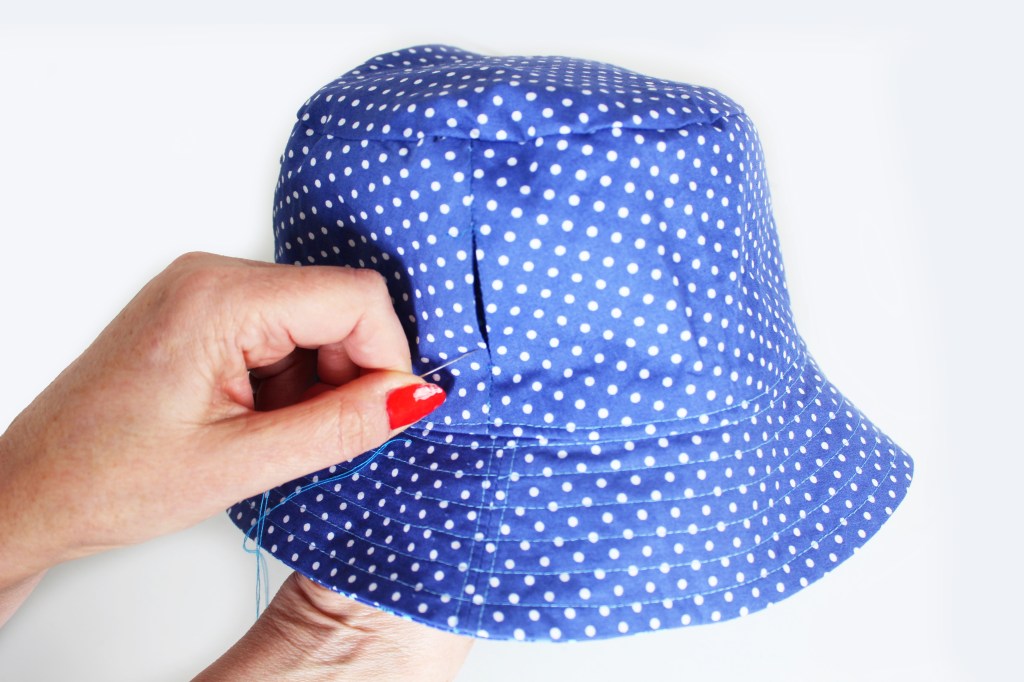
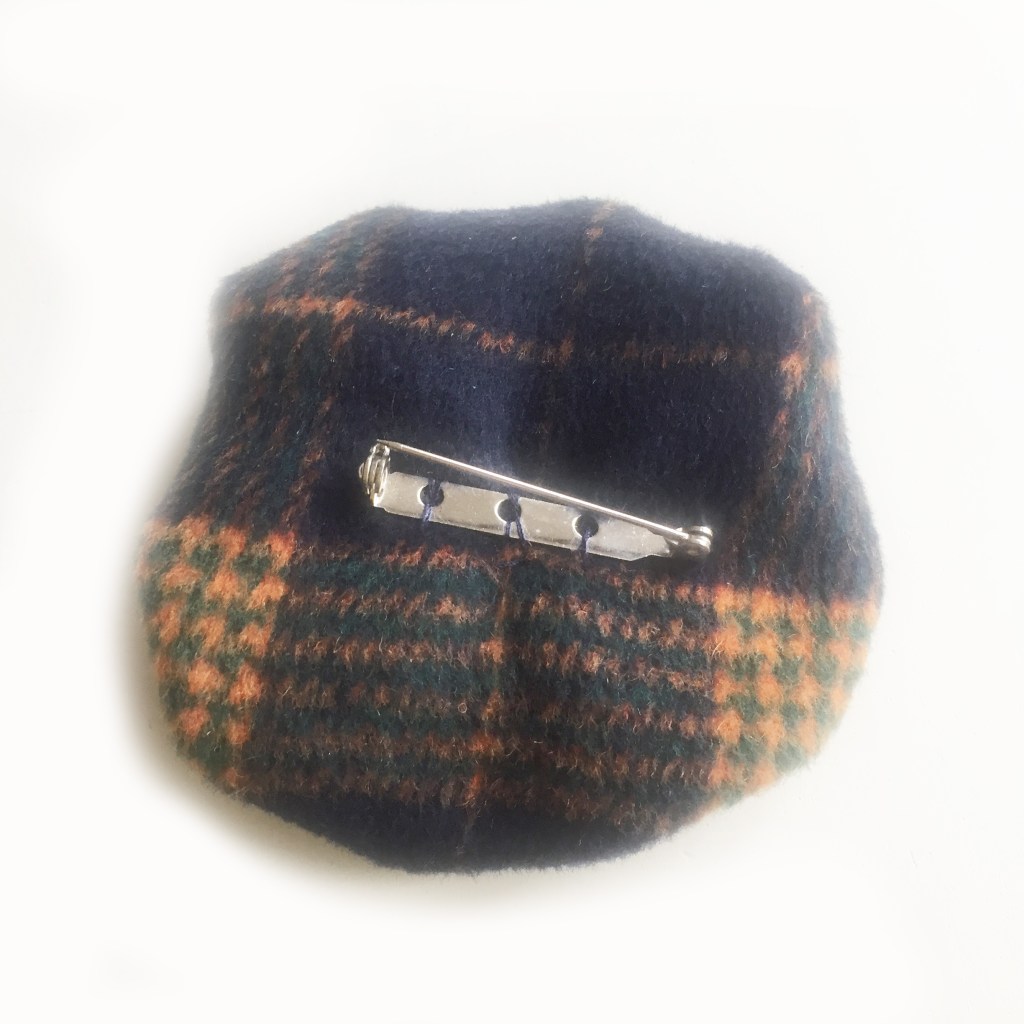
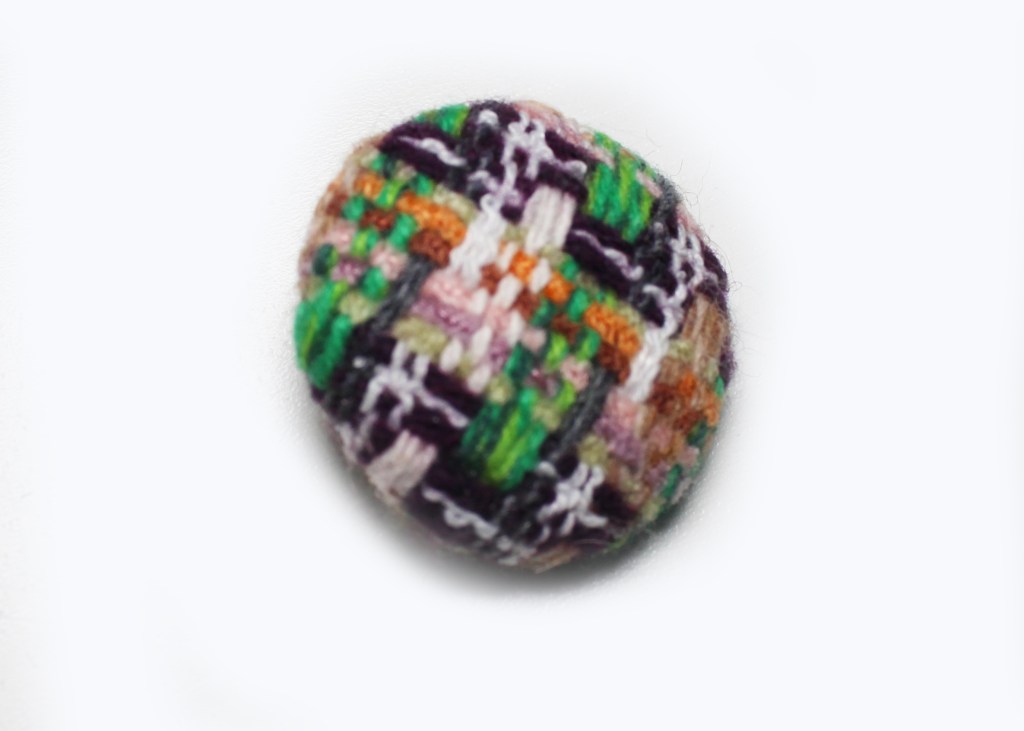
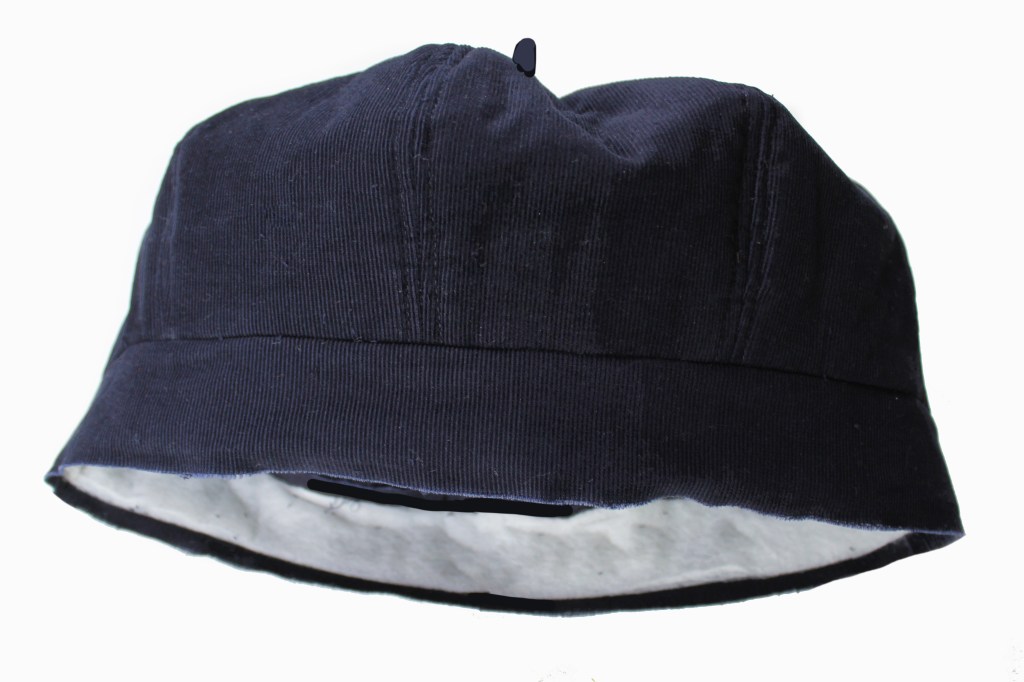
I really love making hats! Tweed ones or cotton prints, denim and velvet or needlecord, a hat is an all year round wardrobe essential for any occasion and time of the year.
This blog will show you some of the step by steps to give you an idea about whats involved. To buy any of the patterns, please click any of the shop links.
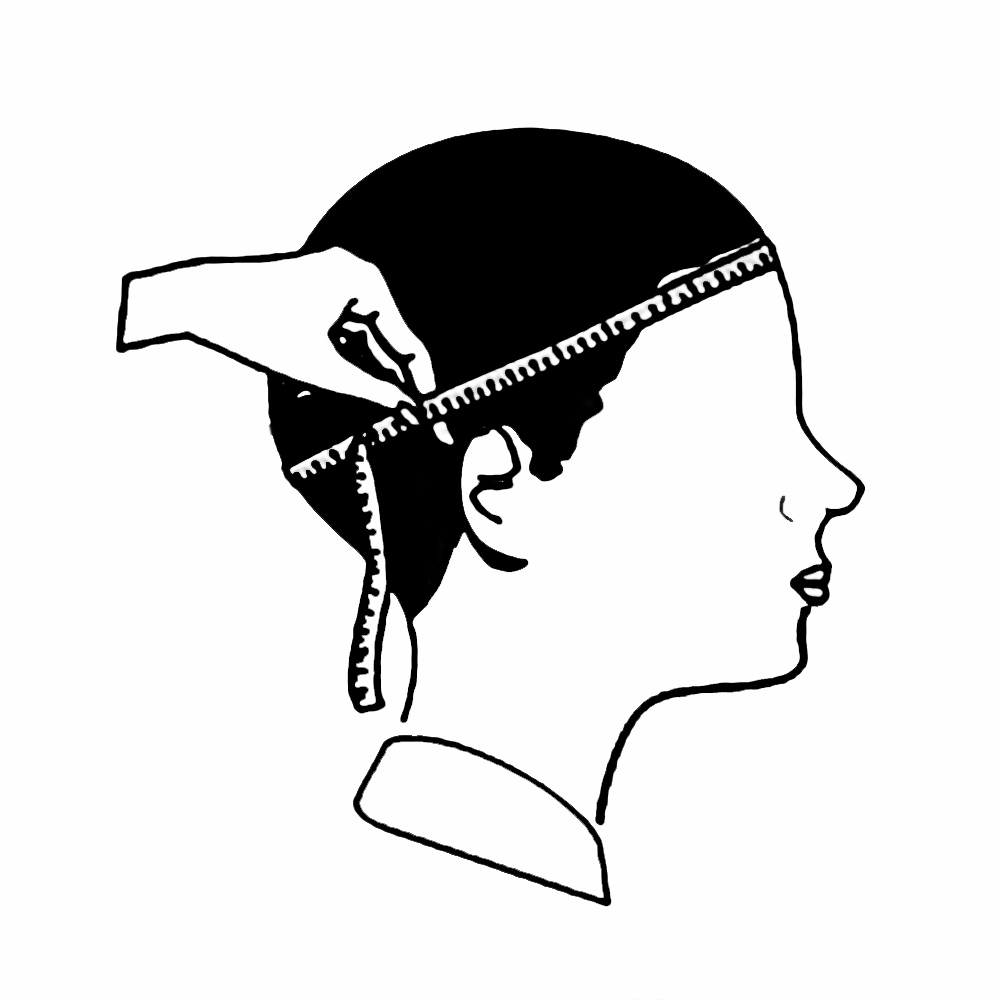
Sewgirl hat patterns are available either as a PDF digital downloads or as a paper pattern on the Shop. All hats can be made in sizes small, medium or large. To measure around your head , extend a tape measure around your forehead and above your ears.
Measure your head for size: SMALL = 55cm (21 3/4″, MEDIUM = 57cm (22 1/2″), LARGE = 59cm (23 1/4″)
Suitable for sewists with some previous experience
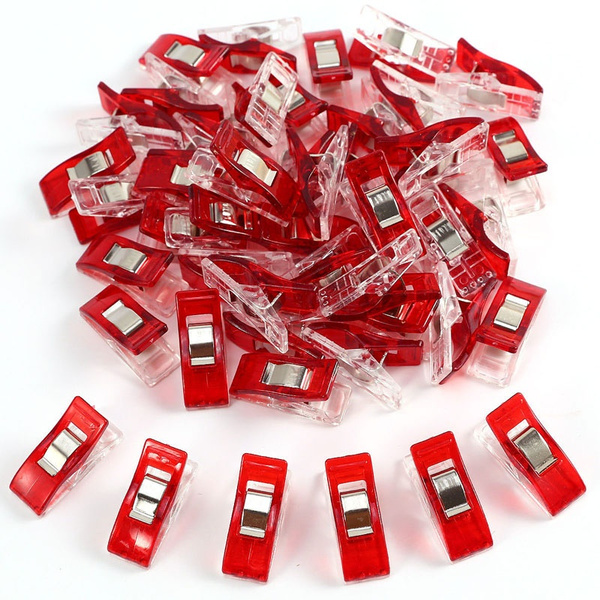
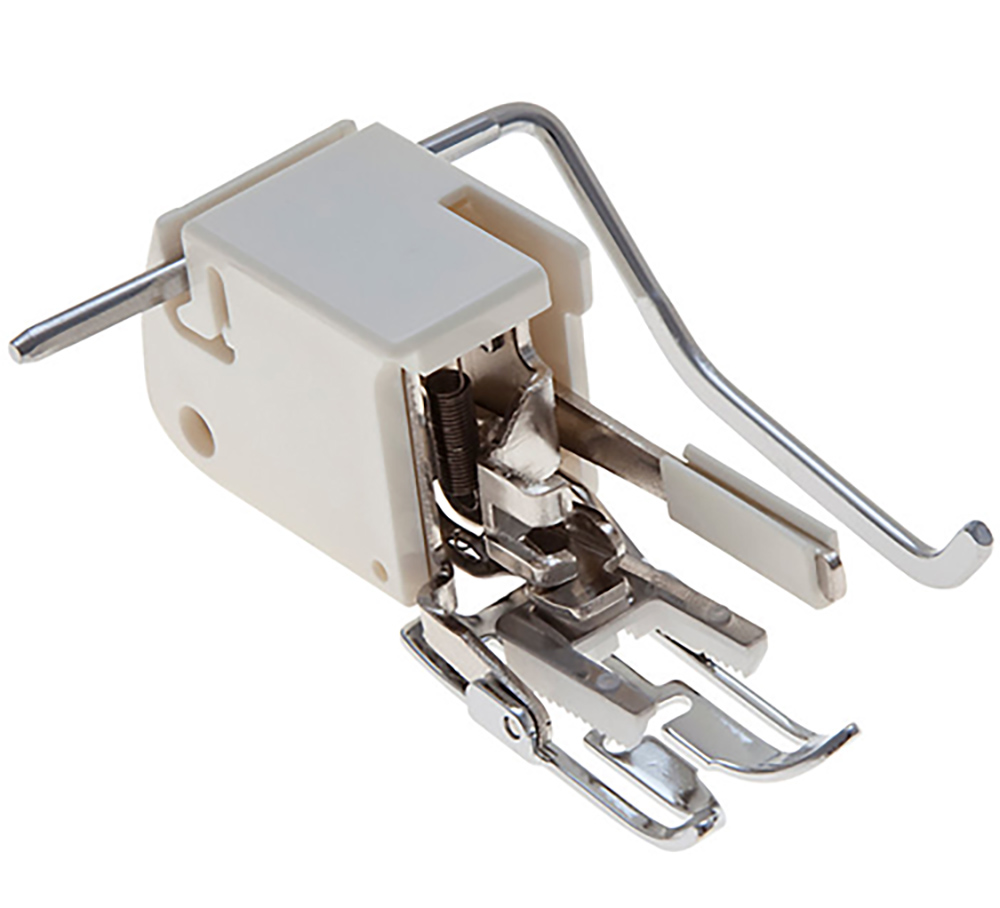
EQUIPMENT REQUIRED: Tailor’s ham, pinking shears, pins / quilter’s clips, stitch ripper and a poking tool. Insert a walking foot attachment on your machine if you have one, which will make it easier to sew.
Tailors ham Quilting clips are good for holding layers together
A walking foot makes bulkylayers so much easier to sew.
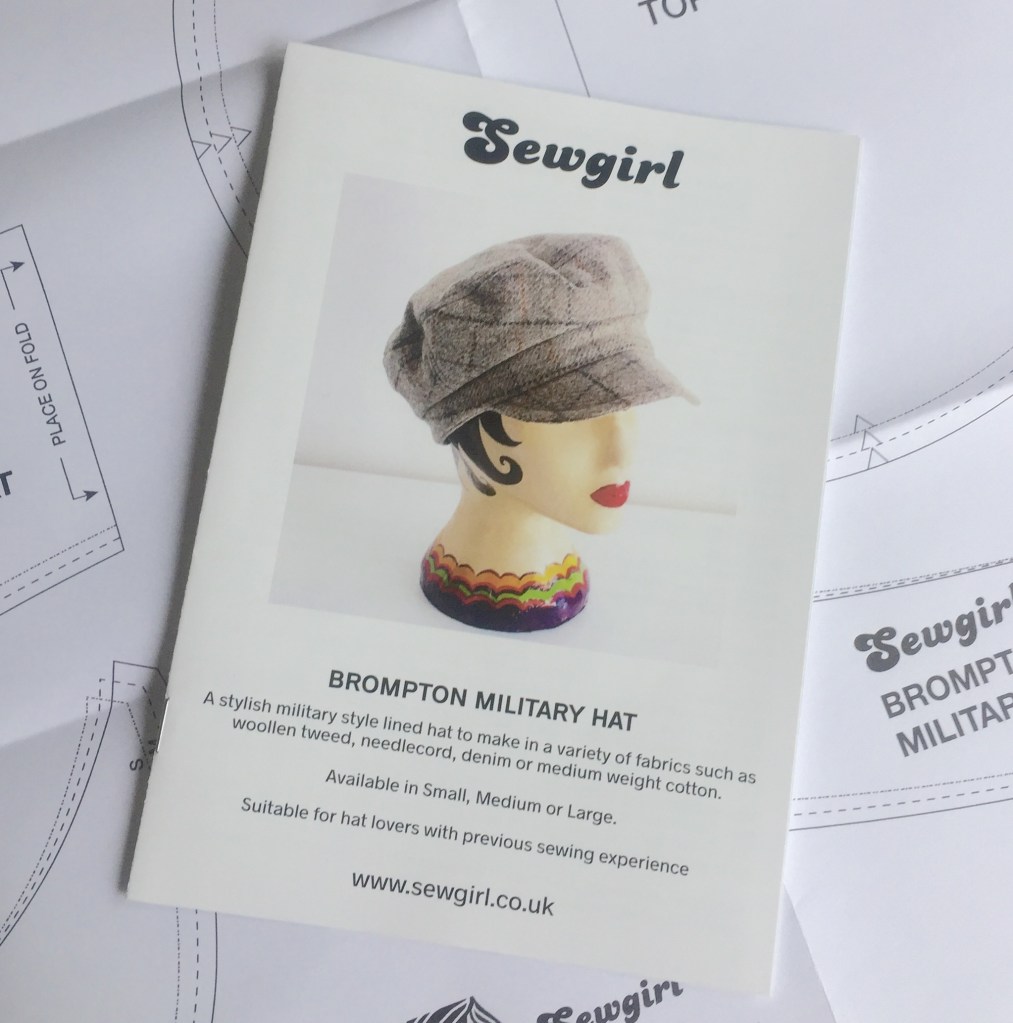
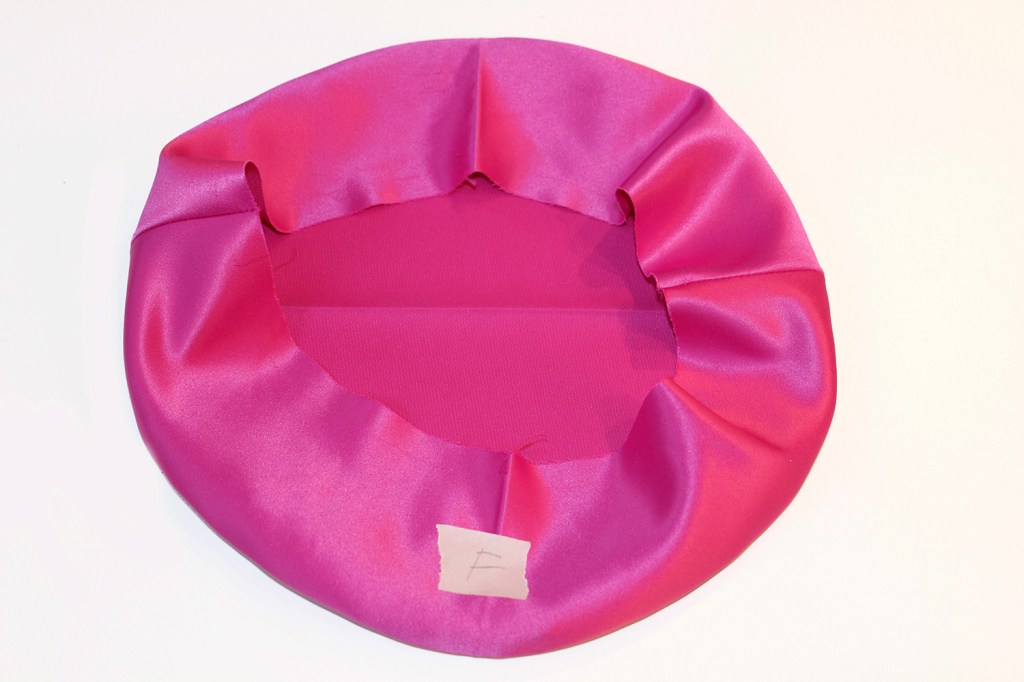
HOW TO MAKE THE BRIGHTON HAT
Winter version of Brighton Hat, for the rosette brooch pattern scroll down
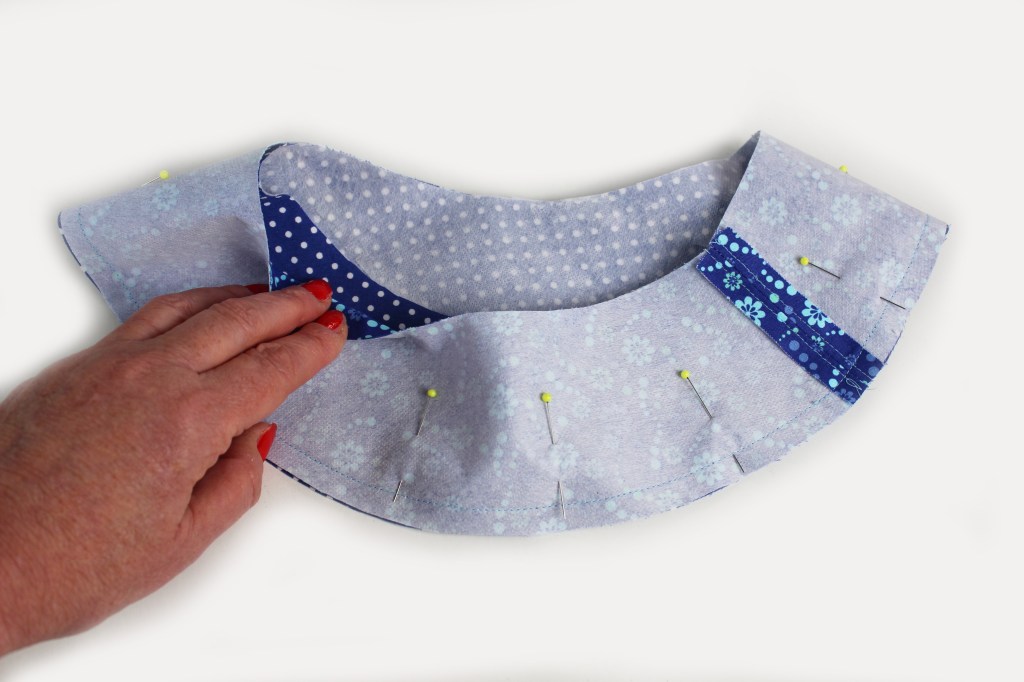
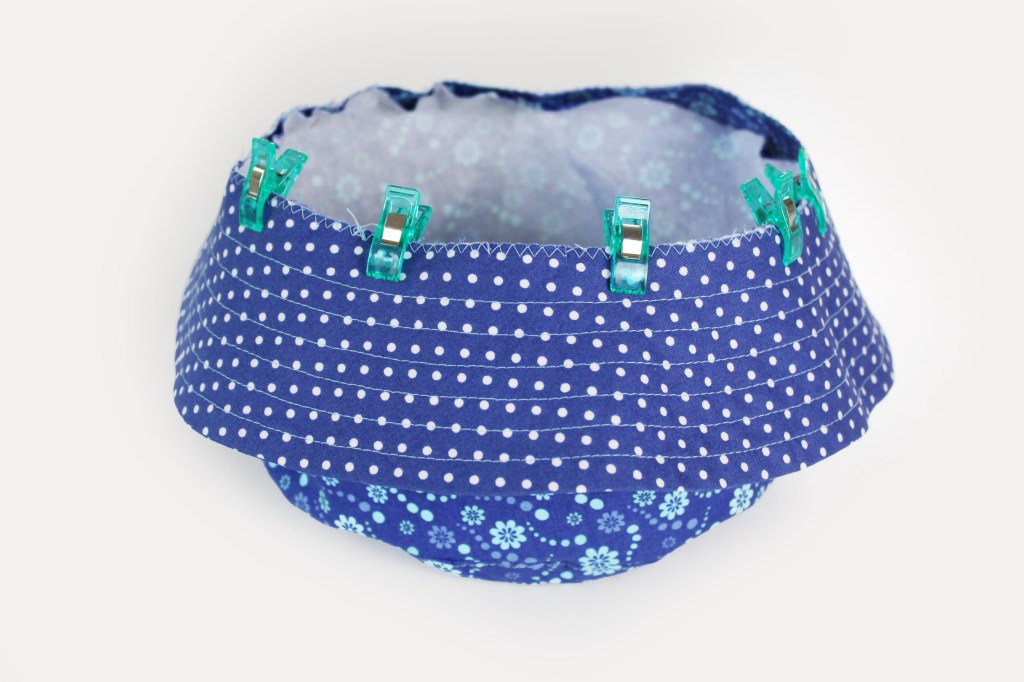
Sew together the Side band and Brim outer and lining pieces.
With the RST, pin the Brim outer and Brim lining together at the outer edge. Sew.
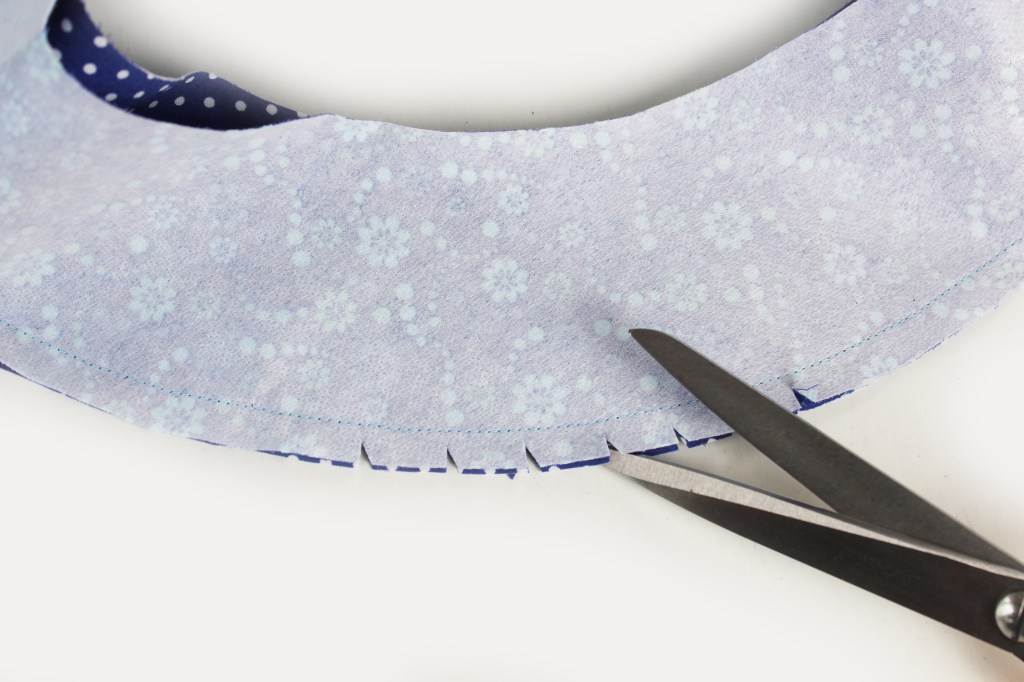
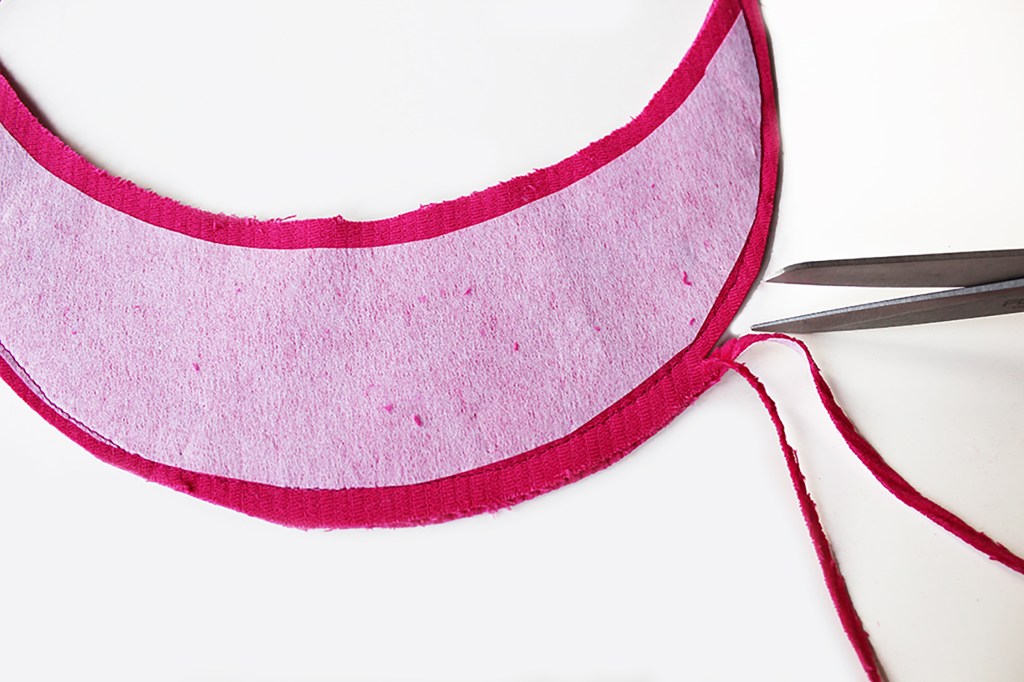
Nick the outer edge all around.
Turn the Brim inside out. Press. Pin all around at the inner edge. Zig zag together the inner raw edges all around.
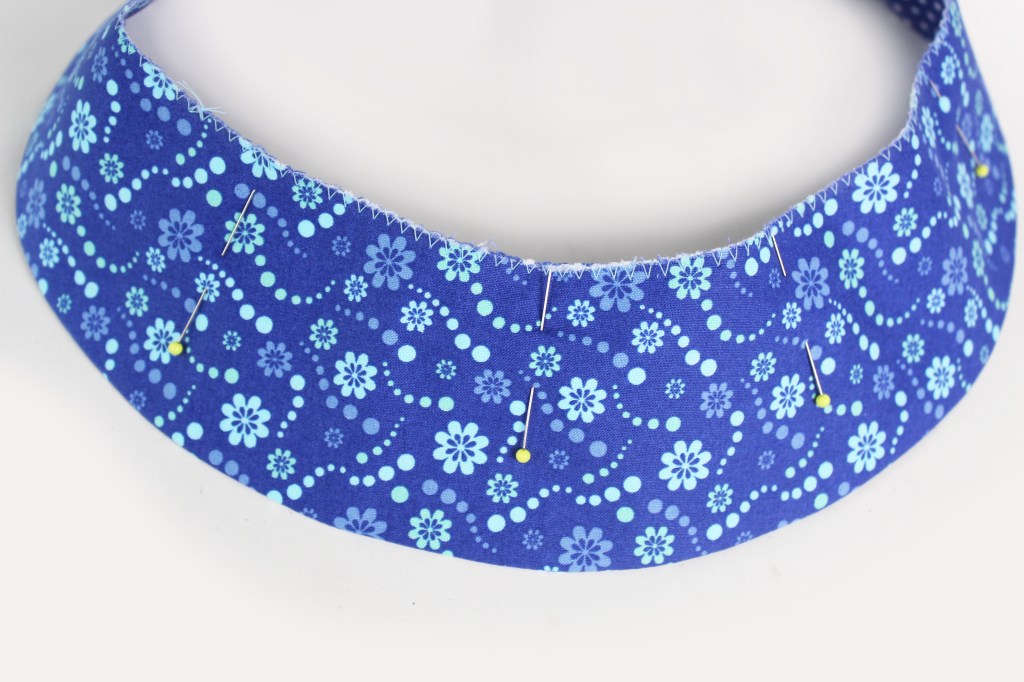
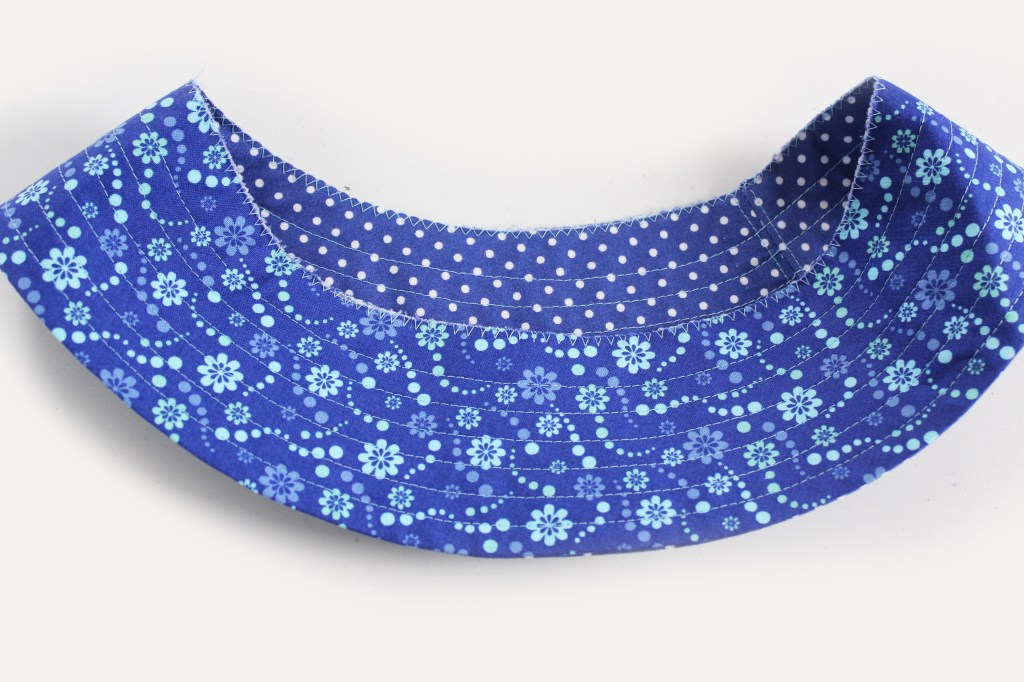
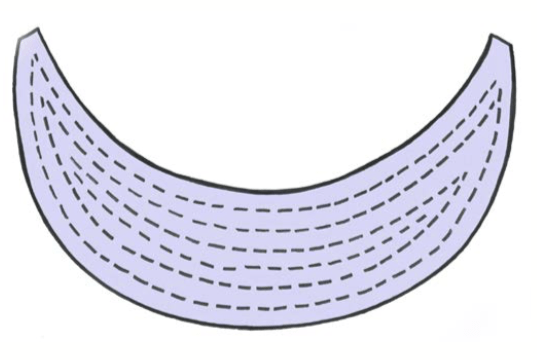
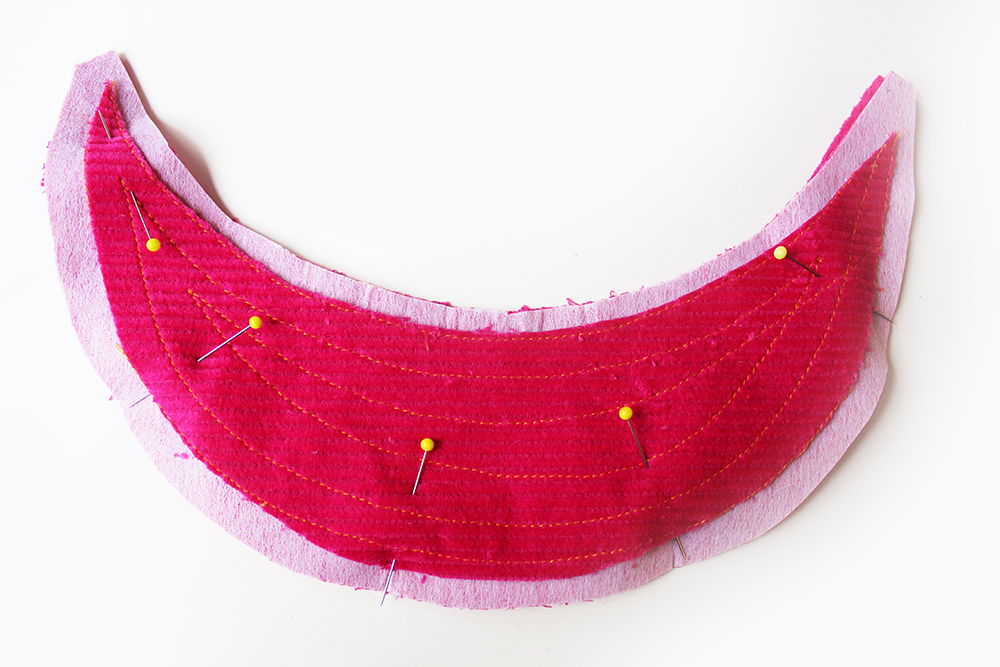
Now for the fun bit…… Stitch lines all around the brim, this helps to stiffen it and it looks good too!
You need about 5 lines, for the small brim and 7 for the large brim, 1cm apart from each other.
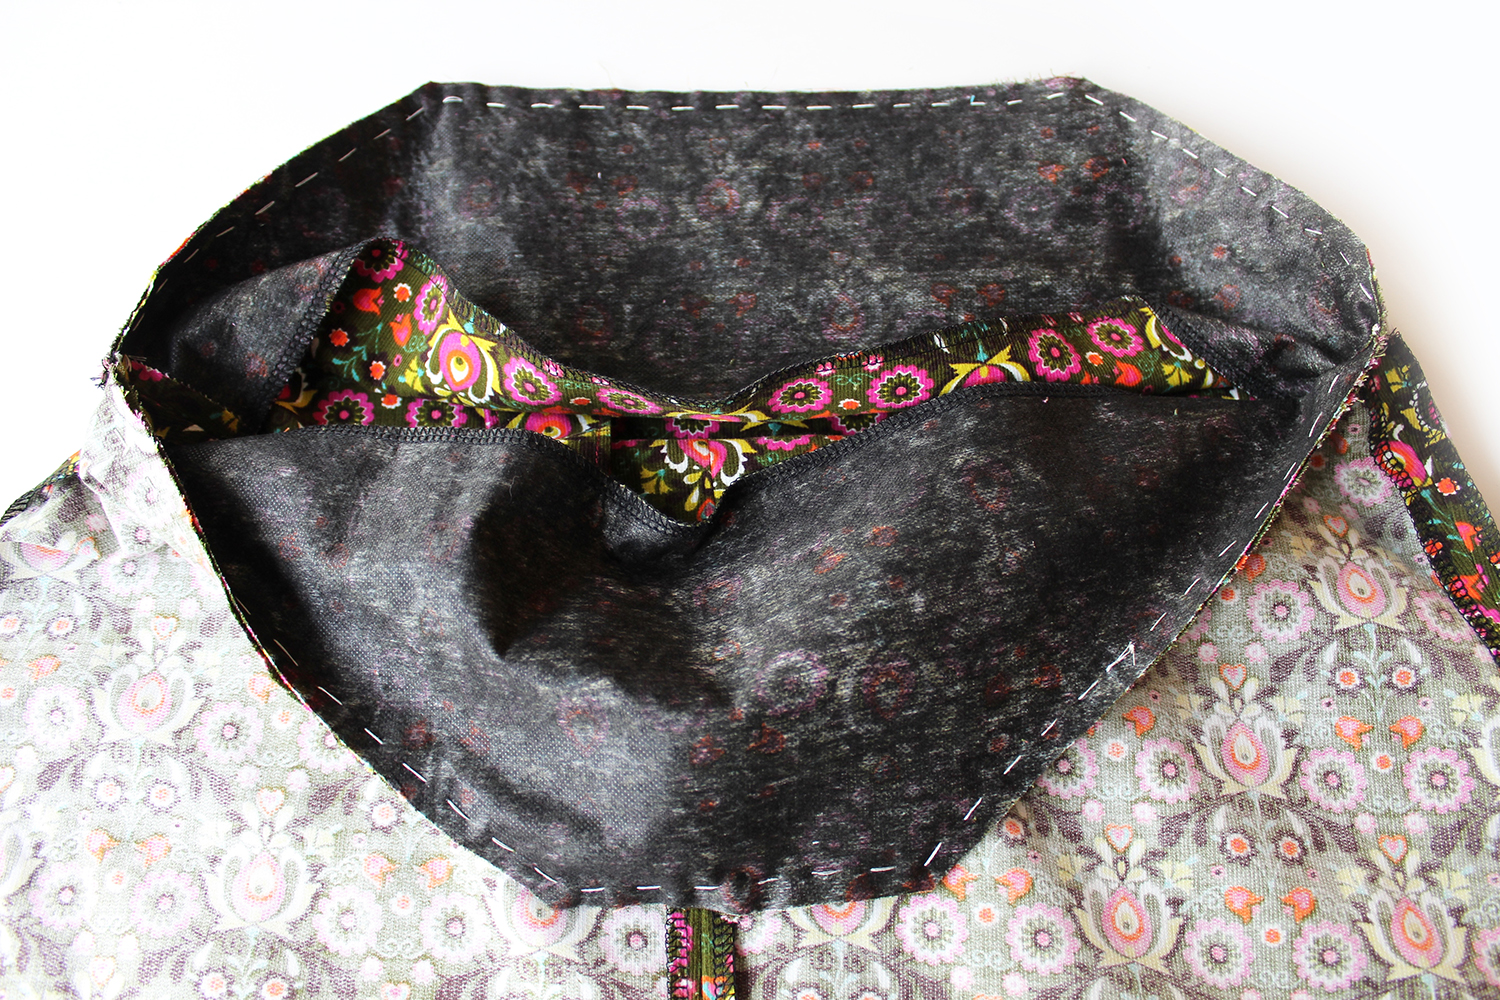
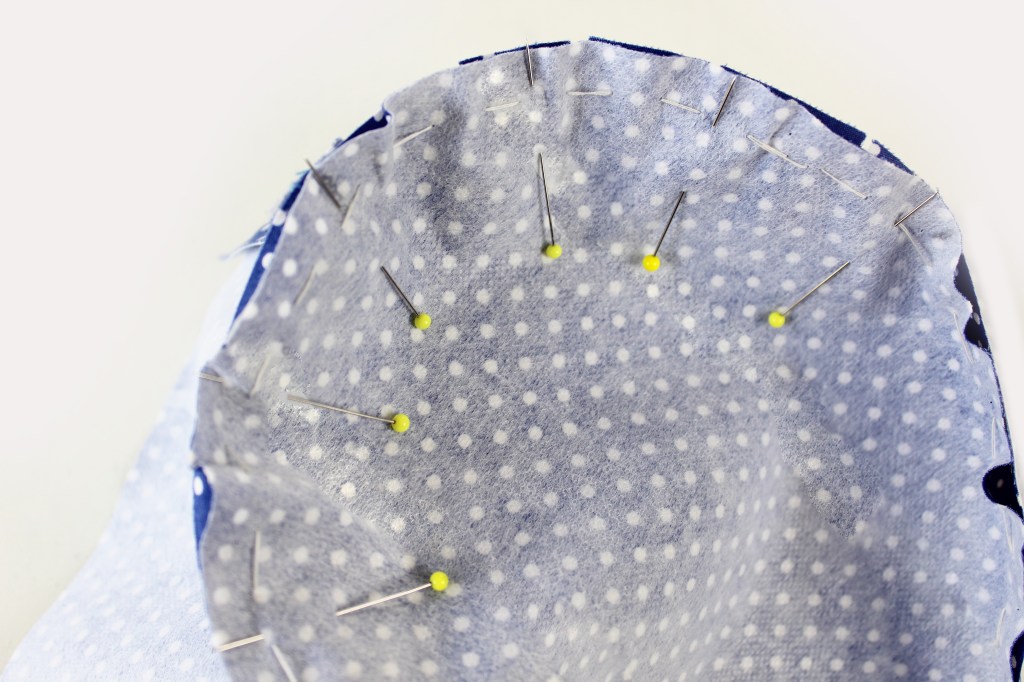
Pin the Crown to the Side band.
Hand tack stitch. Sew all around.
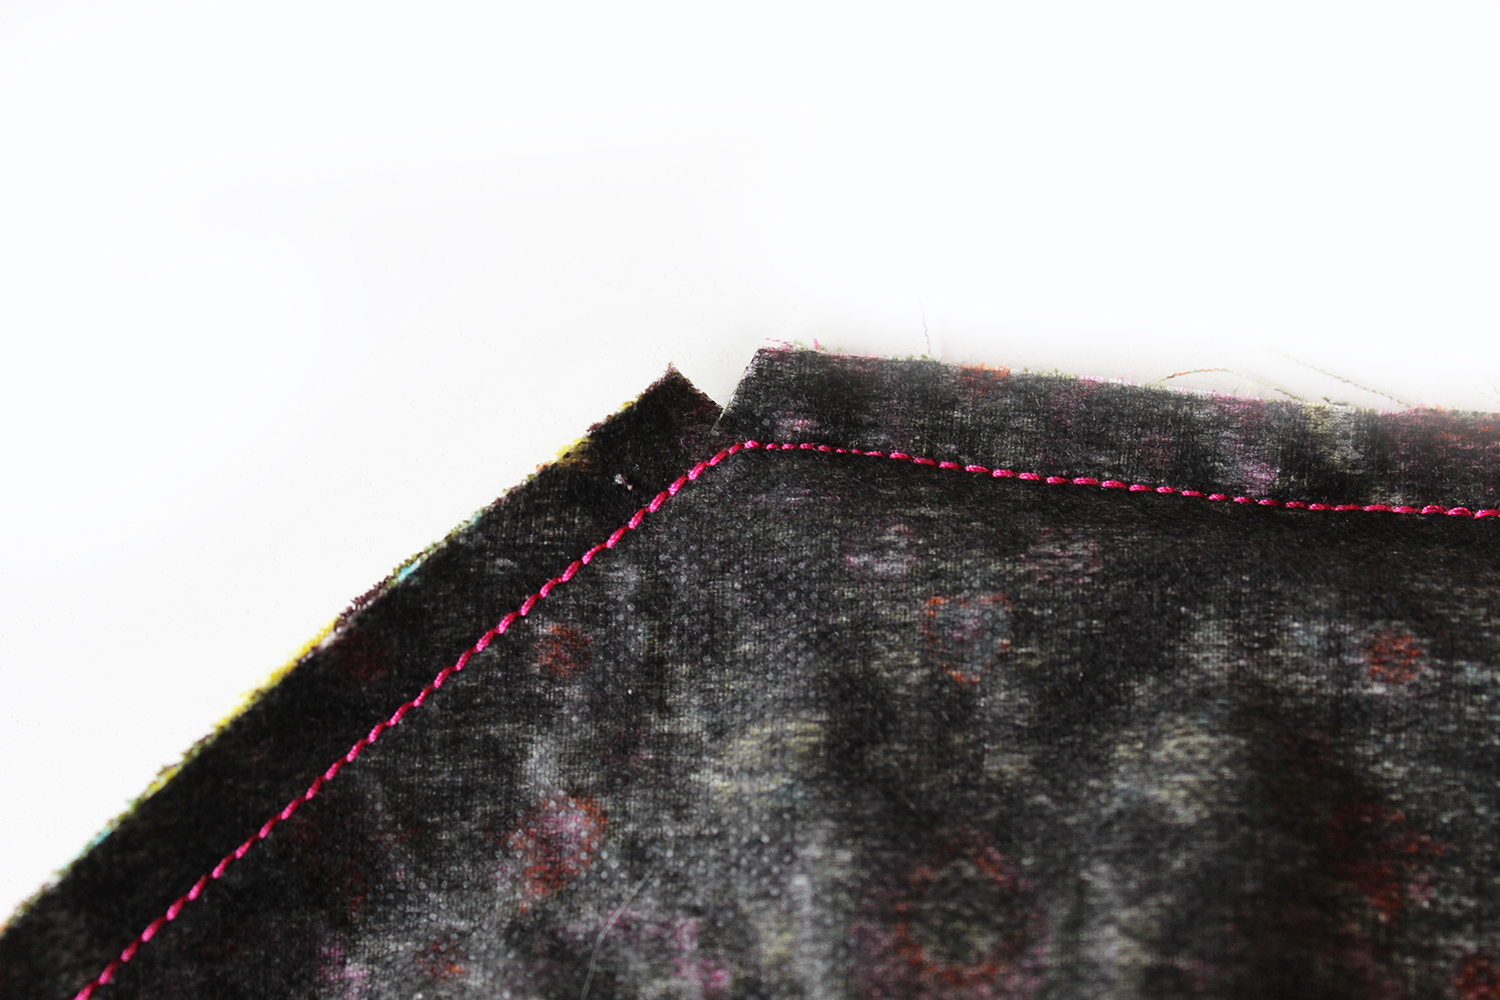
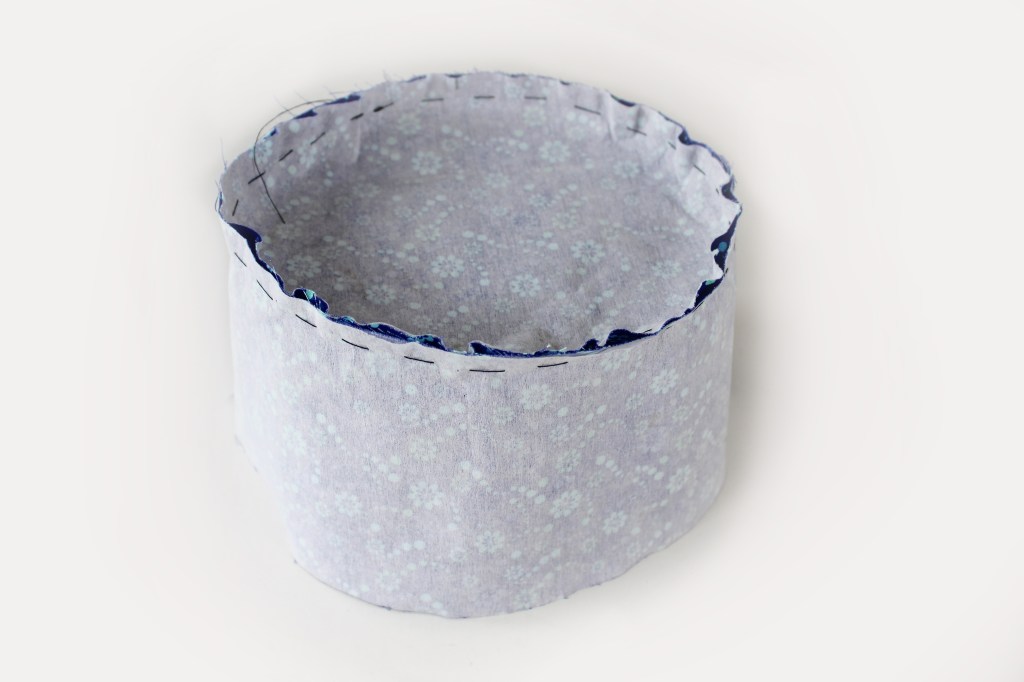
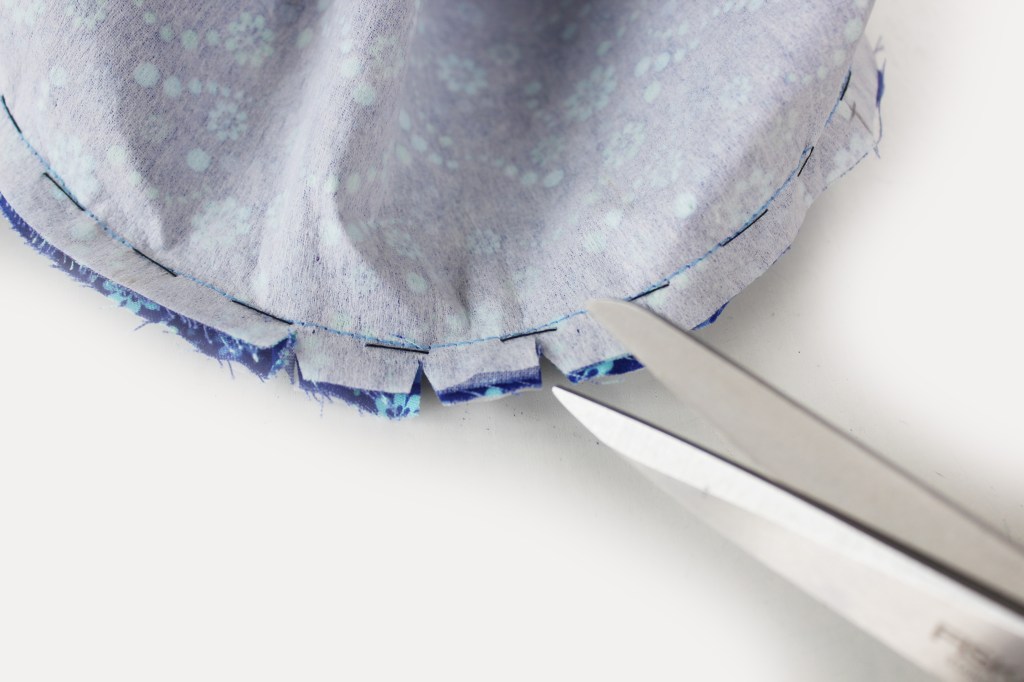
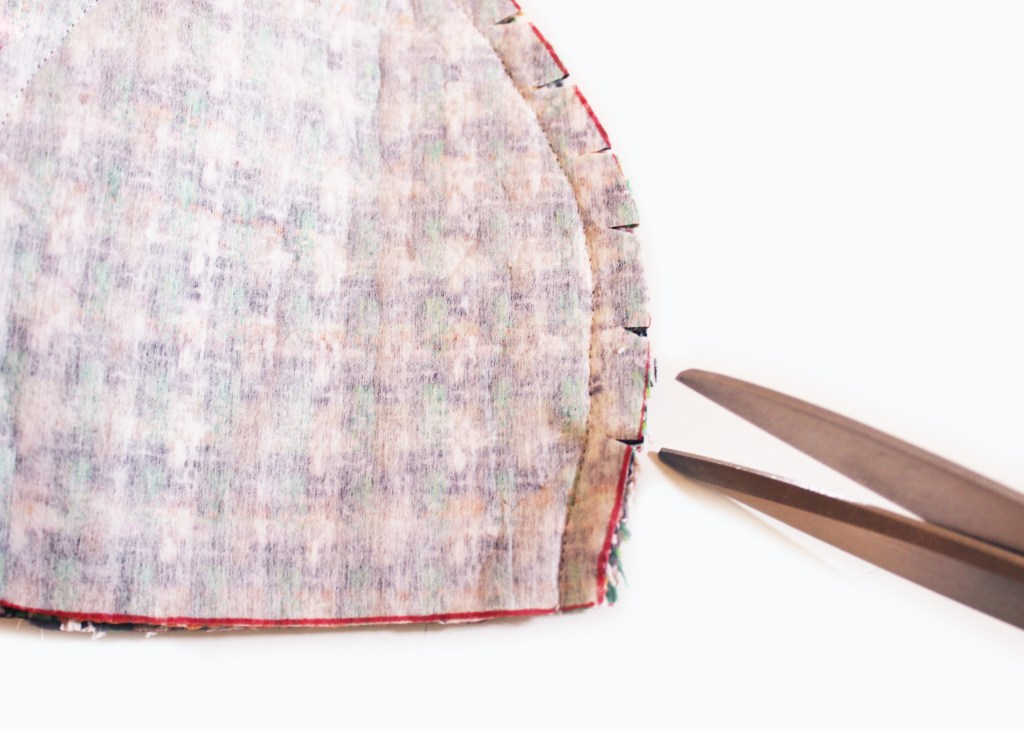
Nick the seam allowance all around.
Repeat for the outer fabric and the lining.
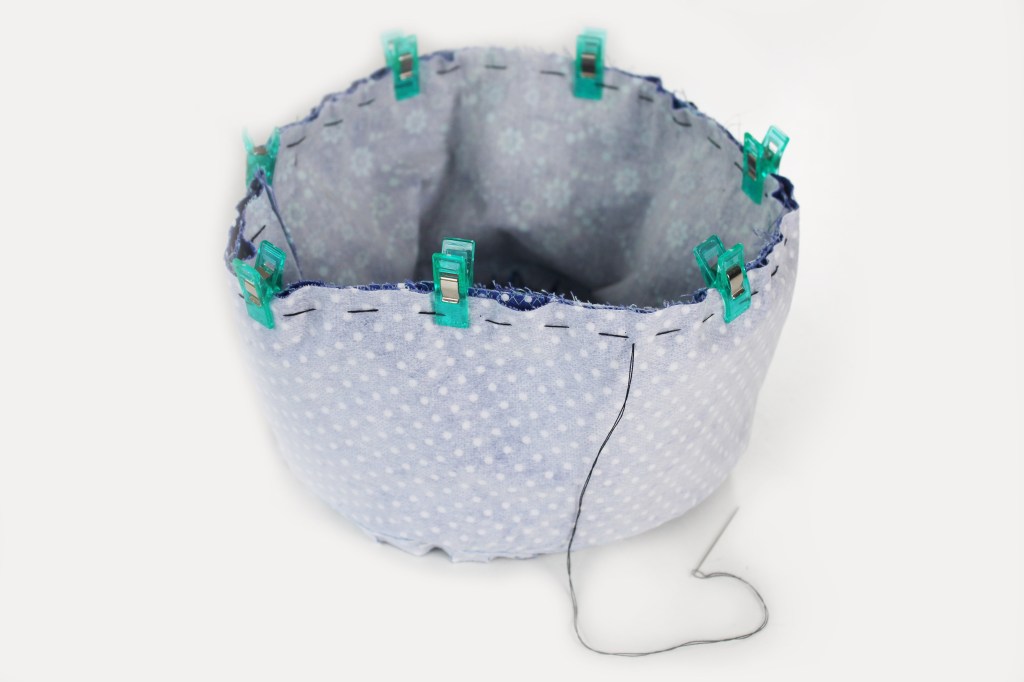
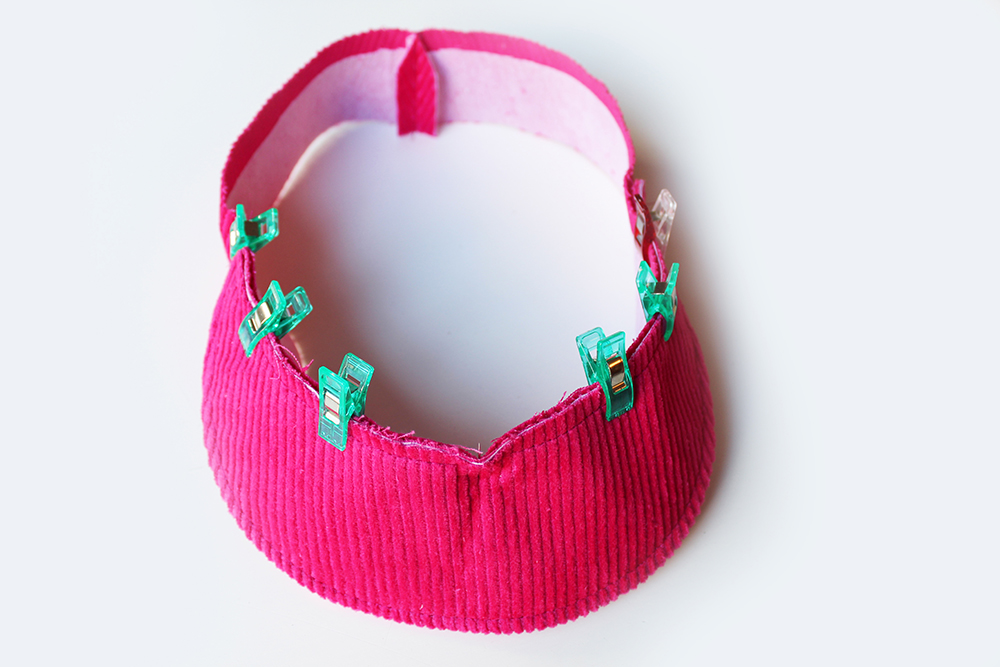
Clip or pin the brim to the outer cap
Pin or clip the lining cap on top of the brim/outer cap piece. Tip: if you are finding that your brim doesn’t fit and that the crown edge is puckering- snip small Vs into the Brim raw edge only within the seam allowance every 2cm approx. Mark a point at four equal points of the hat brim and crown raw edge, starting with the back seam and match them up. Be forceful and ease the brim to make it fit.
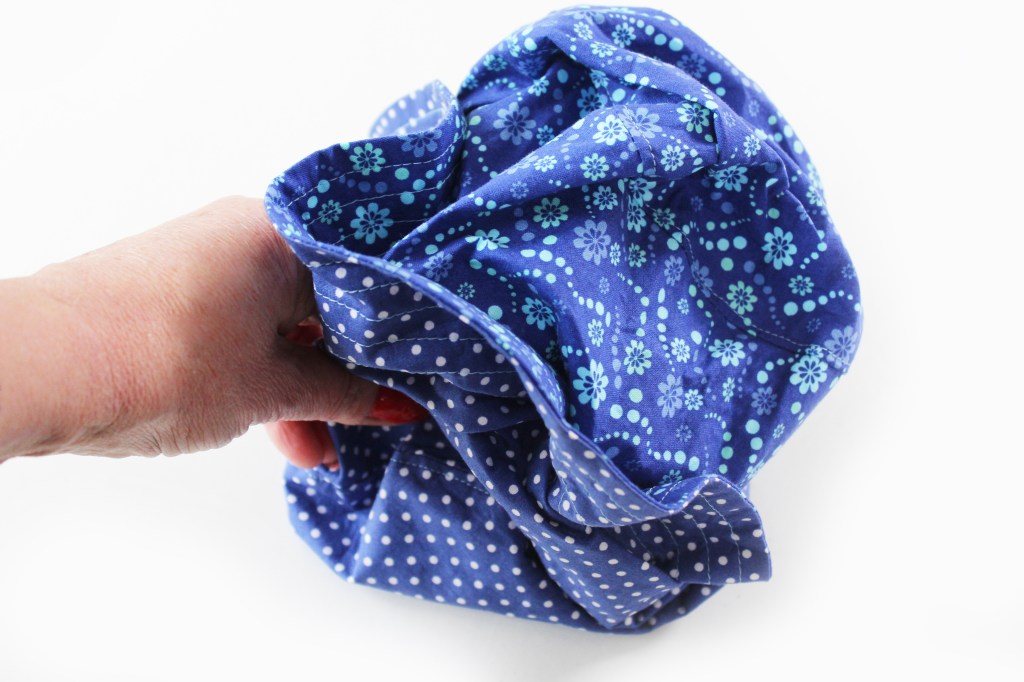
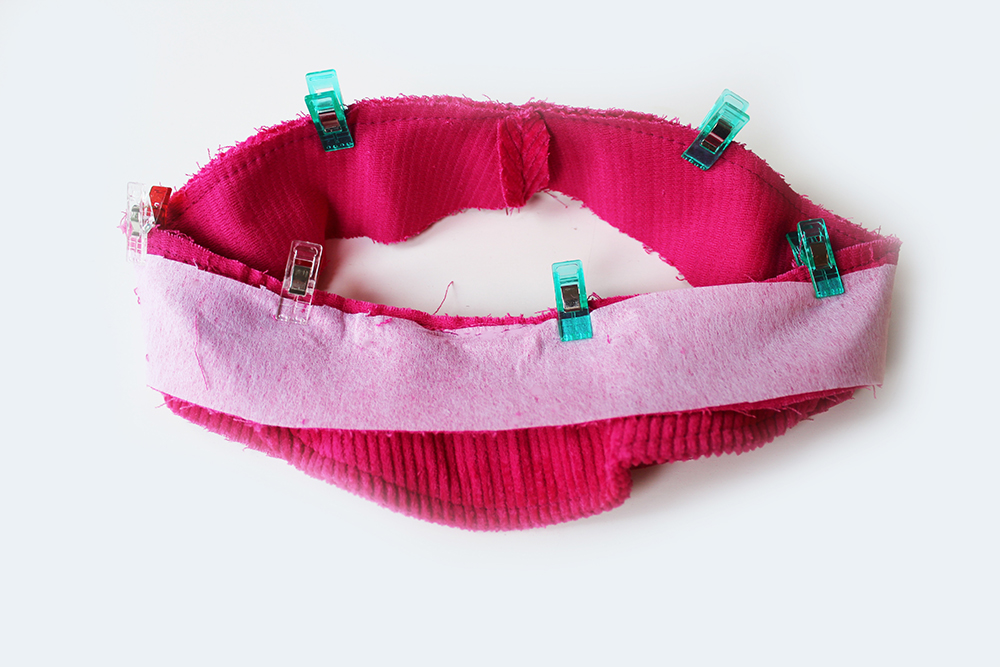
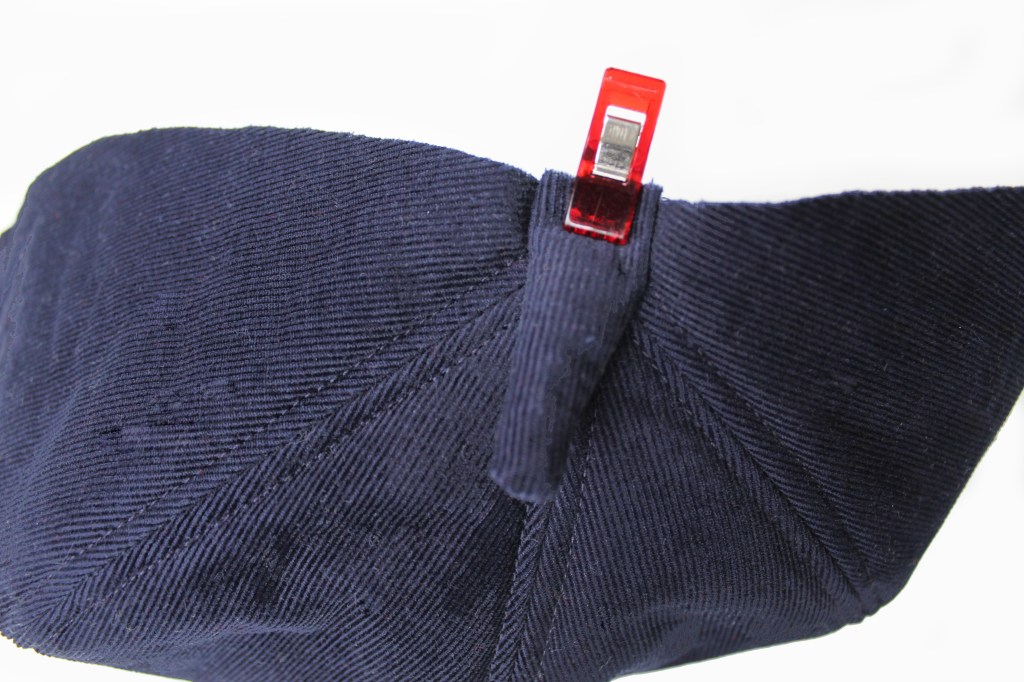
Stitch rip a small opening in the Side Band seam. Turn inside out through the opening.
Sew up the opening.
Et Voila! One lovely Brighton Hat!
Why not add a rosette on the side
HOW TO MAKE A ROSETTE
From the left over hat outer fabric, cut a circle approx 18cm (7″) in circumference Machine tack 6mm (1/4″) in from the outer edge all around with the longest stitch length setting, leaving long thread ends.
Pull the thread ends to gather up the rosette. Stitch to secure. Sew on a lovely large (vintage) button to hide the raw edges.
Attach a brooch pin on the reverse side positioned centrally with a few hand stitches.
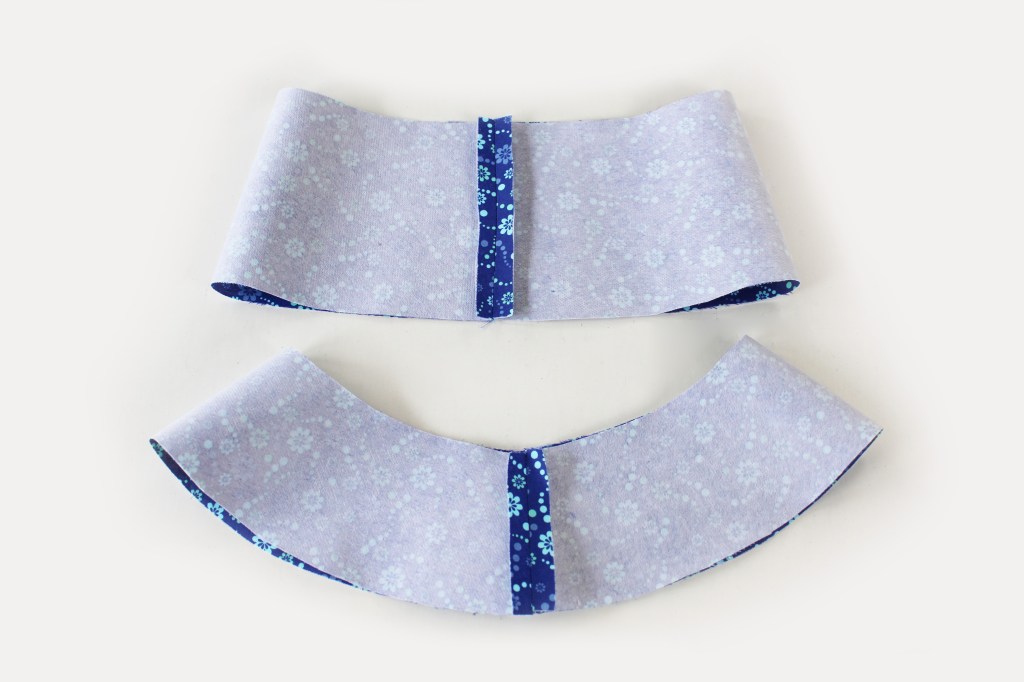
Make a Crown in the lining fabric, in the same way as the outer fabric but leave an opening in the seam for turning the hat inside out at the end.
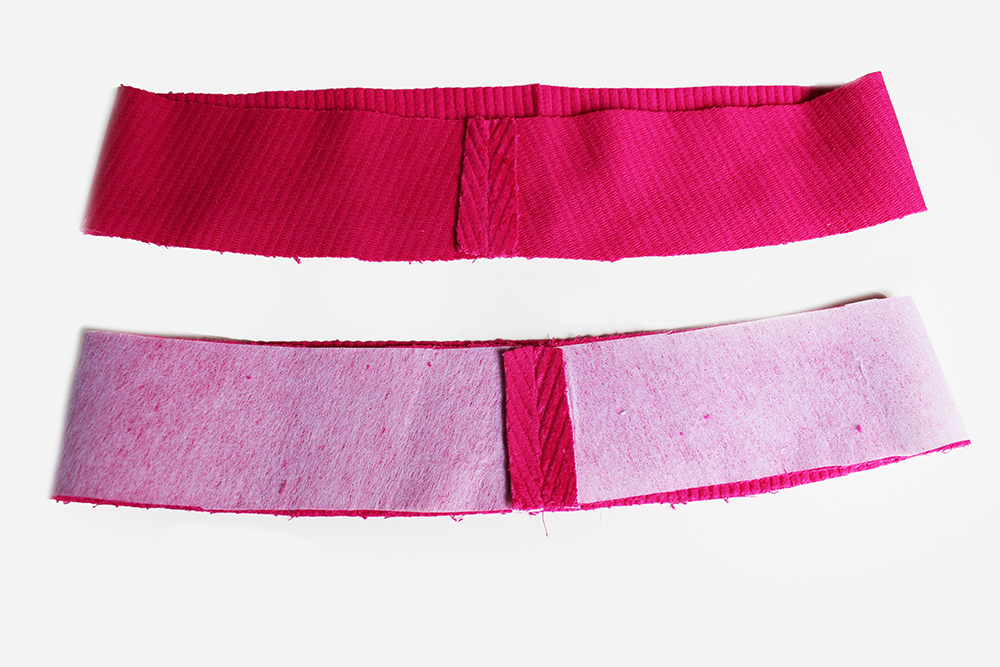
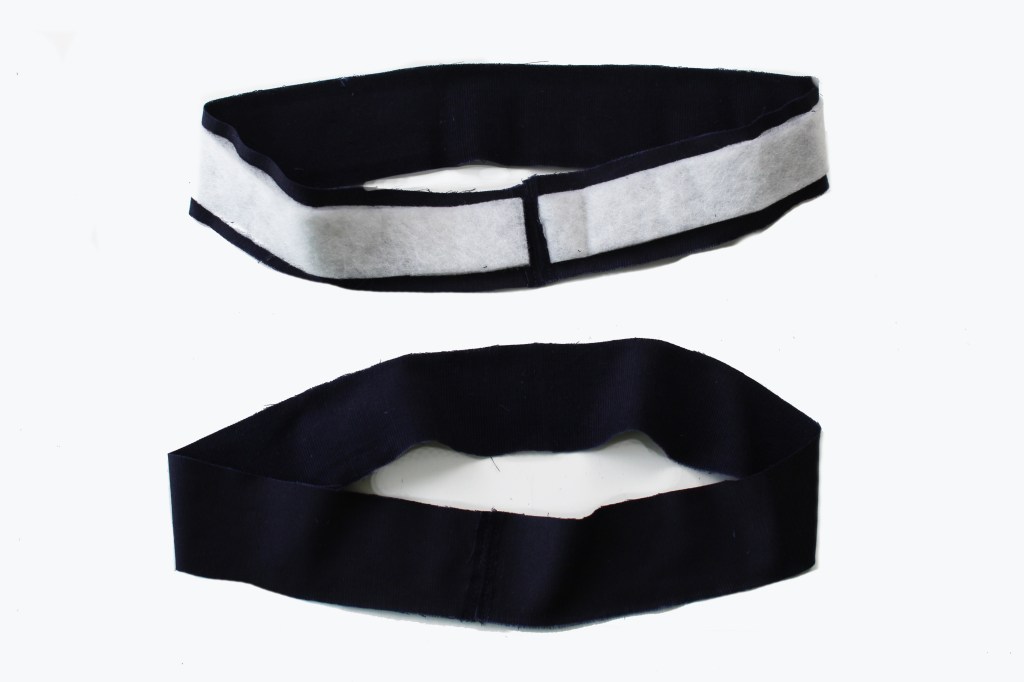
These are the Band and Band lining pieces joined together to make ‘rings’.
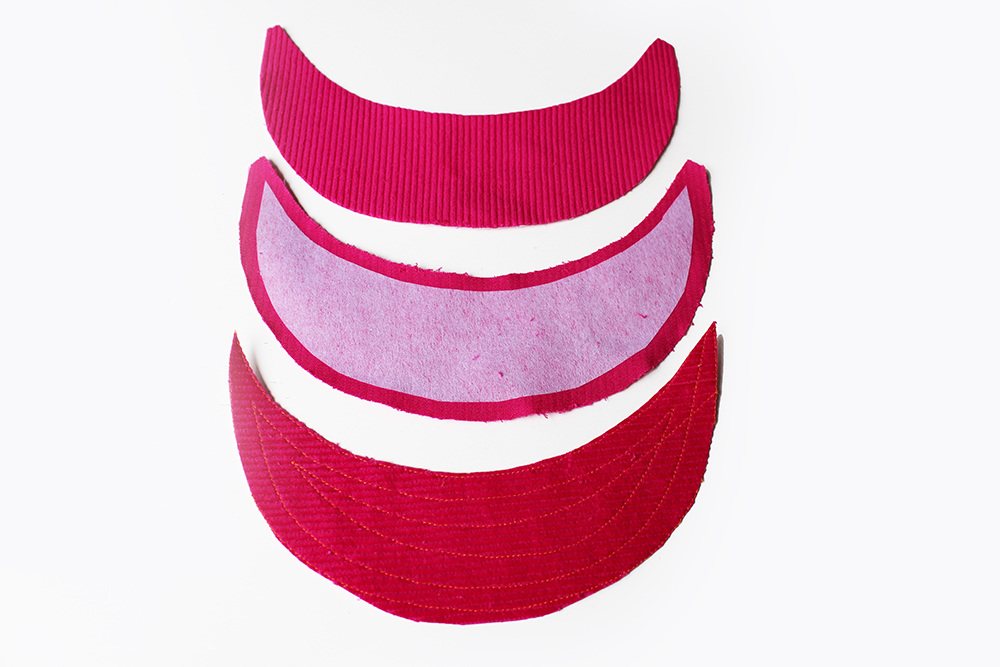
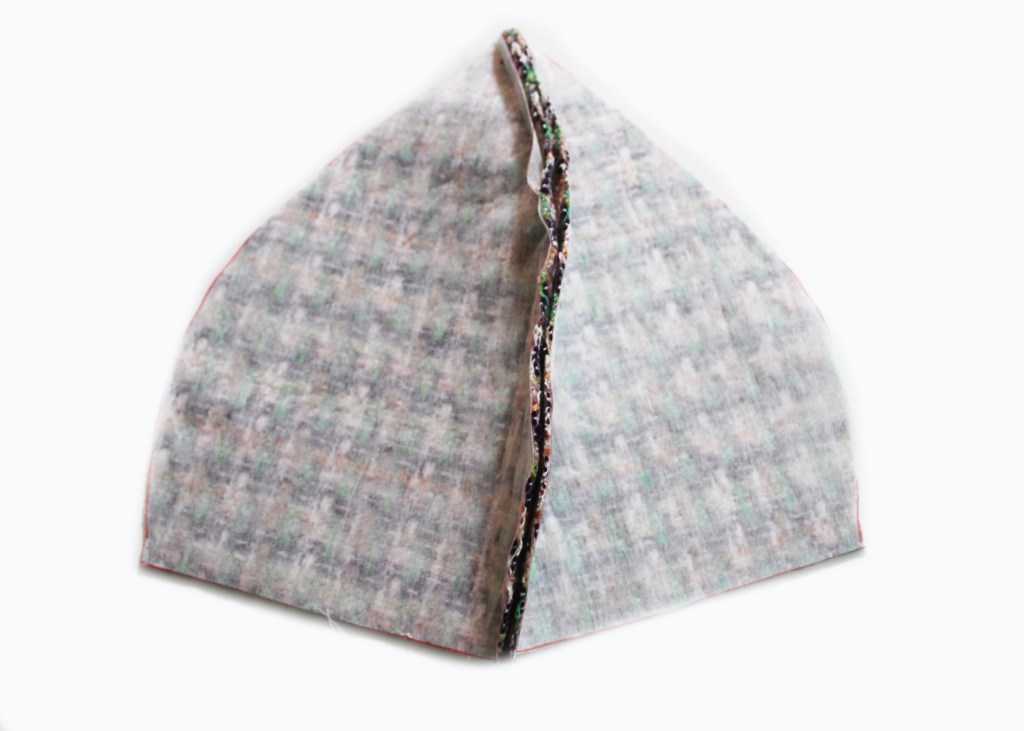
Three peaks! All interfaced and one is reinforced with stitching (this one is sandwiched inside the peak.
The lines of stitching make the peak stiffer.
Add the reinforced peak to the peak lining. Stock with glue or bondaweb.
Stitch around the outer curved edge only. The seam allowance is then trimmed down to 5mm.
Turn the peak inside out, pushing out the edges on the inside with a poking tool. Topstitch around the outer edge. Machine tack the inner curved raw edges together with a zig zag stitch.
With the seams at the centre back, clip (or pin) the peak to the lower edge of the outer band and machine tack to hold. You may find it helpful to nick the raw inner curved edge of the peak to ease it in.
With the seams matching at the back, clip (or pin) the other band lower edge to the peak aligning the centres. Tack.
Stitch all around. Flip the bands up. Press. Machine tack the raw edges together. Try it on at this stage. If you feel it needs some elastic you could add a ring of 3/4″ elastic into the band before tacking together. Adjust to fit.
Heres the outer crown you made earlier. With the RST, matching the centre back and the centre front, pin the band raw edge to the crown raw edge with the right sides together. Sew.
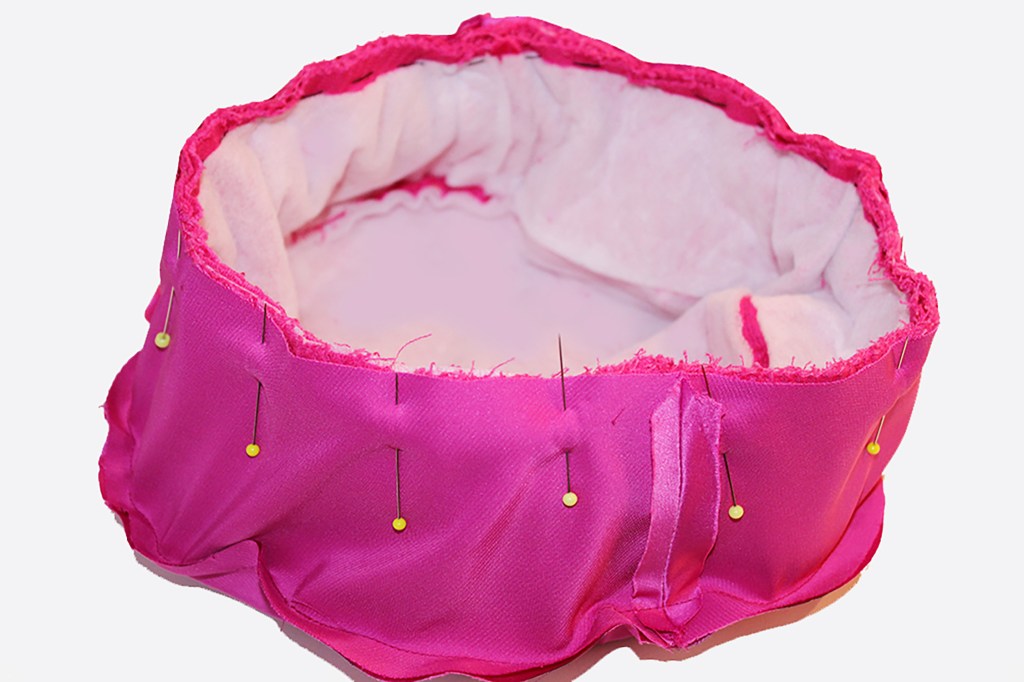
Pin the lining to the other side of the band edge. Hand tack. Sew. Turn the hat inside out through the opening in the lining. Push the lining inside the hat. Give it a good press using your trusty tailors ham.
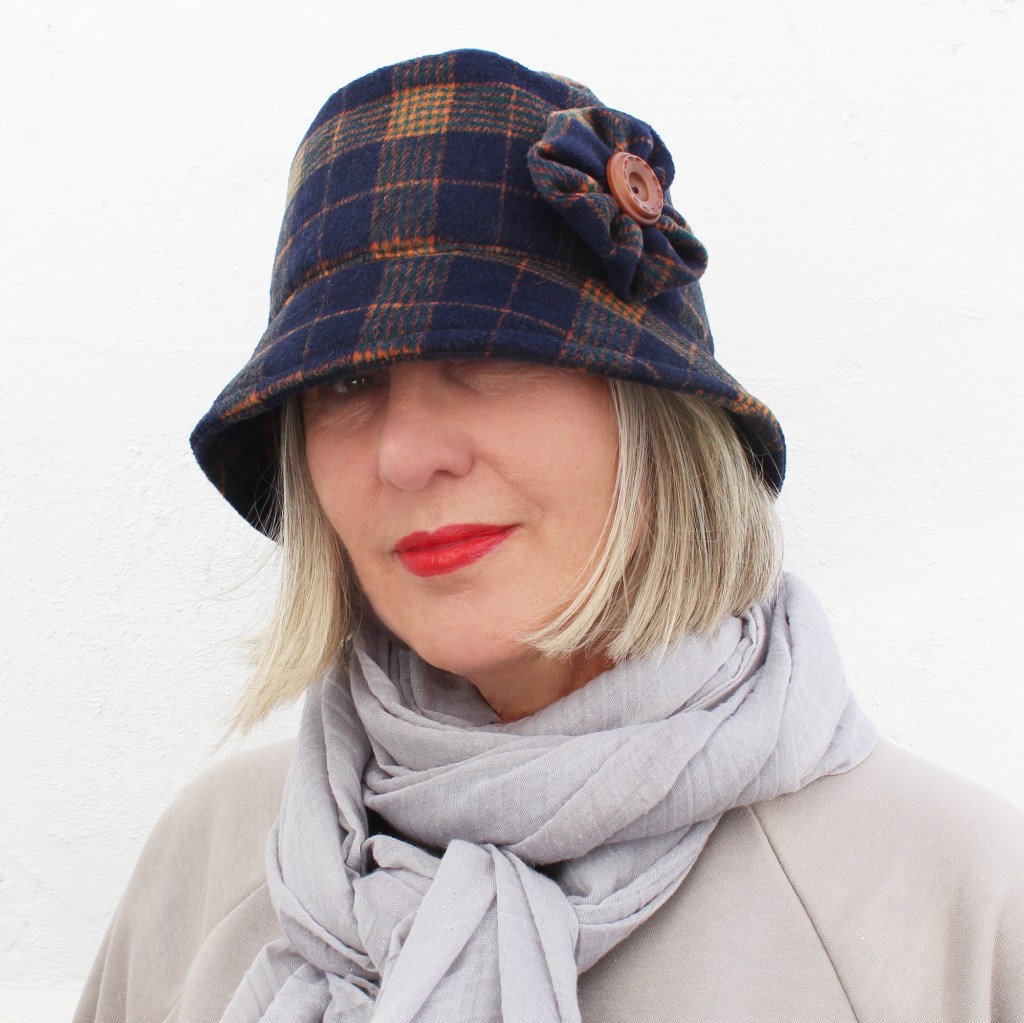
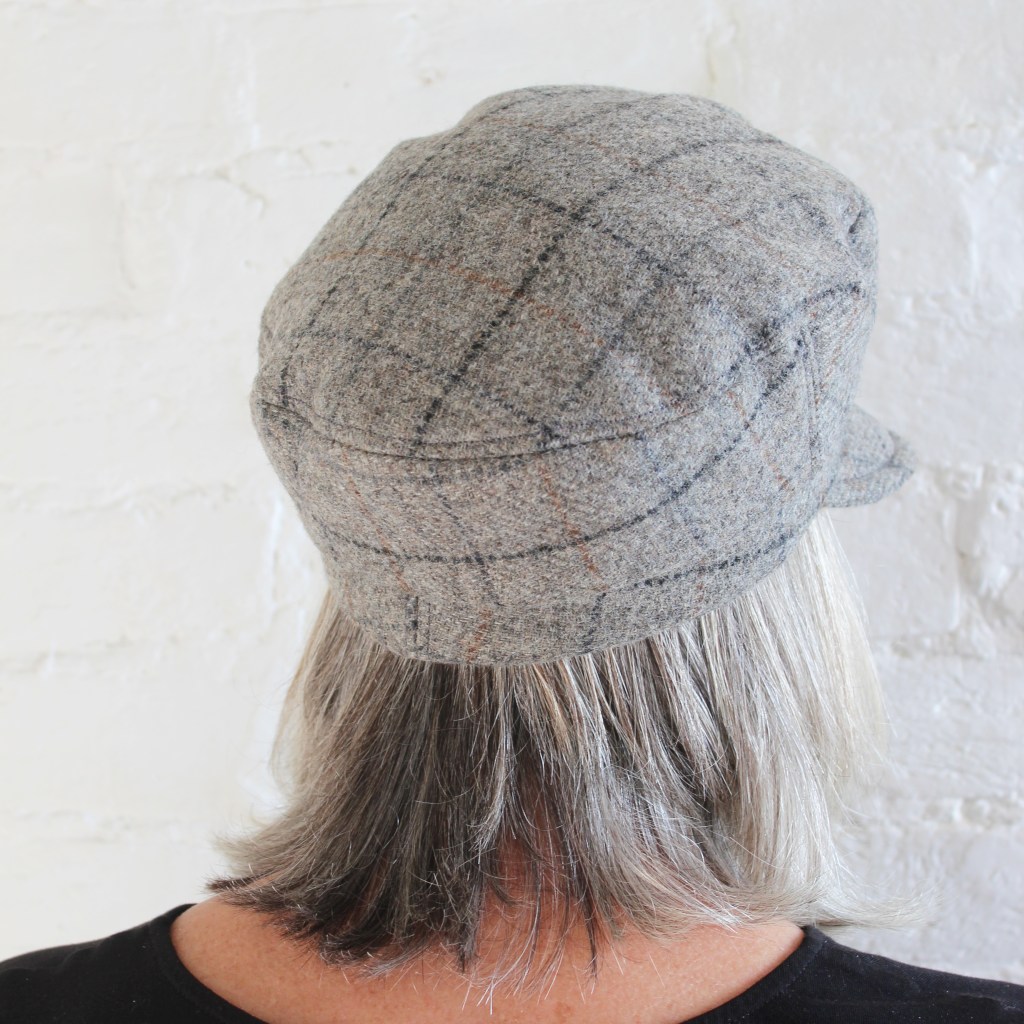
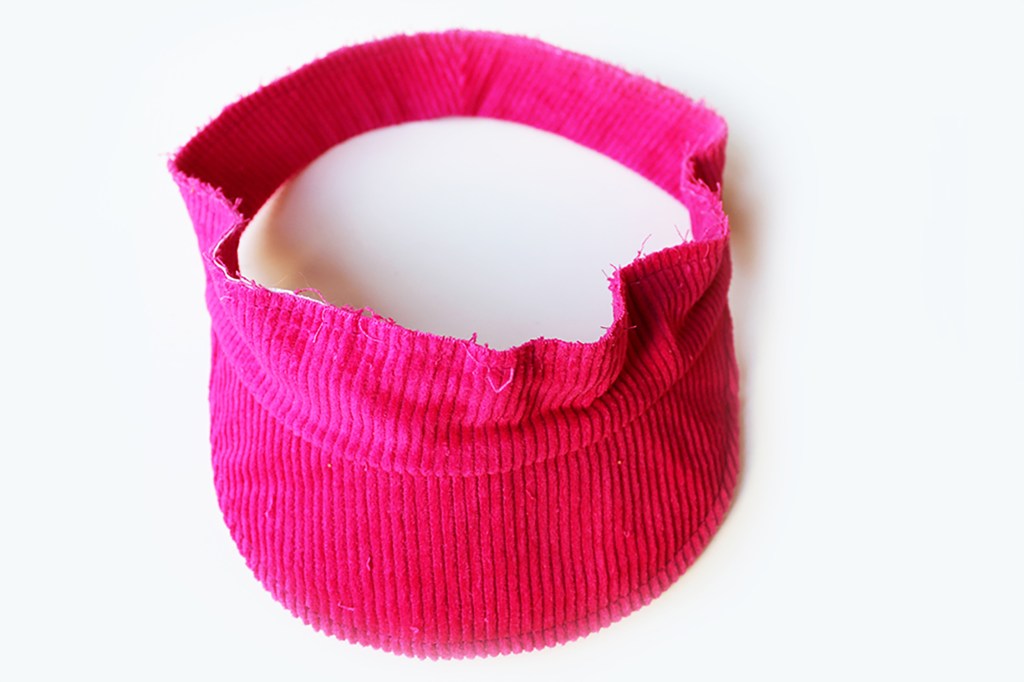
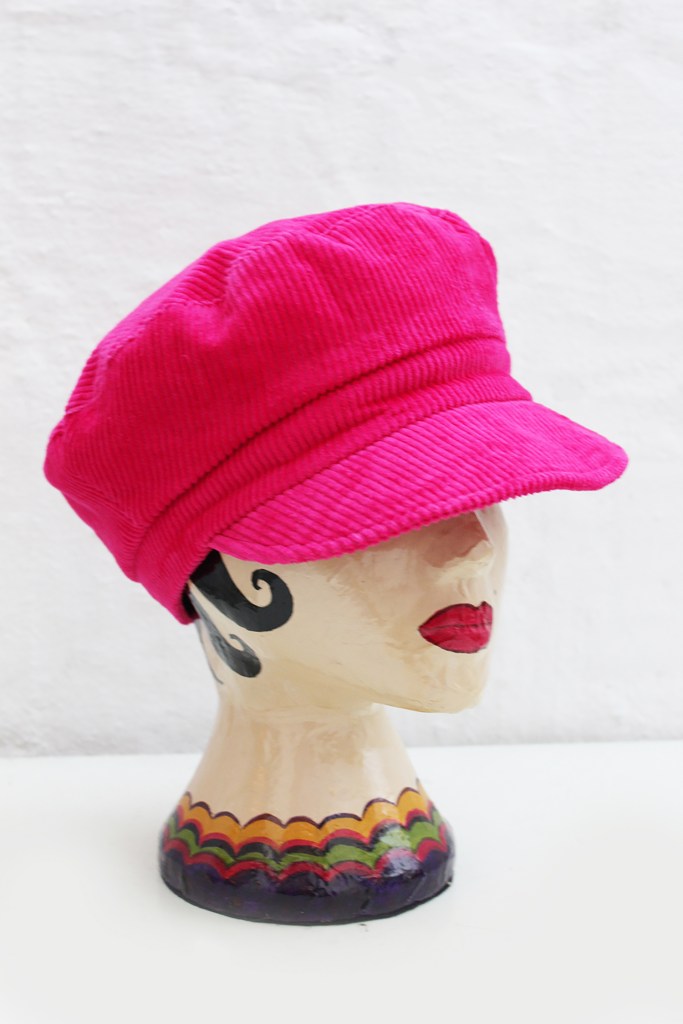
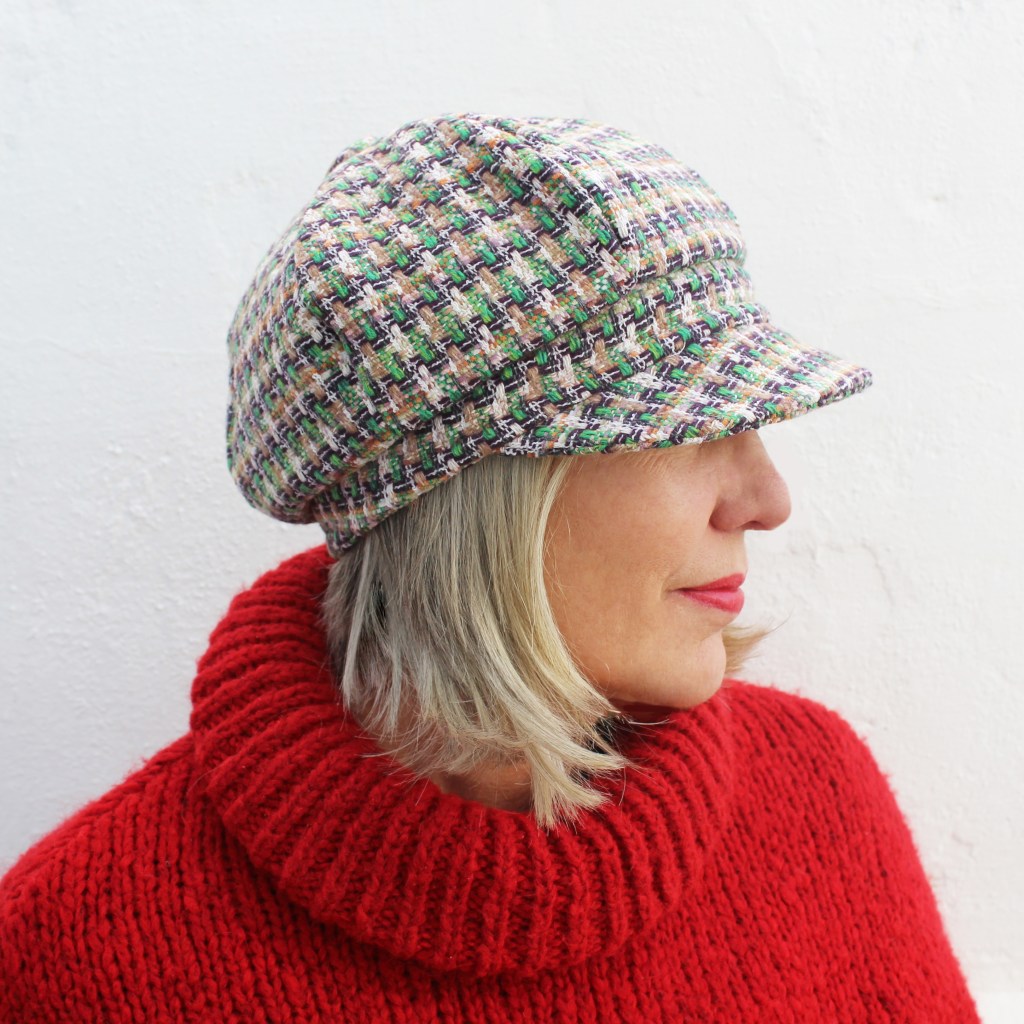
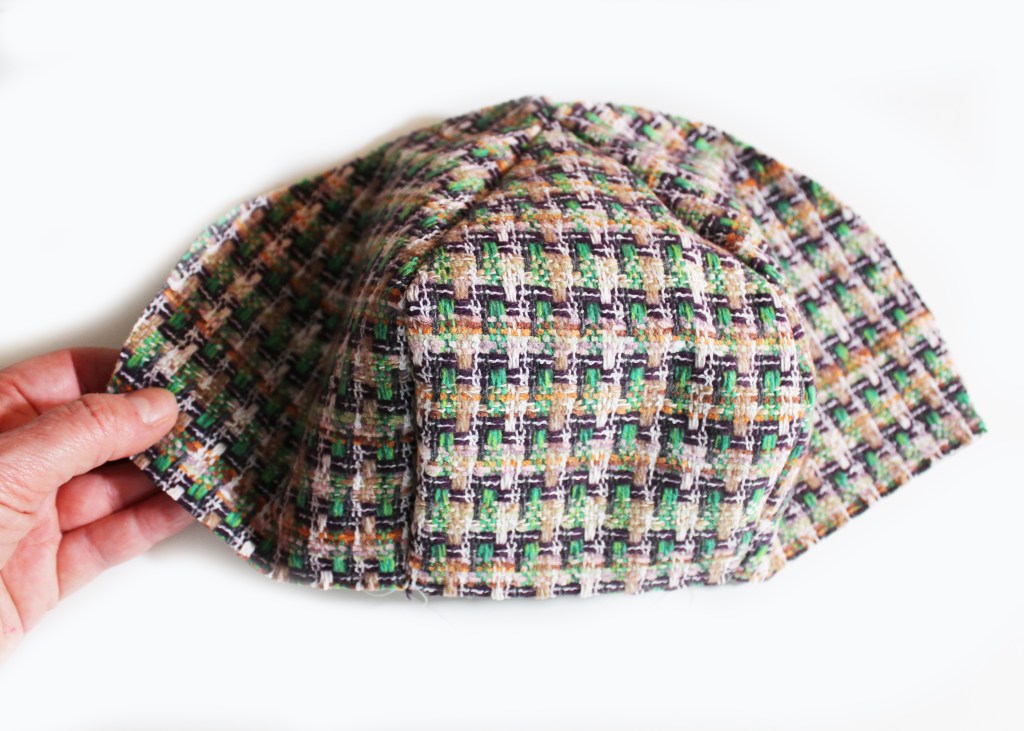
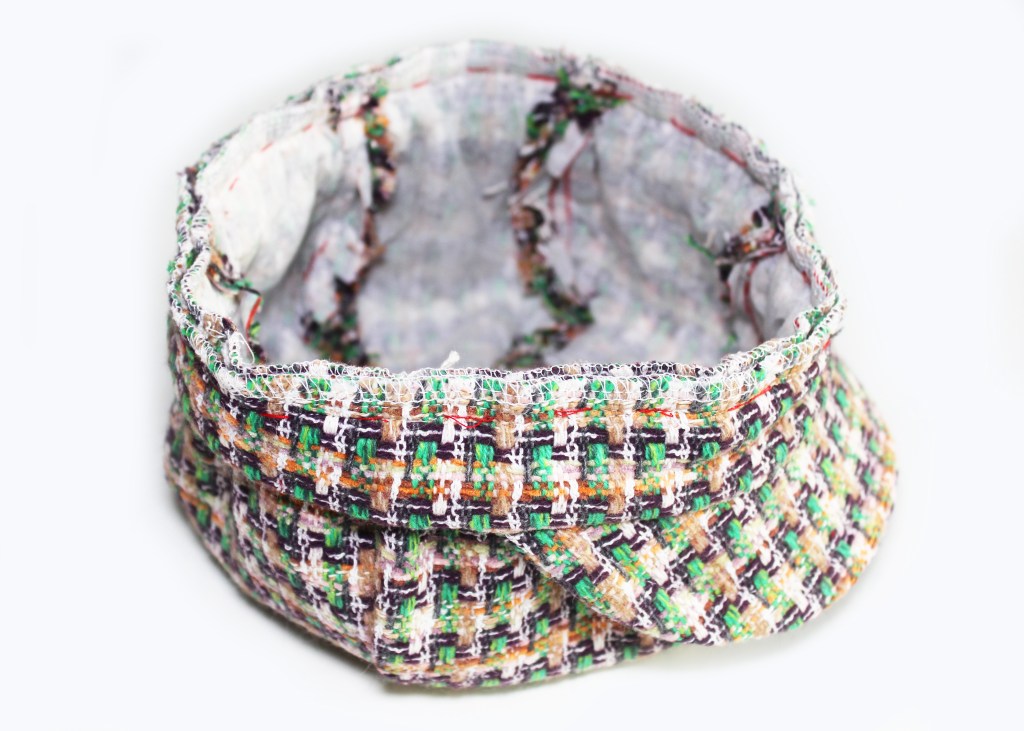
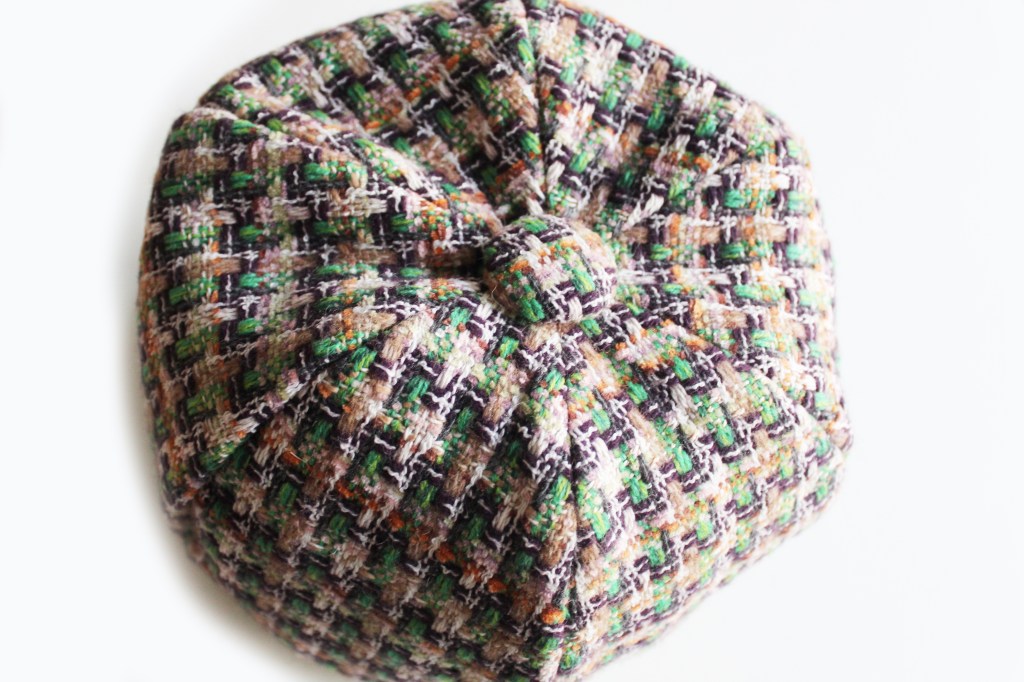
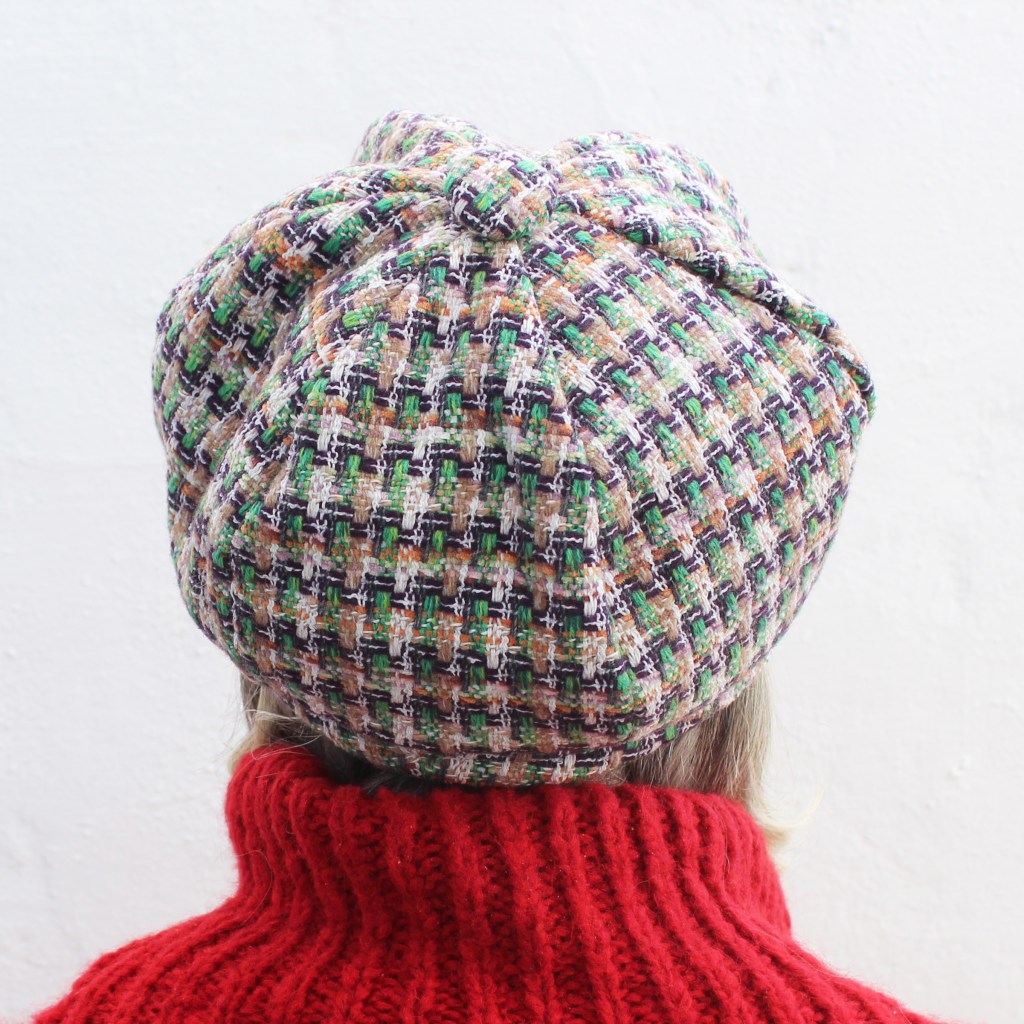
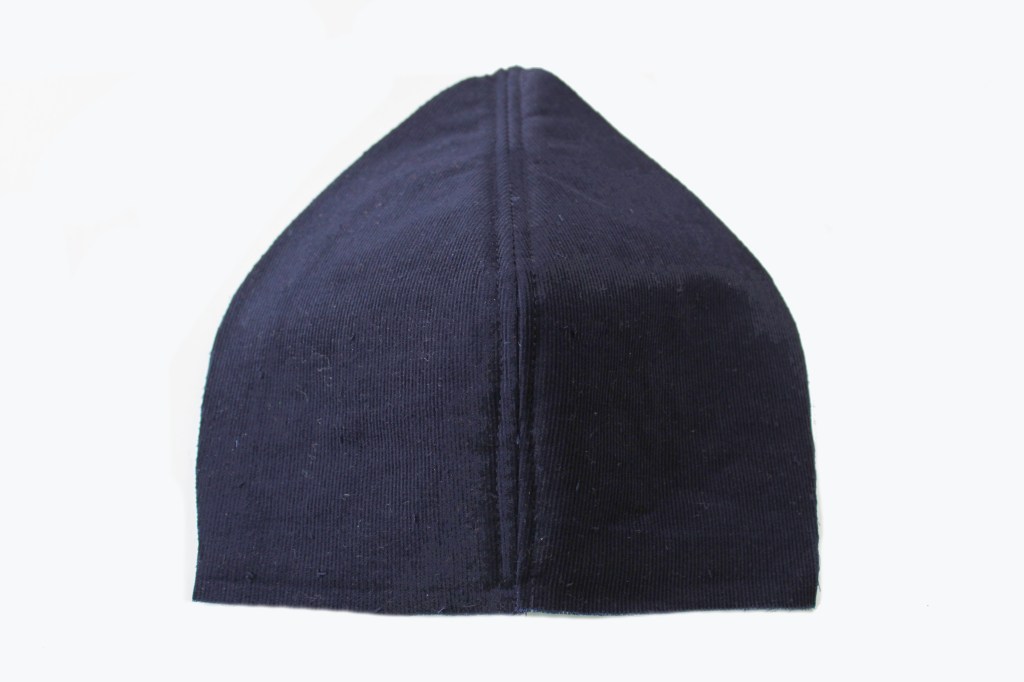
So this ‘Chelsea’ baker boy style hat is similar to the BromptonHat and possibly a more classic style, with its segmented crown, side band and peak. This is an enjoyable project, quick to make, I wouldn’t say any hat project was a beginners project, it can be a tad tricky with bulky seams when inserting the peak, which is why I recommend a walking foot attachment (if you have one), but why not have a go! Its so satisfying and once you get the hang of it, you will want to make one for all your friends and family.
The main difference between the two hats is the Crown. The Chelsea Hat Crown is made in segments like a chocolate orange. (yummy!). Suitable fabrics you could consider: Tweeds, corduroy, cotton, denim so its a hat for all seasons.
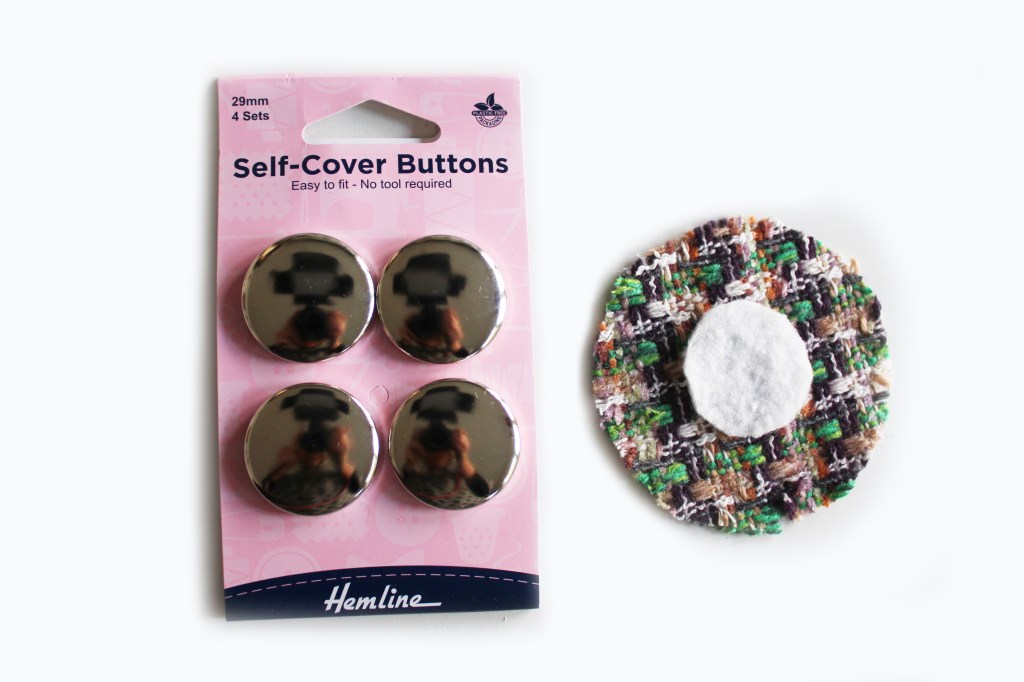
Please note that the pattern includes one 29mm self cover button, if you need any more for making a hat for friends and family, you I have some available in the haberdashery listing on my shop as well as fusible interfacing by the metre.
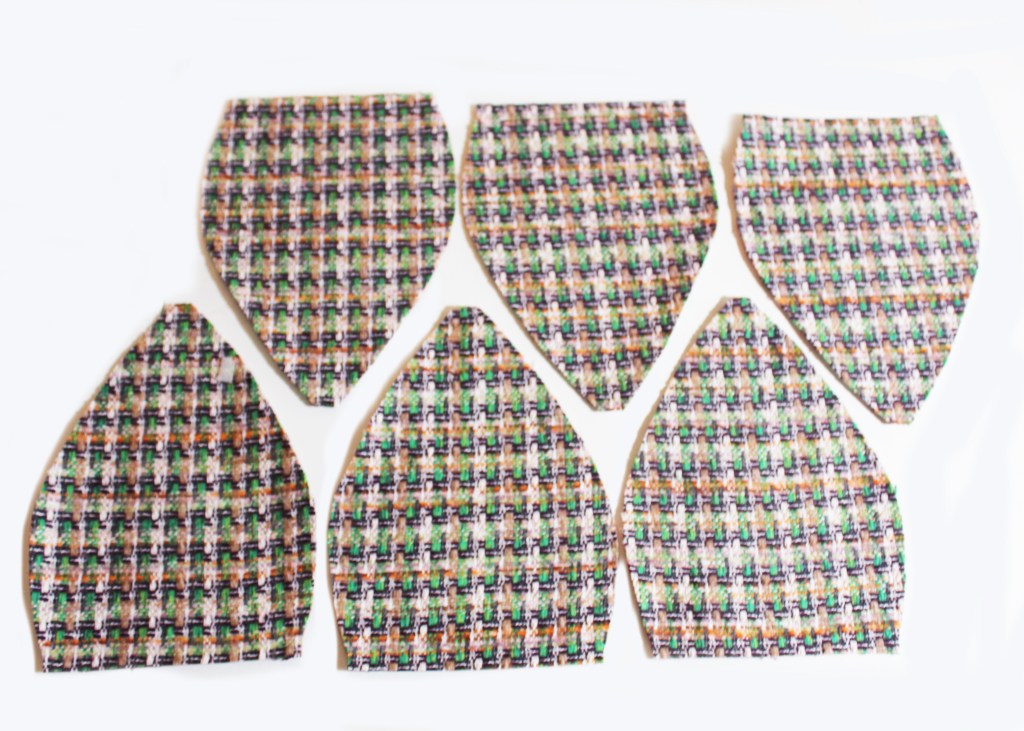
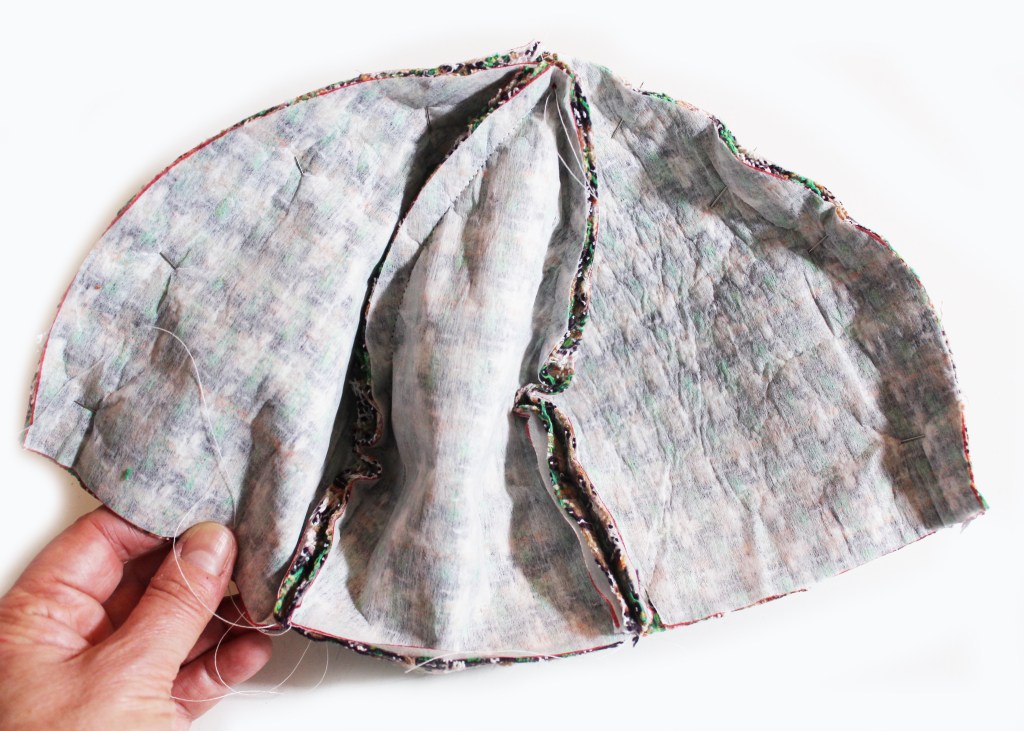
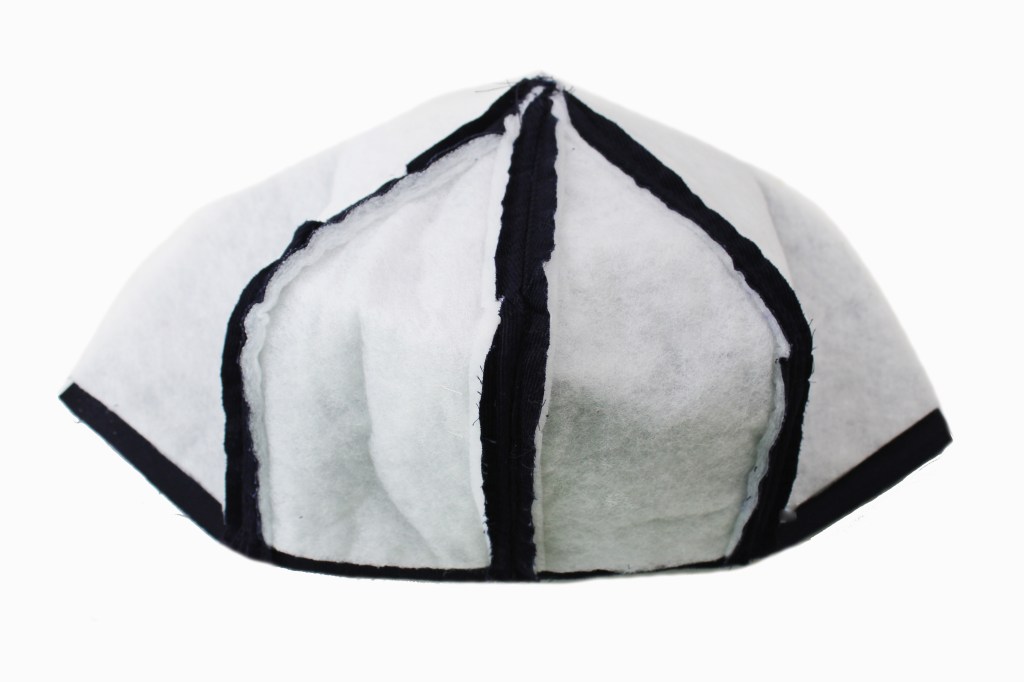
The Crown pieces, when they are cut look like this. There are 6 of them in outer fabric and 6 in lining fabric and they are interfaced either with medium fusible interfacing or fusible fleece wadding (Vlieseline H640) for warmth or just some batting with something like a spray textile glue or bondaweb to fuse the interfacing to the outer fabric pieces. You also need the Band piece and the Peak pieces.
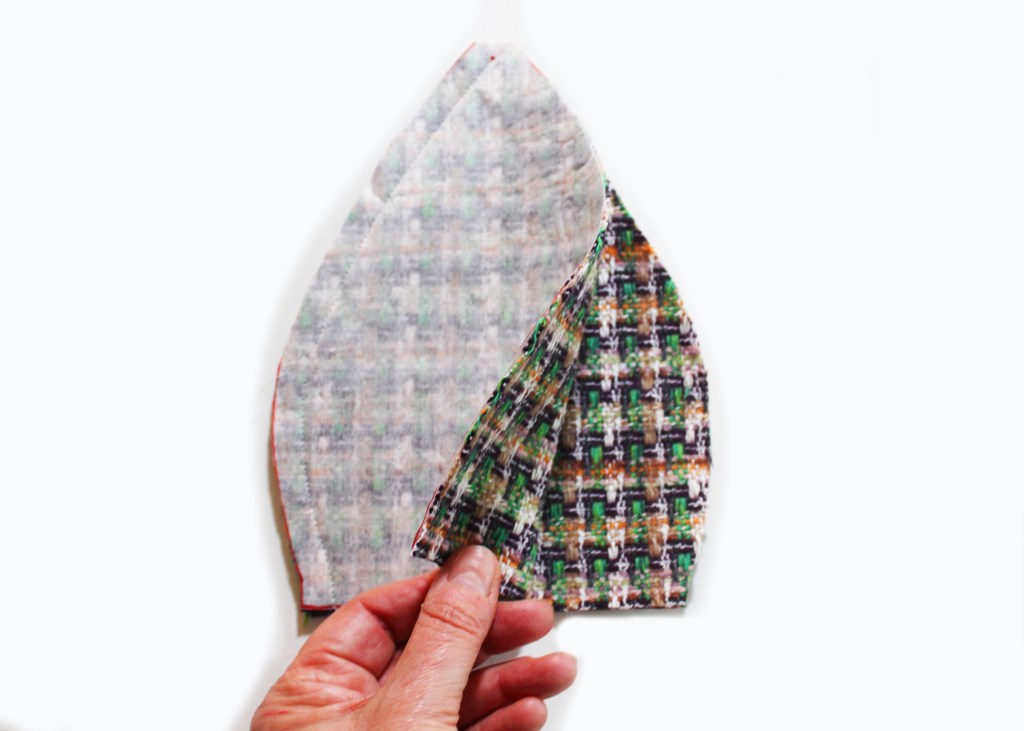
The crown pieces are assembled like this….
Join two pieces at the side curved edges.
Then join the third segment as before, so you have three pieces joined at the side edges altogether.
Repeat with another three crown sections.
Then join the two three section pieces together at the side edges. You should have a crown made of six sections. Now snip snip snip the seam allowances
Repeat for the lining as before
So after you have the Crown outer and lining, you make the Peak and the Band in the same way as with the Brompton Hat. So scroll up to see this bit.
Attach the peak /band piece to the Crown.
Pin the Crown lining to the outer Crown/Band/Peak piece.
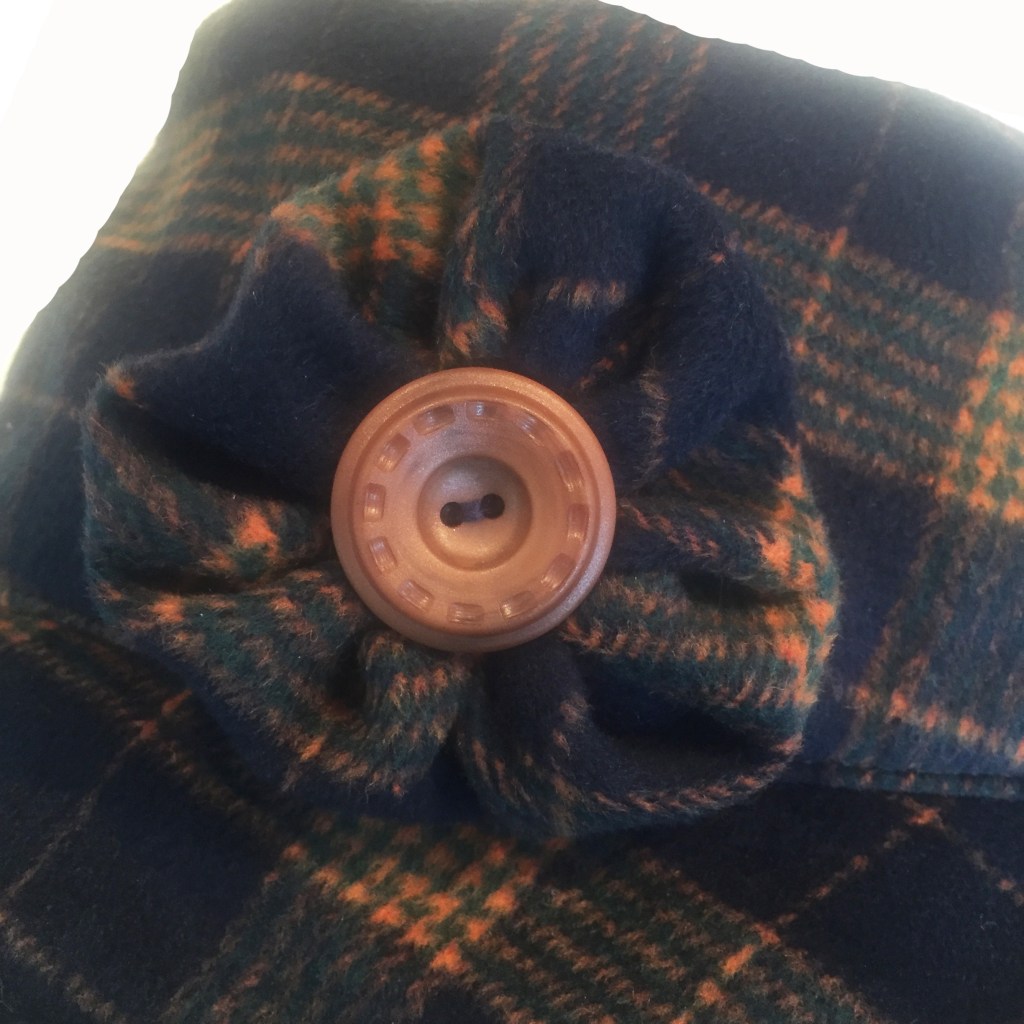
You need a 29mm self cover button and a scrap of fabric to make a small circle approx 5cm in diameter.
Tack stitch around the outer edge of the fabric circle, pull the top thread to gather the ‘dome’, insert the button, push the fabric around the claws of the button all around then finally snap on the backing disc to secure.
Hand stitch to the apex of the hat where the seams converge, this covers up any mismatches! (what mismatches I hear you ask!)
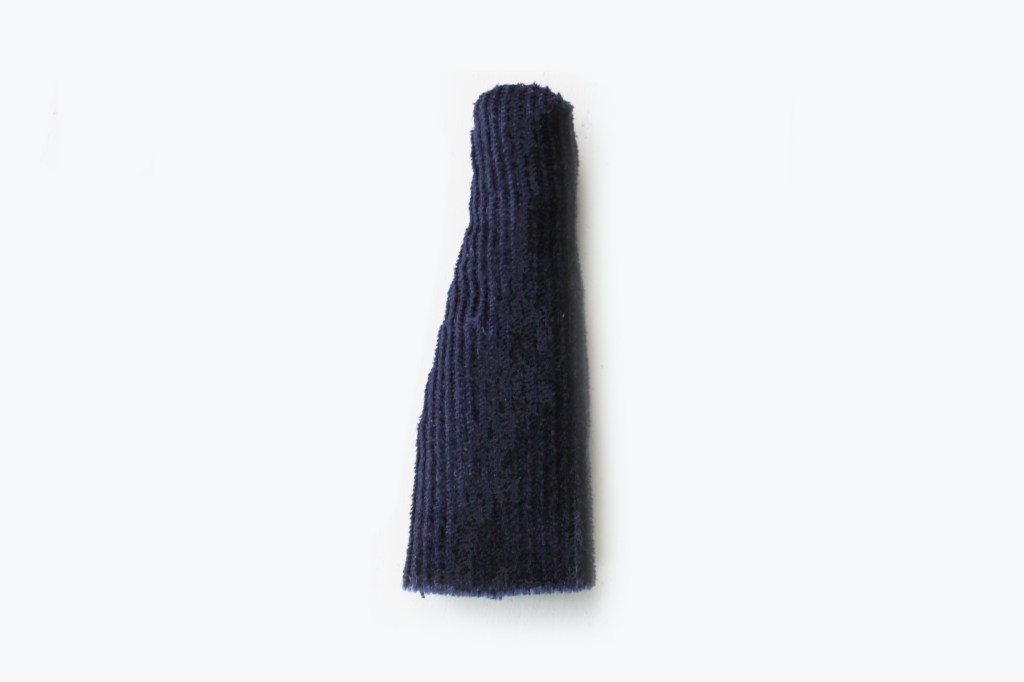
Make the stalk. Fold over and stitch down the side edges and across the top, leaving the lower edge open. Turn inside out. Press.
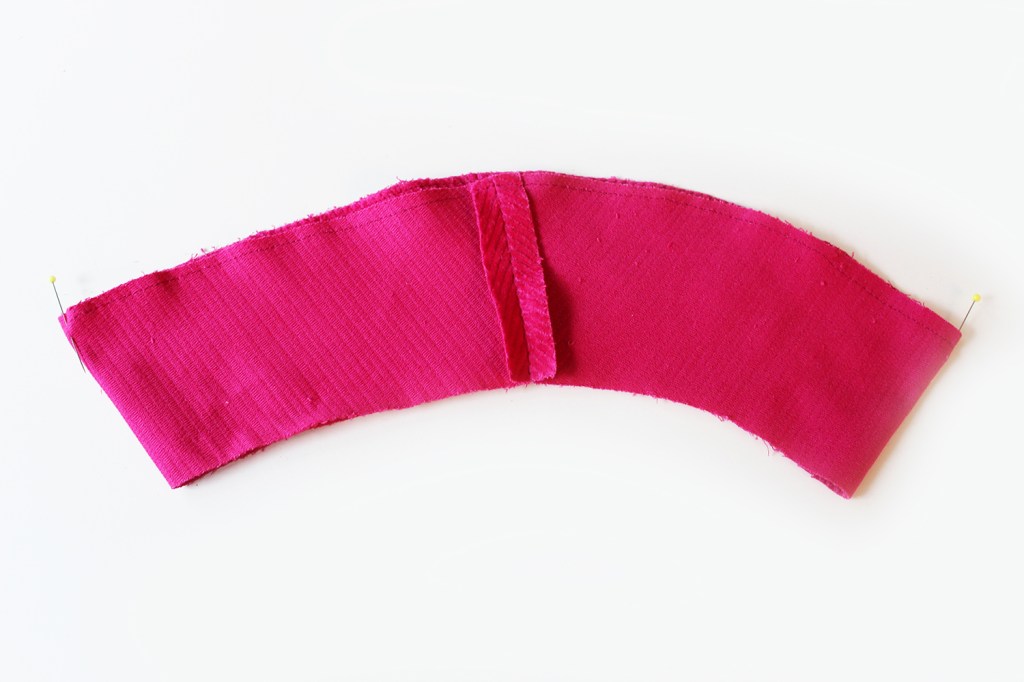
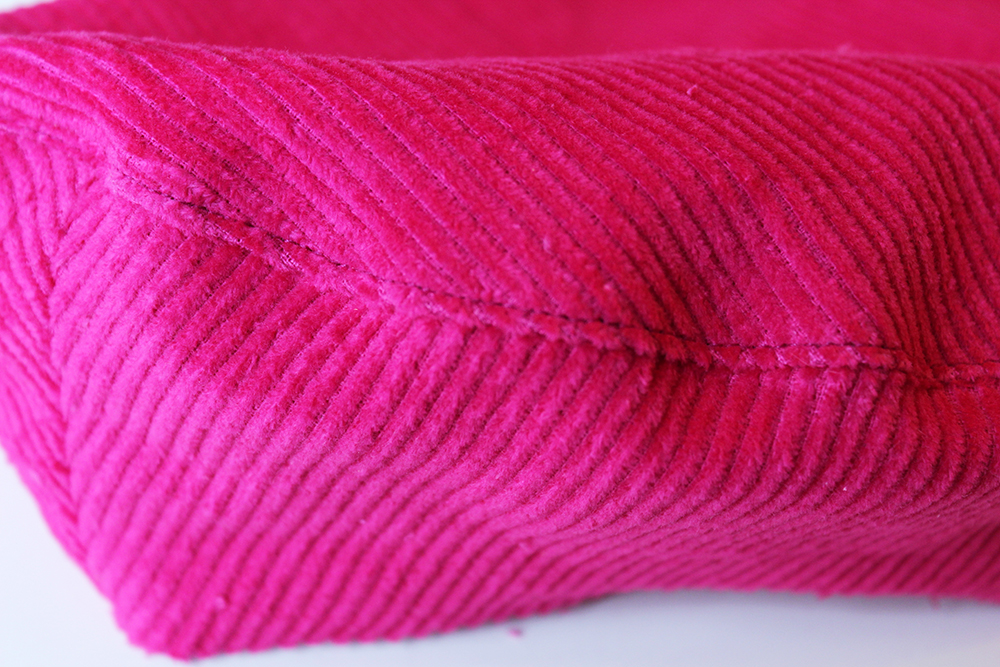
Sidebands- one is interfaced the other isn’t. Sew together at the short side edges with the right sides together to make two rings. Press the seams open then topstitch either side, trim down any excess seam allowance.
Make the Crown in two sections of four Crown pieces sewn together at the curved side edges. press the seam allowances open. Topstitch either side of the seam line.
Before joining the two half sections of the crown, pin (or clip) the stalk to the centre top edge of one Crown piece. Machine or hand tack to secure.
Place one crown inside the other with the right sides together. Sew around the outer curved edge. Press the seam open. Topstitch.
Now pin the Sideband to the Crown at the raw outer edges with the right sides facing together. Sew all around.
Press the Sideband away from the Crown with the seam allowance extended towards the Crown on the reverse side. Topstitch.
ATTACHING THE LINING
LINING -Sew together the four pieces for the lining leaving an opening on one seam for turning. Attach the second un-interfaced Sideband in the same way as the Crown Outer piece.
Pin the Crown and Lining pieces together with the right sides aligned and pin all around at the band raw edges. Sew all around.
Trim the seam allowance.
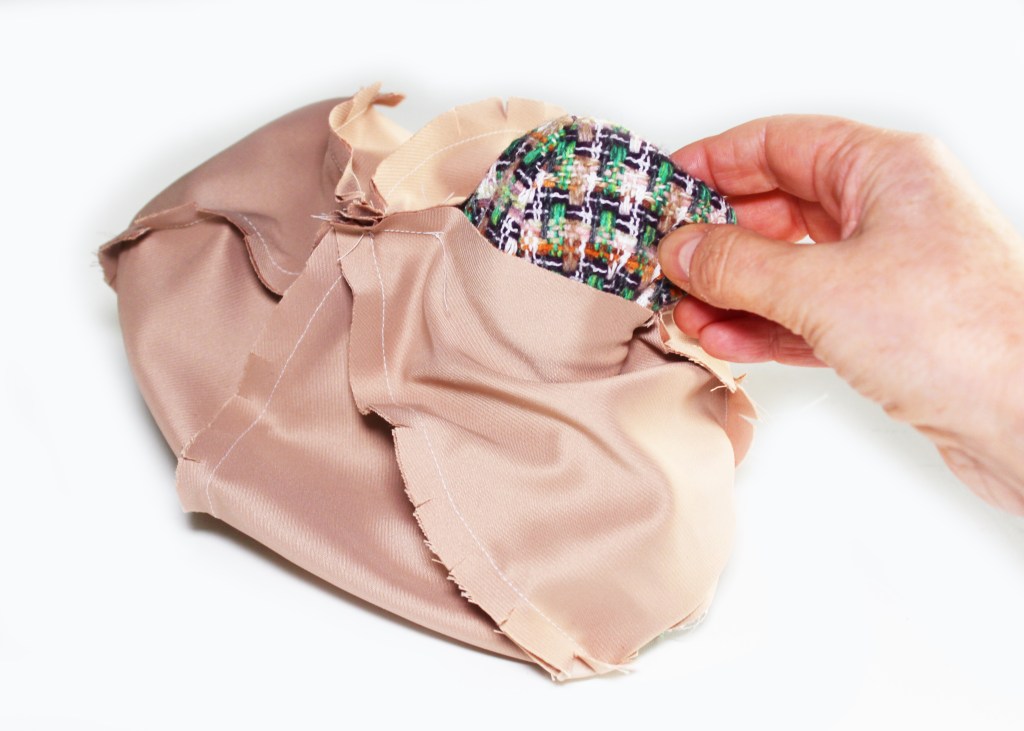
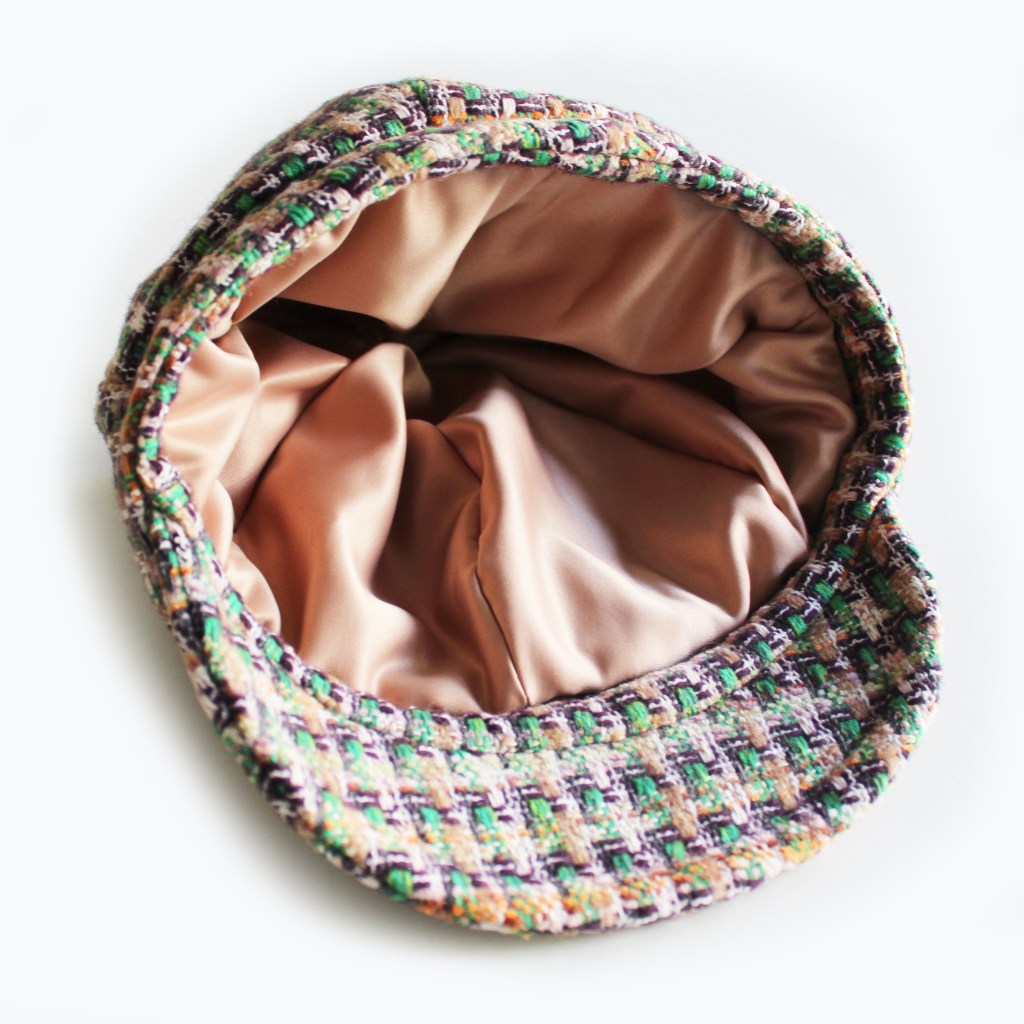
Push the hat through the lining opening and press, pushing out all the edges from the inside.
Pin the band all around. Topstitch close to the outer edge all around and ‘stitch in the ditch’ all around the band seam line, this creates the channel to feed through the elastic.
Insert a length of elastic through a stitch ripped opening in the band inside seam. Adjust to fit. You need it so that it’s not too tight, so that when the hat is on the head, the band sits flat all around. Finally sew up the hole.
Voila!
Copyright Fiona Hesford. Please do not copy or repost any images without prior permission.
Peggy Top with hemmed short sleeves Peggy Top with short elasticated sleeves
So here we are at last…..a long awaited top!!! Yaaay!
This one is so chic and versatile too, you can dress it up or wear in a relaxed weekend sort of way. I’ve made the short version in a cool cotton voile and the long sleeved version in a snuggly cotton/linen denim look twill which is lovely and soft. Both these fabrics (and Peggy top pattern) are normally stocked on my ETSY SHOP subject to availability.
Peggy top can be made in two different sleeve lengths, long or short. You can either just hem the sleeve edge, as shown in the above left picture or add an elasticated channel as shown in the right hand picture to make a lovely subtle puff sleeve effect. It also has a nice side slit opening, so its very comfortable to wear.
The top pattern kit looks like this and comes with fabric, pattern templates, instructions, a piece of elastic, interfacing and a self cover button all packed up in a recycled kraft bag with handles. Yummy!
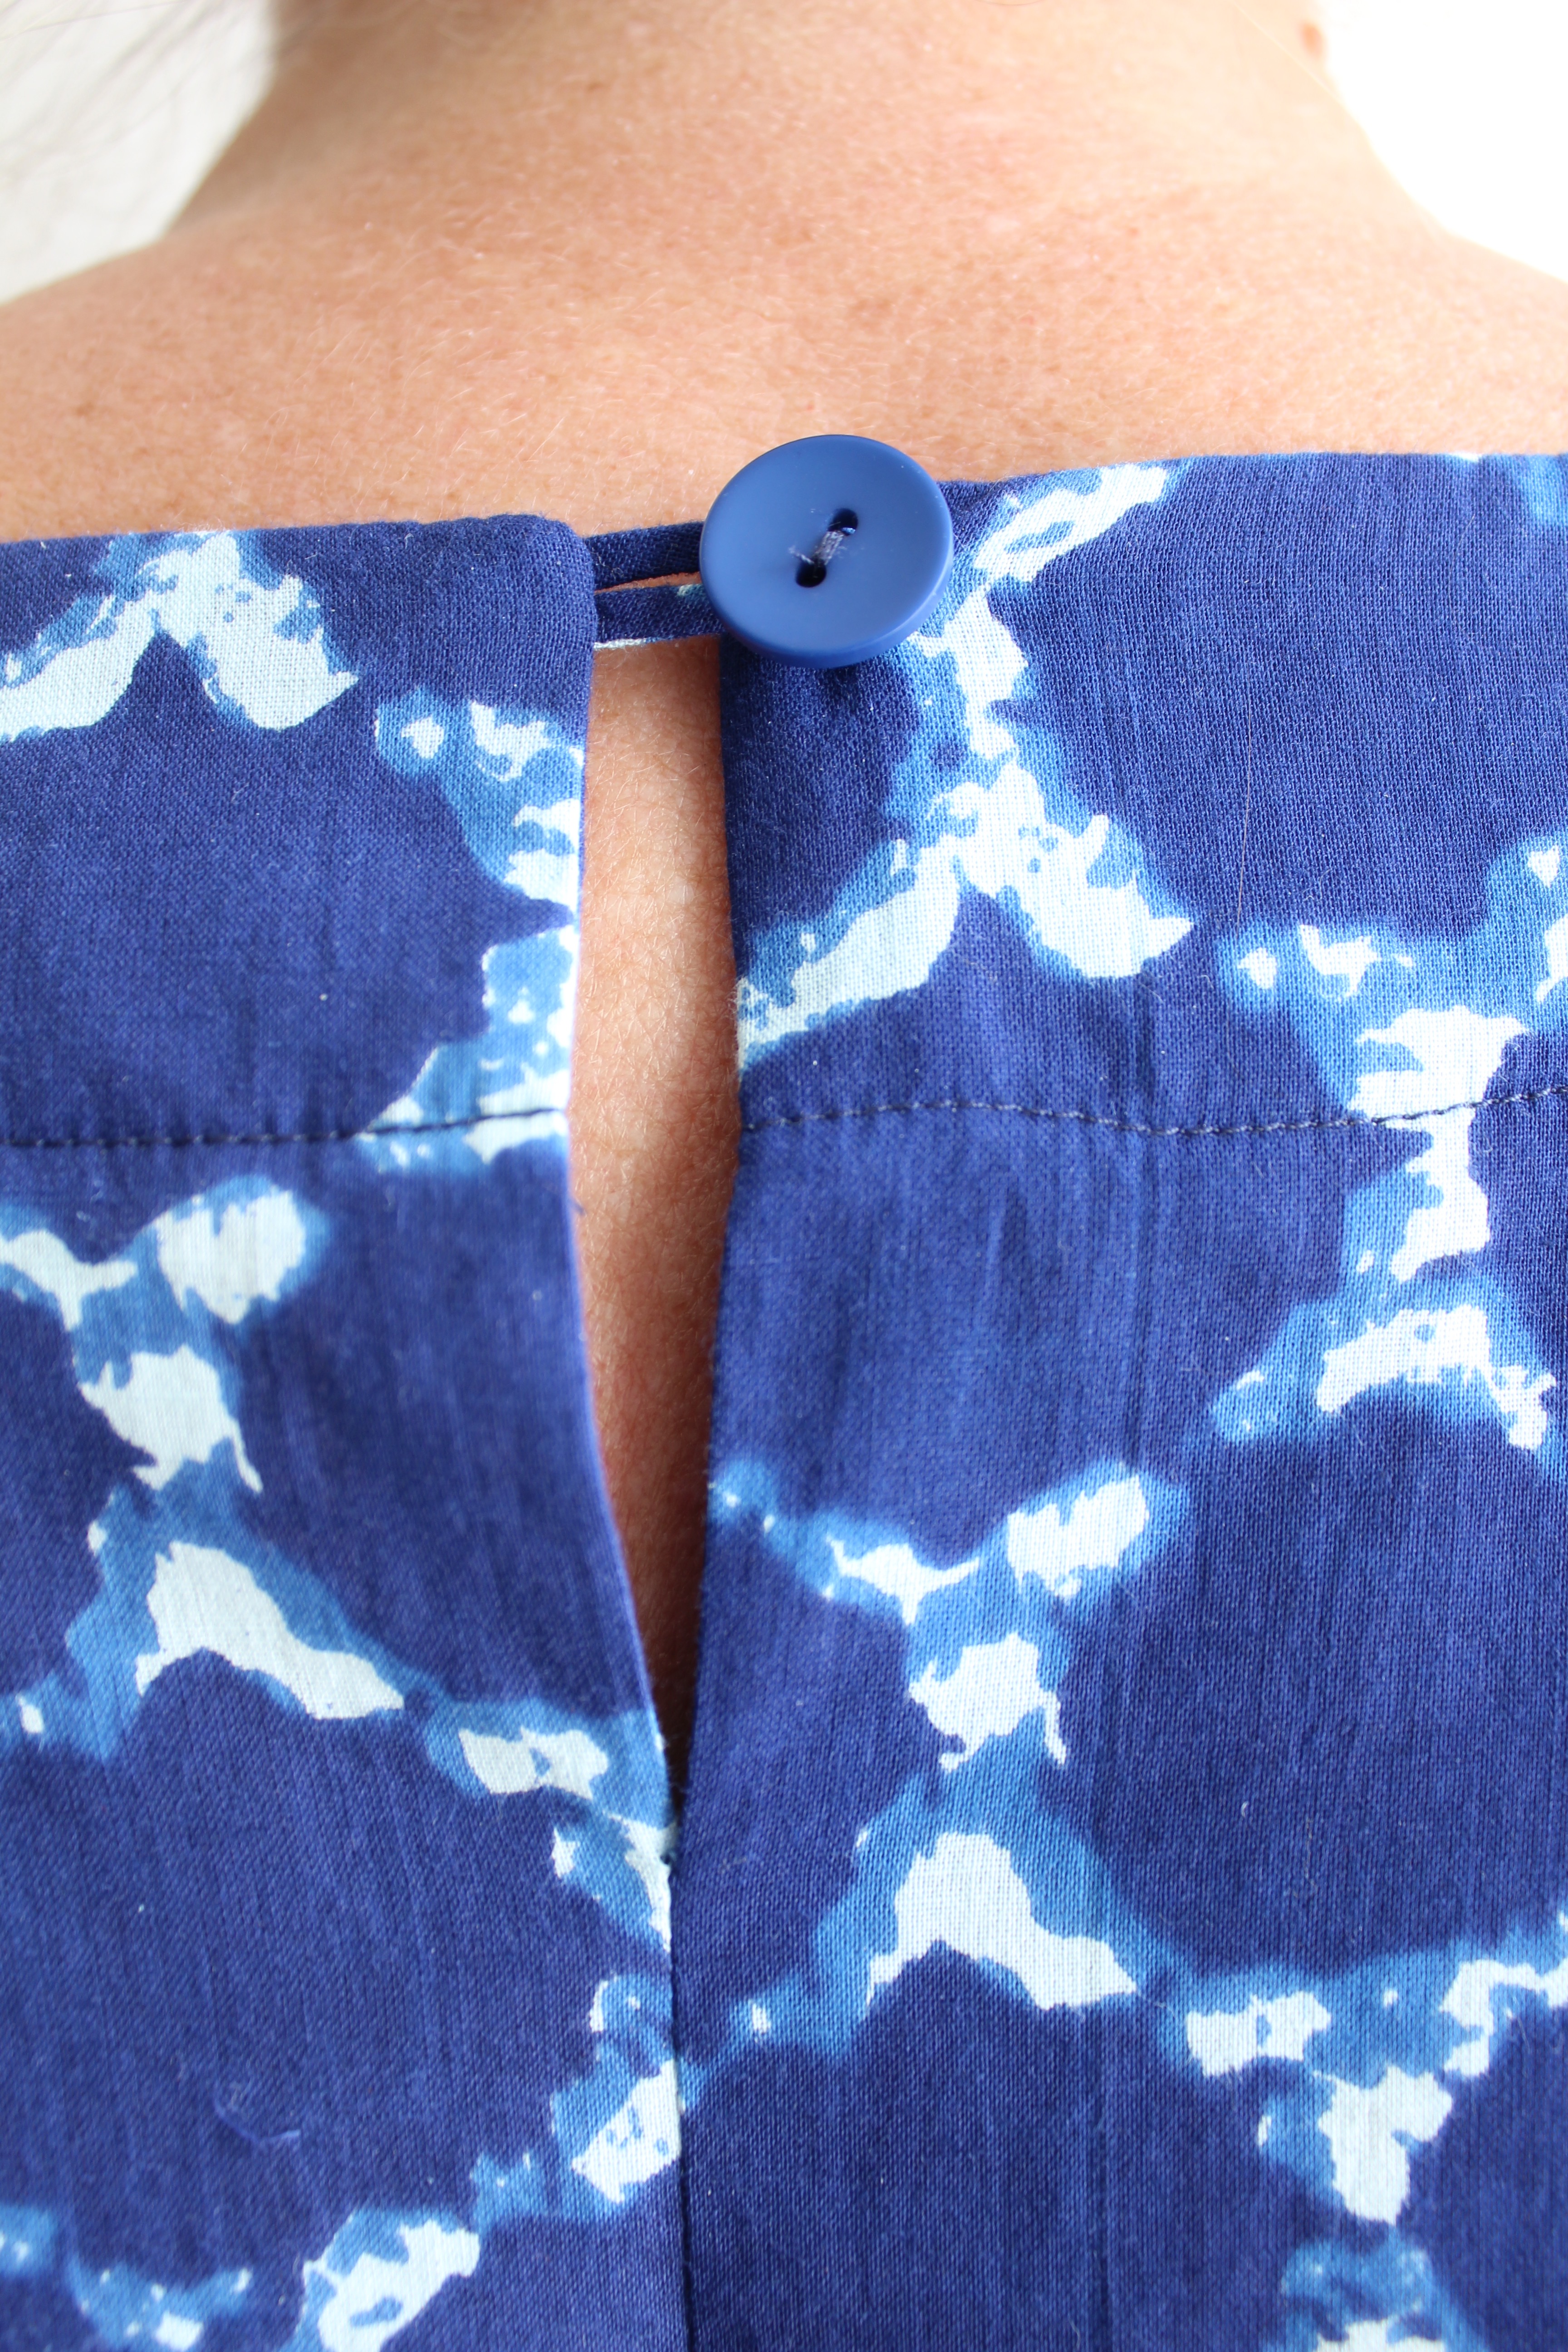
So let me talk you through this easy to make top. Well, its round necked, boxy shape with bust darts and a rather nice back neck loop and button opening (see below).
Peggy top is suitable for adventurous beginners, so maybe you’ve cut your teeth on cushions and bag projects and would like to try some simple dressmaking, well this would be a perfect starter pattern as its really quite a straightforward make. Why not take a look at this condensed tutorial blogpost and it will give you an idea about whats involved.
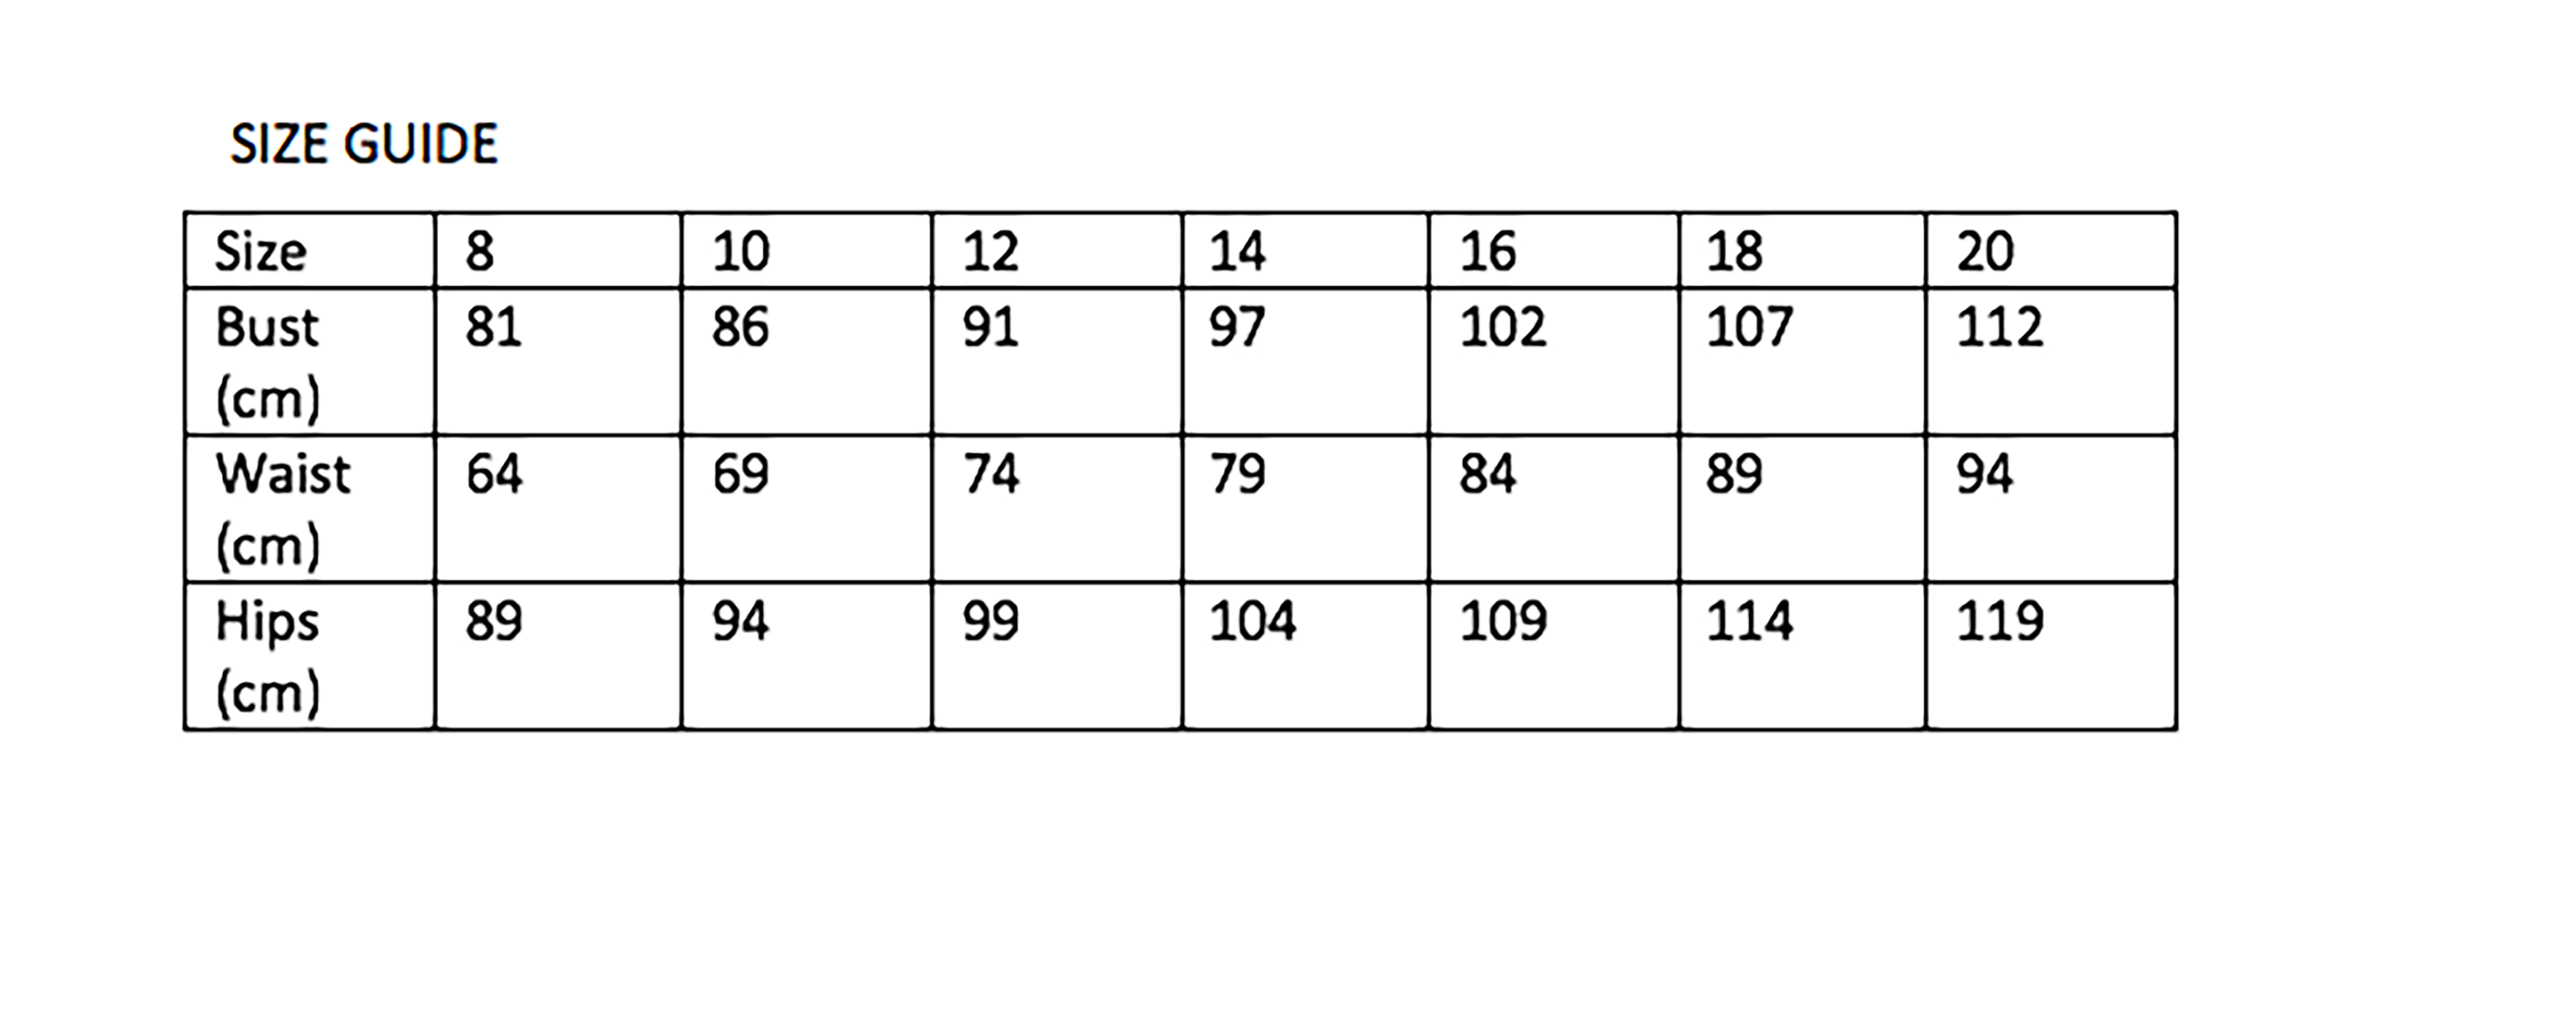
Here are some measurements for you to check over. The pattern is good for sizes 8-20 by the way. If you need to make adjustments to the pattern, check out the tutorials such as Adjusting a Bust dart.
Seam allowance is 1cm (3/8″), however if you prefer to use a 1.5cm (5/8″), then just add 5mm to the outer edges (except for those which are ‘Place on fold’).
Finish raw edges with a zigzag stitch or an overlocker.
You may like to use a contrast colour thread for the topstitching, as I did with the long top to get that ‘jeans’ stitch detail. You don’t need a special topstitch thread in particular, just a colour that will show up).
CUTTING GUIDE – are all shown in the instructions booklet.
HOW TO MAKE PEGGY TOP
On the pattern you can see lots of lines for each Dart size. Each size has two lines: one (outer line) is the ‘cutting’ line and one (inner line) which is the ‘stitch’ line. See the diagram below, Ive marked size 8 Dart lines in yellow (cutting line) and pink (stitch line), to show you more clearly. Its a good idea to mark the required two lines as I have done on your pattern to make them easier to see.Fold the dart so that the RST(right sides together) and the dart raw edges are aligned. Mark your stitch line using a ruler and pencil which runs 1cm parallel to the cutting line.
Sew along the ‘stitch’ line, leaving long thread ends which are tied together and trimmed. Press the darts downwards.
Finish the raw edges of the centre back. Sew the back pieces together with the right sides together, leaving the top section unstitched. Press.
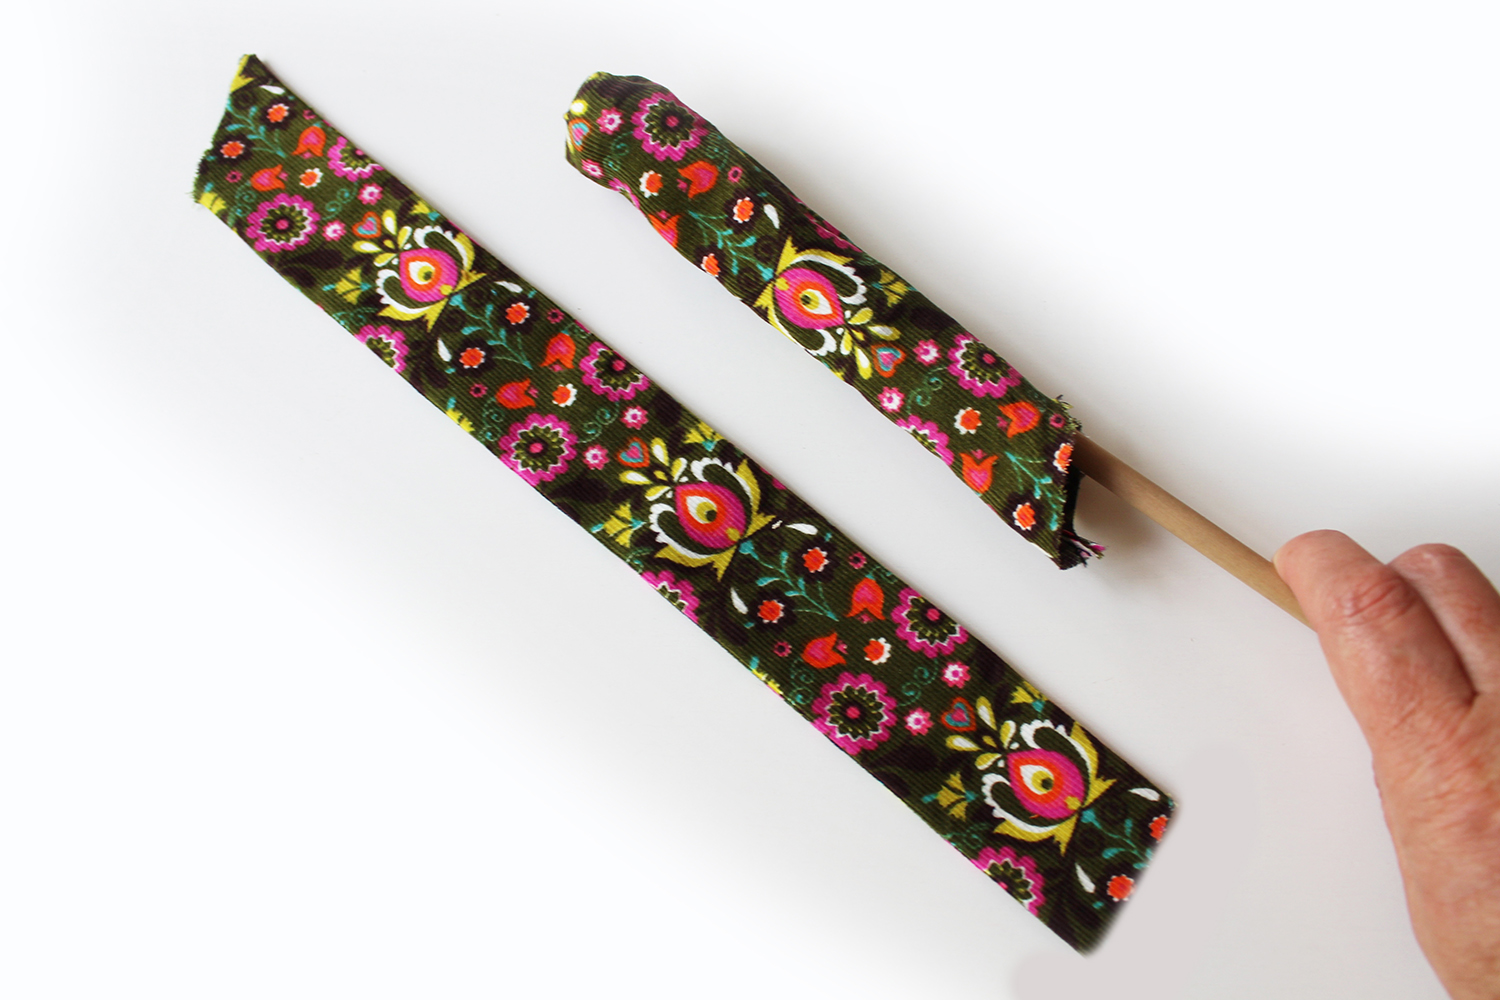
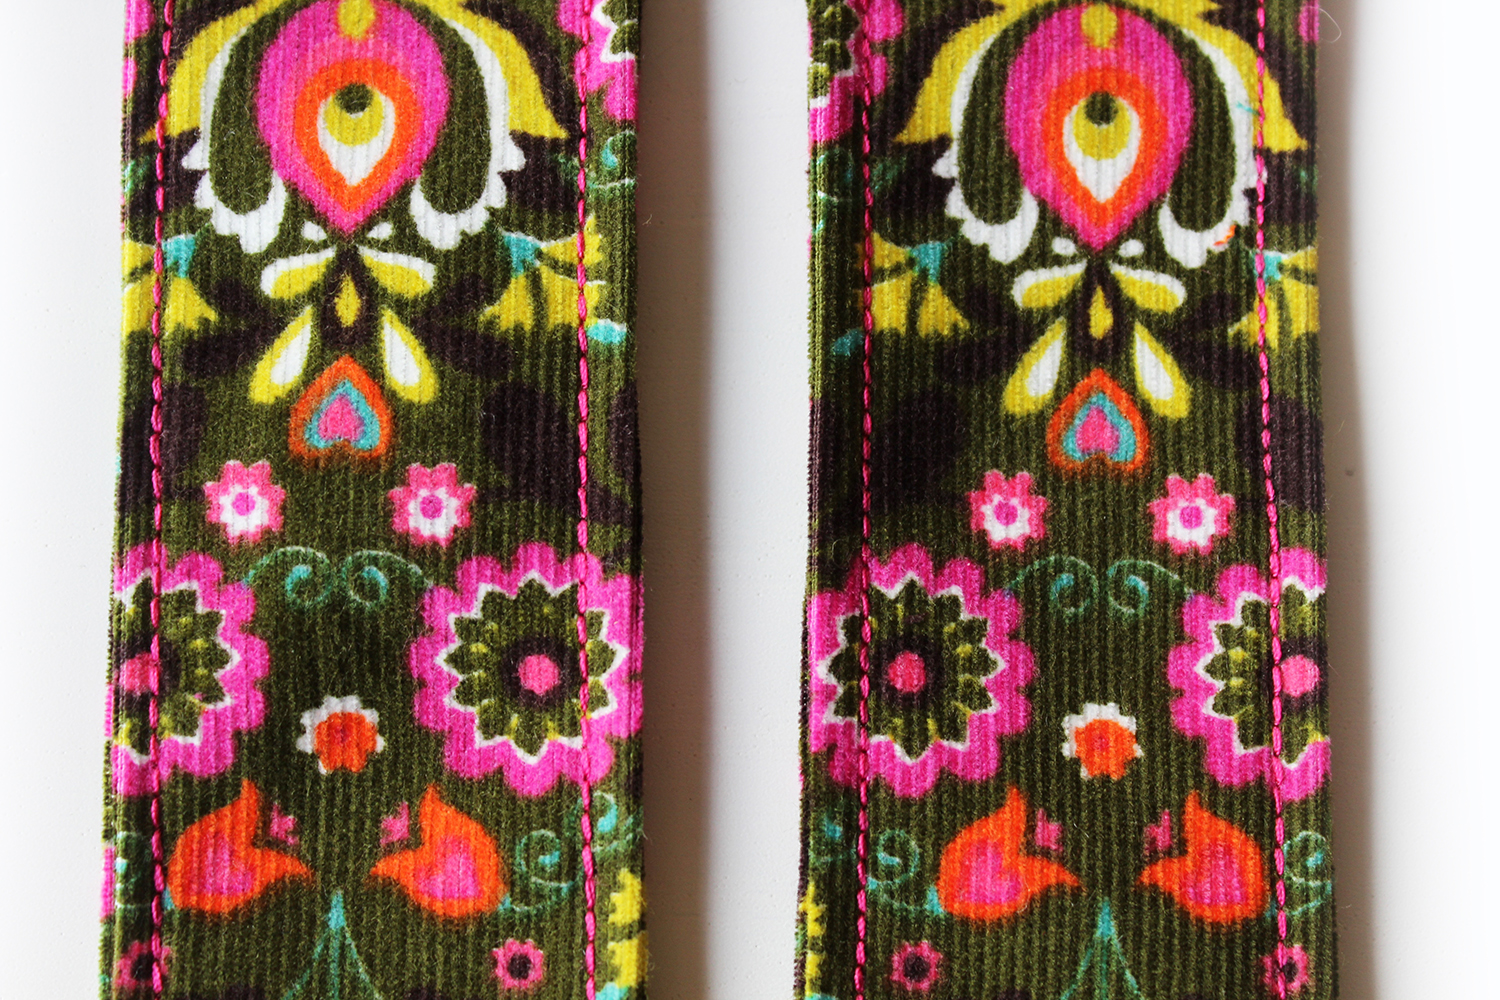
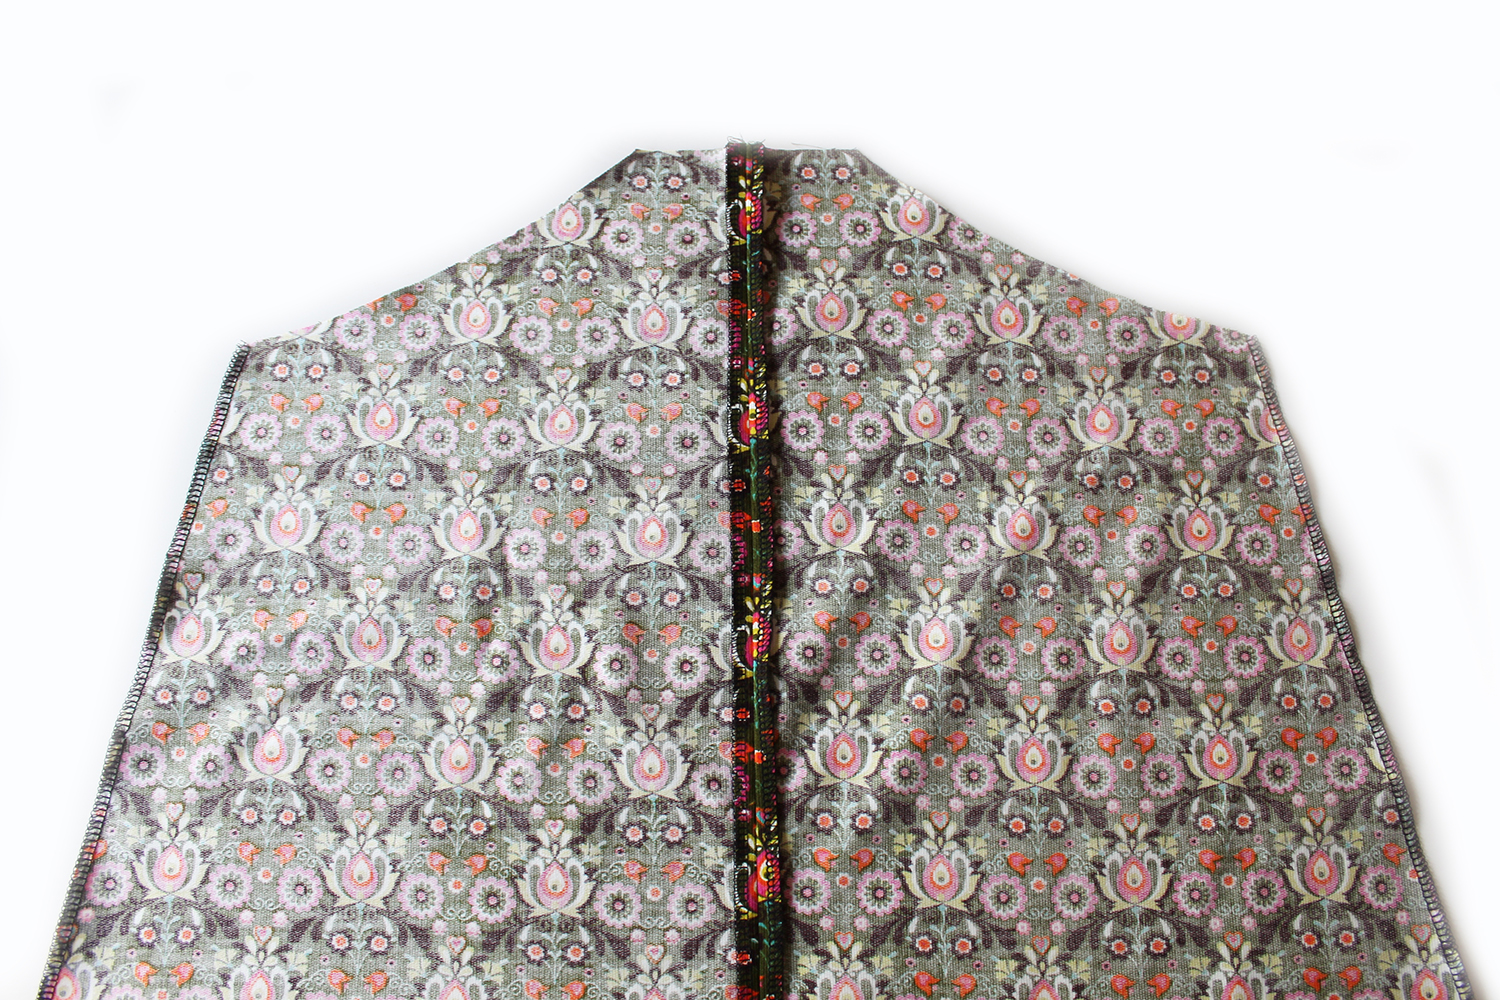
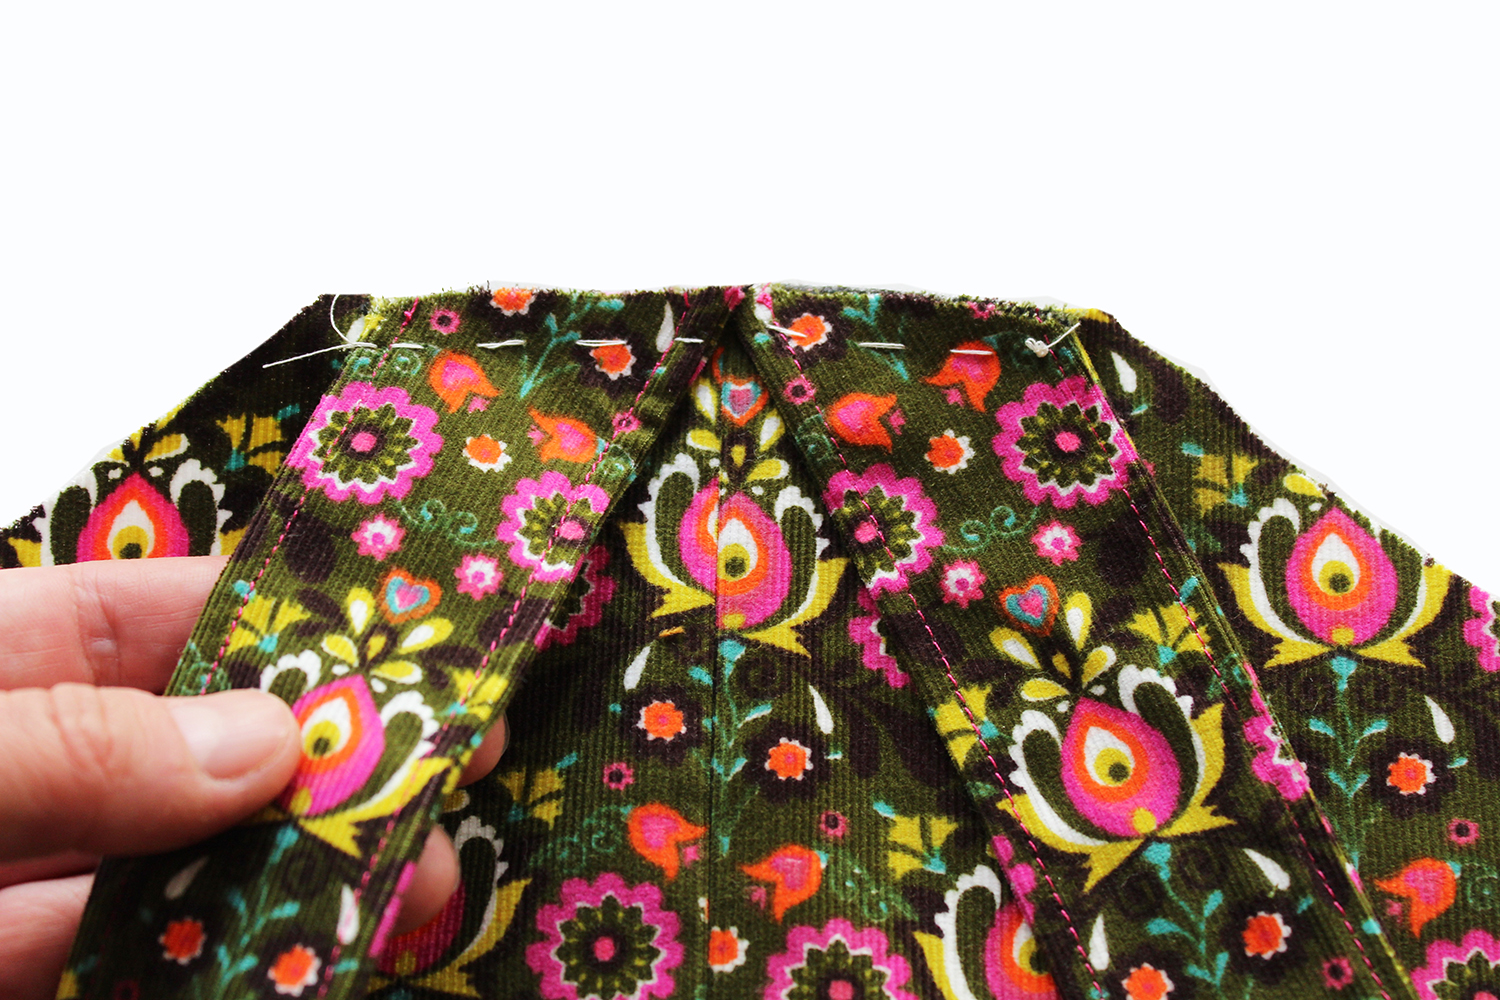
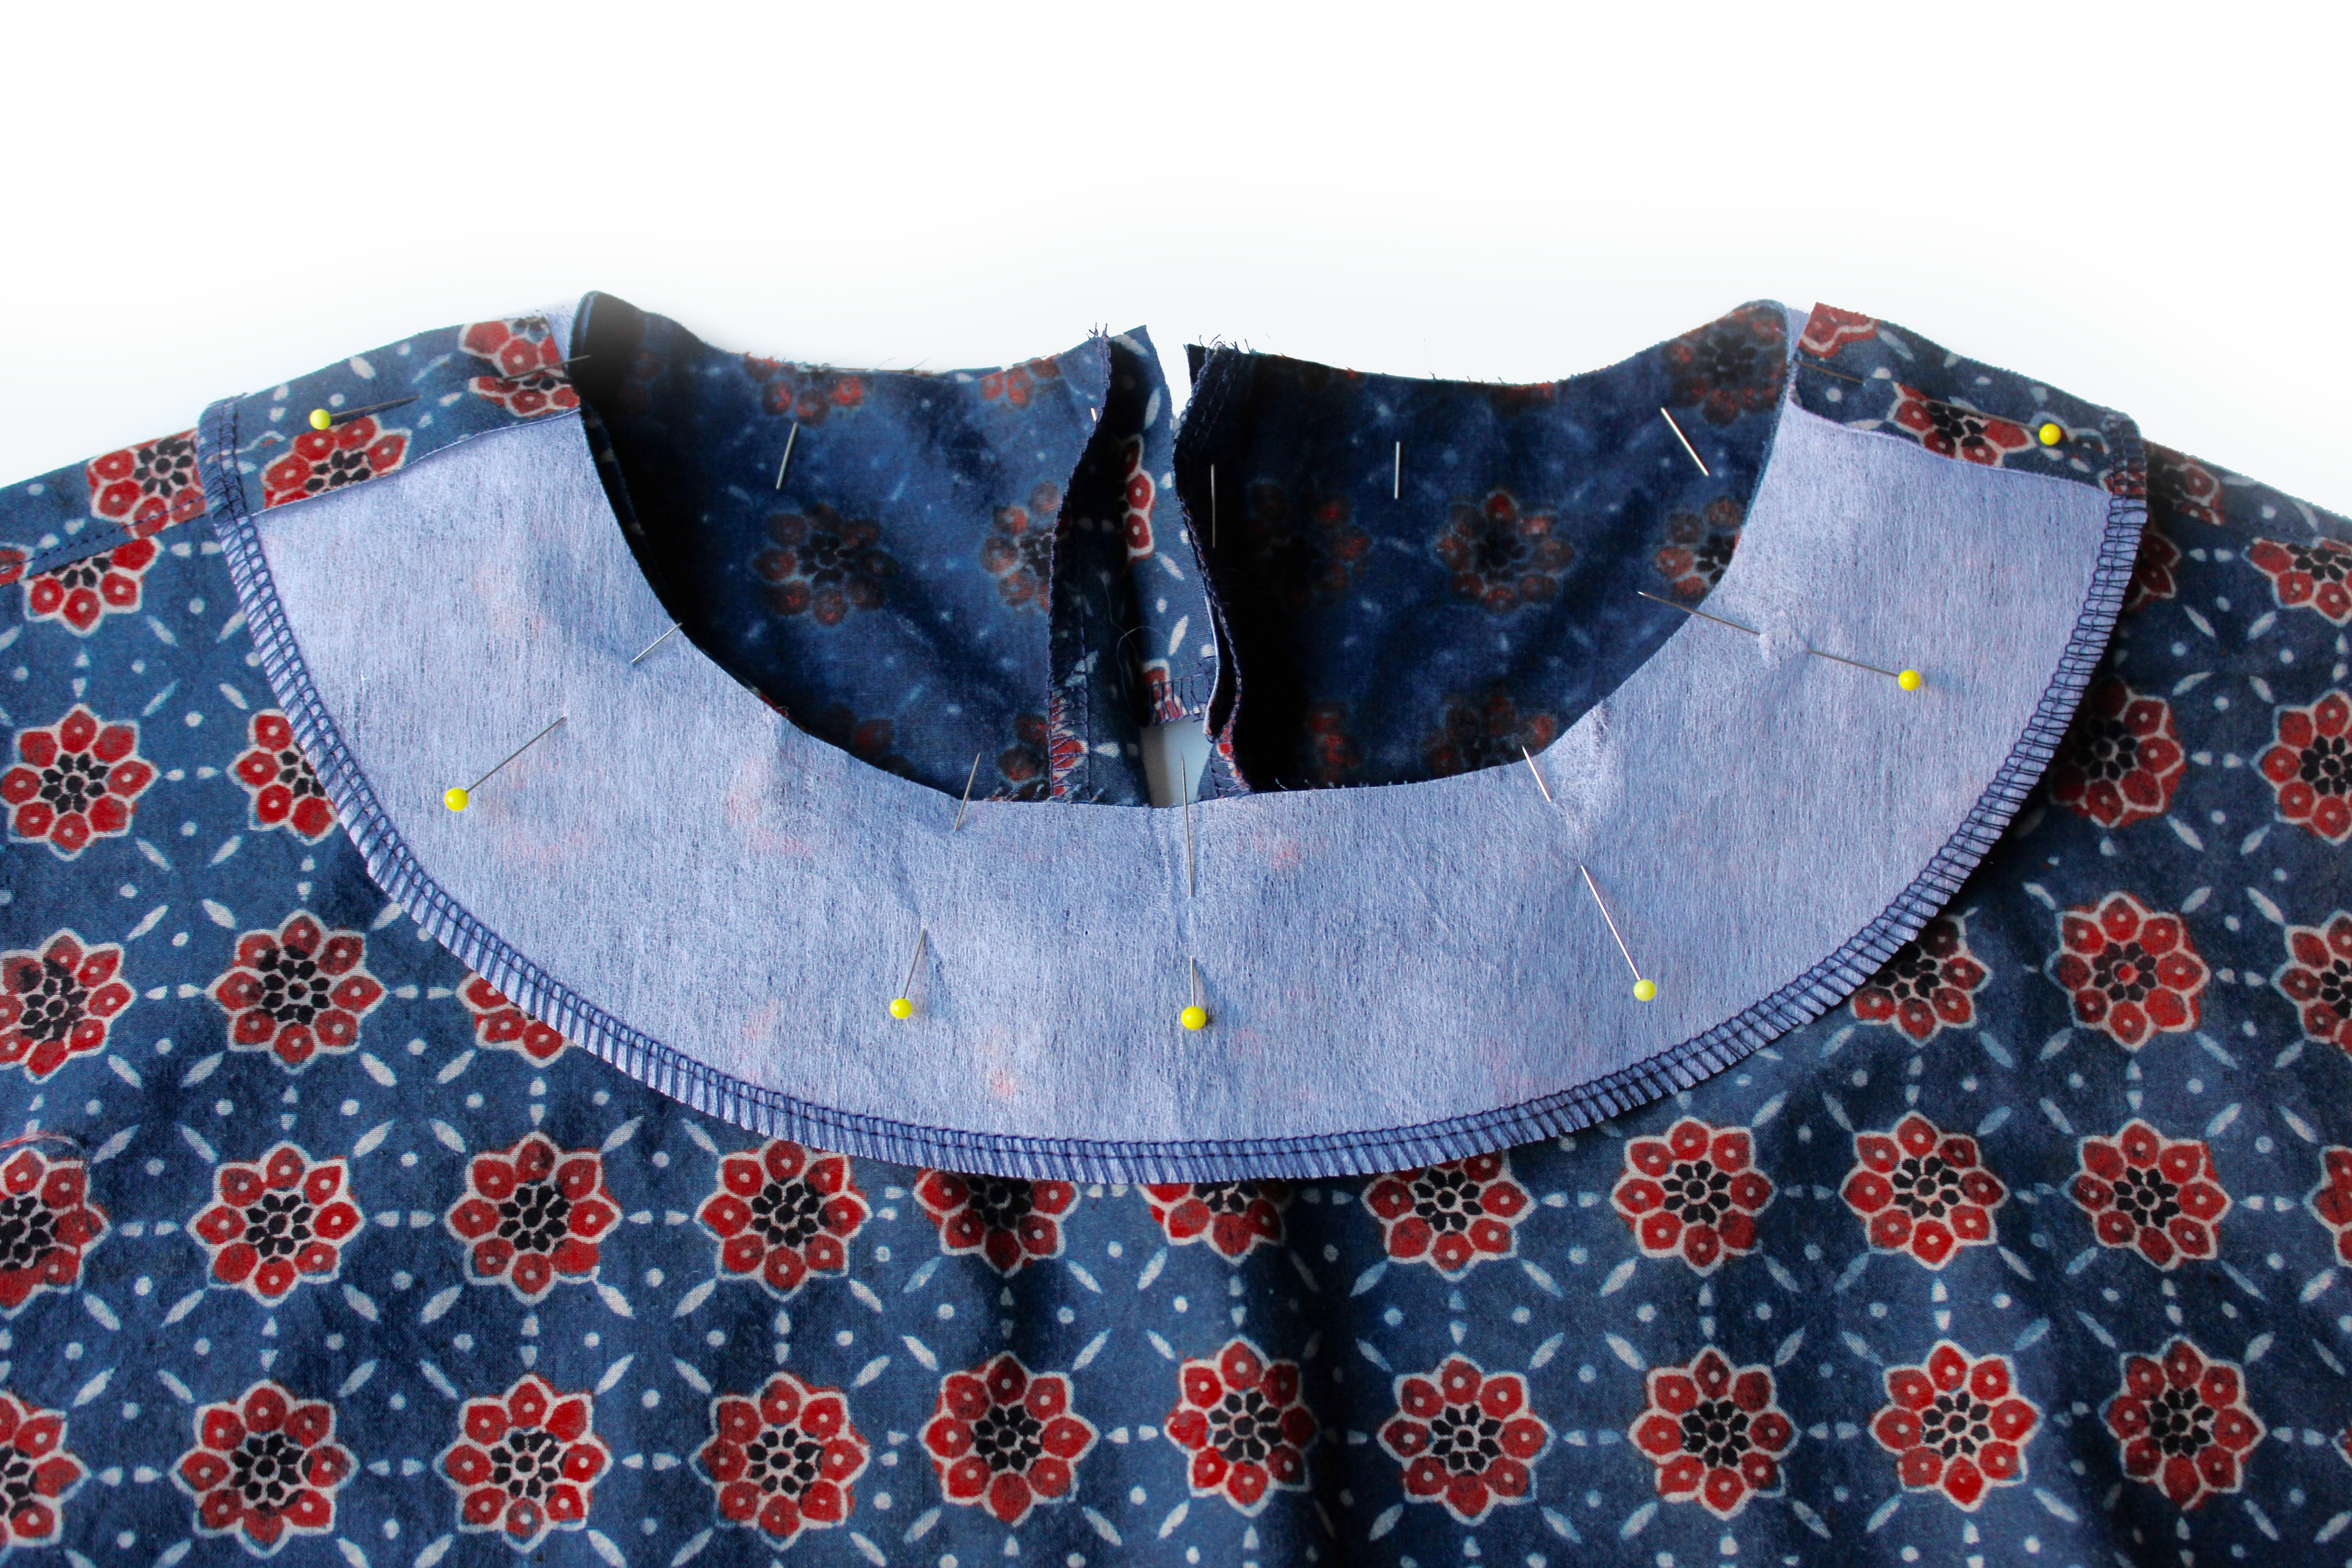
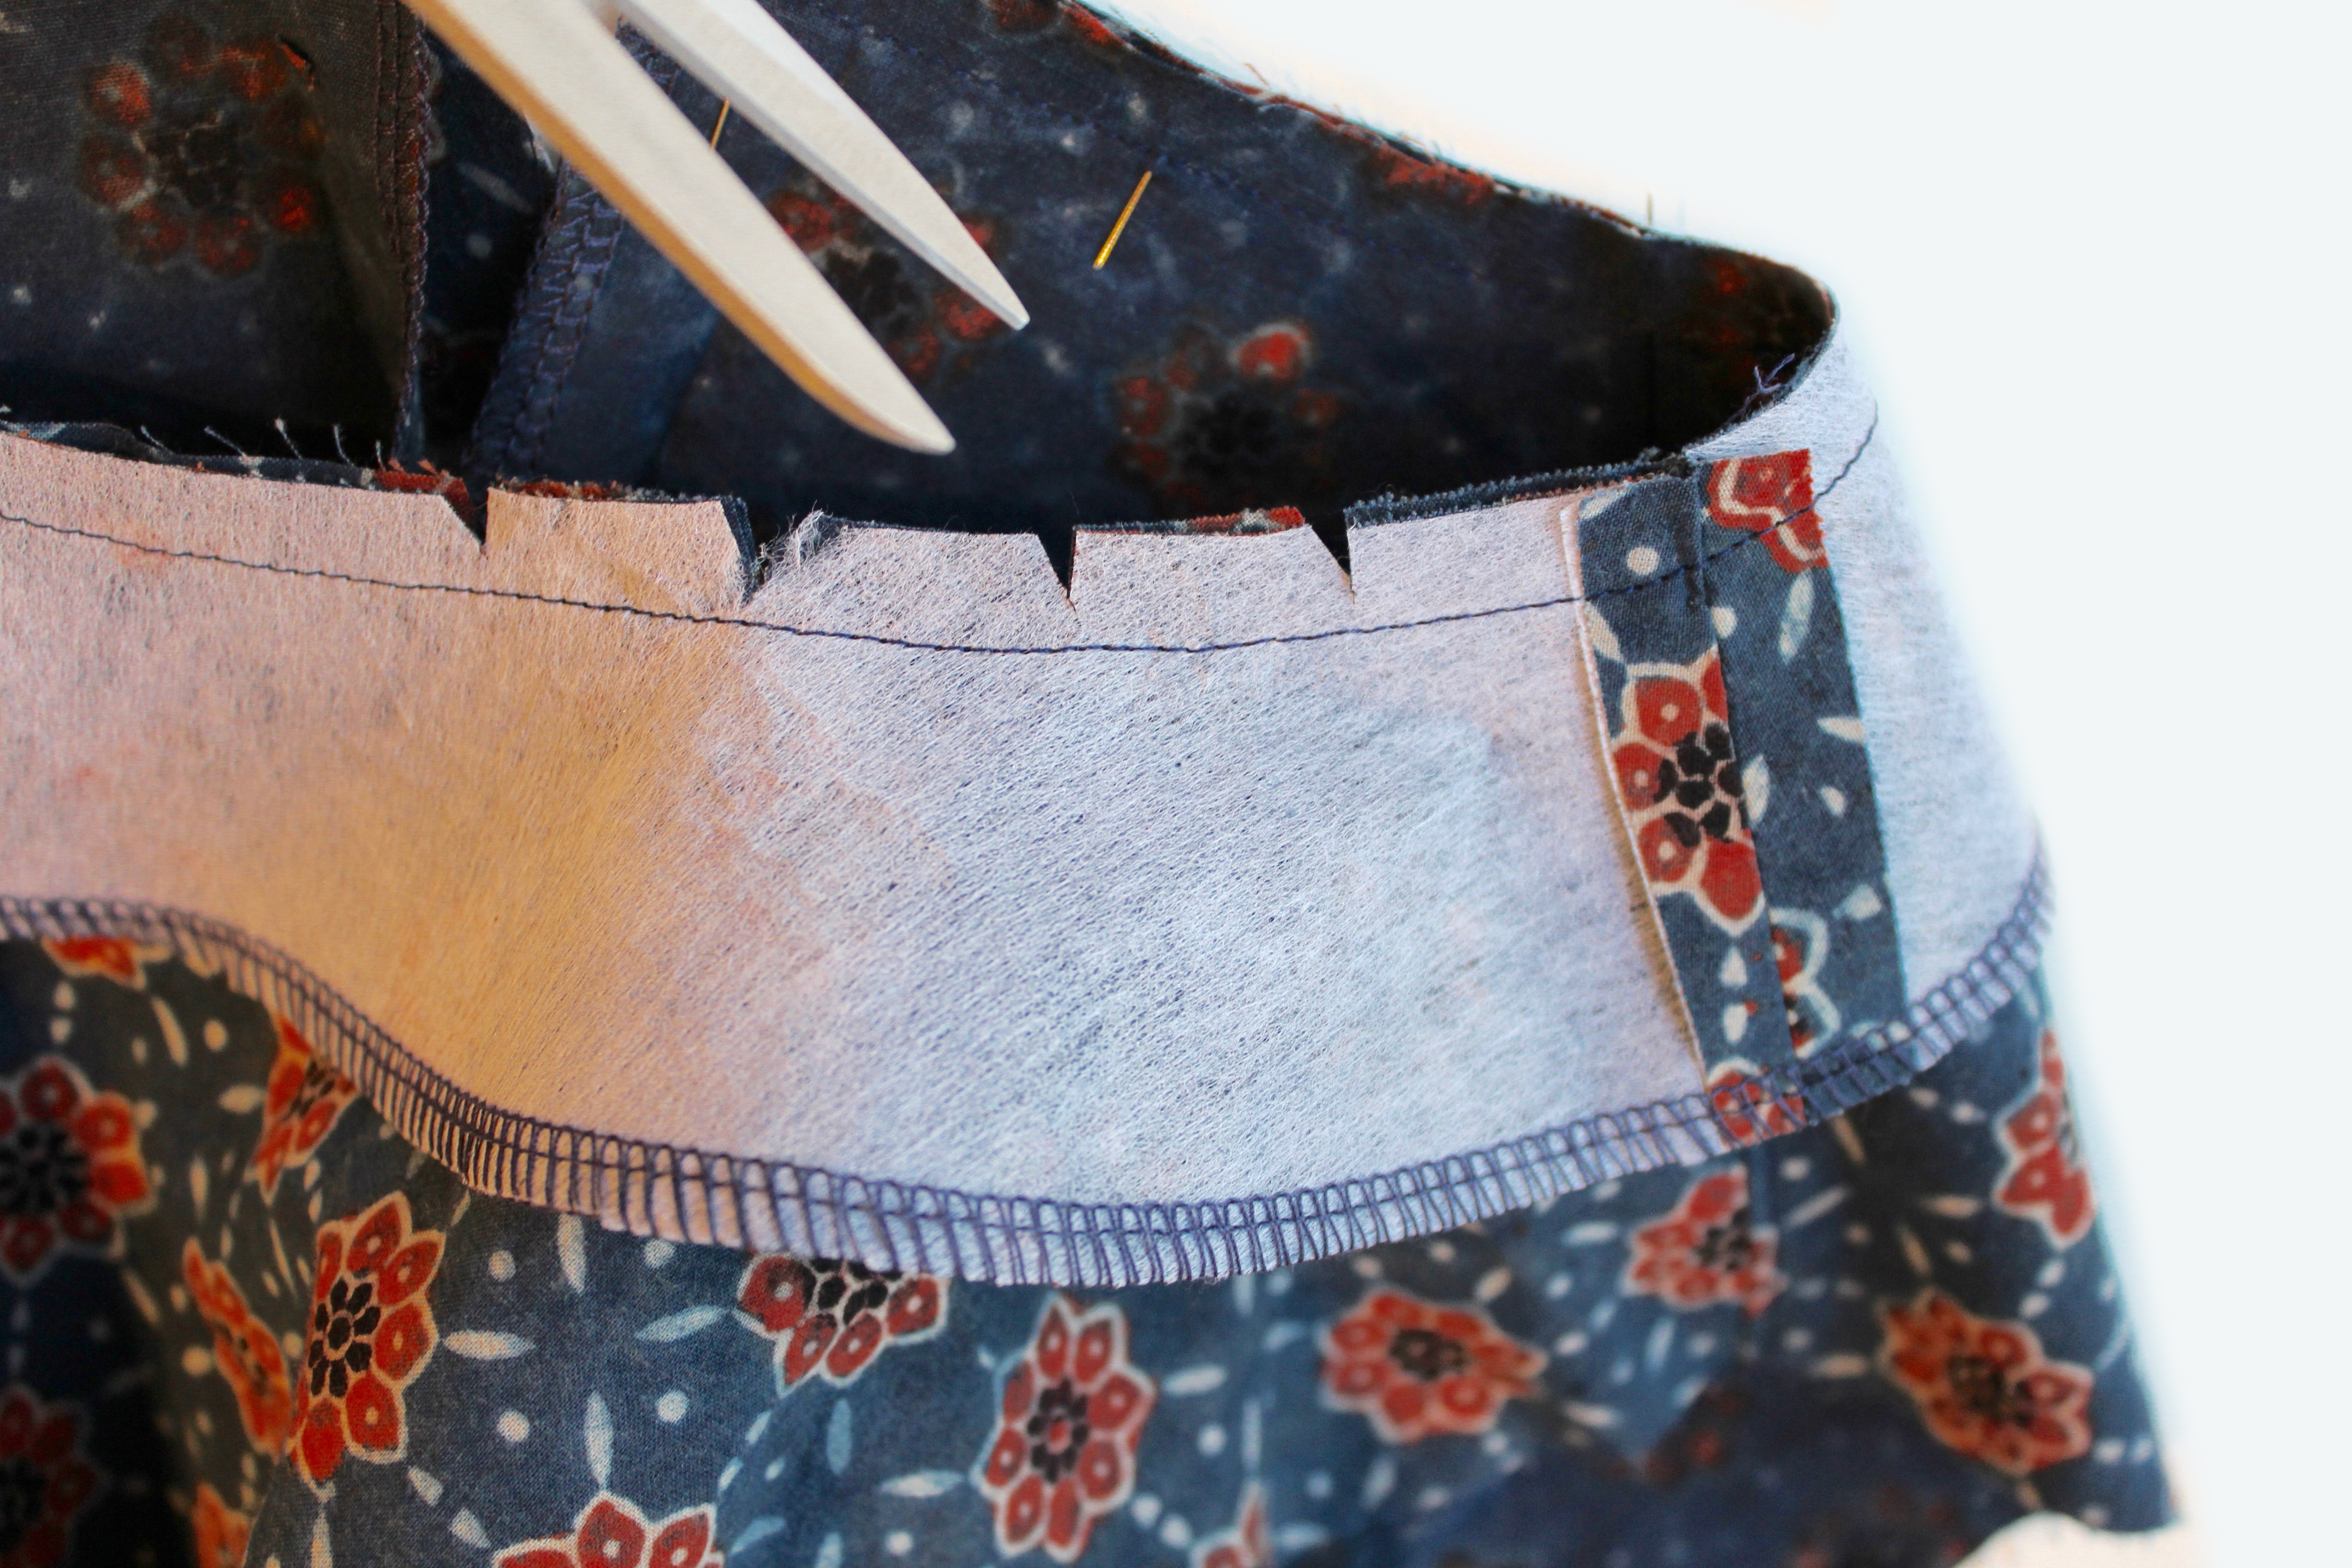
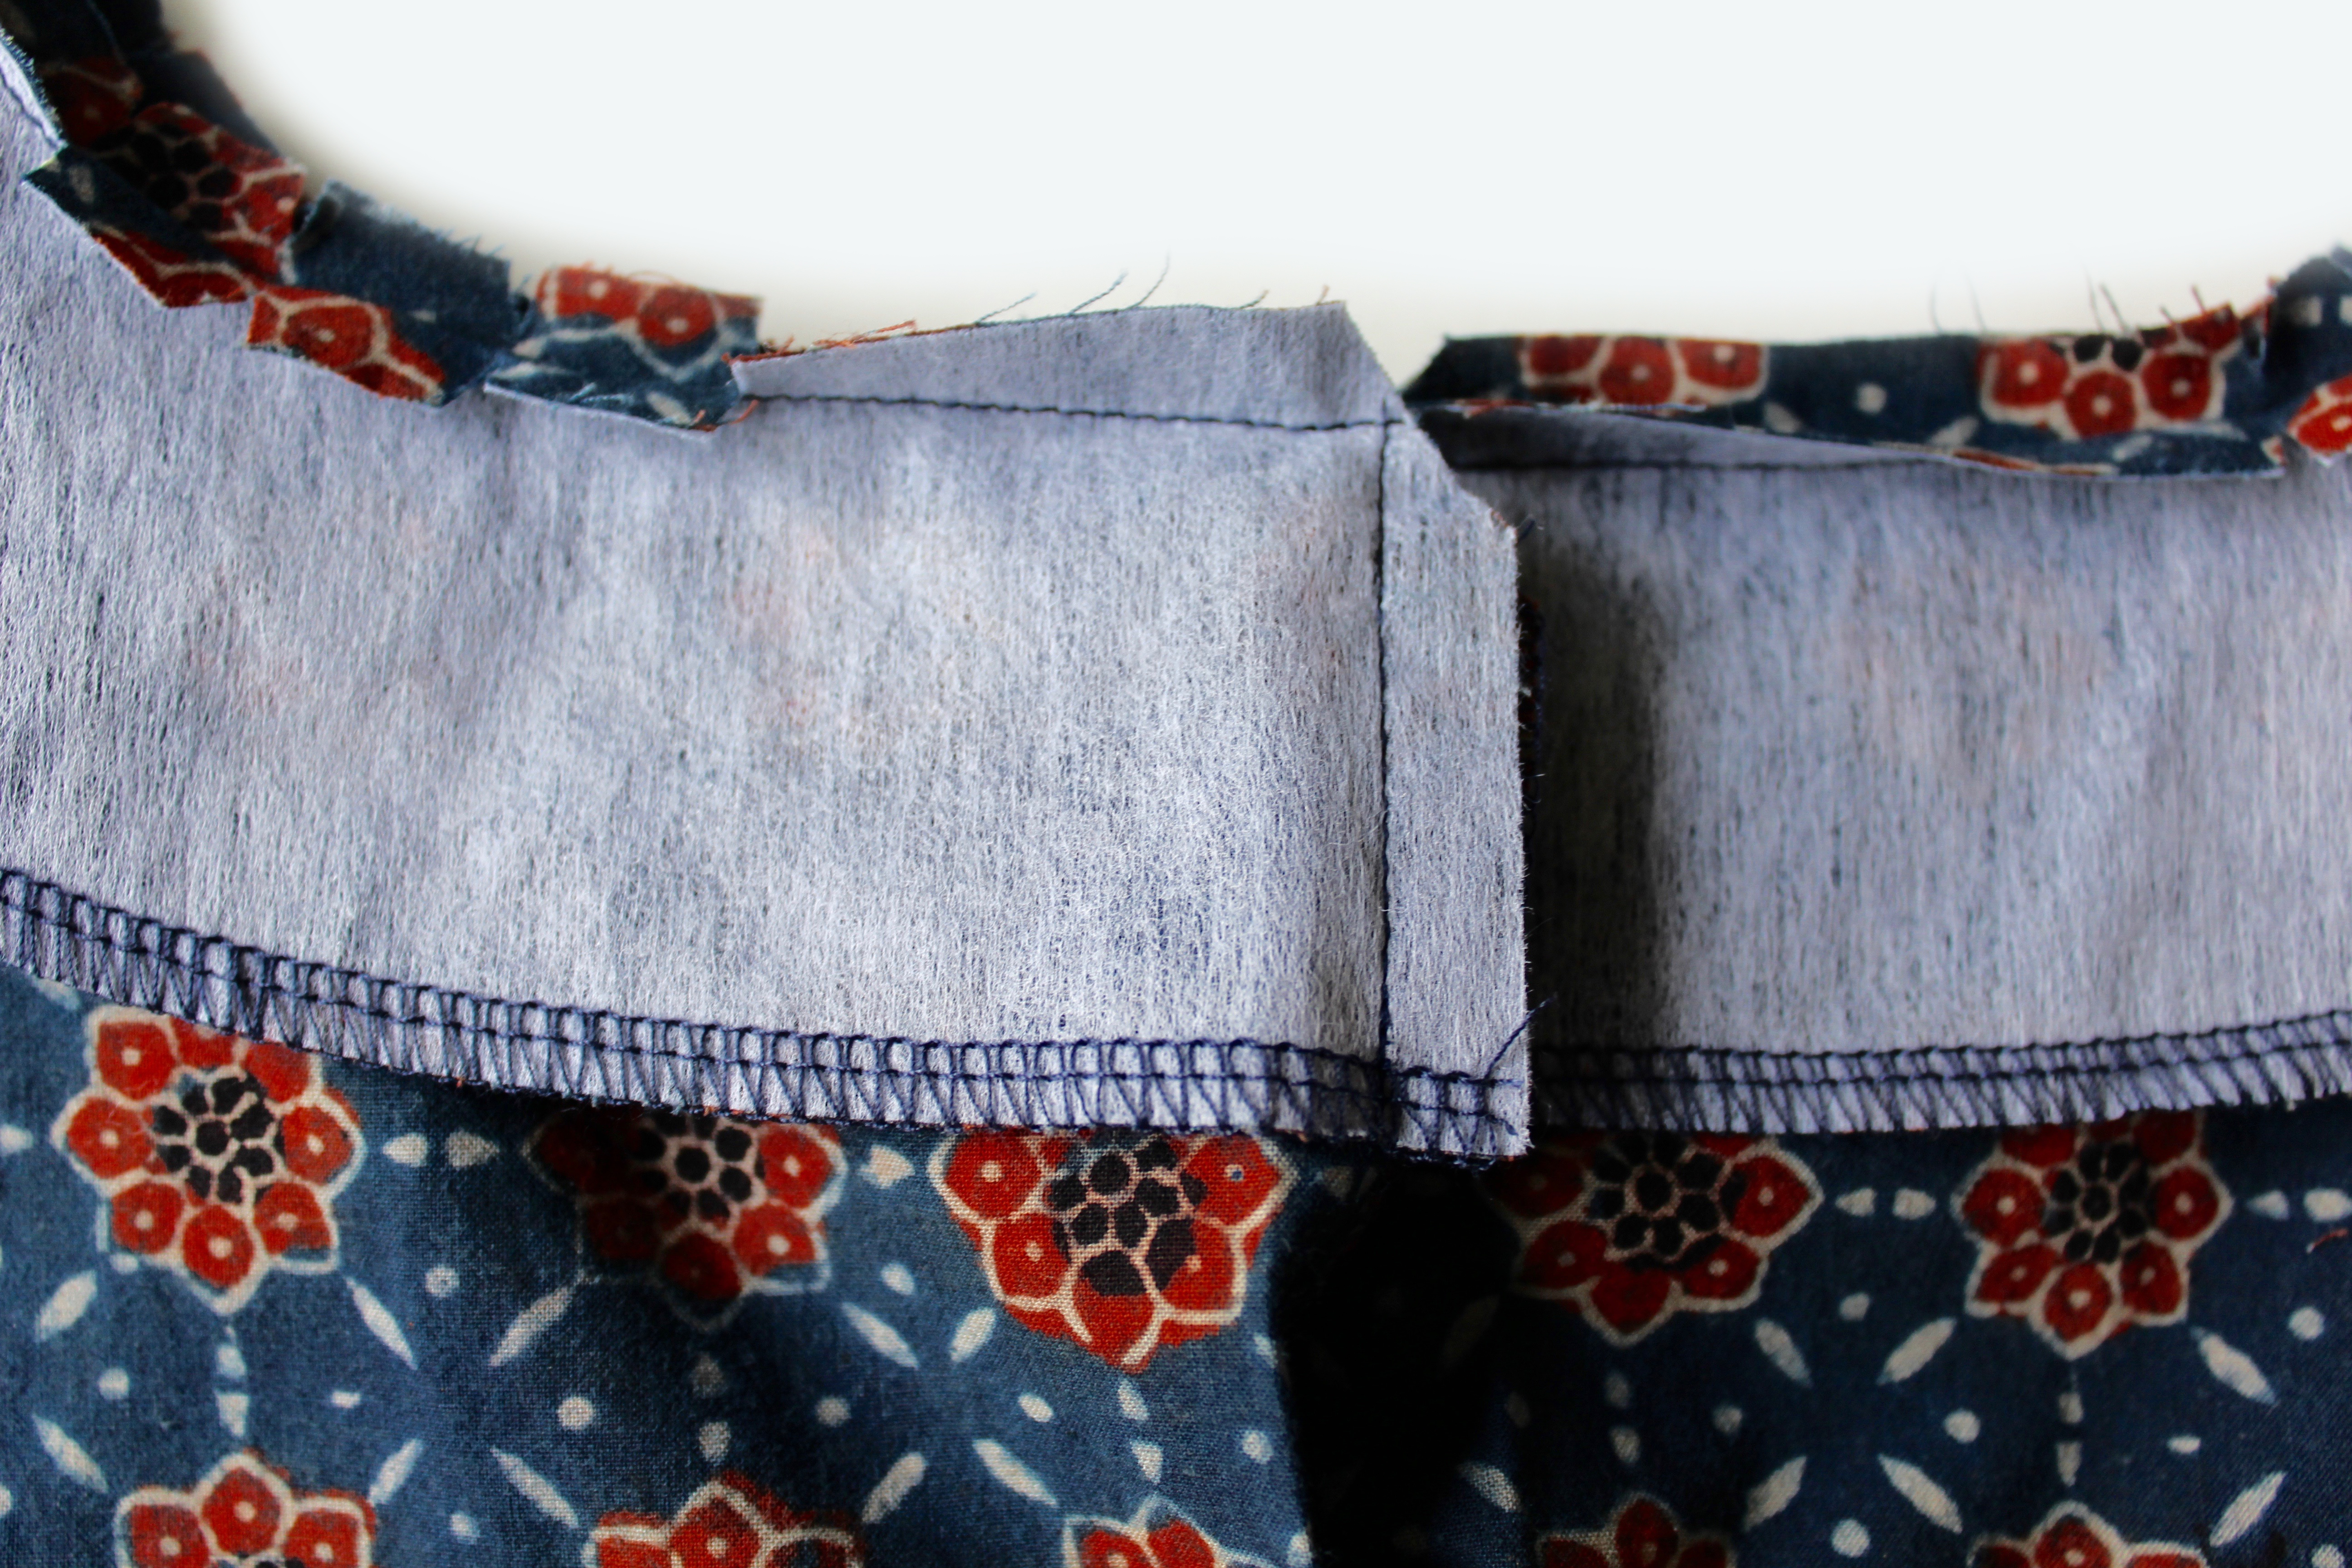
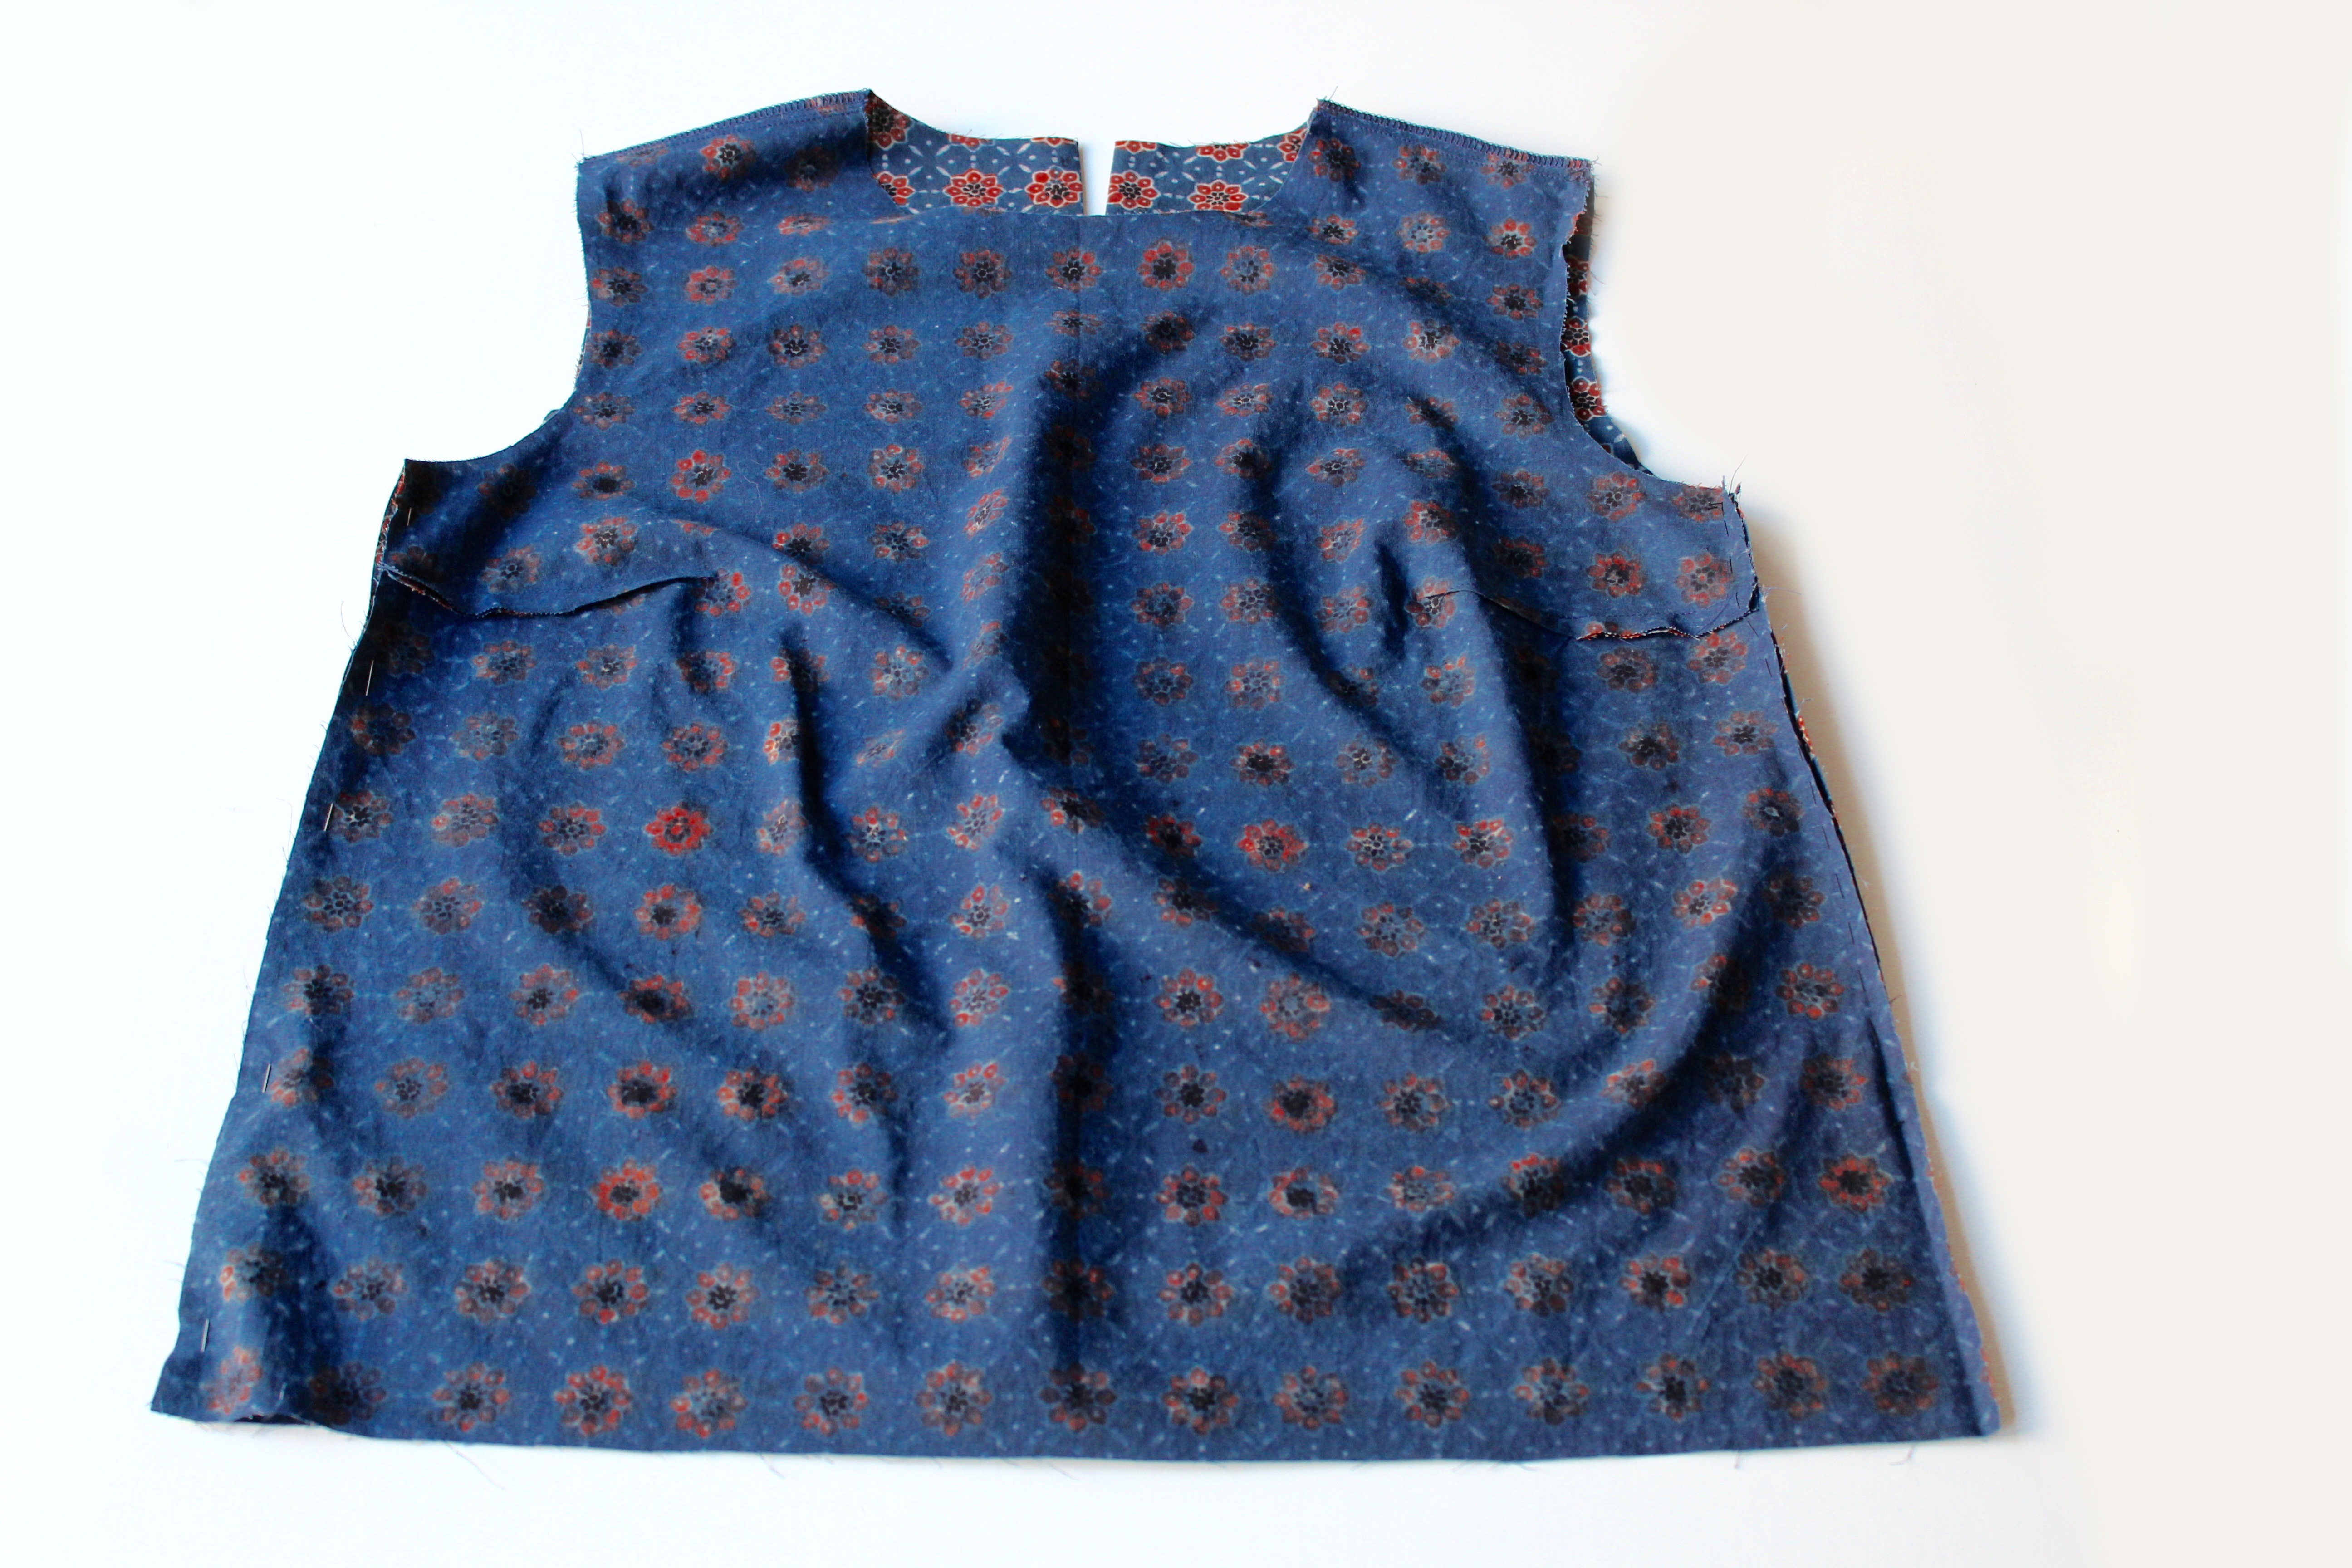
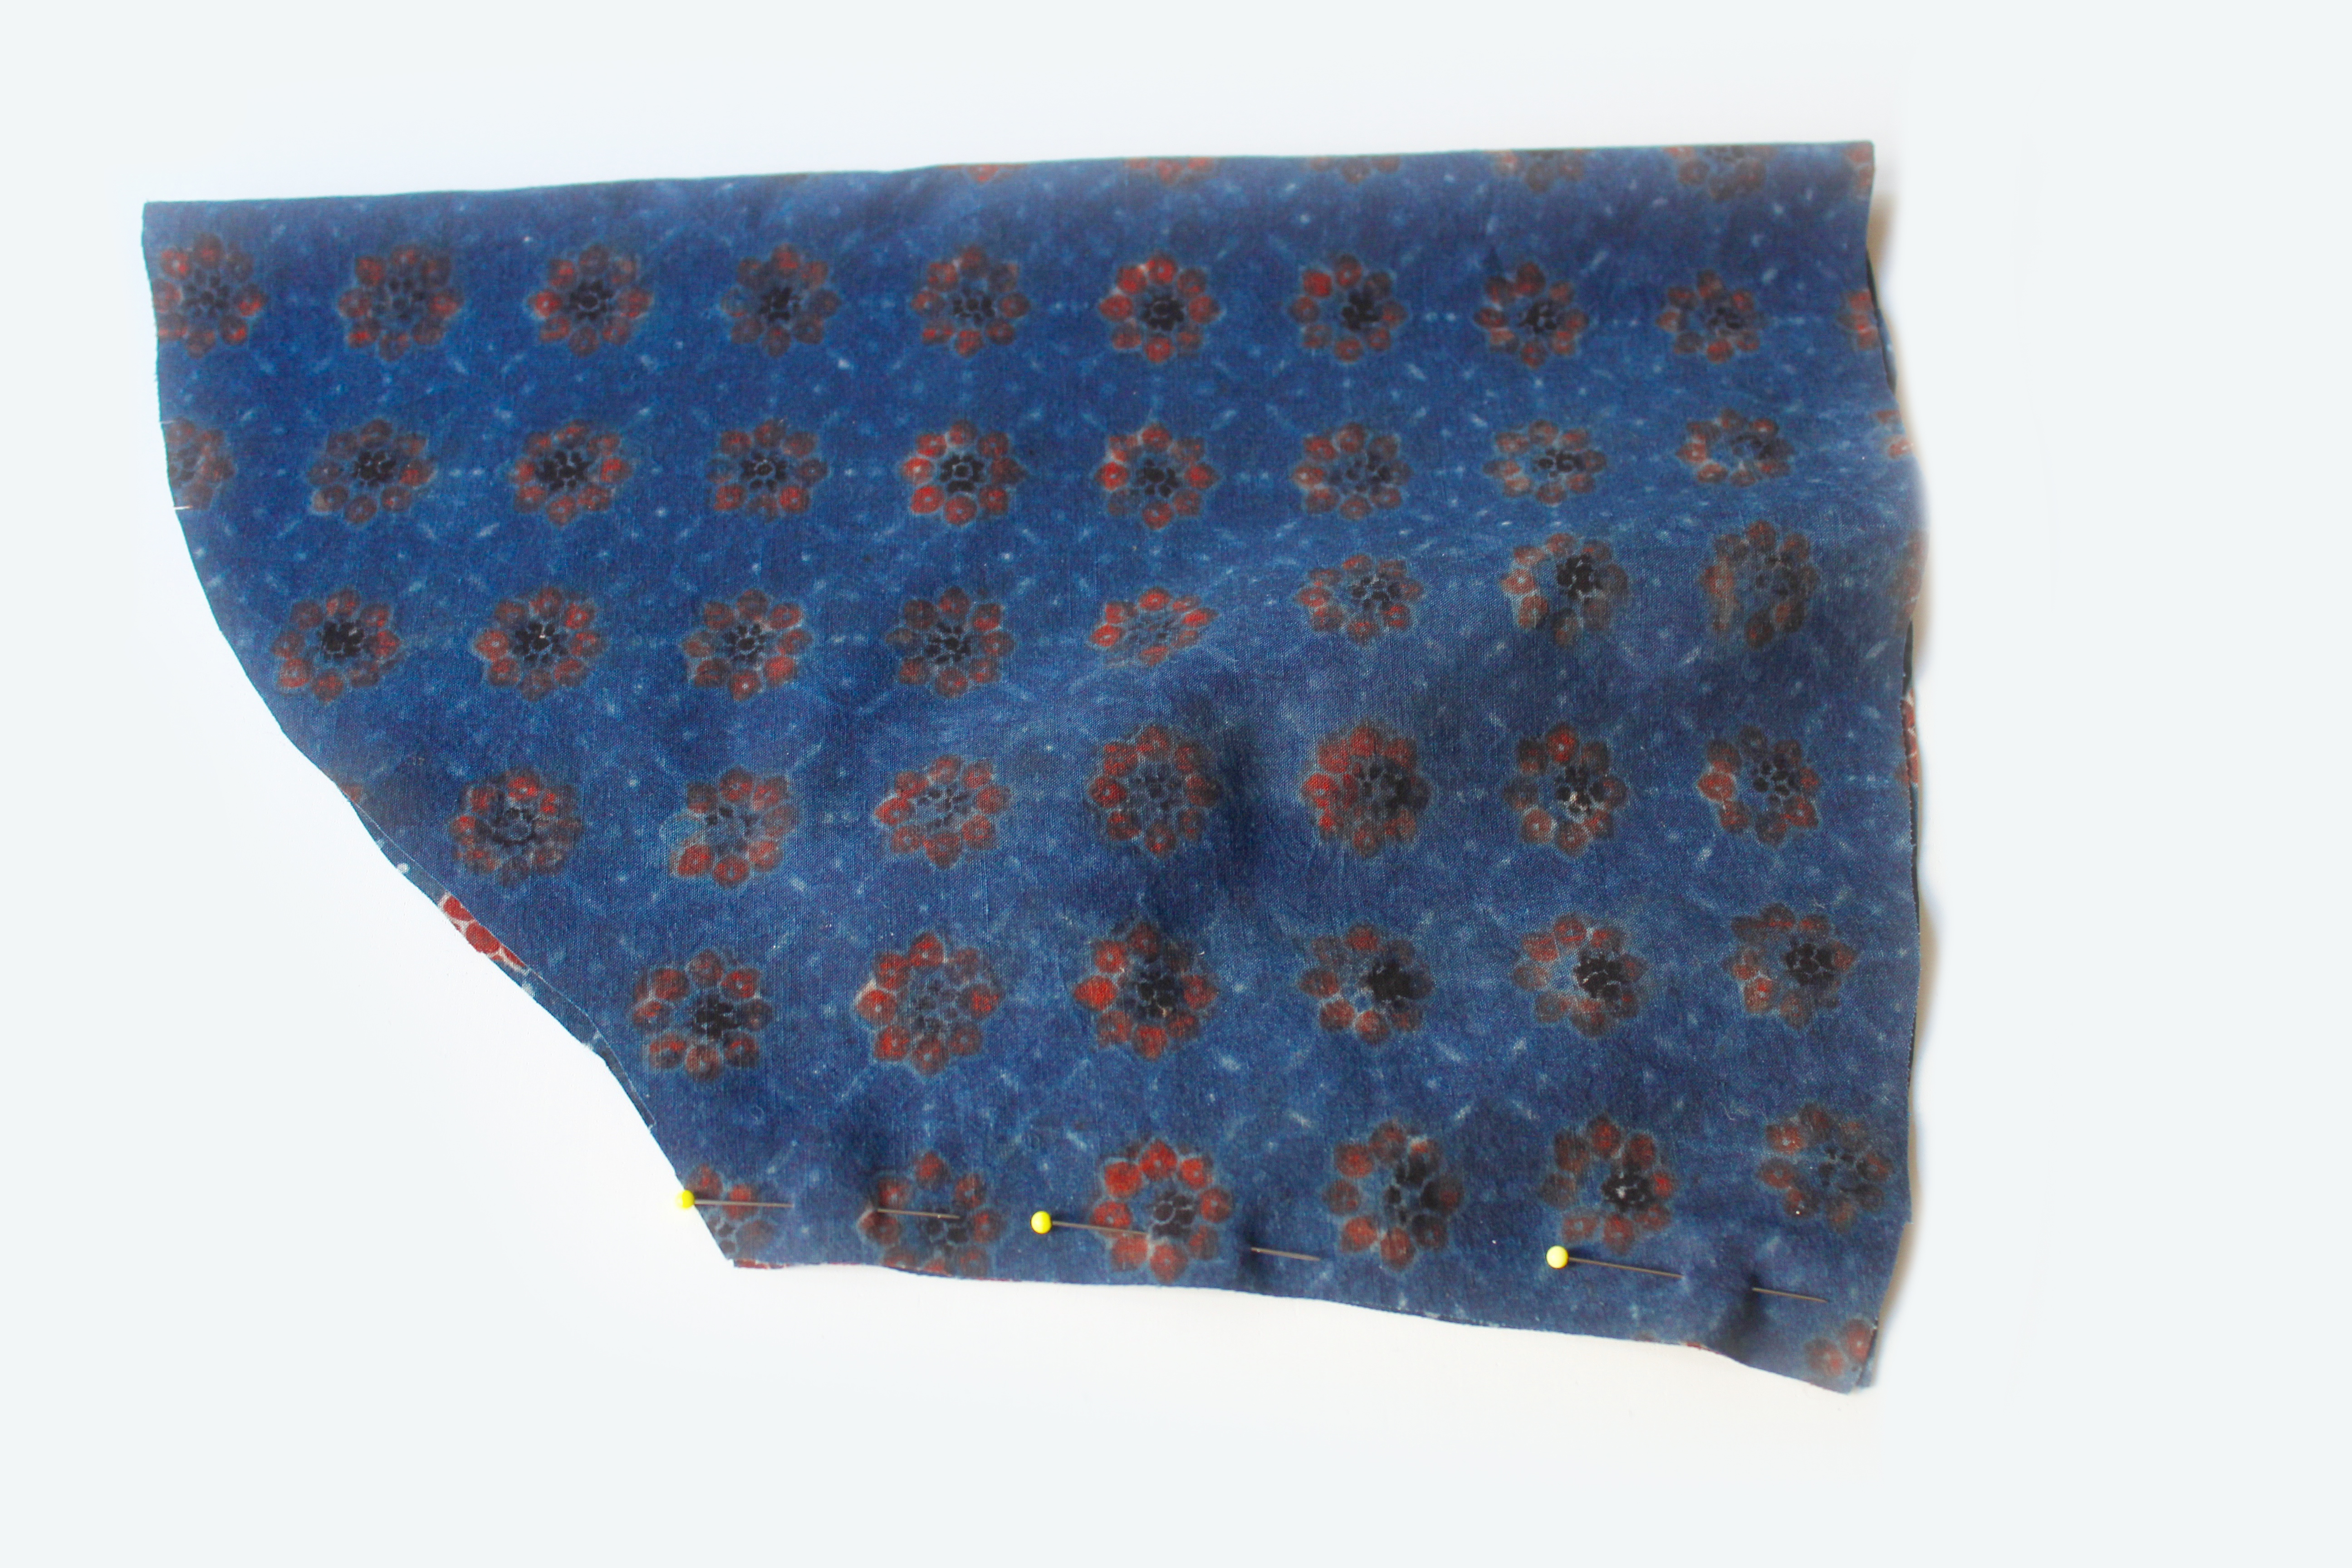
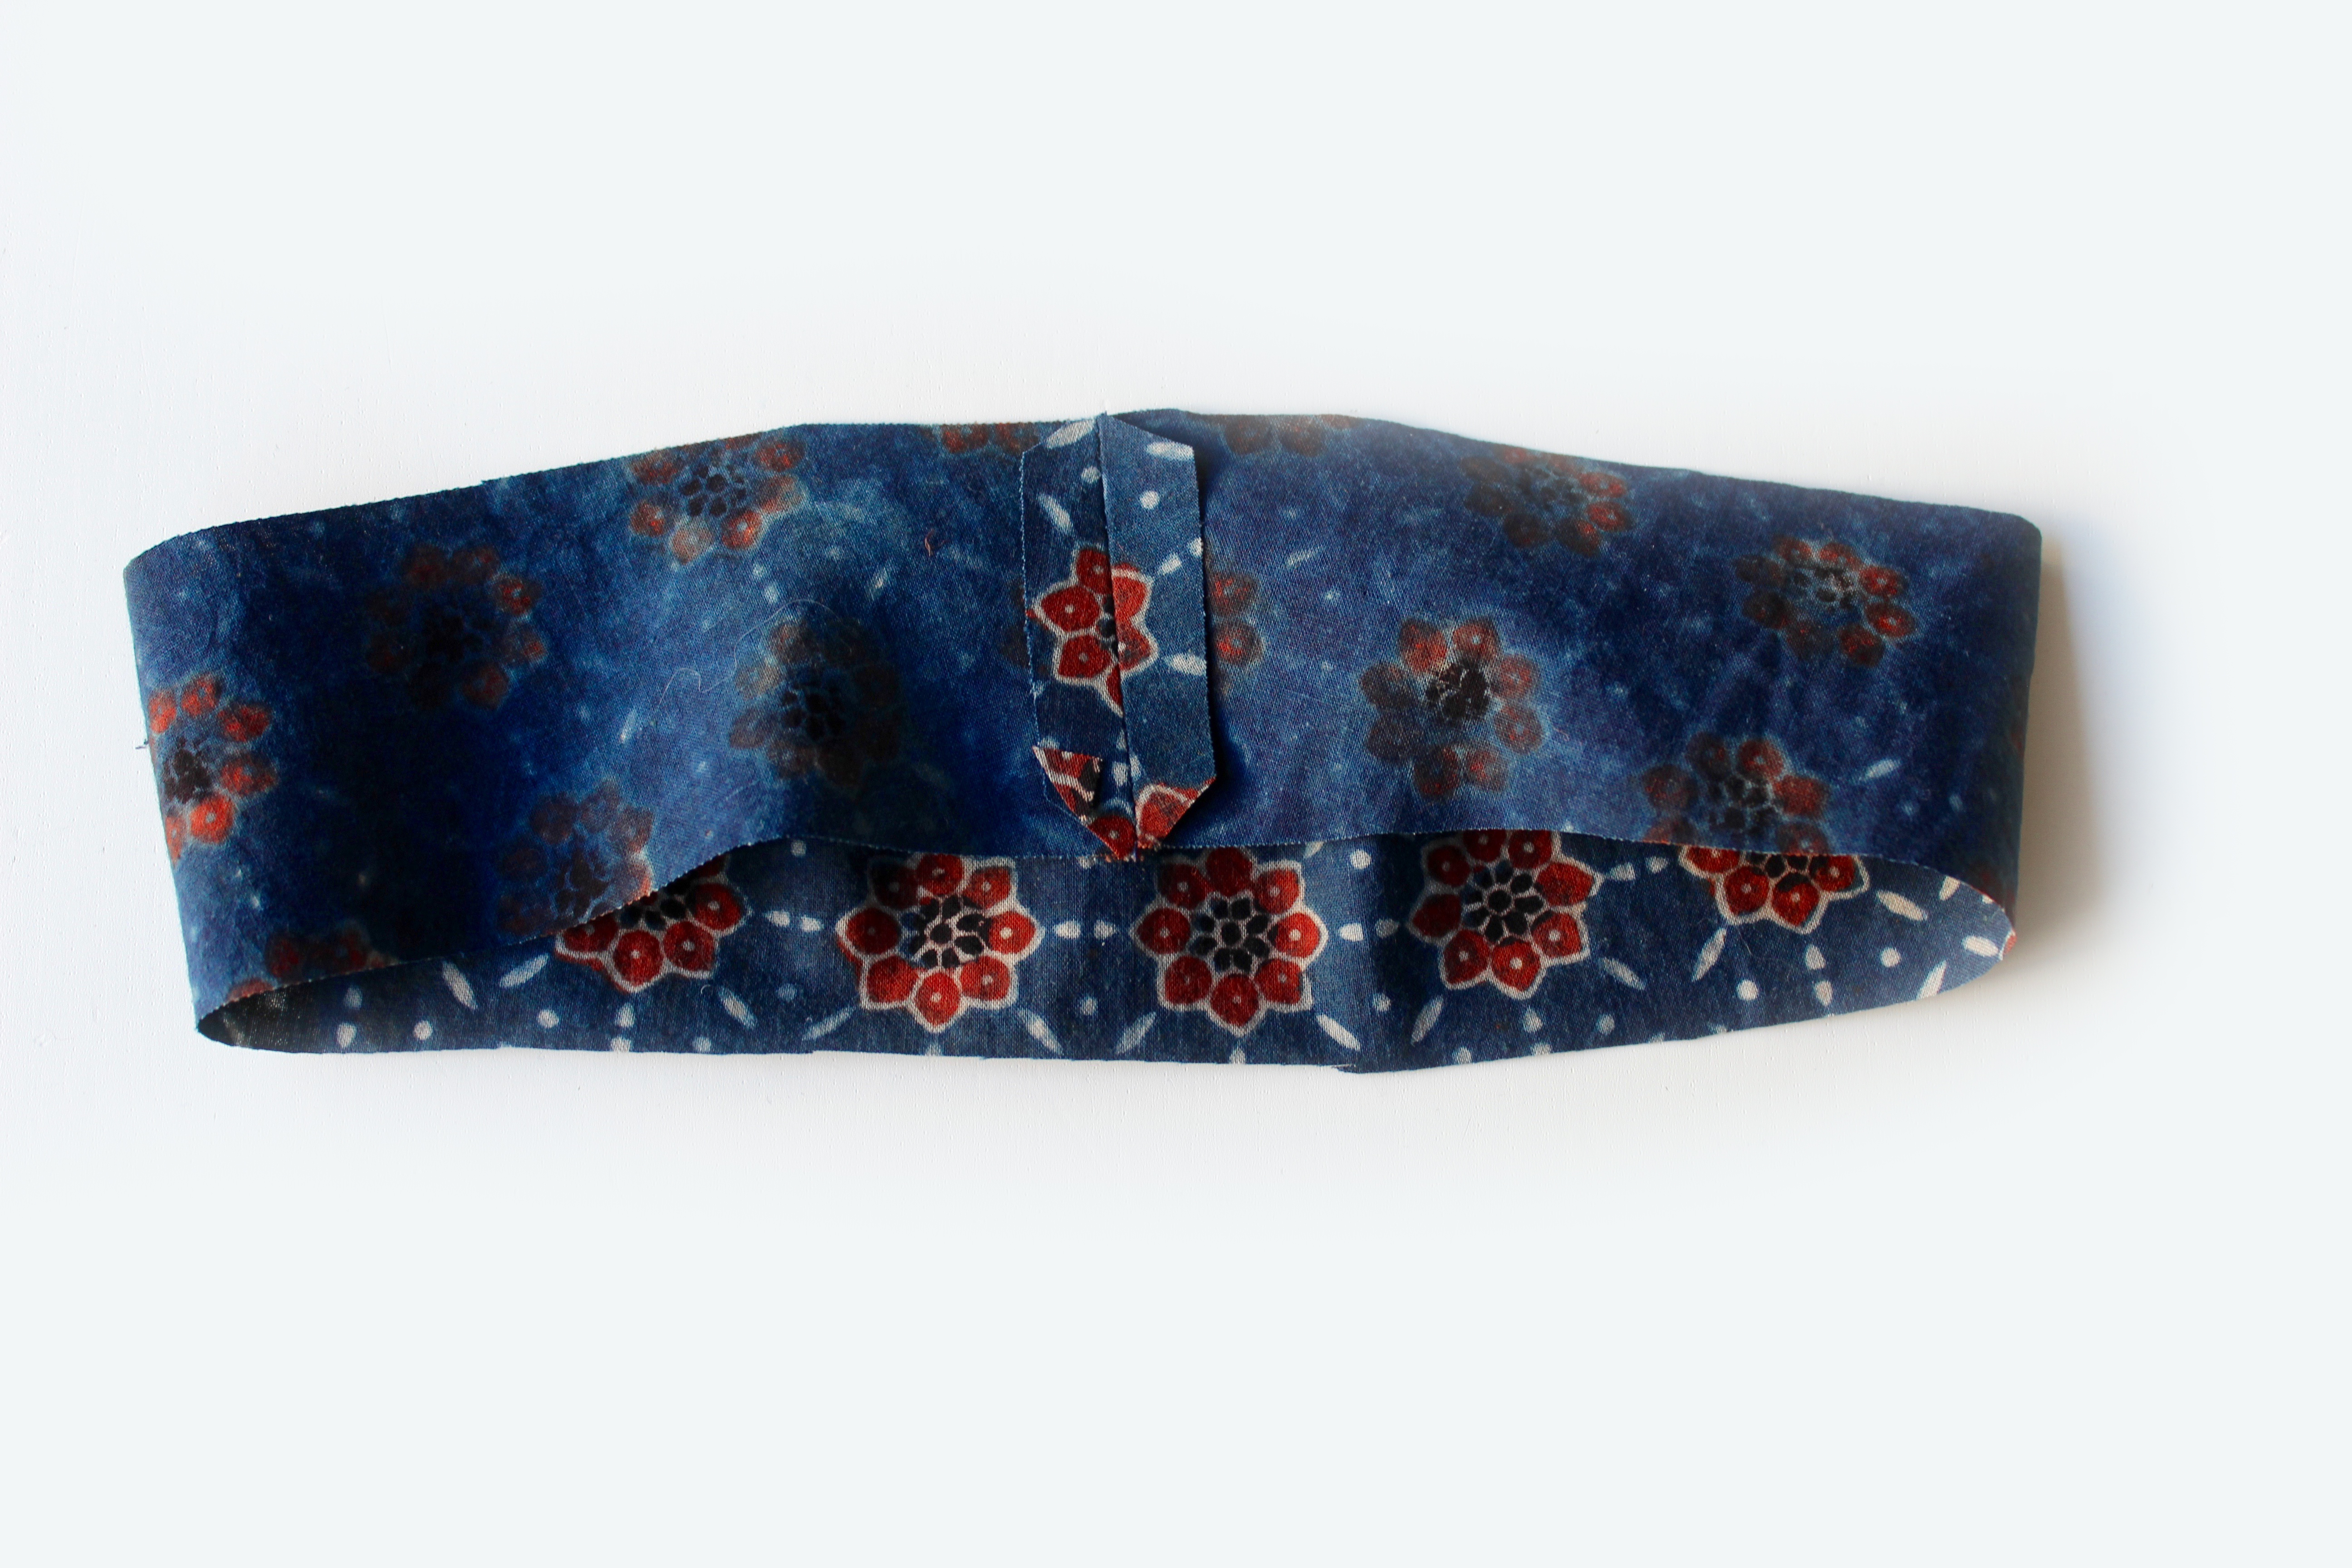
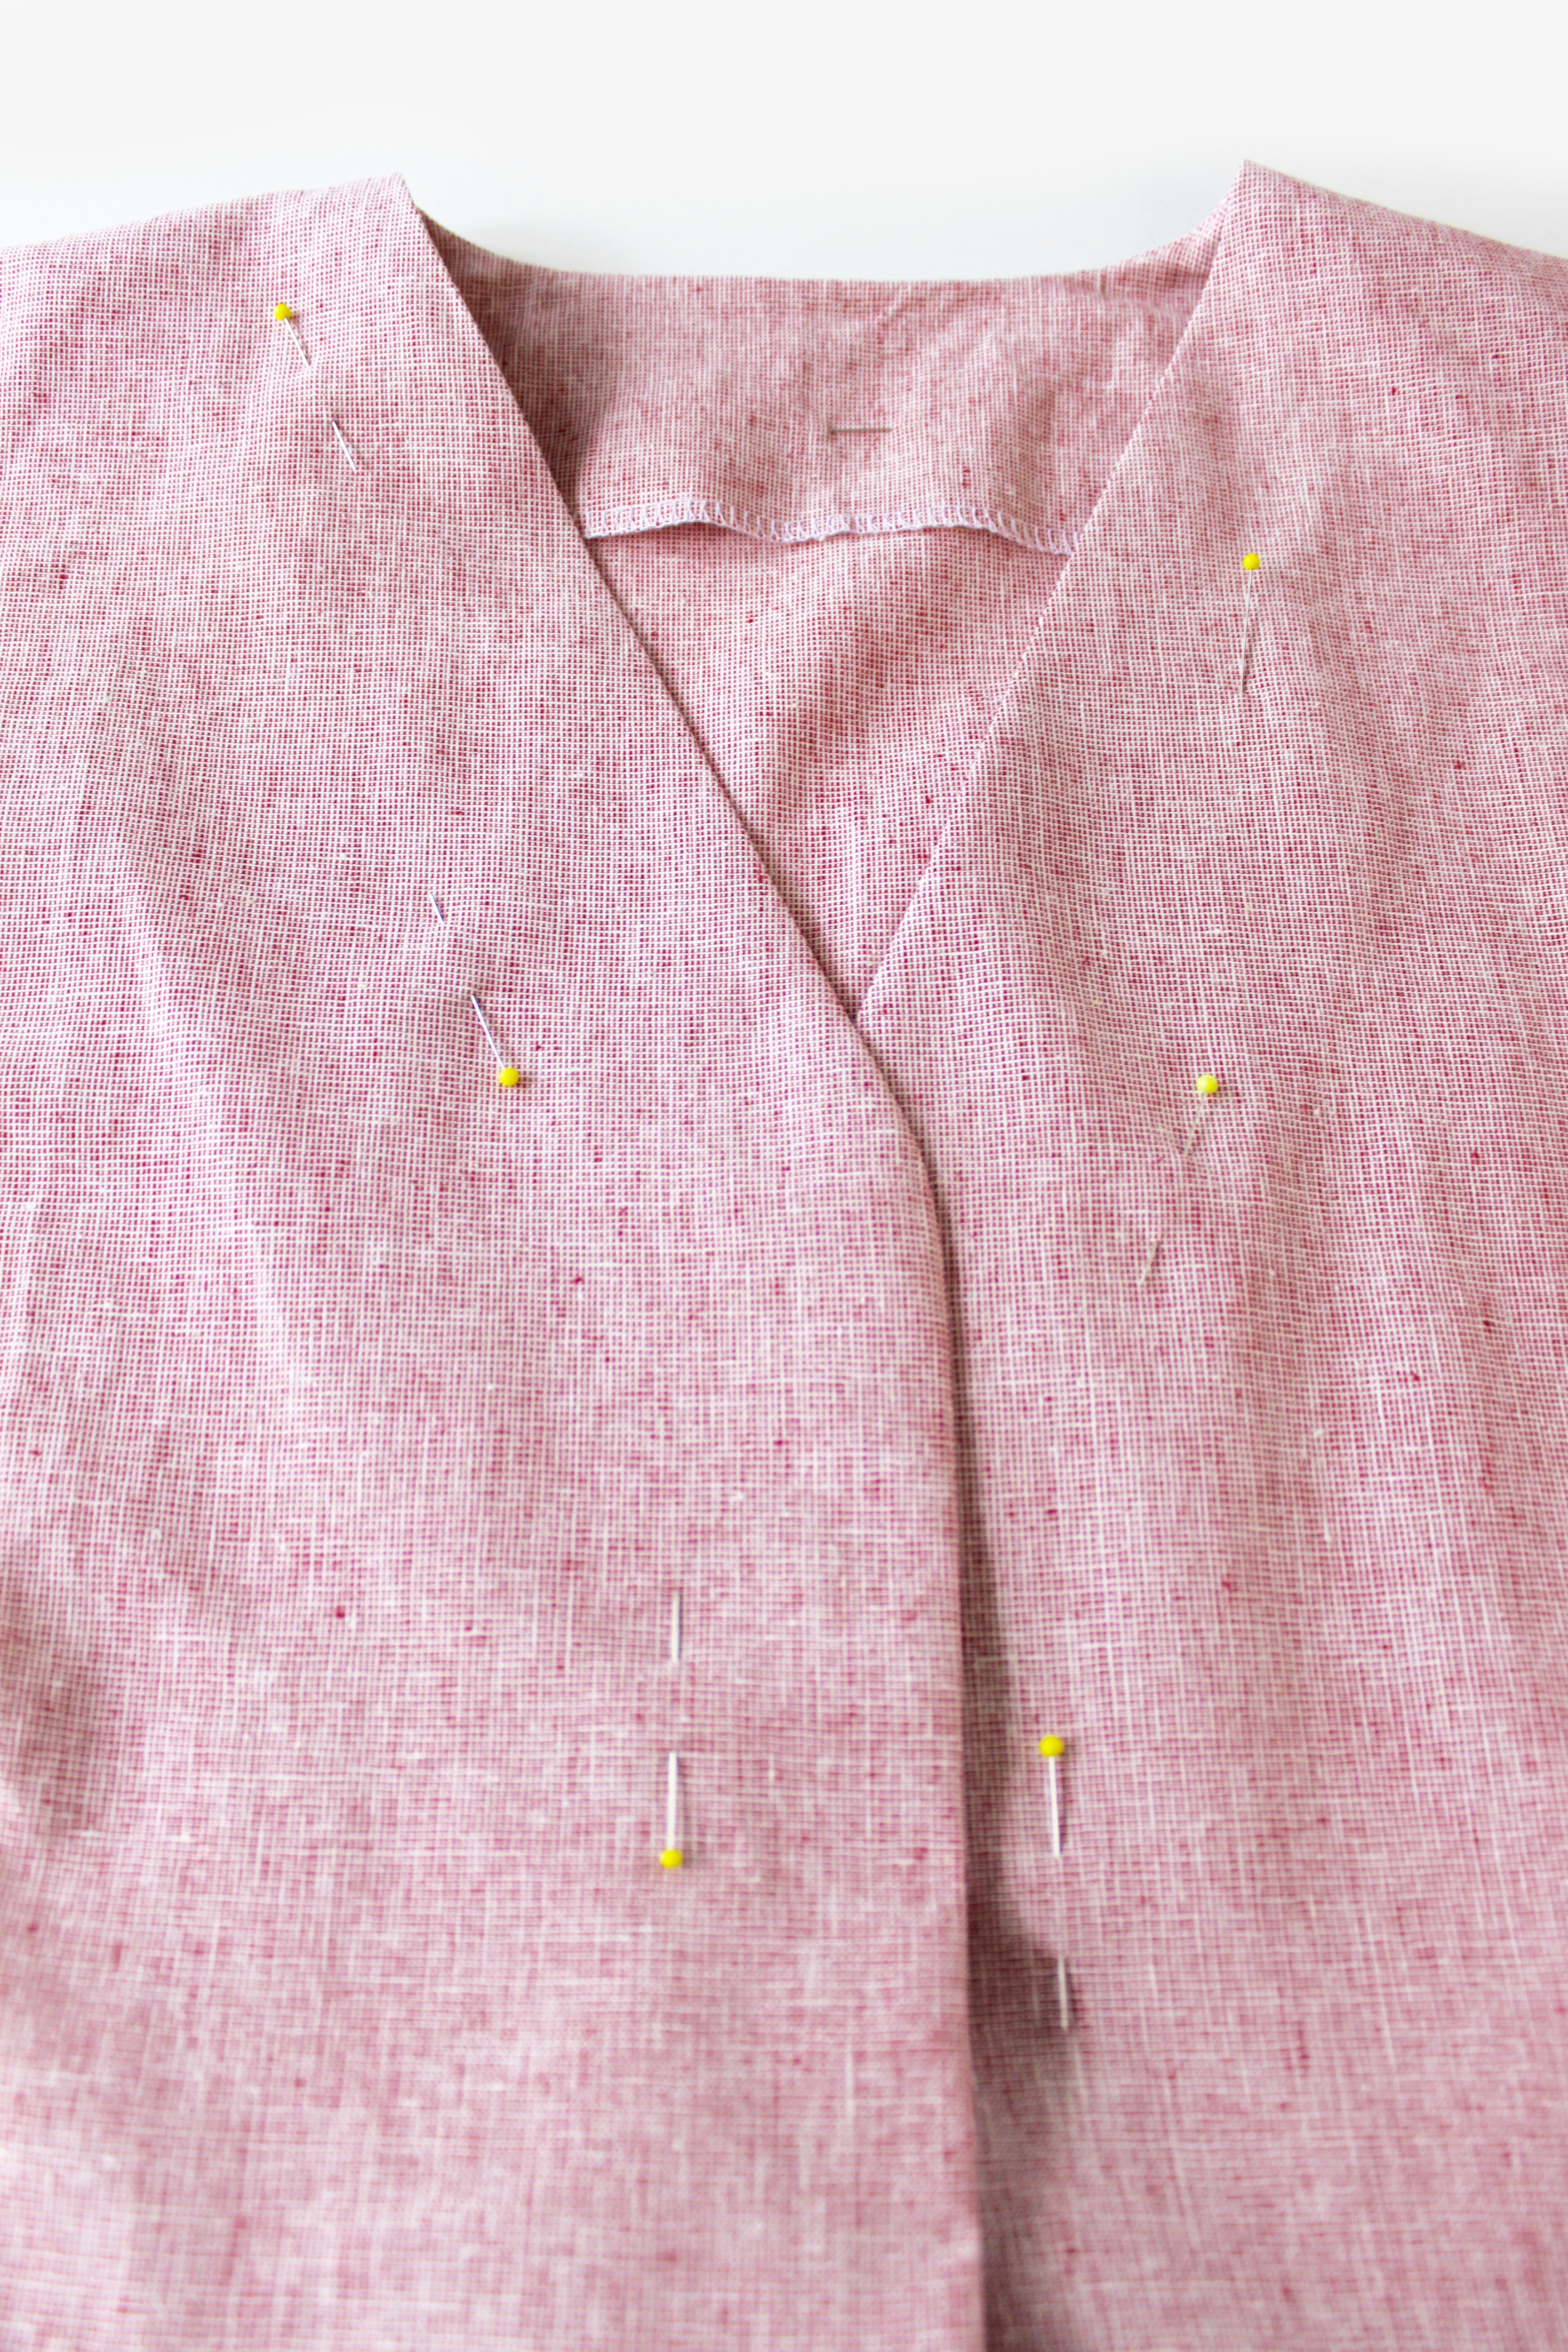
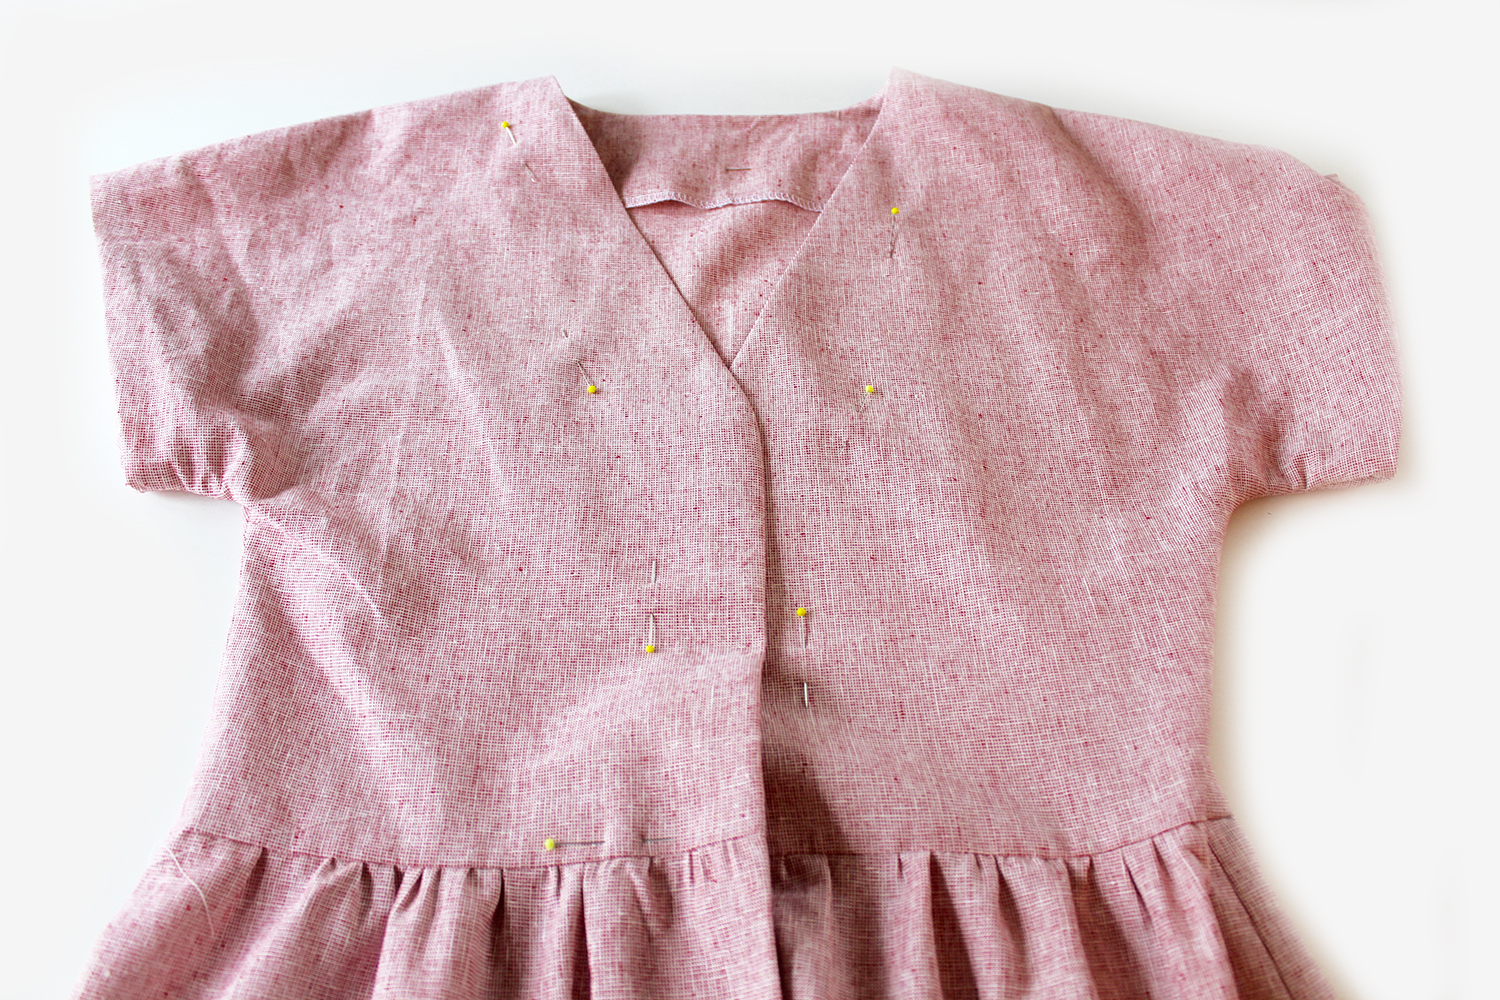
Join the front to back at the shoulder edges. Finish the raw edges. Press them towards the back, then topstitch on the right side. Stay stitch around the neck edge (a line of stitching within the seam allowance to stop the curved section from stretching). Join the facing pieces at the short edges. Press the seam allowances open. Finish the outer edge only. Pin the facing to the neck raw edge. Sew. Nick the seam allowance with small V’s. Careful not to snip your stitching! Press the facing away from the body. You’ve prepared your rouleau as described in the instructions. Pin to the back neck opening just below the seam as shown above. You will need to adjust it to fit your button. Tack stitch to secure. Fold back the facing at the short sides and stitch down the opening edges to secure the rouleau underneath. Trim your seam allowance corners and any excess rouleau ends. Turn the facing to the reverse side, pushing out the corners with a poking tool. Out pops your lovely loop! Pin the front to back at the side edges below the armhole. Finish the raw edges. Press.
SHORT ELASTICATED SLEEVES (For long sleeves scroll down to the next section….)
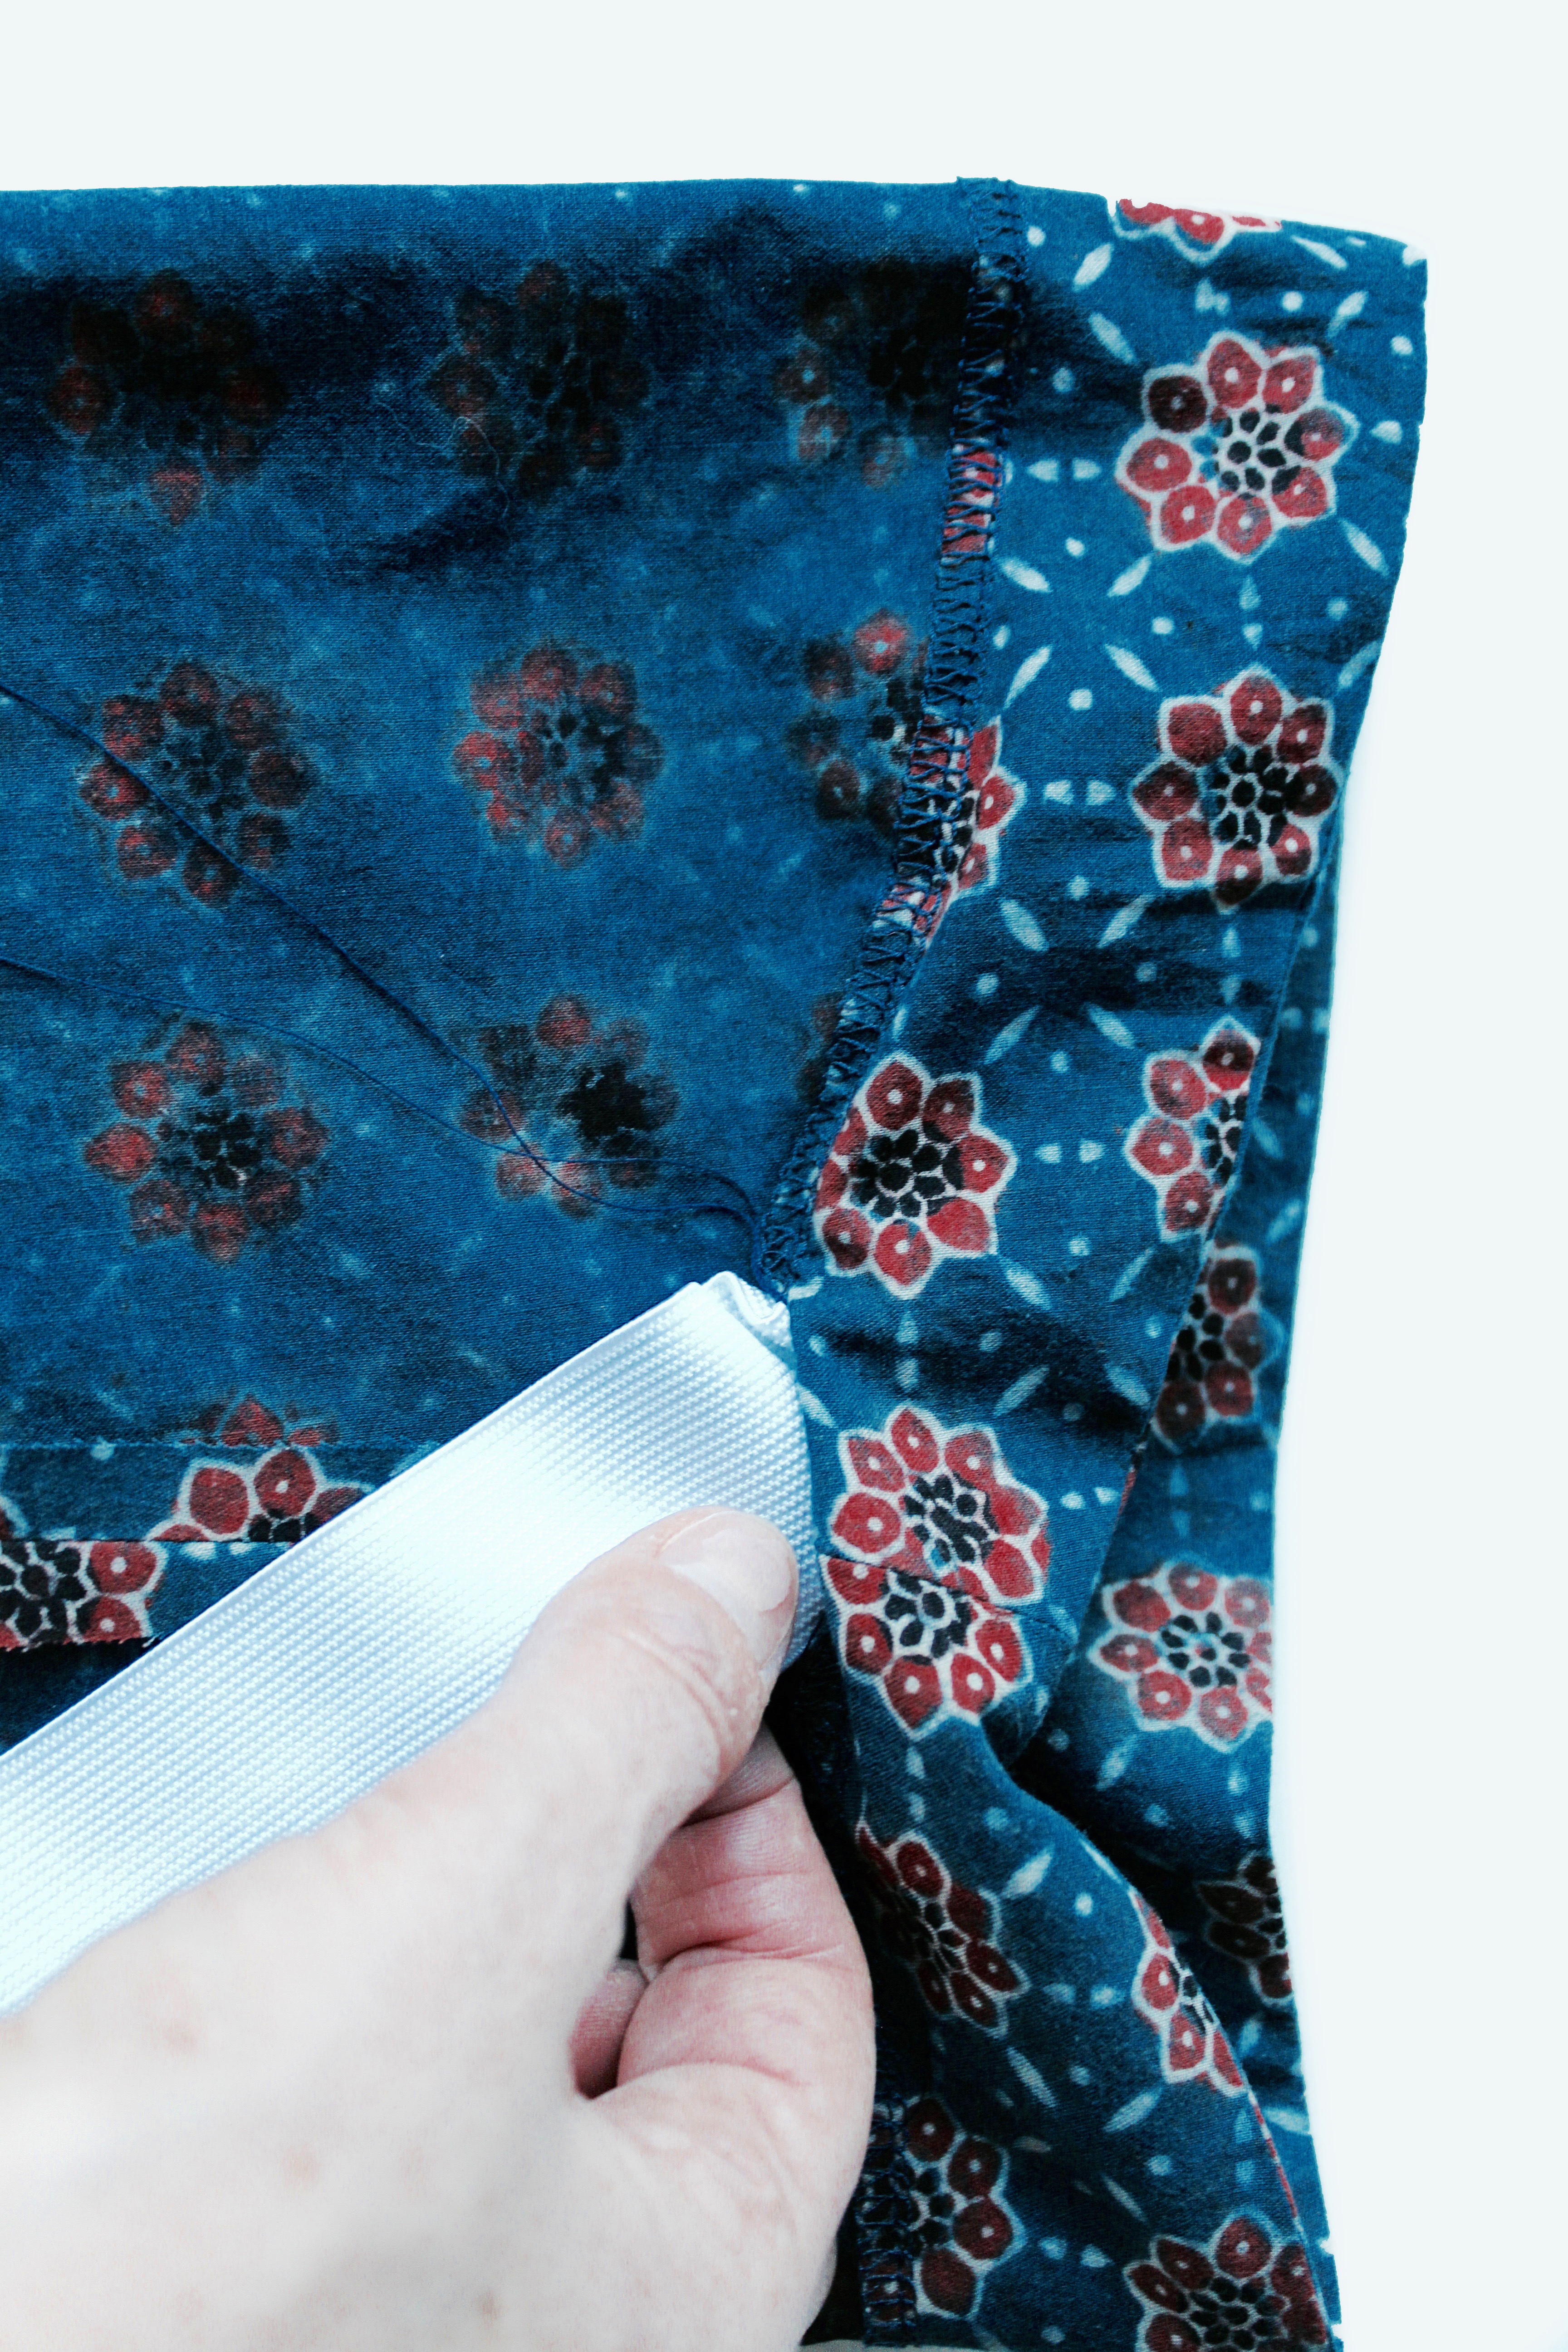
Pin the sleeve together at the side raw edges. Sew. Finish the raw edge. Press. Repeat for the other sleeve. Now make either just a simple hem at the edge or if you prefer an elasticated cuff, continue to the next section and follow the instructions below. Pin the Elastic channel piece together at the short edges. Press the seam allowances open. Pin the longest edge to the sleeve cuff edge with the right sides together. Press away from the sleeve. Fold back the elastic channel so that the seam line is aligned with the fold. NB. If you don’t have an overlocker you could turn under a small hem to neaten the edge. Pin. Sew close to the edge leaving a 4cm opening at the side seam section. Feed in the elastic (cut to size) with a safety pin. Sew together at the ends when you are happy with the fit. Sew up the opening. Ease the elastic evenly.
LONG ELASTICATED SLEEVES
Fold over 1cm then again 3cm at the cuff edge, press. Stitch all around, leaving a 3cm opening. Stitch again 3mm from the far outer edge ensuring you have left a 25mm space for the elastic. You can see here there are two lines of stitching one to secure the hem at the outer edge and one just inside the outer cuff edge. Insert the elastic (cut to size) into the hem with a safety pin, adjust to fit comfortably. Sew the elastic ends together securely. Sew up the opening. Pin then hand tack the sleeve to the armhole, making sure you align the back section of the sleeve head (as indicated by two notches on the pattern) to the back. Sew. Finish the raw edge. Repeat for the other sleeve. Press the seam allowance towards the sleeve and topstitch. Hem the lower edge. Topstitch around the side slits to finish them off nicely.
Self cover buttons… (who doesn’t love a covered button? )
For a 15mm button, cut a piece of fabric approx 25-30mm in diametre. Sew a line of running stitches around the outer edge, pull the threads to gather up the fabric. With the button back placed to one side, pop your button head into the crater and pull the threads some more so that it tightens around the shank. Tuck the raw edges under the claws. Insert the button back on over the shank and push firmly until you hear it snap together. Sew your lovely button on to the back neck opening opposite the loop. I’m very chuffed with my new Peggy top!
All text and images are subject to copyright by Fiona Hesford. Please ask permission if you wish to use any content.
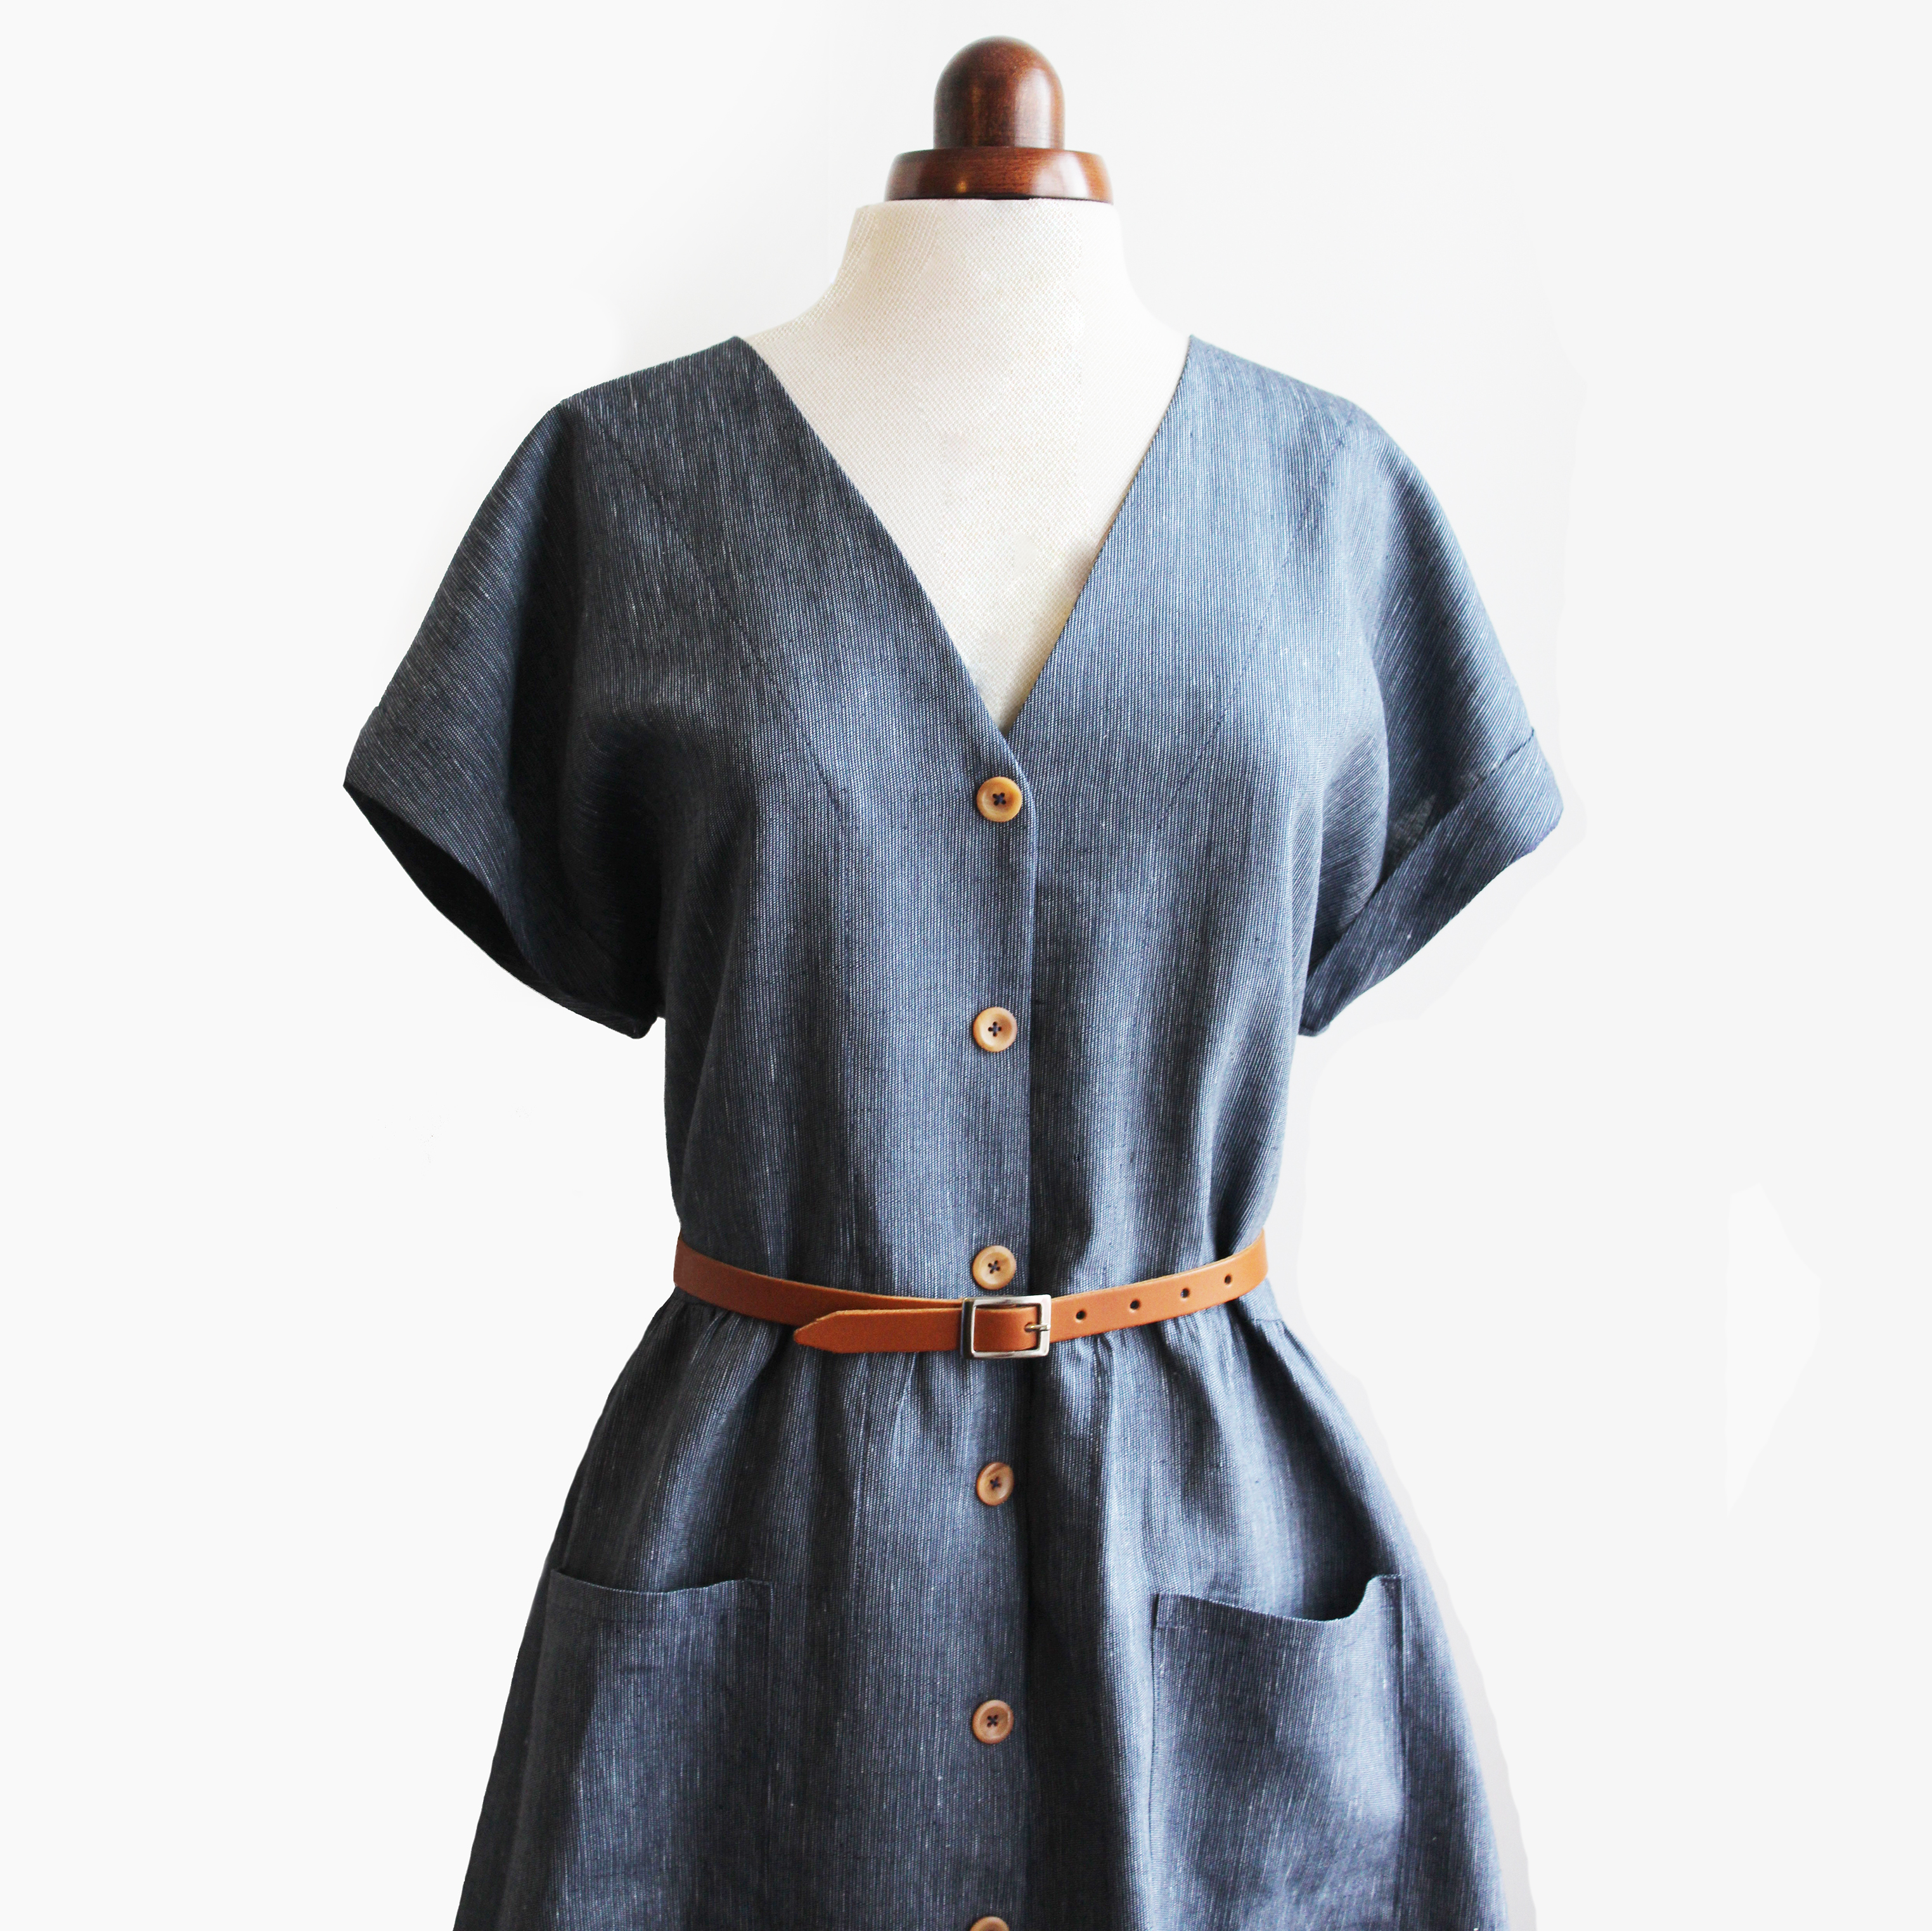
Here she is! A long time coming, but we finally got there. The very fabulous Betty dress pattern… ta dah!
So what can I say about Betty…. well, she is very easy to make, oh so comfortable to wear and well, just lovely really. She’s V-neck, button down (more about that later) with a gathered skirt section on to quite a loose fitting slightly dropped waistline, a curved detail on the side hem is a bit like a shirt style, rolled back sleeves and two patch pockets. The tie belt is optional of course, below shows you a photo of one I wear with a rather smart leather belt (link to where you can buy one at the end of this post.
Now lets talk about buttonholes. There are some people who may be put off by them or don’t want to be bothered with these small but ever so terrifying things, but fear not! Betty can be made without them quite easily. You can pop Betty on with just stitched on buttons. Do you see the blue version below? well that’s exactly what I did with this one, I wanted to live with it first before committing to them, but I’m not sure I will ever get around to doing them but hey whose going to notice!
So Betty is great in all sorts of patterned and plain medium weight cotton fabrics, linen and linen mix fabrics and soft lightweight denims all of which I have in stock on my shop.
Here’s the very lovely Amy Scarr, ex-editor of Love Sewing magazine, in her printed cotton lawn versions of Betty dress, which look just great. You can follow her sewing adventures on Instagram @almondrock_sews or almondrock.co.uk.
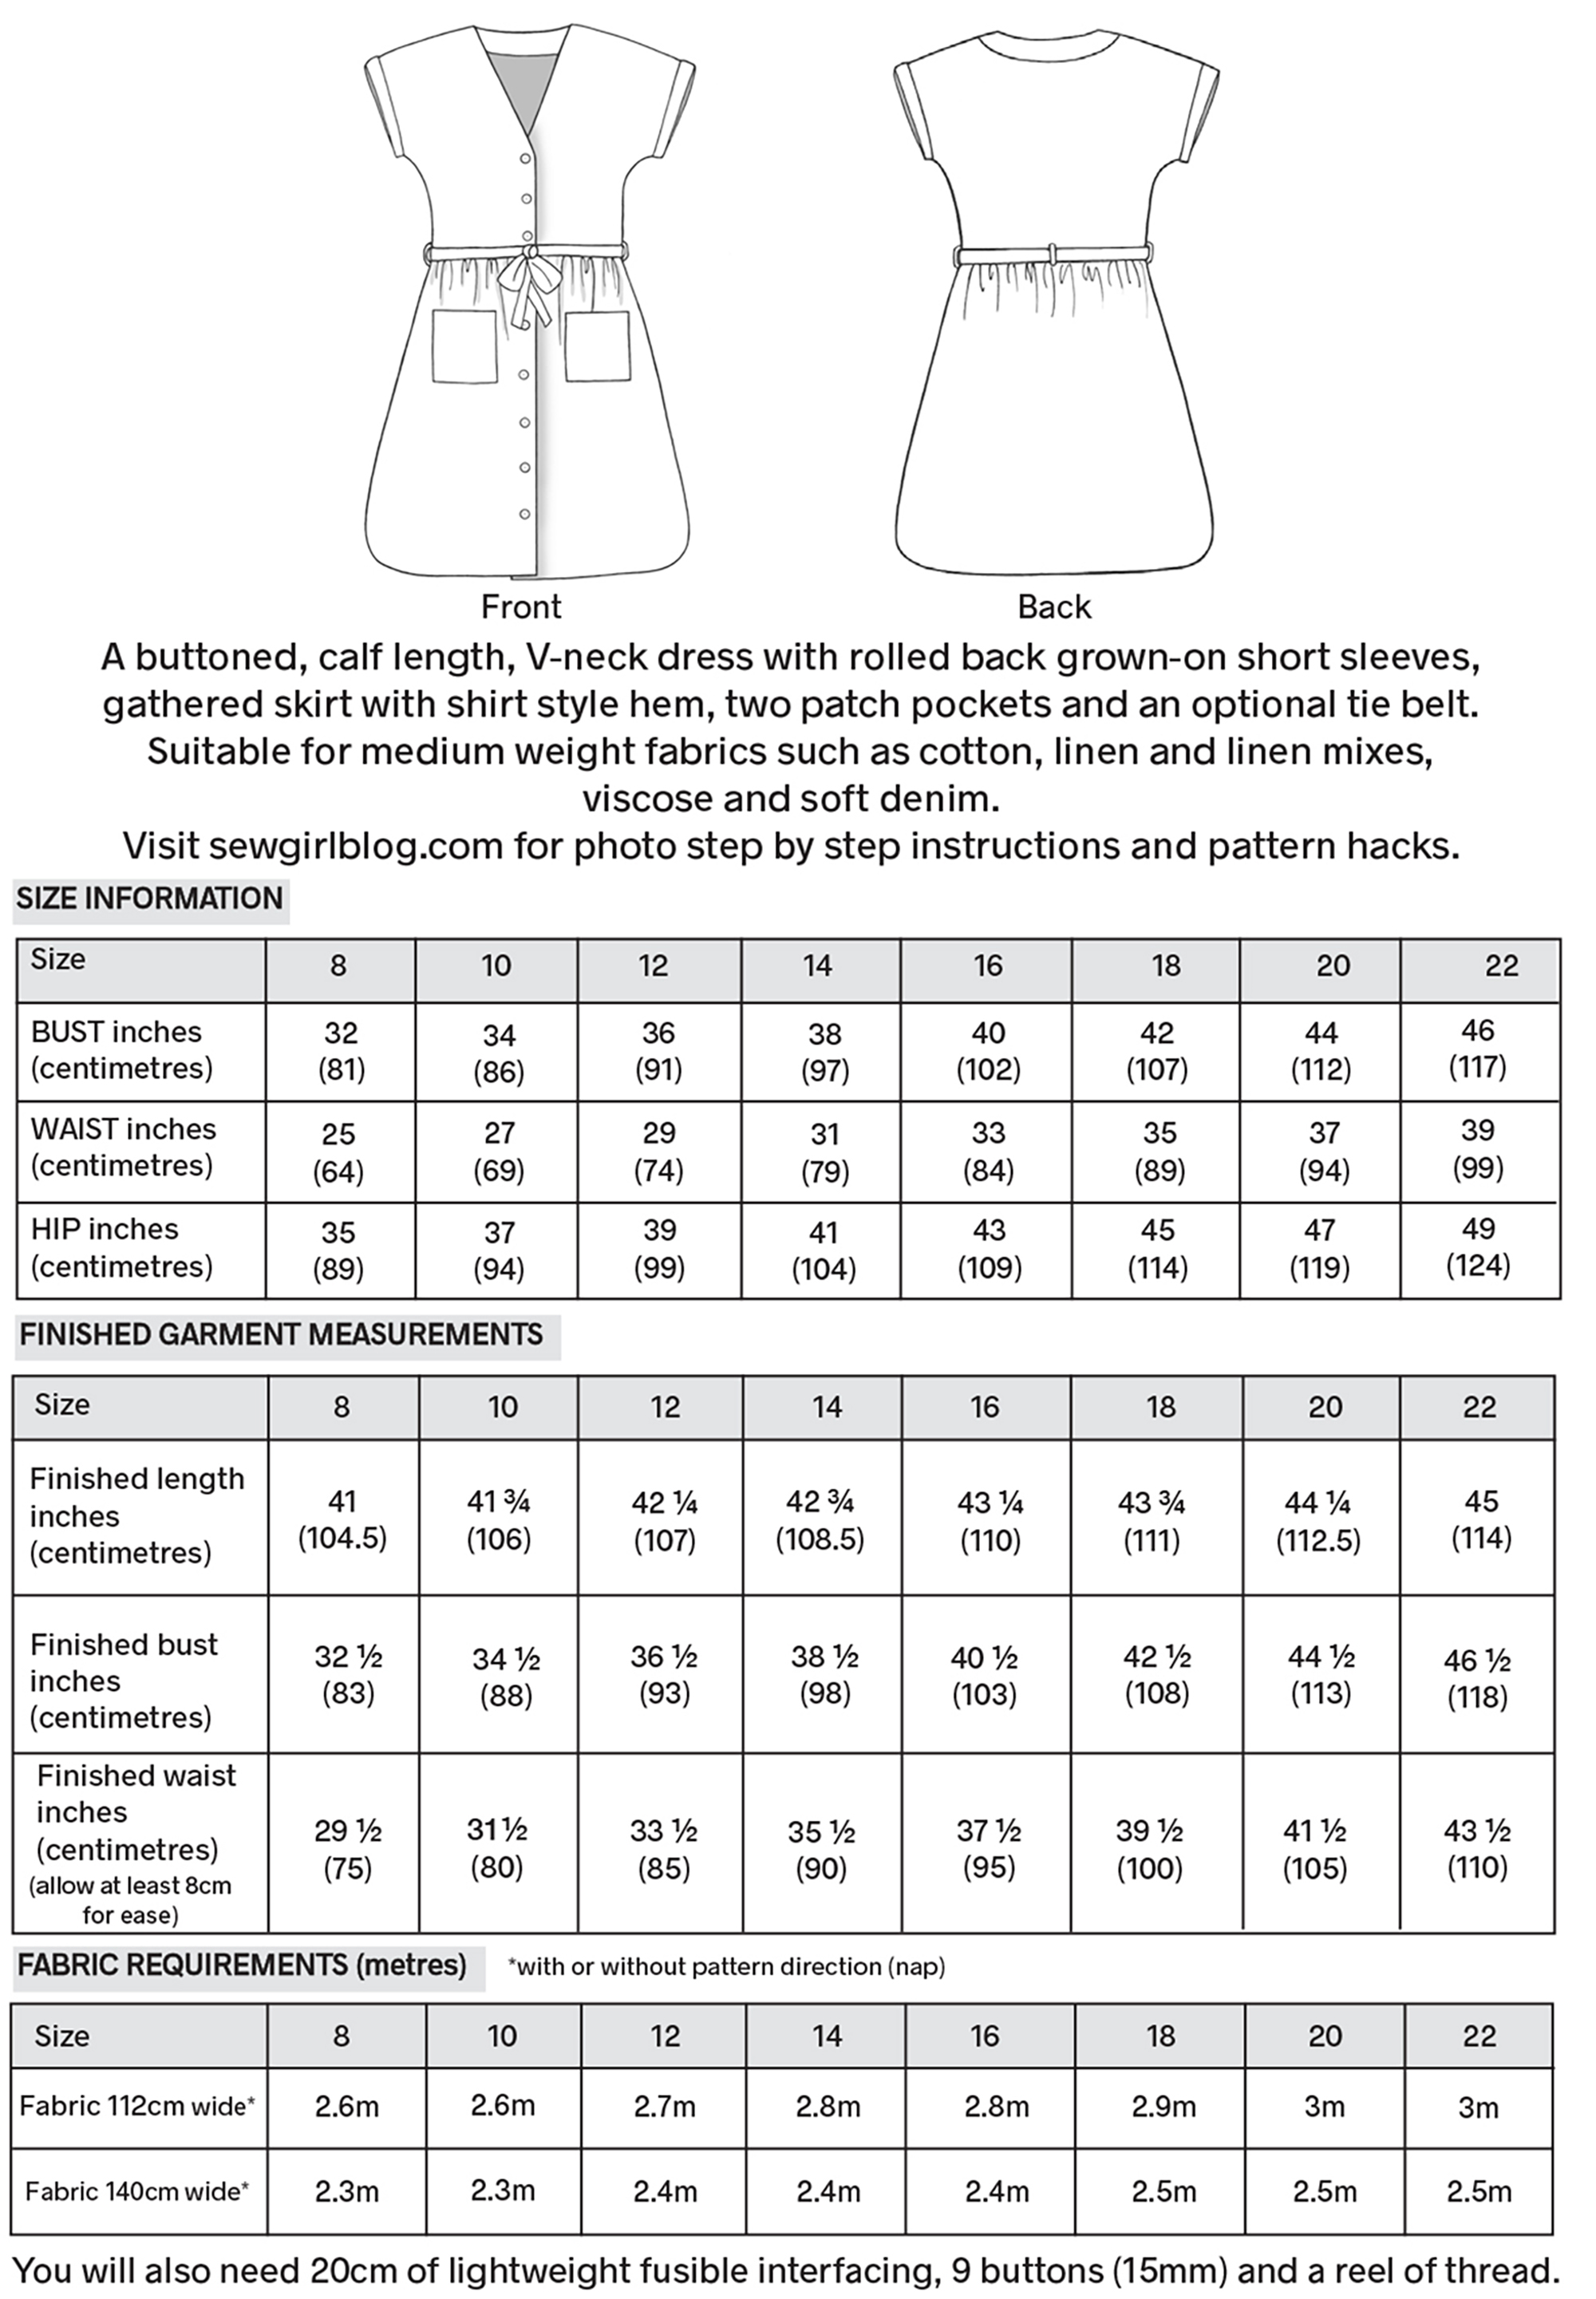
Here is all the info about sizes, finished measurements and fabric requirements.
SEWING A BETTY DRESS
Seam allowance is 1cm. RST= Right Sides Together.
Before you start here are some pattern cutting tips.
Use pattern weights or pins to secure fabric in position.
Make tailors tacks in the same way on the bodice centre front.
Make one tailors tack to mark the stopping point on the side seam.
After removing the pattern gently, the thread markers will be transferred to the fabric.
Make tailors tacks in the centre of your size button circles before removing the pattern.
Also on the skirt section.
Making adjustments to Betty
You may want to make the bodice or skirt section shorter or longer.
So, if this is the case, firstly, measure for your size according to the pattern size info (shown above). Then you need to measure yourself for the desired bodice length from top of the shoulder to the desired length. Now add on 2cm to this measurement for the seam allowances. Next, compare this length to the pattern and you may find that you require a shorter/longer length from one of the other sizes. I prefer to fold back my pattern to the desired line to keep it intact, but if you are drafting your pattern, you just trace the required line.
If you adjust the bodice length, remember its going to make the dress shorter or longer so check that measurement is good and you are happy with the adjustment. If you need to make the skirt section shorter or longer do so at the top edge of the skirt section. Its gathered at the top edge so any extra width will be lost in the gathering.
Finally adjust the button positions accordingly.
HOW TO MAKE BETTY DRESS
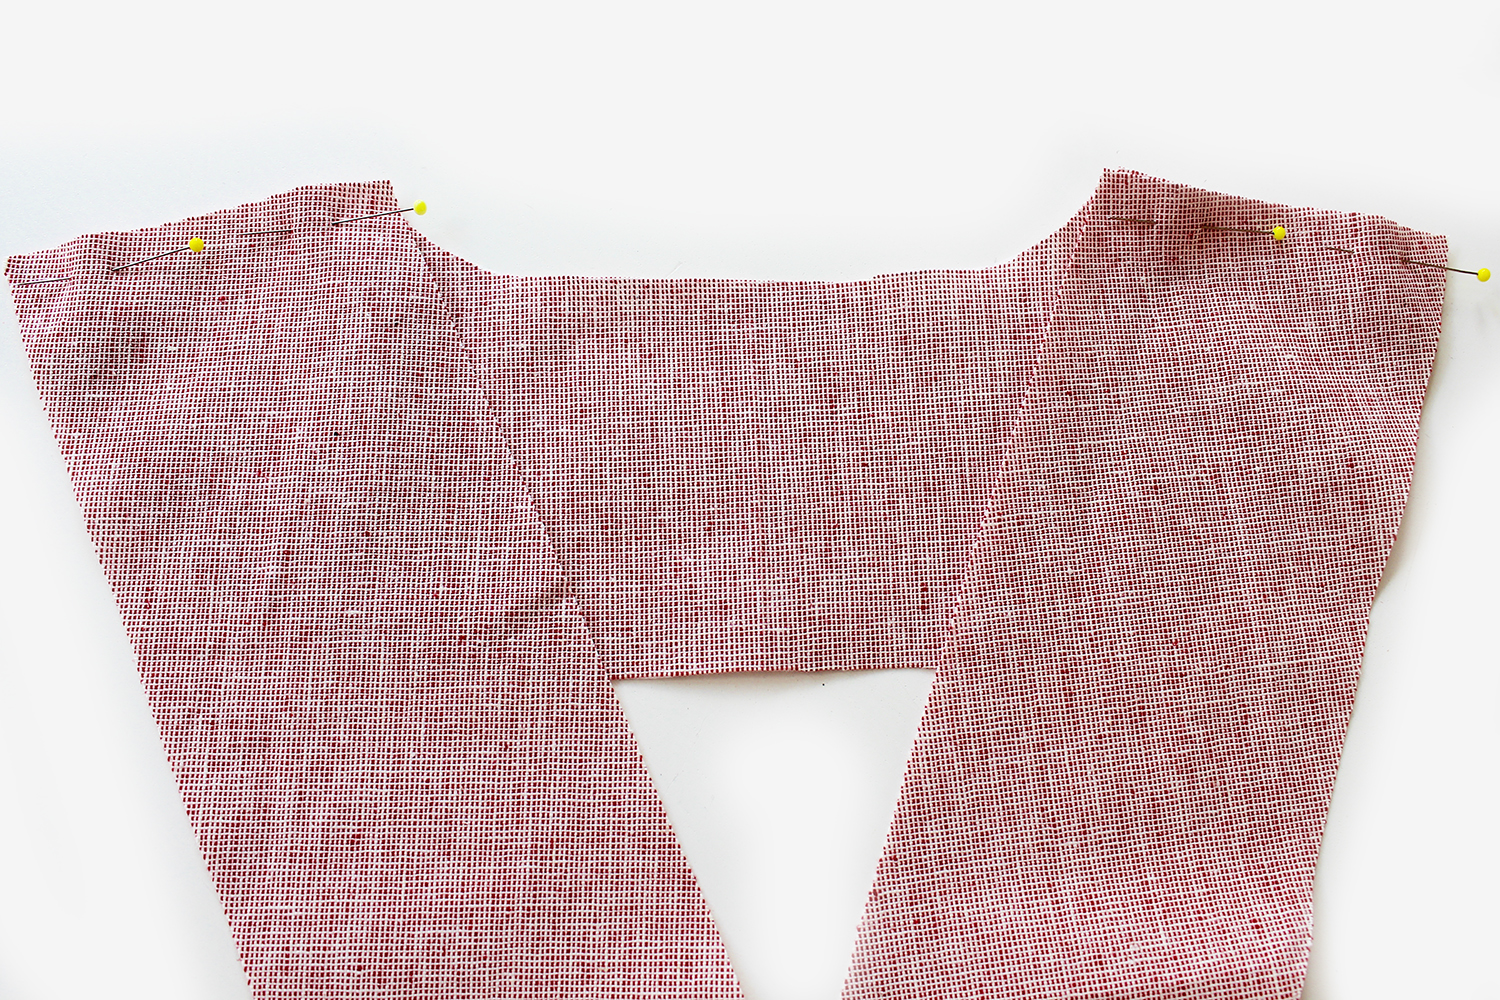
JOINING THE SHOULDERS
Joining the shoulder seams. Finish the raw edges, pressing towards the back. Topstitching.
SKIRT SECTION
Sew the front to back at the side edges with the RST. Finish the raw edges.
Sew the skirt together at the side edges with the RST. Press.
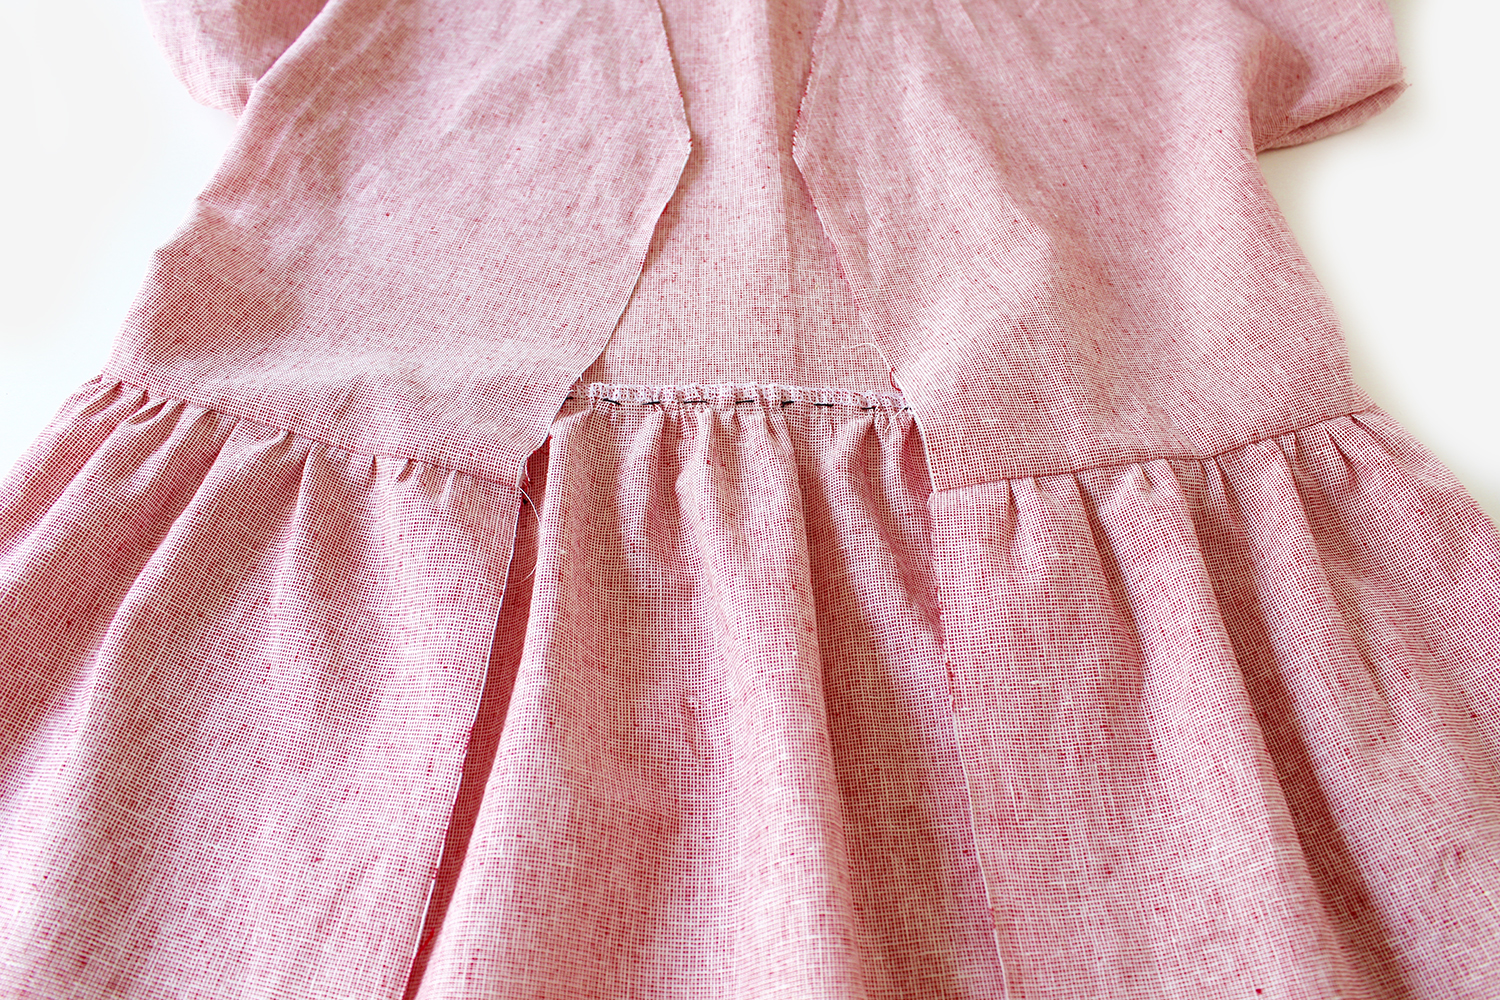
Gather up the fabric at the top edge of the skirt section.
Attach to the bodice with the RST. Press the seam allowance upwards. Topstitch on the bodice side.
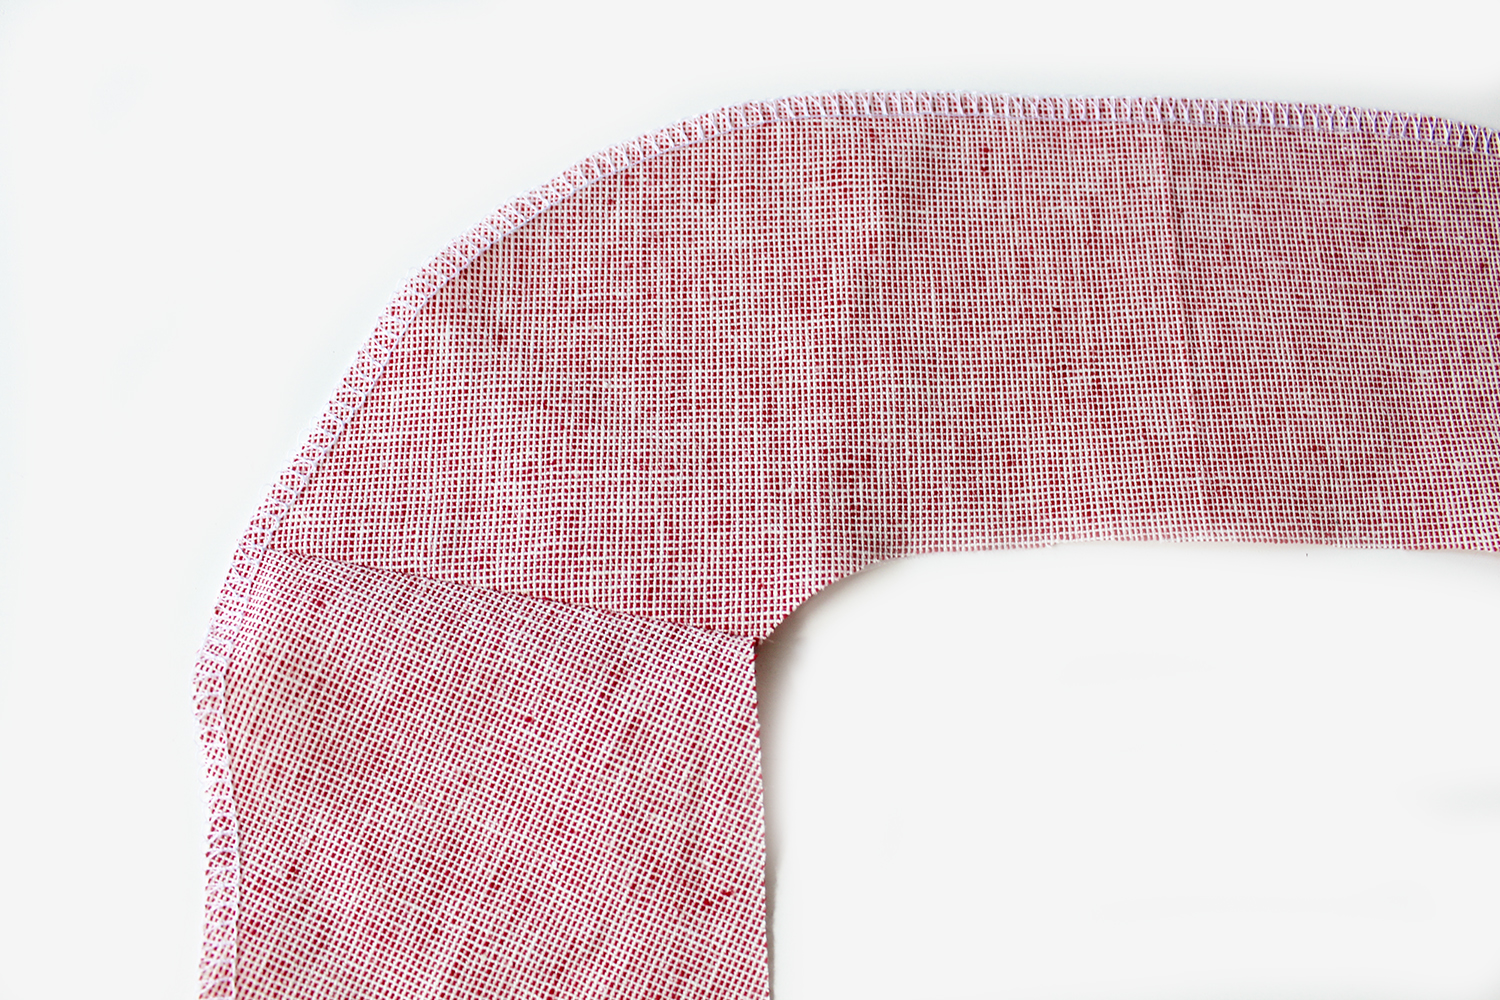
FACINGSJoin the facings front and back at the short edges with the RST. Press open. Finish the outer edge.Pin to the centre front and back neck edge. Sew. Press the facing away from the body. Understitch.
Fold back the facing at the centre lower edge with the RST. Stitch across 1cm up from the lower edge. Trim across the corner, then turn inside out, pushing out the corners with a poking tool.
Press the facing to the reverse side all around. Pin. Hand tack. Top stitch on the reverse side close to the outer edge to secure the facing.
POCKETS
Make your pockets by hemming the top edge and finishing the outer 3 edges. Press over 1cm at these 3 edges.
Pin to the body. Hand tack stitch. Topstitch close to the edge.
SLEEVES
Fold over a 4cm hem at the sleeve edge. Press. Pin. Stitch.
Fold back 2cm. Press. Secure with a few hand stitches at the underarm cross seam to secure if required.
Make your buttonholes, use the position on the template as a guide.
Make your 3 tabs by pressing inwards 1cm each long side, then fold in half. Press, stitch down each long side. Fold up 1cm each short end. Pin to the dress at the sides and centre back. Stitch across the top and lower edge to secure.
TIE BELT
Join the belt pieces together at the short sides with the RST. Press the seam allowances open.
Fold in half so the long edges are matching with the RST. Press. Stitch down one long raw side and across the short diagonal sides, leaving approx 4cm opening at the centre point for turning inside out. Trim the seam allowance to 5mm.
Turn inside out through the opening. These loop turner tools are really useful for this.
Press. Topstitch all around the outer edge, which seals up the opening at the same time. Tie in a lovely big bow and woo hoo…..ready to go!
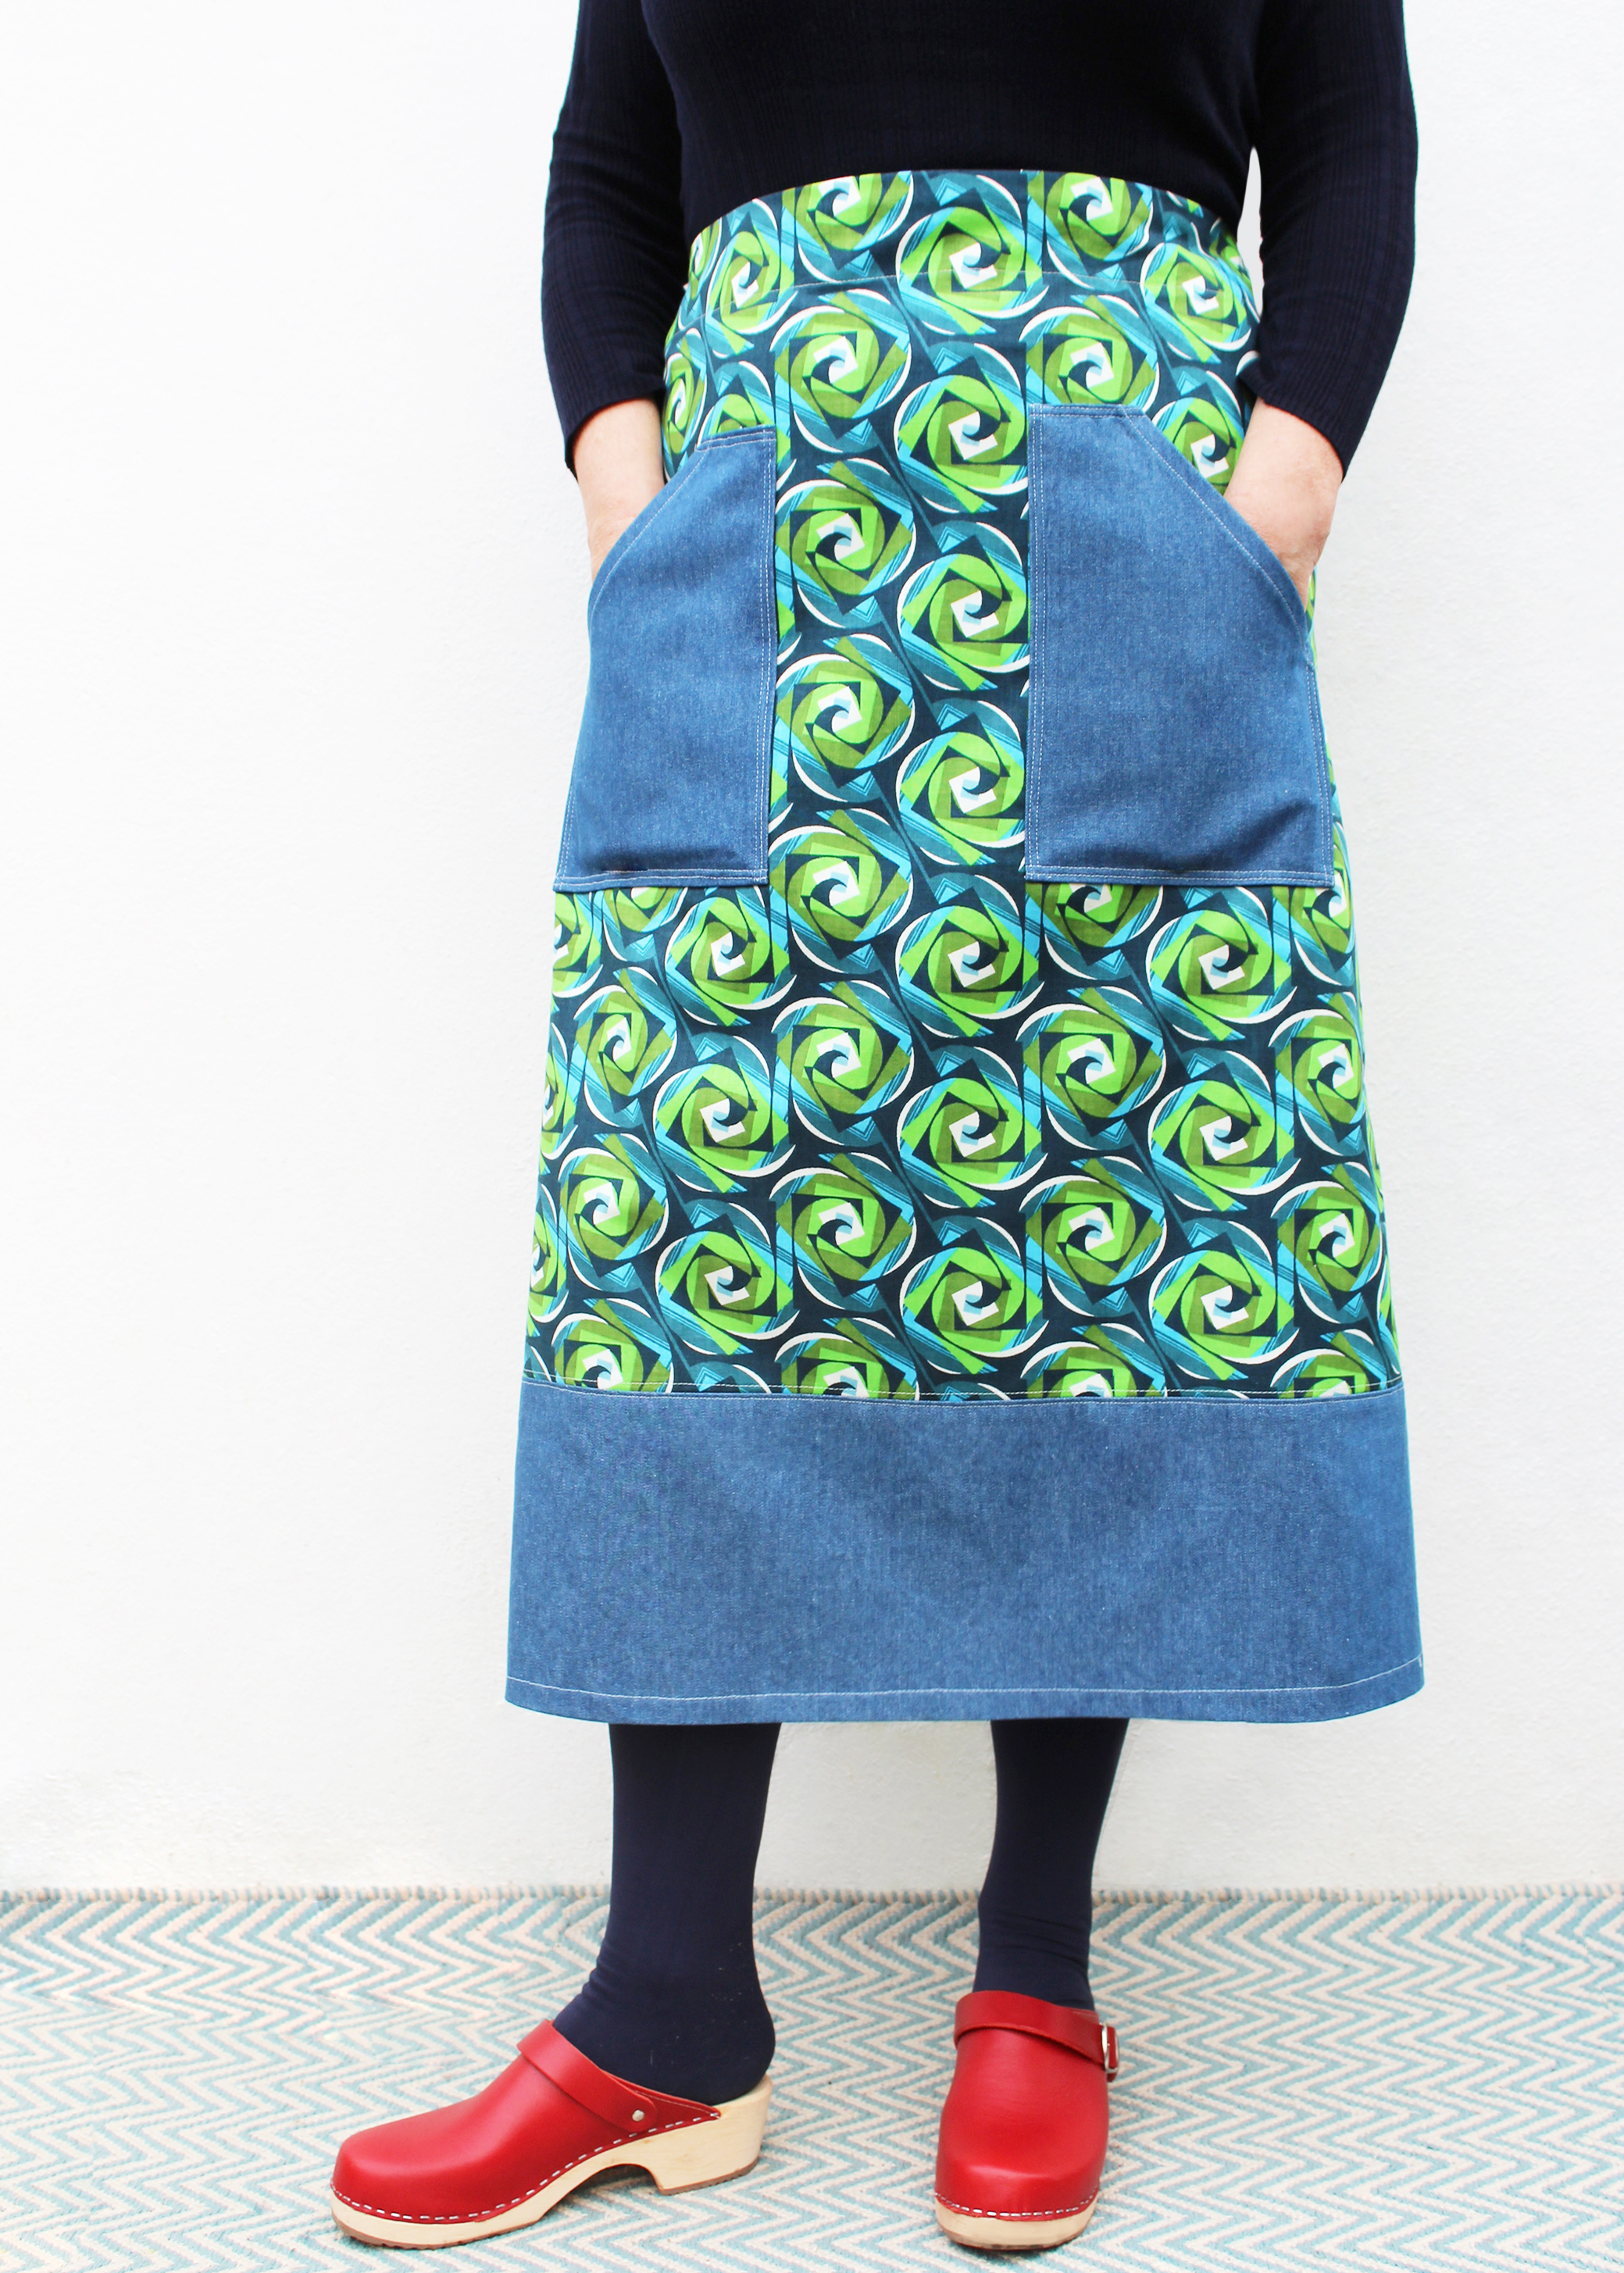
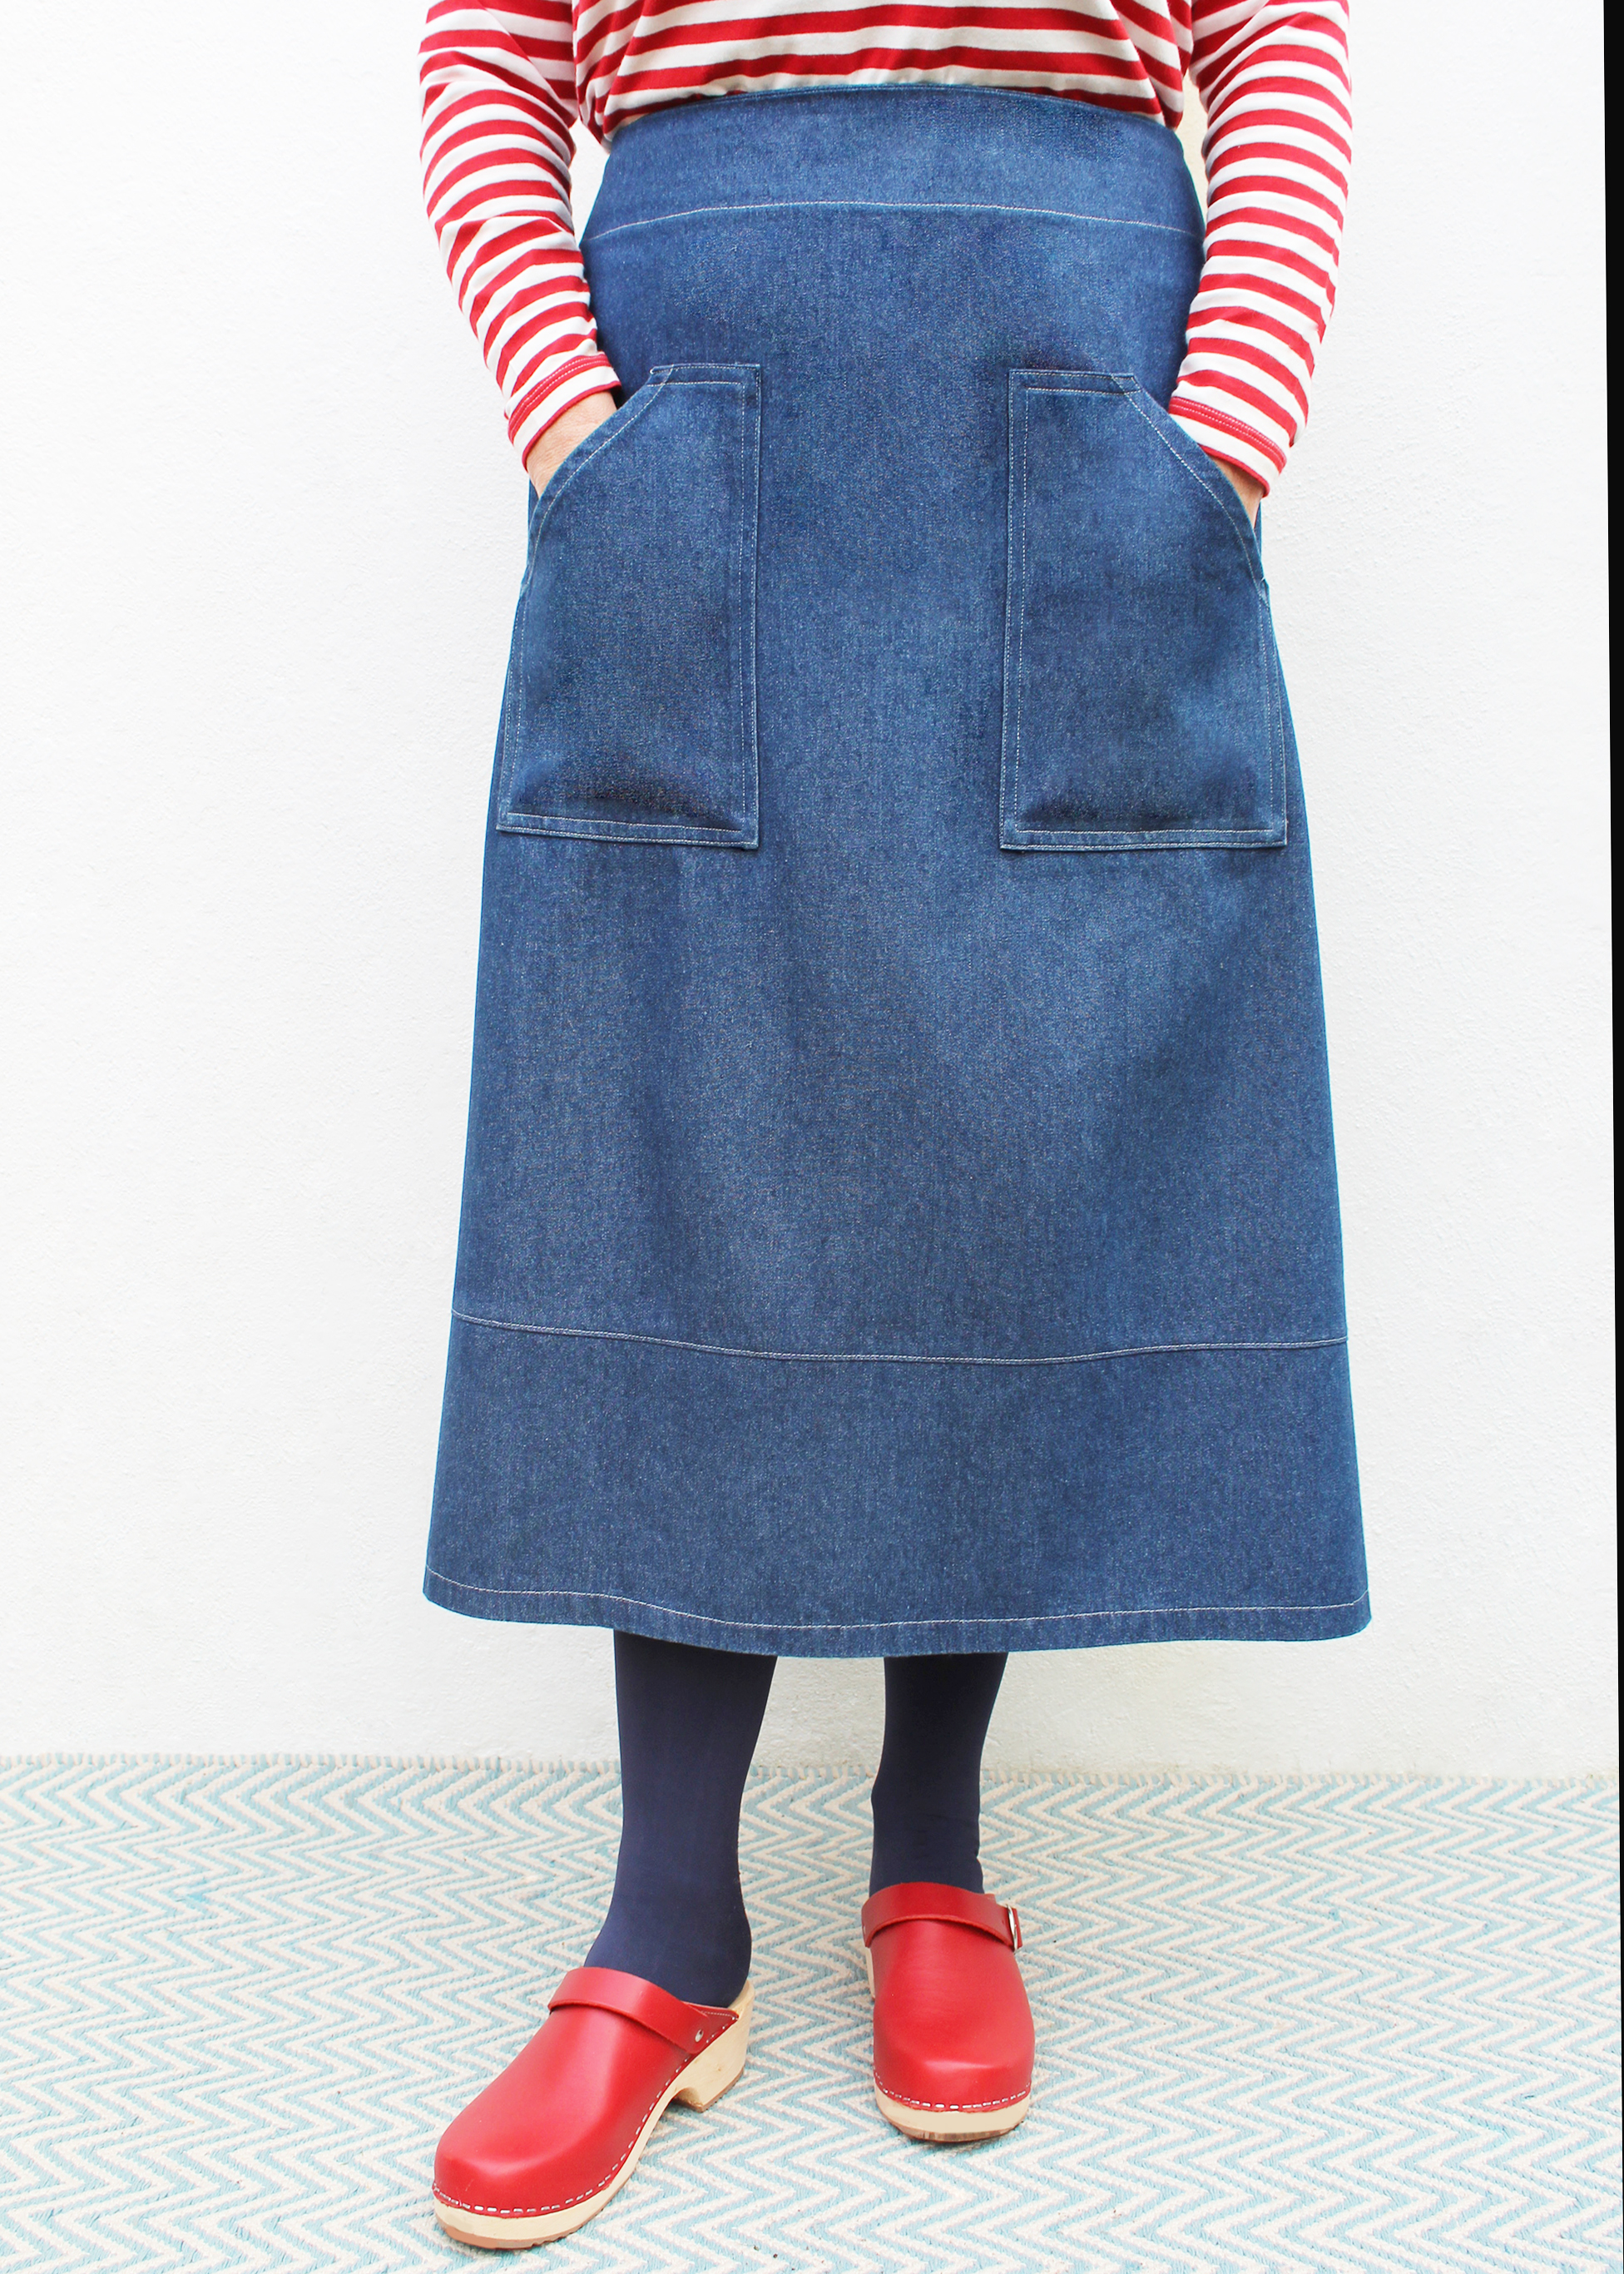
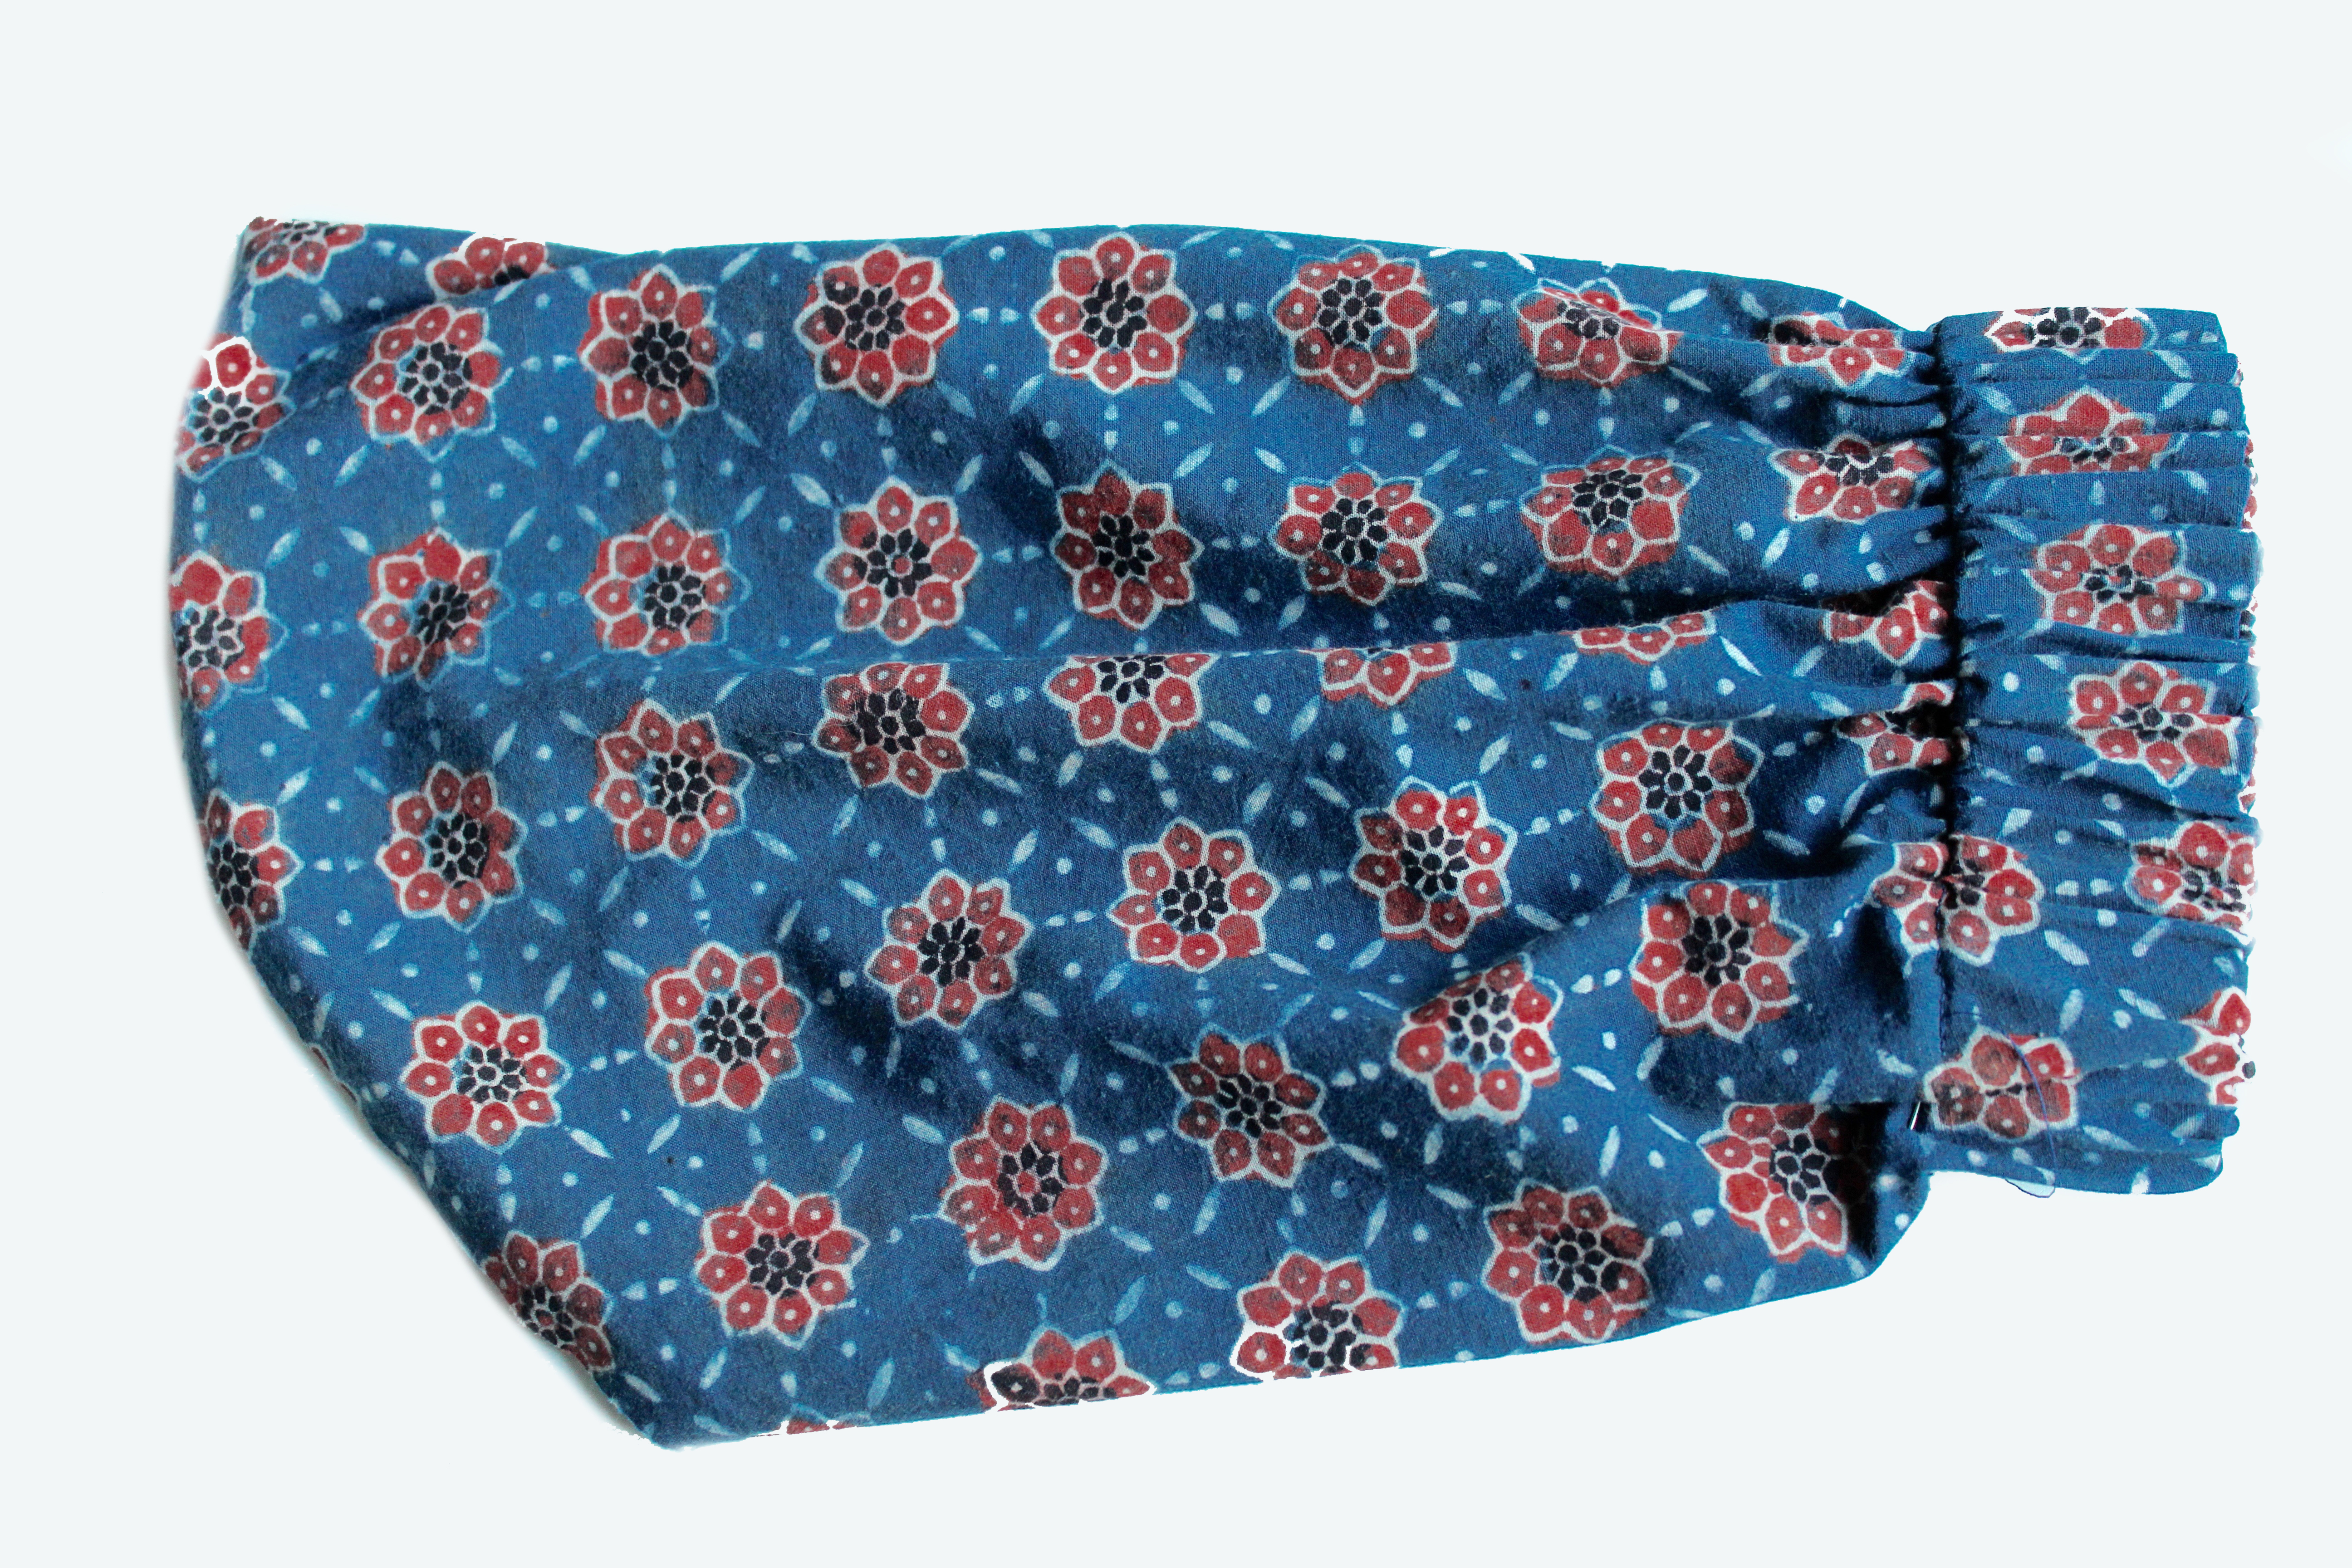
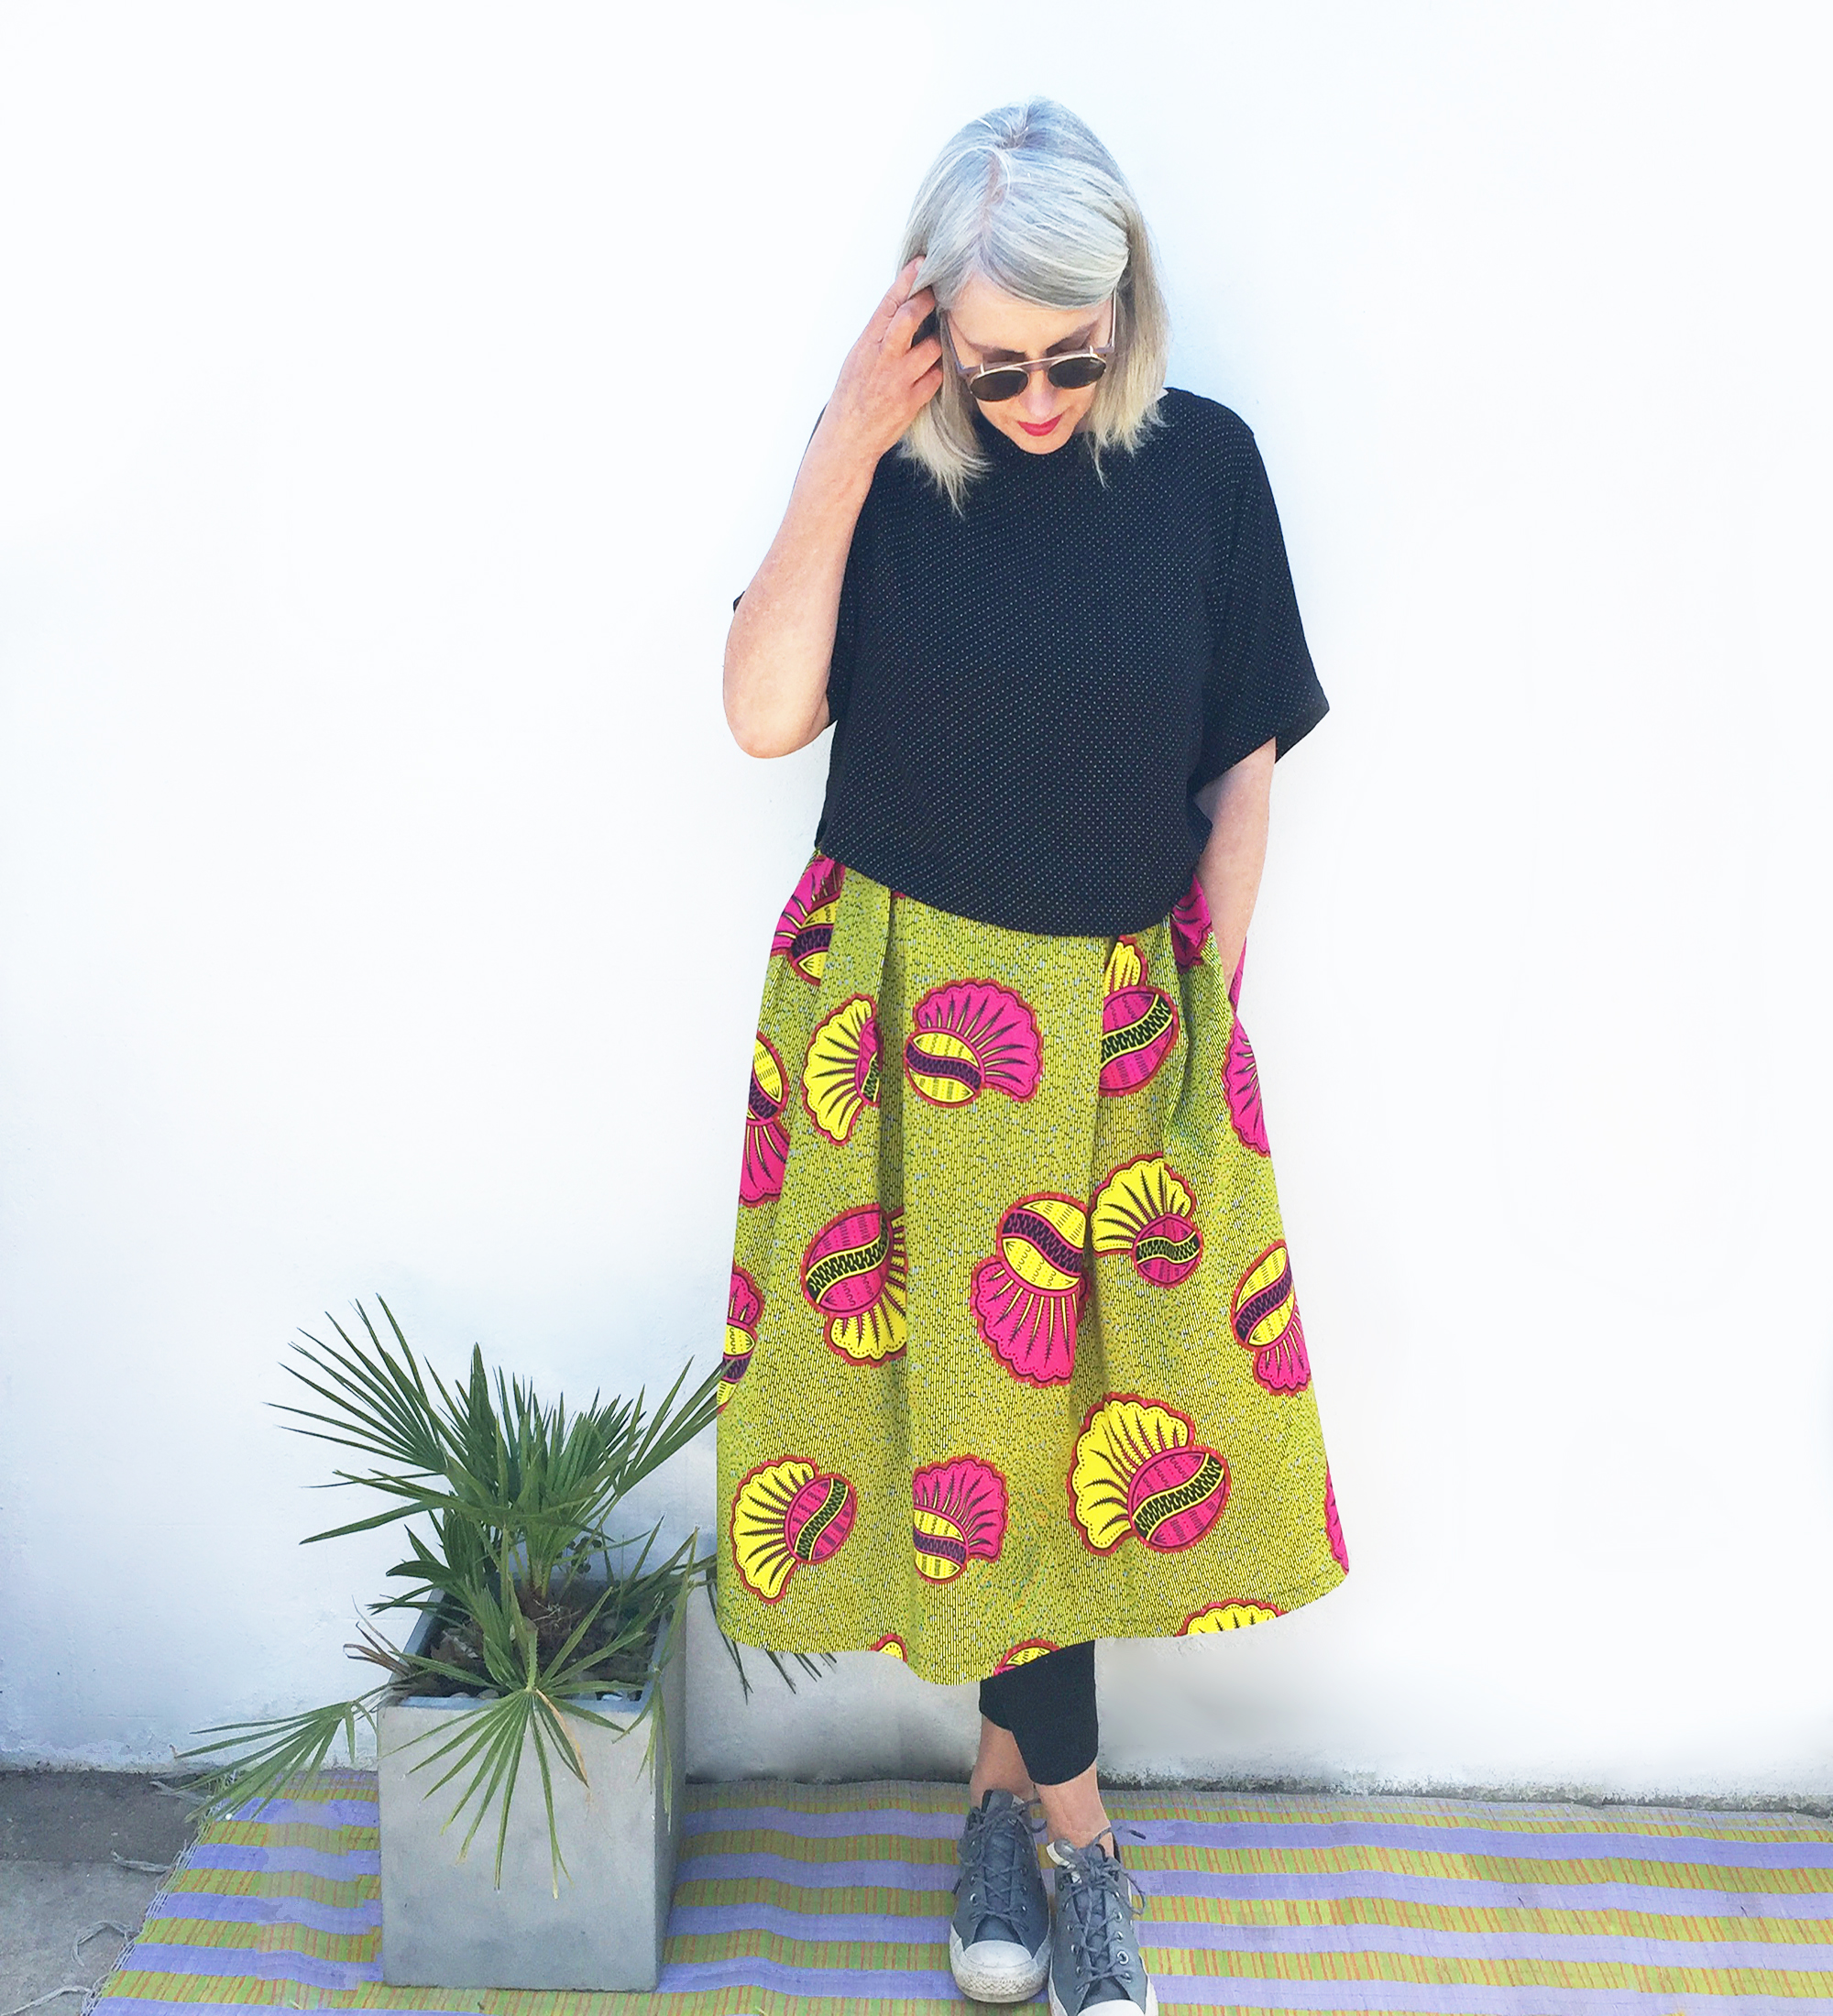
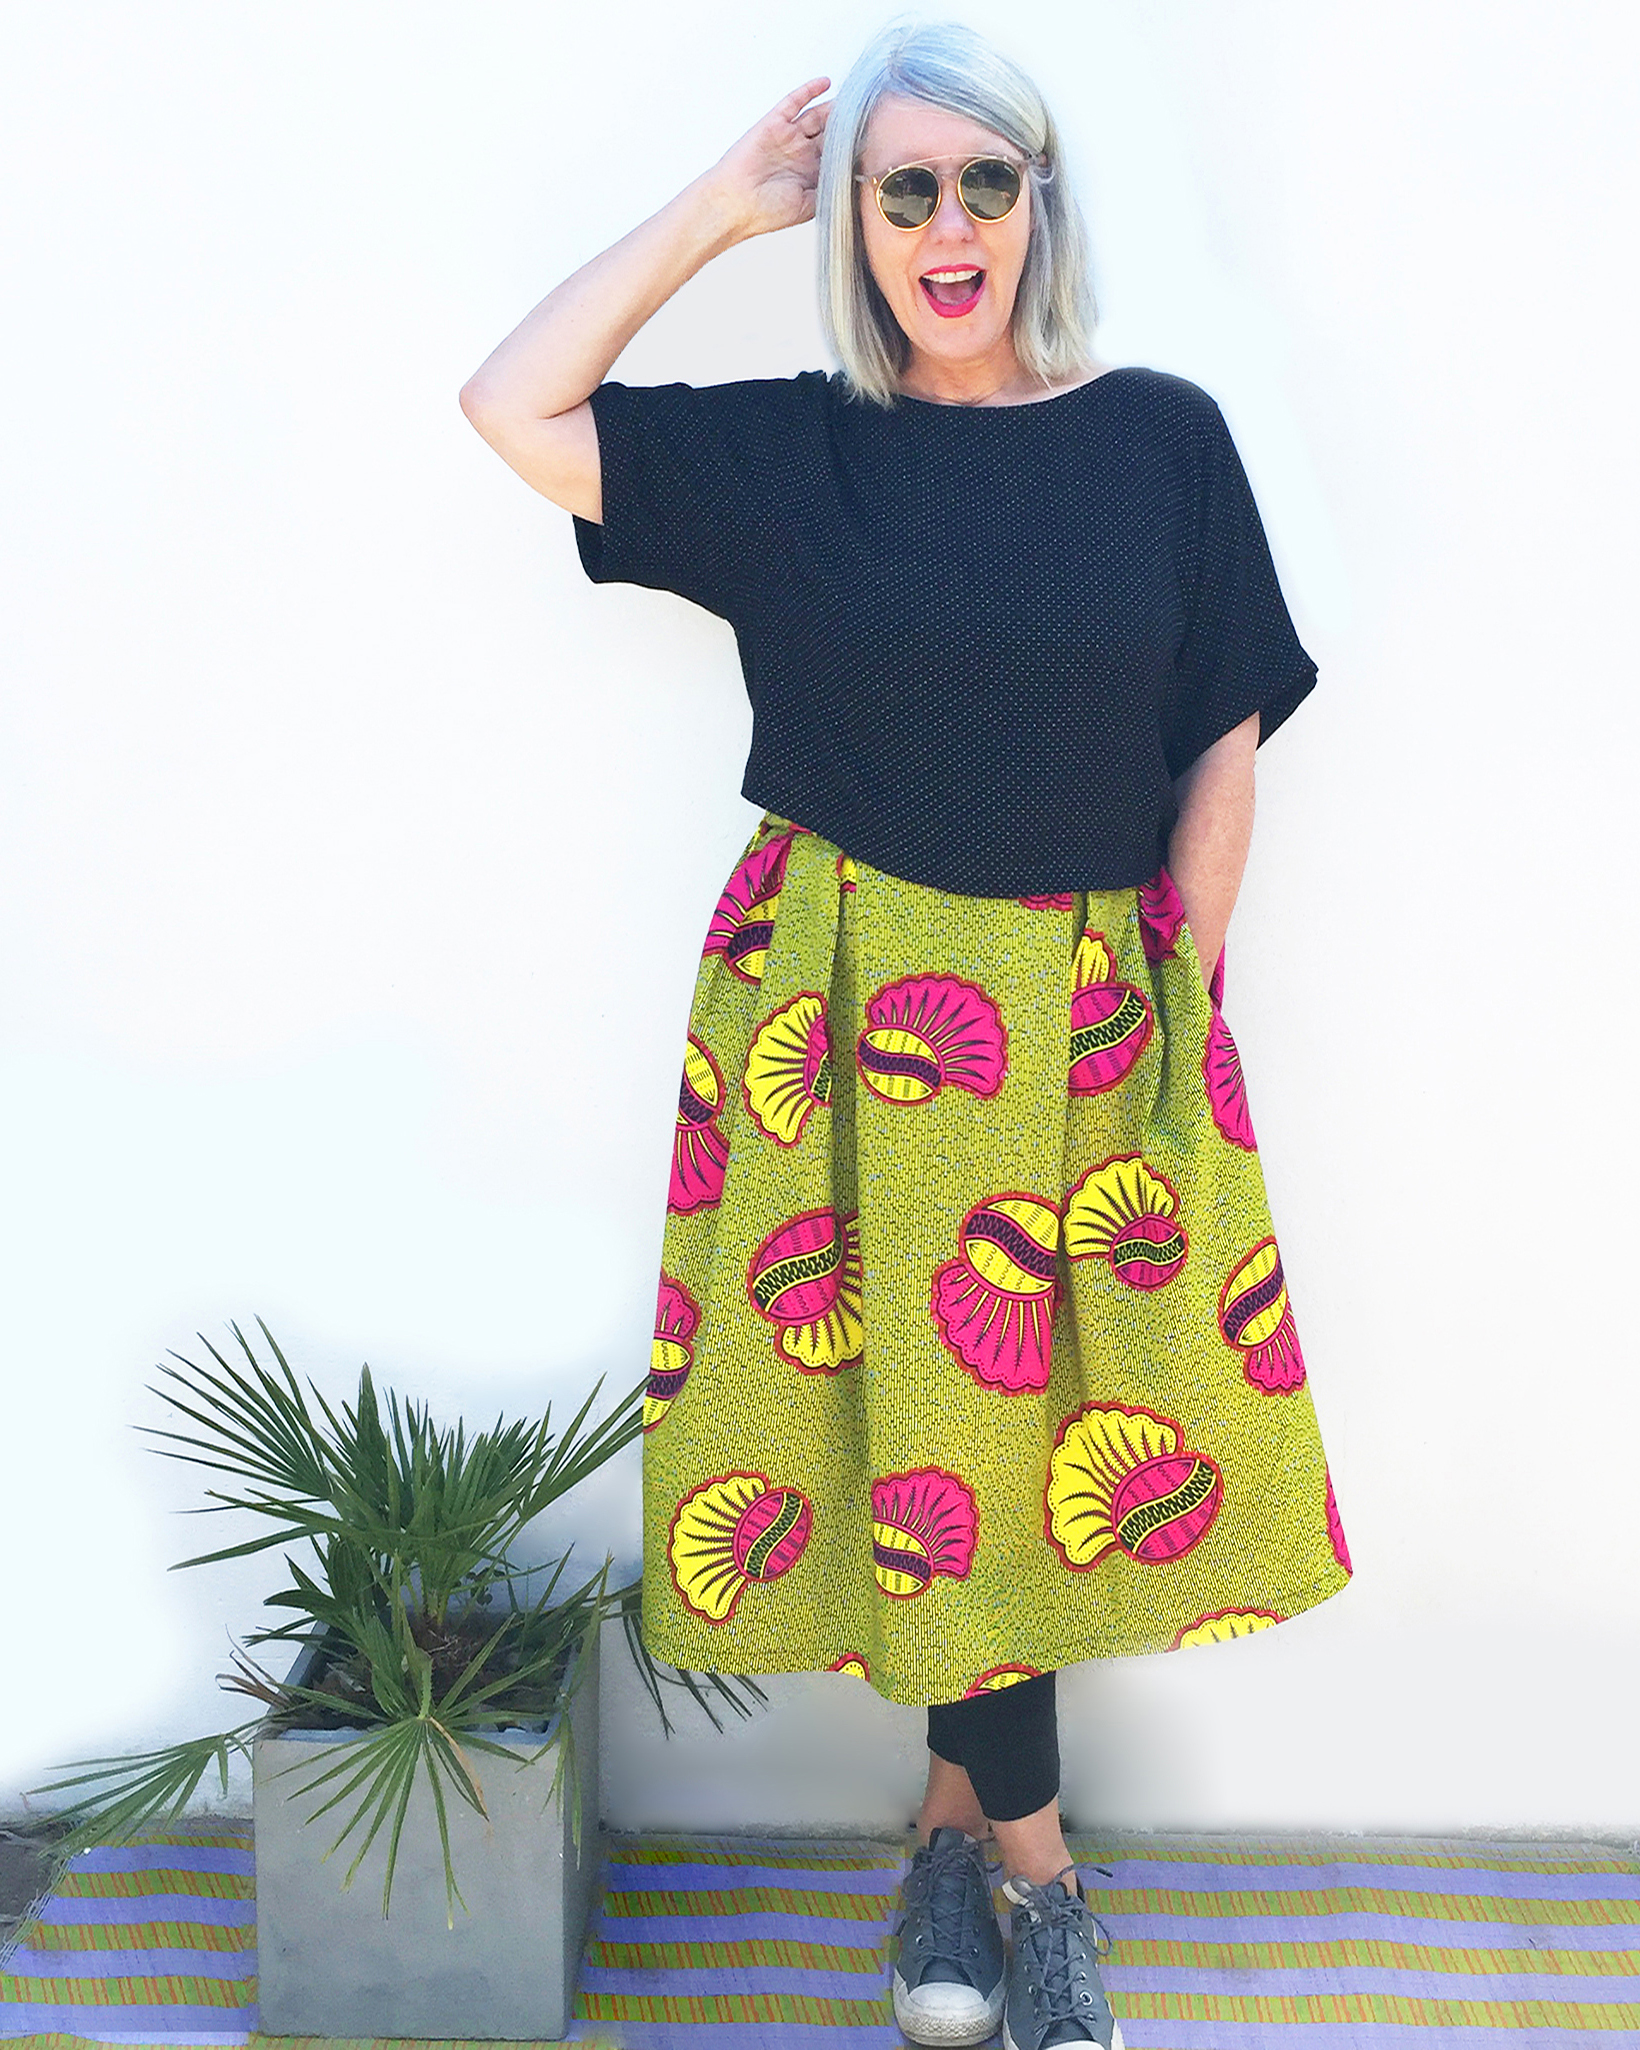
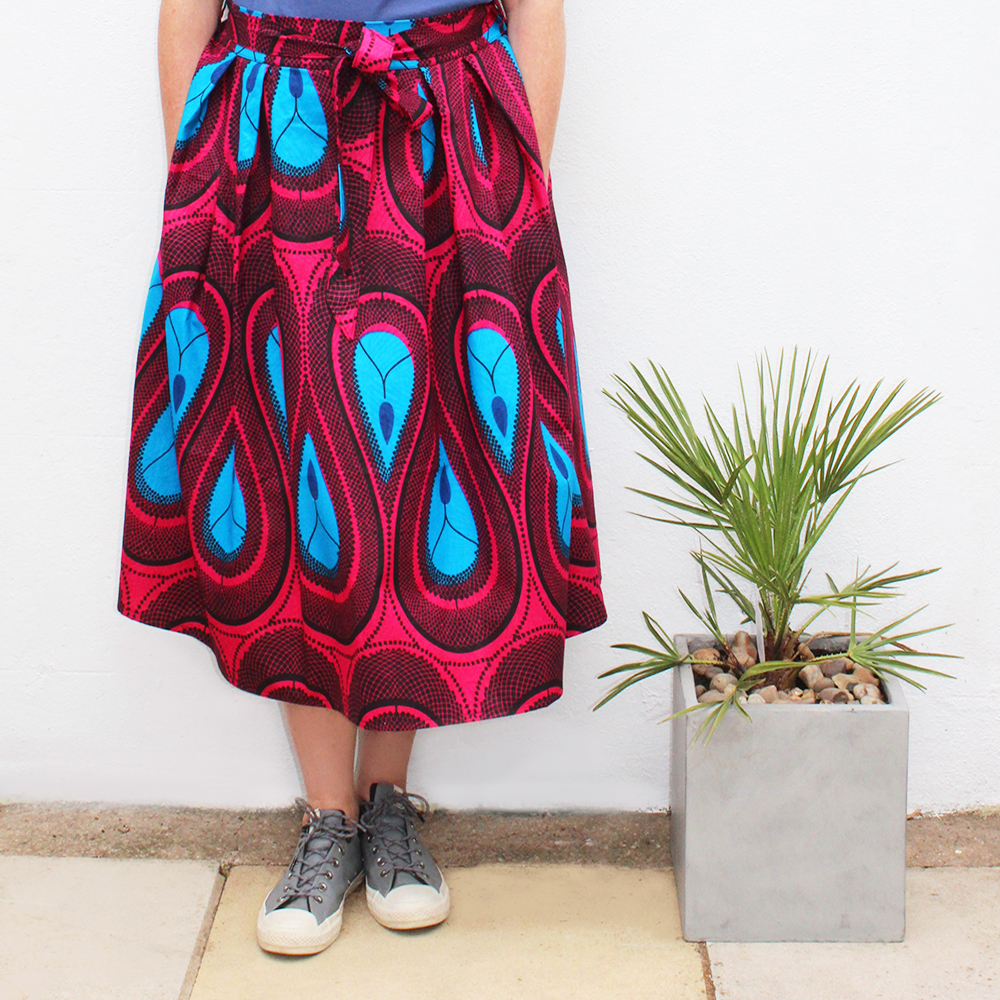
So here it is! …..drumroll please…….Cecily Skirt. Ta dah!
Not a day goes by, when I’m wearing this skirt, when people don’t say ‘Wow! where did you get that skirt! ‘ and I can smugly reply those immortal words…. ‘I made it myself!
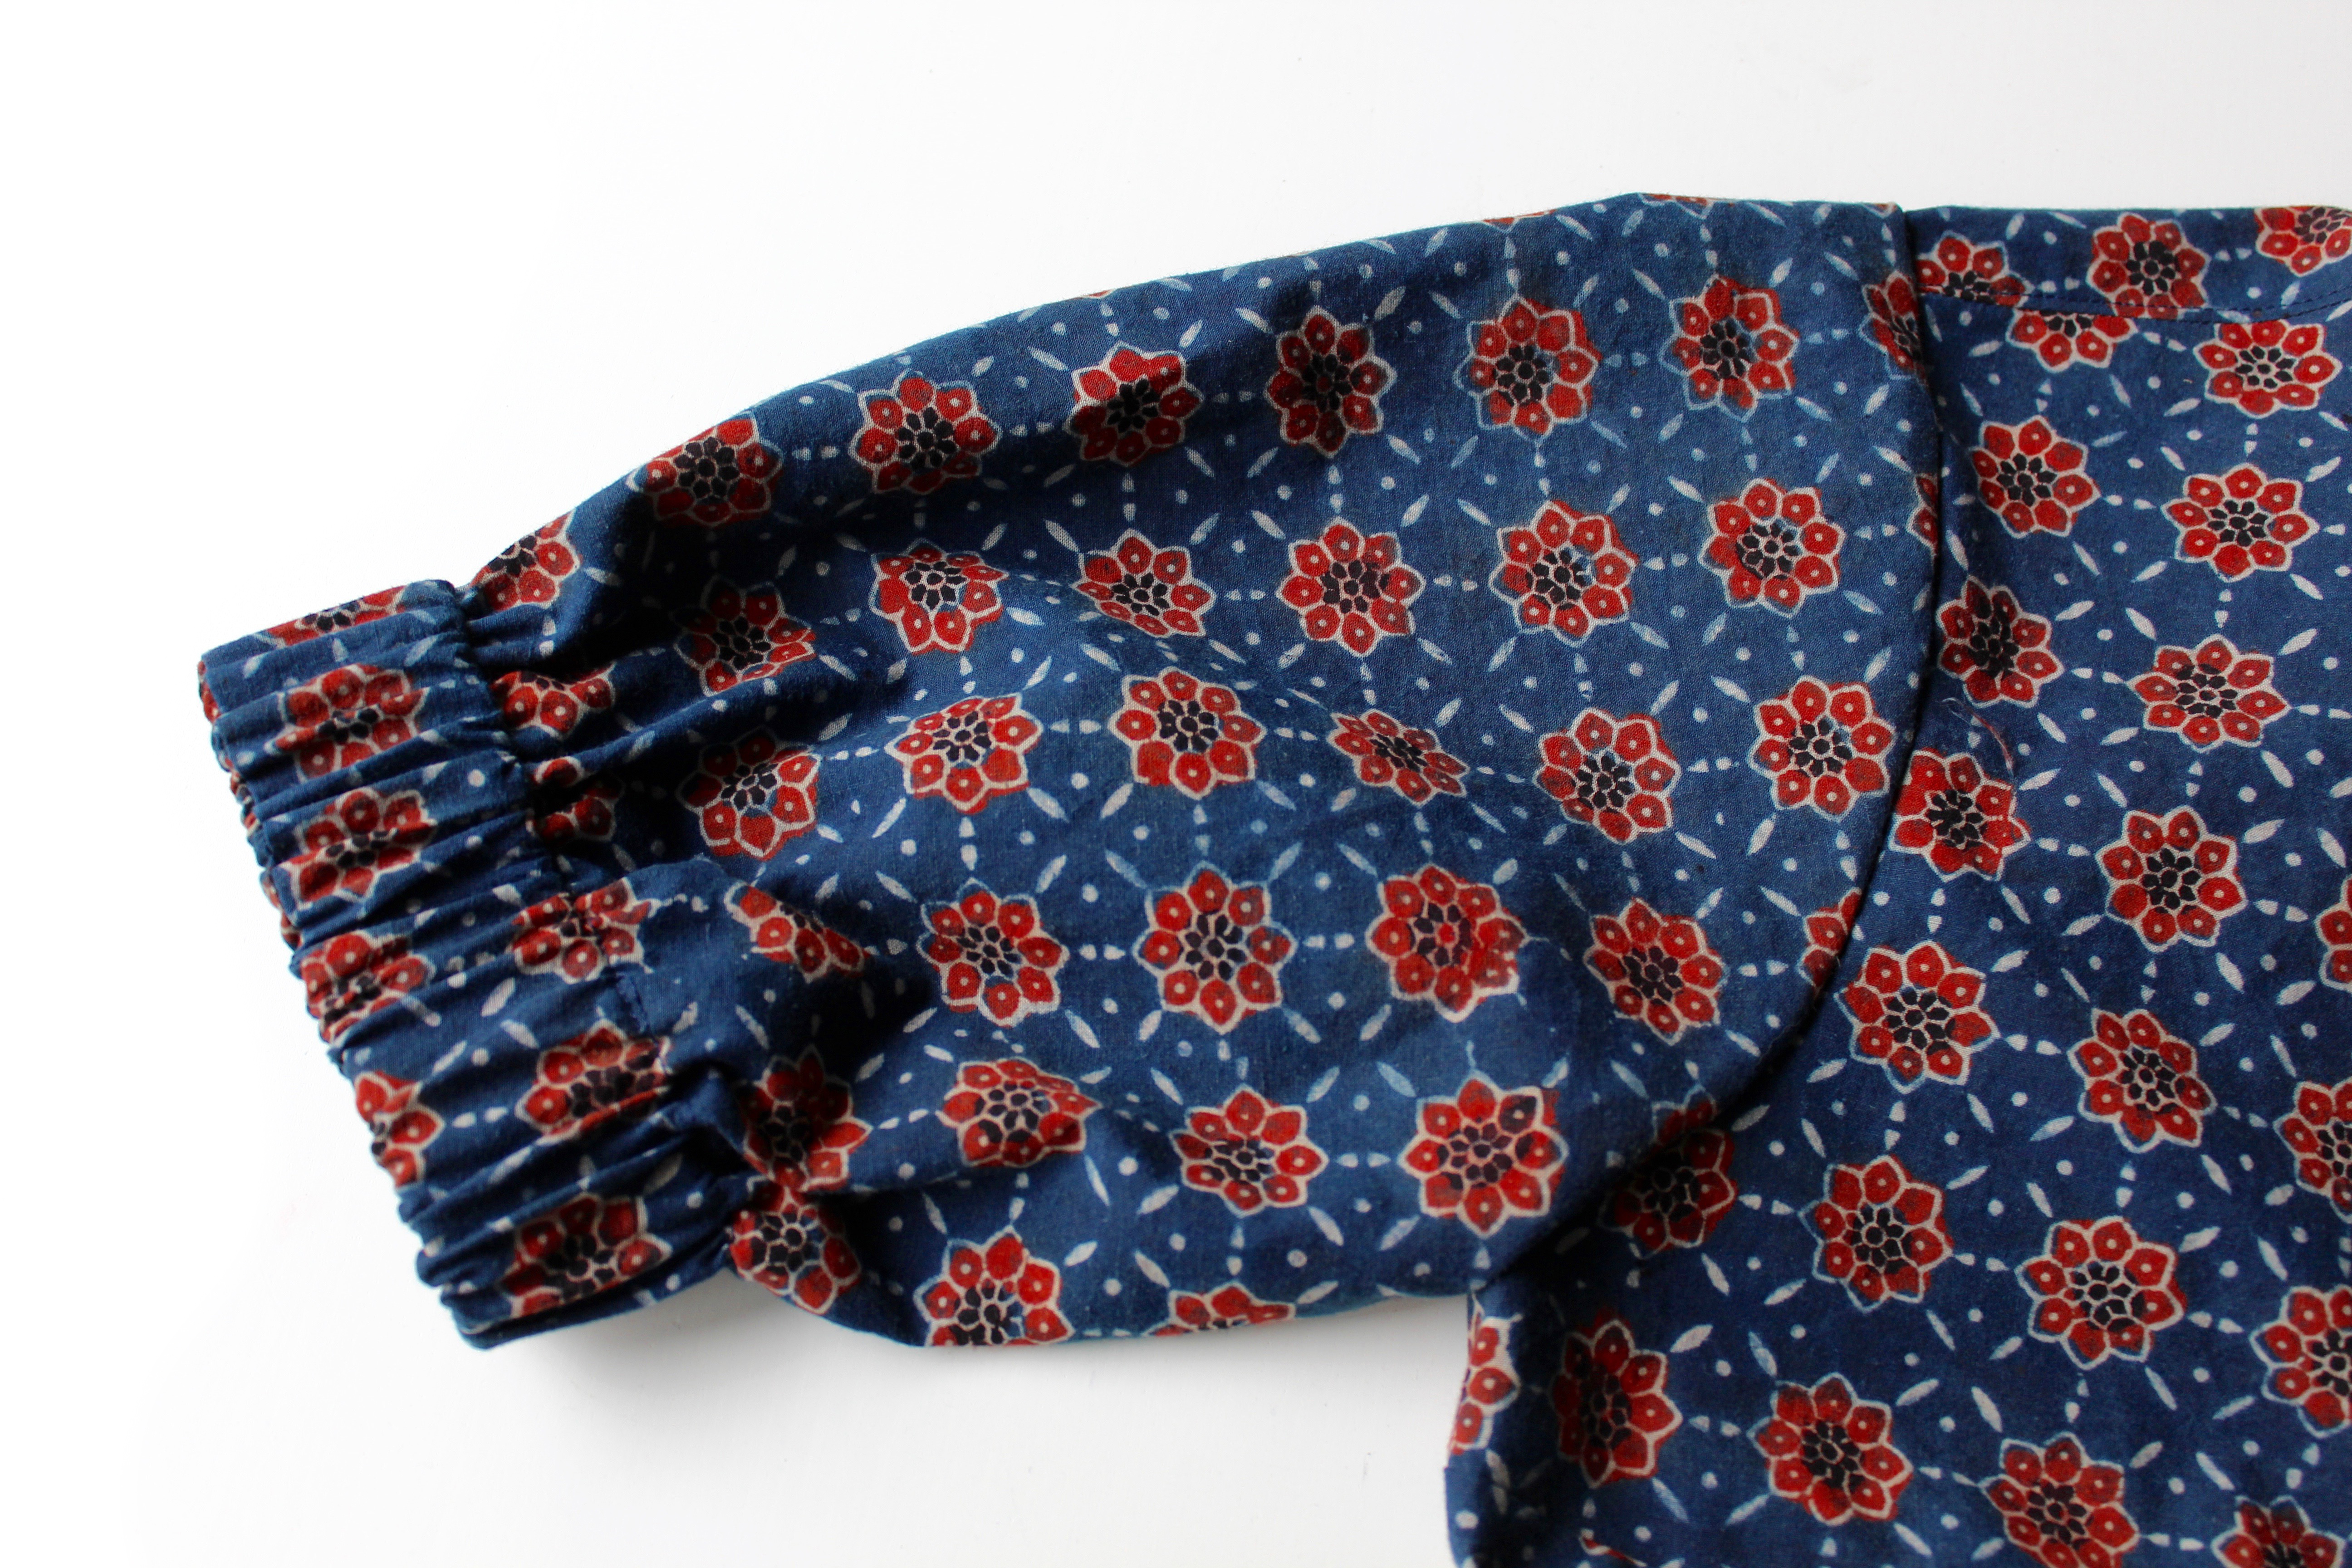
What I love about this skirt, is how easy and quick it is to run up, and how comfortable it is to wear. With its elasticated back waistband, you can pretty much eat what you like, without the waistband feeling tight, (something I absolutely hate, being someone who loves their grub!).
So also, you will be delighted to hear, its got pockets! ….and two of em! There are also no zips, thanks to Mr Elastico. Having said that, the skirt isn’t bulky at the front because of its flattering front pleats or gathers if you are making with the blue ink spot fabric. Whats not to love?
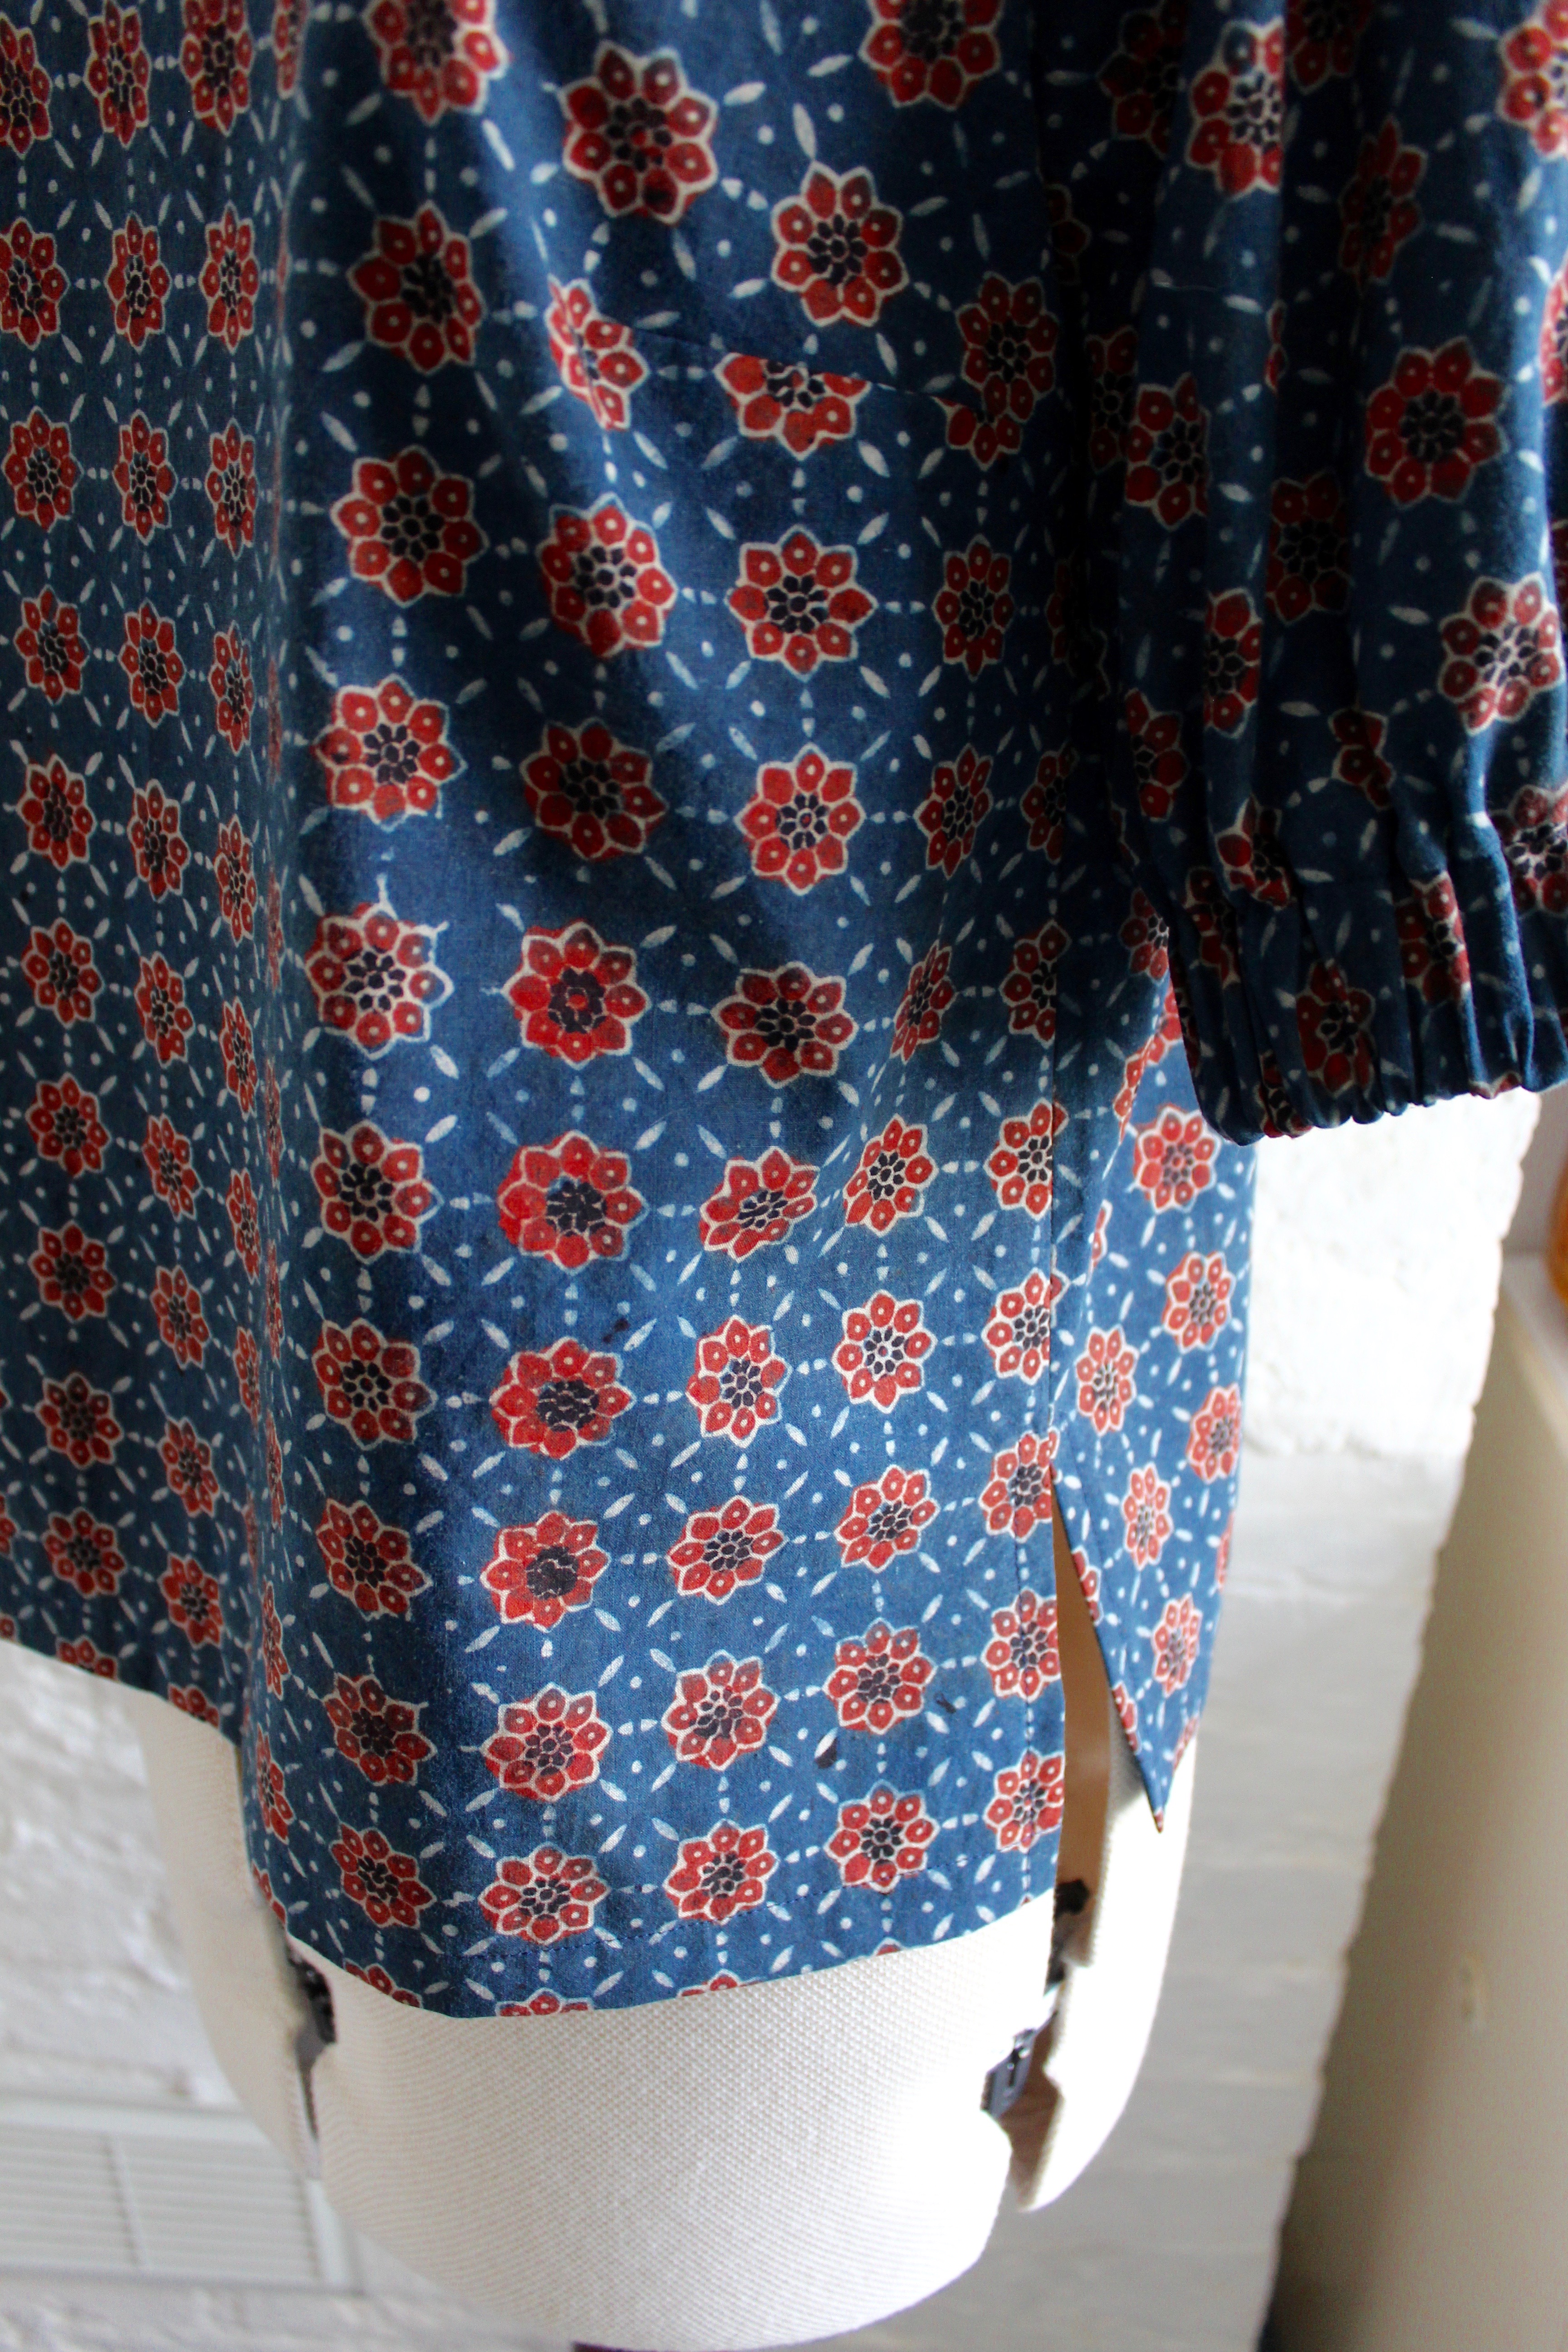
Cecily skirt is quite long in length, with a maximum length of approx 75cm, but of course you could make it shorter. I love to wear mine with leggings or pedal pushers and a tee or a boxy top. If you fancy adding a belt and some tabs like this…. scroll down to the waistband section where it will tell you how it’s done.
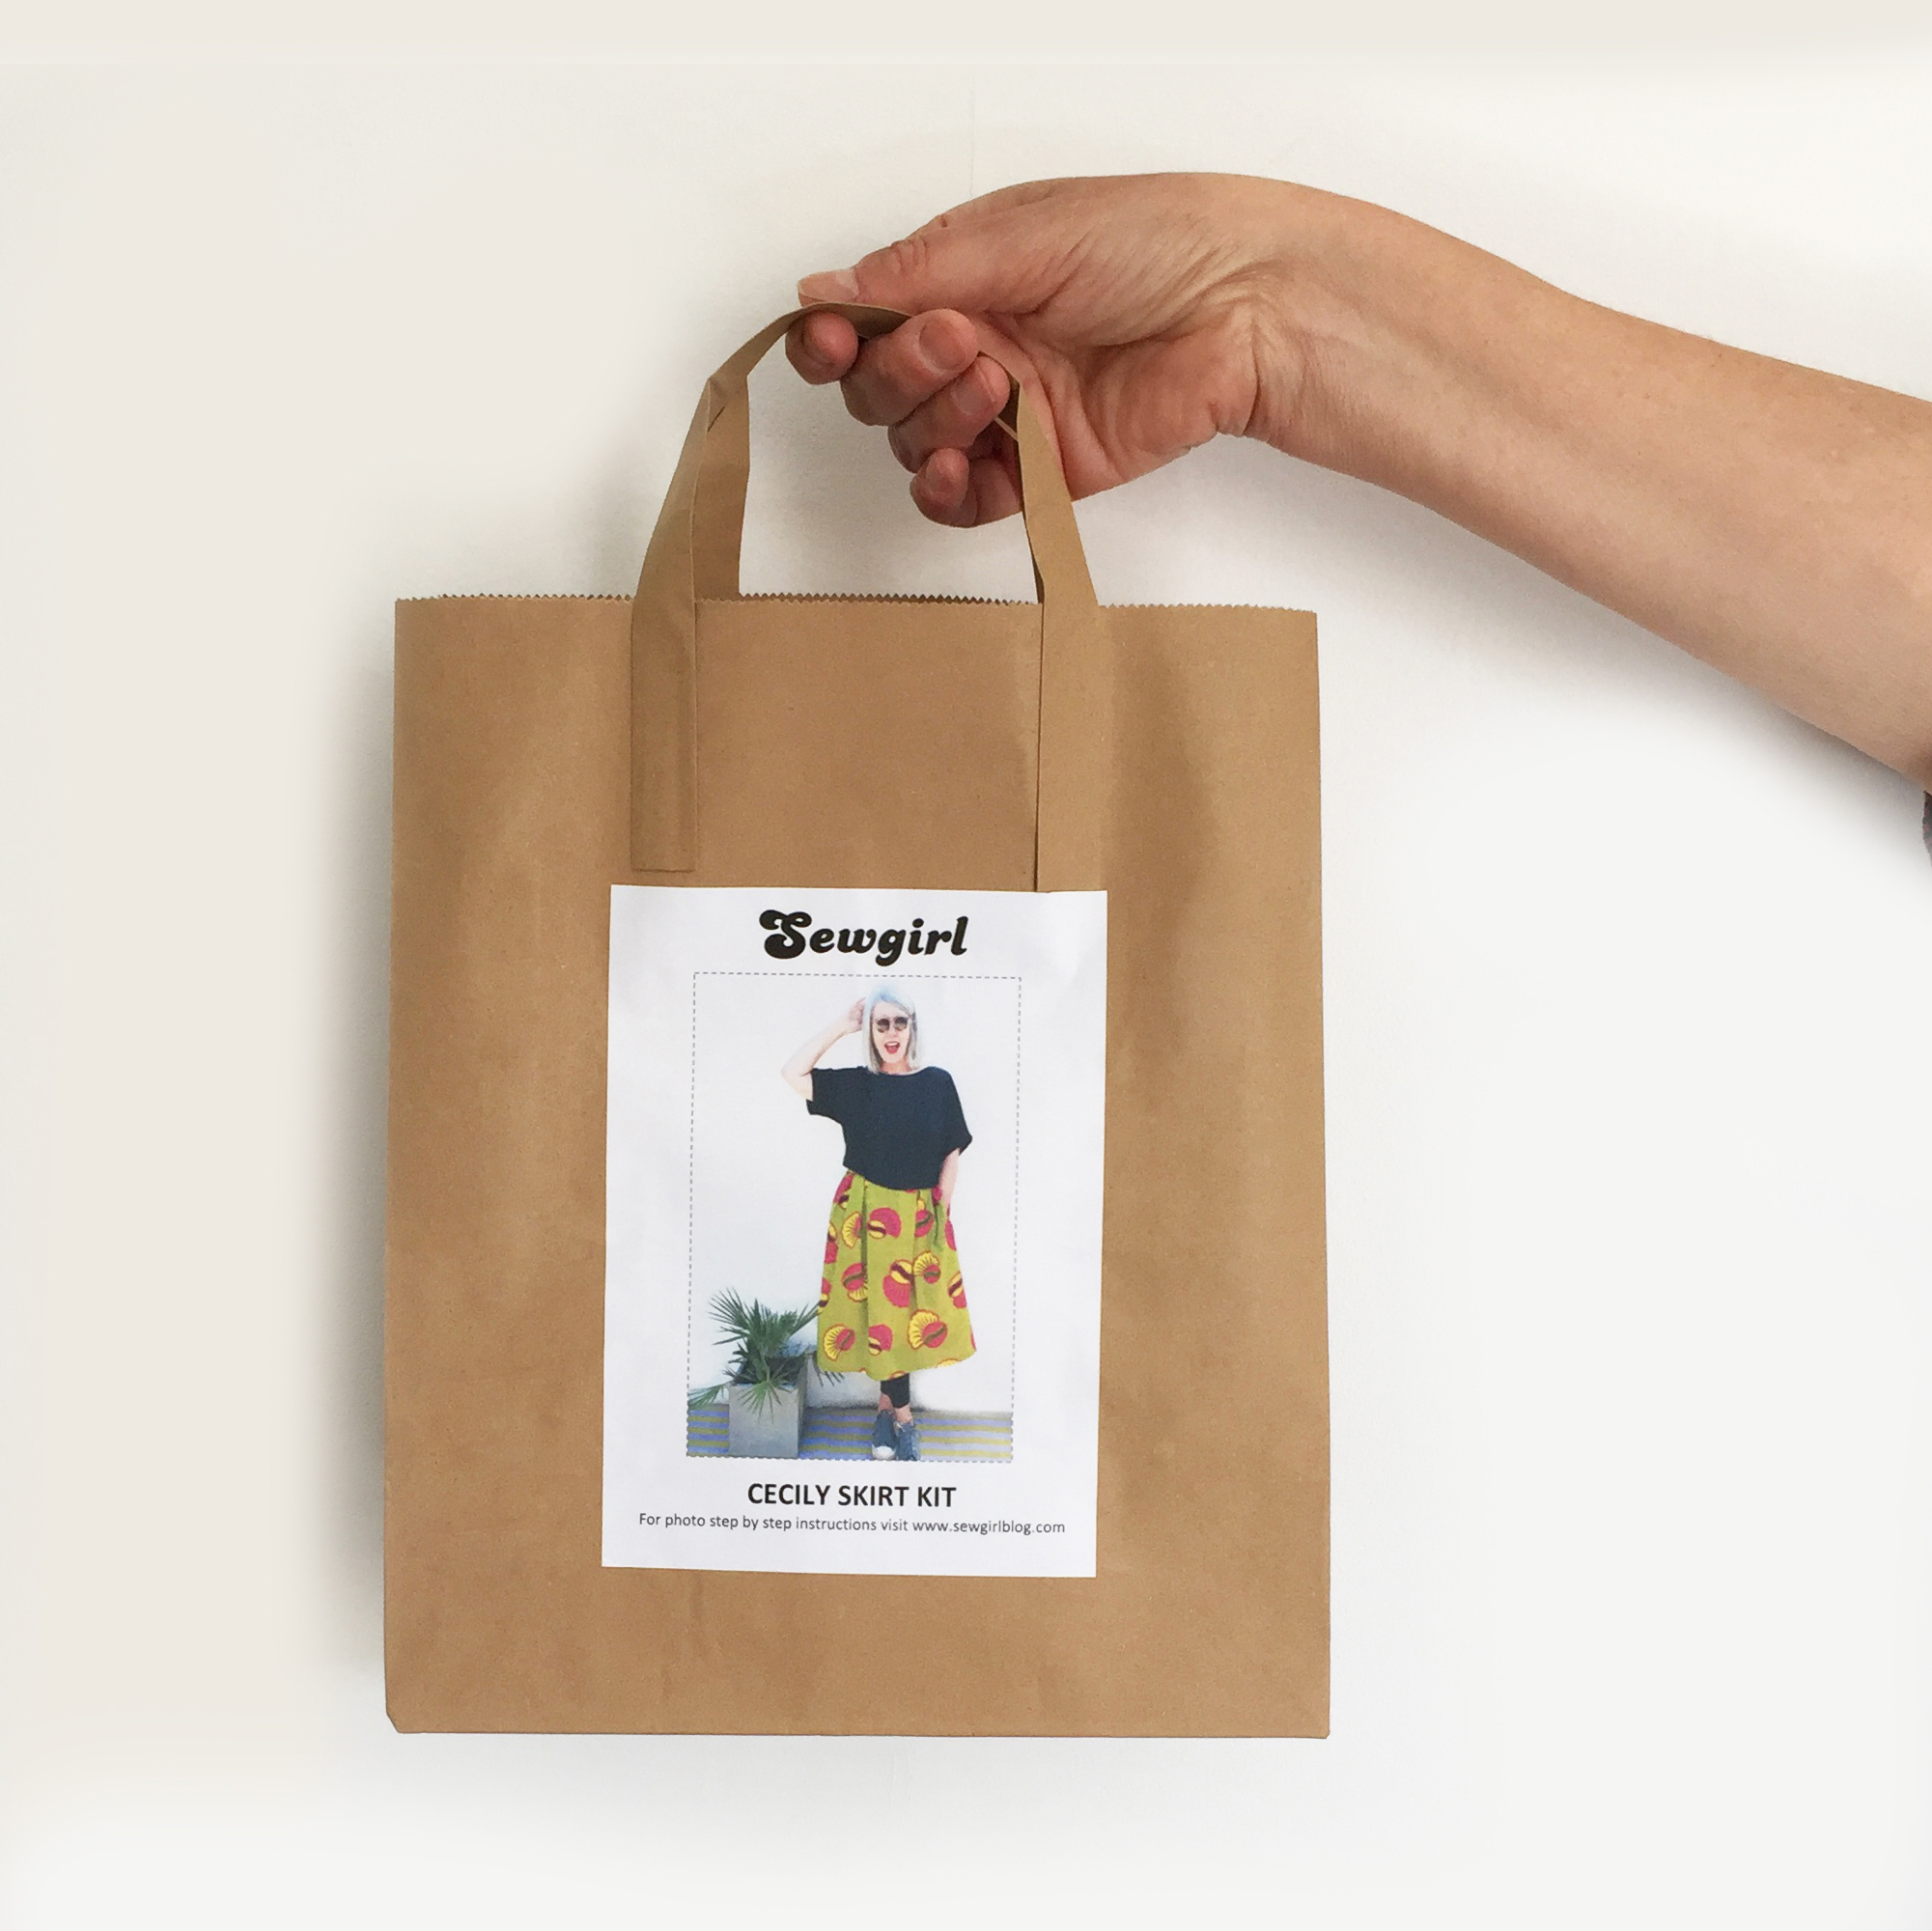
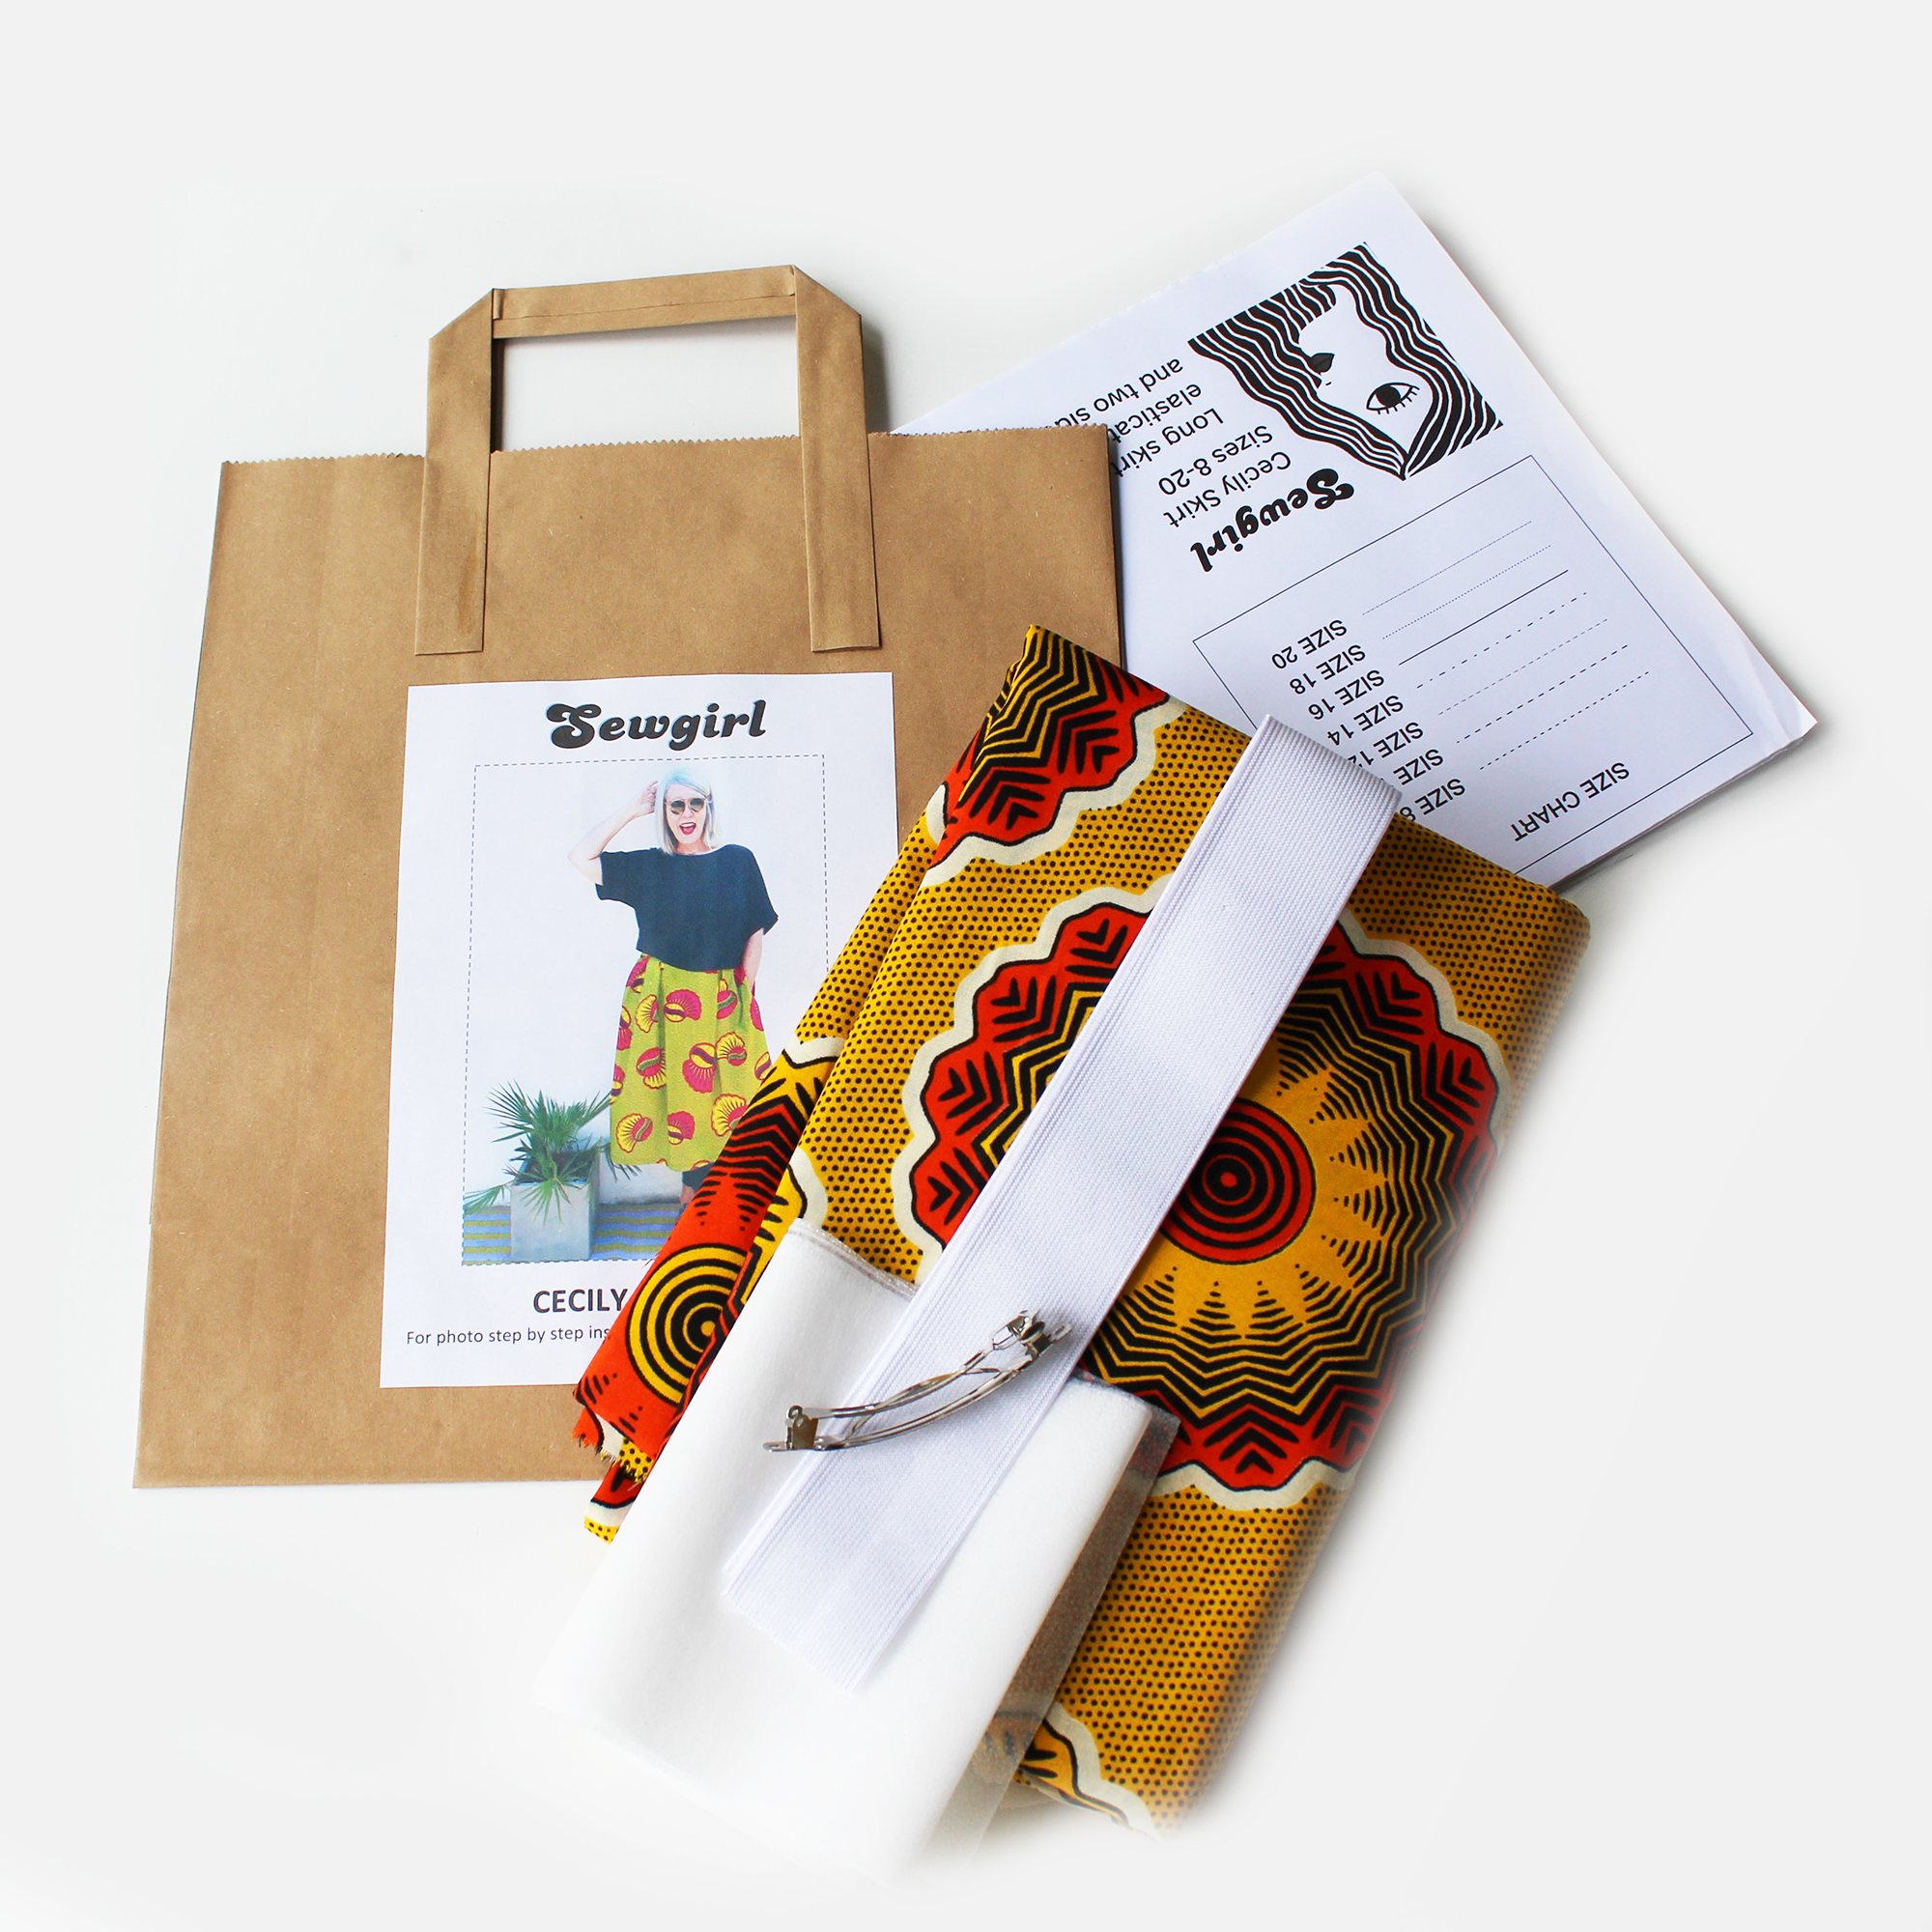
Here is the Sewgirl African fabric kit all packed up in a fab recycled bag, but it can also be purchased as the pattern only, which includes instructions, interfacing and elastic for you to use your own fabric.
African pleated skirt kit
So… Ive made up a kit for this skirt for sizes 8-20 and here is a list of its contents:
A large format template paper pattern for sizes 8-20
50cm of elastic (4cm wide) cut to size as follows:
A piece of fusible interfacing (enough for the front waistband)
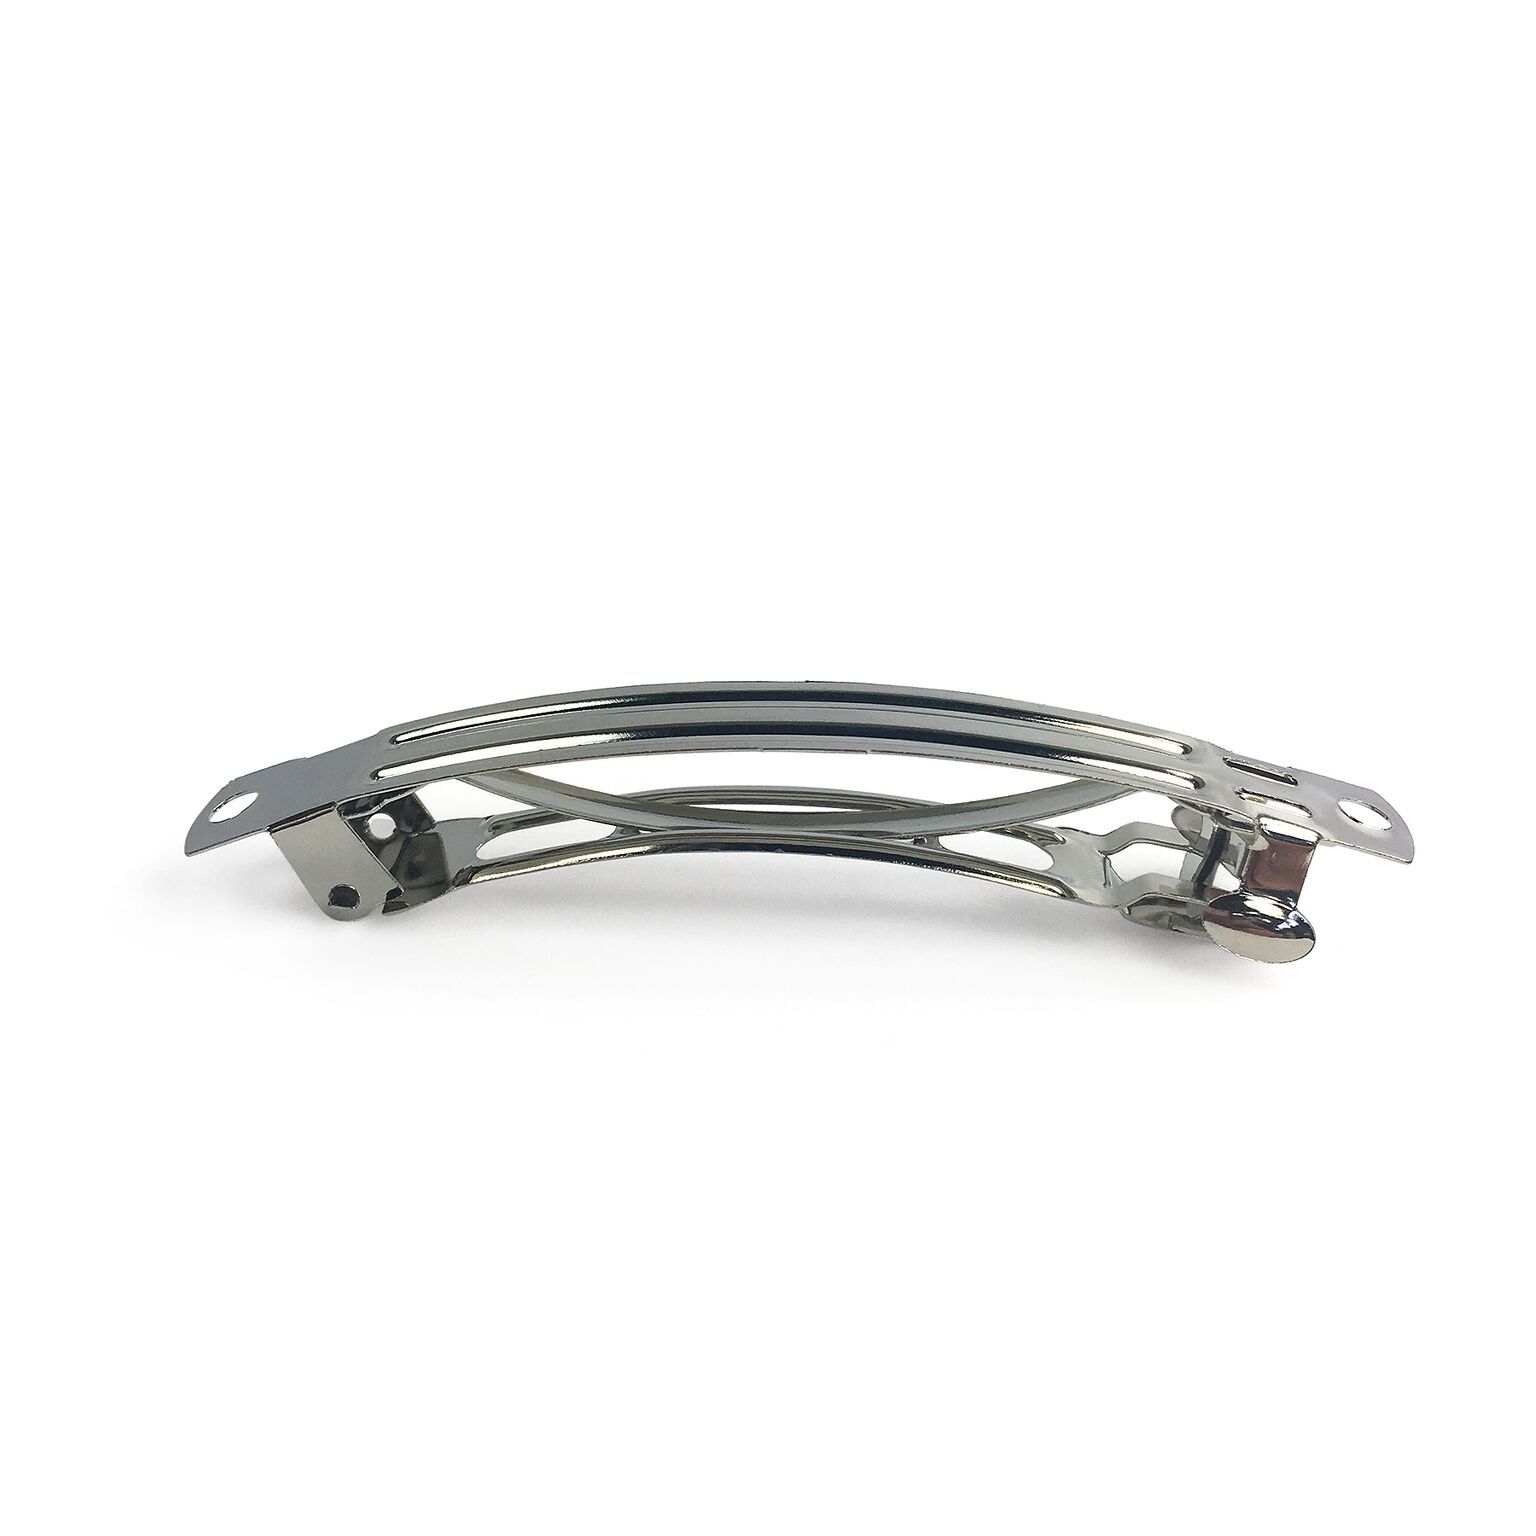
One French hair barrette
and if you have the complete kit with fabric it comes with 1.8m (2 yards) of fabulous genuine African Dutch wax fabric – lovely and soft, 100% cotton with really zingy colours. (Its 112cm wide by the way) and a separate piece of spotty cotton poplin for the pockets.
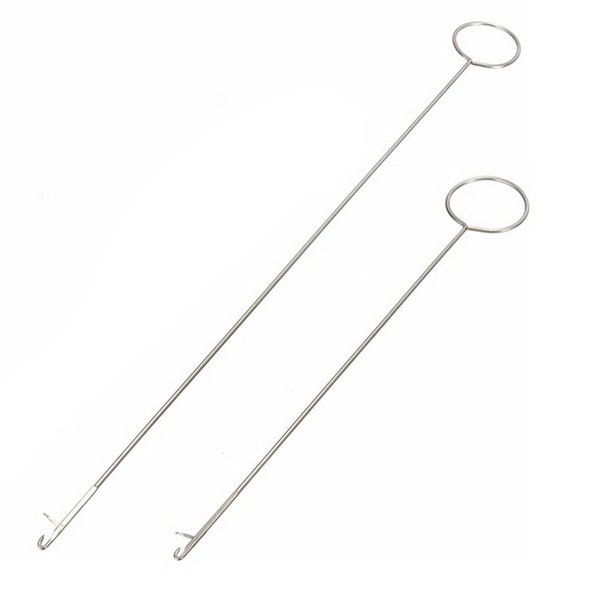
French barrette
Im popping one in your kit in case you fancy making a matching hair accessory either like this, or the little one with a button.
You can find a tutorial for making one of these at the bottom of the page.
SIZE INFO
THE FINISHED SKIRT LENGTH IS:
HOW TO MAKE CECILY SKIRT
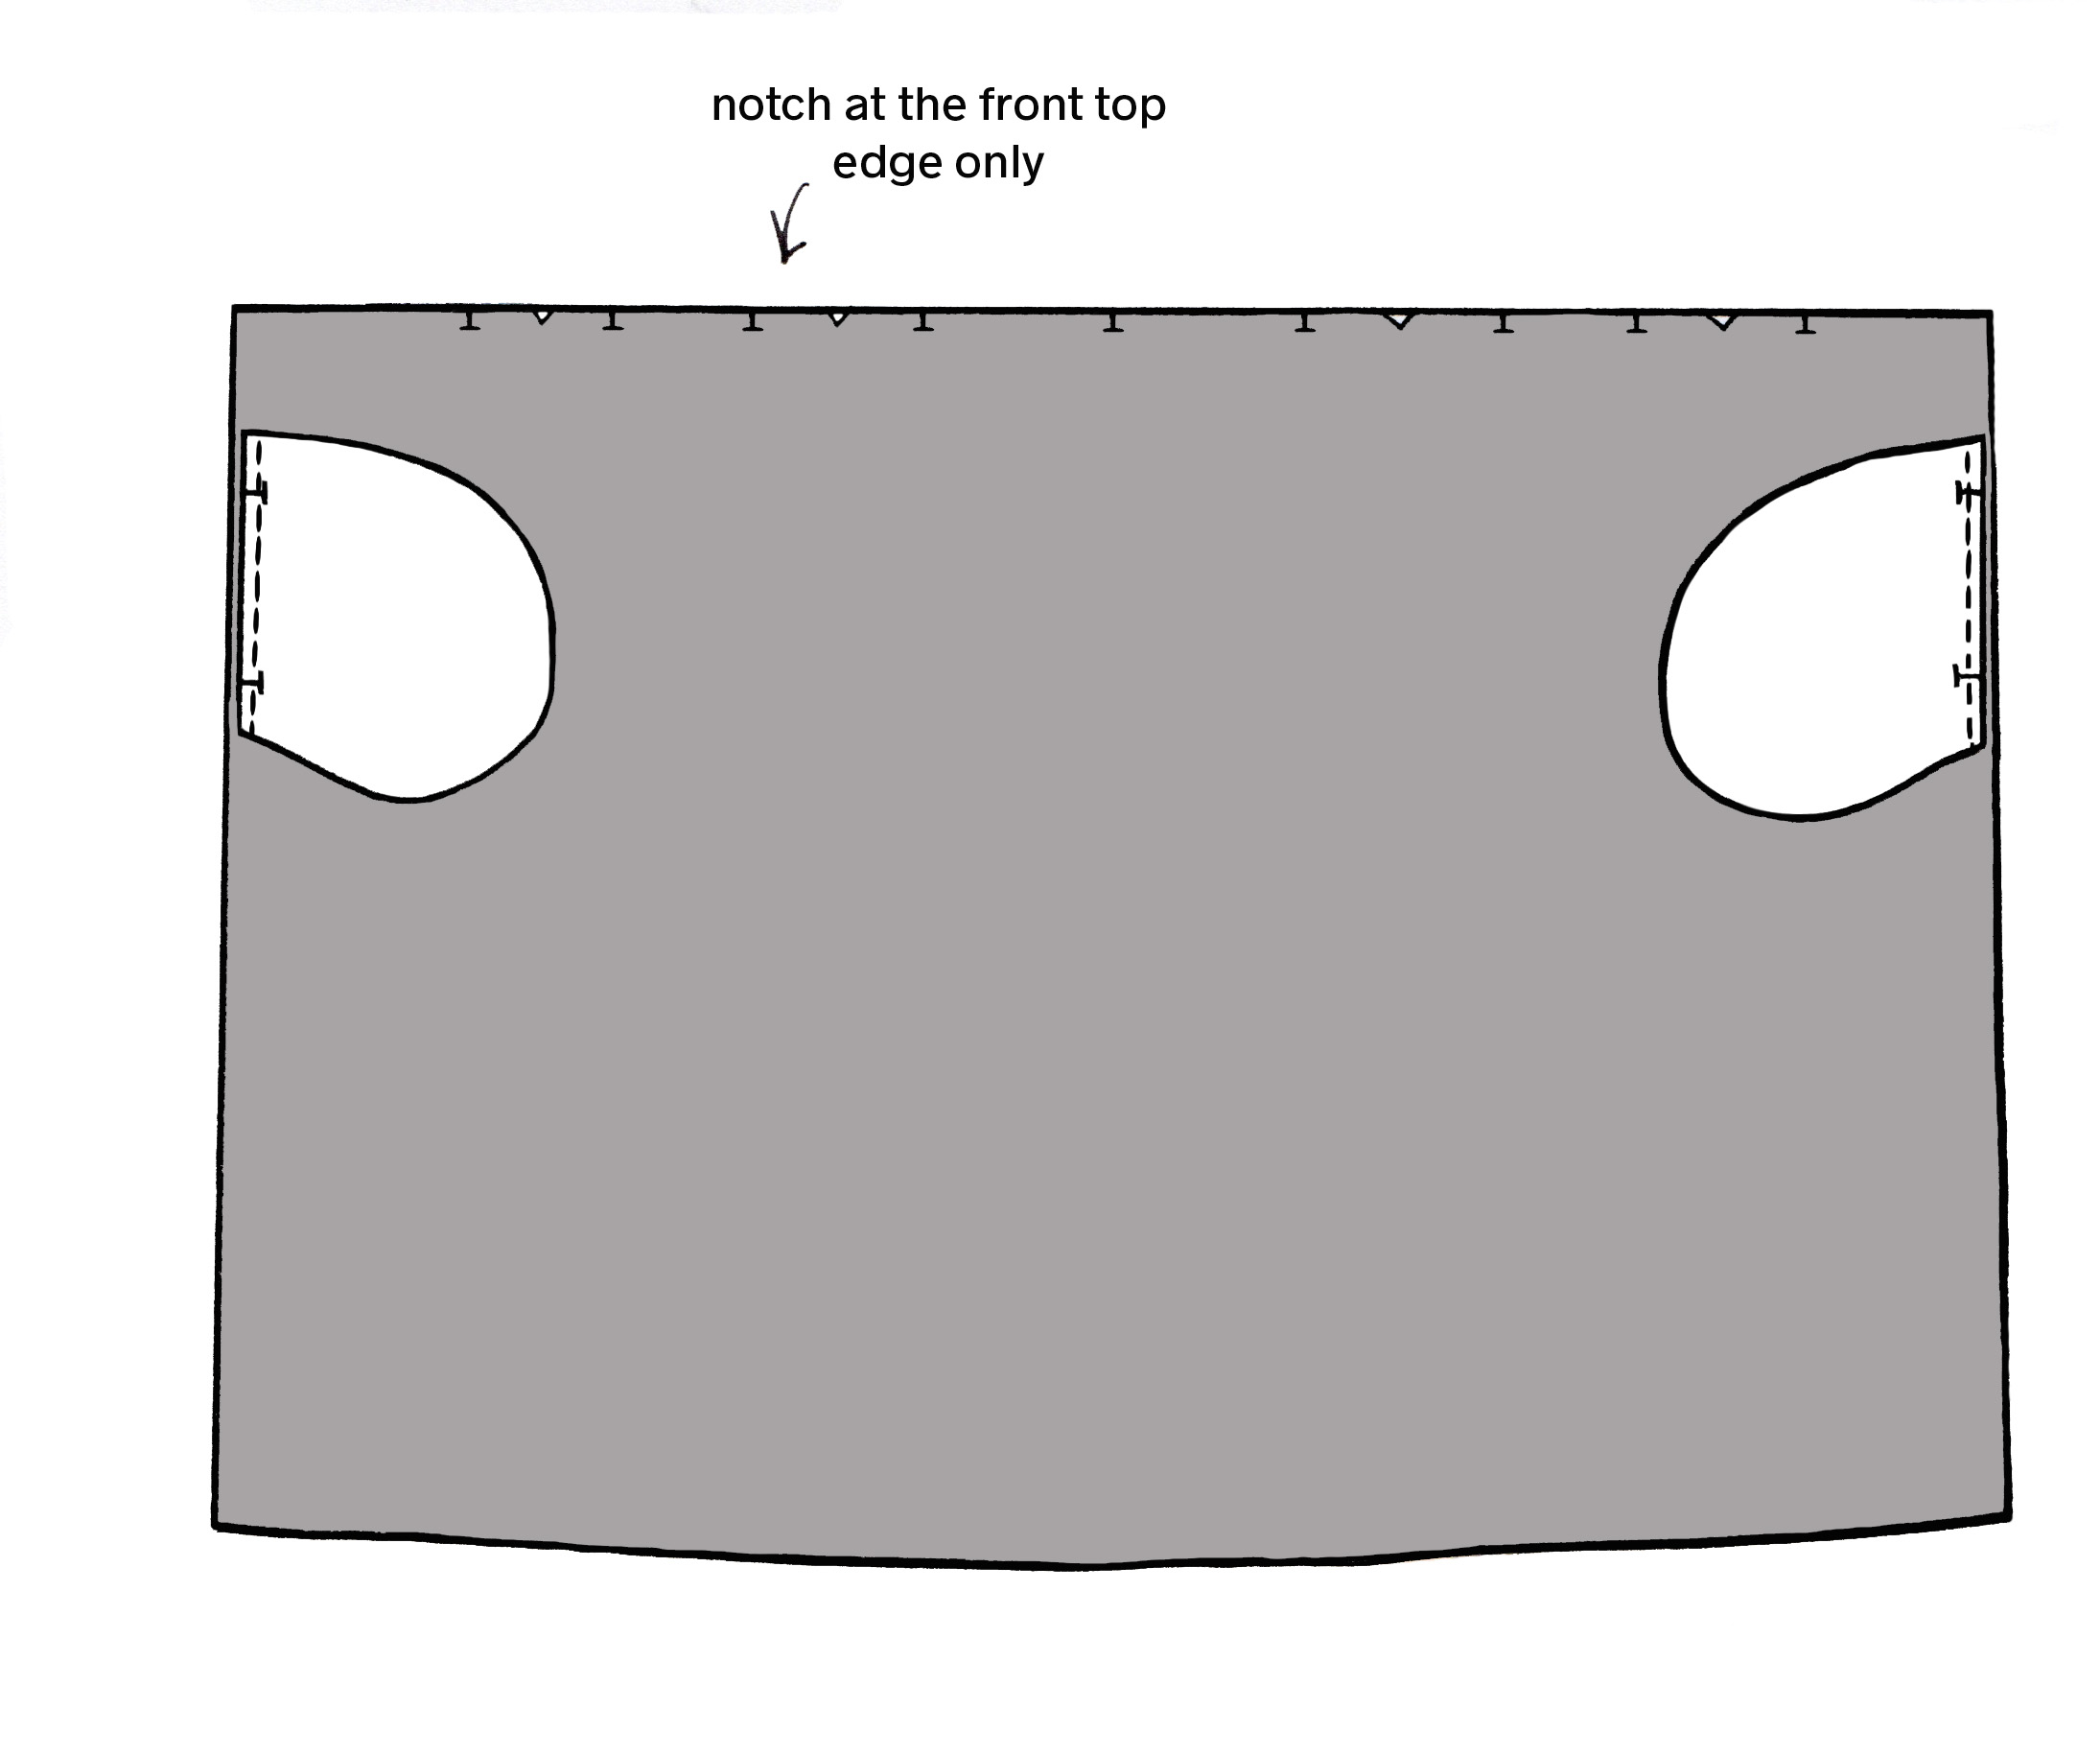
So you have 4 paper pattern pieces: Front & Back (1), Front Waistband (2), Back Waistband (3), Pocket (4).
You’ve ironed your fabric and folded it, so that the selvedges are aligned with the RST (Right Sides Together) and laid it out nicely on a table or floor. Pin the pieces as shown on the Layplans in the pattern.
You will need to cut:
Front & Back (template 1)– Cut two on the fold of the fabric.
Front Waistband (template 2)– Cut one *Iron fusible interfacing to the reverse side of the Front waistband only.
Back Waistband (template 3)– Cut one on the fold of the fabric.
Pocket (template 4)– Cut four (two pairs).
Optional tie belt tabs (x 2) : Cut two pieces 5cm x 8cm. Fold inwards 1cm towards the centre each long side. Press, then fold in half lengthways. You should have a folded piece measuring 1.5cm x 8cm. Stitch down each long side. Repeat for other tab. Place to one side.
Mark the pleat positions at the top edge with a marking pen or small nick within the seam allowance on the Front pieceonly. Now to the sewing bit (the best bit).
Remember the seam allowance is 1cm!
SEWING THE FRONT TO BACK & POCKETS. (For all skirts)
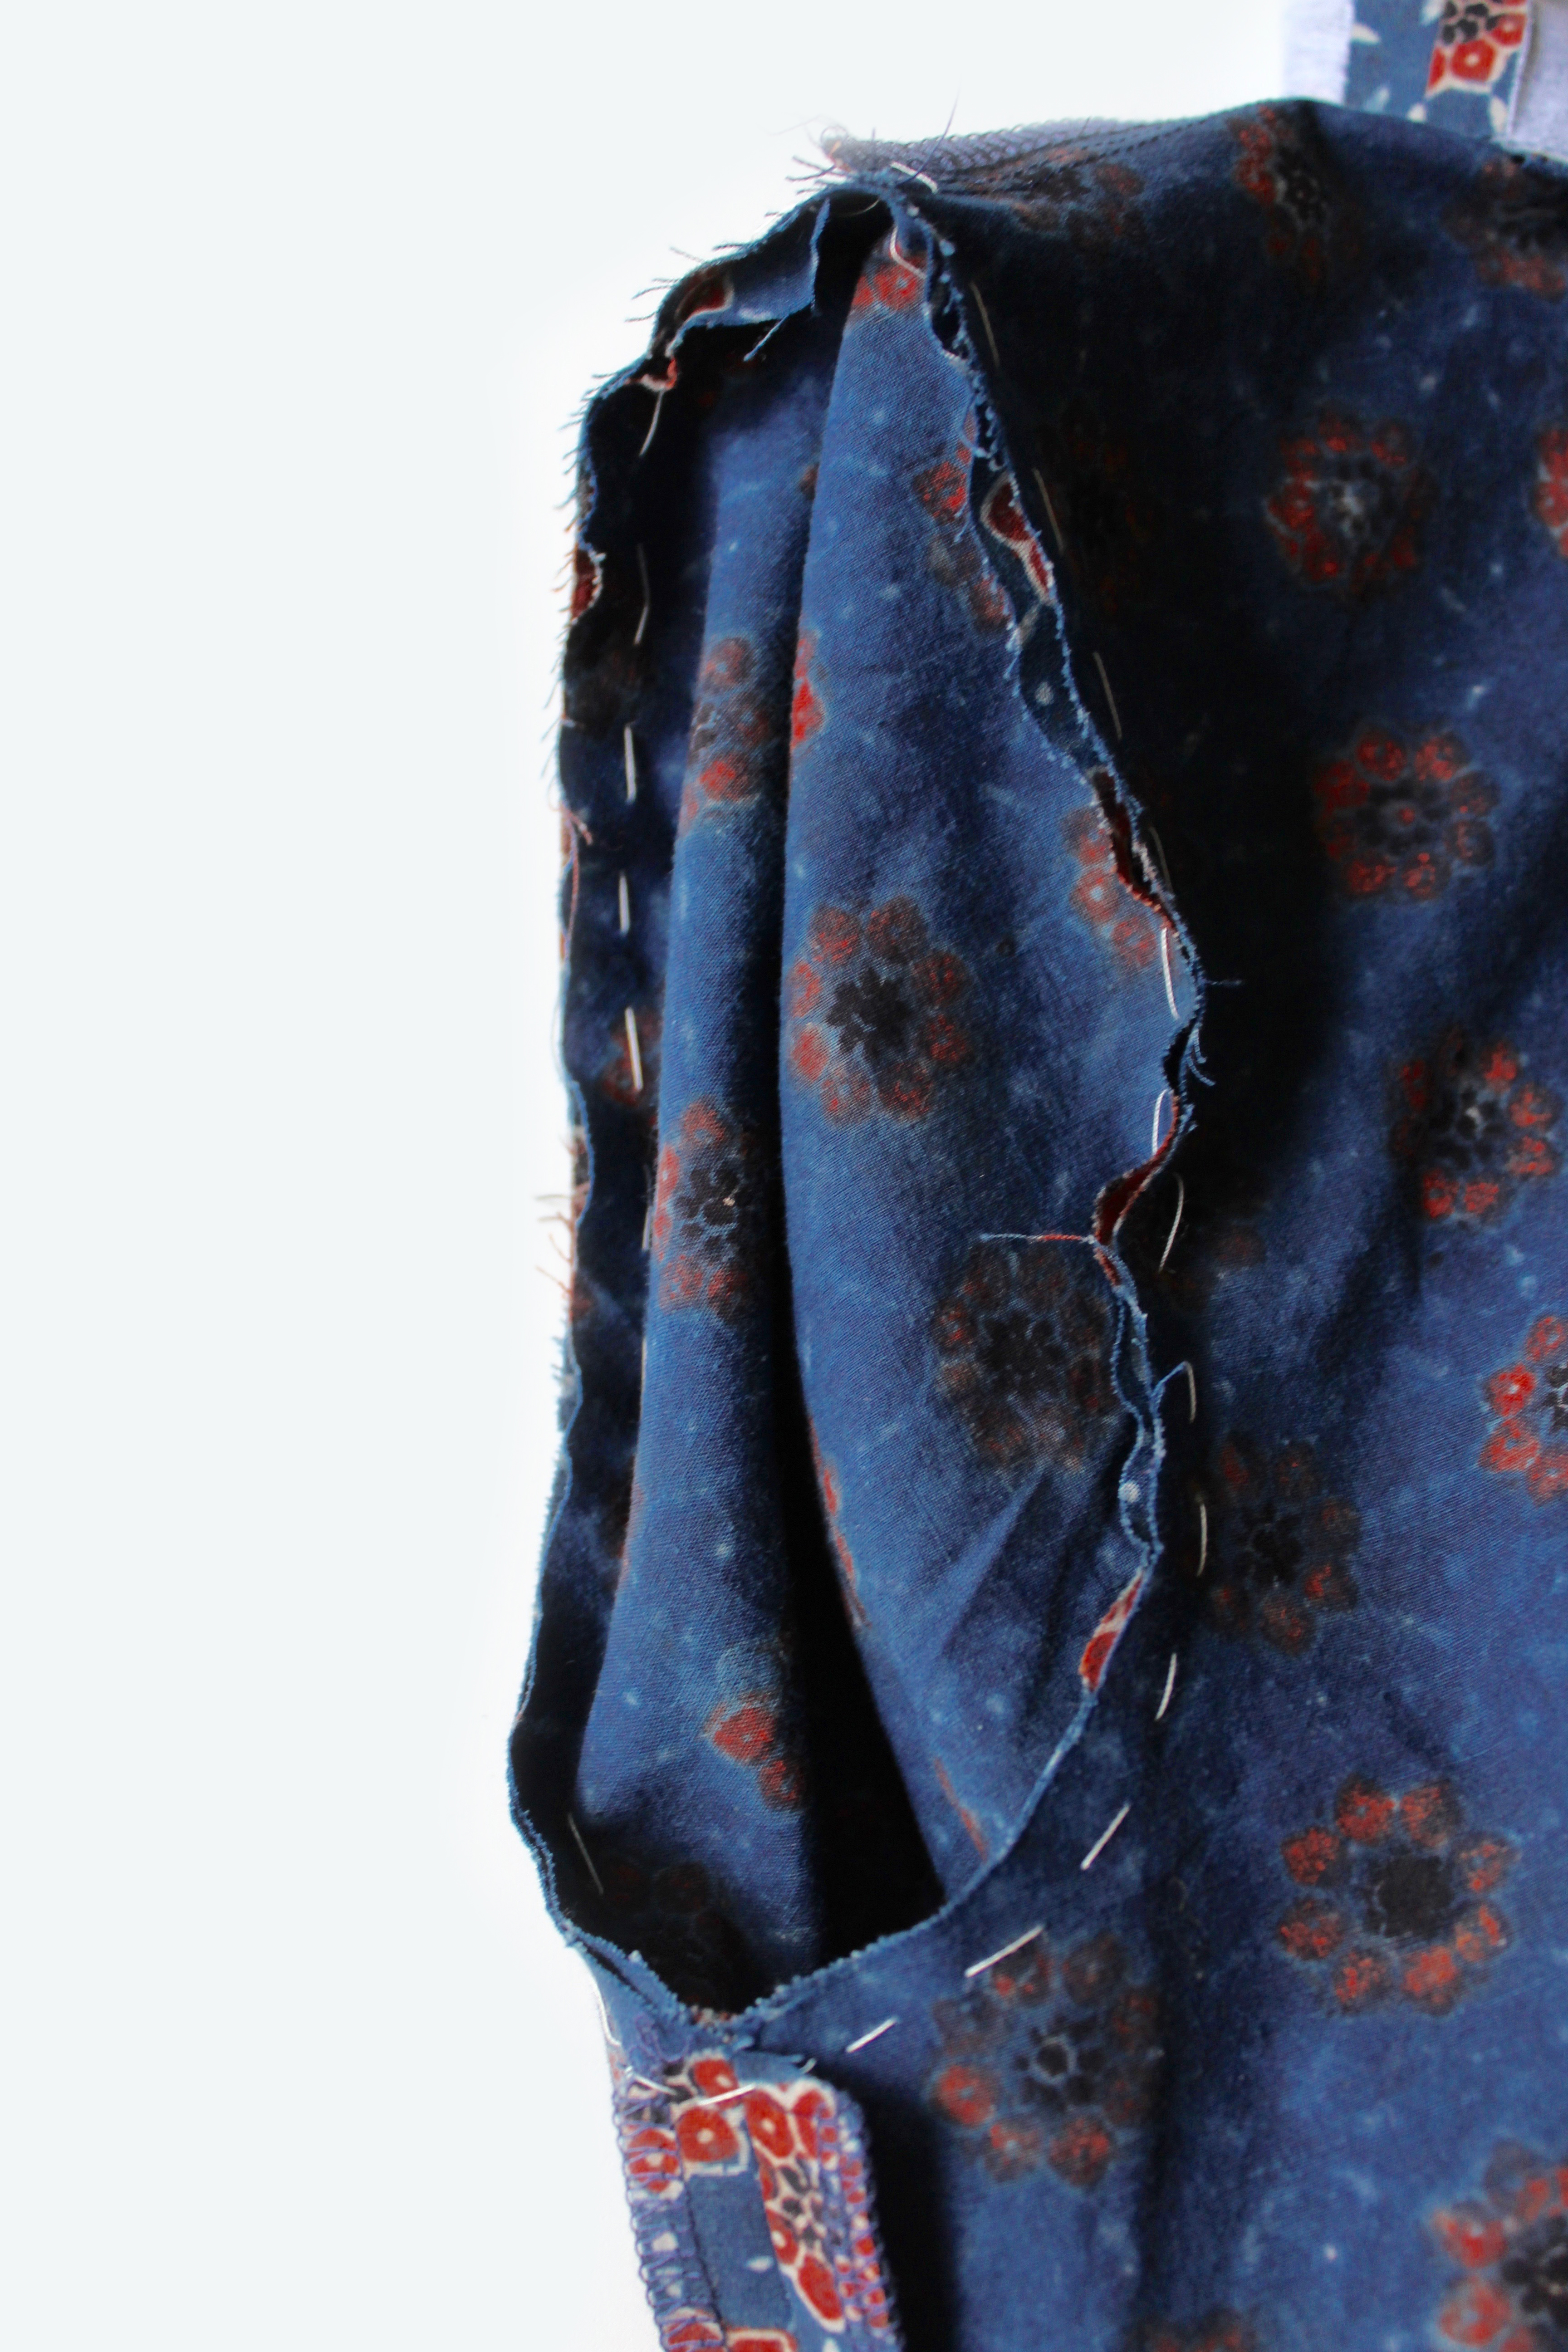
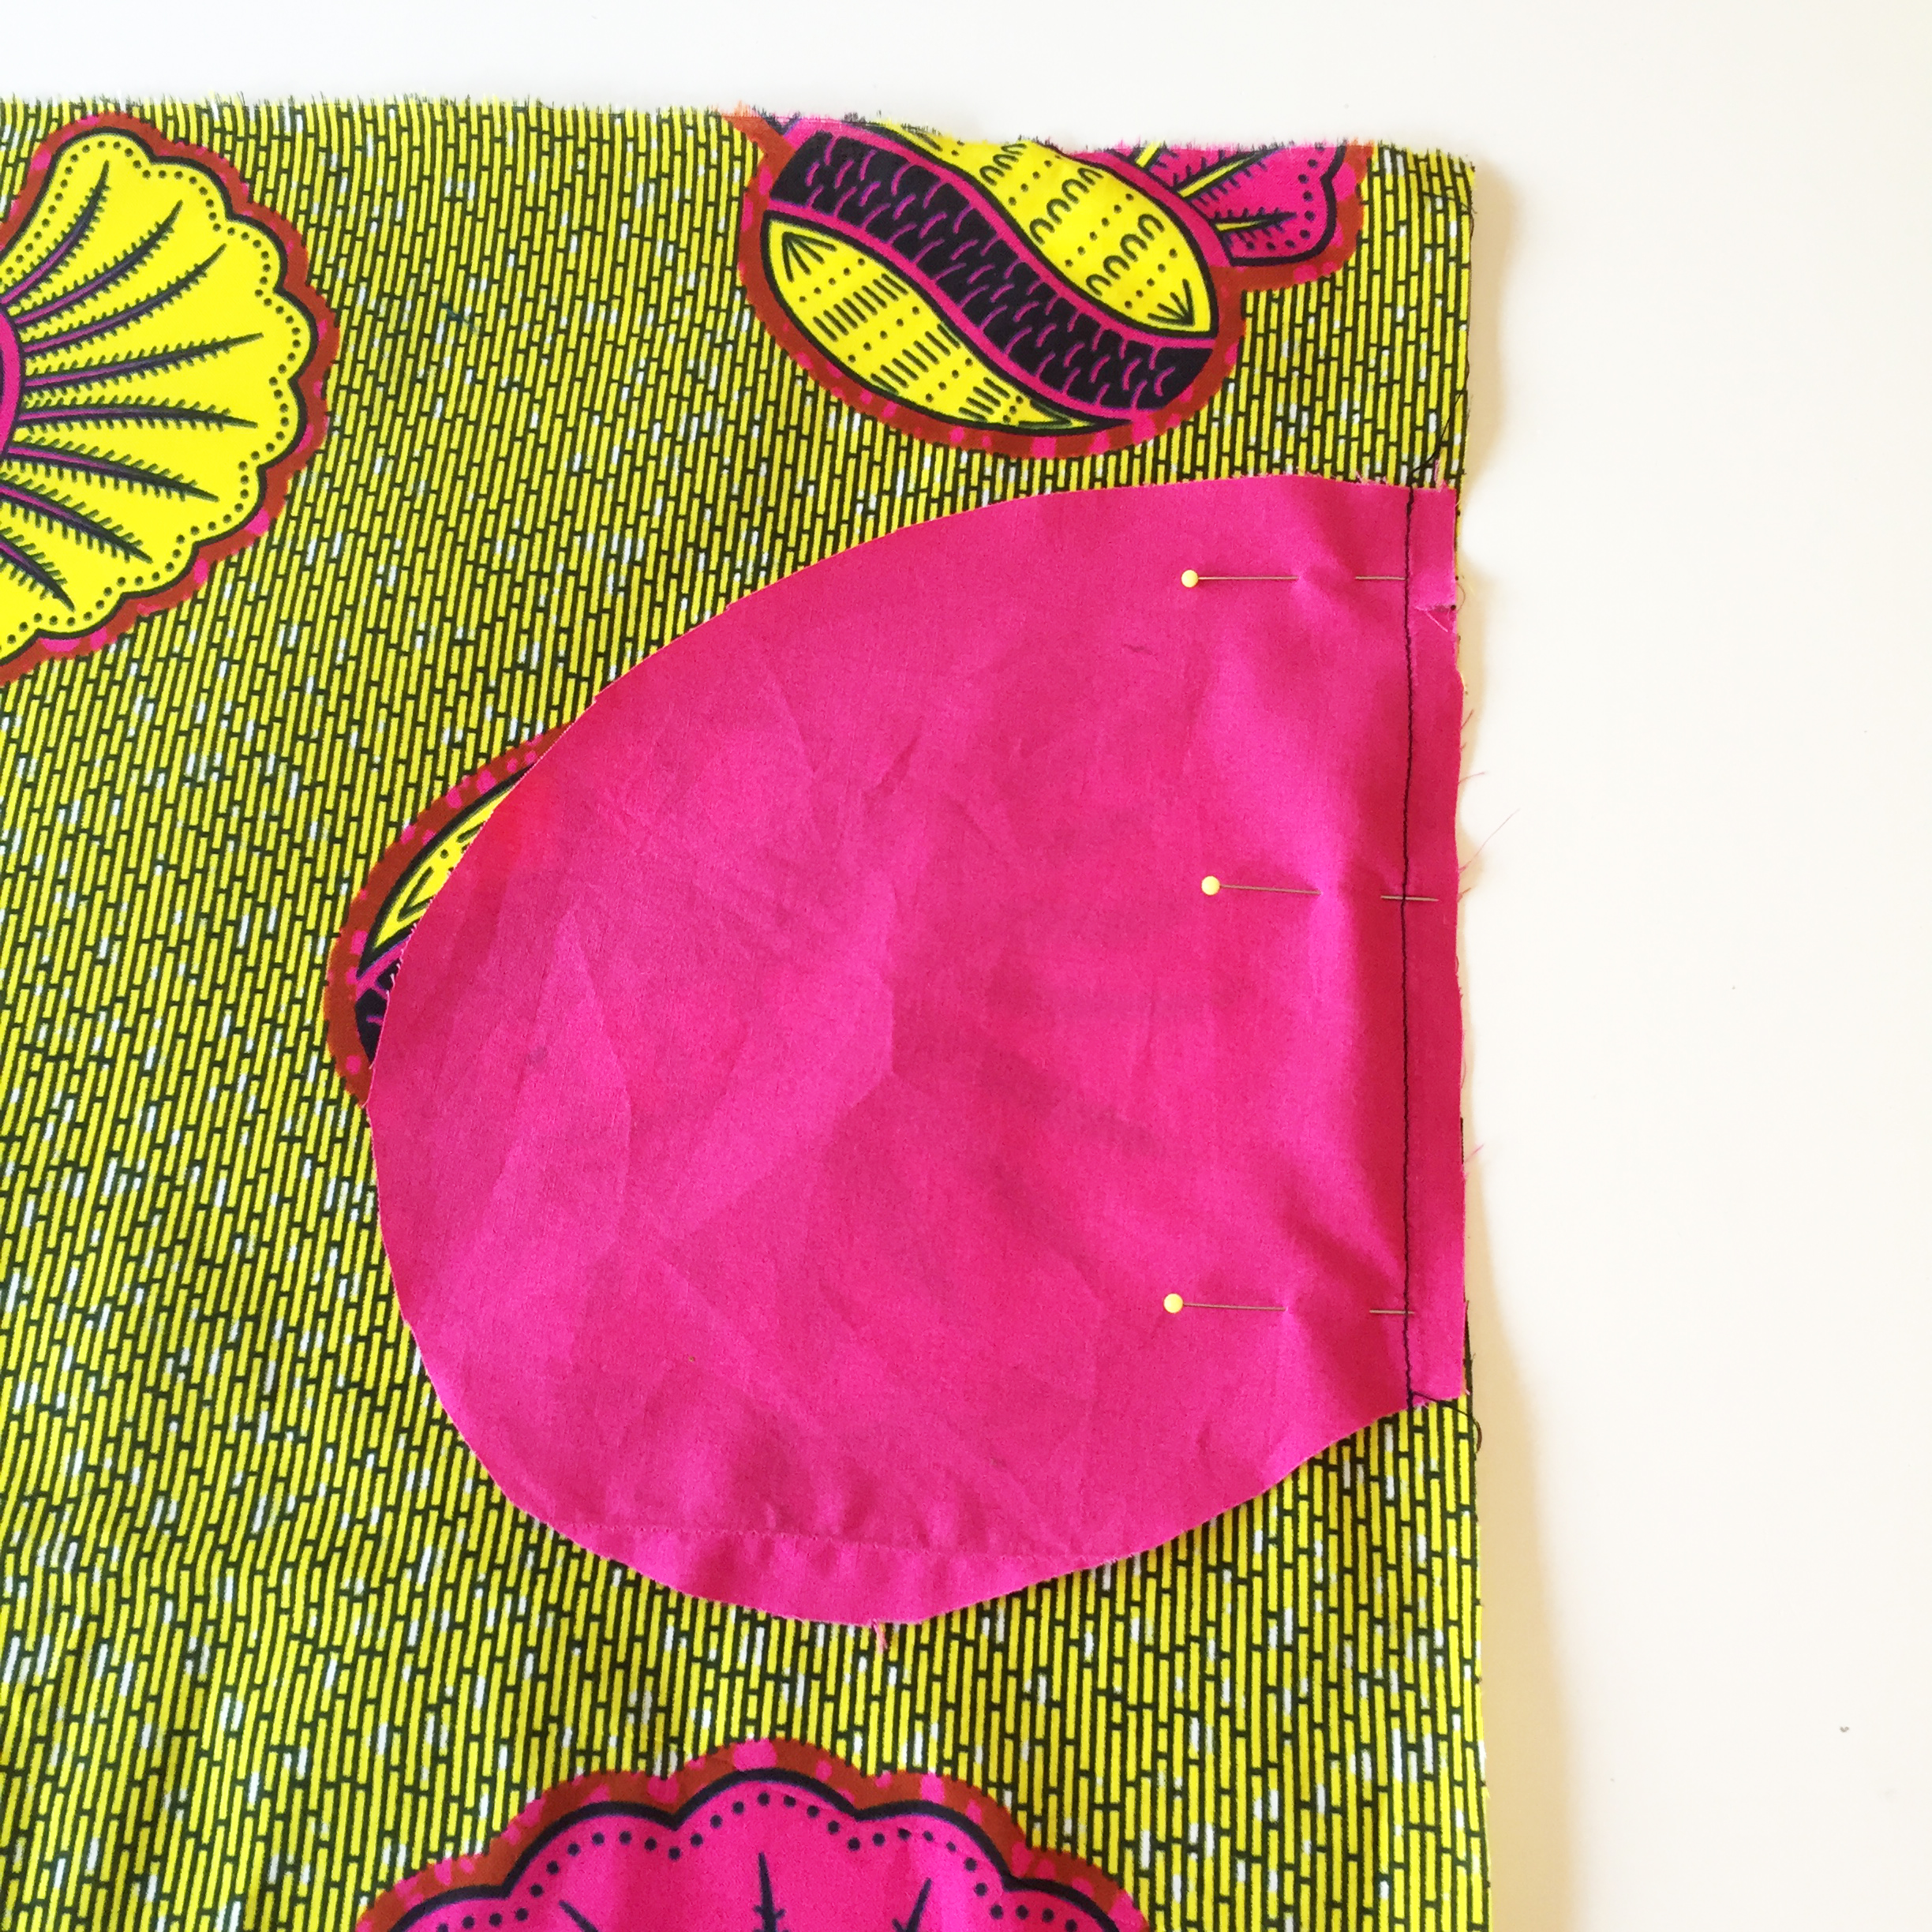
With the fabric right sides facing together, pin one pocket piece at each side edge of the Front and Back pieces in position as shown on the template. Sew down the straight vertical side edge.
2. Press the pocket away from the Front and Back piece. Topstitch on the pocket side.
PLEATS
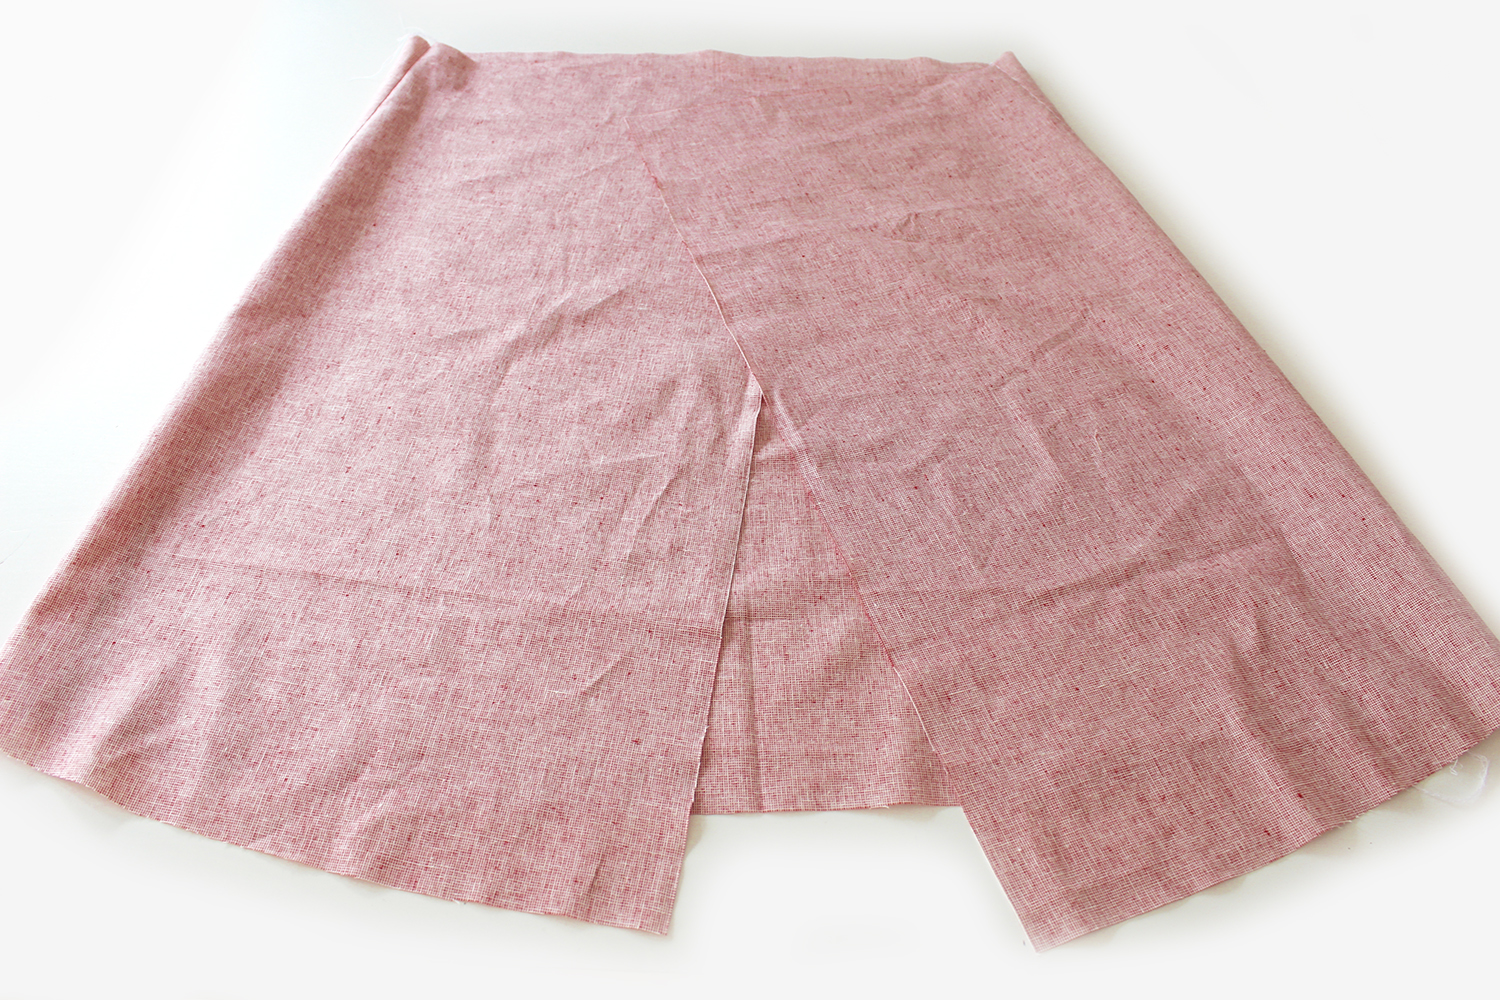
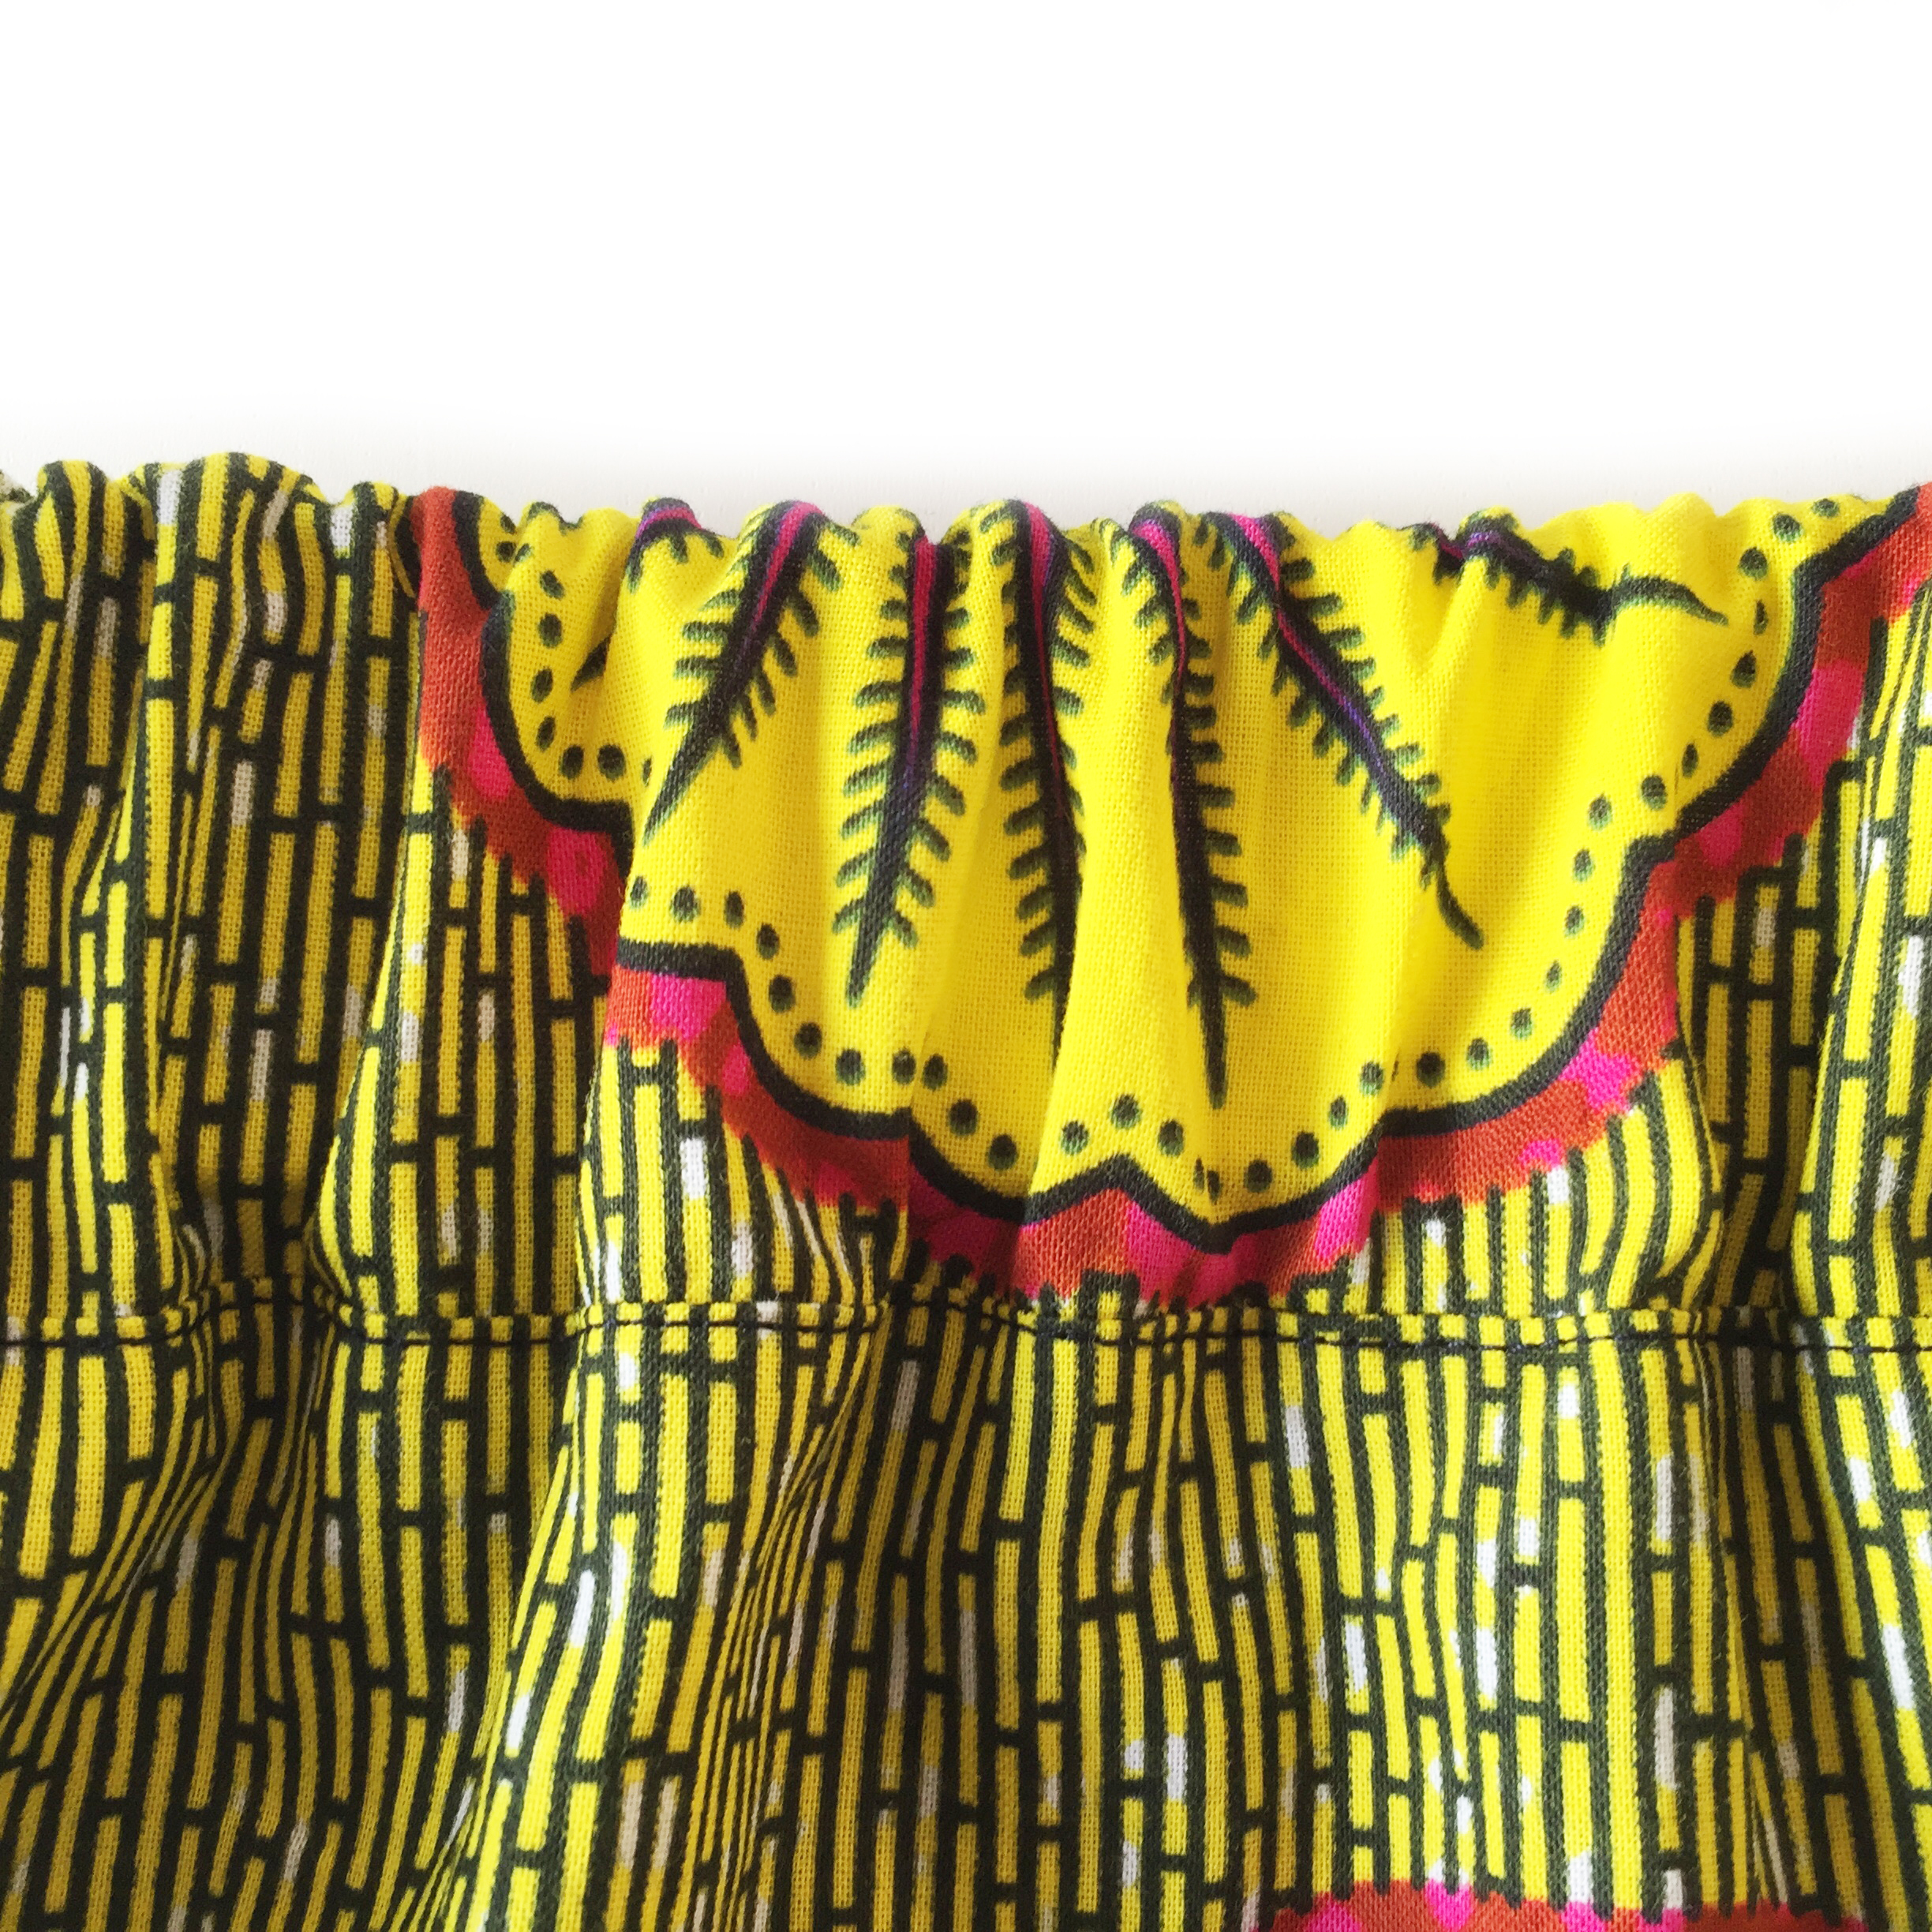
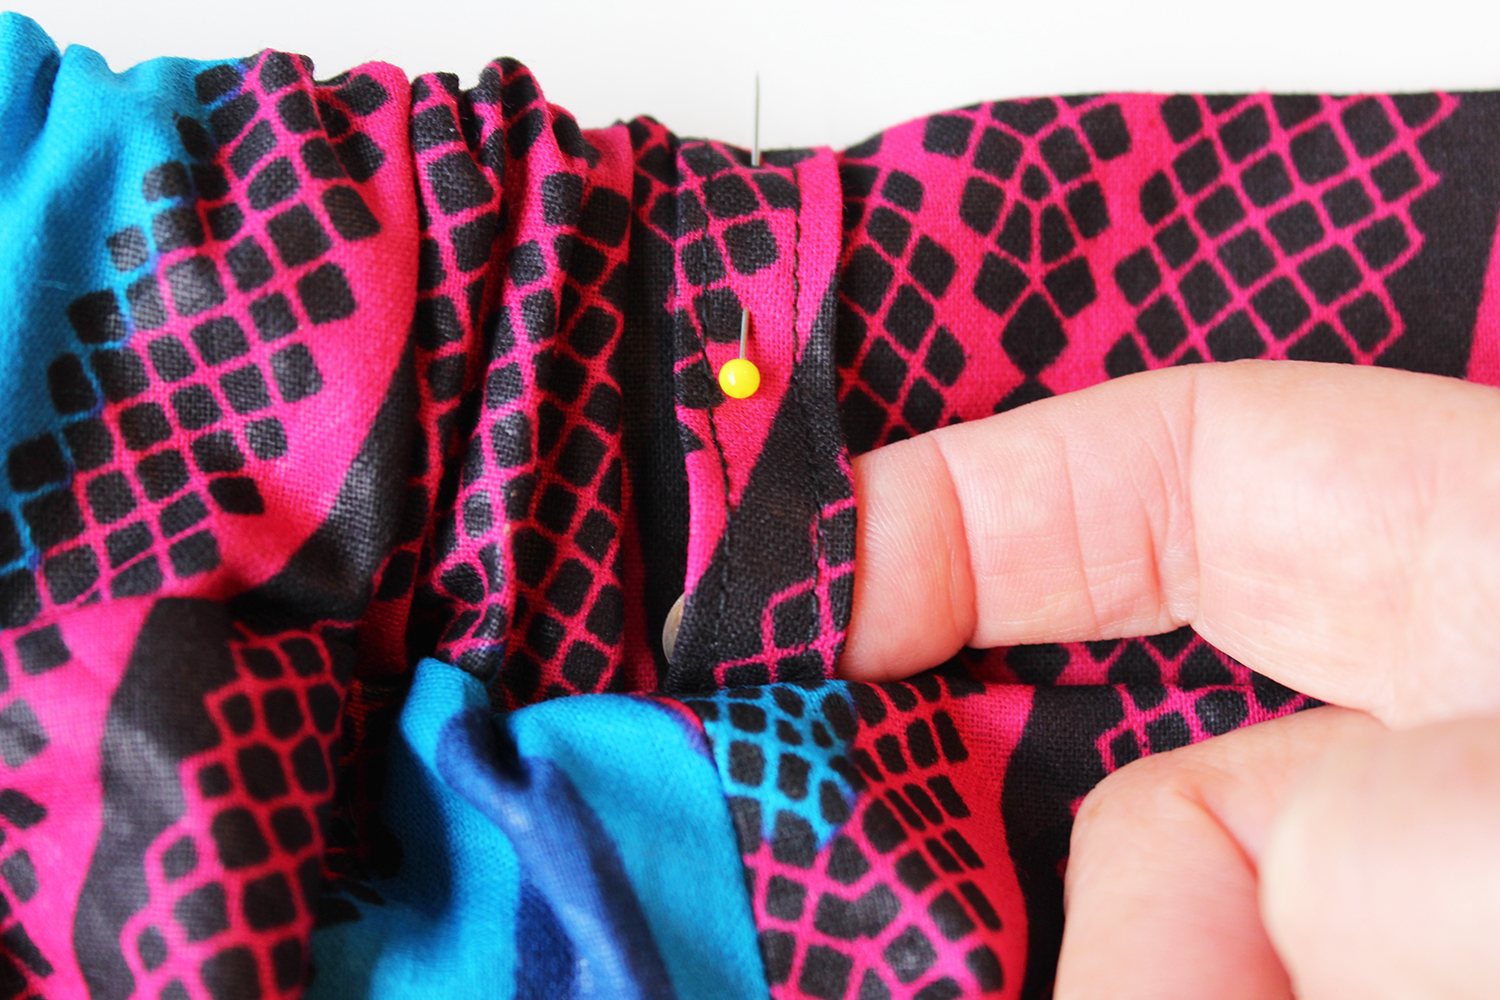
3. On the Front piece ONLY, pin the pleats in the marked positions as shown on the template.
PLEAT-Fabric right side PLEAT- Fabric wrong side Skirt Front right side
CLOSE UP OF THE REVERSE SIDE. Stitch across the top edge within the seam allowance to secure the pleats. Now go to step 4.
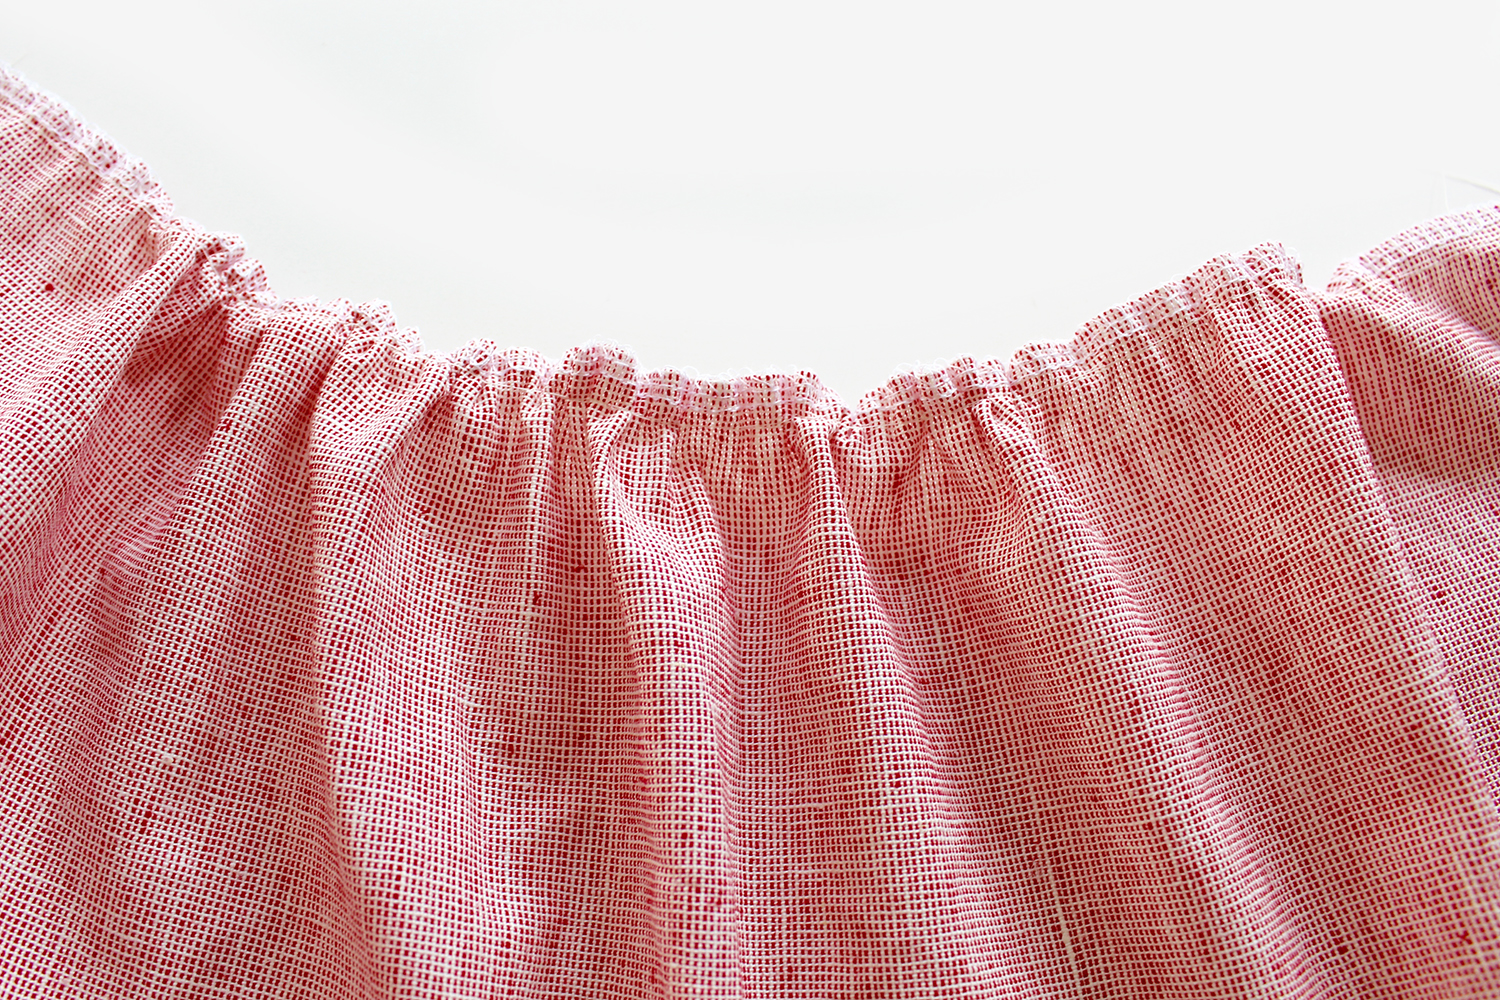
4a. For an alternative to pleating- Gathering up the Front top edge instead. GATHERING (if you prefer instead of front pleats)
Instead of pleats, why not gather up the front piece. To do this, set your sew machine to the maximum stitch length (usually 4 or 5) and sew a line approx 1cm from the top edge. Its a good idea to finish your top raw edge first and remember you are only doing gathering on the front section, the back will be gathered by the elastic we are inserting later.
So after sewing your line of long stitches pull the top thread only to gather up or ‘ease’ as we call this technique in the trade. Its a bit like gathering up the top of curtains if ever you’ve had this wondrous experience! Gather up the fabric to the same width as the front waistband. You can go to the next stage and adjust your gathers later.
JOINING THE FRONT TO THE BACK (Both skirts)
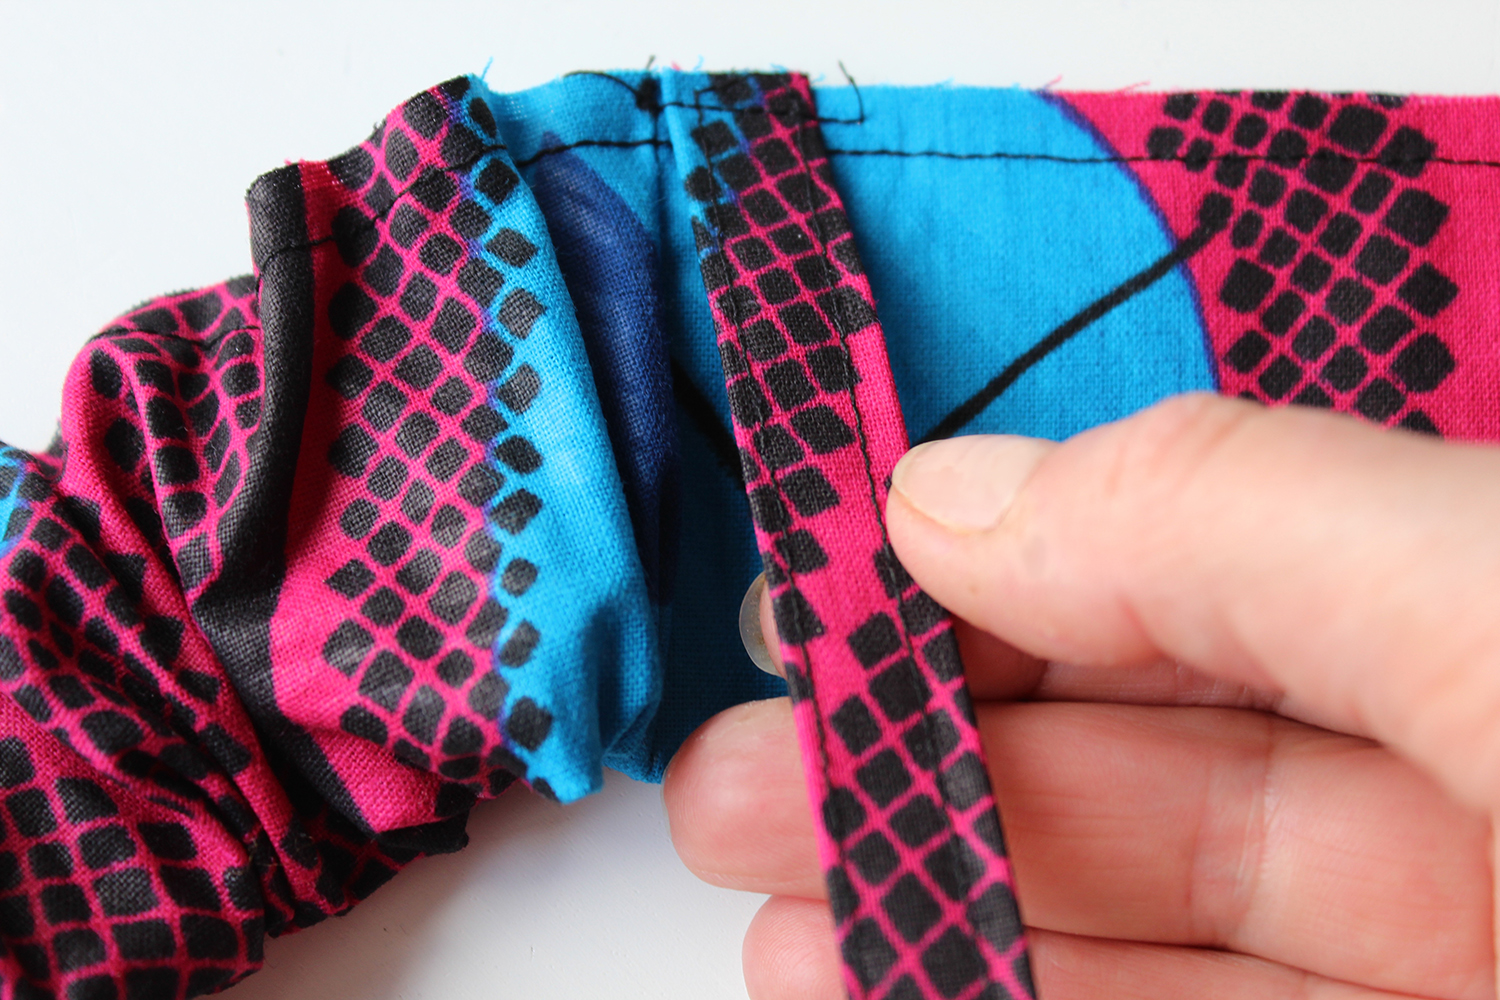
4. With the RST, pin the Front piece to the Back piece at the side edges. Sew from the top of the side edge, all around the pocket to the lower edge. Repeat for the other side.
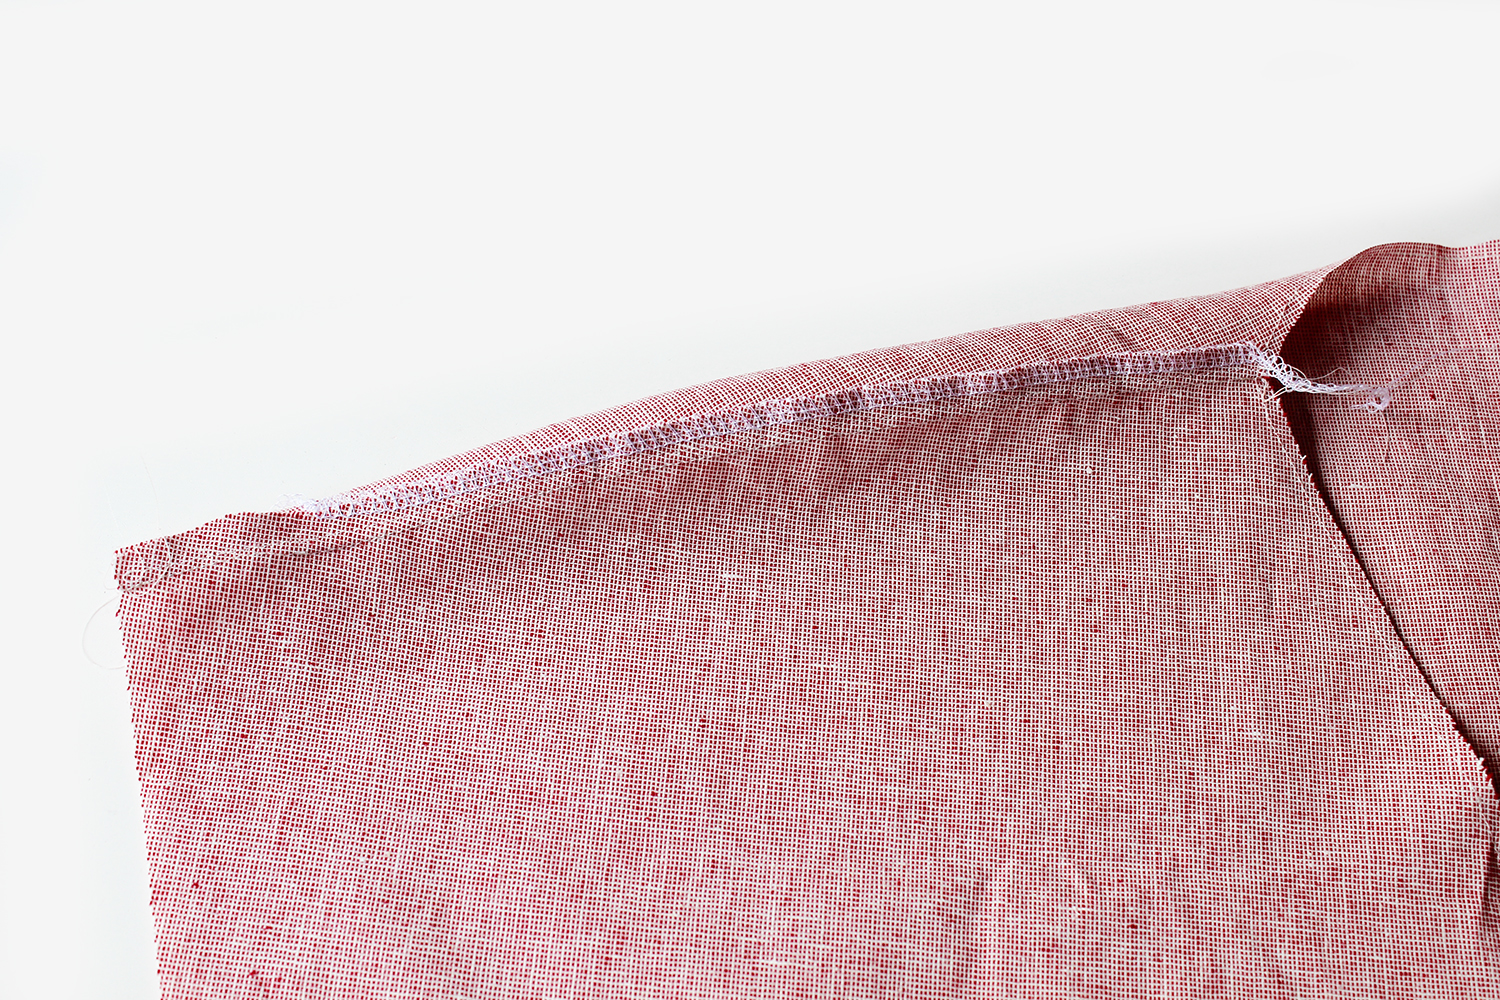
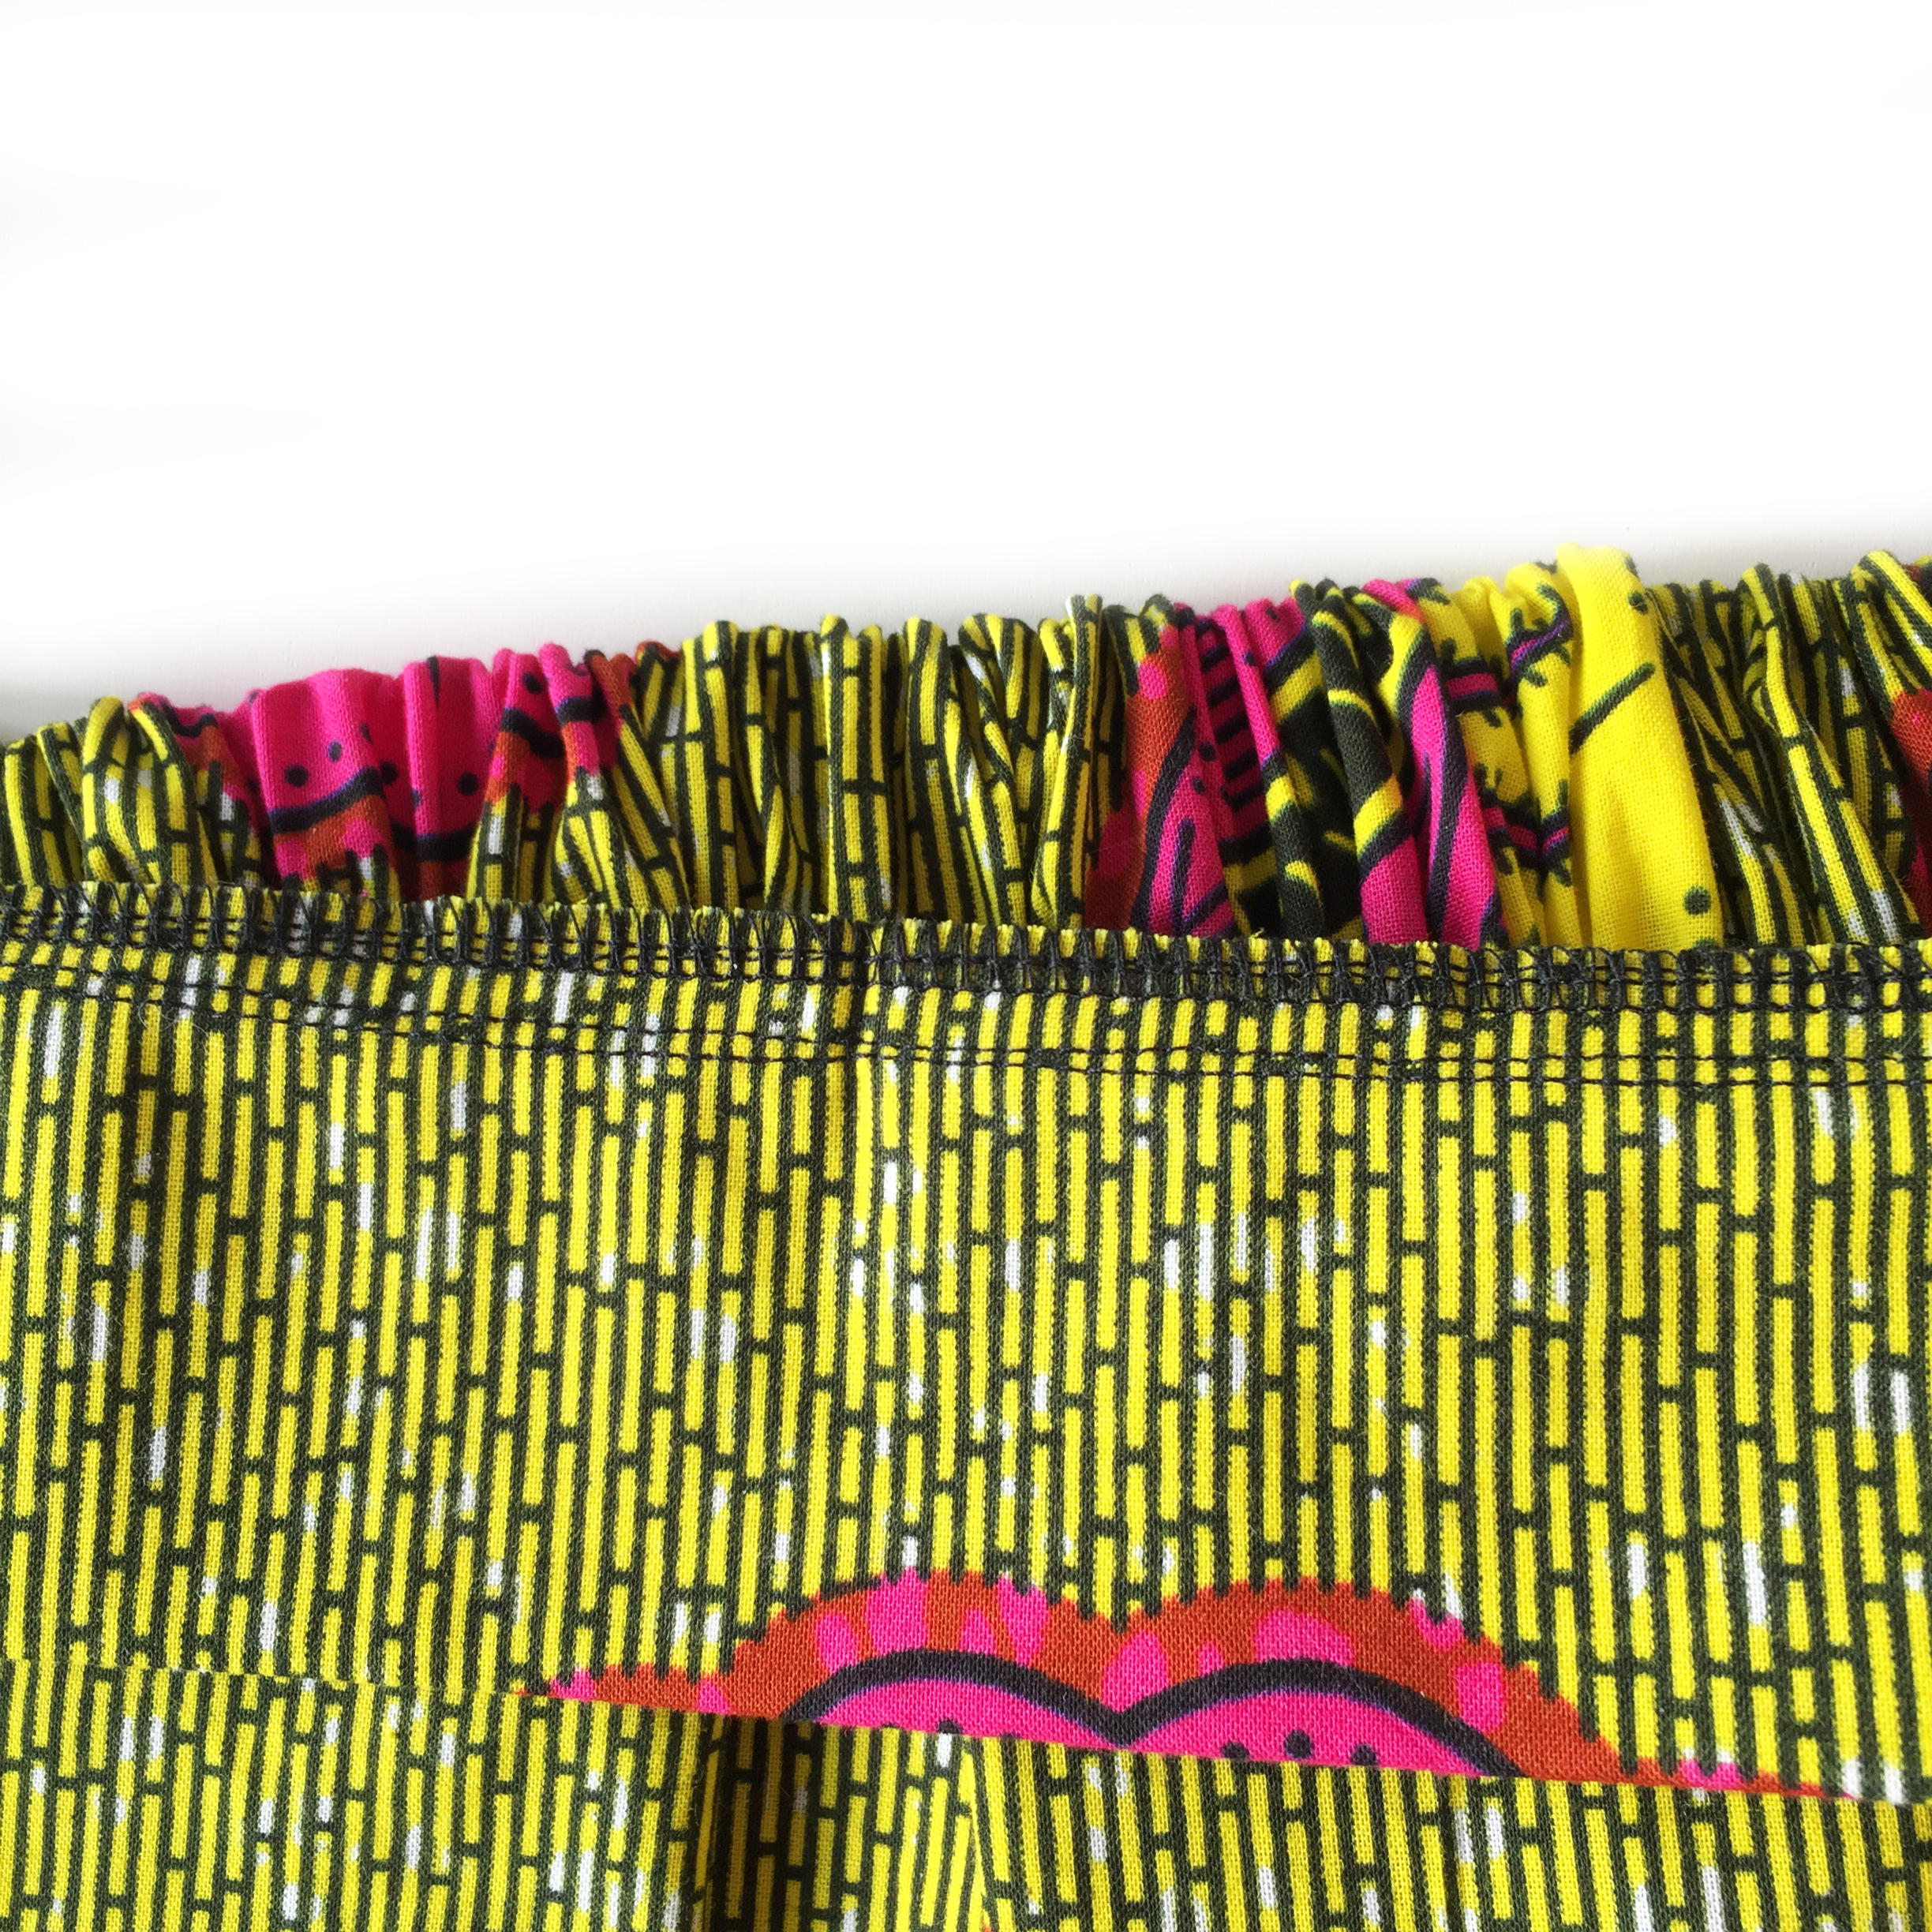
5. Finish the raw edges together. Press. Finish the top raw edge of the Front & Back all around.
WAISTBAND Here is a video link about doing the elastic bit
6. So with the Front Waistband interfaced and with the RST, pin then sew the waistband pieces together at the short edges. Press the seam allowances open.
7. Finish the raw outer edges of the band each side. Its easier to do this at this stage than later…..just saying!
Join the waistband pieces together at the short sides
With the wrong sides together, fold the waistband piece in half aligning the long raw edges all around. Press.
8. Unfold the band. Cut your elastic piece in length according to your size as follows:
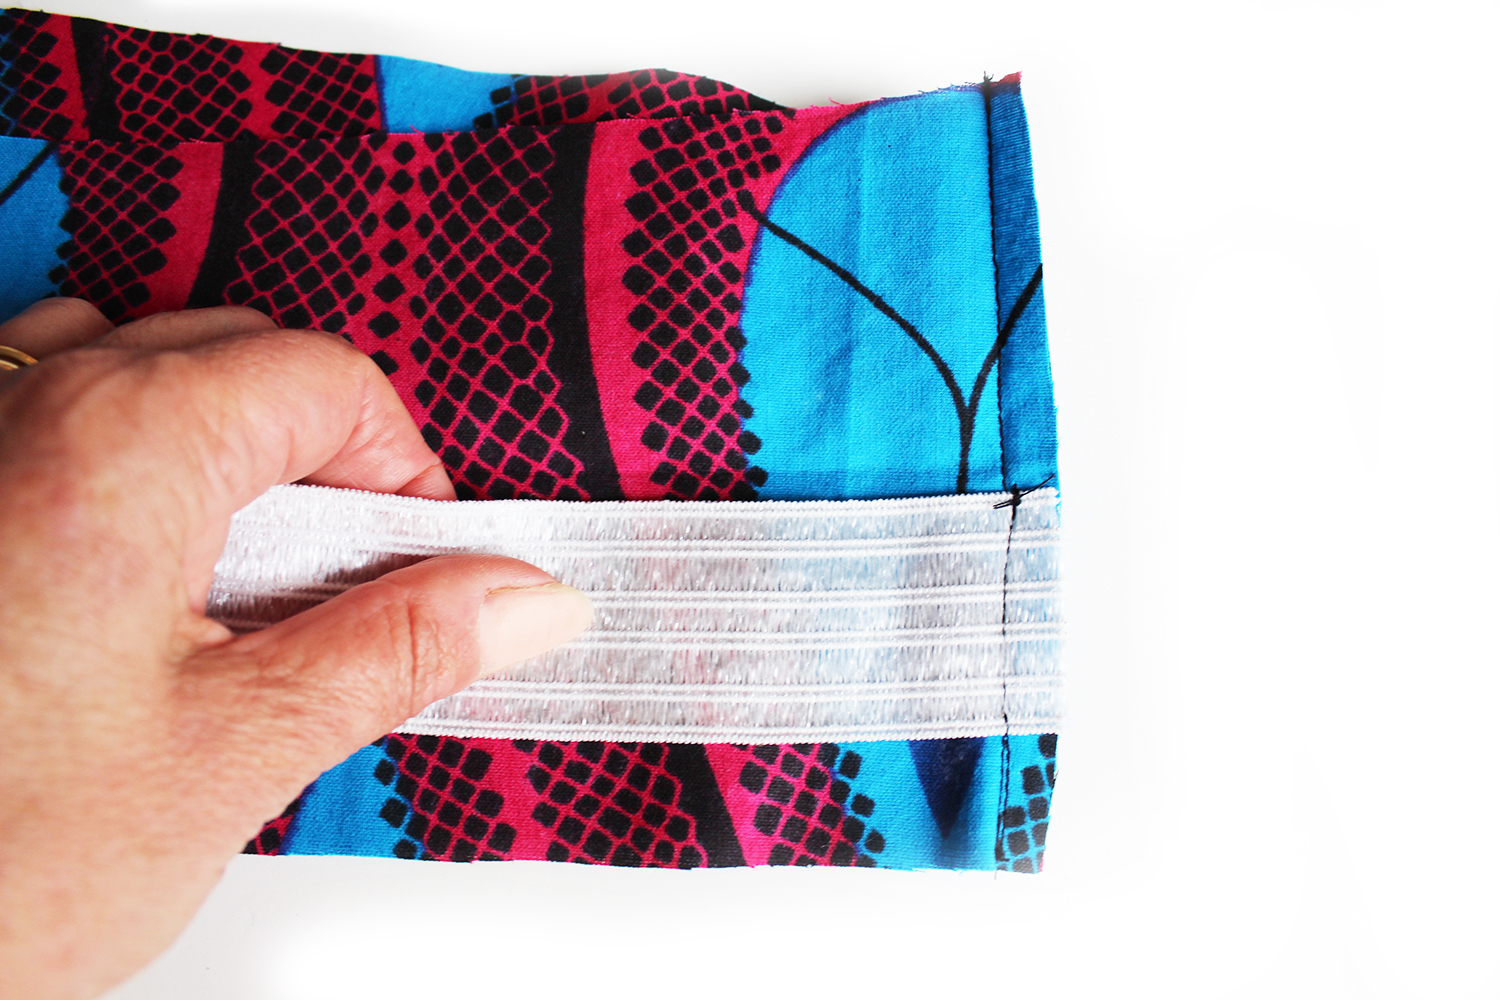
Now, take your elastic piece which has been cut in the length according to your size and pin the elastic to the side seams. Aligning the top of the elastic with the waistband centre fold and approx 1.5cm away from the lower raw edge, laying it across the back waistband. Sew along the side seam each side to secure the elastic.
9. Fold back the waistband piece. Pin along the lower edge. Machine tack stitch all around, as before, easing the fabric beyond the elastic as you go. Heres that video link again to show you how in case you missed it video about putting in the elastic
Optional tabs:at this stage you might like to add the belt tabs and make a tie belt. Instructions for making up the tab pieces is in the cutting guide. Place each tab unfolded short raw edge at the waistband raw edge at each side seam with the tab hanging downwards towards the skirt. Machine tack within the seam allowance to hold. Continue…
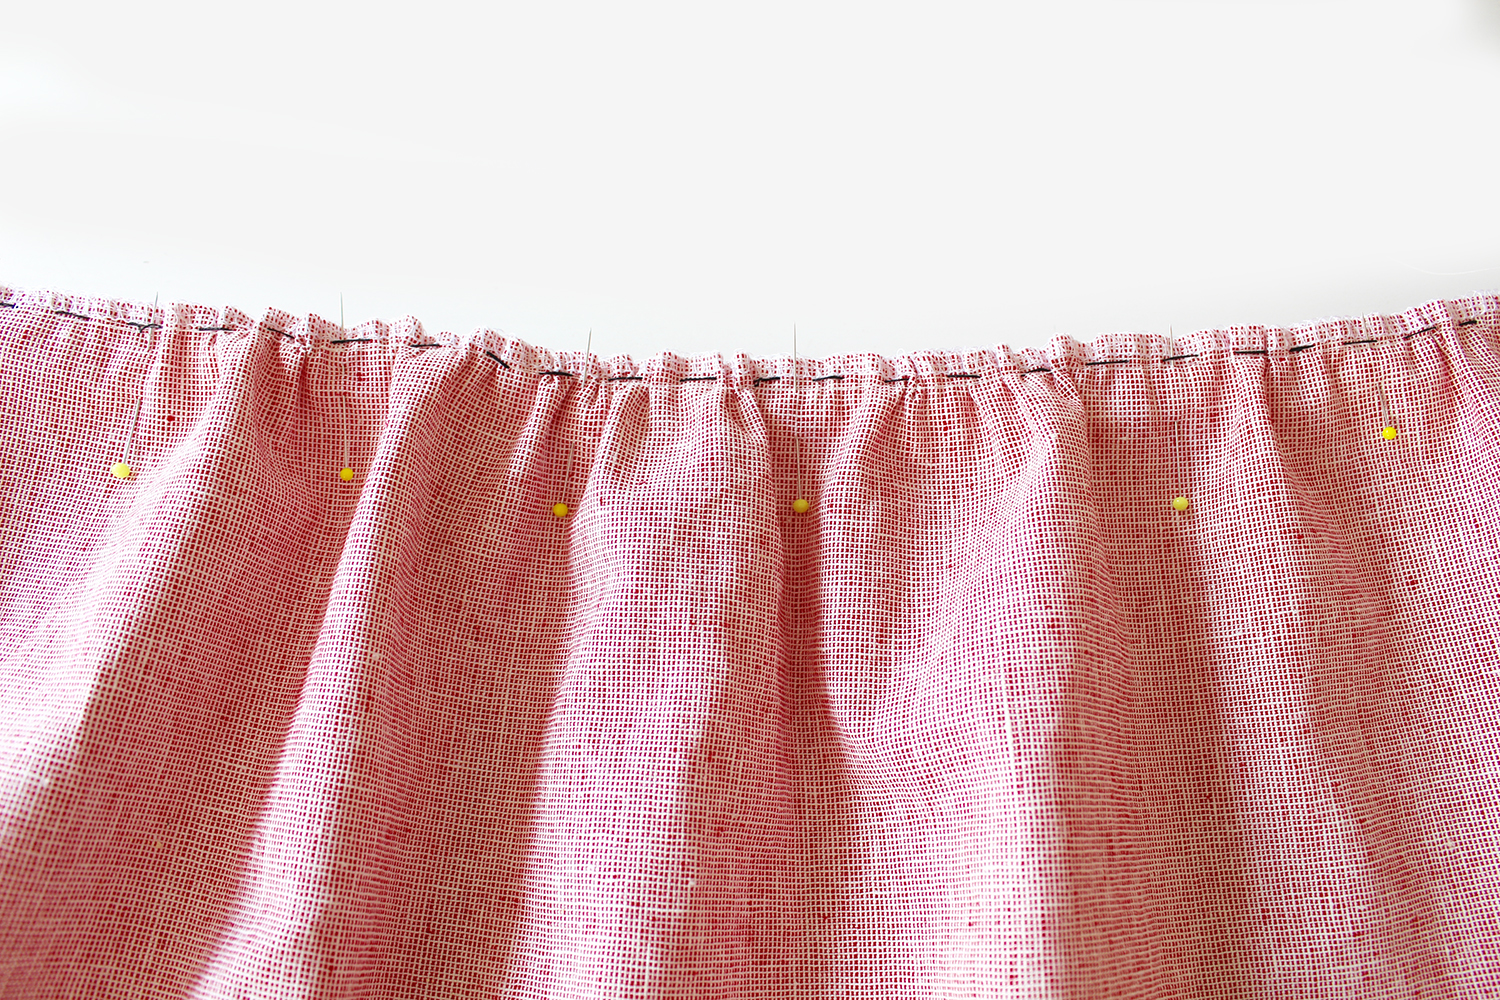
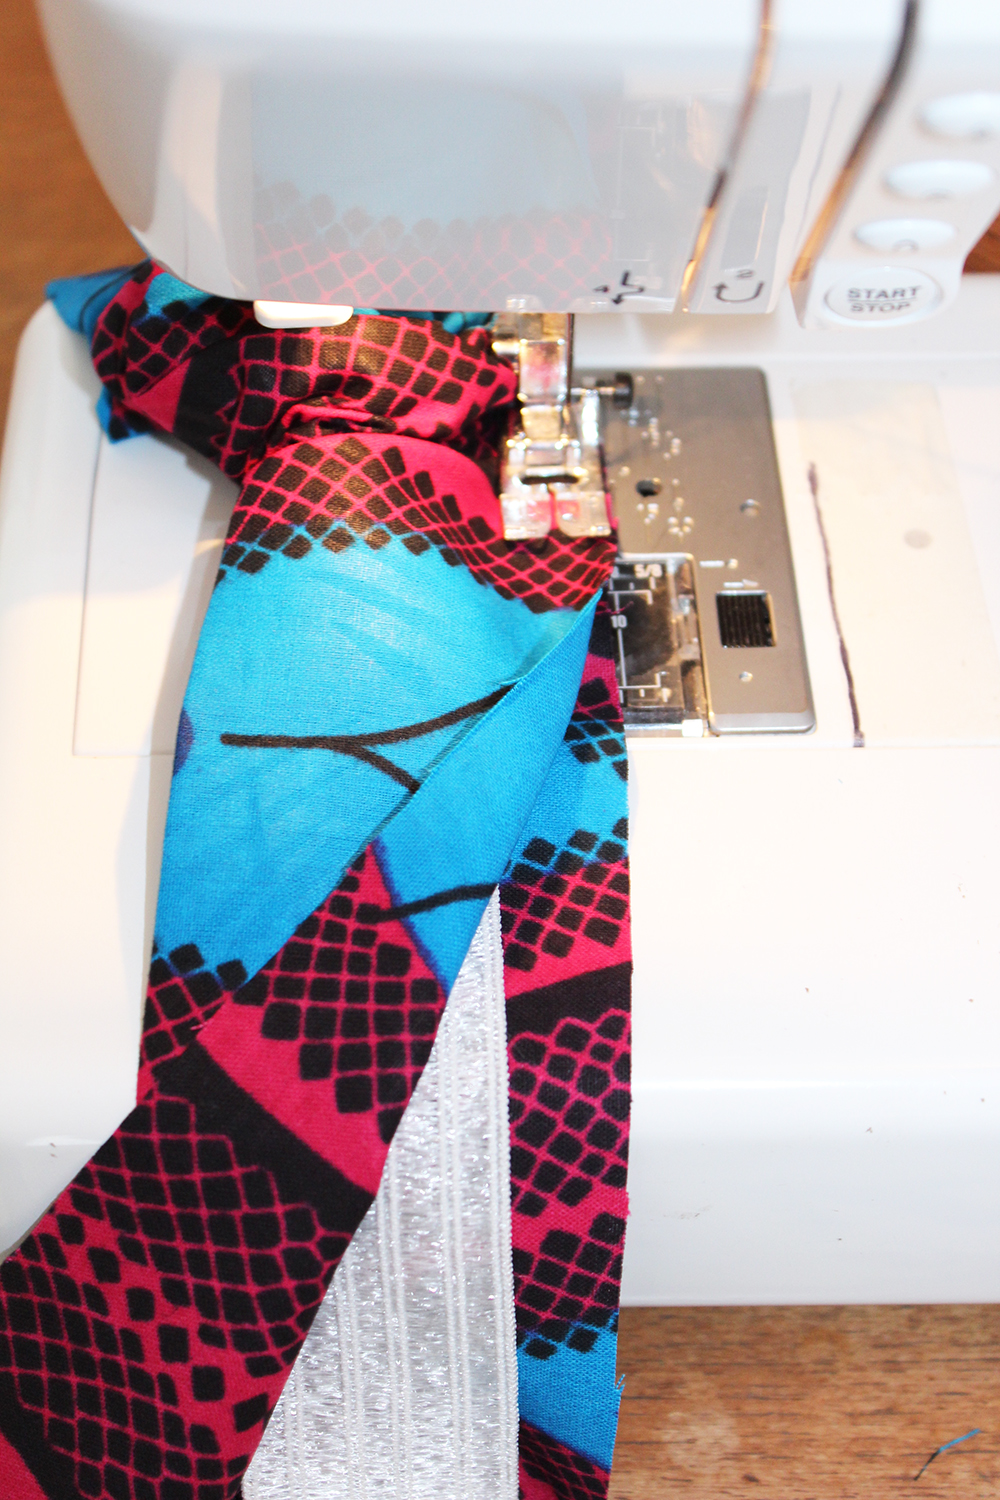
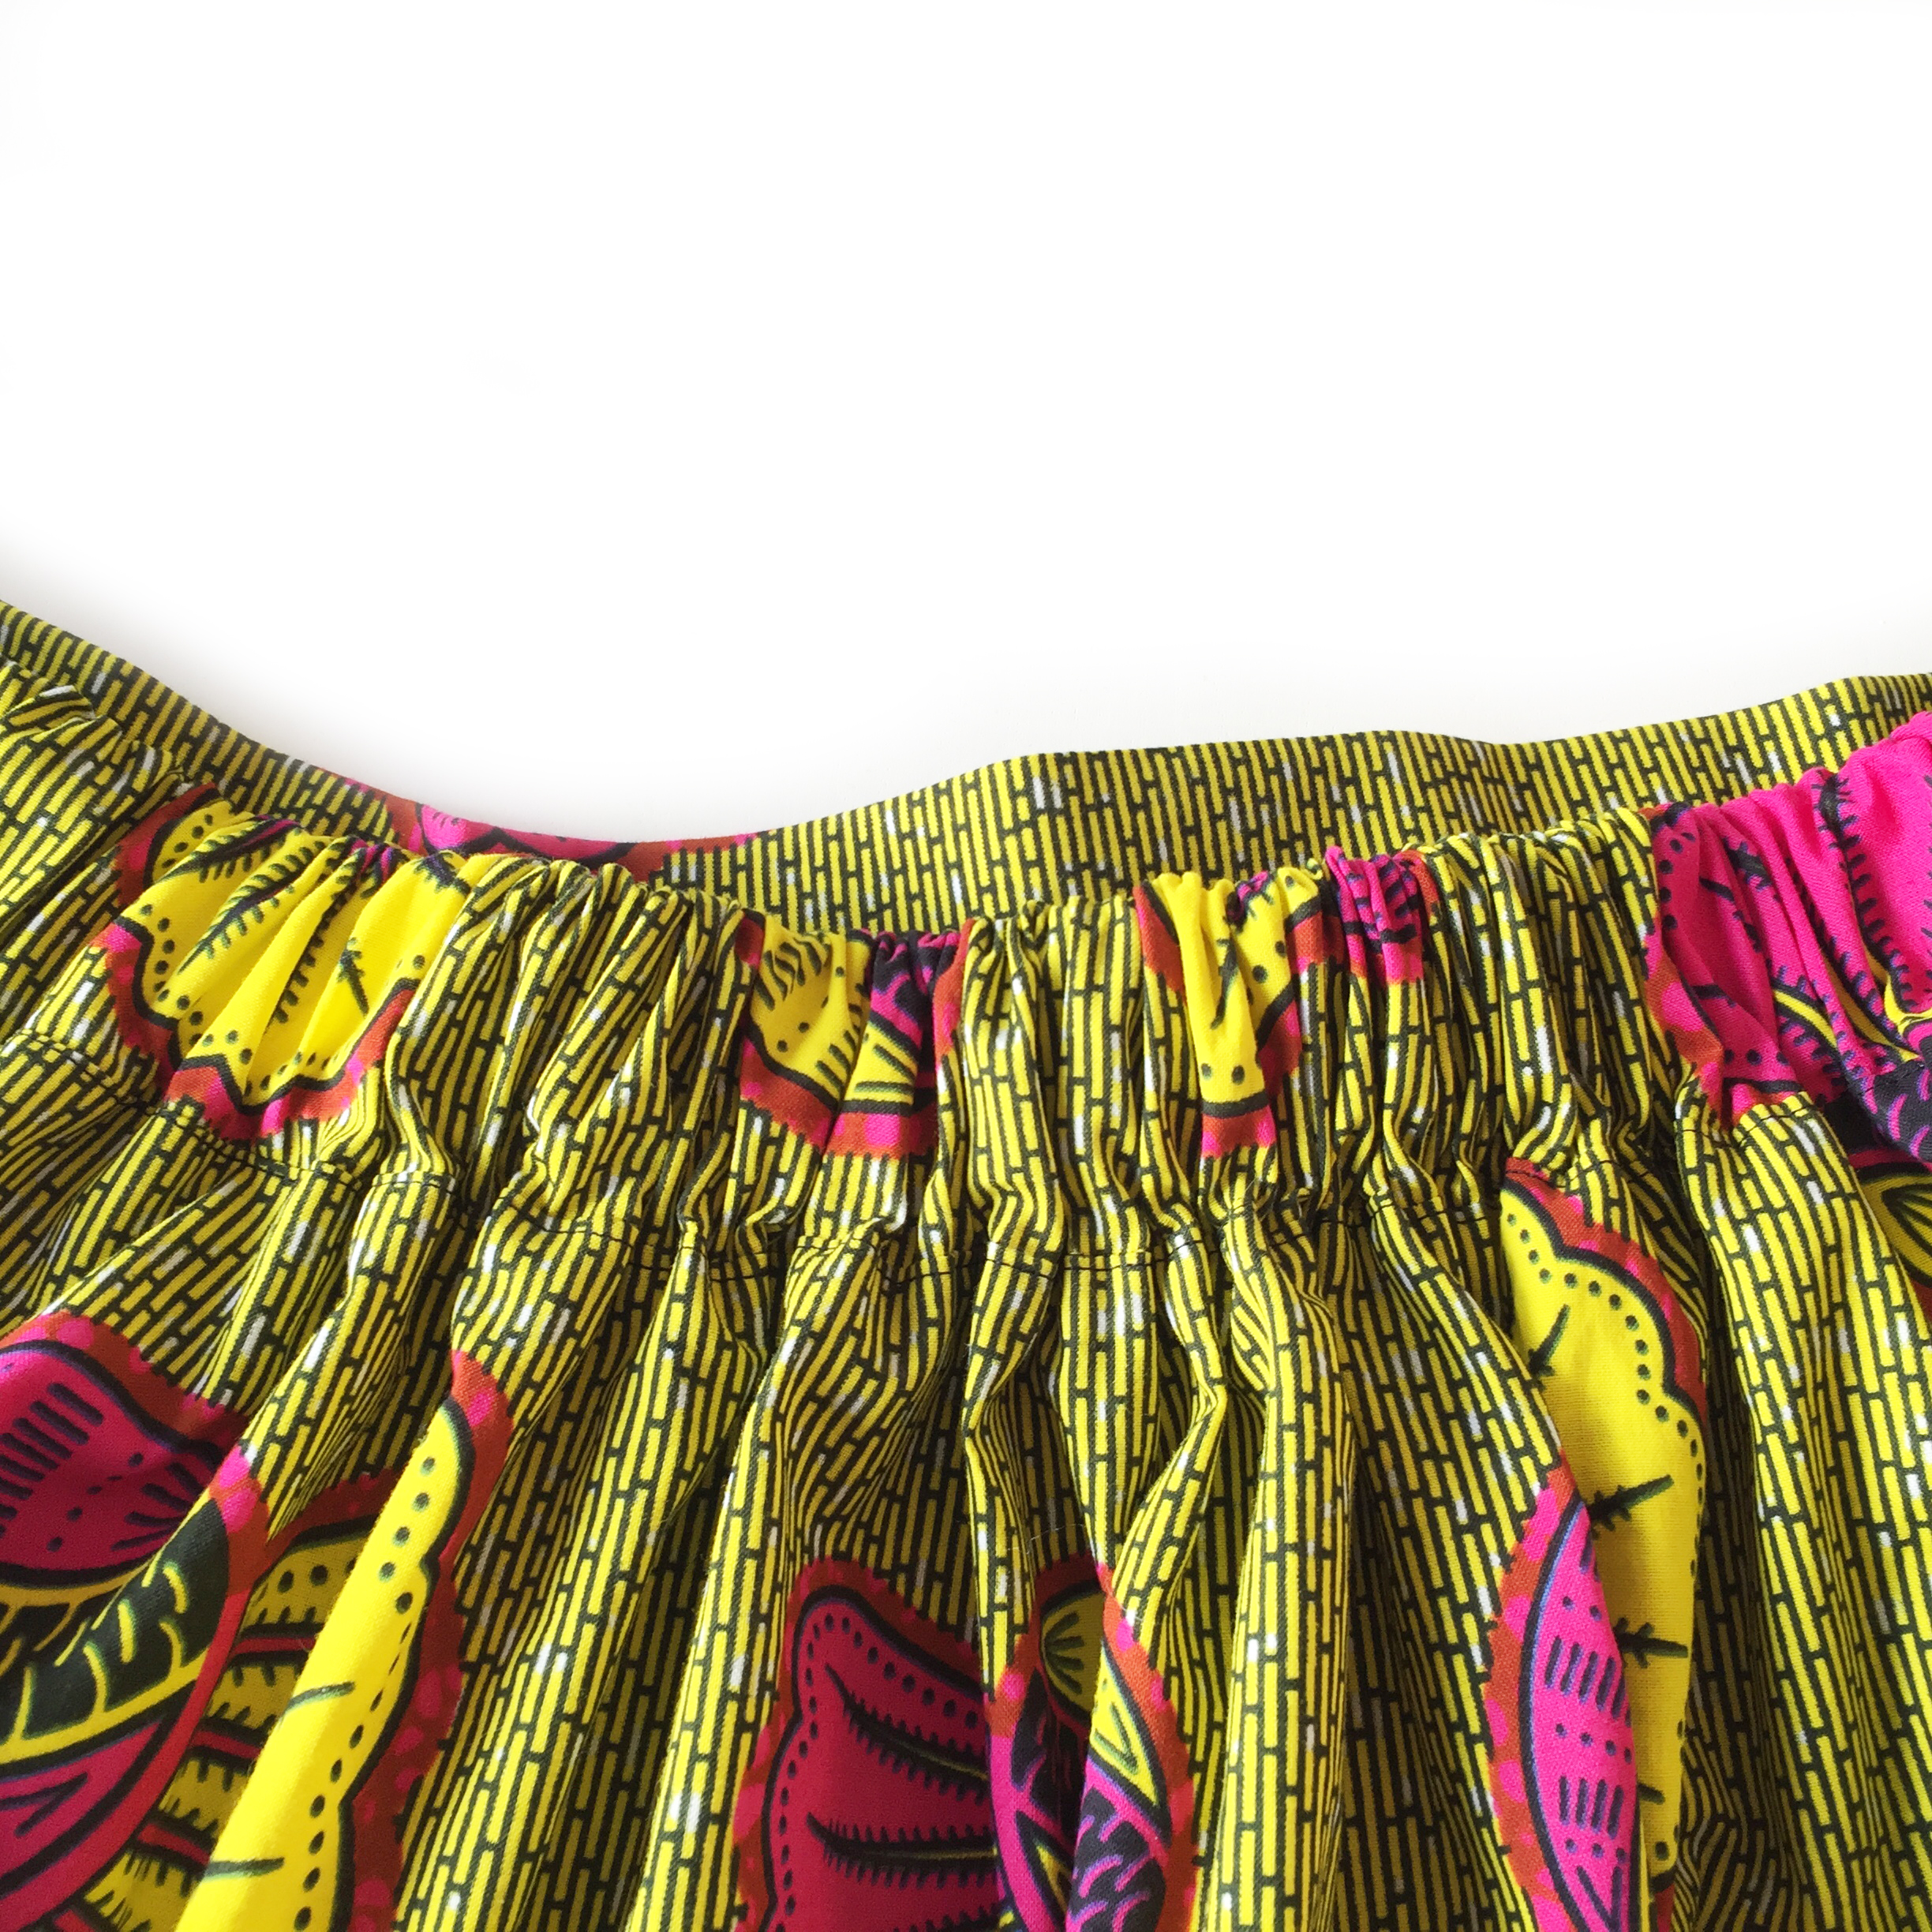
10. Pin the waistband to the skirt top edge. Sew. Tip: ease the gathers of the fabric past the (dropped down) needle as you go, so you are always sewing flat fabric.
11. Press the seam allowance downwards, topstitch on the skirt side all around to secure in place.
Optional tab: Fold up the tab piece that has been stitched into the waistband seam. Press over 1cm at the raw edge, pin at the top of the waistband edge, then topstitch it to secure.
Close up of tab at the top edge
HEMMING
12. Hem the raw lower edge of the Front & Back piece all around. Fold over and press a 2cm hem at the lower edge or length as required. Pin. Sew close to the edge. Press.
Pop it on and admire your handiwork!
MAKING AN OPTIONAL TIE BELT
Cut two pieces of fabric 10cm x 100cm. Join them together at the short edges with the RST. Press the seam allowance open. Fold the tie in half lengthways. Press. Pin. Sew down the two short edges and one long raw edge with a 1cm seam allowance but leave an opening at the centre join of around 4cm. Trim the seam allowance to 5mm and trim across the seam allowance corners. Turn the tie inside out through the opening, pushing out the corners with a poking tool. press so that the seam line is in line with the fold. Topstitch all around approx 3mm from the edge, thus closing up the opening. Feed through the tabs and Voila! Now who doesn’t love a bow tie!
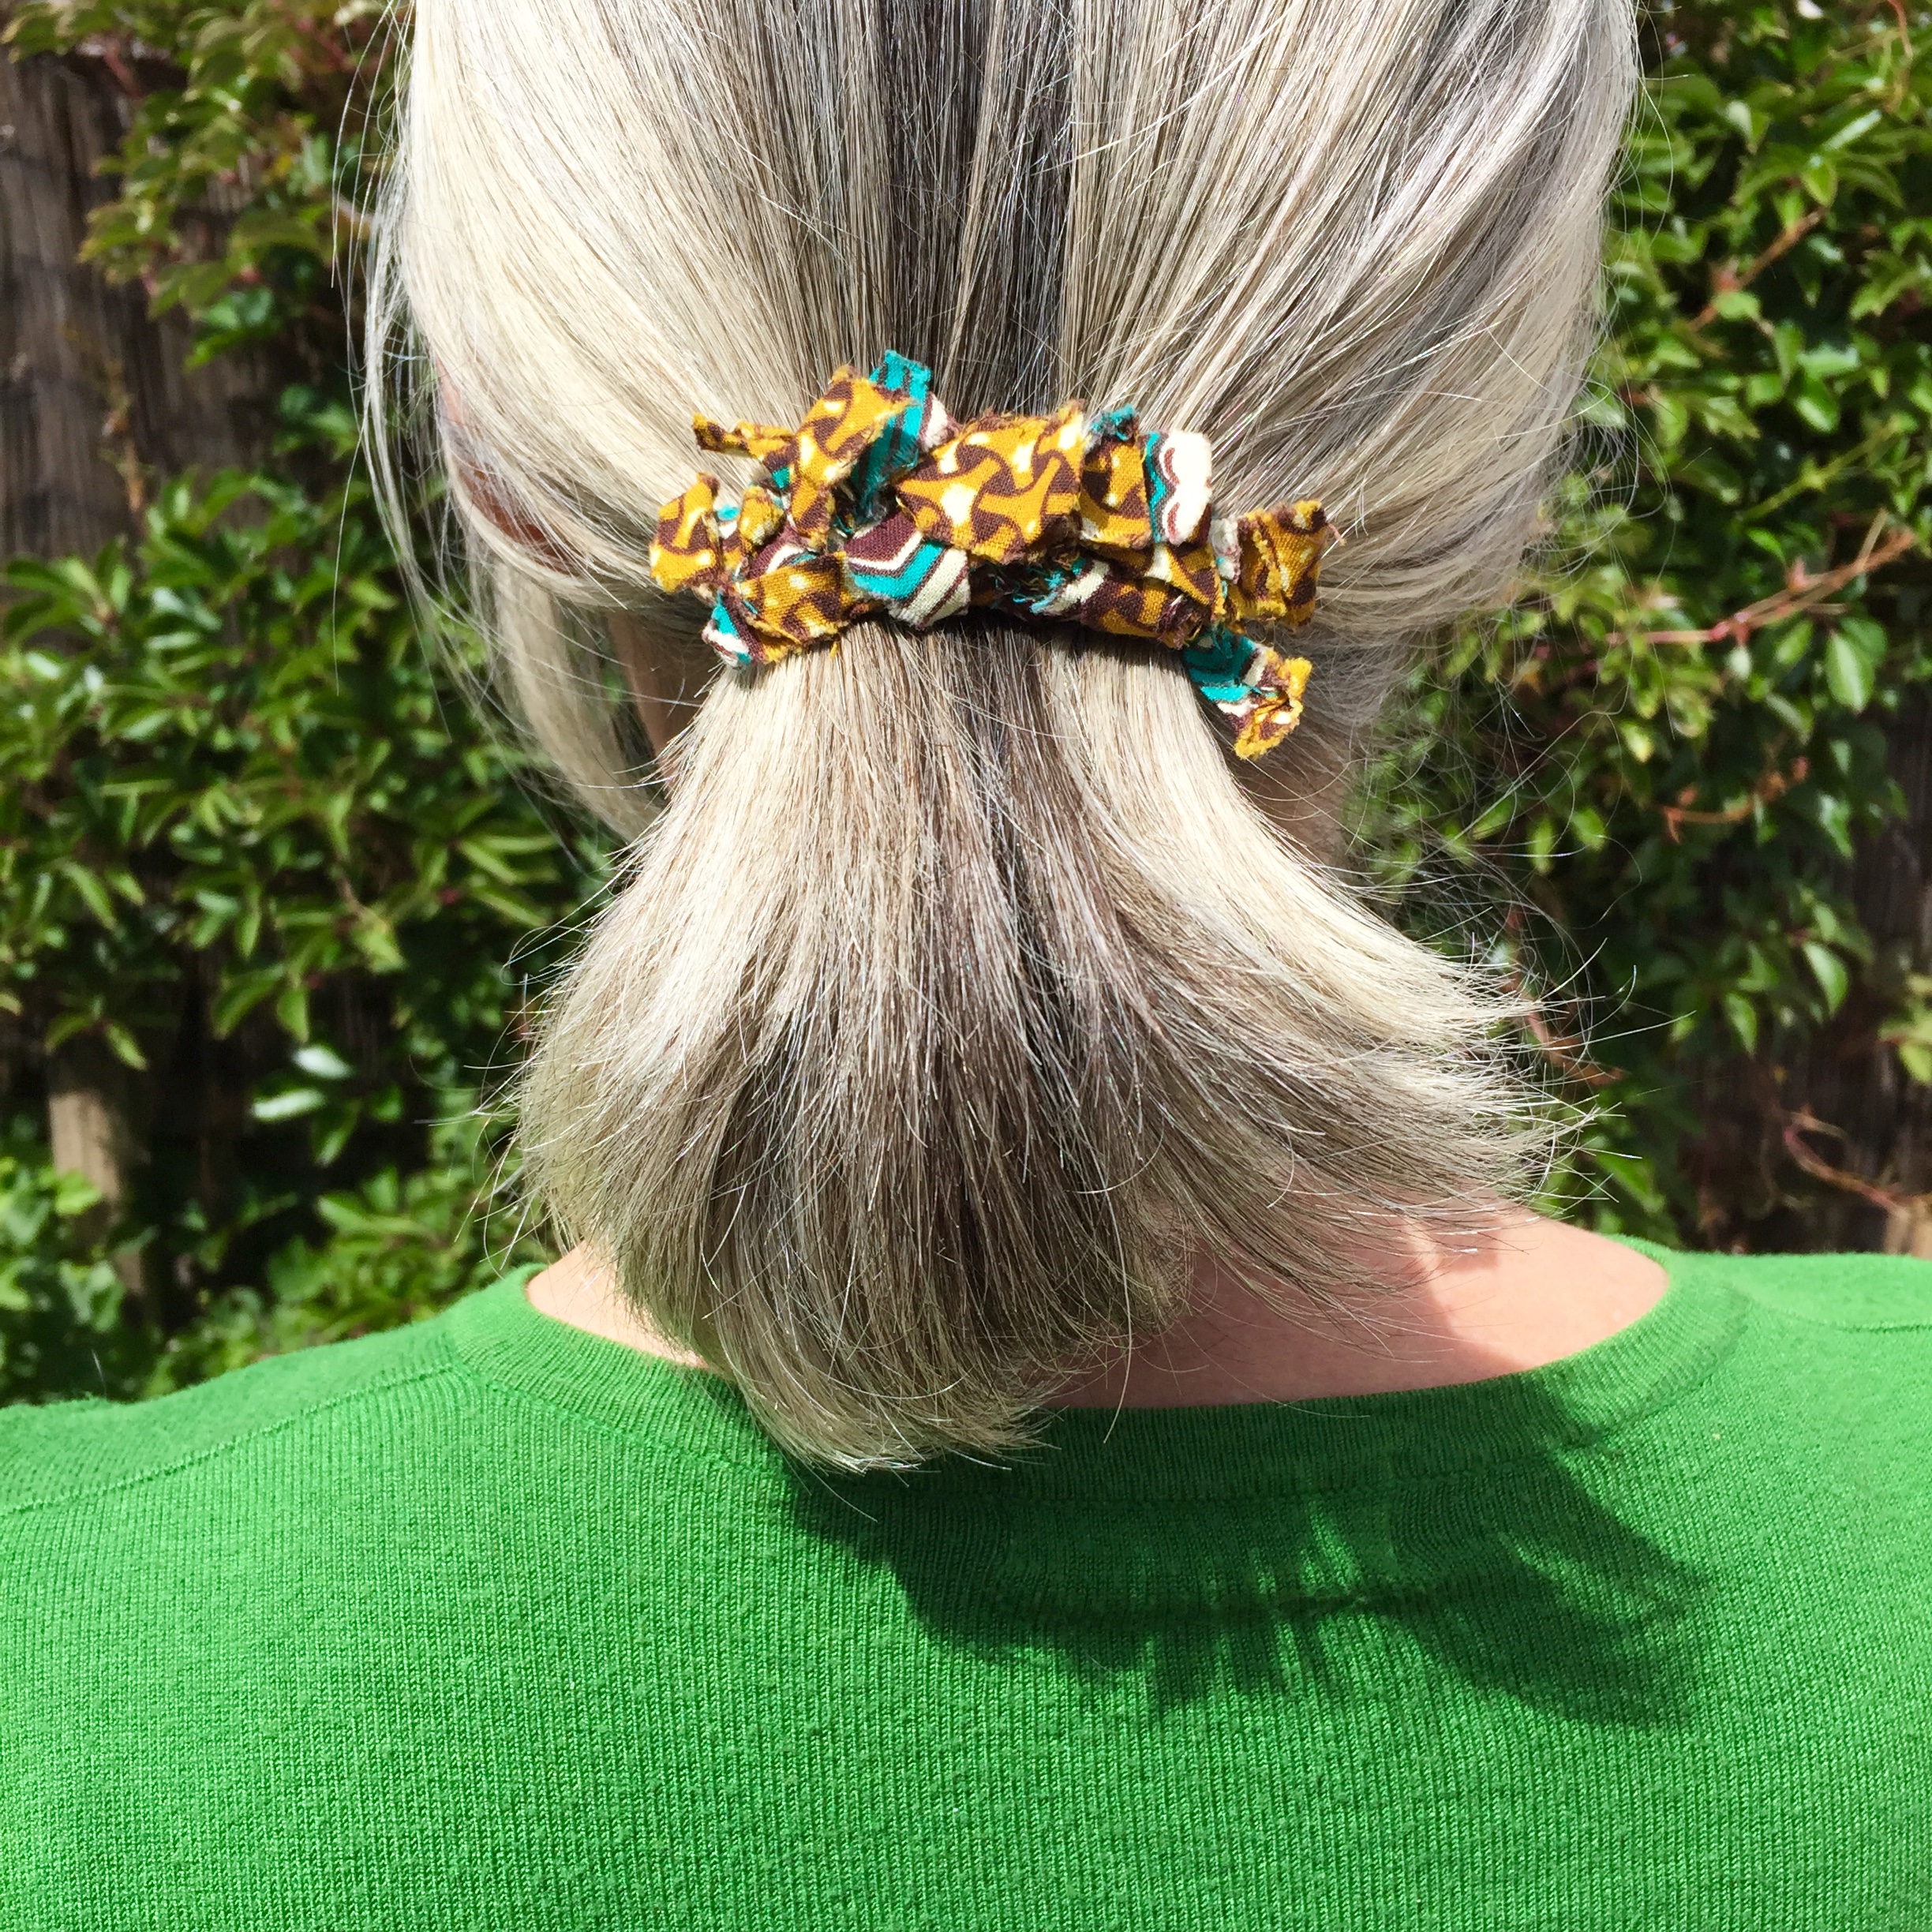
MAKING A MATCHING HAIR RAG ACCESSORY
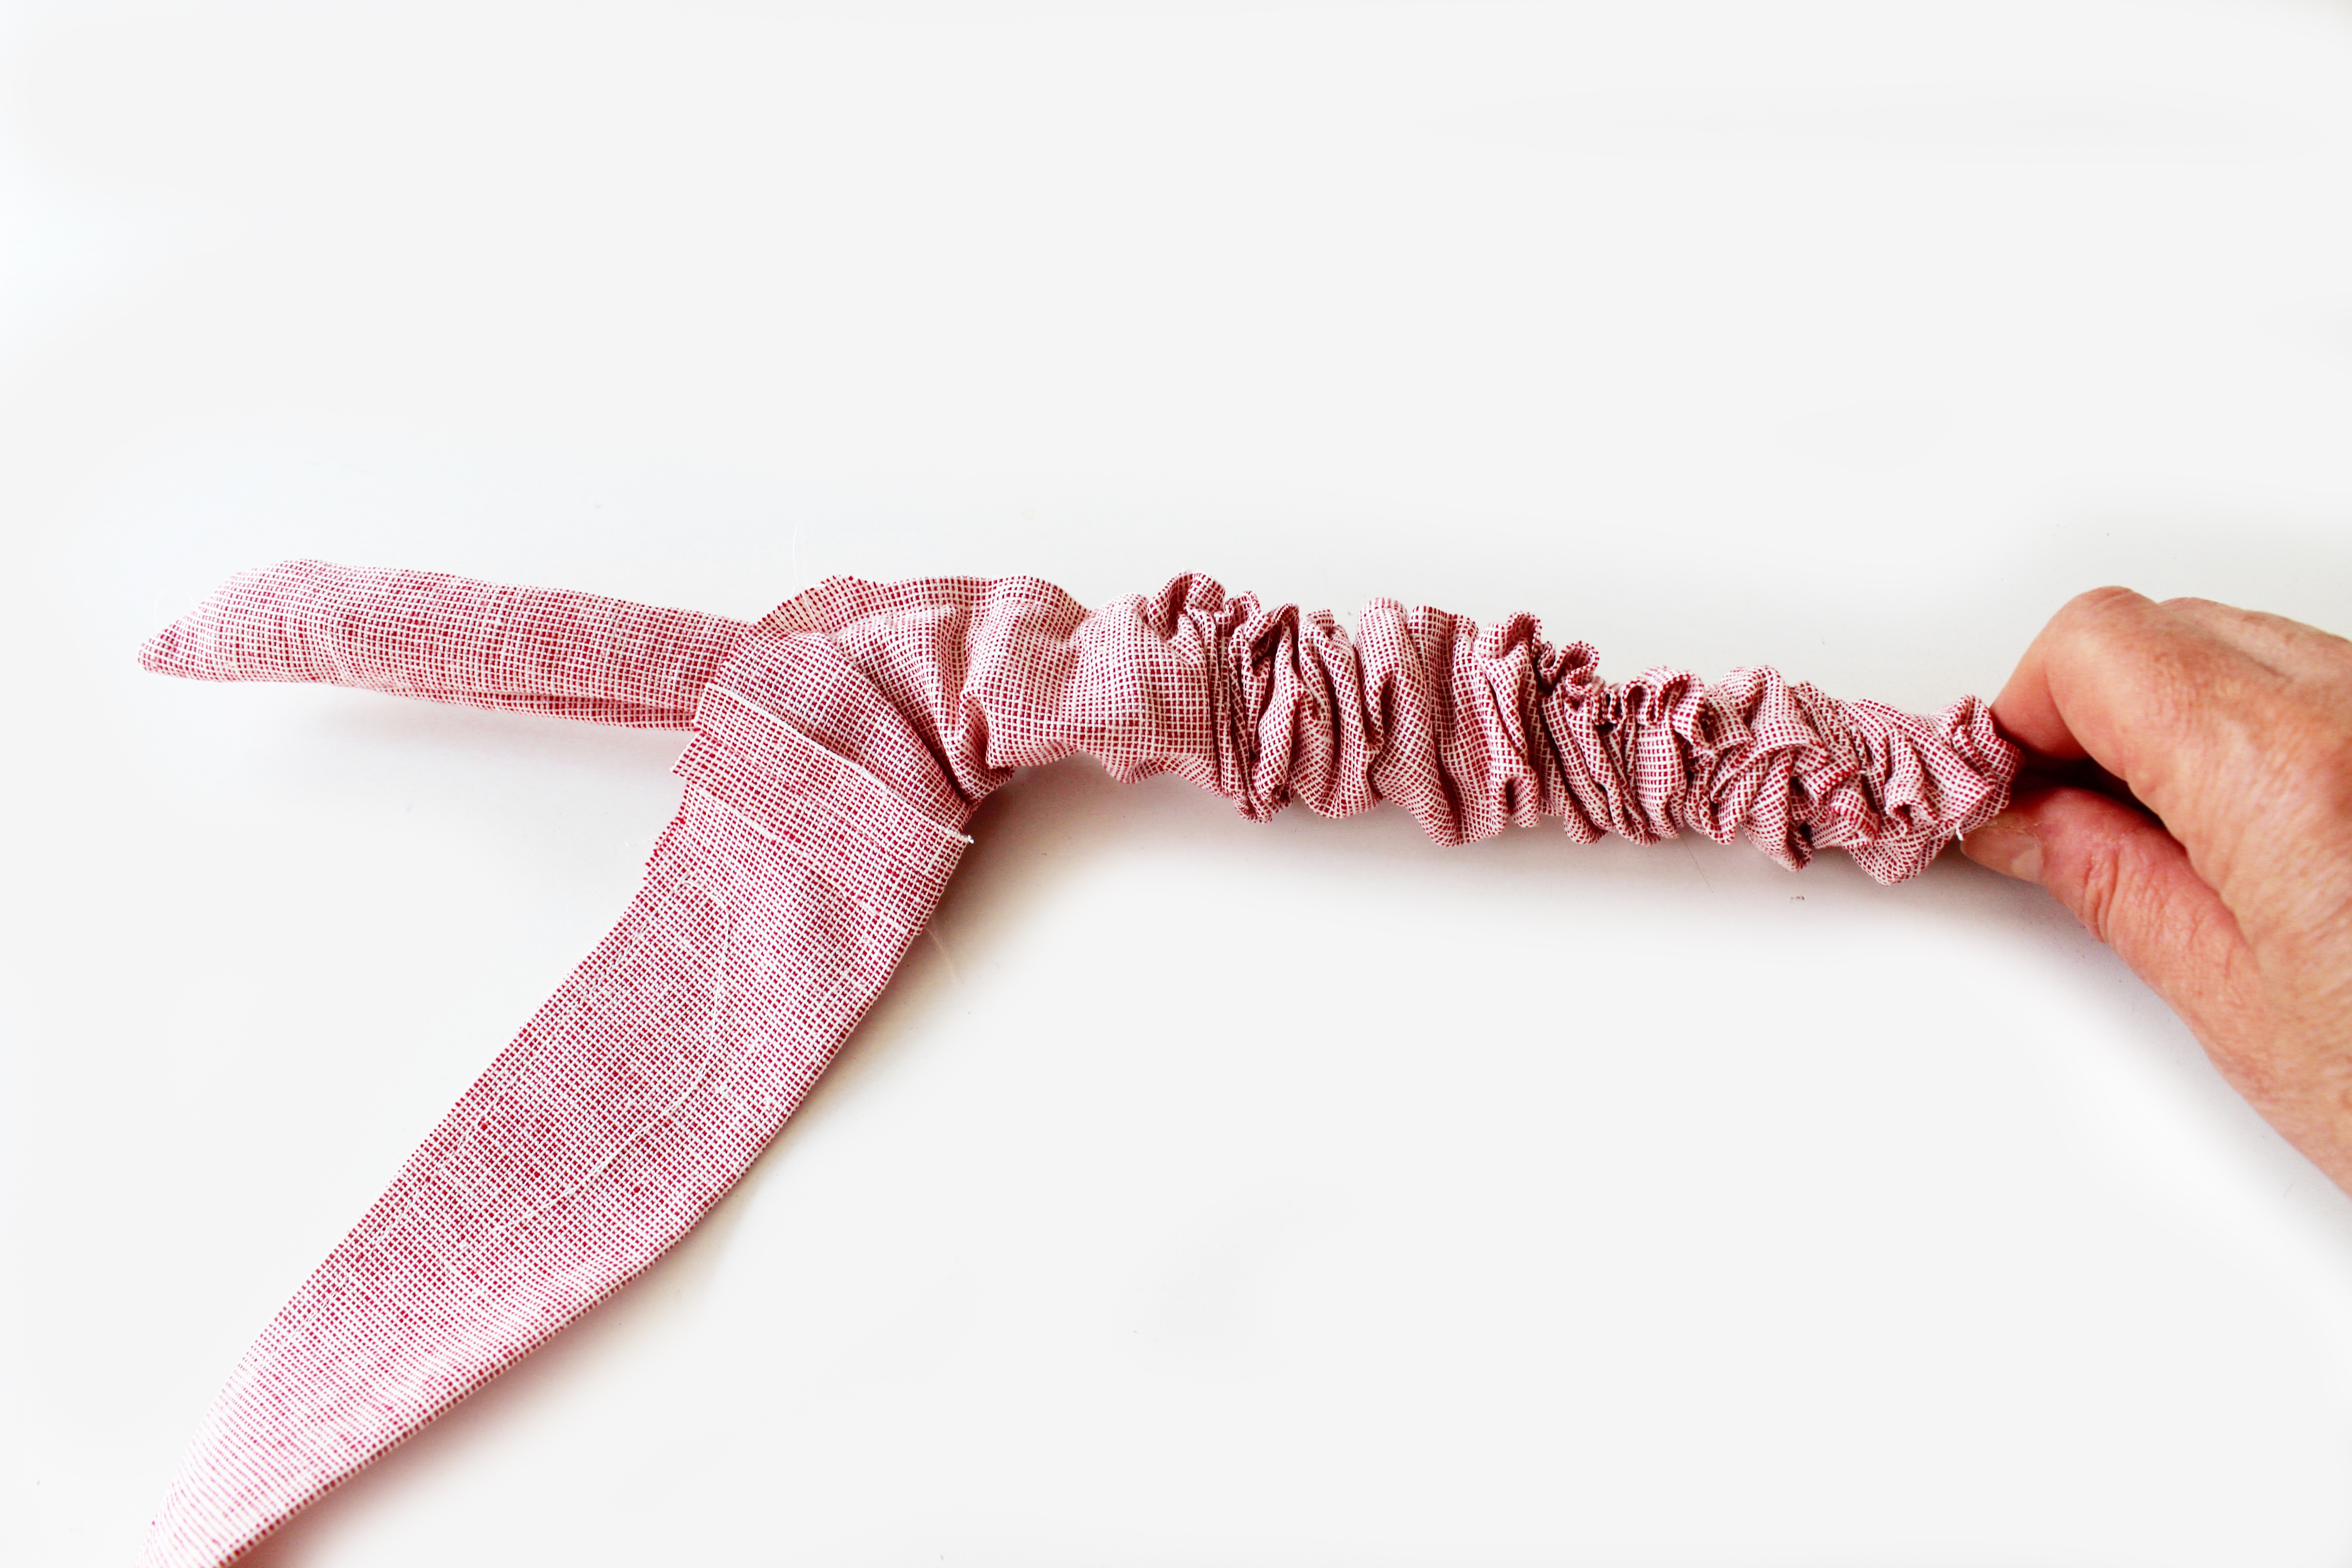
Using your French hair barrette as a base, cut (or tear) long thin strips of fabric approx 1cm wide. Cut the long strips into 10 pieces approx 10-12cm long.
Tie a strip of fabric on to the top metal bar on the barrette with one tight knot, leave a long end. Repeat with the other strips, pushing them up tightly, squashing them together as much as possible. Trim the fabric ends or leave as long as you like. Trim with pinking shears if you have a pair for added jagged edges. There you have it!
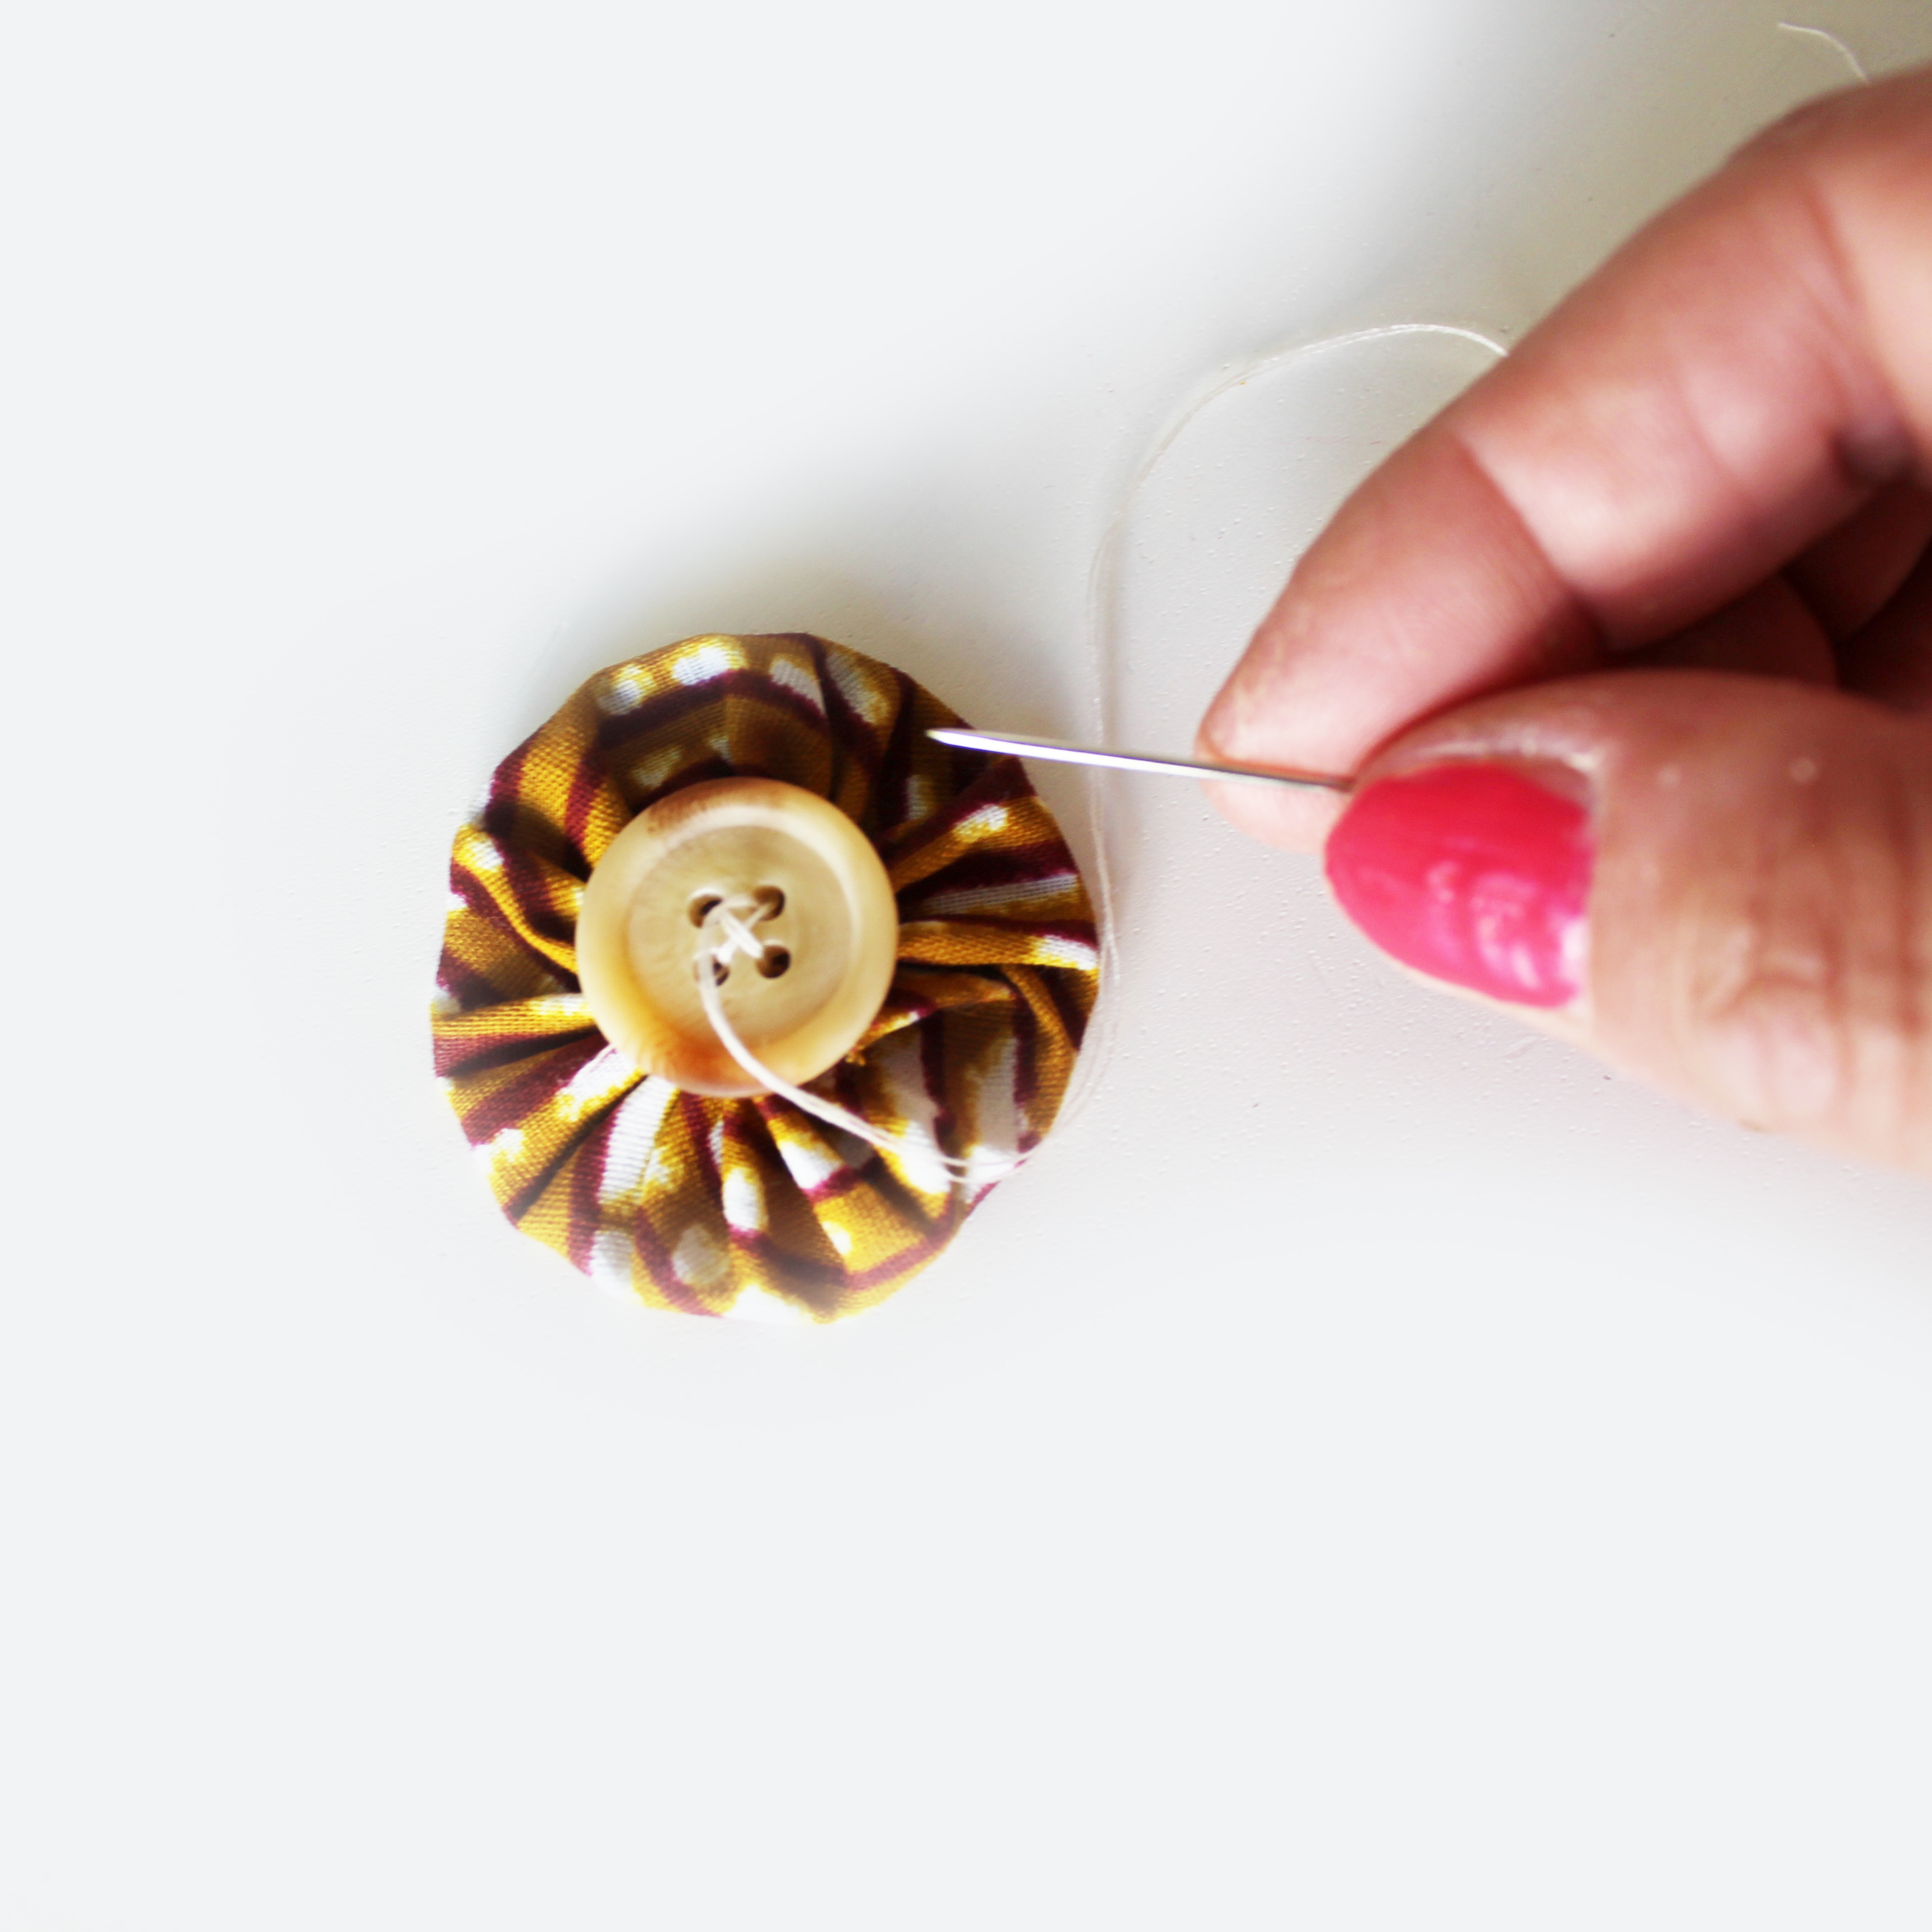
Or using a small barrette make a charming little rosette with a centre button to adorn your hair.
Pull tight and sew a few stitches to secure, then add a button to cover the raw edges
CECILY SKIRT KIT OR PATTERN ONLY IS NOW AVAILABLE TO BUY ON MY SHOP
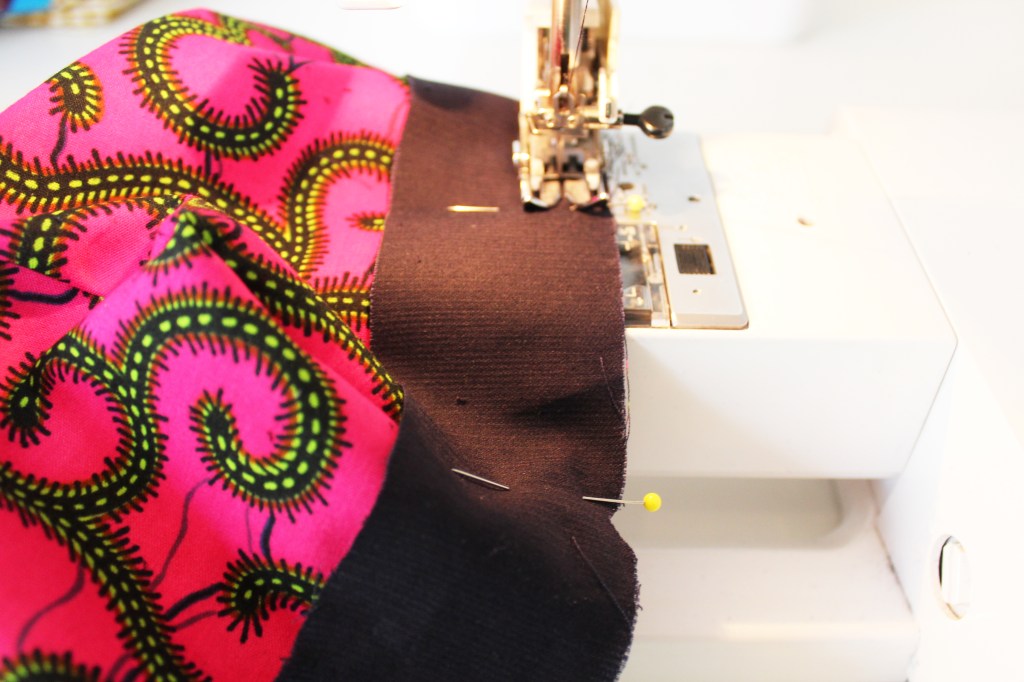
Square ones, round ones, plain, multicoloured they support the backs of the world! They give a colour pop to our sofas, garden furniture and beds, like pieces of art brightening up our homes.
A cushion is a wonderful thing. As my husband put it “what is it with women and cushions?” Well, he’s the first one to bolster himself up with a morning cuppa in bed, so I think that men secretly love them just as much as we do!
Anyway down to business…..
HOW TO MAKE A SQUARE ENVELOPE CUSHION
Here is a tutorial about how to make an envelope cushion. To make a 16″ square envelope cushion you will need:
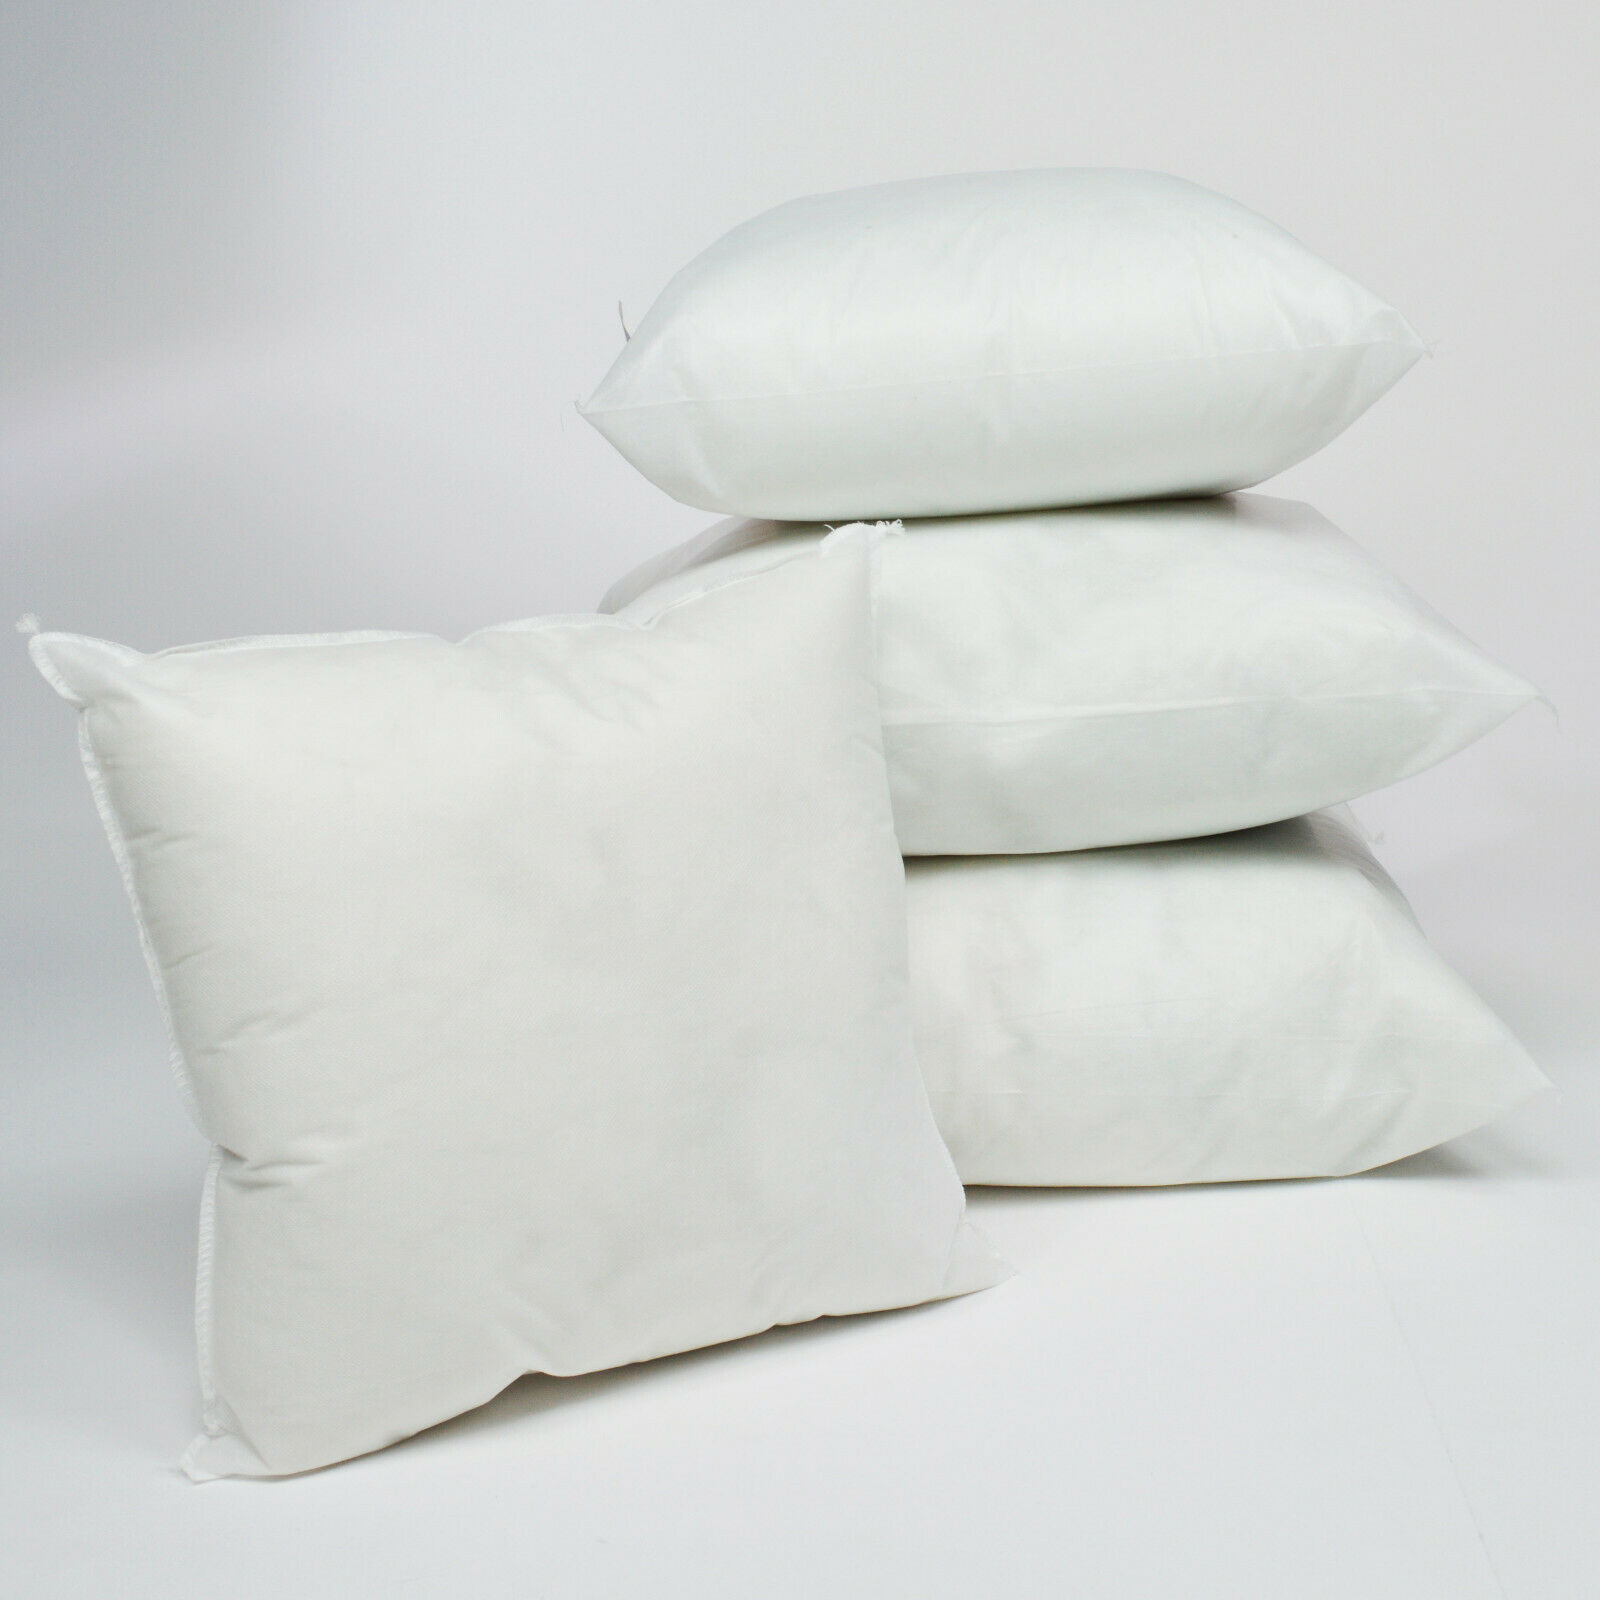
50cm of main fabric, a reel of thread, two 25mm buttons (optional) and a cushion pad inner (polyester or feather).
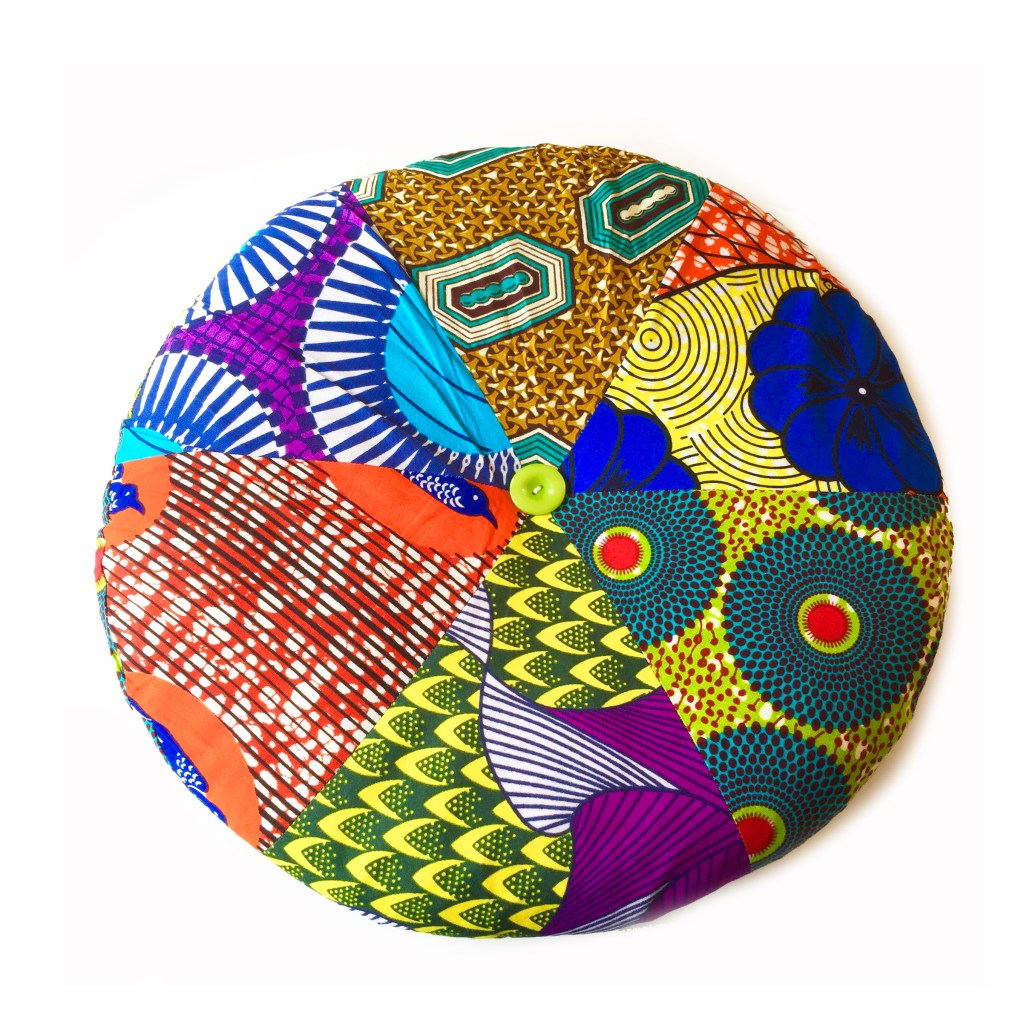
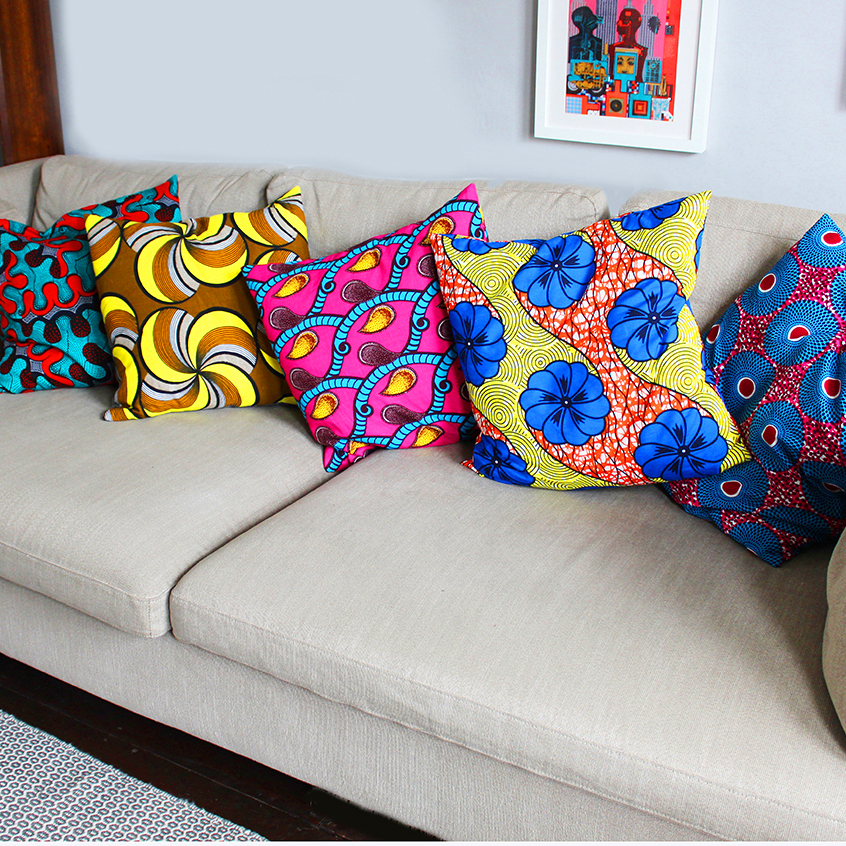
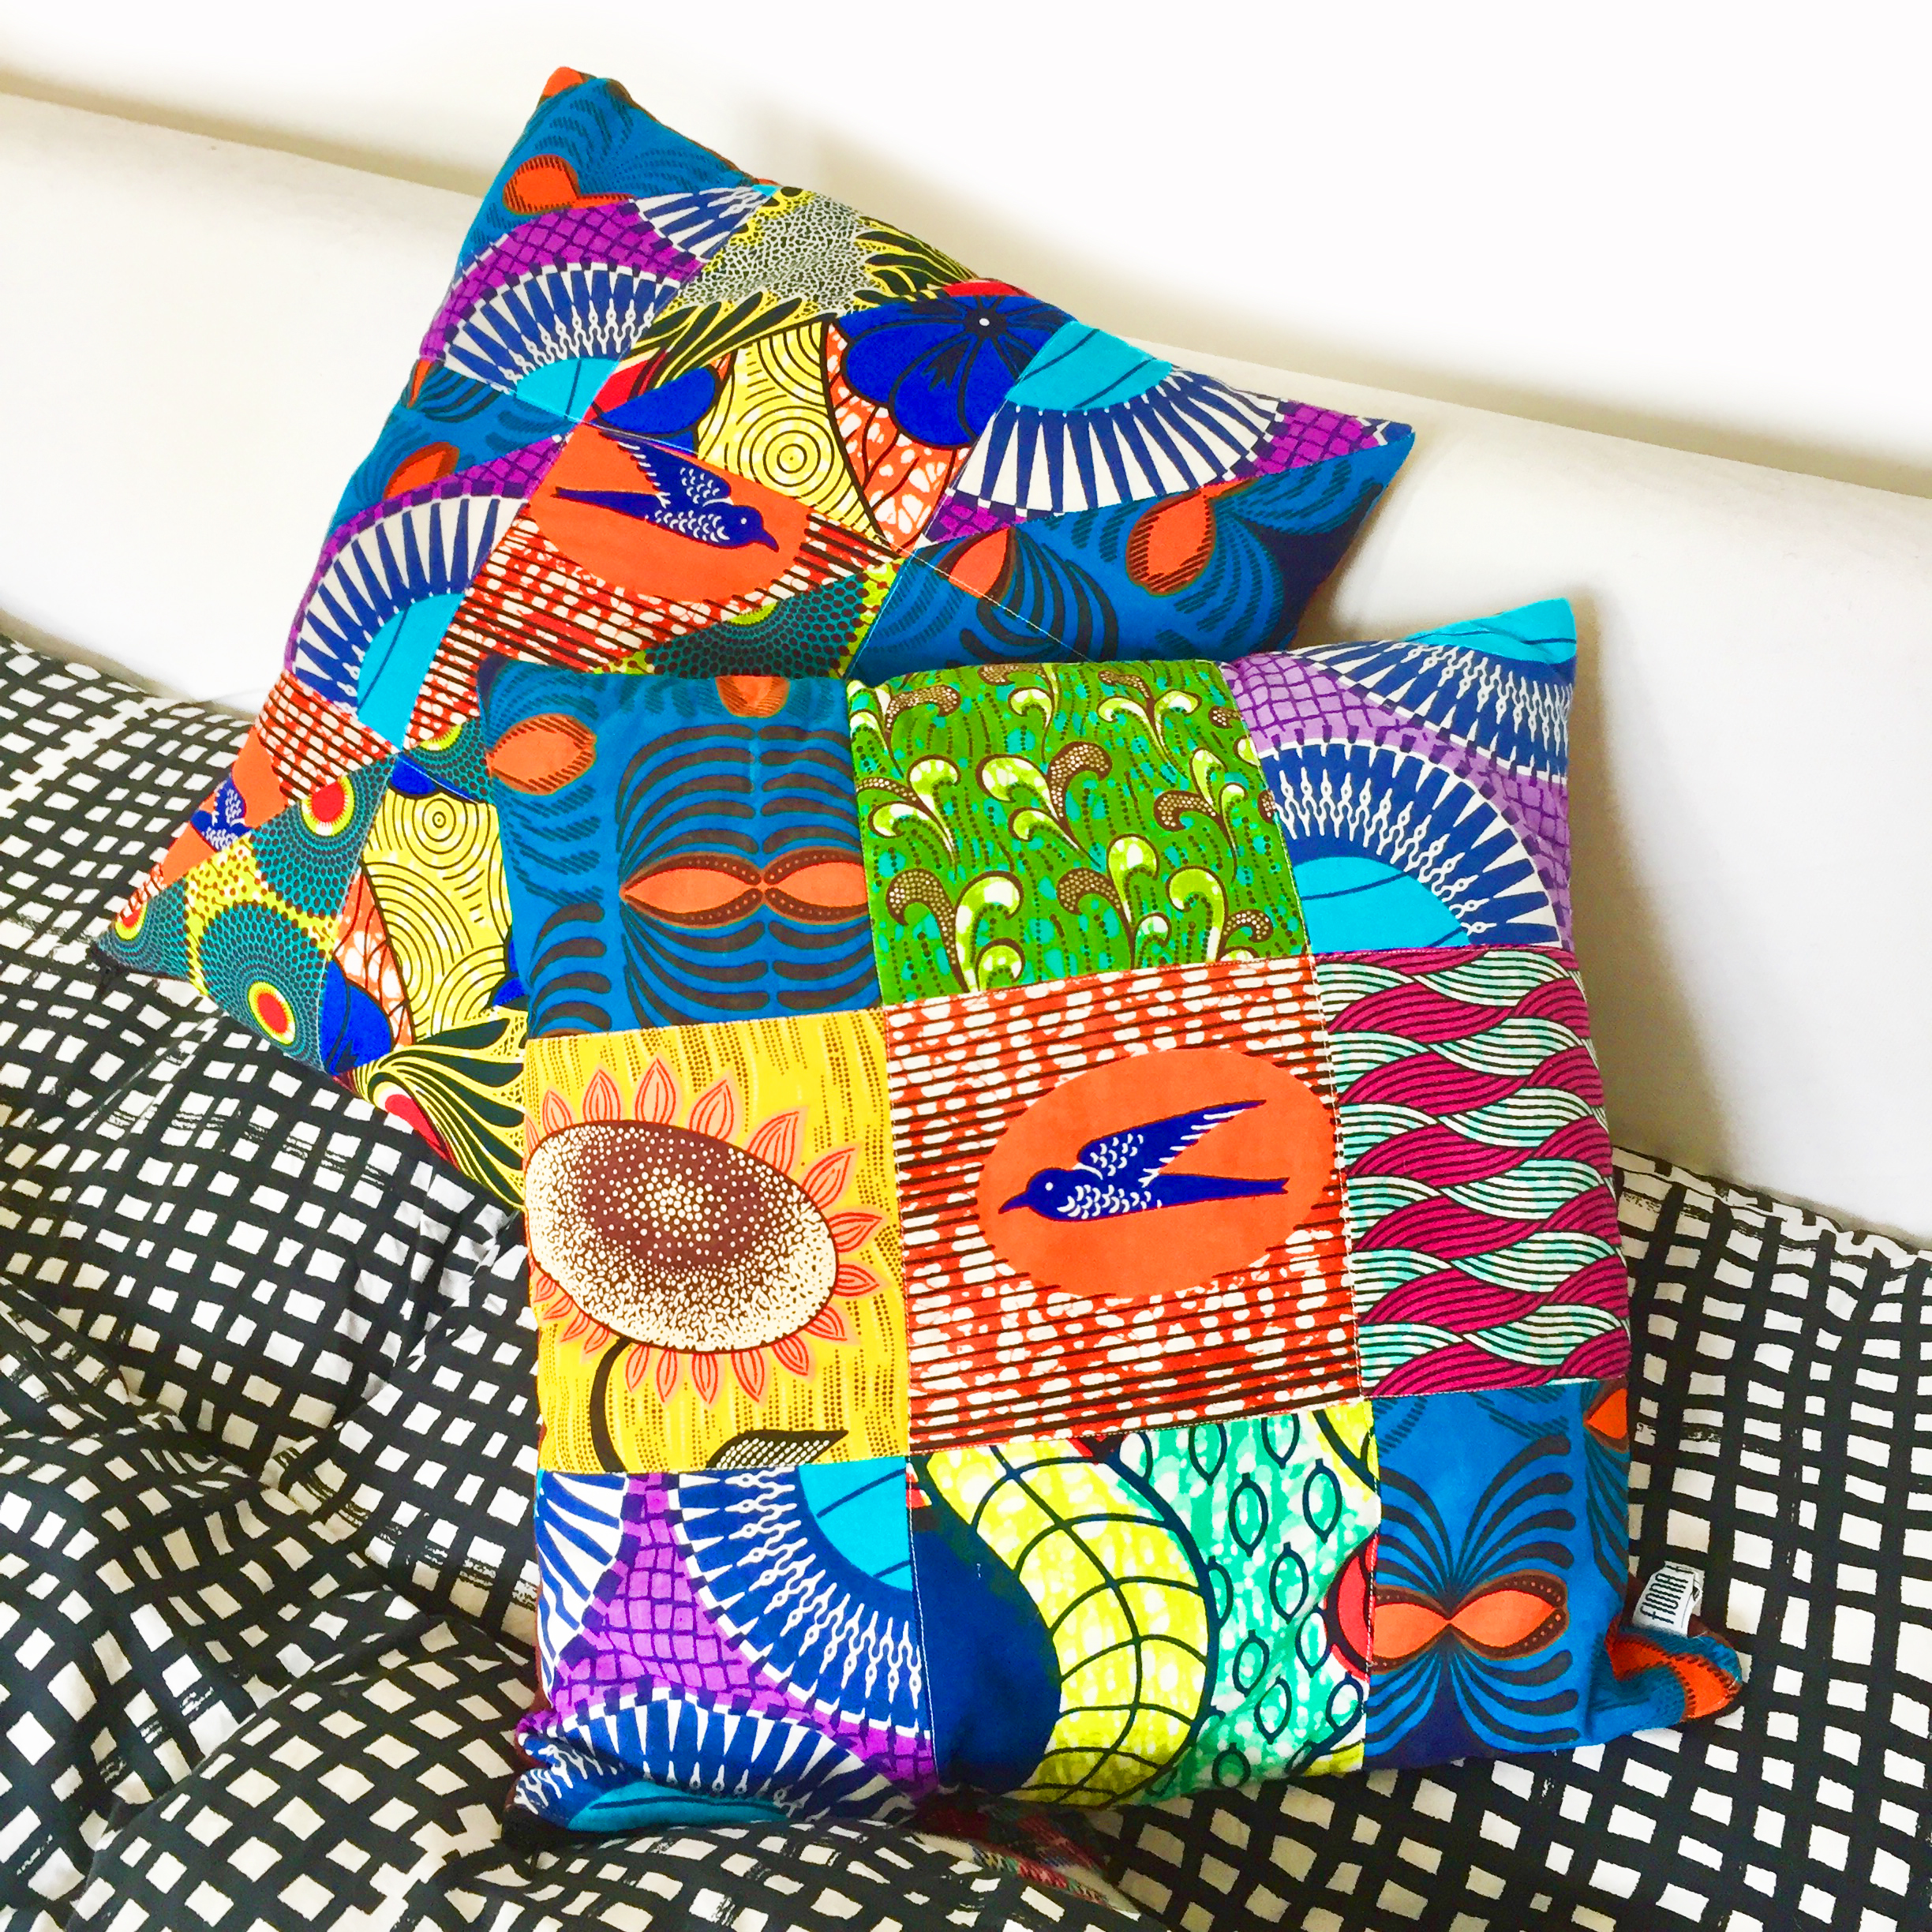
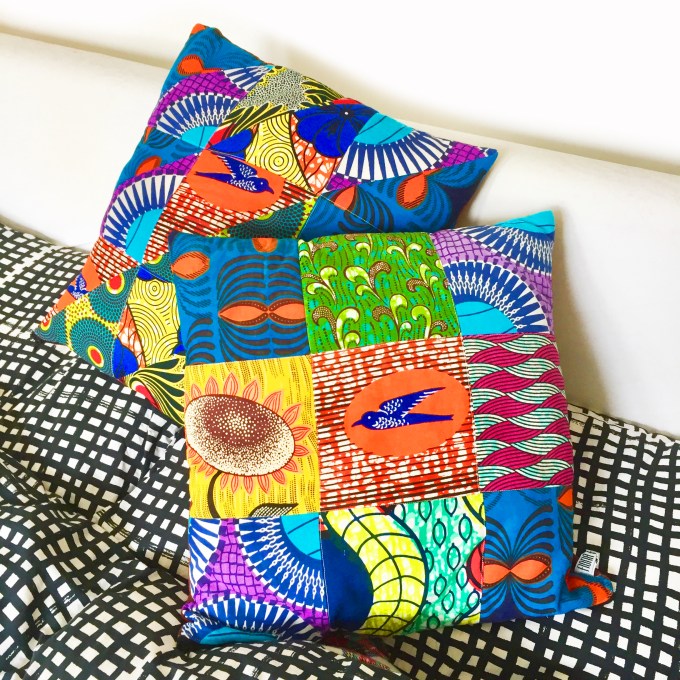
You can make a cushion from all sorts of fabric. Ive made these ones in Ankara fabric, commonly known as African Dutch wax, which I think look great in simple patchwork squares and triangles. With their bold clashing patterns and vibrant colours they cheer up any room up no end!
By the way, I also have a small video on Facebook and Instagram showing you my fabrics in my Funky Kitchen and Lounging around showing you my cushions in situ. Just saying!
So you have a good pair of scissors and a ruler, you need get cutting out the pieces.
For a 16″ cushion you need to:
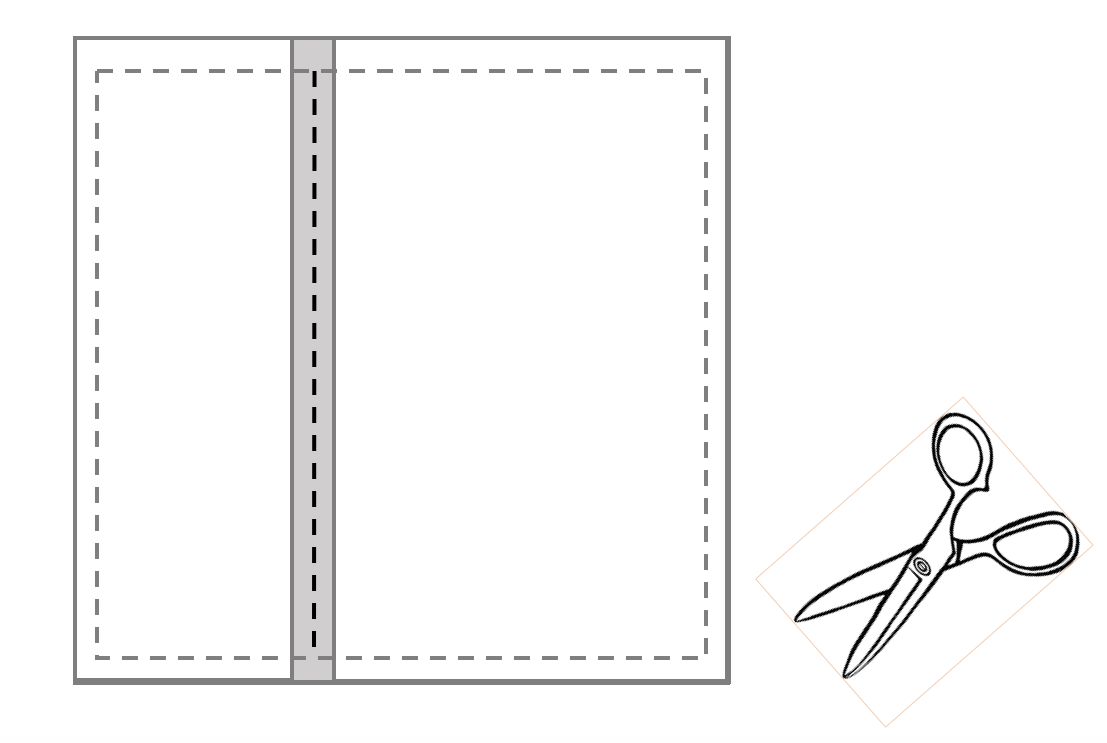
Cut out one piece 43cm x 43cm (front) and two pieces 43cm x 35cm (back).
*With the two back pieces, fold over and press 1cm then again 2cm at one long edge on each piece. Pin, then sew close to the inner fold to make two back pieces with hemmed finished edges.If you would like to insert a buttonhole and button fastening, do so at this stage after making the back hems.
You may have a one step buttonhole attachment – see below for the different types.
Here are links to You tube video tutorials about how to make a one or four step buttonholes:
Not sure which one you have with your machine? Well if you have an attachment like this in pic 1 its a four step:
Or a one step buttonhole attachment looks like this…..
If you don’t have either, it’s possible your machine doesn’t buttonhole, in which case, leave your cushion opening open on the back, thats no big deal!
So, place one or two buttonholes on the back, I like to place one centrally on the hem or two approx 15cm apart. The buttons are stitched on at the end.
If you don’t want to add buttons, just skip this stage.
Now to sew the cushion together.
With the right sides of the fabric together, matching the raw three sides, place one back piece at each side on top of the front piece so that the hemmed sides overlap at the centre. Pin all around.
Sew all around the outer edge with a 1cm seam allowance, drop the needle into the fabric at the corners when pivoting at the corner to avoid losing your place.
Zig zag the raw edge all around to stop fraying.
Trim across the seam allowance corners, this reduces the bulk and makes the corners more pointy.
Turn inside out and push out the corners with a poking tool, a knitting needle, chopstick or scissors end are all good but take care not to poke a hole in your corner! (been there done that!).
Press and insert a cushion pad. Let your cushion relax into its pad and then mark the button position through the centre of each buttonhole. Sew on the buttons in position.
Enjoy! **
HOW TO MAKE AN 18″ SQUARE PATCHWORK CUSHION
Now who fancies making a patchwork cushion? Heres an 18″ one I made from African fabric.
To make a patched front (I like to have a plain linen back) but you could also patch the back too.
To make an 18″ patch cushion you will need to cut:
FRONT PIECE: 9 squares of different fabric 16 cm x 16cm (6 1/4″)
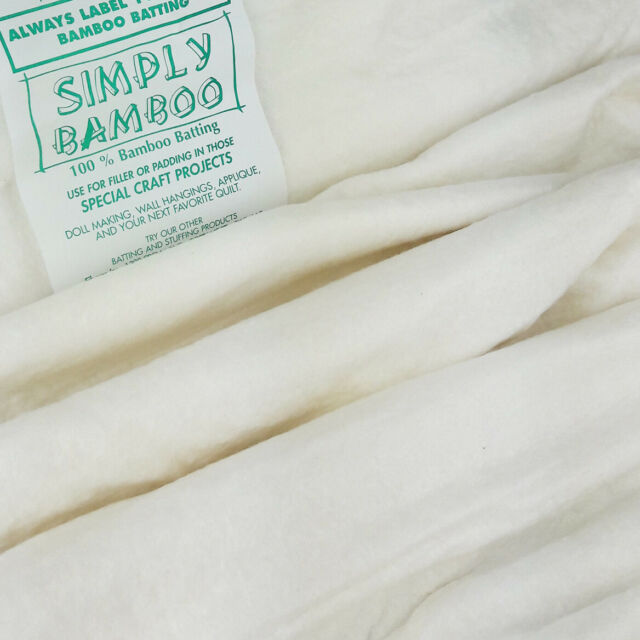
BACKING: one piece 47cm x 47cm (18.5″ x 18.5″) (linen, cotton fabric is good) if you are putting a zip in or two pieces 47cm x 35cm for an envelope style backing. Repeat in Batting* if you would like to quilt your fabric
BATTING*: use a bamboo one for eco friendliness heres a good one, Polyester or cotton thin batting would also work.EBAY BATTING SUPPLIER
PATCHING TOGETHER THE PIECES
Arrange your squares in the formation you require and in 3 rows of 3.
With the right sides of the fabric together and the raw edges aligned, pin pieces 1 & 2 together and sew with a 1/4″ (6mm) seam allowance. Then sew piece 3 to the piece 2 you have just sewn. Press the seam allowance to one side. Repeat for the remaining 2 sets of three squares so you have 3 sets of 3 altogether. Tip: press your seam allowances in opposite directions on each band.
When you have completed three strips of 3 squares, join the first band to the second and then the second to the third, again with the right sides of the fabric together and raw edges aligned.
If you would like to quilt your front piece this is the stage to lay your batting to the reverse side of your front piece and back piece(s). Pin or fuse with fabric spray glue if you have it.
Quilt the front piece (and back too if you would like more stitch detailing) as required, you may need to insert a walking foot on your machine to ease the flow of the fabric.
Press. Now continue with the instructions for constructing the cushion same as the envelope cushion above * to **
Now, if you would like to make a cushion with half triangle squares (its the one shown above at the back) just cut out 9 slightly larger squares 6 1/2″ (16.5cm). Make your triangles by following this video tutorial…
When you have your 9 half triangle squares completed, patch them together as shown in the previous tutorial for the patchwork cushion.
Then follow the instructions as before for making the envelope cushion as from * to **
Now to make a circular cushion with segments like this one
HOW TO MAKE A ROUND SEGMENTED CUSHION
To make a cushion like this one you will need to download and print off two copies of this file for the template, make sure you print at 100% scale and check the 5cm measure on the file:
You need 6 pieces of different fabric prints 25cm x 25cm (10″ x 10″), backing fabric 50cm x 50cm, two 25mm-30mm buttons, one round 18″ cushion pad. Ebay cushion pad shop.
From the constructed template cut out one piece each in the different fabrics. Sew two pieces together with the long sides aligned and the right sides of the fabric together*. Press. Then sew on the third segment to the two part piece so you have two pieces of 3 joined segments.
Then sew the two semi circle pieces of 3 segments together, aligning the longest edges with the RST* Press. You can add batting to the reverse side if you would like.
Finally with the RST, pin the circle piece to the square backing piece. Stitch all around the curved outer edge 1cm from the edge but leave one section unstitched for inserting the cushion. Insert the cushion. Stitch up the opening with a small slip stitch. Sew on the buttons at the centre either side, passing the needle from one side to the other and pulling tight so that it pulls the cushion in at the centre and covers the corner bits.
Pop inside a round cushion pad and give it a squidge!
Copyright Fiona Hesford. All rights reserved. Please consult me if you would like to use any of the images/text shown on this blog.
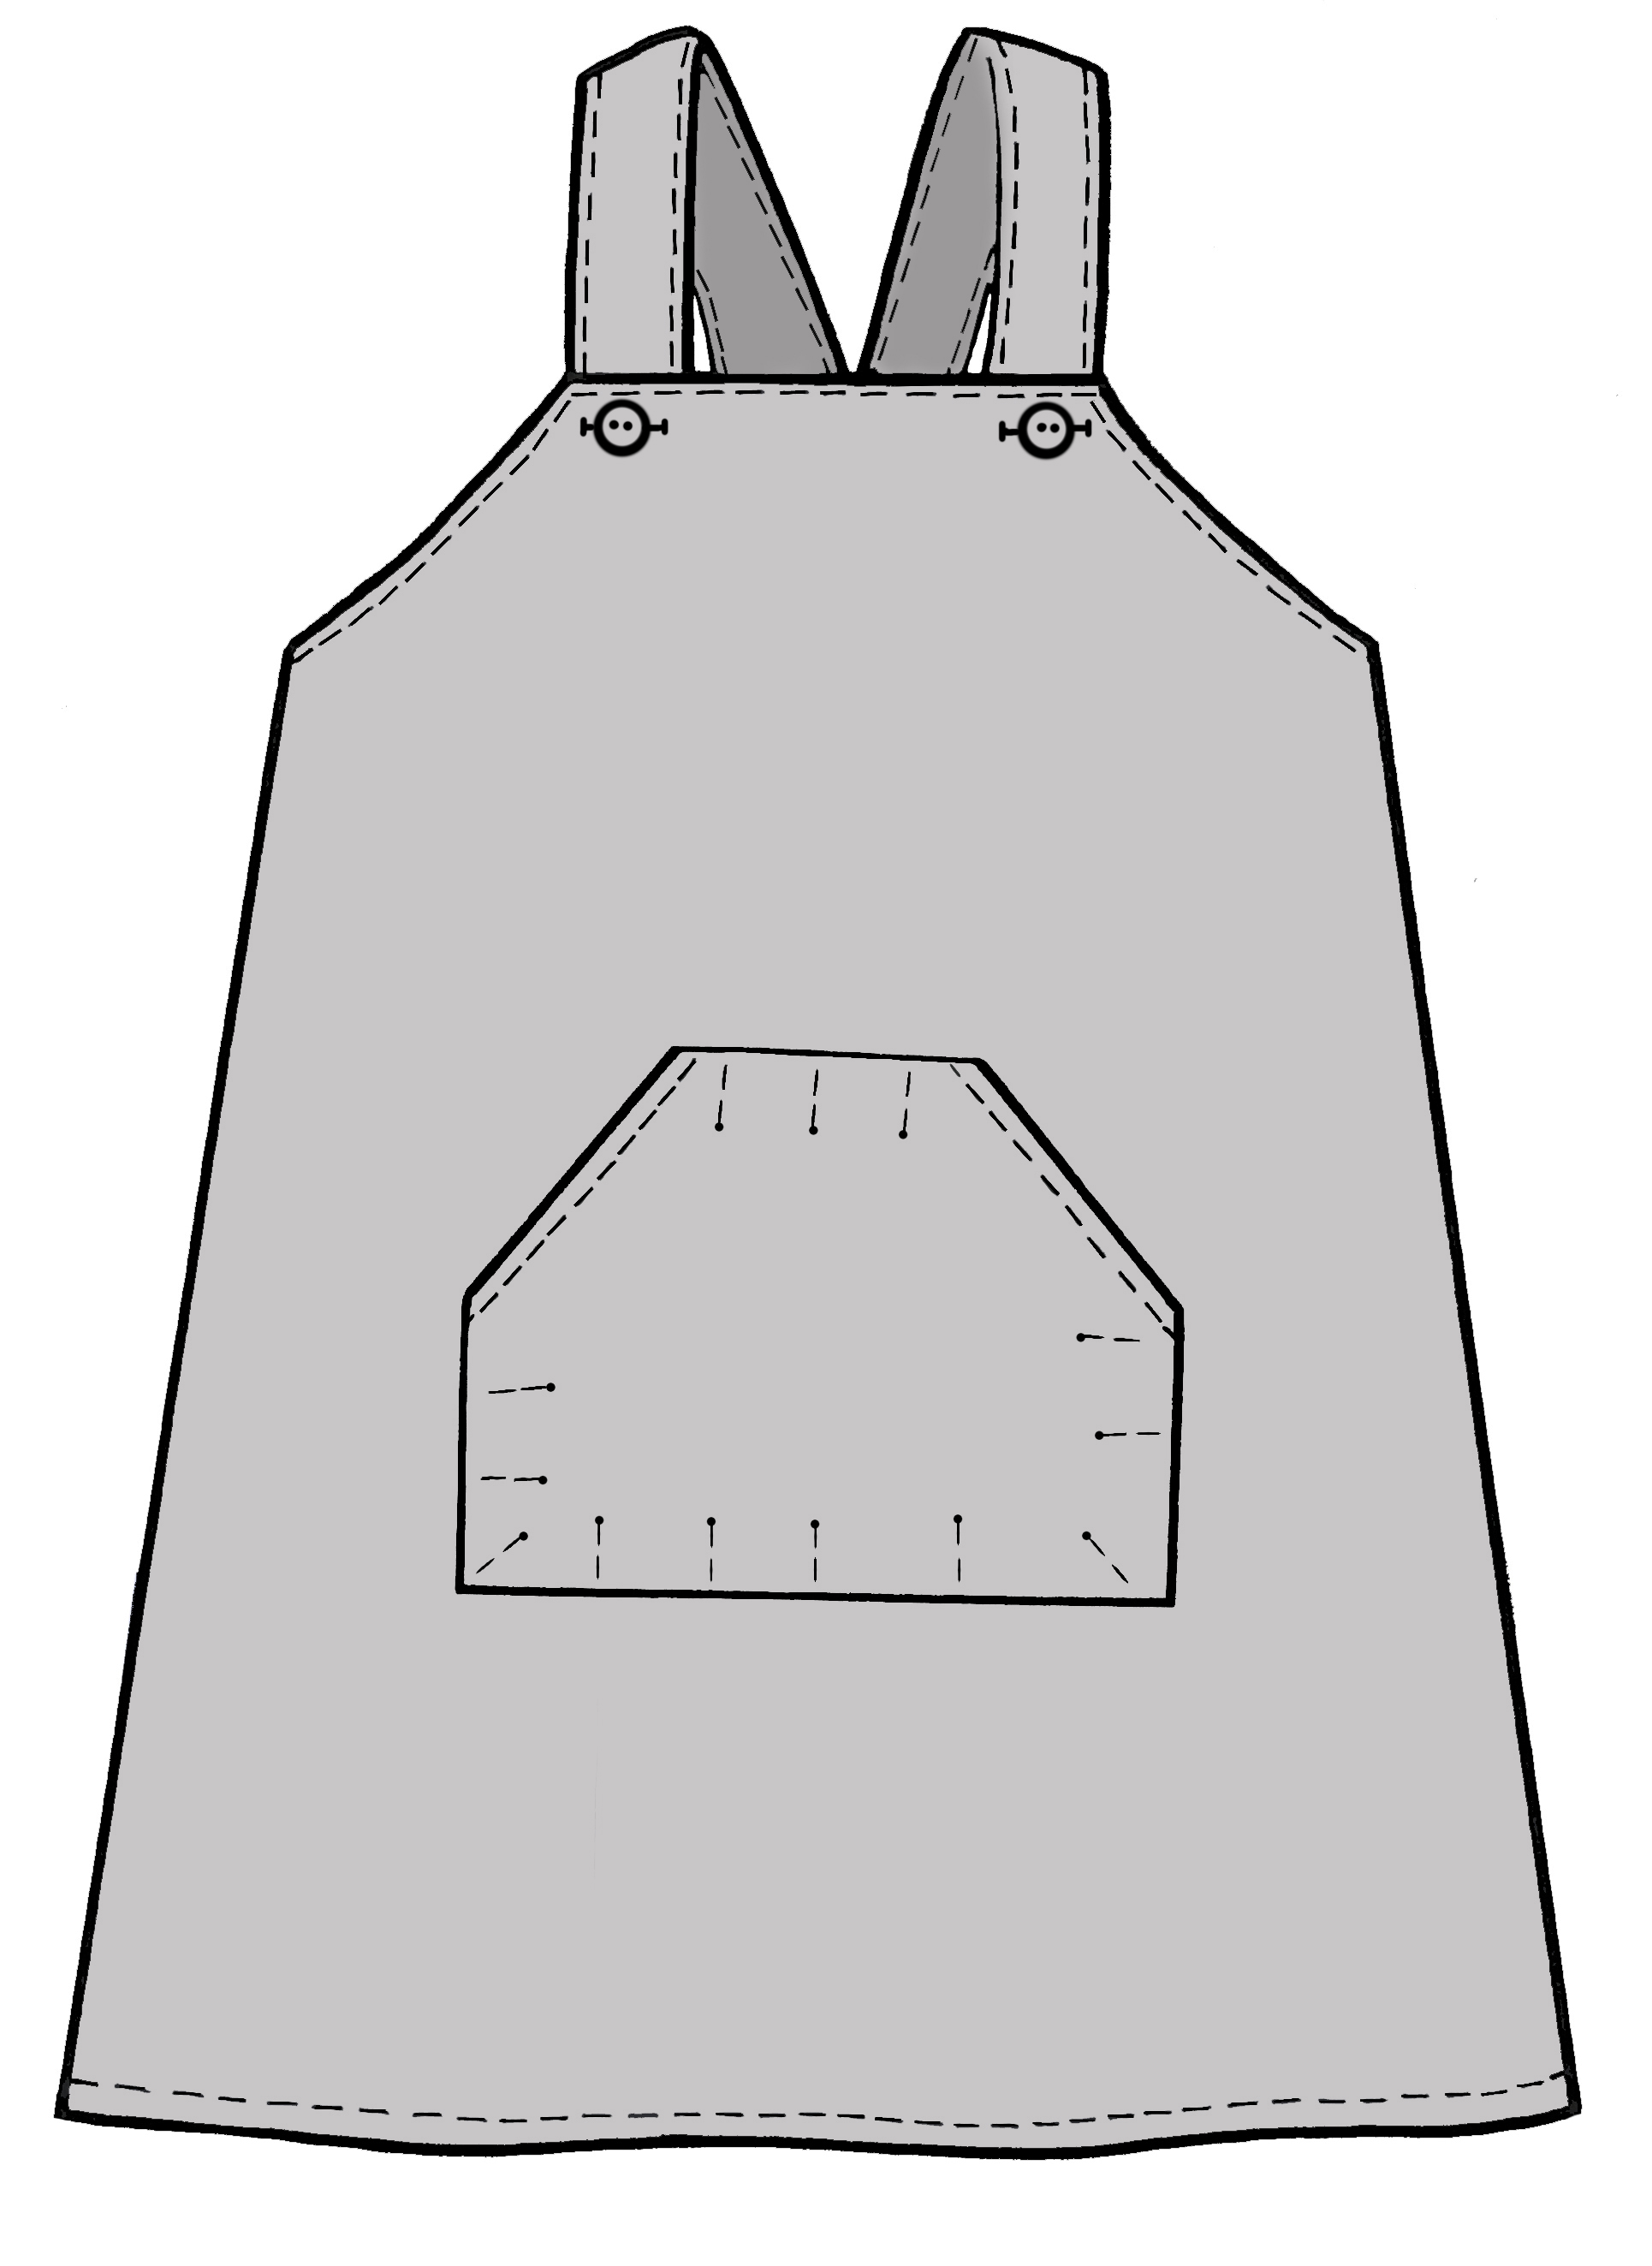
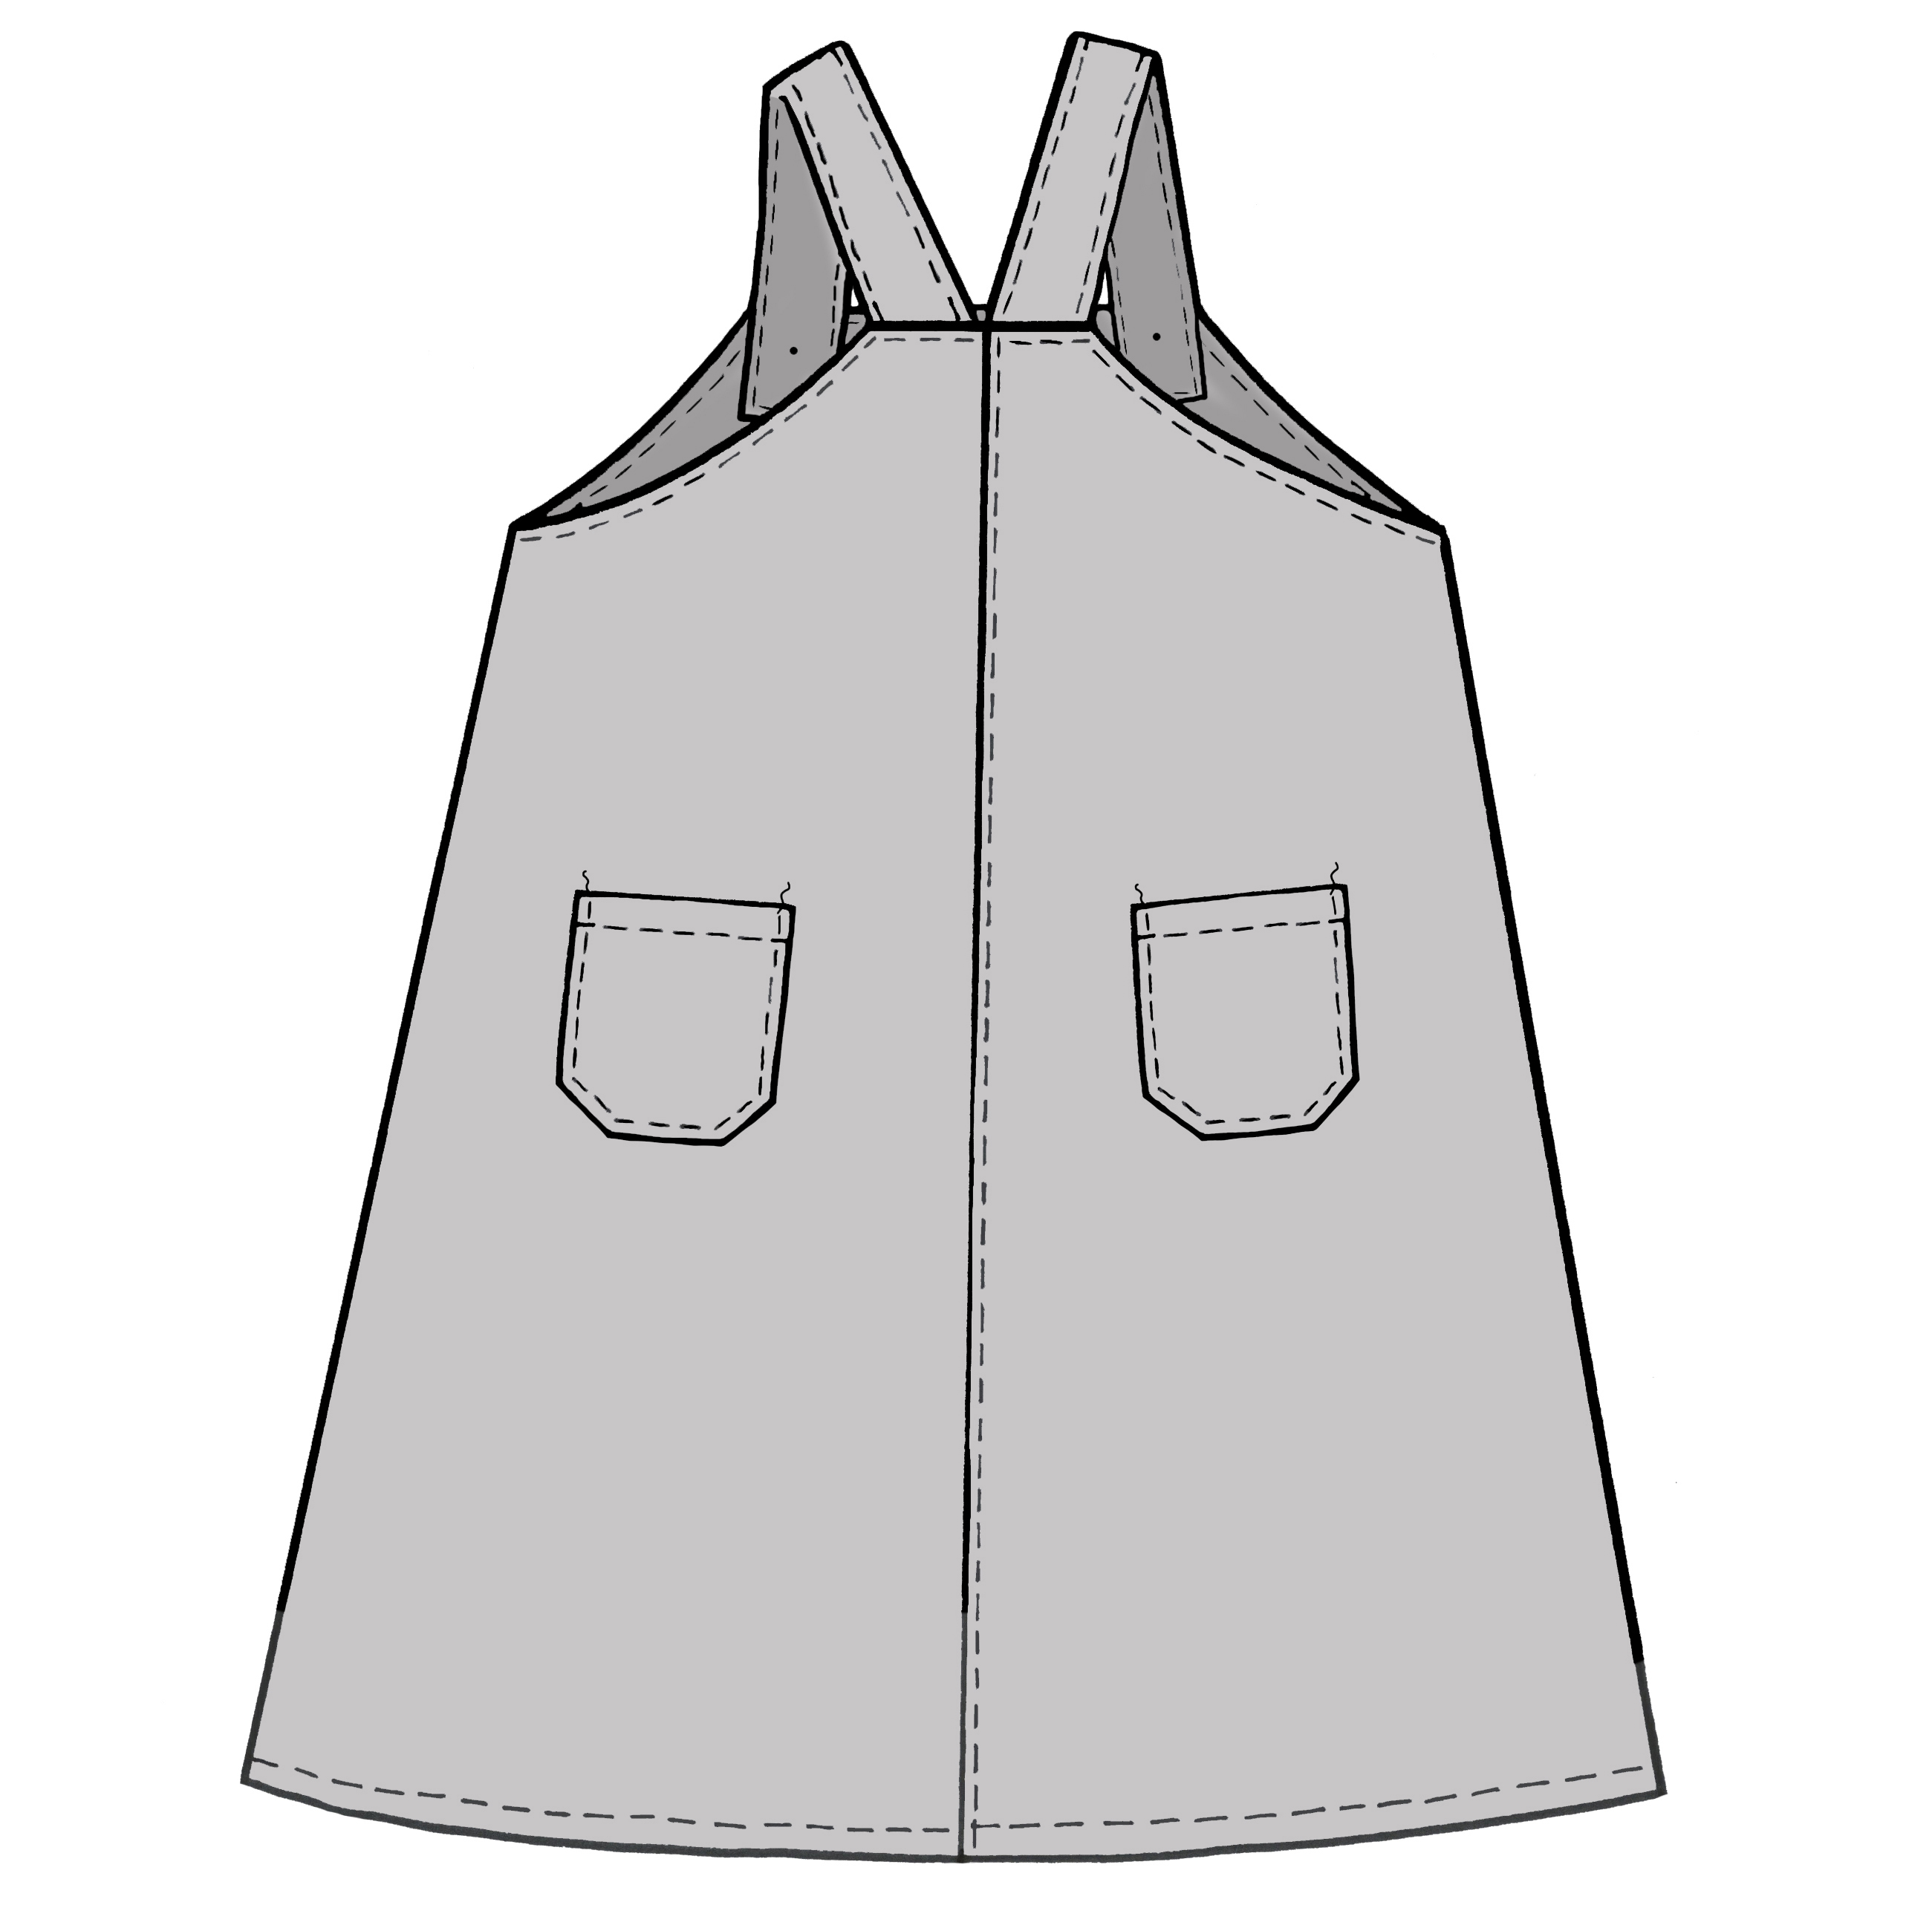
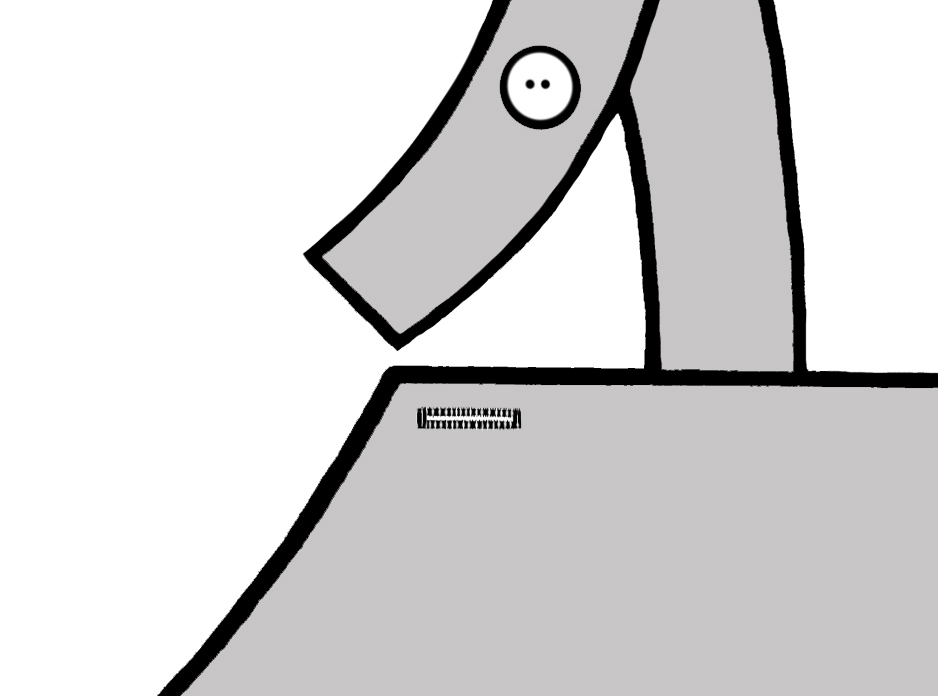
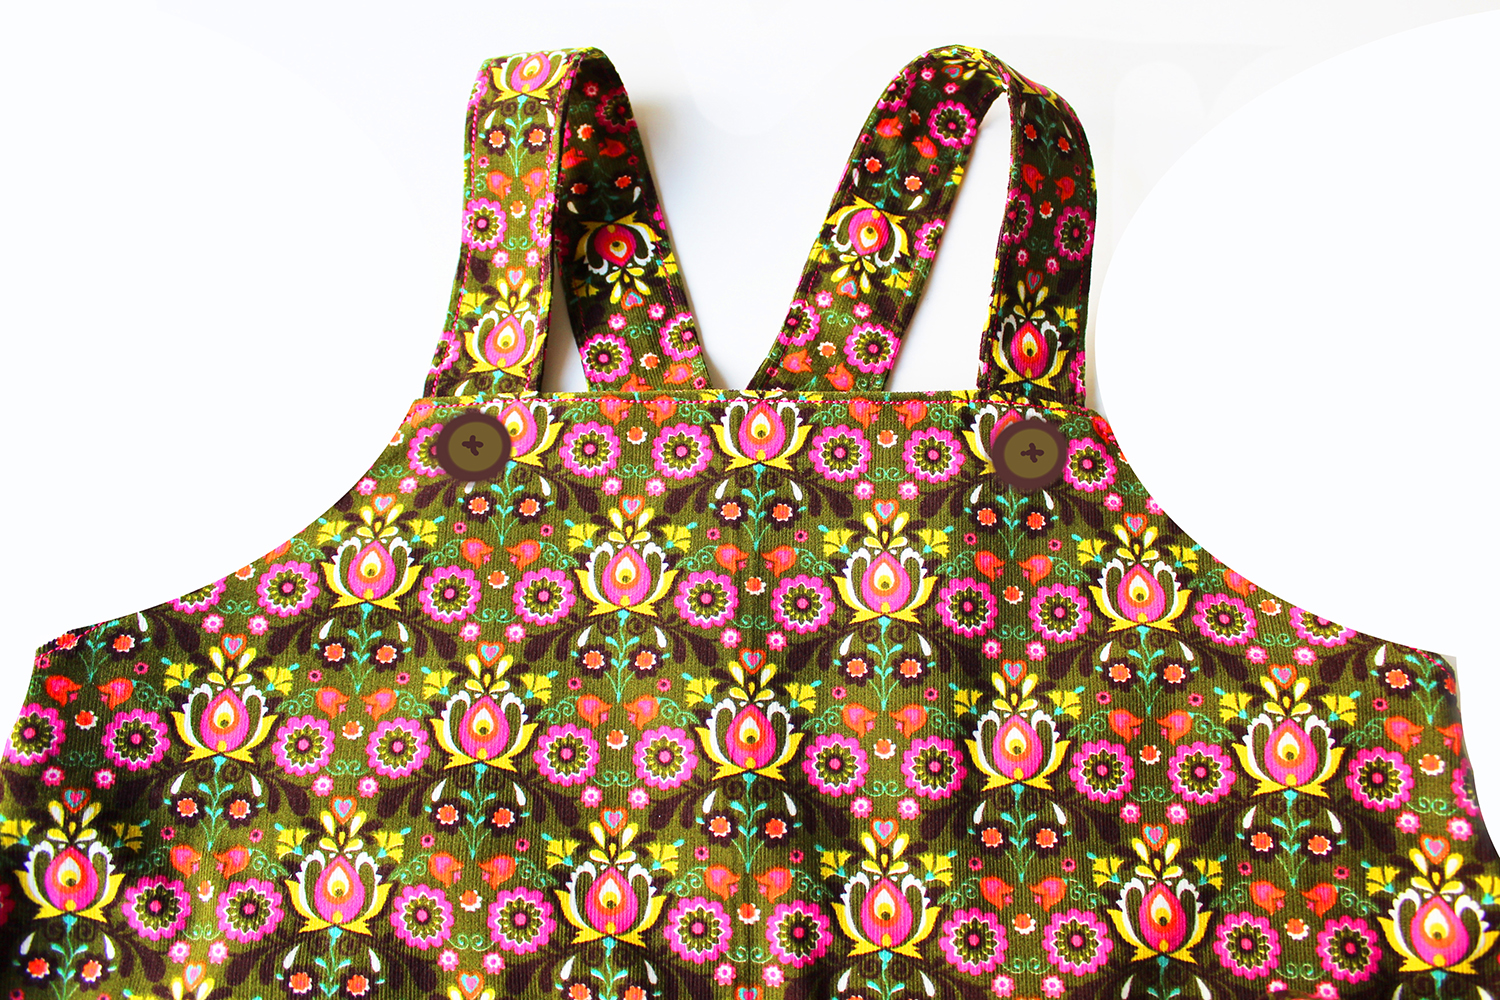
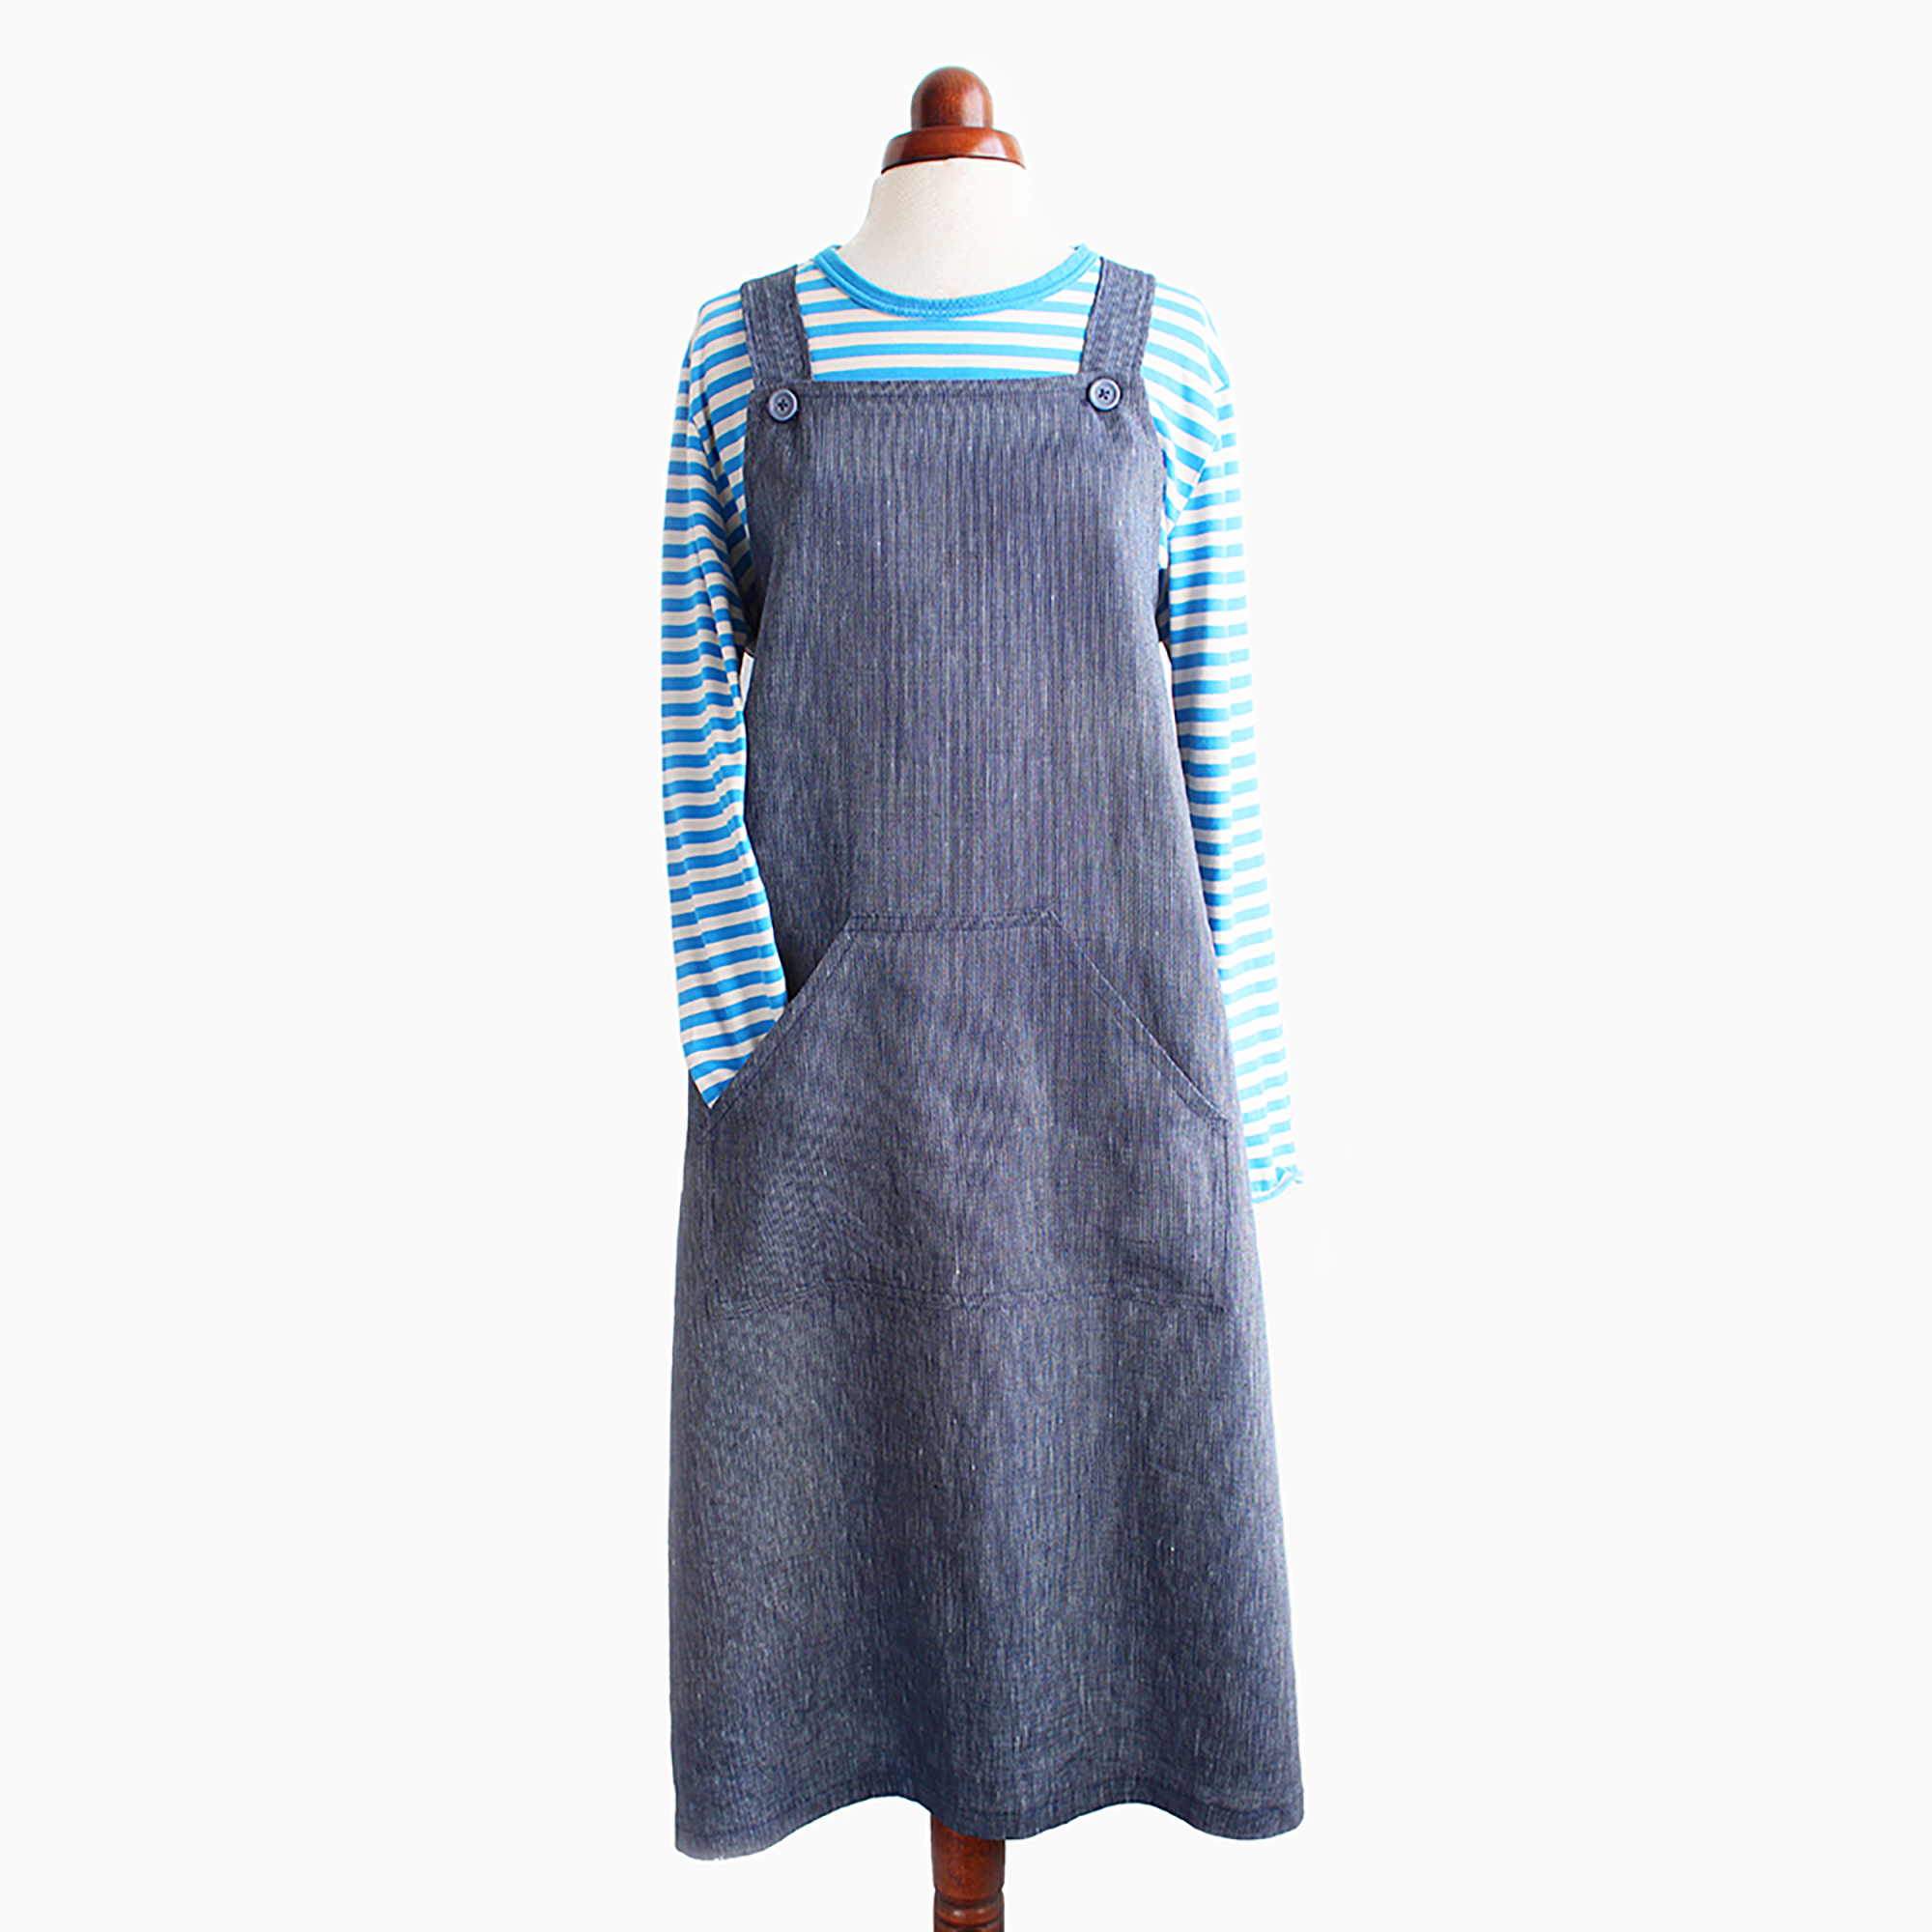
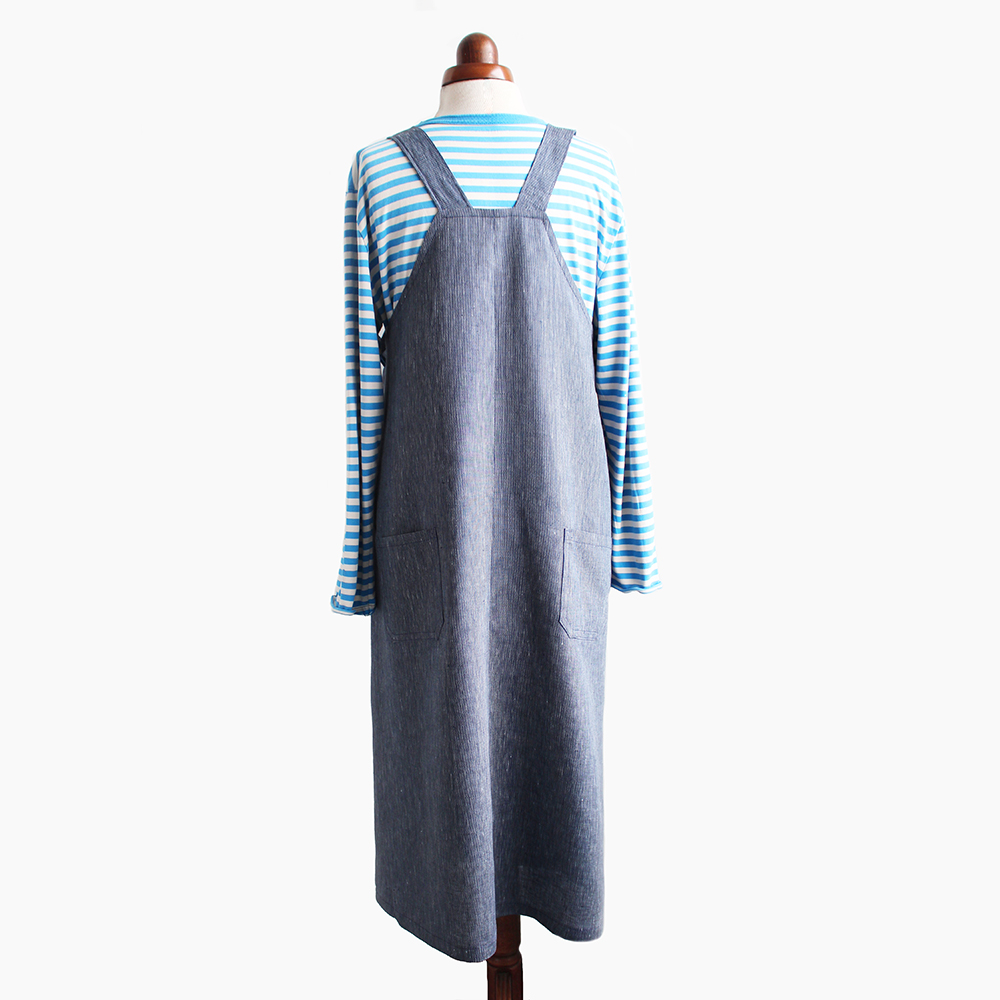
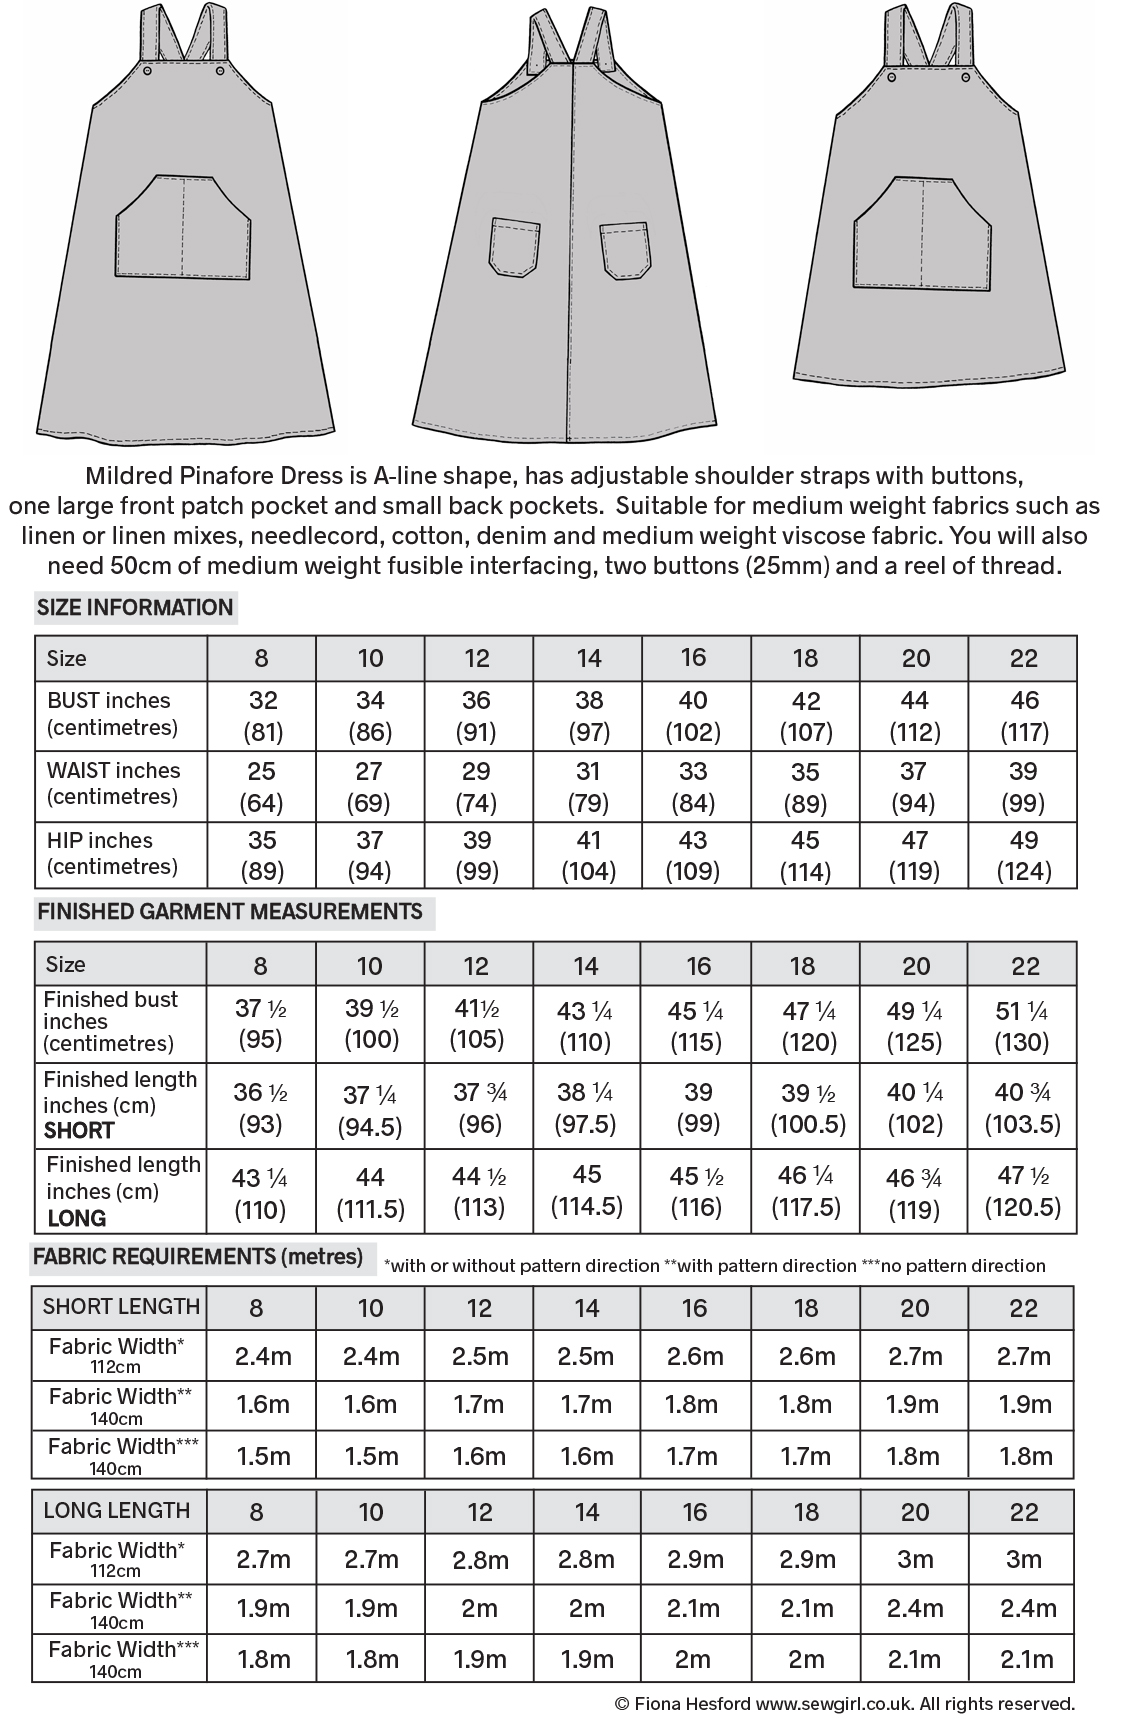
As you can see from the pictures above, Mildred is A-line shape, in a choice of short or long lengths. She’s got adjustable shoulder straps attached with buttons, one large front pocket, two cheeky back pockets and bags of practical style. Whats not to love.
I wear this pinafore a lot. I’ve made it in 8oz soft denim (see above), needlecord (see below), linen and a linen mix. Here is a link to my Etsy shop where I have stock of 8oz indigo denim and linen to buy as bundles.
To say this dress is quick to make is an understatement. An afternoon’s sewing and you are done. I couldn’t wait to try it on and was very reluctant to take it off! Its very roomy because I wanted to be able to wear a jumper underneath in winter and a tee in summer. I really love the big front pocket, a great place for plonking glasses, ideal for me as I’m someone who spends half her life looking for them…. groan! Sometimes I sew a vertical line down the centre of the front pocket to divide it up, or split the pocket pattern and make two front pockets instead of one. The back pockets are just the right size too. Mildred was inspired by an apron style so is a practical for sewers to keep their equipment whilst on the job!
By the way, lets talk about topstitching. I didn’t topstitch my Mildred (pictured), I was worried about wobbly lines, but you could easily do so with either a contrast colour thread and lengthen the stitch, or use a special top stitch thread for a more defined line. Or why not do a double line of stitching around the pockets.
Lets talk about INTERFACING! – I know -its a boring subject but it has to be said that the Mildred pattern asks you to interface the facings (essential) and also the pockets and straps (not so essential). Ive made this pattern up in a gorgeous linen viscose mix which was quite ‘floppy’ and I found it needed the pockets and strap to be interfaced to give them more body. However when it came to making it in denim and linen, all I interfaced was the facings. I found that the pockets didn’t need it.
I always find using my walking foot a fantastic help when topstitching because it helps glide over those bulky seams that can sometimes obstruct the flow of the stitching. If you’ve got one, I would recommend popping it on, if you haven’t just lengthen your stitch when it comes to this bit.
A walking foot
What else is there to say about this pattern?
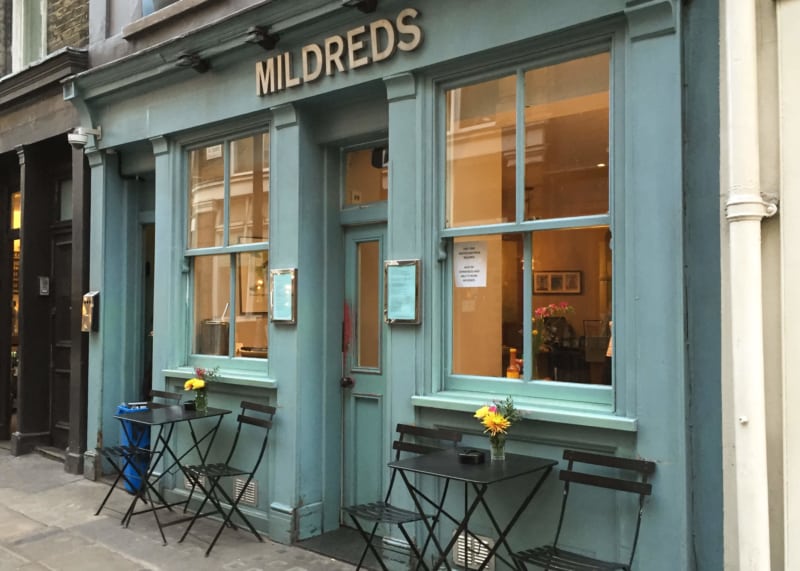
You may wonder why it’s called Mildred? Well, when I was courting my husband (or was it the other way around? hmm) we enjoyed hanging out at a place called Mildred’s cafe in London’s Soho, I think it was one of the first Vegan cafes in London, anyway its a fab place and still going strong. I really loved the name ever since.
Mildred Pinafore dress can be made in a shorter length, I made a shorter one in printed needlecord. It looks great with knee high boots and woolly tights in Winter.
Here is all the info you need to know about Mildred.
PATTERN ERRATA
please note the text above the layplan should read:
Seam allowance is 1cm (3/8″), however if you would prefer to use a 1.5cm (5/8″) then cut 5mm away from the edges all around (except the edges indicated ‘Place on Fold’).
HOW TO MAKE MILDRED
STRAPS
Firstly the straps are sewn down each long side and one short side with the right sides together (RST), trim the seam allowances to 5mm. Nick across the corners at the straight ends. Then, turn them inside out.
These loop turners are quite good tools for doing this. If you haven’t got one, get one! They are cheap to buy and I’m sure you will find them really really useful.
Press them, then top stitch like so…
SEWING THE FRONT AND BACK
Join the back pieces RST, Press the seam allowances open. Topstitch. By the way, its a good idea to finish your raw vertical edges beforehand either with an overlocker, zig zag stitch or pinking shears.
Now there are no pics here about the pockets, but I would advise attaching them at this stage. In the pattern it leaves this bit to the end, which allows you to re-position them to suit you if you want to, but if you are happy with the position as shown on the template, its a lot easier to sew them on before you sew the front and back together. Just saying!
Next pin, tack stitch the straps at the slanted edge at the back.
FACINGS
Join the interfaced facing pieces at the sides with the RST. Press. Finish the raw outer edge.
Join the front to the back at the side edges.
Insert the facing. pin, matching up the cross seams. Hand tack.
Sew! Nick the seam allowances, trim across the corners.
Turn it to the RS, push out the edges. Press. Topstitch along the upper edge.
Hand stitch the facing on the inside at the side seams with a few stitches to secure it down more, or ironing on some wonderweb really helps.
POCKETS Fold over the hem at the slanted edge (front pocket) or top edge (back pocket), press. Stitch. Fold over 1cm at each remaining edge. Pin to the front (front pocket), or back (back pocket) in the position as shown on the template. Hand tack. Topstitch.
Finally, attach a button on each strap and buttonholes on the top of the front bib if you want to be able to undo it. If you don’t want to bother with buttonholes, just sew the strap and button on together so that it’s fixed.
Tip: try it on first and adjust the strap to the correct length first, pin then sew.


 Peggy Top with long sleeves


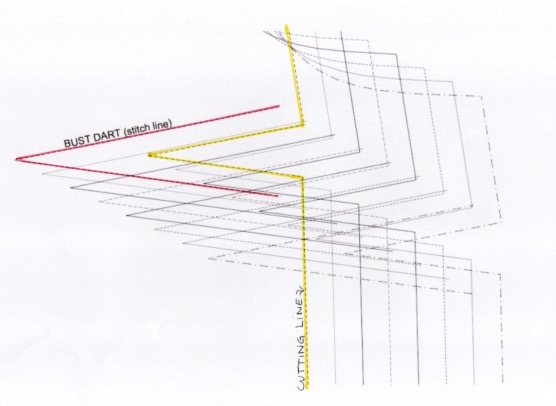 On the pattern you can see lots of lines for each Dart size. Each size has two lines: one (outer line) is the ‘cutting’ line and one (inner line) which is the ‘stitch’ line. See the diagram below, Ive marked size 8 Dart lines in yellow (cutting line) and pink (stitch line), to show you more clearly. Its a good idea to mark the required two lines as I have done on your pattern to make them easier to see.
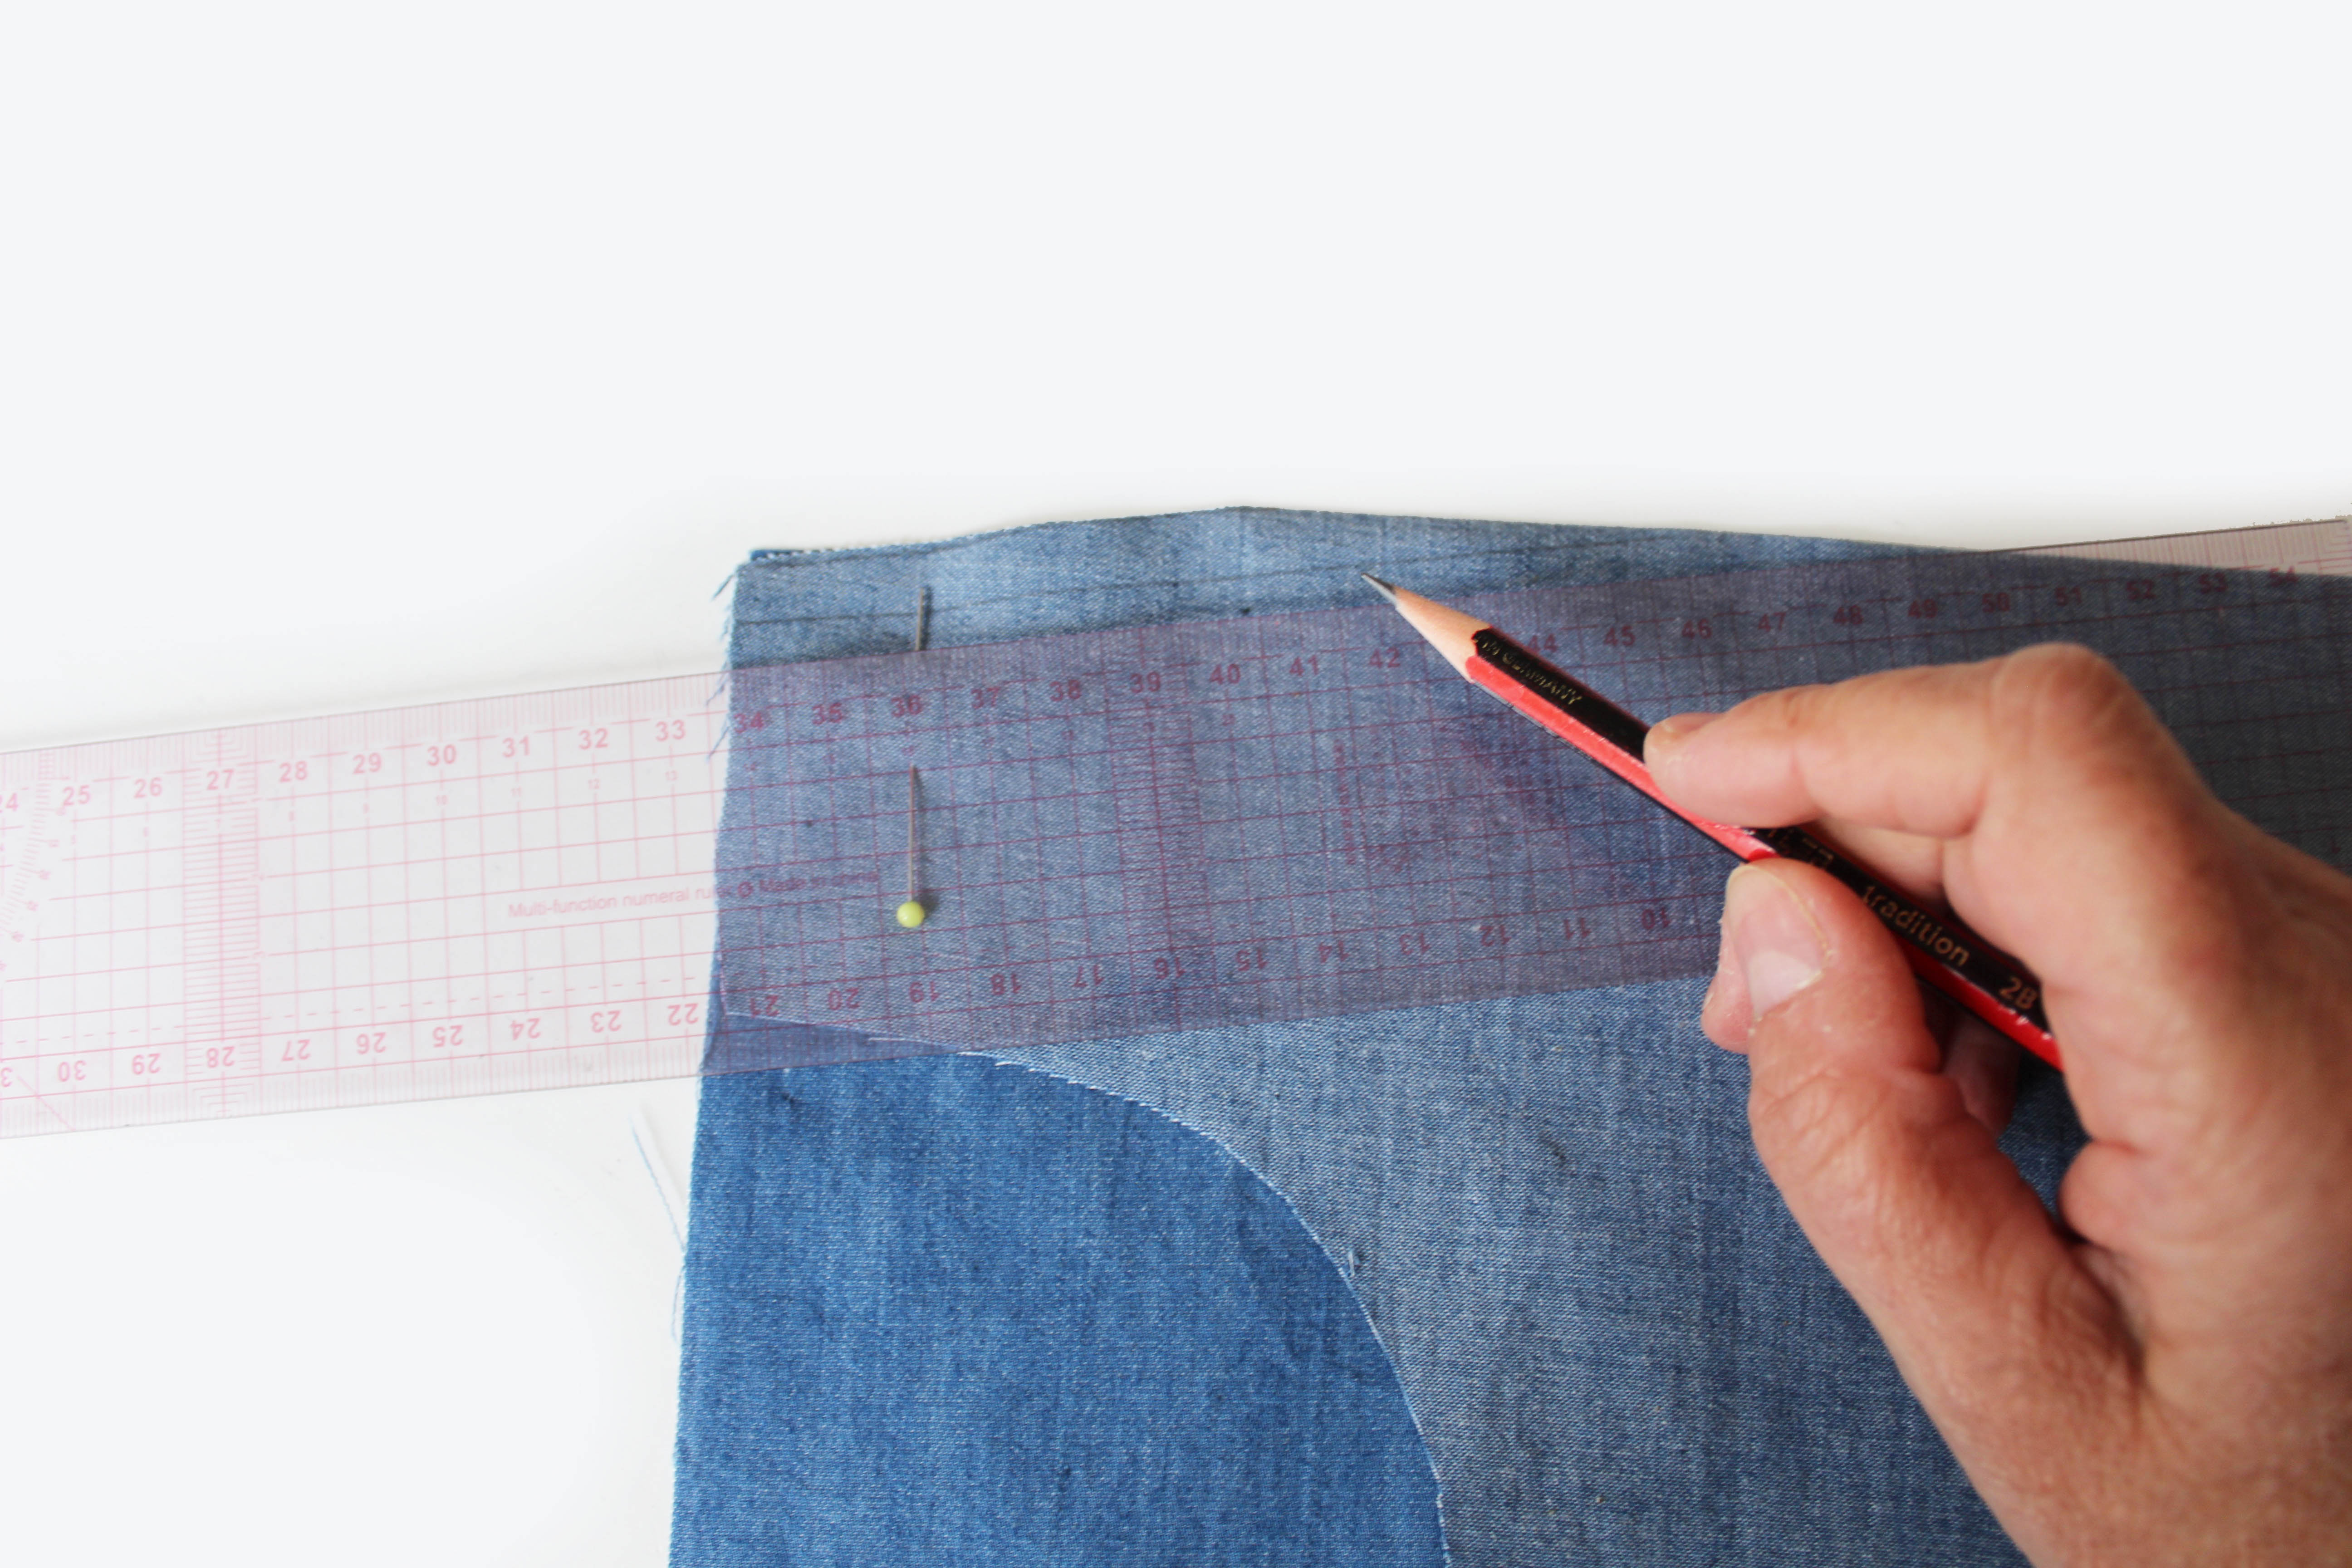 Fold the dart so that the RST(right sides together) and the dart raw edges are aligned. Mark your stitch line using a ruler and pencil which runs 1cm parallel to the cutting line.
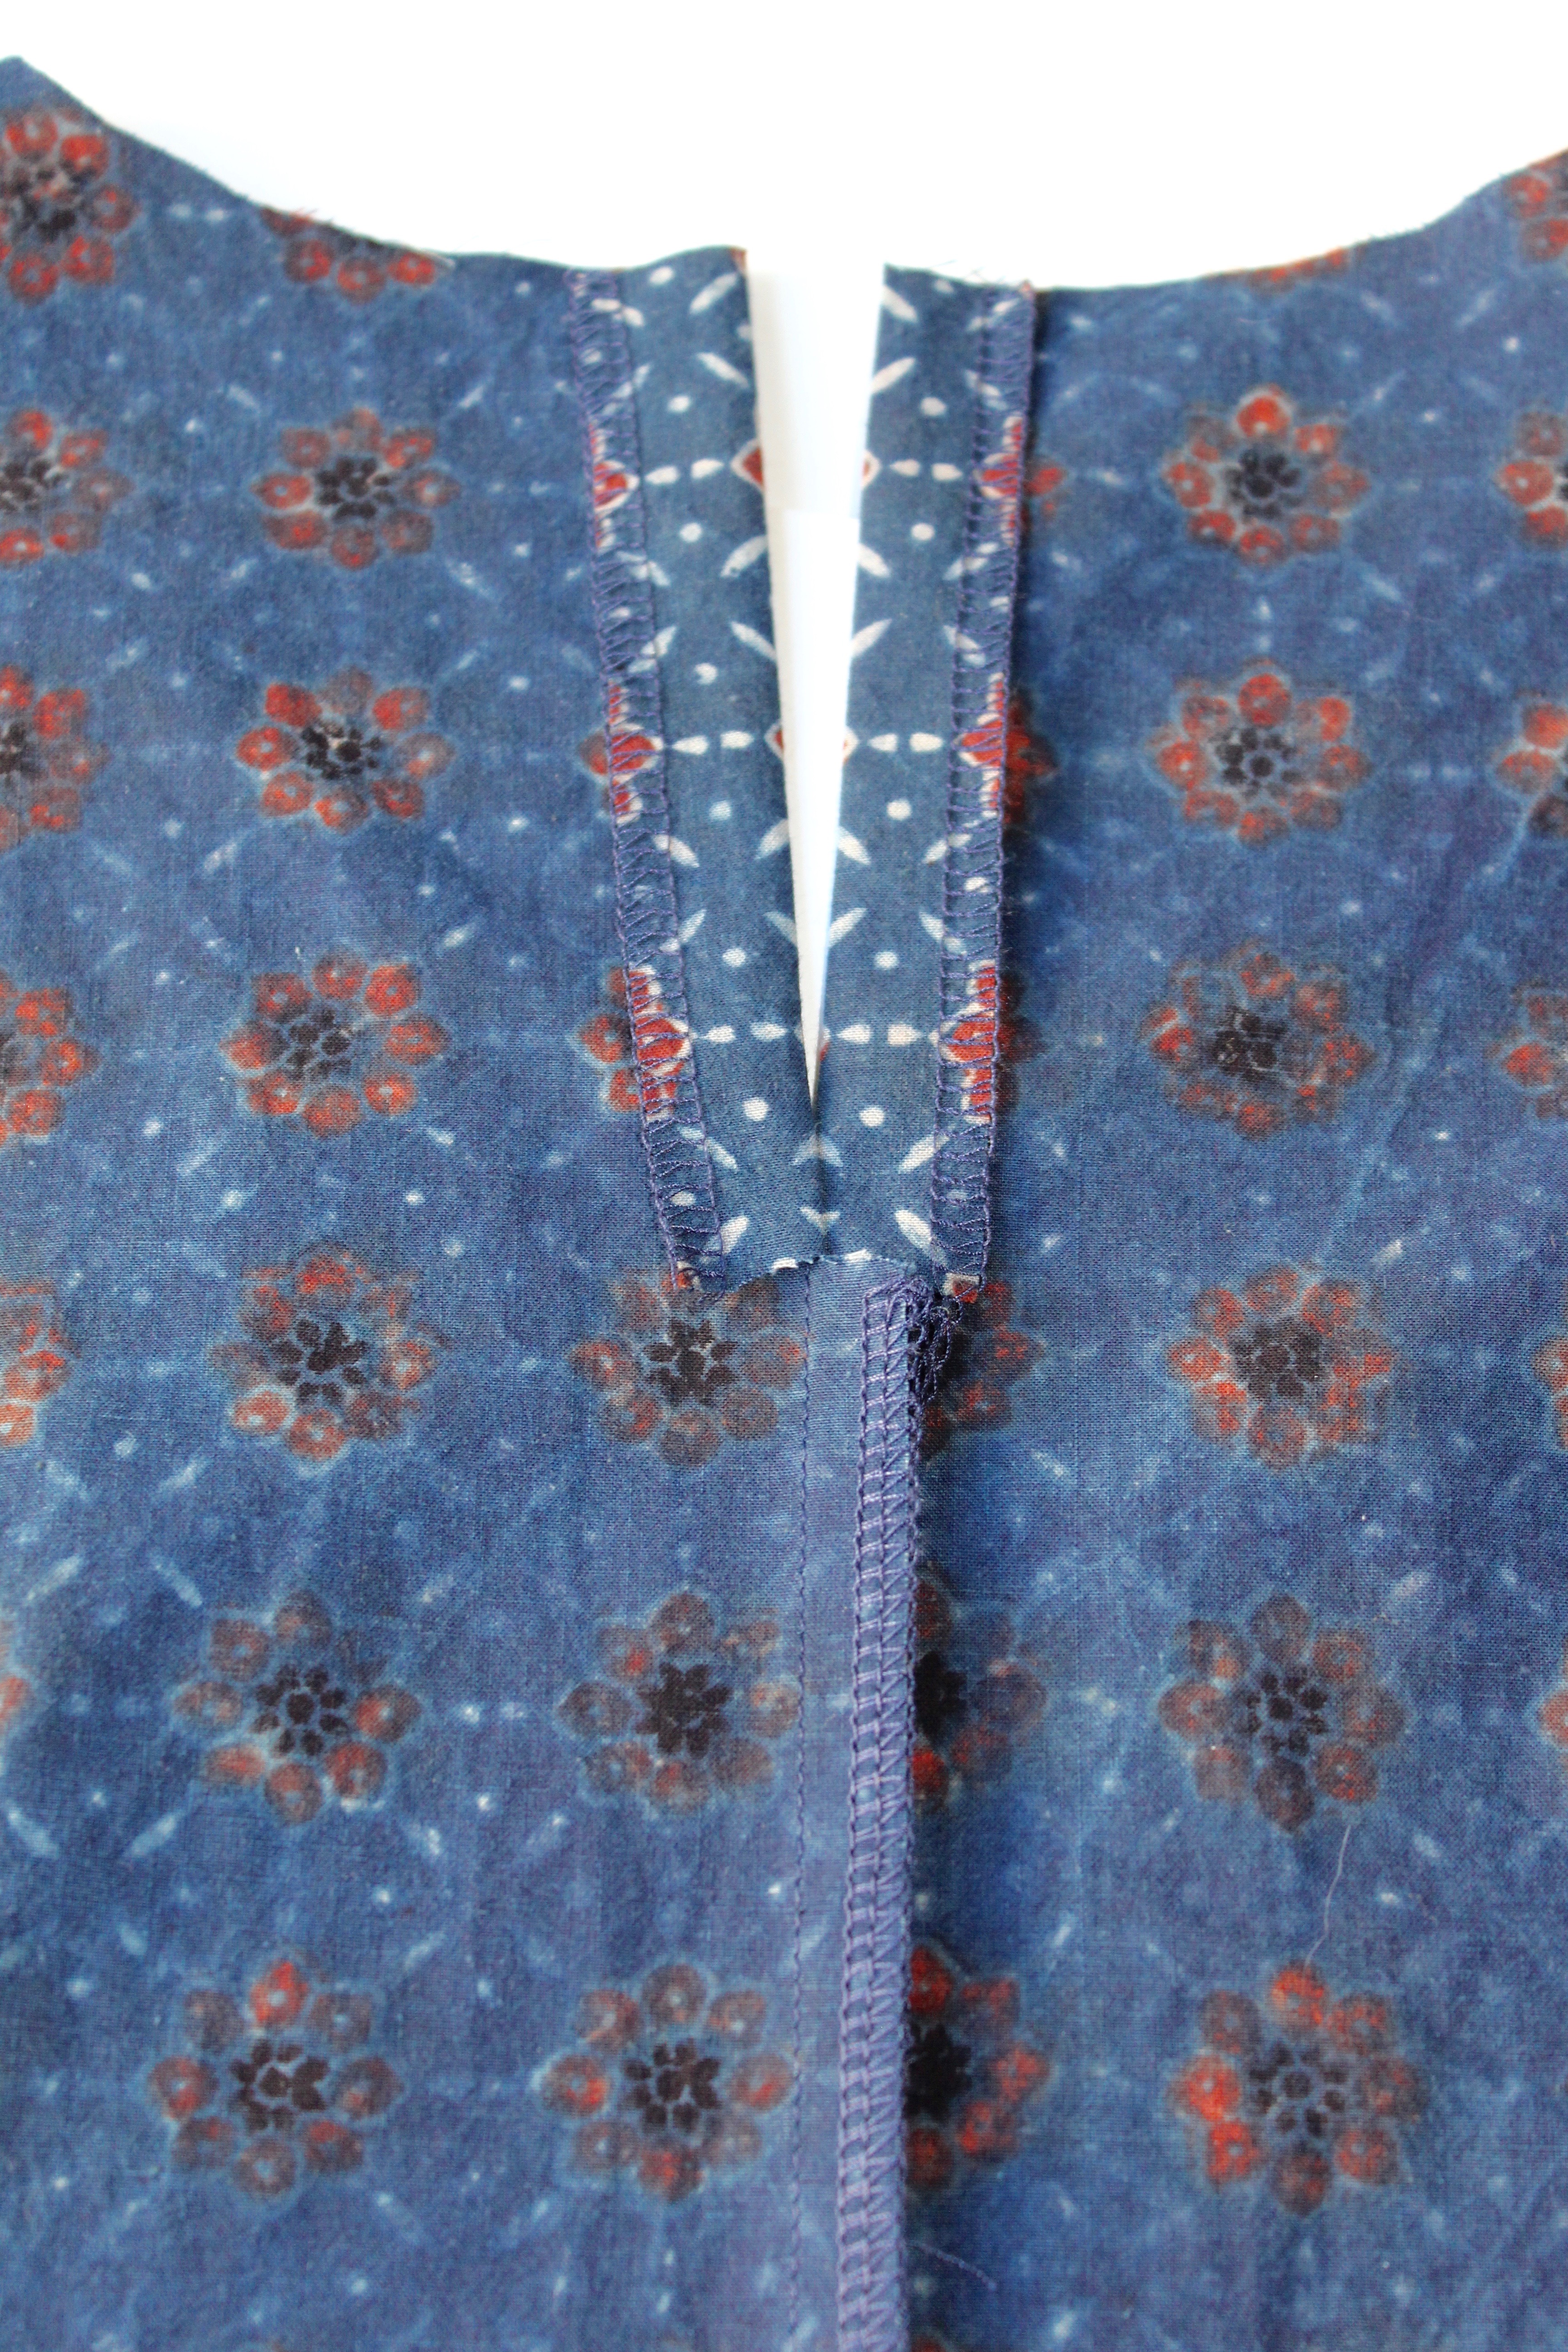 Finish the raw edges of the centre back. Sew the back pieces together with the right sides together, leaving the top section unstitched. Press.
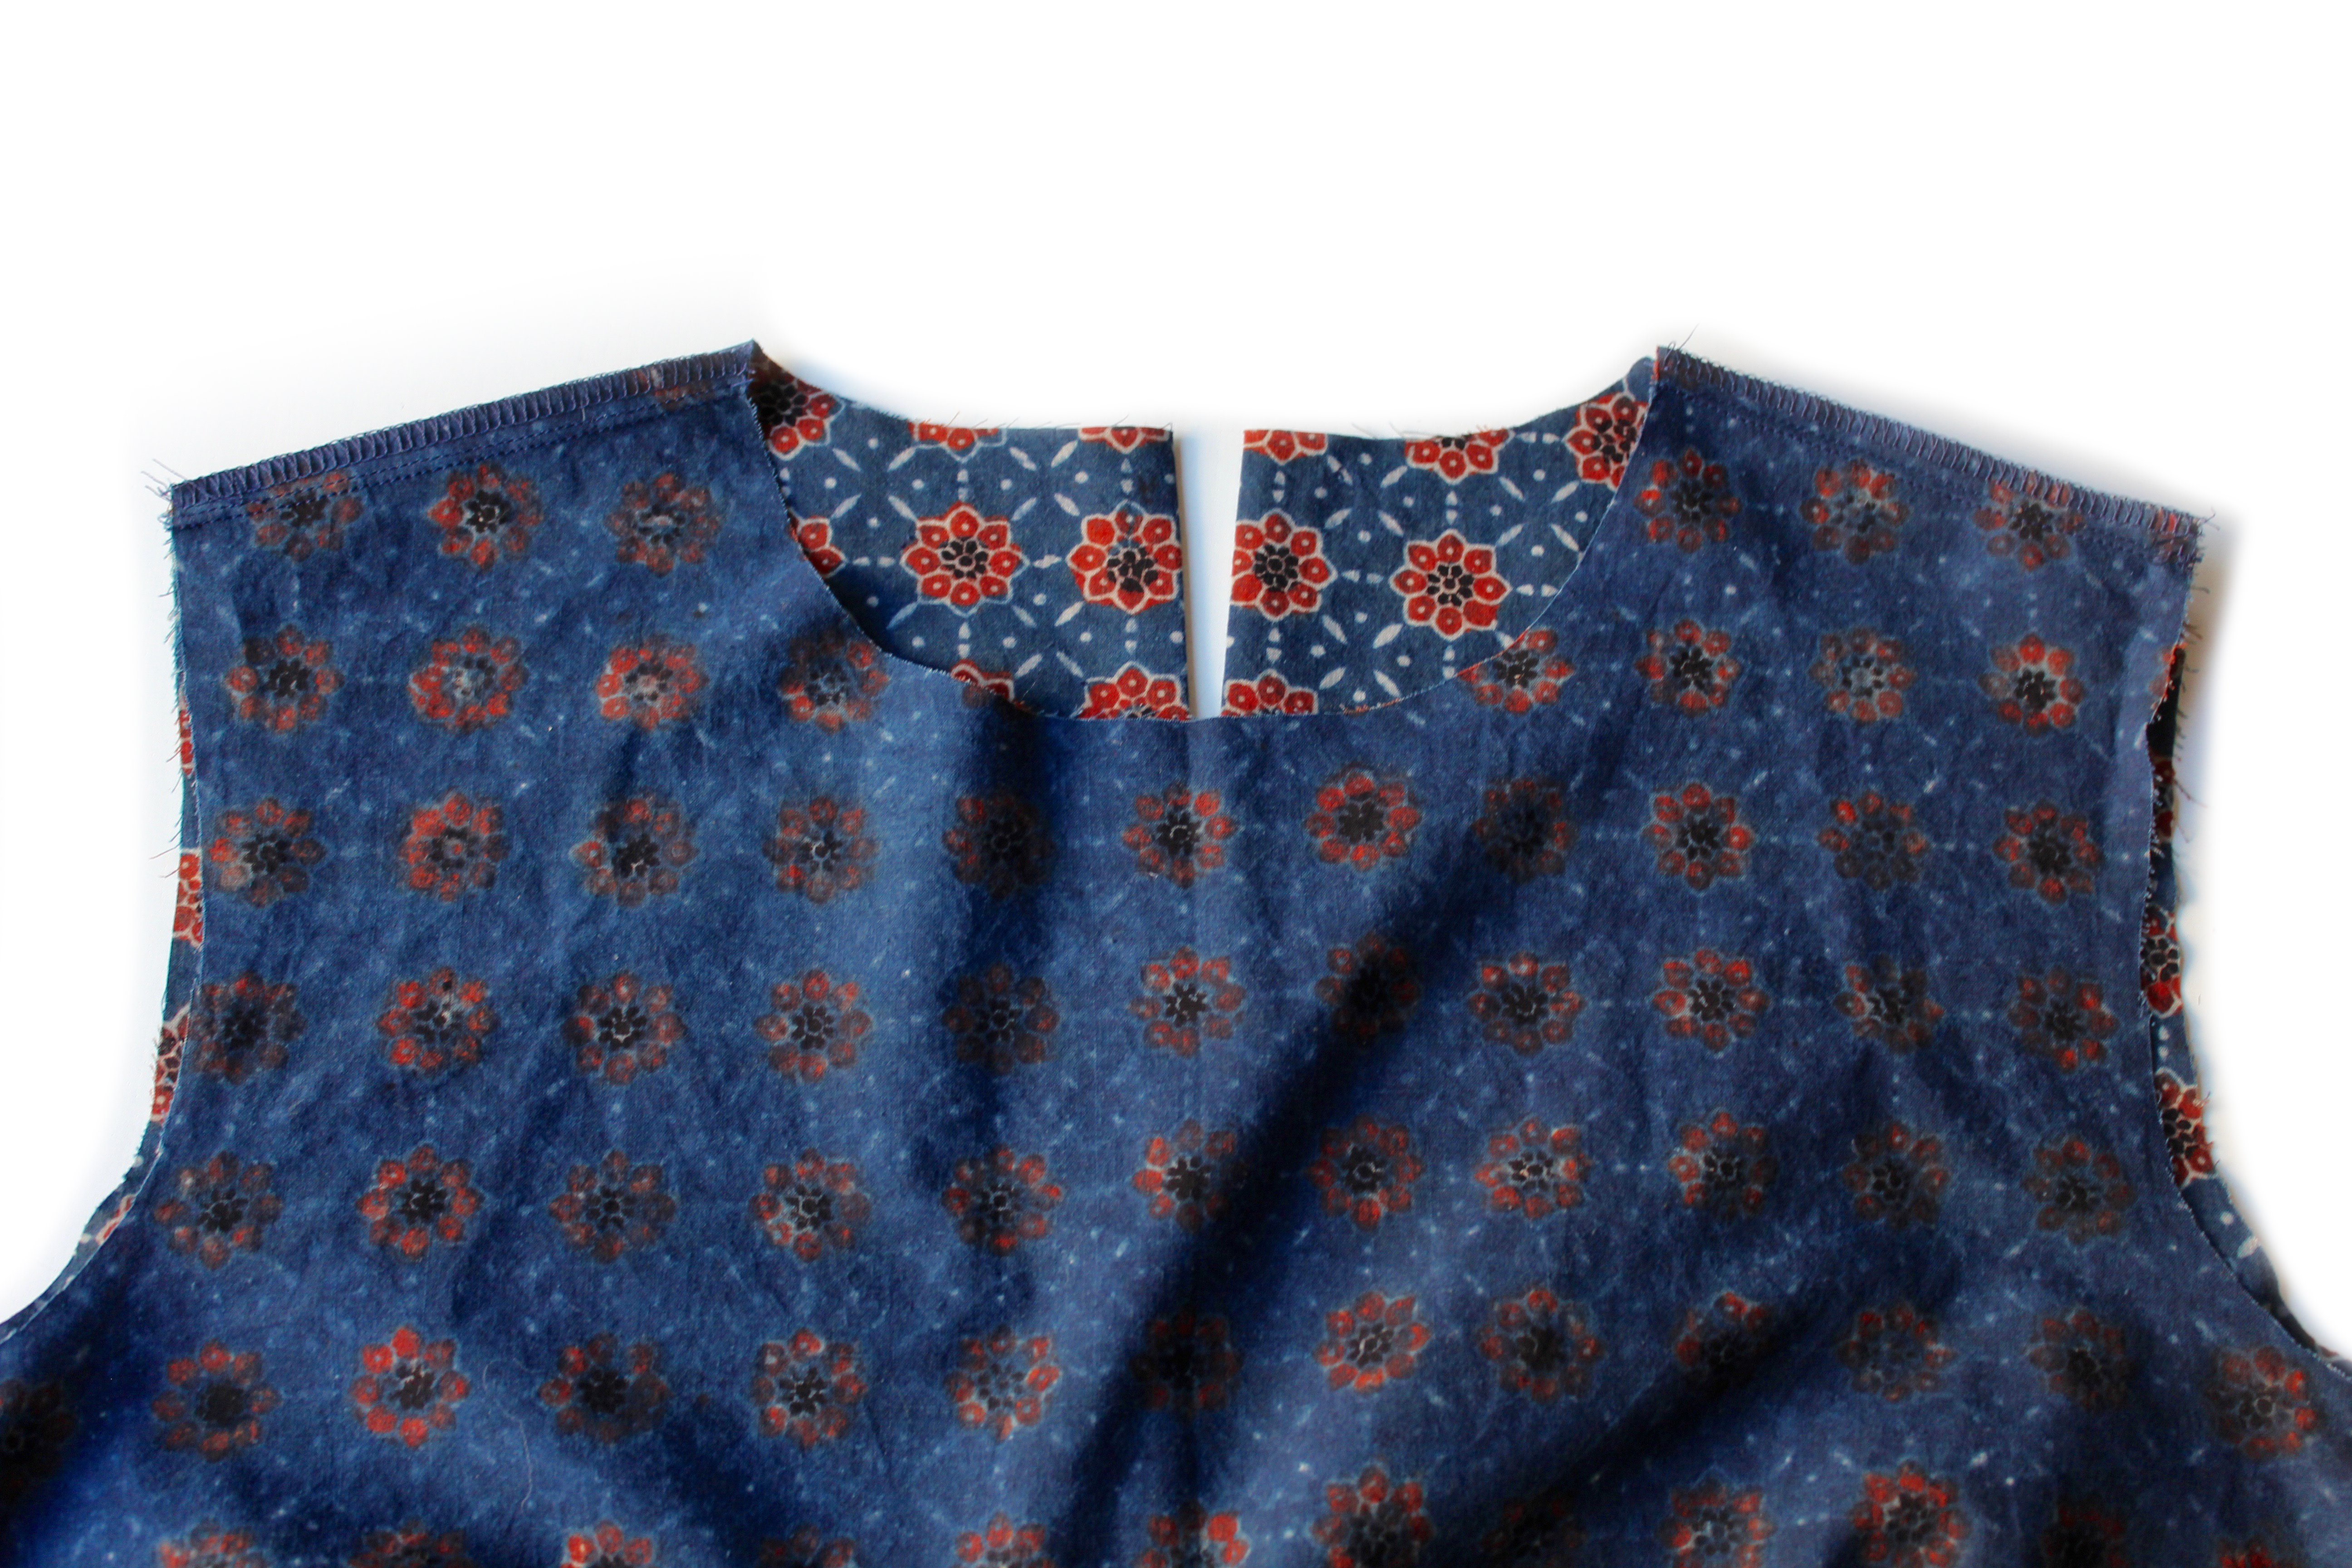


 Join the facings front and back at the short edges with the RST. Press open. Finish the outer edge.
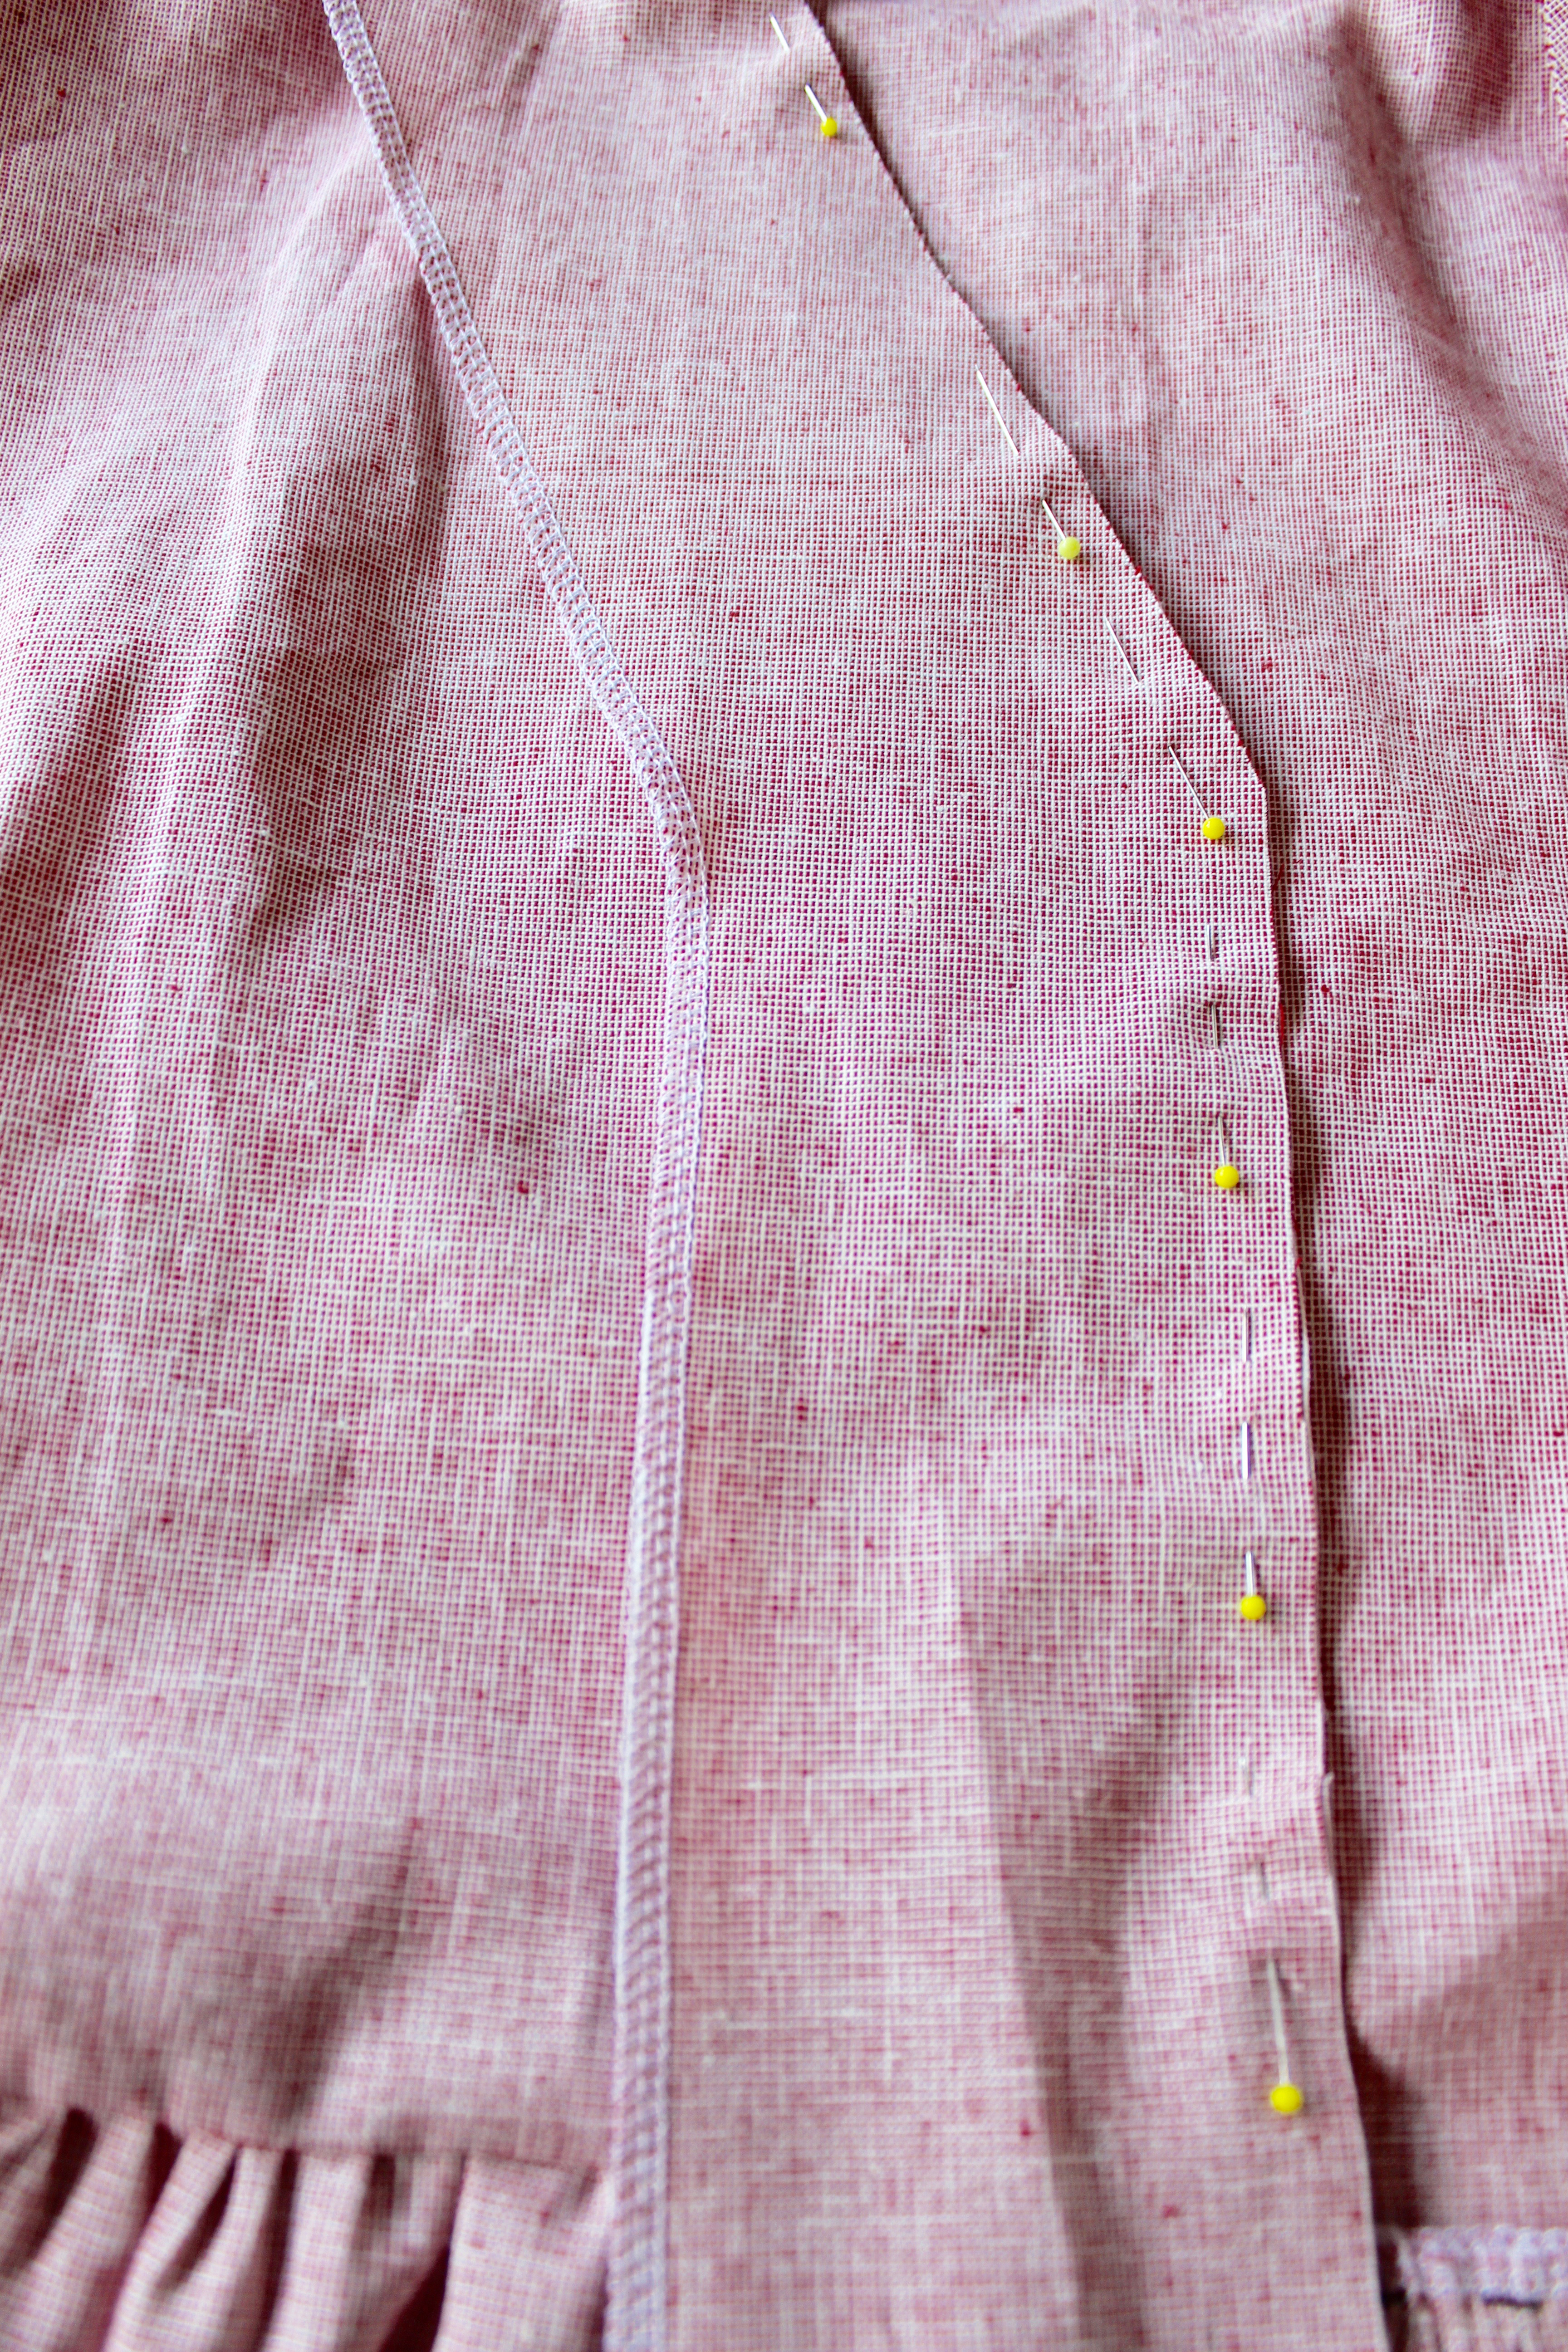 Pin to the centre front and back neck edge. Sew. Press the facing away from the body. Understitch.
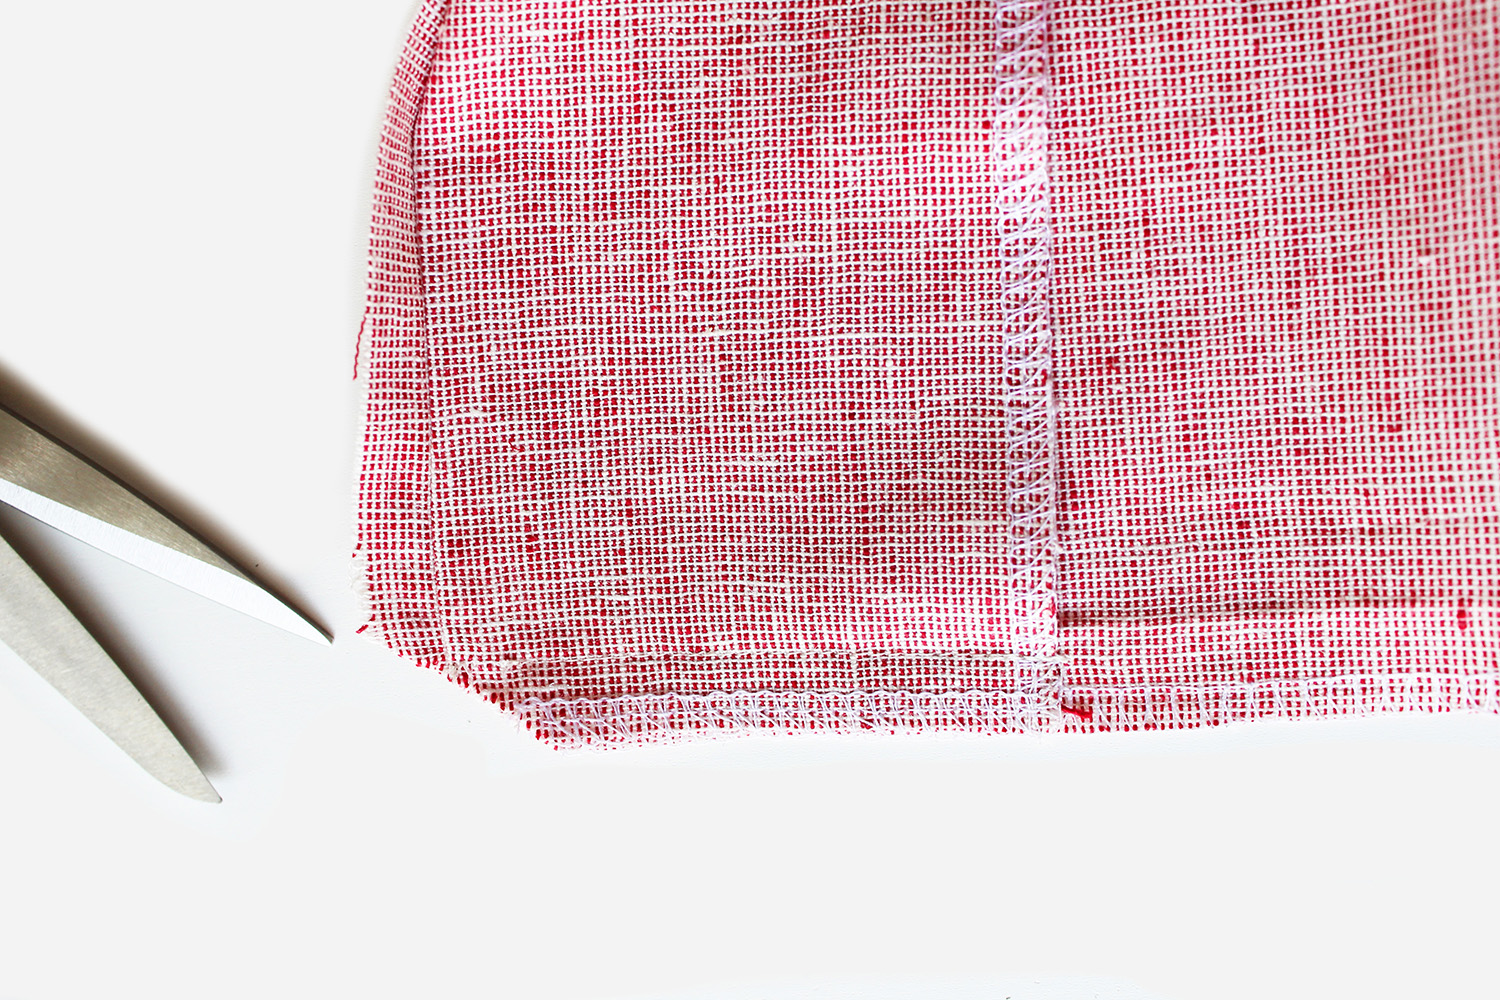
 Press the facing to the reverse side all around. Pin. Hand tack. Top stitch on the reverse side close to the outer edge to secure the facing.


 PLEAT- Fabric wrong side
 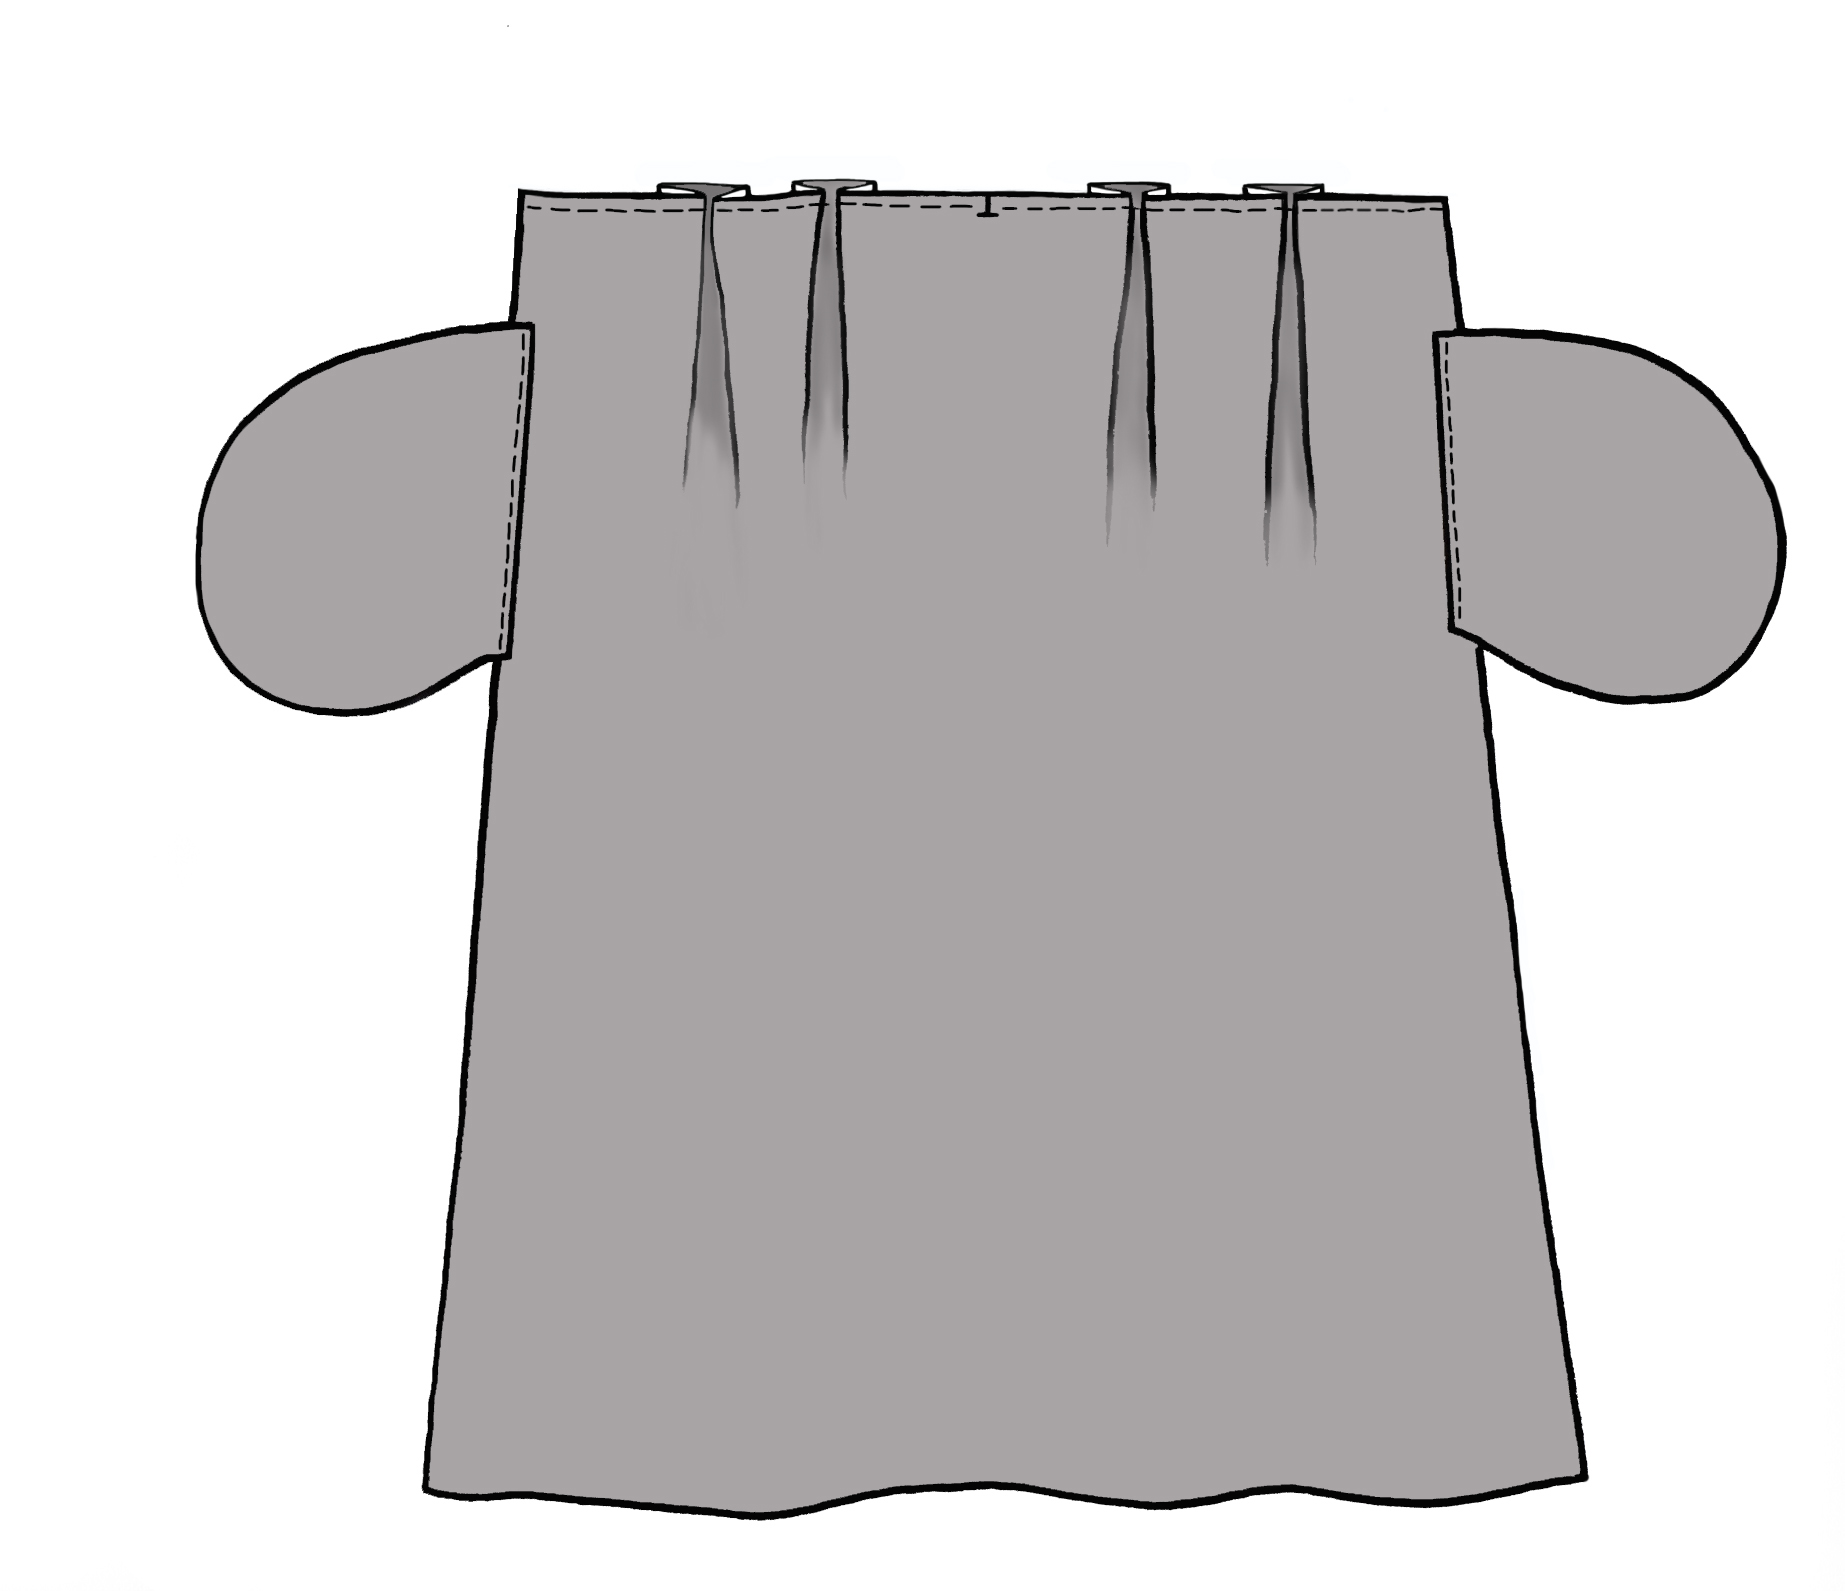 Skirt Front right side
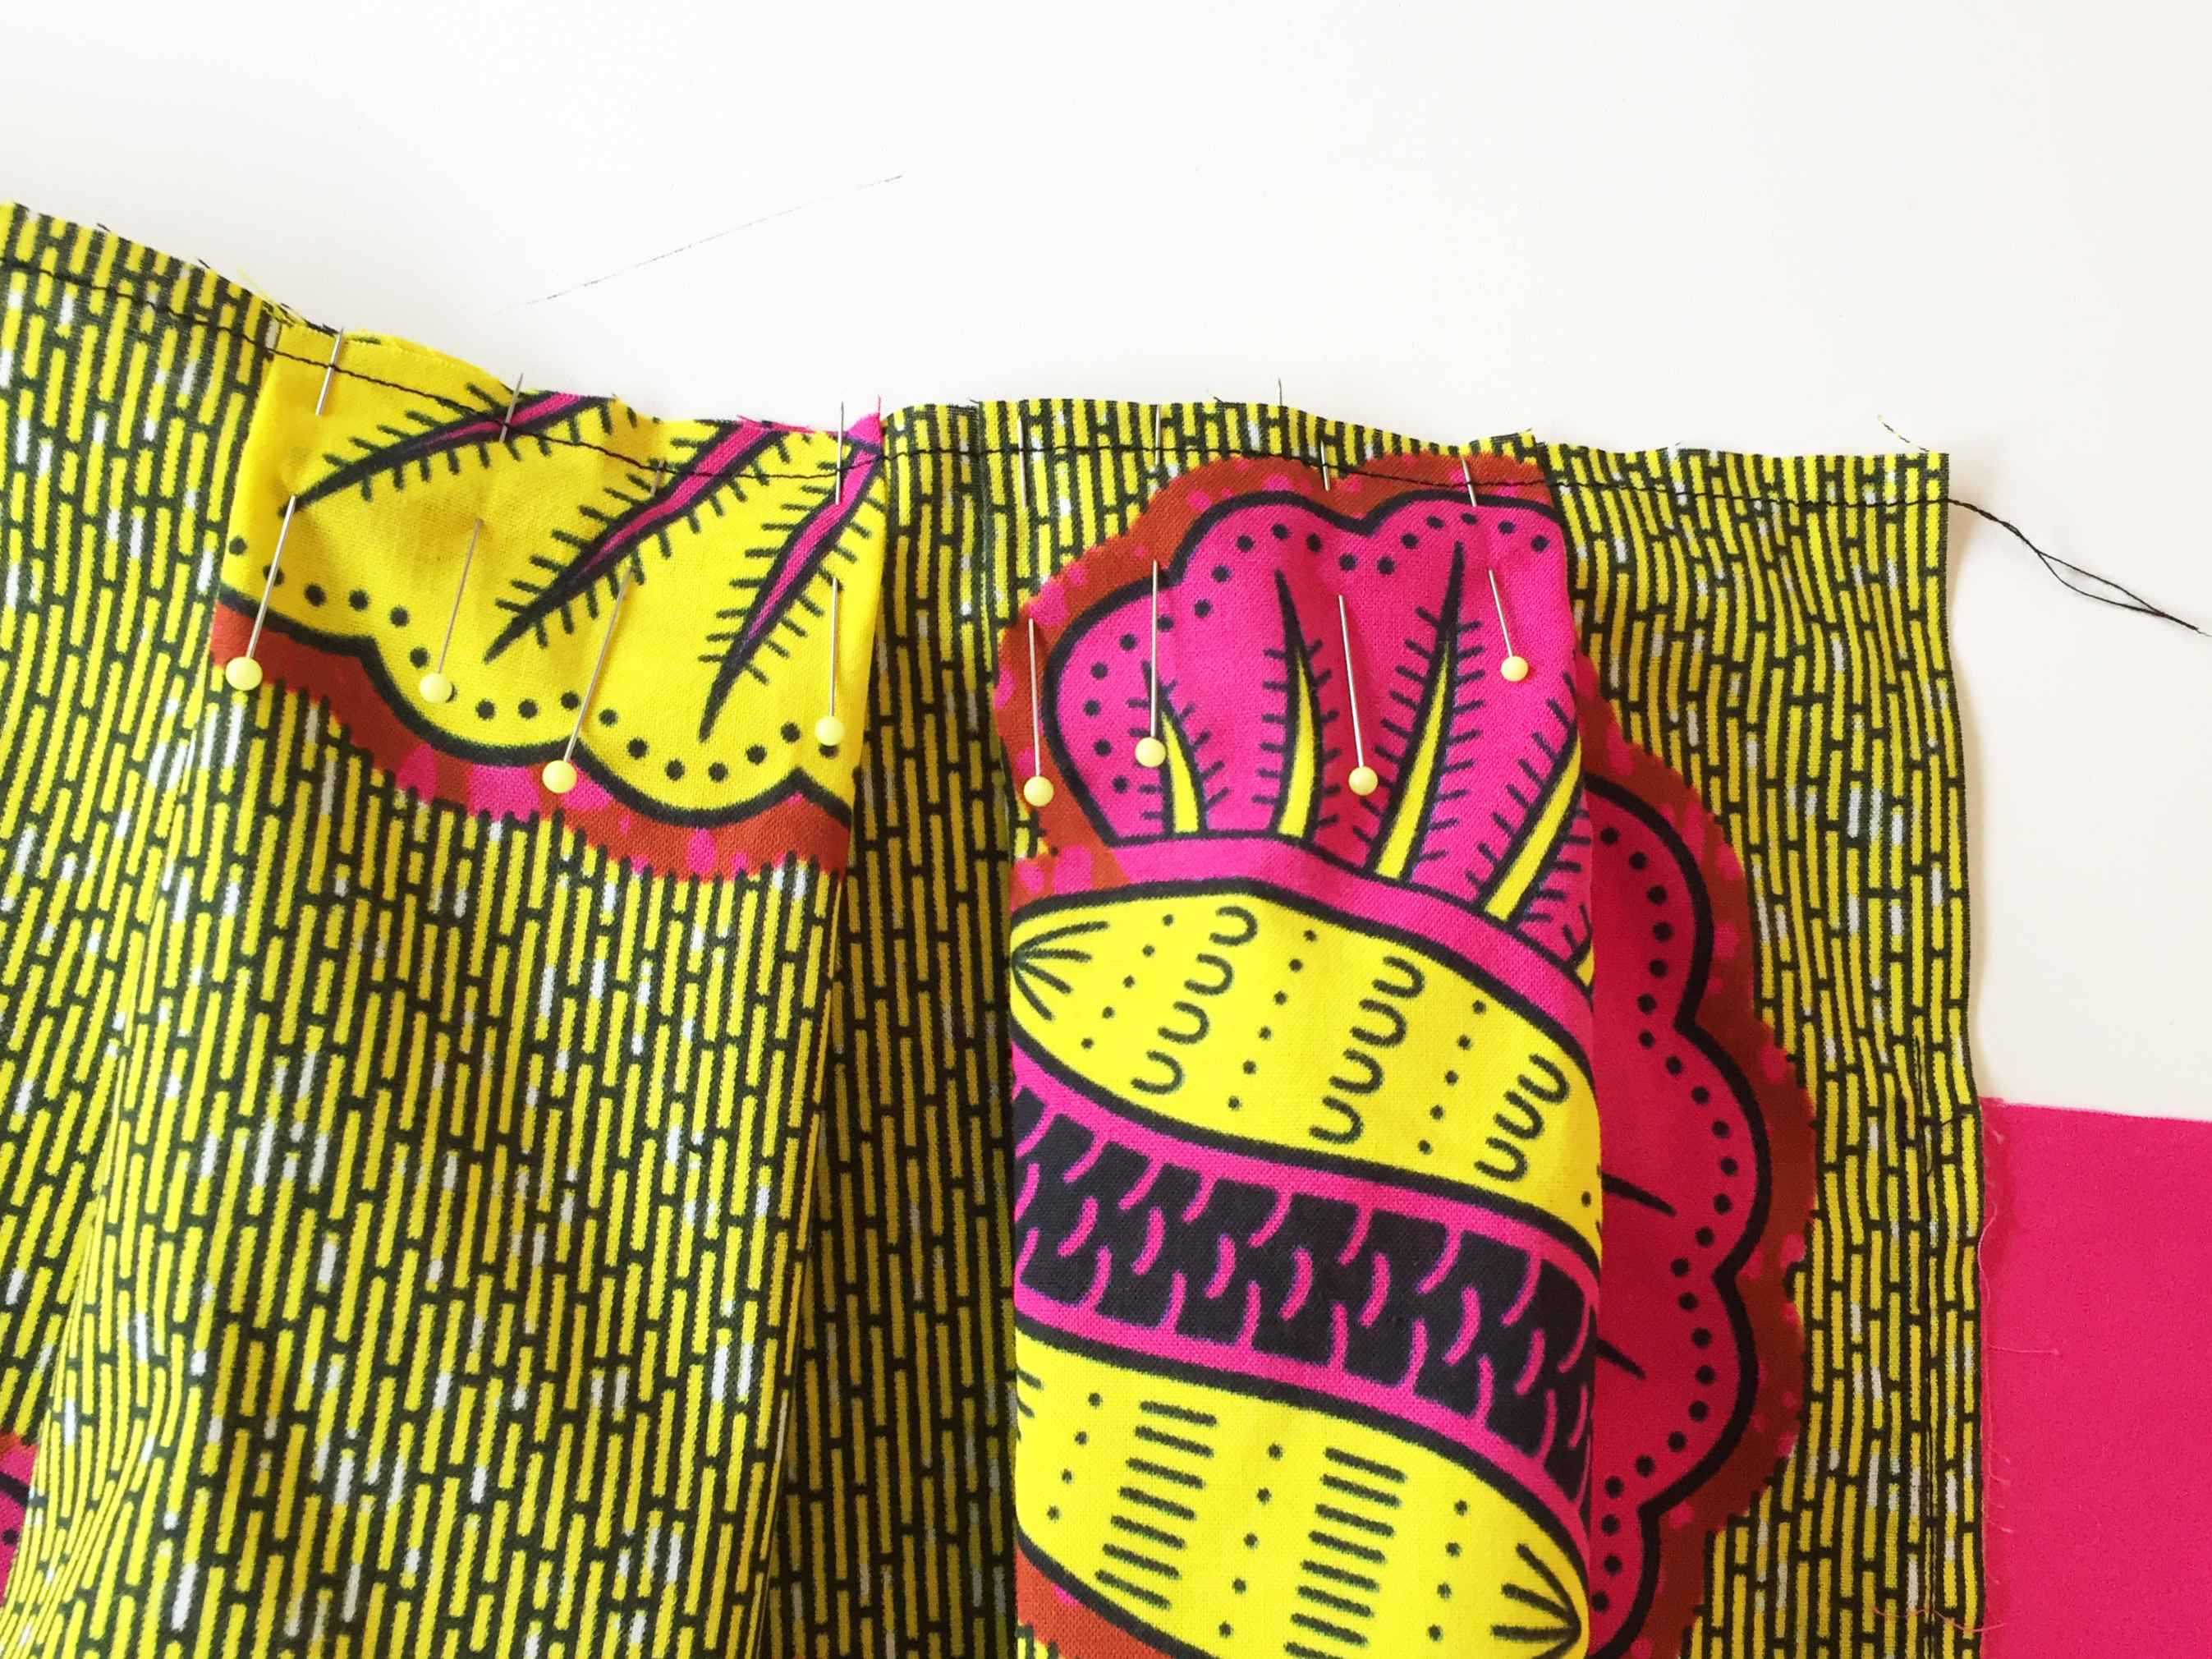

 Pin, then sew close to the inner fold to make two back pieces with hemmed finished edges.
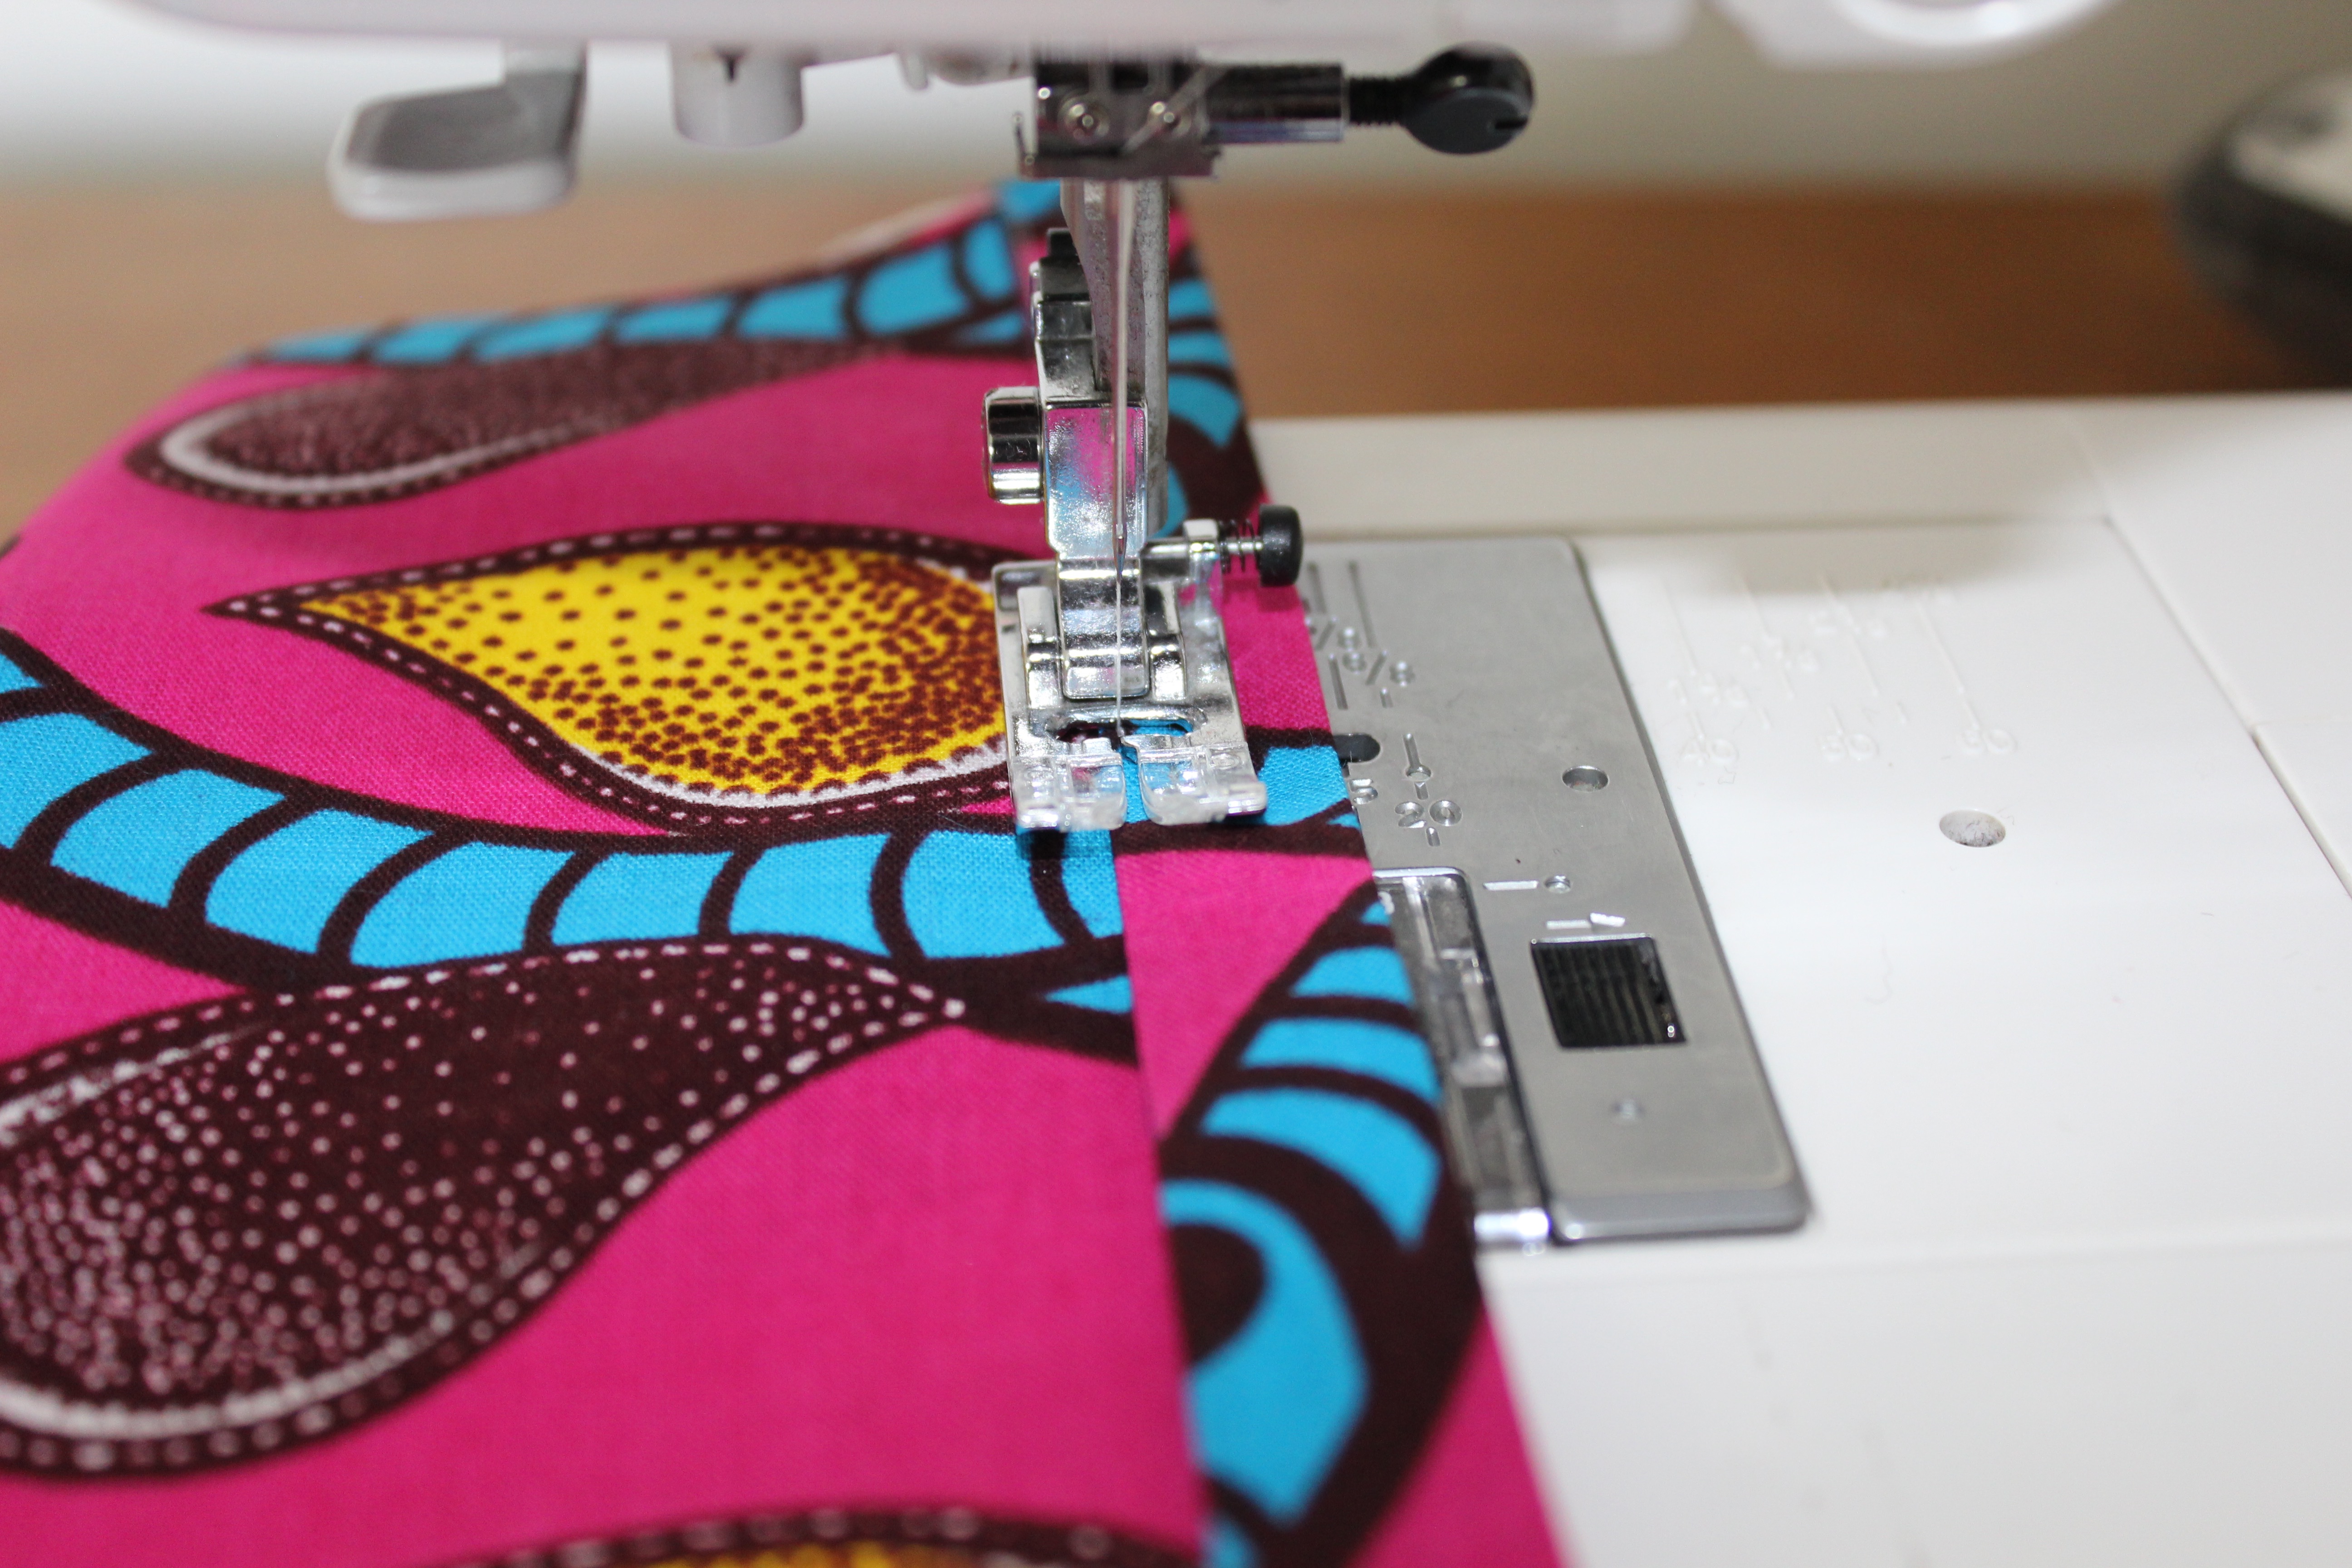 If you would like to insert a buttonhole and button fastening, do so at this stage after making the back hems.
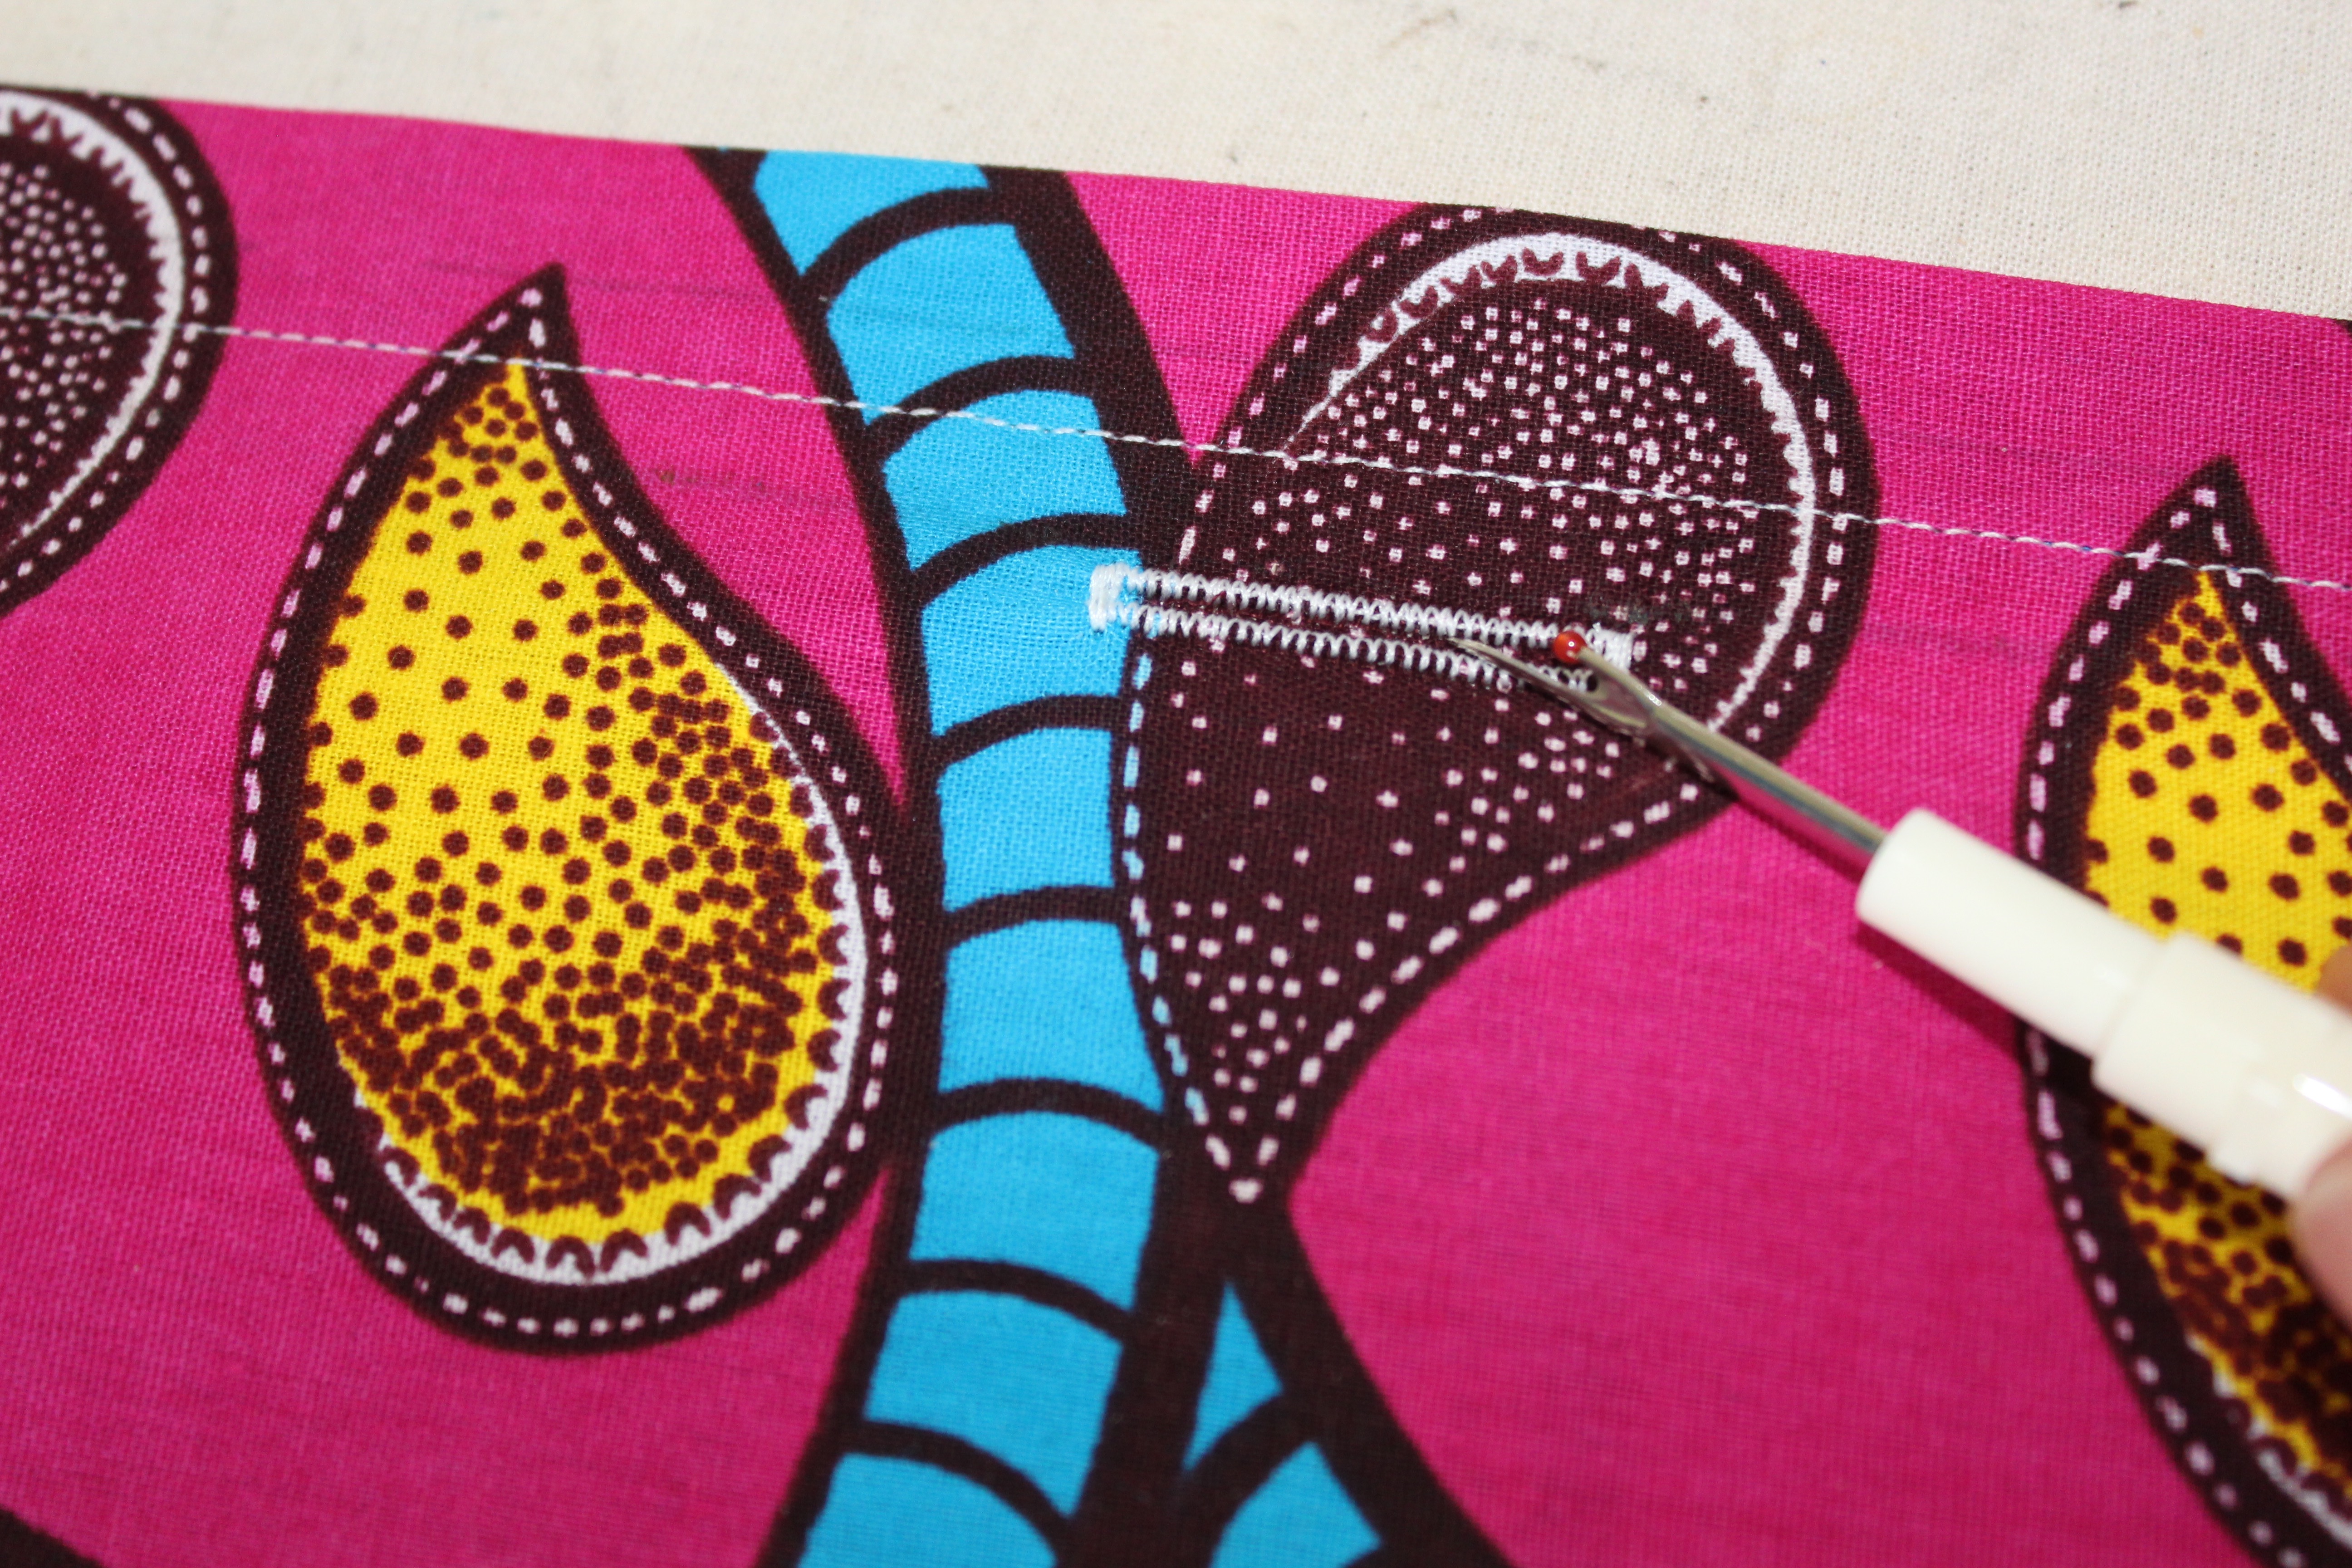


 So ta dah! here she is! …. Mildred!
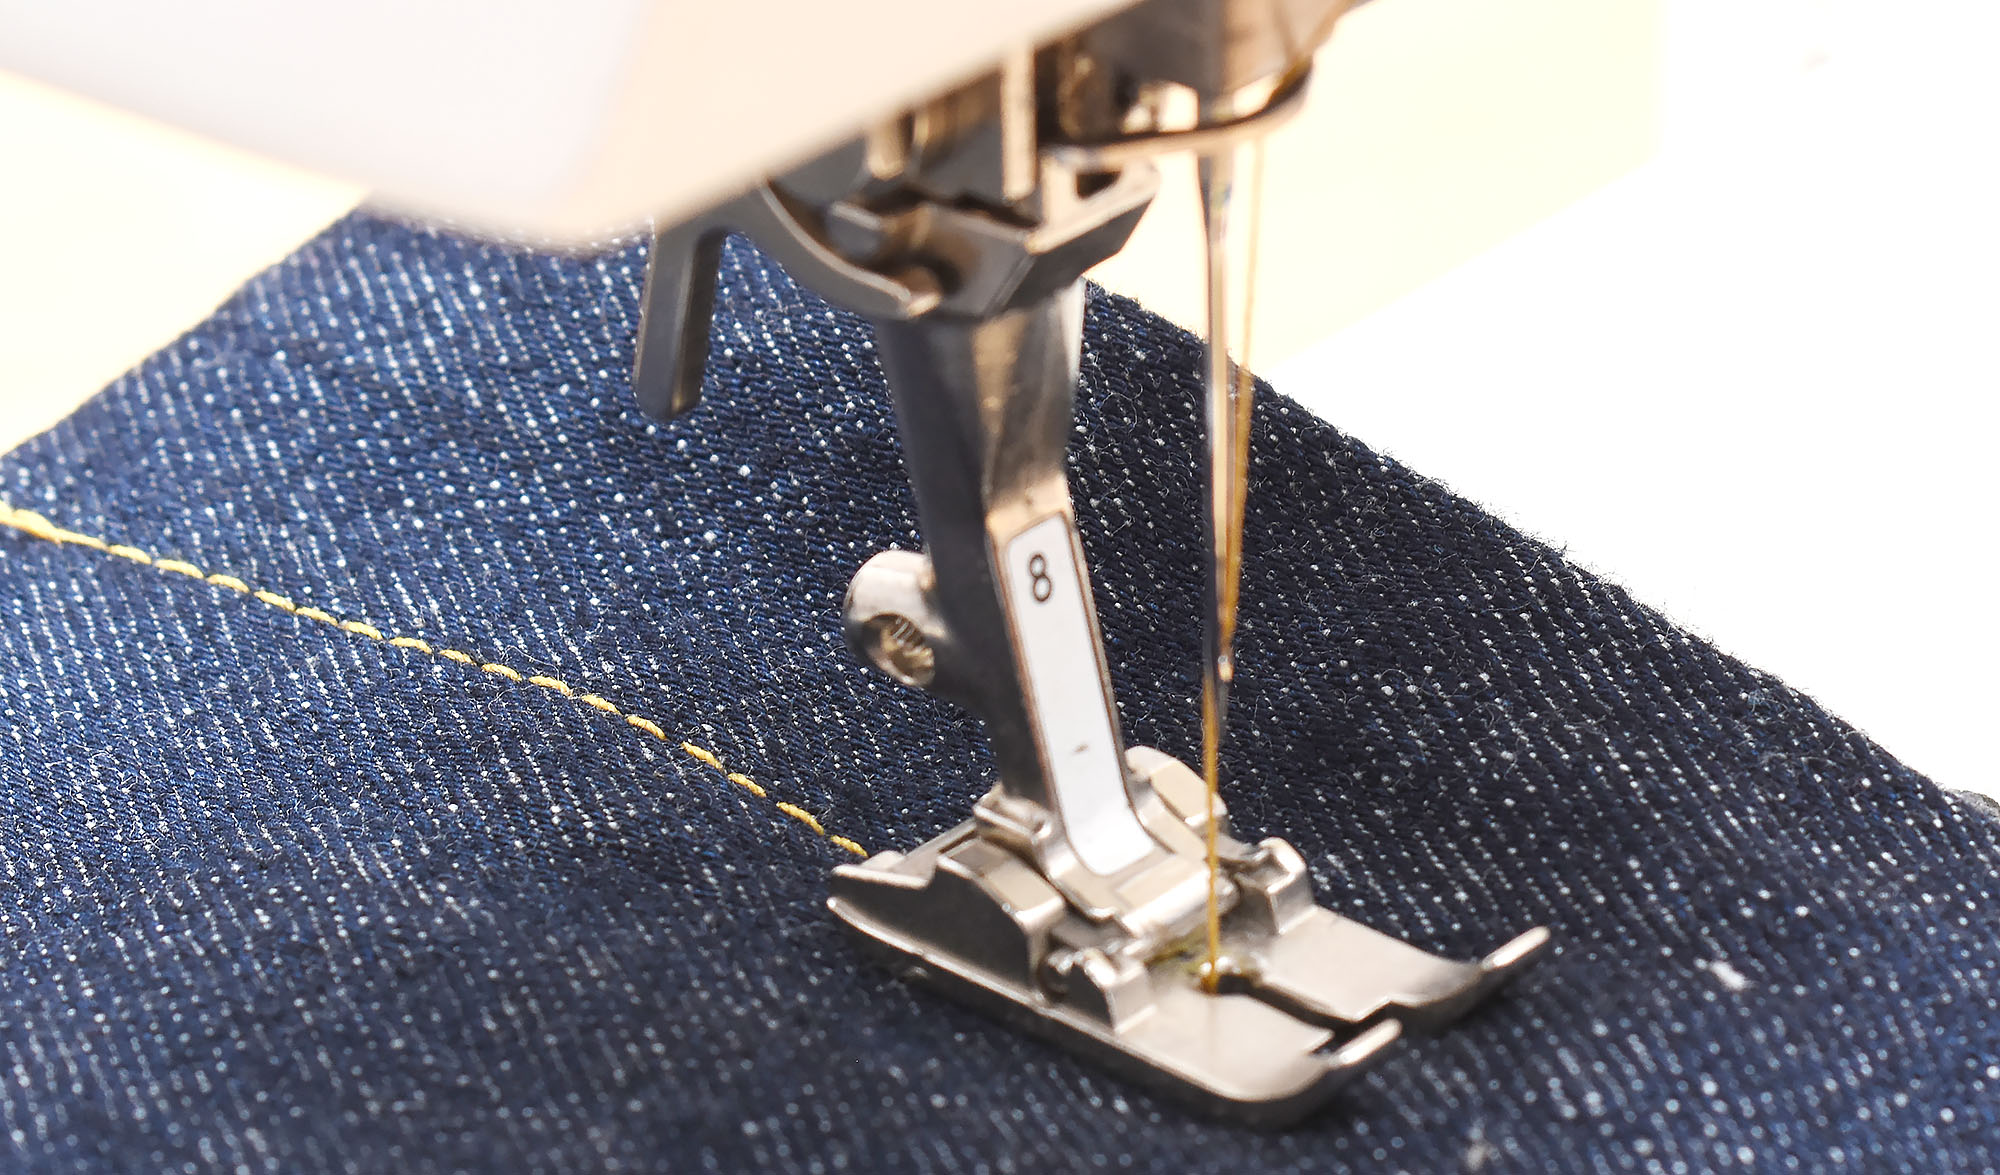


 Then, turn them inside out.